The Delta Dispatch

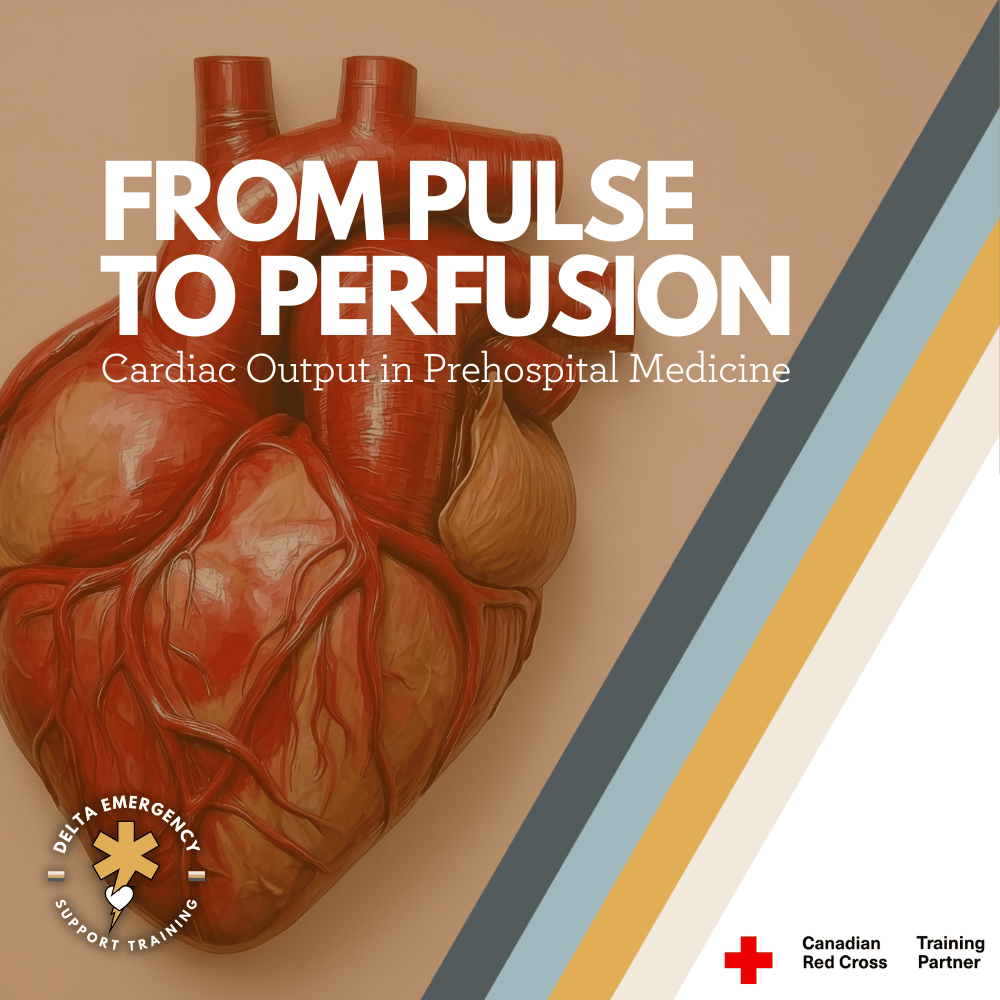
From Pulse to Perfusion: Cardiac Output in Prehospital Medicine

Cardiac output is the foundation of perfusion — the lifeline that keeps every organ functioning. In prehospital care, understanding how heart rate and stroke volume interact helps responders identify shock early, guide treatment, and protect vital organs. This blog breaks down cardiac output in clear, practical terms for EMRs, advanced first aiders, and anyone working in emergency response.

When assessing or treating a patient in the field, one of the most critical yet often overlooked concepts is cardiac output— the amount of blood the heart pumps in one minute. Understanding it helps prehospital providers recognize early signs of shock, guide treatment decisions, and prioritize interventions that can truly make the difference between life and death.

What Is Cardiac Output?

Cardiac Output (CO) = Heart Rate (HR) × Stroke Volume (SV)

  • Heart Rate (HR): The number of heartbeats per minute.

  • Stroke Volume (SV): The amount of blood pumped out of the left ventricle with each beat.

For example, if a patient’s heart rate is 80 bpm and stroke volume is 70 mL, their cardiac output is:
80 × 70 = 5,600 mL/min (5.6 L/min)

This means their heart pumps about 5–6 litres of blood per minute, roughly the body’s total blood volume.

Why It Matters in Prehospital Care

Cardiac output is the foundation of perfusion — how well oxygen and nutrients reach tissues. In the field, recognizing how HR and SV interact can help you determine whether a patient is compensating or decompensating.

When cardiac output drops, tissue hypoxia occurs. Cells switch to anaerobic metabolism, producing lactic acid and leading to shock.

Common causes of decreased cardiac output in the field include:

  • Hypovolemia (bleeding, dehydration)

  • Pump failure (myocardial infarction, cardiomyopathy)

  • Obstruction (cardiac tamponade, tension pneumothorax, pulmonary embolism)

  • Distributive shock (sepsis, anaphylaxis)

Heart Rate and Stroke Volume in Real-Time Assessment

  • Tachycardia: Often the first sign of compensation. The body increases HR to maintain CO when stroke volume drops (like in hemorrhage).

  • Bradycardia: Can be catastrophic in shock, as it limits overall output.

  • Stroke Volume Influencers:

    • Preload: Volume of blood returning to the heart.

    • Contractility: Strength of the heart’s contractions.

    • Afterload: Resistance the heart pumps against.

Understanding how each factor impacts stroke volume helps guide care decisions — for instance, whether a patient needs fluids, vasopressors, or advanced airway management.

In Practice: Assessing Cardiac Output Without a Monitor

Prehospital providers rarely calculate CO directly — instead, you assess it through clinical signs of perfusion:

  • Level of consciousness – is the brain getting enough oxygen?

  • Skin signs – pale, cool, diaphoretic skin suggests poor perfusion.

  • Capillary refill and pulse strength – quick, weak, or absent pulses can all indicate changes in CO.

  • Blood pressure and pulse pressure trends – narrowing pulse pressure (e.g., 90/80) may indicate a drop in stroke volume.

Your hands, eyes, and ears are your diagnostic tools before monitors confirm what you already suspect.

Improving Cardiac Output in the Field

Depending on the cause:

  • Fluid resuscitation restores preload in hypovolemia.

  • Positioning (Trendelenburg or shock position) can temporarily improve venous return.

  • Oxygen therapy supports oxygen delivery when perfusion is limited.

  • CPR and defibrillation are lifesaving when the heart fails to generate output altogether.

Remember — every intervention you perform is ultimately aimed at restoring or maintaining cardiac output to sustain vital organ perfusion.

Final Thoughts

For first responders and EMRs, cardiac output isn’t just a number — it’s the lifeline of your patient.
Understanding how heart rate, stroke volume, and perfusion interact allows you to anticipate deterioration before it becomes irreversible.
Every pulse you feel, every set of vitals you take, tells a story about how effectively the heart is doing its job.

Read More
Advanced First Aid, EMR, First Responder Kumari Malhotra Advanced First Aid, EMR, First Responder Kumari Malhotra

Treating Gunshot Wounds: A Professional Responder’s Guide

Gunshot wounds are life-threatening emergencies that require quick, precise action. This guide for professional responders covers wound assessment, bleeding control, chest seal application for thoracic injuries, and key steps for safe transport to trauma centers.

Gunshot wounds (GSWs) are among the most critical emergencies a responder can encounter. Severity depends on bullet type, trajectory, and location, making rapid assessment and precise intervention essential. Professional responders must be prepared to manage everything from external bleeding to life-threatening internal injuries.

Gunshot Wounds in Canada: Context & Stats

Understanding the prevalence and patterns of firearm injuries in Canada provides important context:

  • Between 2016–2020, Canada saw over 4,000 deaths and thousands of hospitalizations due to firearm injuries.

  • Fatal injuries are most often suicides (~72%), followed by homicides (~23%), with unintentional injuries and law enforcement incidents making up smaller percentages.

  • Non-fatal injuries frequently result from assault or accidental shootings, highlighting the need for skilled first responders.

  • Young adult males (20–34) are most commonly affected, emphasizing the importance of rapid intervention in high-risk scenarios.

Scene Safety & Initial Approach

Before approaching the patient:

  1. Ensure scene safety. Gunshot incidents may occur in violent settings—confirm the area is secure and involve law enforcement if necessary.

  2. Use proper PPE. Gloves, eye protection, and body protection may be required depending on the scene.

  3. Triage and rapid assessment. Identify life-threatening injuries first, especially massive bleeding or airway compromise.

Primary Survey: C-ABCDE Approach

Professional responders often use a C-ABCDE approach, prioritizing massive bleeding first:

  • C – Massive Hemorrhage: Apply direct pressure, hemostatic dressings, or tourniquets (for limbs). Junctional areas may require packing or specialized devices.

  • A – Airway: Ensure airway is clear; use adjuncts if necessary. Be alert for obstructions from blood, tissue, or debris.

  • B – Breathing: Evaluate for chest injuries. Gunshot wounds to the thorax can cause pneumothorax, tension pneumothorax, or hemothorax.

  • C – Circulation: Monitor vitals, assess for shock, establish IV access if in scope, and be ready to administer fluids per protocol.

  • D – Disability: Evaluate neurological status (AVPU or GCS) and look for signs of head or spinal injury.

  • E – Exposure & Environment: Fully assess injuries while keeping the patient warm and preserving dignity.

Treating Gunshot Wounds by Location

Extremities (Arms & Legs)

  • Risks: Severe bleeding, fractures, nerve damage.

  • Intervention: Direct pressure, tourniquets for limbs, immobilize fractures, monitor for shock.

Junctional Areas (Groin, Axilla, Neck)

  • Risks: Major vessel injury; uncontrolled bleeding.

  • Intervention: Use pressure and hemostatic dressings; junctional tourniquet if available.

Chest

Chest injuries are especially dangerous due to risk of lung collapse, cardiac injury, or massive internal bleeding.

  • Signs: Difficulty breathing, sucking chest wound, rapid deterioration, shock.

  • Intervention:

    1. Chest Seal: Apply to open chest wounds to prevent air entry and reduce risk of tension pneumothorax. Venting seals allow trapped air to escape.

    2. Oxygen Support: Provide high-flow oxygen if trained.

    3. Positioning: Keep the patient upright if comfortable to assist breathing.

    4. Rapid Transport: Patients with chest GSWs require urgent trauma care.

Abdomen & Pelvis

  • Risks: Internal organ damage, significant bleeding.

  • Intervention: Cover exposed organs with sterile, moist dressings, avoid manipulation, monitor vitals, rapid transport.

Head & Neck

  • Risks: Airway compromise, brain injury, severe bleeding.

  • Intervention: Protect cervical spine, manage airway, control bleeding, rapid transport.

Special Considerations

  • Bullet Energy & Cavitation: High-velocity bullets create more tissue damage due to cavitation.

  • Shock & Hypovolemia: Internal bleeding may be hidden—monitor vitals closely and maintain patient warmth.

  • Infection Prevention: Stabilize the patient, then follow protocols for wound cleaning, antibiotics, and tetanus prophylaxis.

  • Documentation & Legal Obligations: In Canada, gunshot injuries often must be reported to authorities. Preserve evidence while delivering care.

Tools & Equipment for Responders

  • Hemostatic dressings / pressure dressings

  • Tourniquets for limbs

  • Chest seals for sucking chest wounds

  • Airway adjuncts (OPA/NPA)

  • IV fluids and monitoring equipment (per protocol)

  • High-flow oxygen

  • PPE for responder safety

Transport & Handover

  • Maintain bleeding control, airway, and vital signs during transport.

  • Provide a clear handover to receiving trauma center: wound location, number of shots, interventions performed, and patient vitals.

Summary

Gunshot wounds are complex and life-threatening. Professional responders must:

  • Rapidly control bleeding and manage airways.

  • Use chest seals for thoracic injuries.

  • Monitor for shock and hidden injuries.

  • Provide rapid transport to trauma centers with thorough documentation.

Proper training, situational awareness, and decisive action can significantly improve survival and reduce complications from GSWs.

Read More

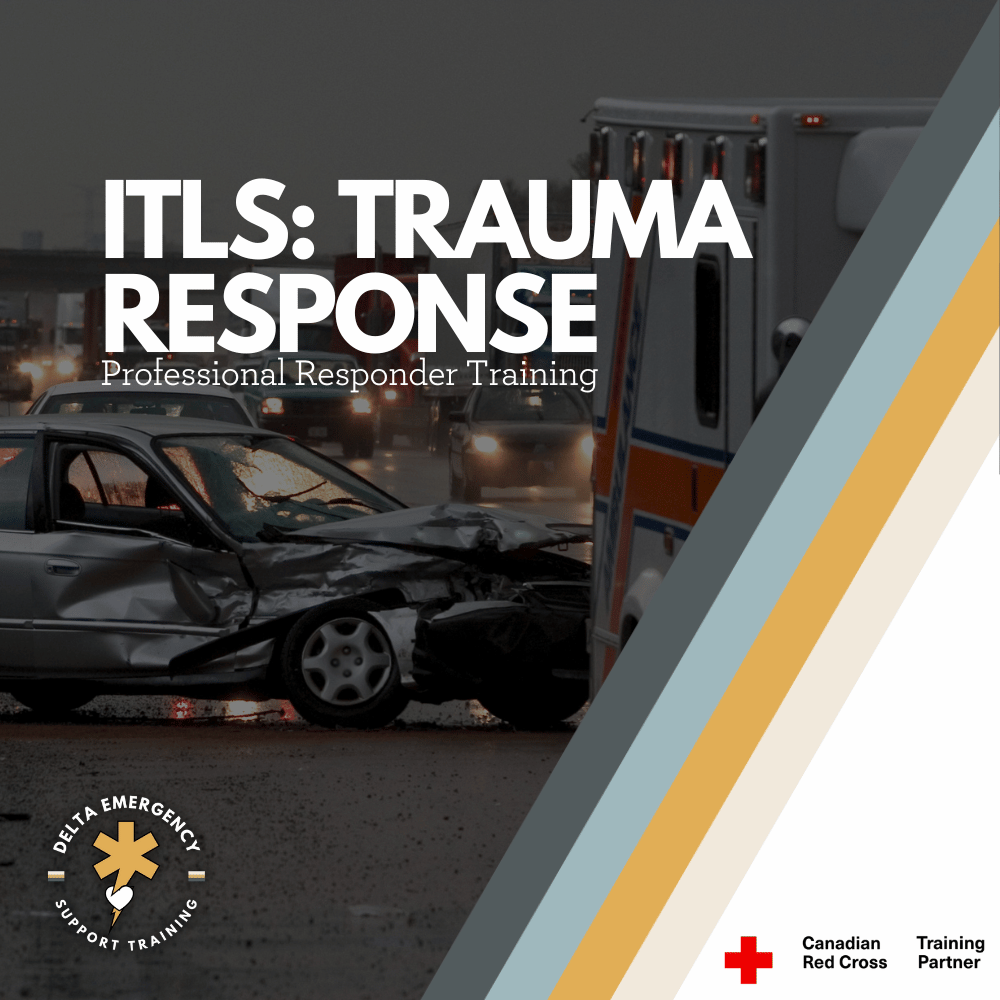
International Trauma Life Support: A Structural Approach to Trauma

Need to take ITLS but not sure what it entails? We’ll break it down for you. International Trauma Life Support (ITLS) gives professional responders the tools to quickly assess, stabilize, and manage trauma patients in high-stress situations. From airway management to bleeding control and spinal care, this course equips you with practical, hands-on skills that could save lives when every second counts.

When emergencies happen, paramedics, firefighters, and advanced first aid responders, having the right tools and knowledge can make the difference between life and death. International Trauma Life Support (ITLS) is a specialized training program that equips professional responders with the skills to rapidly assess, stabilize, and manage trauma patients in high-pressure situations.

If you’re a responder required to take ITLS, here’s what you need to know.

The Purpose of ITLS

ITLS focuses on a structured approach to trauma care. The goal is to give responders a proven framework for:

  • Quickly identifying life-threatening injuries.

  • Performing rapid, effective interventions.

  • Preventing further harm while preparing for transport.

  • Working within professional guidelines and medical protocols.

This training bridges the gap between classroom learning and the unpredictable realities of trauma scenes.

Core Learning in ITLS

Here’s a breakdown of the key skill areas covered in ITLS and what they mean in practice.

1. Patient Assessment & Initial Survey

Responders learn a systematic way to approach every trauma patient:

  • Hazards, Environment, MOI, Patient count and Assistance.

  • Primary survey (C-Spine, LOC, ABCs, RBS,).

  • Identifying life threats in the first few minutes.

Why it matters: A structured assessment ensures nothing is missed under pressure.

2. Airway Management & Adjuncts

Maintaining an open airway is priority number one. ITLS covers:

  • Manual maneuvers (jaw thrust, head-tilt chin-lift).

  • Airway adjuncts (OPA, NPA).

  • Advanced options (supraglottic airways, endotracheal intubation where permitted).

  • Recognizing and managing obstructions.

Why it matters: Without a clear airway, nothing else matters — oxygen can’t reach the body.

3. Breathing & Ventilation Support

Responders are trained to:

  • Recognize respiratory distress and failure.

  • Provide rescue breaths and ventilations with a bag-valve mask.

  • Use oxygen.

  • Identify and treat life-threatening chest injuries (tension pneumothorax, sucking chest wound).

Why it matters: Oxygen delivery is essential to survival, recognizing and treating chest trauma is lifesaving.

4. Circulation & Hemorrhage Control

Stopping major bleeding and supporting circulation includes:

  • Direct pressure and wound packing.

  • Tourniquet application.

  • Recognizing shock and initiating care.

  • Intravenous (IV) or intraosseous (IO) fluid administration (where scope allows).

Why it matters: Uncontrolled bleeding is one of the top causes of preventable trauma deaths.

5. Spinal Motion Restriction (SMR)

Trauma often comes with potential spinal injuries. ITLS emphasizes:

  • Patient assessment for spinal risk.

  • Manual stabilization and cervical collars.

  • Log rolls and backboard use.

  • Updated evidence-based approaches to SMR.

Why it matters: Proper handling prevents permanent paralysis from secondary injury.

6. Head & Chest Trauma Management

Specific scenarios covered include:

  • Managing traumatic brain injuries and increased intracranial pressure.

  • Recognizing chest trauma (flail chest, open chest wounds).

  • Interventions like occlusive dressings, fracture stabilization and deadly bleed control.

Why it matters: These injuries are time-sensitive and require immediate, precise intervention.

7. Protocols & Teamwork

Beyond individual skills, ITLS teaches responders to:

  • Work under medical protocols and established guidelines.

  • Communicate effectively in teams.

  • Prioritize transport decisions (“load and go” vs. “stay and play”).

Why it matters: Trauma care is never solo — effective teamwork saves lives.

Why Professional Responders Need ITLS

For those moving into advanced roles (Advanced First Aid, EMR, PCP, paramedic), ITLS is often a required certification. It ensures all responders use the same language, protocols, and structured assessment, which makes coordination seamless during emergencies.

With ITLS, you’re not just checking a box — you’re developing:

  • Confidence in high-stress scenarios.

  • Competence in trauma management skills.

  • Credibility as a trained professional who can handle life-threatening situations.

Final Takeaway

If you’re required to take ITLS, think of it as more than a course — it’s a survival toolkit for the real world of trauma response. You’ll learn how to rapidly assess patients, manage airways, stop life-threatening bleeds, stabilize spines, and follow trauma protocols effectively.

For professional responders, ITLS is not just training. It’s a commitment to ensuring that when seconds count, you can act decisively, safely, and in line with the best trauma care standards worldwide.

Read More

Be Ready for the Unexpected: First Aid Skills Every Hunter Should Know

Hunting is a beloved Canadian tradition, but heading into the bush without first aid training puts you and your group at risk. Learn the importance of being prepared with skills like bleeding control, wound care, and shock management. Whether you hunt with family, friends, or solo—make sure you're ready to protect what matters most.

Why You Should Learn First Aid Before Hunting Season

Be Prepared for the Unexpected in Canada’s Wilderness

Father and son hunting

As the crisp fall air rolls in and leaves begin to turn, thousands of Canadians prepare for one of the most anticipated times of the year—hunting season. For many, it’s more than a pastime. It’s a family tradition, a weekend with friends, or time spent in the backcountry with loved ones—passing down skills, telling stories around the fire, and enjoying the stillness of nature. Hunting is deeply woven into Canadian culture, a proud part of our heritage from coast to coast.

But no matter how experienced or well-prepared you are, the wilderness comes with real risks. And when something goes wrong, you're often far from help, without cell service, and hours from emergency responders.

That’s why first aid training isn’t just helpful—it’s essential.

Whether you’re a weekend hunter or a guide, learning Red Cross-certified First Aid, Advanced First Aid (AFA), Wilderness First Aid, or Emergency Medical Responder (EMR) skills can make all the difference in an emergency. It means being ready—not just for yourself, but for the people who matter most.

At Delta Emergency Support Training, we believe that part of keeping these traditions alive means learning how to protect them.

Hunting Safety in Canada: Know the Risks

Hunting is generally safe when done responsibly, but accidents still occur. According to the Canadian Firearms Program and provincial wildlife agencies:

  • Most firearm-related hunting injuries involve accidental discharges or poor handling technique.

  • Tree stand falls are one of the most common hunting injuries, often resulting in fractures or spinal trauma.

  • Hunters often travel to remote areas with no cell service, delaying access to emergency care.

  • In some provinces, hypothermia is the leading non-injury emergency reported during hunting season.

Each year, hundreds of injuries are reported across the country—many of which are preventable with basic training and better preparation.

🏹 Common Hunting Injuries and Medical Situations

Understanding potential emergencies helps you prepare properly. Here are the most common situations faced in the field:

  • Gunshot wounds or impalement from firearm mishandling or accidents.

  • Knife cuts and lacerations during field dressing or gear use.

  • Falls from tree stands or rocky/uneven ground, resulting in broken bones or head injuries.

  • Cold exposure: frostbite, hypothermia, or trench foot.

  • Heat stress in early season hunts.

  • Allergic reactions to insect stings, animal bites, or plants.

  • Getting lost or separated from your group, increasing the risk of panic, exposure, or dehydration.

🧠 First Aid Skills Every Hunter Should Know

Here’s what every hunter—beginner or seasoned—should know:

  • Bleeding control: How to apply direct pressure, pack a wound, or use a tourniquet.

  • Managing broken bones: Stabilizing with splints and slings.

  • Shock treatment: Recognizing and managing pale, cold, clammy symptoms.

  • CPR and AED use: Cardiac arrest can happen in any setting.

  • Anaphylaxis care: Recognizing severe allergic reactions and administering an EpiPen.

  • Basic wound care: Cleaning and dressing wounds to prevent infection.

  • Spinal motion restriction: Important if someone falls from a height or hits their head.

These lifesaving skills are taught in Red Cross First Aid and Wilderness First Aid programs and are enhanced further in EMR-level training.

🎒 Essential First Aid Items to Pack for the Field

Your hunting first aid kit should be compact, durable, and versatile. Pack:

  • Tourniquet (e.g., CAT or SOFTT models)

  • Gauze pads, trauma dressings, adhesive tape

  • SAM splint and triangular bandage

  • Antiseptic wipes, tweezers, antibiotic ointment

  • Antihistamines and pain relievers

  • CPR mask, gloves, emergency blanket

  • Water purification tablets or filter

  • Whistle, signal mirror, and flashlight

  • Personal locator beacon (PLB) or satellite communicator

Pack gear—but more importantly, know how to use it.

🏔️ Why Location Matters: The Reality of Remote Response

In urban areas, EMS might reach you in under 10 minutes. In the wilderness, it could be hours—or days. Even when you can call 911, delays are common due to:

  • No cell service

  • Impassable terrain

  • Poor visibility or weather conditions

  • Long distances from the nearest ambulance or search-and-rescue base

That’s why wilderness preparedness and basic medical self-reliance are key. The Red Cross Wilderness First Aid program focuses specifically on prolonged care and making decisions when help is hours away.

🧭 Preventing Emergencies: Smart Safety Tips for Hunters

Avoiding an emergency is the best-case scenario. Here’s how to minimize risk:

  • Take a buddy—never hunt alone if you can avoid it.

  • File a trip plan: Leave your route and return time with someone you trust.

  • Carry emergency communication (PLB, satellite text device, or two-way radio).

  • Inspect your gear, especially firearms, knives, and tree stands.

  • Dress appropriately in layers, blaze orange, and waterproof gear.

  • Know the weather and avoid risky conditions (fog, snowstorms, extreme cold).

  • Stay hydrated and take regular breaks.

  • Stay sober while handling firearms—alcohol and hunting don’t mix.

📚 Which First Aid Training Is Right for You?

At Delta Emergency Support Training, we help hunters, outdoor workers, and future first responders get the skills they need. We offer:

  • Standard and Advanced First Aid (AFA) – Learn bleeding control, airway management, CPR, and trauma care.

  • Wilderness First Aid – Specialized for remote environments and delayed help.

  • Emergency Medical Responder (EMR) – For guides, professionals, or those planning a career in emergency services.

All courses follow Red Cross Emergency Care for Professional Responders guidelines.

Conclusion: Be the One Who’s Ready

Hunting isn’t just a hobby—it’s a cherished Canadian tradition, often passed down through generations. Whether you’re heading into the woods with your father, sister, best friend, or your own kids, you’re not just out for the harvest—you’re making memories. You're sharing laughter around the campfire, waking up at dawn with excitement, and carrying on a way of life that means something deeply personal.

But with that comes responsibility.

If something goes wrong—and it can—you want to be the one who knows what to do. Whether it’s treating a serious injury, spotting early signs of hypothermia, or managing an allergic reaction, your actions can save the life of someone you care about.

At Delta Emergency Support Training, we’re here to make sure you’re ready. Our Red Cross-certified Advanced First Aid, Emergency Medical Responder, and Wilderness First Aid programs prepare you not just for emergencies—but for protecting what matters most: your family, your friends, and the memories you’re out there to create.

Let’s keep hunting a safe, proud tradition—for this season, and every season to come.

Read More

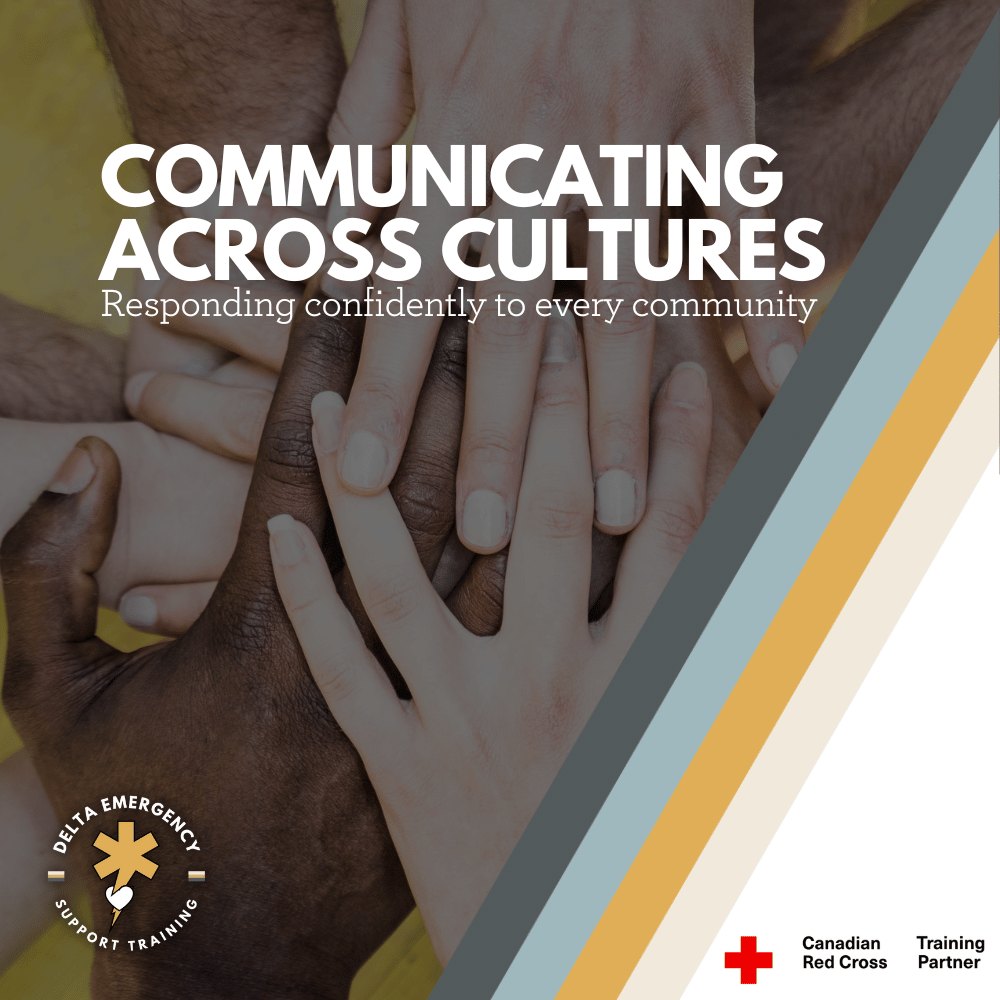
Cultural Differences and Language Barriers: A First Responder’s Guide to Respectful, Effective Care

Emergency calls often involve diverse cultures and languages. First responders face unique challenges in communication and cultural understanding that can impact patient care. This guide offers essential strategies to navigate language barriers respectfully, recognize cultural differences, and deliver compassionate, effective emergency care. Improve your skills and confidence with our practical tips.

As a first responder, you’re trained to act swiftly and decisively—but every emergency call is unique. One of the most important factors that can affect your response is cultural diversity. From language barriers to differing customs, beliefs, and expectations, understanding and respecting cultural differences is essential to providing compassionate and effective emergency care.

This guide explores common challenges you may encounter and offers practical strategies for navigating language barriers and cultural nuances with respect and professionalism.

1. Recognizing the Impact of Cultural Differences

Culture shapes how people perceive health, illness, pain, and emergency care. For example:

  • Some cultures prefer family involvement in medical decisions, while others expect individual autonomy.

  • Eye contact, physical touch, and personal space norms vary widely.

  • Certain gestures, language, or uniforms may be misunderstood or viewed differently.

  • Religious or cultural practices may affect treatment preferences (e.g., gender considerations, modesty, dietary restrictions).

Being aware of these factors helps you approach each situation with sensitivity.

2. Language Barriers: Challenges and Solutions

Language differences can hinder communication, delay treatment, or cause misunderstandings. Common challenges include:

  • Difficulty understanding symptoms or medical history.

  • Inability to explain procedures or gain informed consent.

  • Stress and fear amplified by lack of clear communication.

How to Overcome Language Barriers:

  • Use clear, simple language. Avoid jargon, speak slowly, and use short sentences.

  • Use non-verbal communication. Gestures, facial expressions, and demonstration can help convey meaning.

  • Employ translation tools such as phone interpretation services or translation apps if available.

  • Involve bilingual family members or community members cautiously—ensure they understand medical confidentiality.

  • Be patient and give time for responses. Don’t rush; encourage questions.

3. Showing Respect for Cultural Beliefs and Practices

Respect is the foundation of effective care. To show respect:

  • Ask permission before touching the patient—especially with cultural or religious sensitivities.

  • Respect privacy and modesty. Use same-gender responders when possible.

  • Be mindful of dietary or medical restrictions related to religion or culture.

  • Avoid assumptions or stereotypes. Every individual is unique, even within cultural groups.

  • Listen actively and validate concerns. Even if you can’t fully accommodate, acknowledging beliefs builds trust.

4. Practical Tips for First Responders

  • Prepare ahead: Learn about cultural demographics in your service area and common practices.

  • Use cultural competence training to build awareness and skills.

  • Maintain a calm and compassionate demeanor. Non-verbal cues can ease tension.

  • Clarify understanding: Repeat key information back to ensure comprehension.

  • Document any cultural considerations relevant to treatment or care.

  • Be adaptable: Some situations require flexibility while maintaining safety and protocol.

5. The Role of Empathy and Patience

Responding with empathy can bridge gaps where words fall short. Simple acts—like a reassuring tone, gentle touch (when appropriate), or attentive listening—can make a huge difference. Patience helps you navigate confusion or fear, especially when communication is tough.

6. When to Call for Assistance

If language barriers severely impair communication and immediate care decisions, or if cultural concerns affect treatment, don’t hesitate to:

  • Request professional medical interpreters.

  • Consult supervisors or cultural liaison officers if available.

  • Involve community health workers who understand cultural contexts.

7. Why Cultural Competence Matters

Respectful, culturally aware care leads to:

  • Better patient cooperation and outcomes.

  • Reduced stress and fear for patients and families.

  • Stronger community trust in emergency services.

  • Enhanced professional confidence and effectiveness.

Final Thoughts

Every call is more than just a medical emergency—it’s a human moment shaped by diverse stories and backgrounds. As a first responder, your cultural sensitivity and ability to navigate language barriers not only save lives but honor the dignity of every individual you serve.

By embracing respect, patience, and continuous learning, you make your emergency care truly inclusive and effective.

Read More

Advanced First Aid for Dog Bites: A Firefighter & EMS Responder’s Guide

Dog bites demand swift, skilled care from first responders. Our Red Cross Advanced First Aid & EMR course trains firefighters and EMS personnel in critical skills—from scene safety to wound management and emotional support. Learn to confidently handle dog bite emergencies and more with hands-on training that prepares you for real-world situations.

Dog bites are common and can range from minor injuries to life-threatening wounds. As an advanced first aider—often a firefighter or EMS responder—you’re frequently the first healthcare professional on scene. Your response can significantly impact the victim’s recovery, infection risk, and emotional well-being.

This guide provides an in-depth approach to managing dog bites, emphasizing scene safety, injury treatment, wound care, and patient support with your advanced training and EMS protocols in mind.

1. Scene Safety: Your First Priority

As firefighters and EMS responders, scene safety is non-negotiable. Before attending to the victim:

  • Ensure the dog is secured or removed from the scene.

  • Coordinate with police or animal control if the dog is aggressive or unrestrained.

  • Use situational awareness to spot hazards like traffic, bystanders, or multiple animals.

  • Wear appropriate personal protective equipment (PPE), including gloves and eye protection.

  • Brief your team on potential risks and establish safe zones.

Remember: your safety is critical. You cannot assist others if injured.

2. Rapid Assessment of Injury and Vital Signs

Upon approaching the patient:

  • Perform a quick but thorough assessment:

    • Identify bite locations, wound depth, and bleeding severity.

    • Assess airway, breathing, circulation (ABCs), especially if bites are on the face or neck.

    • Look for signs of shock or distress.

  • Evaluate distal circulation and neurological status if extremities are involved.

  • Prepare for rapid transport if injury severity or patient condition warrants.

3. Managing Bleeding and Stabilizing the Wound

  • Apply direct pressure with sterile dressings to control bleeding.

  • Elevate the injured limb if it does not exacerbate pain or injury.

  • Use hemostatic dressings or pressure bandages if standard methods fail and bleeding is life-threatening.

  • Avoid closing wounds—leave that to hospital staff.

  • If bones are exposed or fractures suspected, immobilize the limb appropriately.

4. Cleaning and Infection Control in the Field

  • Use available clean water or saline to gently irrigate wounds, flushing away debris and contaminants.

  • Avoid harsh scrubbing to prevent tissue damage.

  • Apply sterile, non-adherent dressings loosely to reduce infection risk.

  • Maintain standard precautions—dog bites pose high infection risk from mixed bacterial flora.

5. Addressing Emotional Trauma and Providing Reassurance

  • Understand that dog bite victims, especially children, often experience intense fear or shock.

  • Use your training in crisis intervention to calm and reassure patients and caregivers.

  • Maintain eye contact, speak in a calm voice, and explain procedures as you go.

  • If a child is involved, engage a parent or guardian for comfort, and use age-appropriate communication.

6. Differences in Treatment: Adults vs. Children

  • Children’s smaller anatomy and thinner skin increase risk of deeper injuries. Facial and neck bites require immediate airway assessment.

  • Children may be less cooperative; use gentle distraction and clear, comforting language.

  • Monitor for airway obstruction and signs of respiratory distress in both adults and children, but be especially vigilant with pediatric patients.

  • Adults may underreport pain or injury severity—conduct thorough assessments.

7. When to Activate Advanced Care and Transport

Immediately initiate rapid transport and notify receiving facility if:

  • Bleeding is uncontrolled or severe

  • Patient shows signs of shock or compromised airway

  • Wounds involve face, neck, hands, or joints

  • Suspected fractures or nerve injuries are present

  • Signs of infection or systemic illness are evident

  • Pediatric patients require specialized care

Coordinate transport with EMS and hospital staff for optimal continuity of care.

8. Documentation and Reporting

  • Record detailed information on the bite incident, dog description, and circumstances.

  • Document patient’s vital signs, treatment provided, and response to interventions.

  • Share info with receiving medical personnel and law enforcement/animal control as needed.

  • Proper documentation supports patient care and public safety.

9. Post-Incident Patient Education

  • Advise victims to seek follow-up care for tetanus boosters, rabies prophylaxis, and wound management.

  • Educate on signs of infection to watch for at home.

  • Stress importance of reporting dog bites to local health authorities.

10. Summary for Firefighters & EMS Responders

StepKey ActionsScene SafetySecure environment, coordinate with animal control, PPE use.AssessmentRapid injury and ABC evaluation, assess for shock.Bleeding ControlDirect pressure, elevation, hemostatic dressings if needed.Wound CareGentle irrigation, sterile dressing, infection prevention.Emotional SupportCalm communication, involve caregivers, monitor for shock.Pediatric CareAirway vigilance, gentle approach, watch for distress signs.TransportRapid evacuation for severe cases, notify hospital.DocumentationAccurate records for care and reporting.

As a firefighter or EMS advanced first aider, your training equips you to manage the complex needs of dog bite victims with confidence and professionalism. Your timely intervention saves lives, prevents complications, and supports recovery—physically and emotionally.

Read More

The Critical Role of BSI: Protecting Yourself First as a First Responder

Body Substance Isolation (BSI) is more than just wearing gloves—it's a life-saving habit for every first responder. From bloodborne pathogens to airborne illnesses, BSI protects you from invisible threats on every call. At Delta Emergency Support Training, we emphasize BSI in every scenario because your safety comes first. Learn what PPE to wear, how to use it, and why BSI is essential in every emergency situation.

When responding to emergencies, your focus is naturally on saving others. But as a first responder, your own safety must come first. That’s where Body Substance Isolation (BSI) comes in—a fundamental part of emergency medical care that often gets overlooked, especially by new responders.

BSI is more than just gloves—it's a mindset, a habit, and a crucial layer of protection against invisible but dangerous threats like bloodborne pathogens, bacteria, and bodily fluids.

At Delta Emergency Support Training, we emphasize BSI in every scenario because if you’re not safe, you can’t help anyone else.

🚨 What Is BSI?

Body Substance Isolation (BSI) is a set of precautions used to prevent contact with potentially infectious body fluids. This includes blood, vomit, saliva, urine, feces, and respiratory secretions.

BSI is part of Standard Precautions, a cornerstone of infection control recommended by health authorities and the Canadian Red Cross. BSI assumes that anyone could be carrying an infectious disease, whether or not symptoms are visible.

🦠 Diseases & Infections That Can Be Transmitted

Here are some of the infections you risk exposure to during first aid or emergency response:

Bloodborne Pathogens

  • Hepatitis B (HBV): Can survive in dried blood for up to a week

  • Hepatitis C (HCV): No vaccine, often leads to chronic liver issues

  • HIV/AIDS: Though lower risk, exposure via blood or sexual fluids can occur

Airborne & Droplet Diseases

  • COVID-19

  • Influenza

  • Tuberculosis

Contact-Transmissible Infections

  • MRSA (Methicillin-resistant Staphylococcus aureus)

  • Norovirus

  • C. difficile

These diseases can be transmitted through:

  • Cuts or broken skin

  • Mucous membranes (eyes, mouth)

  • Inhalation (coughs, sneezes)

  • Contaminated surfaces or medical equipment

🧰 What BSI Gear to Use—and When

🔹 Gloves (Always)

Used on every call. Always don gloves before patient contact, even when no fluids are visible. Use nitrile gloves for latex-sensitive patients and for better chemical resistance.

🔹 Eye Protection & Face Shield

For any situation involving splash risk (e.g., severe bleeding, childbirth, vomiting). Goggles or a full face shield help protect your mucous membranes from exposure.

🔹 Gowns/Aprons

For major trauma, childbirth, or mass-casualty events with heavy blood loss or body fluid exposure.

🔹 Masks (Surgical/N95)

  • Surgical Mask: For droplet protection during coughing, vomiting, or respiratory distress.

  • N95 Respirator: Use during airborne illness calls (e.g., suspected TB, COVID-19) and when performing aerosol-generating procedures like CPR or suctioning.

🧠 Scenario-Based BSI Examples

Scenario 1: Motor Vehicle Collision

  • Patient bleeding heavily from the scalp and face.

  • You wear: Gloves, goggles/face shield, gown if time permits.

  • Tip: Be cautious kneeling near broken glass or on spilled fuel.

Scenario 2: Unconscious Overdose

  • Risk of vomit, saliva, or needle sticks.

  • You wear: Gloves, mask, eye protection.

  • Tip: Never blindly reach into pockets or under the person—use tools and visual checks.

Scenario 3: Respiratory Distress in a Child

  • Coughing, drooling, rapid breathing.

  • You wear: Gloves, surgical or N95 mask, eye protection.

  • Tip: Keep your face out of the line of the patient’s airway.

Scenario 4: Diabetic Emergency with Vomiting

  • Patient is responsive but disoriented and vomiting.

  • You wear: Gloves, eye protection.

  • Tip: Position yourself behind or to the side—not in front—when managing vomiting to avoid splash.

⚠️ Hidden Dangers: BSI Tips from the Field

🔸 Where You Put Your Bag Matters

  • Keep gear off the ground and away from pools of fluid.

  • Use tarps, bags with plastic bottoms, or place equipment on elevated surfaces like a bench or chair.

🔸 Watch Where You Kneel

  • Glass, needles, body fluids, and animal waste can all be on the ground.

  • Wear durable, washable uniforms and clean gear after every shift.

🔸 Double Glove for Safety

  • In high-risk situations (e.g., trauma, unknown environment), wear two pairs of gloves and peel the outer layer off after initial contact.

🔸 Avoid Touching Your Face

  • It's a reflex, but it’s dangerous. You could unknowingly transfer pathogens to your eyes, nose, or mouth.

🔸 Proper Doffing Technique

  • Removing PPE incorrectly can contaminate you. Practice safe removal: gloves off first, then goggles, then gown, then mask.

🔸 Use a Buddy System

  • Have a partner check you for contamination before you remove gear or re-enter a clean zone.

🧽 After the Call: BSI Doesn’t End on Scene

  • Disinfect your equipment: Stethoscopes, trauma shears, radios, pens, and patient monitors all carry pathogens.

  • Change uniforms: Always bring an extra change of clothing. Launder contaminated items ASAP.

  • Hand hygiene: Wash thoroughly or use alcohol-based sanitizer (60–90%) after glove removal—even if your hands “feel clean.”

👩‍⚕️ Why BSI Isn’t Optional—It’s Life-Saving

BSI isn’t about paranoia—it’s about routine protection in an unpredictable world. Even minor exposures can result in career-altering infections, transmission to loved ones, or weeks of medical follow-up.

At Delta Emergency Support Training, we train first responders to treat every scene like it matters—because it does. From our Standard First Aid and Advanced First Aid/EMR courses to BLS and professional response training, we focus on real-world practices that protect you and your patients.

✅ Final Reminder

  • Always wear gloves.

  • Always assess the scene for fluid or sharp hazards.

  • Always treat every person as potentially infectious.

🩺 You’re no help to anyone if you’re not protected. BSI is not just protocol—it’s your first layer of survival on every call.

Read More

From First Aid to Fireline: Your Path to Wildland Deployment

Canada’s wildfire seasons are getting more intense—so is the demand for skilled wildland firefighters. Learn what the job involves, the certifications you need (like S-100, S-185, and EMR), and how Delta Emergency Support Training helps future responders build a solid foundation in Red Cross-certified Advanced First Aid and Emergency Medical Responder programs.

Into the Flames: Exploring Wildland Firefighting in Canada

Wildland firefighter clearing brush

Canada’s Increasing Need for Wildland Firefighters

With fire seasons growing longer and more intense across Canada, wildland firefighters are more essential than ever. From British Columbia’s dry interior to the boreal forests of Alberta and Northern Ontario, fire crews are called on every summer to battle large, unpredictable blazes that threaten ecosystems, homes, and entire communities.

If you're working toward becoming a first responder, Emergency Medical Responder (EMR), or firefighter, wildland firefighting can be a powerful way to gain experience, build resilience, and serve when it matters most.

What Is Wildland Firefighting?

Wildland firefighting involves controlling and suppressing fires that occur in natural areas—forests, grasslands, or remote terrain. In contrast to urban or structural firefighting, wildland firefighters operate in rugged, undeveloped areas, often far from roads, with limited access to resources.

You might be:

  • Building fire guards (hand-dug trenches to stop fire spread)

  • Conducting controlled burns

  • Monitoring hot spots for reignition

  • Assisting with helicopter bucket drops or pump setups

  • Supporting evacuations of nearby communities

Canadian Training and Requirements

If you're interested in working as a wildland firefighter in Canada, here are the typical requirements:

Required Certifications:

  • S-100: Basic Fire Suppression and Safety

  • S-185: Fire Entrapment Avoidance

  • ICS-100: Introduction to Incident Command System

  • Standard First Aid, Advanced First Aid, or EMR (depending on the role)

🏋️ Fitness Testing:

Many agencies require a physical fitness test (like the WFX-FIT), which includes:

  • Carrying a 25 kg pump

  • Hose pack hikes

  • Grip strength and balance challenges

🧰 Additional Skills That Help:

  • Chainsaw safety certification

  • WHMIS (Workplace Hazardous Materials)

  • Radio communication skills

  • Class 4 or air brake license (for driving fire vehicles)

In Canada, wildland firefighters are employed by:

  • Provincial agencies (e.g., BC Wildfire Service, Alberta Wildfire, Ontario Ministry of Natural Resources and Forestry)

  • Private contractors

  • Federal emergency response teams

Why EMR and AFA Matter on the Fireline

Medical incidents on wildfire deployments are more common than many expect. Team members may face:

  • Heat exhaustion or heat stroke

  • Dehydration or altitude sickness

  • Burns or smoke inhalation

  • Trauma from slips, trips, or falling debris

  • Insect stings or allergic reactions

Having a certified Emergency Medical Responder or someone with Advanced First Aid training on a crew means faster, more effective care until paramedics or air support can arrive. It's also a valuable asset that can make your application stand out.

What Deployment Is Really Like

Canadian wildland fire deployments can last days or even weeks, especially during peak season (June to August). Expect:

  • Camp life (tents, cots, and basic food services)

  • 12+ hour shifts

  • Variable weather (extreme heat, rain, or smoke)

  • Team living — camaraderie and close-knit bonds are key

The work is physically tough, but the environment is incredibly rewarding—many describe it as life-changing.

What to Pack on a Deployment

Most agencies provide essential PPE (boots, helmet, Nomex gear), but your go-bag should include:

  • High-energy snacks

  • Extra socks

  • Lightweight sleeping gear

  • Rehydration tablets or electrolytes

  • Small first aid kit

  • Bug spray and sunscreen

Mental Resilience Is Key

The mental strain of extended deployments, long shifts, and witnessing environmental damage can take its toll. Fireline crews rely heavily on:

  • Peer support

  • Strong leadership

  • Daily briefings and debriefings

  • Mental health resources when needed

How to Get Started in Canada

  1. Take an Advanced First Aid or EMR course to meet hiring and deployment requirements.

  2. Get your S-100 and S-185 certifications (typically offered through wildfire agencies or training providers).

  3. Train physically for endurance, balance, and strength.

  4. Apply to provincial wildfire services or contractors in early spring (applications often open between January and March).

Why Wildland Firefighting Is a Great Step Toward a Fire Service Career

Many municipal firefighters start with wildland contracts. It helps build:

  • Teamwork under pressure

  • Medical and safety experience

  • Exposure to command structures (ICS)

  • Mental and physical readiness for emergency work

🔥 Train With Delta Emergency Support Training

At Delta Emergency Support Training, we support future wildland firefighters with Red Cross-certified Advanced First Aid and EMR training—delivered by real paramedics and firefighters who know what the job demands. If you’re serious about joining the fire service, we’ll help you start strong and stay prepared.

Ready to begin your career on the front lines of Canada’s wildfires? Join Team Delta and let’s get started.

Read More
Advanced First Aid, First Responder, Red Cross Kumari Malhotra Advanced First Aid, First Responder, Red Cross Kumari Malhotra

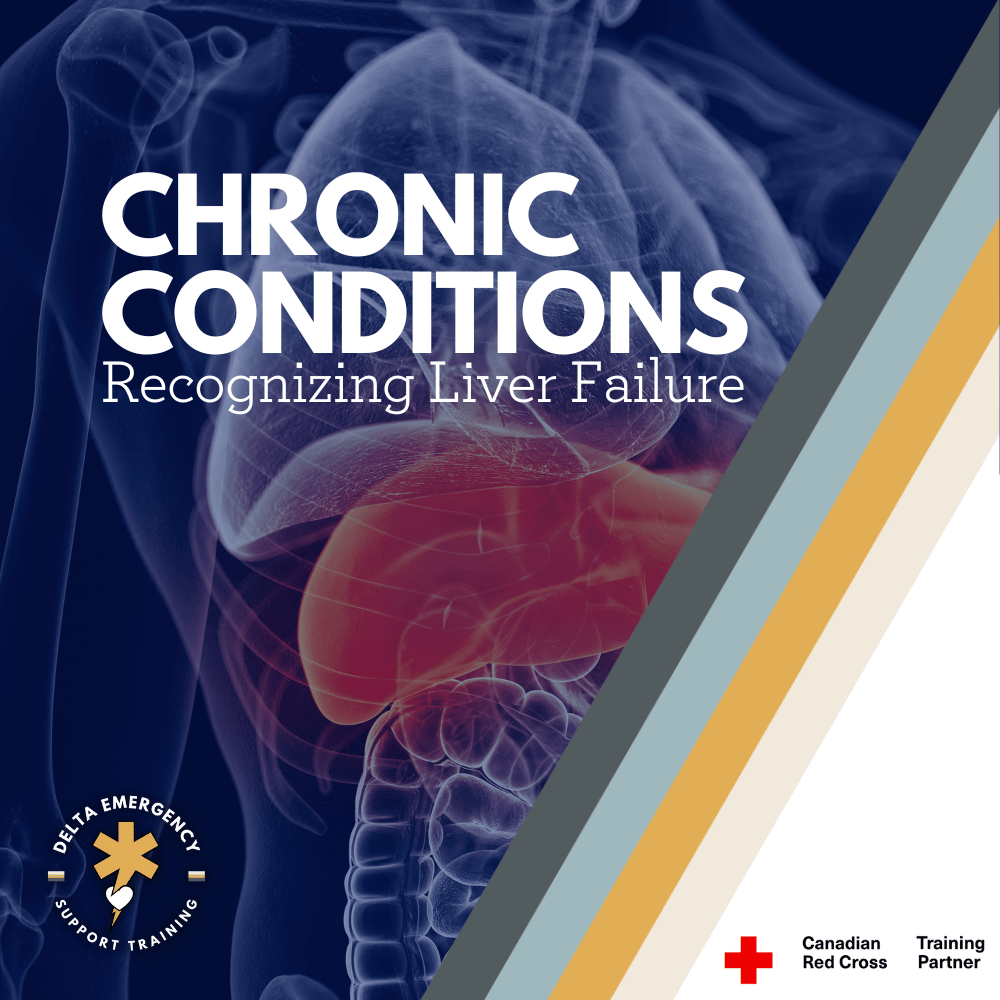
Liver Failure: What Every Future First Responder Should Know

Liver failure is a life-threatening condition that every future first responder should be able to recognize. This in-depth guide covers liver function, causes of failure, patient symptoms, and how firefighters and EMRs can respond—based on Red Cross emergency care standards.

The liver is one of the most vital organs in the human body, responsible for a wide range of essential functions. As a first responder—whether you're training as a firefighter, Emergency Medical Responder, or preparing for a healthcare career—it’s important to understand what liver failure is, how it presents, and what role you can play in early recognition and supportive care.

This blog post is designed for students and professionals taking Advanced First Aid or Red Cross EMR courses who are beginning their journey into emergency services. Whether you’re on a call with your fire crew or treating a patient as part of EMS, knowing how to recognize and respond to liver failure can save lives.

The Role of the Liver in the Human Body

The liver has more than 500 known functions. Key responsibilities include:

  • Detoxification: Filtering toxins from the blood (including medications, alcohol, and waste byproducts).

  • Metabolism: Processing carbohydrates, fats, and proteins.

  • Storage: Storing glycogen, vitamins, and iron.

  • Bile Production: Aiding digestion by producing bile for fat absorption.

  • Clotting Factors: Synthesizing proteins necessary for blood clotting.

When liver cells become damaged or overwhelmed, these processes break down—leading to liver failure, which can progress rapidly.

What Is Liver Failure?

Liver failure occurs when the liver loses its ability to function adequately. It can be acute (develops quickly over days or weeks) or chronic (progresses over months or years).

Types of Liver Failure:

  • Acute Liver Failure (ALF): Often caused by overdose, viral hepatitis, or toxins. Patients may have had no prior liver disease.

  • Chronic Liver Failure (CLF): Usually due to long-term conditions like alcoholism, hepatitis C, or nonalcoholic fatty liver disease (NAFLD).

Stages of Liver Failure

  1. Inflammation: Liver becomes swollen or inflamed.

  2. Fibrosis: Scar tissue begins to form.

  3. Cirrhosis: Scar tissue replaces healthy tissue, impeding function.

  4. End-Stage Liver Disease (ESLD): Liver stops functioning effectively.

  5. Hepatic Encephalopathy: Toxins affect brain function due to liver's inability to filter.

Common Causes of Liver Failure

  • Alcohol abuse

  • Hepatitis A, B, and C

  • Acetaminophen overdose

  • Autoimmune liver disease

  • Genetic conditions (e.g., Wilson’s disease)

  • Fatty liver disease

  • Toxin exposure (mushrooms, industrial chemicals)

Signs and Symptoms

As a first responder, here are the signs you may observe:

Early Signs:

  • Fatigue

  • Loss of appetite

  • Nausea and vomiting

  • Right upper quadrant abdominal pain

Progressing Symptoms:

  • Jaundice: Yellowing of the skin and eyes

  • Bruising or bleeding easily (due to loss of clotting factors)

  • Swelling in legs and abdomen (ascites)

  • Dark urine, pale stool

  • Confusion or personality changes (hepatic encephalopathy)

  • Fetor hepaticus: A sweet, musty breath odor

How These Patients Present to EMS:

  • Altered level of consciousness

  • Seizures or unresponsiveness in severe encephalopathy

  • Abdominal pain and distention

  • Visible jaundice or bruising

  • History of alcohol use, medication use (especially acetaminophen), or hepatitis

  • Possible GI bleeding (hematemesis or melena)

Treatment Overview

While definitive treatment often includes hospitalization, liver transplant, or intensive supportive care, first responders can play a crucial early role:

Emergency Priorities:

  • Airway, Breathing, Circulation (ABCs): Always your first step.

  • Monitor LOC: Liver failure can rapidly lead to encephalopathy and unconsciousness.

  • Manage bleeding: These patients bleed easily due to impaired clotting.

  • Prevent further harm: Minimize medications and toxins.

  • Rapid transport: Time is critical in acute liver failure.

How Firefighters, EMRs, and Paramedics Respond

For Firefighters:

  • Be aware during medical assist calls, particularly for unconscious individuals.

  • Look for signs of jaundice or a known history of liver disease.

  • Support EMS with lifting and extrication in swollen or weakened patients.

For EMRs:

  • Take a clear history if possible (alcohol, drug use, known liver issues).

  • Use primary and secondary survey techniques to identify symptoms.

  • Support airway and manage LOC as needed.

  • Understand your role in ongoing assessment and timely transport.

For Paramedics:

  • Initiate IV access if within scope.

  • Administer oxygen and prepare for airway intervention.

  • Check glucose levels—hypoglycemia is common.

  • Be prepared for seizures or altered mental status.

  • Notify receiving hospital of suspected liver failure.

Why Liver Knowledge Matters for First Responders

Liver failure is often underrecognized in the pre-hospital setting, especially in its early stages. However, responders with advanced first aid or EMR training can spot the red flags and advocate for timely care.

Understanding the liver’s role in the body, the signs of dysfunction, and how these patients deteriorate can help you:

  • Communicate effectively with paramedics and hospital staff.

  • Make informed decisions during assessment.

  • Improve outcomes by acting early.

Join the Front Lines: Train with Confidence

At Delta Emergency Support Training, we specialize in Red Cross-certified Advanced First Aid and Emergency Medical Responder (EMR) courses for individuals looking to start a career in emergency services.

Whether you're working toward a future as a paramedic, firefighter, or healthcare professional, our instructors—many of whom are active EMS providers and firefighters—are here to prepare you for real-world scenarios, including recognizing critical conditions like liver failure.

Final Thoughts

Liver failure may not be the first thing that comes to mind during a call—but for the trained eye, it's a condition that demands attention. As a first responder, being equipped with the knowledge to recognize and respond can make all the difference.

Take the first step in your emergency services career by enrolling in one of our Red Cross-certified training programs. Learn to recognize more than symptoms—learn to save lives.

Read More

Scene Assessment for AFA & EMR: A Step-by-Step Guide

Discover how first responders assess scenes in seconds using real tools like HEMPPA, PWCATS, and SCORTS. We teach it in our EMR course — with real-world scenarios to make it stick.

In emergency medical care, scene assessment is your first critical move. It ensures your safety, guides your approach to the patient, and sets the foundation for triage, treatment, and transport. Whether you’re first on the scene or part of a larger response team, a systematic assessment process helps you stay focused and effective.

🚨 Step 1: Scene Overview – HEMPPA

The acronym HEMPPA helps responders quickly assess for overall scene safety and initial priorities:

H – Hazards

  • Look for anything that could harm you, the patient, or bystanders.

  • Examples: traffic, fire, electricity, gas, violence, sharp objects.

  • Why it matters: A dead rescuer helps no one. Always protect yourself first.

E – Environment

  • Assess conditions like weather, lighting, terrain, and location access.

  • Slippery roads, tight spaces, or poor visibility can impact patient care and evacuation.

M – Mechanism of Injury (MOI) / Nature of Illness (NOI)

  • MOI: What caused the injury? (e.g., fall from height, motor vehicle crash)

  • NOI: For medical calls, what’s wrong? (e.g., chest pain, shortness of breath)

P – Patients (Number)

  • Are there multiple patients?

  • Call for more resources if needed (e.g., MVC with multiple occupants).

P – PPE (Personal Protective Equipment)

  • Gloves, eye protection, masks — wear what’s appropriate to protect from bodily fluids or contaminants.

A – Additional Resources

  • Fire, police, ALS units, specialized rescue — ask early.

  • Helps control the scene, provide support, or manage large-scale incidents.

🧠 Step 2: What Else Should You Ask or Observe?

Here are key scene-based questions that build context before you even touch the patient:

  • Position of the patient: Supine, seated, slumped, or ejected from vehicle?

  • Witness reports: What did bystanders or family see? Events leading up to the incident?

  • Chief complaint: What is bothering the patient most right now?

  • Age & gender: Helps form medical differentials quickly.

  • Is the patient tracking/responding? (Eye contact, awareness)

  • Skin colour and condition: Pale, cyanotic, flushed? Cool, clammy, hot? Clues for perfusion.

🔤 PWCATS: For Immediate Patient Impressions

PWCATS helps EMRs gather critical info during the primary assessment.

P – Position

  • Are they standing, lying, slumped, or fetal?

  • Can indicate level of distress or unconsciousness.

W – Witnesses

  • Ask what happened, timing, onset of symptoms, seizure activity, etc.

  • Helps reconstruct events and guide priorities.

C – Chief Complaint

  • What’s their main issue? Chest pain, difficulty breathing, pain scale?

  • Directs your initial focus and treatment.

A – Age

  • Children and elderly present differently.

  • Age affects vital signs, resilience, and urgency of care.

T – Tracking (eye contact/alertness)

  • Are they focused? Following your movements?

  • Quick check of neurologic status or altered mental state.

S – Skin (colour, condition, temperature)

  • Pale, cool, clammy = shock.

  • Flushed, hot = fever or heat stroke.

  • Cyanosis (blue lips/nails) = hypoxia.

⚠️ SCORTS: Scene-Specific Red Flags

Use SCORTS to identify serious, time-sensitive conditions or complicating factors:

S – Stridor / SOB (Shortness of Breath)

  • Upper airway obstruction or respiratory distress?

  • High priority for airway intervention or oxygenation.

C – C-Spine

  • Suspect spinal injury if trauma involved (falls, MVCs).

  • Apply manual stabilization early if indicated.

O – Obvious Bleeding

  • Life-threatening external bleeds need immediate control — pressure, tourniquet, or dressing.

R – Rural / Remote

  • Consider access to definitive care, transport time, or need for air medevac.

  • Distance may increase urgency for certain interventions.

T – Time from ER

  • How far are you from advanced care?

  • May influence treatment decisions, especially in critical cases.

S – Stable / Unstable

  • Is the patient deteriorating? ABCs intact?

  • Helps you determine the transport priority and whether to initiate rapid extrication.

🧭 Scene Assessment in Action: Example Workflow

  1. Pull up, pause, and scan: Use HEMPPA.

  2. Approach safely with PPE on.

  3. Identify number of patients, call for help if needed.

  4. Walk up, observe PWCATS.

  5. Start ABC assessment and initiate any urgent interventions.

  6. Consider SCORTS: look for red flags or complicating factors.

  7. Report findings and updates using structured handover (e.g., ISBAR or CHART).

📋 Summary Cheat Sheet

AcronymStands ForPurpose HEMPPA Hazards, Environment, MOI/NOI, Patients, PPE, Additional ResourcesScene safety & setup PWCATSPosition, Witness, Chief Complaint, Age, Tracking, SkinInitial impression & focused questioning SCORTS Stridor/SOB, C-Spine, Obvious Bleeding, Rural, Time from ER, Stability Red flags & transport factors

🧑‍🏫 Learn Scene Assessment with Us

We teach all of this — and more — in our AFA and EMR classes. You'll learn to apply these acronyms like HEMPPA, PWCATS, and SCORTS in realistic emergency scenarios, helping you build the confidence to assess any scene quickly and safely. Scene assessment is one of the most critical skills a first responder can have, and we make sure you understand why it matters — not just in theory, but in action.

Read More

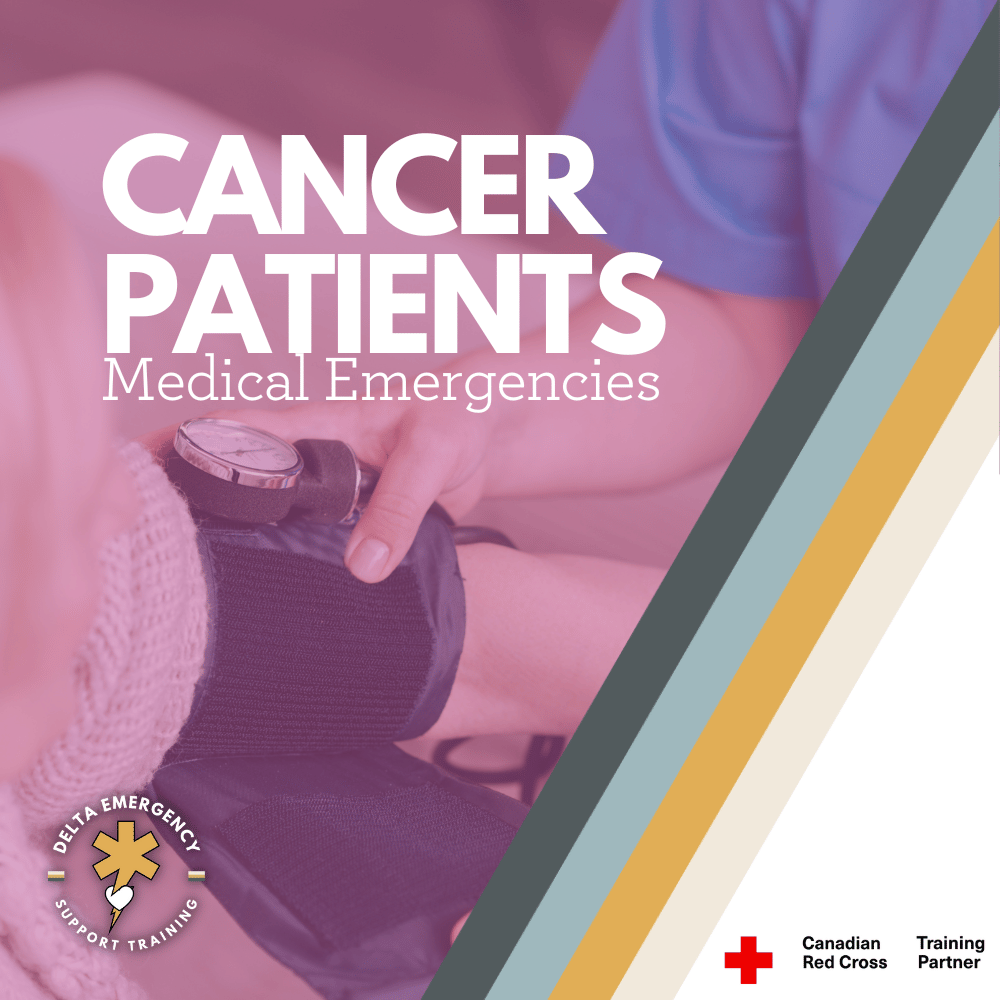
First Responder’s Guide: Medical Calls Involving Cancer Patients

Responding to medical calls involving cancer patients requires both clinical expertise and compassionate care. This guide provides first responders with essential knowledge on managing cancer-related emergencies, from understanding treatment side effects to providing emotional support in high-stress situations.

Responding to Medical Calls Involving Patients with Cancer: Key Considerations for First Responders

Introduction

When responding to medical calls involving patients with cancer, first responders play a crucial role in providing timely, compassionate, and competent care. Cancer patients often have unique medical needs, and responding to emergencies in these situations requires both clinical knowledge and emotional sensitivity. Whether it's a cancer-related emergency, side effects from treatment, or a complication related to the disease, understanding how to approach these situations is key to delivering the best care possible.

At Delta Emergency Support Training, we offer training that prepares first responders to handle a wide range of medical emergencies, including those involving cancer patients. Here's a guide on how to approach these situations.

Understanding Cancer and Its Impact on the Body

Cancer is a broad term used to describe a range of diseases where abnormal cells divide and grow uncontrollably. The disease can affect various parts of the body, leading to complications like pain, fatigue, immune suppression, and organ dysfunction. The type of cancer and the stage of the disease greatly influence how patients present medically.

Common Types of Cancer:

  • Breast cancer

  • Lung cancer

  • Leukemia

  • Lymphoma

  • Colorectal cancer

  • Prostate cancer

Each cancer type can affect patients in different ways, and treatment regimens such as chemotherapy, radiation therapy, and immunotherapy also have their own side effects, which can exacerbate existing conditions or create new health challenges.

Key Considerations When Responding to a Cancer Patient's Emergency

1. Be Aware of Treatment Side Effects

Patients undergoing cancer treatments often experience side effects that can complicate their condition, including:

  • Nausea, vomiting, and dehydration from chemotherapy.

  • Fatigue and weakness due to the impact of treatment on the body.

  • Infections due to immune suppression from chemotherapy or other treatments.

  • Pain associated with the cancer itself or as a side effect of treatment.

When responding to an emergency call, ask patients or caregivers about their treatment history, as this will help you understand potential side effects and offer appropriate care.

2. Pain Management

Cancer patients often suffer from chronic pain, which can be exacerbated during medical emergencies. It’s essential to manage pain appropriately while providing care. Pain relief protocols can vary based on the patient’s condition and medical history, so be prepared to:

  • Administer pain relief medications if authorized by medical protocols.

  • Use comfort measures, such as positioning or providing emotional support.

  • Monitor pain levels and adjust your response based on the patient’s feedback.

3. Complications from Cancer

Some cancer patients may face complications such as bleeding disorders, respiratory issues, or organ failure. For example, leukemia patients may have low platelet counts, leading to a higher risk of bleeding. It’s important to:

  • Be prepared to manage bleeding with direct pressure or appropriate dressing techniques.

  • Monitor for respiratory distress, especially if the cancer has spread to the lungs.

  • Support cardiac function, particularly if the patient has heart-related issues caused by cancer or its treatments.

4. Managing the Emotional Impact

Cancer patients may experience fear, anxiety, or even depression related to their diagnosis. Being a compassionate and empathetic first responder is critical in these situations:

  • Listen actively and provide reassurance.

  • Avoid making promises about treatment outcomes or the future.

  • Respect patient wishes, especially if they are nearing the end of their life.

5. Handling Medical Devices and Port Access

Many cancer patients have medical devices like central venous catheters (CVC), ports, or peripheral intravenous (IV) lines for chemotherapy or other treatments. Understanding how to manage these devices is essential:

  • Never attempt to remove or adjust a port unless specifically trained.

  • Ensure sterile techniques are used when handling devices to prevent infections.

  • Be mindful that some devices may be used for pain management, nutritional support, or drug delivery.

Emergency Scenarios in Cancer Patients

Cancer patients can experience a range of emergencies that may require immediate attention from first responders:

  1. Respiratory Distress

    • Cancer types affecting the lungs (e.g., lung cancer) or metastasis to the lungs may cause shortness of breath, labored breathing, or coughing up blood. Use of oxygen and positioning for optimal breathing is important.

  2. Severe Bleeding

    • If the patient has leukemia or other conditions affecting blood clotting, they are more prone to bleeding. Apply pressure and elevate the injured area if necessary, and be prepared for potential internal bleeding or bruising.

  3. Sepsis

    • Cancer patients undergoing chemotherapy or with low immune function are particularly vulnerable to sepsis, which is a life-threatening infection. Symptoms can include fever, chills, confusion, and rapid heart rate. Quick intervention with fluids, antibiotics, and airway management can save lives.

  4. Spinal Cord Compression

    • In some cancers, such as breast cancer and lung cancer, the tumor can press on the spinal cord, causing severe pain, weakness, or loss of movement. Immediate stabilization and transfer to a medical facility are critical.

  5. Hypercalcemia

    • Elevated calcium levels in the blood can occur with certain types of cancer and lead to confusion, weakness, or cardiac issues. Recognizing this and providing supportive care can prevent further complications.

Conclusion

Responding to medical calls involving cancer patients requires a balance of clinical knowledge and compassionate care. First responders must be prepared to handle the complex medical needs of cancer patients, from managing side effects and complications to addressing the emotional impact of the disease. By understanding the types of cancer, recognizing potential complications, and providing effective, empathetic care, you can make a significant difference in the lives of patients facing cancer.

At Delta Emergency Support Training, we equip first responders with the training they need to handle a variety of emergency scenarios, including those involving cancer patients. By providing Standard First Aid (SFA), Advanced First Aid (AFA), and other specialized training, we ensure responders are ready to deliver life-saving care in any situation.

Read More

The Red Cross: Everything Aspiring First Responders Need to Know Introduction

Thinking about becoming a first responder? The Red Cross provides essential training, from Standard First Aid (SFA) with CPR/AED Level C to Advanced First Aid (AFA), Basic Life Support (BLS), and Emergency Medical Responder (EMR). At Delta Emergency Support Training, we offer all these courses, including bridge programs and recertifications, helping you stay certified and ready to respond. 🚑

If you’re looking to become a first responder or expand your emergency care knowledge, the Red Cross is one of the most recognized and respected organizations for first aid and lifesaving training. Whether you’re starting with Standard First Aid (SFA) with CPR and AED Level C or progressing to Advanced First Aid (AFA) and Basic Life Support (BLS), understanding the training pathway is essential for anyone serious about emergency response.

At Delta Emergency Support Training, we offer all of these courses, including Emergency Medical Responder (EMR), bridge courses, and recertifications to help you stay up to date and advance your skills.

Standard First Aid (SFA) – The Essential Foundation

Before you can progress to advanced emergency medical training, you’ll need a strong foundational knowledge of first aid. Standard First Aid (SFA) with CPR/AED Level C is a prerequisite for more advanced training, making it the first step for aspiring first responders.

What Does Standard First Aid (SFA) Include?

This course covers the essential lifesaving skills needed to respond to common emergencies, including:

  • CPR and AED (Level C): Learn how to perform Cardiopulmonary Resuscitation (CPR) on adults, children, and infants and how to use an Automated External Defibrillator (AED).

  • Choking Response: Techniques for assisting choking victims of all ages.

  • Bleeding Control: Proper wound care, including bandaging, applying direct pressure, and using tourniquets.

  • Shock Management: Recognizing and responding to different types of shock.

  • Burns and Environmental Emergencies: First aid for burns, heat exhaustion, hypothermia, and frostbite.

  • Head, Neck, and Spinal Injuries: How to stabilize an injured person and prevent further harm.

  • Medical Emergencies: Recognizing and responding to diabetic emergencies, seizures, strokes, and allergic reactions.

Why Is Standard First Aid Important?

  • It is a prerequisite for Advanced First Aid and EMR (AFA).

  • It meets workplace safety requirements for many jobs, including healthcare, security, and childcare.

  • It provides practical, hands-on training to build confidence in emergency situations.

At Delta Emergency Support Training, we offer recertification courses to help you maintain your certification and stay prepared.

Advanced First Aid (AFA) vs. Emergency Medical Responder (EMR)

Once you have completed Standard First Aid, you may want to continue with Advanced First Aid (AFA) or Emergency Medical Responder (EMR). Understanding the differences between these two courses is important for choosing the right path.

Advanced First Aid (AFA)

  • Designed for those interested in becoming a first responder as well as workplace first responders, security personnel, and safety officers.

  • Includes oxygen therapy, airway management, and advanced bleeding control.

  • Covers spinal immobilization, fractures, and extended care skills.

  • Focuses on scene management and multi-casualty incidents.

Emergency Medical Responder (EMR)

  • A more advanced course designed for those looking to work in EMS, firefighting, or law enforcement.

  • Includes all AFA content plus advanced medical care, such as patient assessments, pharmacology, and vital signs monitoring.

  • Prepares students to assist paramedics in emergency medical situations.

  • Required for those pursuing a career in emergency services.

At Delta Emergency Support Training, we offer both AFA and EMR, as well as bridge courses to help transition between certifications.

Basic Life Support (BLS) – For Medical Professionals and First Responders

For those pursuing a career in healthcare, paramedicine, or emergency response, Basic Life Support (BLS) is an essential certification. BLS is more intensive than standard CPR training and focuses on high-performance resuscitation techniques used by medical professionals and first responders.

What Does Basic Life Support (BLS) Cover?

  • High-performance CPR with a focus on teamwork.

  • Bag-valve mask (BVM) ventilation for respiratory support.

  • Two-rescuer resuscitation techniques.

  • Management of choking in unresponsive individuals.

  • Use of oxygen equipment and suctioning.

  • AED use in complex medical settings.

Who Needs BLS Certification?

  • Paramedics and emergency medical responders.

  • Nurses, doctors, dental hygenists and other healthcare providers.

  • Firefighters and law enforcement officers.

  • First responders working in high-risk settings.

At Delta Emergency Support Training, we offer BLS courses and recertifications to ensure first responders stay up to date with the latest life-saving techniques.

Choosing the Right Course for Your Goals

If you’re unsure which course is right for you, consider the following pathway:

  1. Start with Standard First Aid (SFA) + CPR/AED Level C → For general emergency preparedness and workplace safety.

  2. Move to Advanced First Aid (AFA) → If you need a higher level of training for emergency response roles.

  3. Complete Basic Life Support (BLS) → If you are pursuing a healthcare or first responder career.

  4. Pursue Emergency Medical Responder (EMR) → If you are looking to work in EMS

Each step builds upon the previous one, ensuring that first responders develop both knowledge and practical skills to handle a wide range of emergencies.

Conclusion

The Red Cross provides essential training for aspiring first responders, workplace safety officers, and healthcare professionals. Whether you’re beginning with Standard First Aid or advancing to AFA, BLS, or EMR, every step prepares you for real-world emergencies where your skills can make a life-saving difference.

At Delta Emergency Support Training, we offer all of these courses, including bridge programs and recertifications, ensuring that you stay trained and ready. Whether you need SFA, AFA, BLS, or EMR, we have the right course for you!

🚑 Be prepared. Get trained. Save lives.

Read More

EMR Guide to Facial Trauma: Airway Management, Bleeding Control, and Injury Assessment

Facial trauma is a serious medical emergency that requires prompt attention. This guide for EMRs covers essential steps for managing facial injuries, including airway management, bleeding control, and fracture stabilization. Learn how to assess and treat patients with maxillofacial trauma to reduce the risk of permanent functional loss and disfigurement.

Facial Trauma - Assessment and Treatment

Tradesmen with laceration to face

Facial trauma refers to injuries involving damage to the bones or soft tissue of the face. These injuries can occur due to a variety of causes such as motor vehicle accidents, assaults (including gunshots), sports injuries, falls, chemical exposures, thermal burns, or animal bites. Because the human face is complex and contains many critical structures, such as bones, blood vessels, nerves, muscles, and sensory organs, untreated facial trauma can lead to permanent functional loss (such as problems with seeing, chewing, speaking, or swallowing) and severe disfigurement. Therefore, rapid and effective assessment and treatment are crucial in preventing long-term complications.

Facial trauma can be categorized into two primary categories: bone and soft tissue injuries. Depending on the type and severity of the trauma, the treatment and management priorities will differ. Let’s explore how to assess, treat, and what to expect when dealing with facial trauma in an emergency setting.

Key Considerations for EMRs Responding to Facial Trauma

When an EMR encounters a patient with facial trauma, the first priority is to assess the patient's airway, control bleeding, and assess for any associated injuries. This is especially critical because facial trauma can lead to airway compromise and severe bleeding, both of which are life-threatening.

Airway Management: The First Priority

One of the most critical aspects of treating facial trauma is securing the airway. The face houses the upper airway structures, and injuries to the face can easily result in obstruction. Up to 42% of patients with severe maxillofacial trauma may require intubation. If airway compromise is not addressed, it can result in hypoxia, shock, or even death.

Airway compromise in facial trauma typically occurs due to:

  • Soiling of the airway: Blood, vomit, or other debris can obstruct the airway, especially in patients with severe bleeding or emesis.

  • Obstruction: This can result from displaced soft tissue (such as the tongue), facial swelling, or foreign bodies (like dislodged teeth).

When assessing for airway compromise, EMRs should prioritize maintaining patency and anticipate potential difficulties with bag-mask ventilation due to the altered facial anatomy. For example, in Le Fort II and Le Fort III fractures, which cause significant facial displacement, it can be challenging to achieve a proper seal with a mask. If bag-mask ventilation becomes difficult, consider using a supraglottic airway device as a temporary bridge to more definitive airway management until advanced care can be provided.

Controlling Bleeding

Facial injuries, especially those involving trauma to the nose, mouth, or eyes, often result in significant bleeding. The face is highly vascular, so controlling bleeding early is vital to avoid shock and further complications. The steps to control bleeding are:

  1. Direct Pressure: Apply direct, firm pressure over the bleeding site using sterile gauze or a clean cloth.

  2. Elevation: If possible, elevate the patient’s head to minimize blood flow to the injury site.

  3. Pressure Points: Use pressure points such as the carotid artery or facial artery to control hemorrhage when direct pressure is insufficient.

  4. Hemostatic Agents: In severe cases, use hemostatic agents or dressings to assist in clotting and bleeding control.

Assessing Associated Injuries

Facial trauma often occurs as part of multi-system injuries. Once the airway is secured and bleeding is controlled, assess for other possible injuries, such as:

  • Head injury: Concussions, skull fractures, or intracranial hemorrhages are common in traumatic incidents that involve facial injury.

  • Spinal injury: Always suspect cervical spine injury in any trauma patient, especially those with altered mental status or facial fractures.

  • Dental injuries: Dislodged teeth or fractures to the jaw may occur in conjunction with facial trauma and may require specific management.

  • Eye injuries: Damage to the eyes, such as orbital fractures, corneal abrasions, or foreign bodies, should be suspected and managed accordingly.

Types of Maxillofacial Fractures

Facial fractures can be complex, and different fractures require different management strategies. Some common types of fractures include:

  1. Le Fort Fractures:

    • Le Fort I: A horizontal fracture of the maxilla (upper jaw), often associated with palate and teeth displacement.

    • Le Fort II: A pyramidal fracture involving the maxilla, nasal bones, and orbit, which may cause significant facial deformity.

    • Le Fort III: A complex fracture involving the maxilla, zygomatic bones, and orbit, resulting in severe facial disfiguration and airway compromise.

  2. Orbital Fractures: These fractures affect the bony orbit surrounding the eye. They may lead to eye injuries and double vision, requiring immediate attention to preserve vision.

  3. Nasal Fractures: Fractures to the nasal bones are common and often associated with bleeding and airway obstruction due to the nasal passages becoming blocked with blood.

  4. Mandible (Jaw) Fractures: Fractures of the mandible may affect the ability to chew, swallow, and speak. In some cases, the fractured jaw may obstruct the airway.

Treatment Considerations

The management of facial trauma depends on the type and severity of the injury. However, the basic principles of care involve airway management, bleeding control, and stabilization of fractures.

Airway Management

As previously mentioned, ensuring airway patency is paramount in facial trauma cases. If there is any suspicion of airway compromise, early intubation should be performed. In some cases, a supraglottic airway device may be used to bridge the gap before definitive airway management. In more severe cases, surgical airway interventions may be required.

Fracture Stabilization

Fractures, particularly those involving the mandible, maxilla, or facial bones, may need to be stabilized. The use of splints, jaw wiring, or other external fixation devices can help keep the fractures in place until surgical intervention by a plastic or maxillofacial surgeon can be performed.

Transportation

Facial trauma victims, particularly those with suspected airway compromise, require rapid transport to a hospital with appropriate resources for managing complex trauma. Transport should be done with the patient’s head elevated and airway support in place to prevent further compromise.

Conclusion

Facial trauma is a serious medical condition that requires prompt and effective intervention. As an EMR, your role in ensuring airway management, bleeding control, and assessment of associated injuries is vital in improving patient outcomes. While facial trauma may be life-threatening, the coordinated efforts of EMRs, emergency doctors, and specialists such as plastic and reconstructive surgeons can significantly reduce the risk of permanent functional loss and disfigurement. By understanding the anatomy of the face, the types of fractures, and the treatment strategies, you can provide critical care that saves lives and improves the long-term recovery of those injured in traumatic incidents.

Stay informed, stay prepared, and continue to prioritize the ABCs (Airway, Breathing, Circulation) in any trauma situation.

Read More

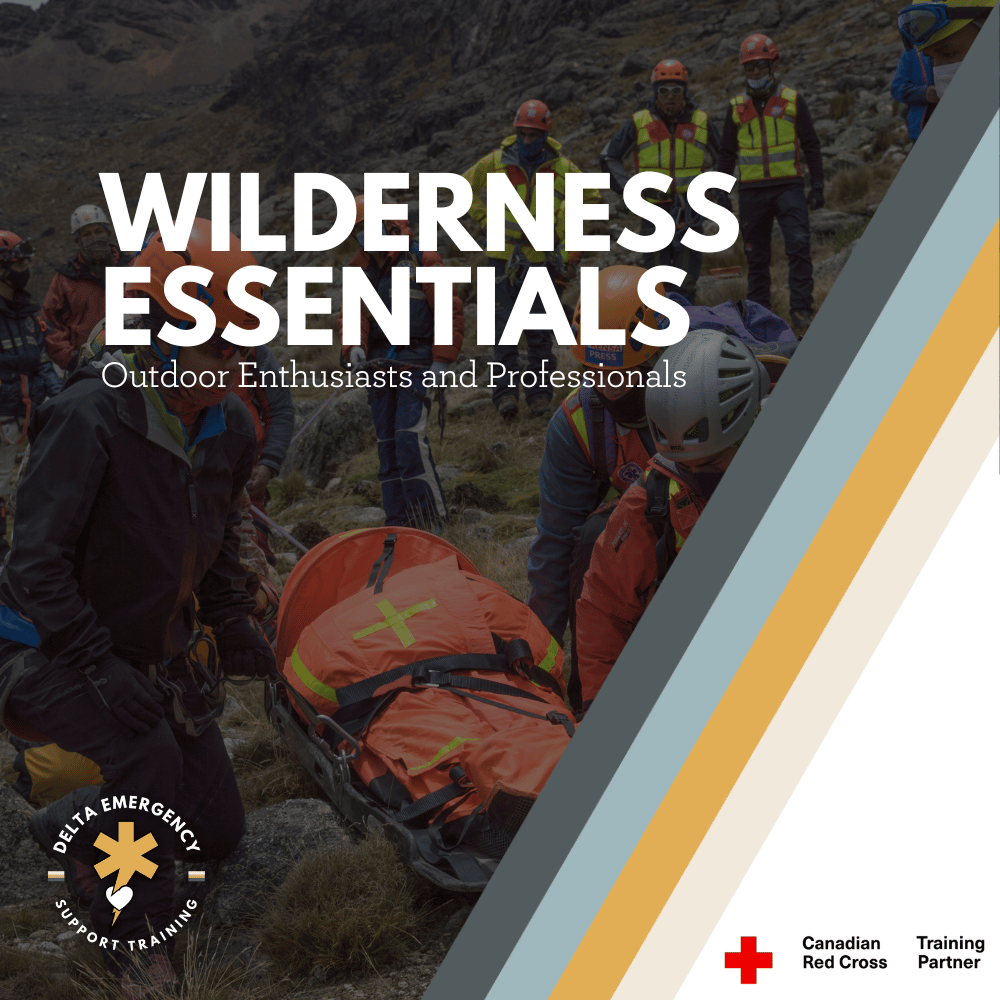
Unlocking the Great Outdoors: Mastering Wilderness First Response with Delta Emergency Support Training

The Wilderness First Responder Course is a must for outdoor enthusiasts and professionals who venture into remote areas. Whether you're hiking, camping, or leading outdoor adventures, this course provides the essential skills to respond to medical emergencies in the wilderness. Learn to assess, treat, and manage injuries, illnesses, and life-threatening situations when help is far away. Equip yourself with the knowledge to handle emergencies confidently and safely.

Why the Wilderness First Responder Course Package is Essential for Outdoor Enthusiasts and Professionals

The wilderness is unpredictable, and those who brave its untouched landscapes know that preparation is key—not just in gear but in knowledge and skills. Delta Emergency Support Training offers the "Canadian Red Cross: Wilderness First Responder Course Package," a comprehensive trio of textbooks designed specifically for those who find themselves as first responders in remote and rugged environments. This package isn't just a set of books; it's an essential toolkit for saving lives where traditional medical help may be hours away.

Three Textbooks, One Mission: Comprehensive Preparedness

  1. The Core Manual: This textbook covers a broad range of topics necessary for a solid foundation in wilderness medicine, including patient assessment and emergency response strategies tailored to the unique challenges of the wilderness.

  2. The Scenario Guide: Packed with realistic scenarios, this guide pushes you to apply what you've learned in dynamic and challenging situations, enhancing decision-making skills under pressure.

  3. The Quick Reference Handbook: When time is critical, this handbook is your go-to for quick checks and reminders, ensuring you have the right information at your fingertips when every second counts.

Designed for Depth and Durability

Each book in the Wilderness First Responder Course Package is crafted to withstand the elements, making them perfect for outdoor use. Water-resistant and tear-resistant pages mean that whether you're caught in a downpour or navigating rough terrain, your source of critical information remains intact.

Affordably Priced, Invaluable Investment

At Delta Emergency Support Training, we understand the importance of accessibility to quality education. That's why we offer these textbooks at prices well below standard retail costs. Investing in this package means investing in the safety of your team and the individuals you'll have the skills to assist, making it invaluable to any professional or agency involved in wilderness activities.

Why Choose a Physical Book Over Digital?

While digital devices are ubiquitous, in the wilderness, they are often unreliable. A physical book doesn’t require battery power or signal reception. It becomes not just a tool, but a reliable companion that ensures information is always available, no matter where your journey takes you.

Conclusion

Whether you're leading expeditions, embarking on solo wilderness adventures, or providing professional training, the Canadian Red Cross: Wilderness First Responder Course Package from Delta Emergency Support Training is your essential companion. By equipping yourself with this knowledge, you prepare to face the wilderness not just with confidence, but with competence.

Ready to take your wilderness preparedness to the next level? Visit our website at Delta Emergency Support Training to purchase your course package today and step confidently into your next adventure, knowing you are trained to handle whatever comes your way.

Read More

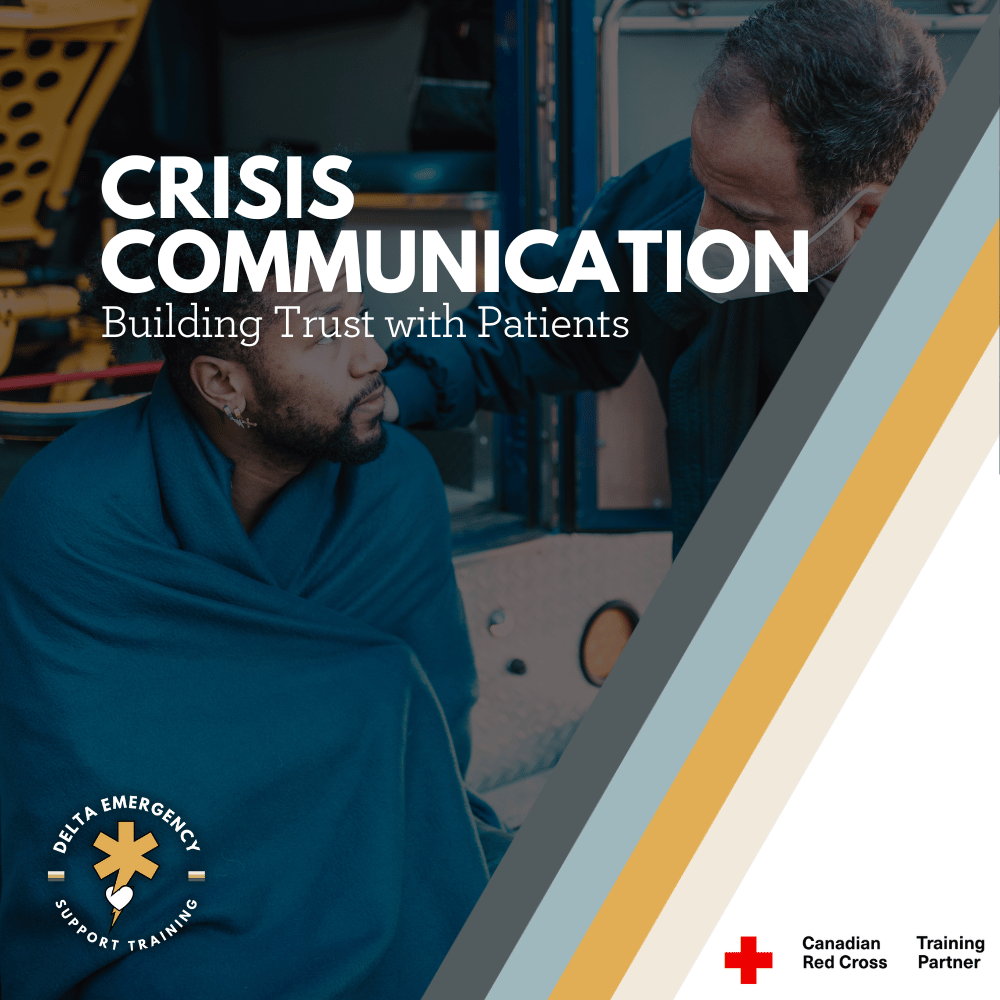
The Importance of Patient Communication for First Responders: A Guide to Effective, Compassionate Care

In the critical moments following an emergency, the way first responders communicate with patients can make all the difference. Good communication not only helps calm patients and build trust but also ensures more effective care. In this article, we’ll explore why patient communication matters, what to say to reassure and educate patients, and what to avoid in order to prevent escalating anxiety or confusion. By using clear, empathetic communication, first responders can enhance patient outcomes and foster a deeper sense of security.

First responder comforting patient.

As first responders, your job extends beyond providing medical care. You are often the first point of contact in a crisis, and your communication skills can significantly impact the patient’s experience. Whether the person you’re helping is conscious or in distress, calm and effective communication can not only reassure them but also improve their overall outcome. In this blog, we will explore the significance of patient communication, what you should say, and what you should avoid saying when interacting with patients.

Why Communication Matters

When a person is injured, ill, or in an emergency situation, they are often frightened, confused, and uncertain. As a first responder, you are not just a medical professional—you are a source of comfort and security. Strong communication skills can help calm anxious patients, build trust, and ensure that you can gather the critical information needed to provide effective care.

Here are a few key reasons why good communication is essential:

  1. Reassures the Patient: Effective communication can reduce anxiety and fear. A patient who feels heard and understood is more likely to trust you and follow your instructions.

  2. Informs and Educates: Patients may not understand the severity of their situation. Explaining procedures and what is happening helps them feel more in control and informed.

  3. Builds Trust: When patients sense your professionalism and empathy through your words, they are more likely to feel safe and cooperate, allowing you to deliver care efficiently.

  4. Improves Health Outcomes: A patient who is actively involved in their care is more likely to comply with necessary procedures and instructions, leading to better outcomes.

What to Say: Key Elements of Effective Communication

In high-stress situations, it’s easy to forget the fundamentals of clear communication. Here are some essential tips to ensure you communicate well with patients:

  1. Introduce Yourself and Explain Your Role: It’s important to let the patient know who you are and what you’re doing. For instance, you could say:

    • “Hi, I’m [Your Name], and I’m an EMT. I’m here to help you today.”

    This immediately sets the stage for trust, as it lets the patient know that they are in professional hands.

  2. Stay Calm and Confident: Patients take emotional cues from you. If you appear calm and in control, they are more likely to mirror those emotions. If you’re uncertain or panicked, it may escalate their fear. Use a calm, steady voice and be confident in your actions.

  3. Use Simple, Clear Language: Avoid medical jargon that may confuse your patient. Instead, explain procedures and information in simple, easy-to-understand terms.

    • “I’m going to check your heart rate now. This will help us understand how your body is reacting.”

    Keeping things clear prevents confusion and fosters trust.

  4. Give Clear Instructions: Patients may not know what to do in an emergency. Be clear in your instructions, but also use positive language that emphasizes what they can do.

    • “Can you please take slow, deep breaths with me?”

    Avoid telling them what not to do, as this may be confusing or create a sense of urgency. Positive phrasing helps guide their actions.

  5. Empathy and Reassurance: Let the patient know that you understand how difficult their situation is. Even a simple statement can go a long way in creating rapport.

    • “I know this is scary, but you’re not alone. We’re here to take care of you.”

  6. Provide Information About What’s Happening: It’s important to keep the patient informed about what you’re doing and why. In emergencies, patients may feel out of control, so explaining things step-by-step helps them stay grounded.

    • “I’m going to put an IV in to give you fluids. It might feel a little uncomfortable, but it’s important for your recovery.”

  7. Listen Actively: Communication is a two-way street. Make sure to listen attentively to the patient’s concerns, and acknowledge their feelings. If they have questions, answer them as clearly and calmly as possible. This shows that you care about their well-being and helps maintain a strong connection.

What NOT to Say: Common Pitfalls to Avoid

While there is much to say in terms of effective communication, there are also many things that should be avoided. First responders need to be mindful of how their words can affect a patient’s emotional state. Here are a few things to keep in mind:

  1. Avoid False Reassurance: Telling a patient that everything is going to be “fine” when you aren’t sure is not helpful. While you want to reassure, it’s important to remain honest about what you know and what’s uncertain.

    • Instead of saying, “You’ll be fine,” try, “We’re doing everything we can to help you right now.”

  2. Don’t Make Assumptions: Avoid making statements that assume the patient’s condition or needs without knowing the facts. For example, saying “This will hurt, but it’s necessary” can cause unnecessary anxiety.

    • Instead, phrase it more carefully: “You may feel some discomfort as we do this, but it will help us get you the treatment you need.”

  3. Don’t Rush or Overwhelm: In fast-paced emergencies, it’s easy to get caught up in the urgency, but avoid overwhelming the patient with too much information too quickly. Try to break things down into manageable steps.

    • Instead of saying, “We need to get you to the hospital, start an IV, monitor your vitals, and administer fluids—all at once,” you could say, “We’re going to start by getting an IV in so we can give you fluids. Then we’ll check your vitals and get you ready for transport.”

  4. Don’t Dismiss Concerns: Never trivialize the patient’s feelings or complaints. What may seem minor to you could feel significant to the patient.

    • If a patient expresses worry, avoid saying things like, “It’s not that bad.” Instead, listen, acknowledge their feelings, and reassure them.

  5. Avoid Overloading with Technical Details: While patients deserve information, keep in mind that too much medical detail can be overwhelming. Focus on what’s necessary for their immediate understanding.

Building Trust: The Role of Empathy in Patient Communication

Empathy is at the core of good patient communication. Demonstrating that you care about the patient’s well-being can make all the difference, especially in high-stress situations. Showing empathy doesn’t mean solving all their problems—it means showing that you understand their fears and frustrations.

Empathetic phrases to use:

  • “I know you’re in pain, and I’m here to help you through this.”

  • “It’s okay to feel scared; we’re going to take good care of you.”

  • “I can imagine this is really tough right now. We’re doing everything we can to help.”

Empathy fosters a connection that can make patients feel more comfortable, even in dire situations.

Final Thoughts

In the demanding role of a first responder, you play a pivotal part in both the physical and emotional care of patients. Effective communication can build trust, ease anxiety, and improve the overall care experience. By using clear, compassionate, and thoughtful communication techniques, you can ensure that your patients feel heard, cared for, and more at ease during some of the most vulnerable moments of their lives.

Mastering patient communication not only helps provide better care but strengthens the bonds between first responders and the communities they serve. When it comes to saving lives, it’s not just the physical interventions that matter—it’s the way we communicate with those who need us most.

Read More

Ejections from Vehicles: What Every First Responder Should Know

Vehicle ejections are one of the most dangerous and traumatic incidents first responders encounter. This blog provides vital insights into the causes, injuries, and best practices for responding to ejections, as well as how advanced first aid training can help firefighters and emergency responders handle these high-risk situations effectively.

Ejections from vehicles are among the most traumatic and severe incidents that first responders—including advanced first aid professionals—encounter. These types of accidents are especially dangerous for both the ejected individual and the responders who must navigate potentially hazardous environments. In Alberta, advanced first aid training is a prerequisite for firefighters and emergency medical responders (EMRs), equipping them with the skills needed to handle these high-risk emergencies effectively.

In this blog, we’ll explore what vehicle ejections are, why they happen, the injuries that often result, and how firefighters and first responders should approach such incidents. We’ll also highlight the importance of advanced first aid training in such high-stakes situations.

What is a Vehicle Ejection?

A vehicle ejection occurs when a person is thrown from their vehicle during a crash. This can happen in a variety of ways: high-speed crashes, rollovers, or when seatbelts aren’t used or fail. Ejections are dangerous because victims often land on hard surfaces, like the road, which increases the risk of life-threatening injuries. Immediate and proper intervention is critical to give these victims the best chance of survival and recovery.

Injuries caused by ejections can range from head trauma and spinal injuries to broken bones and internal bleeding. The consequences of such injuries can be catastrophic without timely and professional care.

Causes of Ejections

  1. Lack of Seatbelt Use: A major cause of ejections is the failure to wear seatbelts. Seatbelts significantly reduce the risk of ejection by keeping passengers securely in place during a crash.

  2. Rollover Accidents: In rollover crashes, passengers are more likely to be ejected as the vehicle tumbles, increasing the chances of being thrown out.

  3. High-Speed Collisions: High-speed crashes, especially when hitting stationary objects, create enough force to propel occupants out of the vehicle.

  4. Side-Impact (T-Bone) Collisions: When a vehicle is struck from the side, particularly with high impact, the risk of ejection increases as the side windows may shatter and the force can throw an occupant from the car.

Injuries from Ejections

Ejected vehicle victims can suffer a range of injuries, many of which are life-threatening:

  • Head and Brain Injuries: Traumatic brain injuries (TBI) are common and can range from concussions to severe skull fractures, leading to long-term disabilities or death.

  • Spinal Cord Injuries: Damage to the spine can result in paralysis or death, especially if the spinal cord is compromised during the ejection.

  • Internal Injuries: Blunt force trauma can cause internal bleeding, ruptured organs, and significant damage to internal structures. Rapid recognition and treatment of internal injuries are essential.

  • Fractures and Limb Injuries: Broken limbs, ribs, and pelvis are frequent in ejected patients, especially as they come into contact with the road or surrounding objects.

  • Soft Tissue Injuries: Scrapes, cuts, and bruises from the force of ejection and contact with surfaces are common and can add to the patient’s overall trauma.

How to Approach Vehicle Ejections: First Responder Steps

1. Start Your Size-Up at Dispatch

The time to start assessing the situation is before you even arrive on the scene. The dispatch information provides vital clues about the nature of the crash, the type of road (residential or highway), the speed of the impact, and any hazards that may be present, like industrial vehicles or hazardous materials. This early information helps responders prepare mentally and strategically for what lies ahead.

2. Perform an Inner Circle Survey

Upon arriving at the scene, conduct a quick 360-degree assessment of the incident—what we call the "inner circle survey." Walk around the wreckage to gather information about the number of victims, vehicle conditions (engine running, fluids leaking), and possible hazards (e.g., fuel, electrical lines, airbags). Noticing these details early will help guide your approach and ensure responder safety.

Safety systems such as airbags, rollover protection devices, and seatbelt pretensioners may have deployed, which can present both advantages and hazards during rescue operations. Recognizing these features will help prevent accidental injury to responders.

3. Stabilize the Victim and the Scene

Severe Bleeding Control: Ejected victims often suffer significant blood loss due to trauma. Controlling bleeding should be your first priority. Apply direct pressure to visible wounds and use tourniquets if needed to control extremity bleeding. Hemorrhage control is vital to prevent shock and further complications.

Spinal Stabilization: Always assume spinal injury in ejected patients until proven otherwise. Quickly immobilize the head and neck using cervical collars and spinal boards, ensuring minimal movement to prevent further damage.

Treat for Shock: Victims of vehicle ejections are at a high risk for shock, due to the trauma they’ve sustained. Keep the victim warm, elevate their legs (unless there’s suspected spinal injury), and monitor their vital signs.

4. Coordinate with EMS for Transport

Once the victim has been stabilized, prepare for rapid transport. Ensure that EMS has been notified, and keep in mind that time is critical in cases involving vehicle ejections. While waiting for EMS, continue to monitor the victim and provide necessary care.

Why Advanced First Aid Is Crucial for Firefighters

In Alberta, firefighters must undergo advanced first aid training as part of their professional certification. This training is invaluable when responding to high-risk incidents like vehicle ejections, where rapid, effective care can significantly impact patient outcomes.

Advanced first aid courses equip firefighters with skills such as:

  • Trauma assessment and management

  • Spinal immobilization techniques

  • CPR and airway management

  • Hemorrhage control and shock management

Having this expertise ensures that firefighters are prepared to handle the complex and often dangerous nature of vehicle ejection incidents. The ability to recognize signs of serious injury, apply the right interventions, and work safely around hazards can be the difference between life and death for the patient.

Conclusion

Vehicle ejections are some of the most challenging and dangerous situations first responders will face. Understanding how to assess, stabilize, and transport these patients is essential for their survival and recovery. With advanced first aid training, firefighters and emergency responders are better equipped to handle the complexities of vehicle ejections, ensuring they provide the best care possible in high-pressure situations.

At Delta Emergency Support Training, we offer specialized advanced first aid courses designed to prepare firefighters, paramedics, and emergency responders for these high-stakes incidents. Our training is hands-on, scenario-based, and tailored to the specific challenges you face in the field. Reach out to us today to find out how we can help your team be prepared for anything.

About Us

At Delta Emergency Support Training, we specialize in providing advanced first aid training for firefighters and emergency responders in Alberta. Our training ensures that you have the knowledge and hands-on experience to handle complex medical emergencies, from vehicle ejections to cardiac arrest. Contact us to learn more about our training programs and how we can help you be prepared for any emergency.

Read More

Common Gynecological Medical Emergencies Every First Responder Should Know

Gynecological emergencies, such as ovarian torsion, ectopic pregnancy, and toxic shock syndrome, require quick action and careful handling. For first responders, understanding the symptoms, knowing how to prioritize care, and maintaining patient comfort and dignity are essential. This blog explores common gynecological emergencies, providing essential information for responders to manage these situations with professionalism, especially when male responders are involved. Learn how to respond effectively and respectfully to ensure the best outcomes for your patients.

Gynecological emergencies require quick assessments, clear decision-making, and fast intervention. For first responders, understanding these conditions is essential for providing the right care and support. While some gynecological issues may seem daunting, being knowledgeable about these emergencies can make all the difference in saving lives and minimizing long-term complications.

In this blog, we’ll dive deeper into some of the most common gynecological emergencies, including endometriosis, ovarian torsion, ectopic pregnancy, toxic shock syndrome, and more. Additionally, we’ll discuss how first responders can handle these situations efficiently, with a focus on maintaining patient comfort and professionalism, particularly when male responders are involved.

1. Endometriosis: Managing Acute Flare-Ups

What It Is:
Endometriosis is a chronic condition where tissue similar to the lining of the uterus grows outside of it, often affecting the ovaries, fallopian tubes, or other organs in the pelvic region. While it’s usually a long-term condition, flare-ups can create acute pain and other complications.

Emergency Symptoms:

  • Intense pelvic pain, especially during menstruation

  • Nausea, vomiting, or dizziness

  • Heavy menstrual bleeding

  • Pain during intercourse

What to Do:
First responders should focus on pain management, as the acute pain associated with endometriosis flare-ups can be overwhelming. Administer analgesics as per protocol and assess vital signs. If bleeding is severe, treat for shock and prepare for transport to the nearest medical facility for further treatment, including possible imaging and evaluation by a gynecologist.

2. Ovarian Torsion: A Time-Sensitive Surgical Emergency

What It Is:
Ovarian torsion occurs when an ovary twists on its supporting ligaments, cutting off its blood supply. This is a surgical emergency and, if not treated promptly, can lead to ovarian necrosis (death of the ovary).

Emergency Symptoms:

  • Sudden, severe pelvic pain, often localized to one side

  • Nausea or vomiting

  • Abdominal tenderness

  • Possible fever

What to Do:
Time is critical in ovarian torsion. The primary action for first responders is pain management and stabilization. Administer pain relief (IV or oral as per protocol) and monitor for signs of shock. Rapid transport to a surgical facility is essential for surgical intervention to save the ovary. Delaying treatment could result in permanent damage or loss of the ovary.

3. Miscarriage: Spontaneous Pregnancy Loss

What It Is:
A miscarriage refers to the loss of a pregnancy before the 20th week. Miscarriages are often associated with heavy bleeding and pain, and they can lead to emotional distress for the patient.

Emergency Symptoms:

  • Heavy bleeding or passing of tissue

  • Cramping or abdominal pain

  • Lower back pain

  • Dizziness or fainting

What to Do:
For first responders, it’s important to manage bleeding and monitor for signs of shock. Heavy bleeding can result in hypovolemic shock, so maintaining the patient’s blood volume with IV fluids is critical. Emotional support is also key—be compassionate and empathetic, as this is often a traumatic experience. Transport the patient to a medical facility for further evaluation, including an ultrasound to confirm the miscarriage and assess for any retained tissue.

4. Ectopic Pregnancy: A Life-Threatening Condition

What It Is:
An ectopic pregnancy occurs when a fertilized egg implants outside the uterus, usually in a fallopian tube. This is a dangerous condition because the fallopian tube can rupture, leading to significant internal bleeding.

Emergency Symptoms:

  • Severe abdominal pain, often on one side

  • Vaginal bleeding or spotting

  • Dizziness, fainting, or low blood pressure

  • Shoulder pain (referred pain due to internal bleeding)

What to Do:
Ectopic pregnancy is a medical emergency that requires immediate transport to the hospital. First responders should stabilize the patient, monitor vitals, and treat for shock if necessary. If an ectopic pregnancy is suspected, it is critical to get the patient to a surgical facility as quickly as possible, as a ruptured ectopic pregnancy can be fatal.

5. Uterine Fibroids: Managing Complications from Benign Tumors

What It Is:
Uterine fibroids are non-cancerous growths in the muscle of the uterus. In many cases, they don’t cause symptoms, but in some women, they can result in heavy menstrual bleeding or pain, especially during pregnancy or menopause.

Emergency Symptoms:

  • Heavy vaginal bleeding, potentially leading to shock

  • Pelvic or abdominal pain

  • Pressure on the bladder or rectum

  • Painful intercourse

What to Do:
If a patient with uterine fibroids presents with heavy bleeding, assess the degree of bleeding and treat for shock if necessary. Administer fluids to maintain blood pressure and transport the patient to a medical facility for further evaluation and treatment. In severe cases, surgical intervention may be needed to manage bleeding or remove the fibroids.

6. Vulvar Abscess: Infection and Inflammation of the Vulva

What It Is:
A vulvar abscess is a localized collection of pus caused by infection. It may occur due to bacteria entering the vulvar glands, leading to swelling, pain, and tenderness.

Emergency Symptoms:

  • Painful swelling or tenderness in the vulva

  • Redness and warmth in the affected area

  • Fever

  • Drainage of pus

What to Do:
While vulvar abscesses typically require drainage and antibiotics, first responders should focus on pain relief and preventing the infection from spreading. Administer pain relief and fluids as per protocol and prepare for rapid transport to a hospital where surgical drainage may be needed.

7. Toxic Shock Syndrome (TSS): A Severe Bacterial Infection

What It Is:
Toxic Shock Syndrome is caused by bacterial toxins, usually from Staphylococcus aureus or Streptococcus pyogenes. Though it’s rare, it can progress rapidly and lead to organ failure and death.

Emergency Symptoms:

  • Sudden high fever

  • Vomiting and diarrhea

  • A red, sunburn-like rash

  • Low blood pressure, confusion, or shock

What to Do:
TSS is a critical emergency requiring immediate intervention. First responders should administer fluids to combat shock, manage the fever, and prepare for transport to a medical facility. Treatment typically includes IV antibiotics and supportive care to prevent organ failure.

8. The Challenges of Responding to Gynecological Emergencies, Especially for Male Responders

Patient Comfort and Professionalism:
Handling gynecological emergencies can be particularly sensitive, especially if the responding team is composed of male responders. As a first responder, it’s essential to be aware of the patient’s emotional and physical comfort while still prioritizing their care.

Key Considerations for Male Responders:

  • Maintain Decency: Ensure that the patient’s privacy is respected at all times. Use blankets or gowns to cover them as much as possible, especially during transport or examination.

  • Provide Clear Communication: Always explain the procedures you’re performing and why they are necessary. Patients may feel vulnerable during gynecological emergencies, so explaining what is happening at each stage can help reduce anxiety.

  • Offer Emotional Support: Gynecological emergencies often come with an emotional component. Be compassionate and understanding, offering reassurance and support throughout the process.

  • If Possible, Involve Female Responders: If you’re a male responder and the situation involves intimate care, offer the patient the option to be attended to by a female responder, if available, to maintain comfort and dignity.

First responders should always prioritize patient safety and dignity. Being sensitive to these issues helps build trust and ensures that you are providing the best care possible, especially in potentially traumatic situations.

Conclusion: Efficient, Respectful Care for Gynecological Emergencies

Gynecological emergencies can present unique challenges for first responders, but with the right knowledge and skills, you can manage these situations effectively and compassionately. Whether dealing with ovarian torsion, toxic shock syndrome, or ectopic pregnancy, understanding the symptoms and knowing the right actions to take will ensure better patient outcomes. Responding with professionalism, sensitivity, and respect for the patient’s dignity is just as important as delivering medical care.

At Delta Emergency Support Training, we equip first responders with the knowledge and skills necessary to handle all types of emergencies, including gynecological ones. Our comprehensive training prepares you to respond with confidence, ensuring you provide the best care in critical situations.

Read More

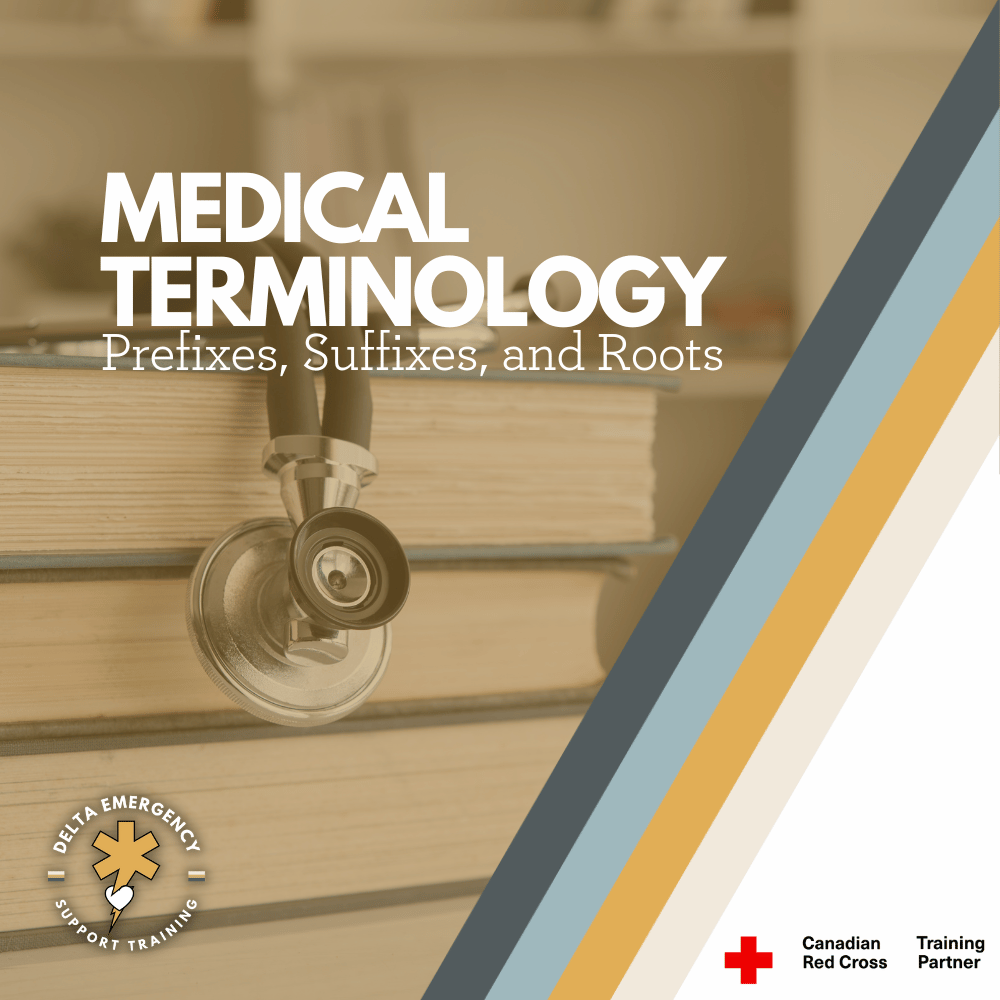
Understanding Medical Terminology: A Guide to Prefixes, Suffixes, and Roots for First Responders

Mastering medical terminology is essential for first responders. Understanding common prefixes, suffixes, and roots will help you communicate more effectively, make informed decisions, and provide quicker, more effective care. In this guide, we break down essential medical terms that will boost your confidence on the job and improve patient outcomes.

In the fast-paced world of Emergency Medical Services (EMS), effective communication and quick thinking are crucial. One way to improve both is by mastering medical terminology. As a first responder, understanding the building blocks of medical terms — prefixes, suffixes, and roots — will allow you to interpret unfamiliar terms quickly, leading to better patient care and more effective communication with other healthcare professionals.

In this guide, we’ll break down the most common prefixes, suffixes, and roots in medical terminology, with a focus on how these parts come together to help you understand the language of medicine. By familiarizing yourself with these building blocks, you’ll be equipped to navigate the world of medical terminology with confidence.

What Are Prefixes, Suffixes, and Roots?

Medical terms often seem complex, but most are built from smaller components that convey specific meanings. Understanding how these components work will help you quickly decode medical terms.

  • Prefix: A prefix is added at the beginning of a word to modify its meaning. It typically indicates time, location, quantity, or status.

  • Suffix: A suffix is placed at the end of a word to alter its meaning. It often refers to a condition, disease, procedure, or part of the body.

  • Root Word: The root is the central part of the word that provides the core meaning. It typically refers to a body part, function, or medical concept.

By breaking down terms into these components, you can understand what a word means without needing to memorize every single term.

Why EMS Professionals Need to Understand Prefixes, Suffixes, and Roots

As a first responder, you’ll often encounter long, unfamiliar medical terms during patient care. Breaking these terms down into their prefixes, suffixes, and roots helps you:

  1. Interpret Symptoms Faster: For example, recognizing terms like “tachypnea” (rapid breathing) or “bradycardia” (slow heart rate) allows you to quickly assess the situation and respond accordingly.

  2. Improve Communication: Whether you’re talking to a doctor, paramedic, or other healthcare professionals, using the correct medical terminology ensures clear, efficient communication, which leads to better patient outcomes.

  3. Streamline Documentation: Accurate medical documentation is essential in EMS. Knowing medical terms ensures you can write reports that are both precise and comprehensive.

Common Medical Prefixes Every First Responder Should Know

Here are some of the most common prefixes you’ll encounter in EMS. These prefixes provide important information about the patient's condition and can help you make quicker decisions in the field.

1. “Hyper-”

  • Meaning: Excessive, above normal

  • Example: Hypertension (high blood pressure)

2. “Hypo-”

  • Meaning: Below normal, deficient

  • Example: Hypoglycemia (low blood sugar)

3. “Brady-”

  • Meaning: Slow

  • Example: Bradycardia (slow heart rate)

4. “Tachy-”

  • Meaning: Fast

  • Example: Tachypnea (rapid breathing)

5. “Pre-”

  • Meaning: Before

  • Example: Preoperative (before surgery)

6. “Post-”

  • Meaning: After

  • Example: Post-traumatic (after trauma)

7. “Sub-”

  • Meaning: Under, beneath

  • Example: Subcutaneous (beneath the skin)

8. “Inter-”

  • Meaning: Between

  • Example: Intercostal (between the ribs)

9. “Intra-”

  • Meaning: Within

  • Example: Intravenous (within the vein)

10. “Exo-”

  • Meaning: Outside, outward

  • Example: Exoskeleton (external skeleton)

Common Medical Suffixes for EMS Professionals

Suffixes are essential for understanding the nature of a medical condition, procedure, or diagnosis. Below are key suffixes that are frequently used in EMS:

1. “-itis”

  • Meaning: Inflammation

  • Example: Arthritis (inflammation of the joints)

2. “-ectomy”

  • Meaning: Surgical removal

  • Example: Appendectomy (removal of the appendix)

3. “-algia”

  • Meaning: Pain

  • Example: Neuralgia (nerve pain)

4. “-pathy”

  • Meaning: Disease or condition

  • Example: Neuropathy (nerve disease)

5. “-emia”

  • Meaning: Blood condition

  • Example: Anemia (low red blood cell count)

6. “-plasty”

  • Meaning: Surgical repair

  • Example: Rhinoplasty (surgical repair of the nose)

7. “-scopy”

  • Meaning: Viewing or examination using a scope

  • Example: Endoscopy (examination of a body cavity)

8. “-logy”

  • Meaning: The study of

  • Example: Cardiology (study of the heart)

9. “-osis”

  • Meaning: Abnormal condition or disease

  • Example: Cirrhosis (a liver disease)

10. “-graphy”

  • Meaning: The process of recording

  • Example: Cardiography (recording heart activity)

Common Medical Roots in EMS Terminology

Roots form the core of medical terms and typically describe body parts, organs, or functions. Here are some important roots you’ll encounter in your training and practice:

1. “Cardi/o”

  • Meaning: Heart

  • Example: Cardiology (study of the heart)

2. “Gastr/o”

  • Meaning: Stomach

  • Example: Gastritis (inflammation of the stomach lining)

3. “Hemat/o”

  • Meaning: Blood

  • Example: Hemorrhage (excessive bleeding)

4. “Neuro/o”

  • Meaning: Nerve, nervous system

  • Example: Neurology (study of the nervous system)

5. “Oste/o”

  • Meaning: Bone

  • Example: Osteoarthritis (arthritis of the bone)

6. “Pulmon/o”

  • Meaning: Lungs

  • Example: Pulmonary edema (fluid buildup in the lungs)

7. “My/o”

  • Meaning: Muscle

  • Example: Myocardial (related to the heart muscle)

8. “Derm/a”

  • Meaning: Skin

  • Example: Dermatitis (inflammation of the skin)

9. “Ren/o”

  • Meaning: Kidney

  • Example: Renal failure (kidney failure)

10. “Rhin/o”

  • Meaning: Nose

  • Example: Rhinoplasty (surgical procedure on the nose)

Study Strategies for Mastering Medical Terminology

While learning prefixes, suffixes, and roots can seem overwhelming, there are several effective study techniques to help you retain and apply these concepts:

1. Use Flashcards

Flashcards are an excellent way to reinforce your understanding of prefixes, suffixes, and roots. Use physical cards or apps like Quizlet to test your knowledge on the go. Write the term on one side and its meaning on the other.

2. Create Mnemonics

To help remember terms, create memorable associations. For example, remember “tachy-” by thinking of “tachometer,” which measures speed (fast). For “brady-” (slow), think of Brady the tortoise from the classic story.

3. Break Down Terms

Whenever you encounter an unfamiliar term, break it down. Start with the root word, then look at the prefix and suffix. For example, Tachycardia:

  • Tachy- = fast

  • Cardi/o = heart

  • -ia = condition So, Tachycardia = a condition of a fast heart rate.

4. Group Study and Practice

Group study sessions help reinforce what you've learned. Discuss terms with classmates or colleagues and quiz each other regularly to ensure you understand the material.

5. Use Interactive Tools

Interactive quizzes and apps can make learning more engaging. Tools like Anki or MedTerm offer practice exercises that reinforce your understanding of medical terminology in a fun, interactive way.

Conclusion: Mastering Medical Terminology for EMS Professionals

In EMS, quick decision-making and clear communication can save lives. Understanding medical terminology, including prefixes, suffixes, and roots, allows you to decode complex terms on the fly and makes you a more effective responder. It’s a skill that will improve your ability to assess patients, document care, and work with your team efficiently.

At Delta Emergency Support Training, we understand the importance of a solid foundation in medical terminology. Our comprehensive Red Cross Babysitting course and First Aid training cover essential medical concepts that will set you up for success in the field. Whether you're just getting started or looking to advance your skills, mastering medical terminology is a key step in becoming a top-tier first responder.

Read More

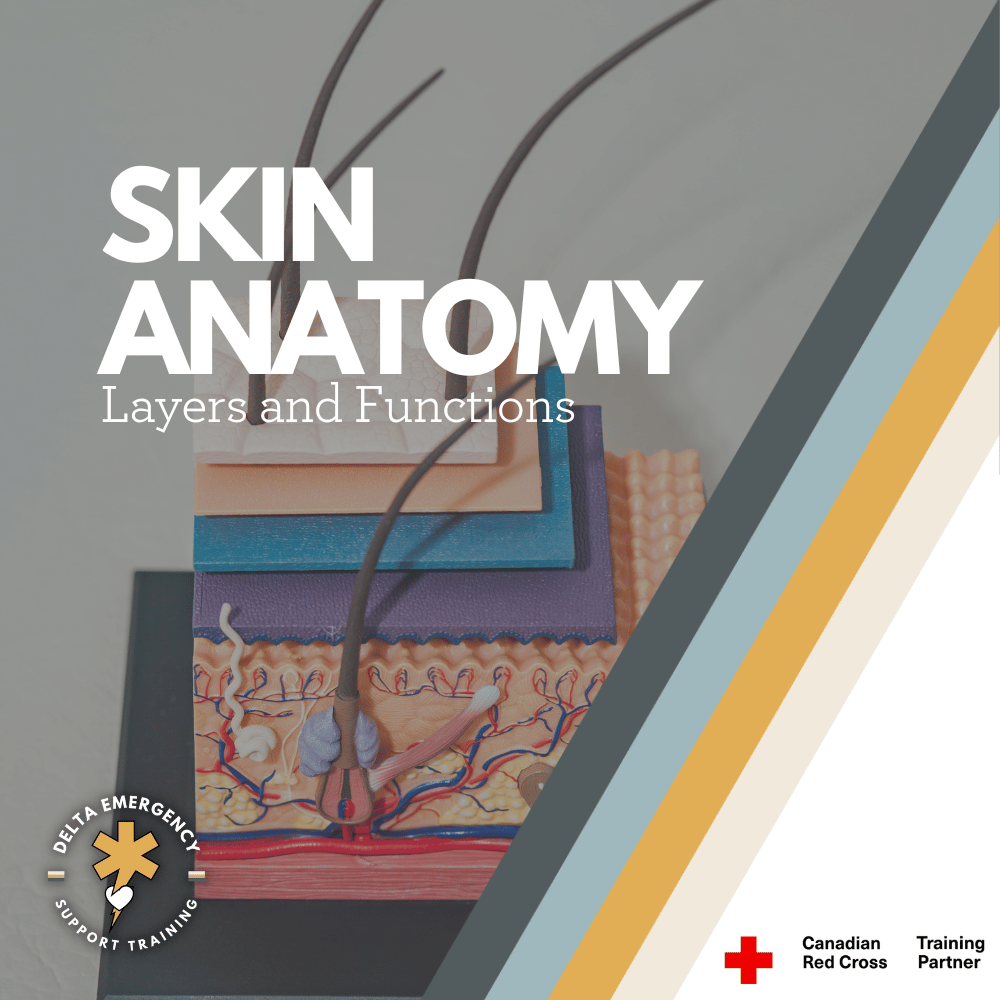
Skin Anatomy Overview for First Responders: Layers and Functions

Understanding the anatomy of the skin is essential for first responders. The skin serves as the body’s first line of defense, regulating temperature and protecting against infection. In this blog, we’ll break down the three layers of skin—epidermis, dermis, and hypodermis—and explore their functions, common injuries, and how this knowledge can help you provide better care in emergency situations.

As a first responder, you're trained to respond to a variety of emergencies, from burns and cuts to more complex trauma situations. Understanding the anatomy of the skin is crucial, as it plays a vital role in protecting the body from infection, regulating temperature, and healing injuries. In this blog, we’ll break down the layers of the skin, their functions, and how this knowledge helps you in your critical role as a first responder.

medical skin layer model

The Basics of Skin Anatomy

The skin is the body's largest organ, serving as the primary barrier between the internal systems and the outside world. It protects against physical damage, pathogens, and dehydration, while also playing a key role in temperature regulation. The skin is made up of three main layers, each with its own distinct function:

  1. Epidermis (Outer Layer)

  2. Dermis (Middle Layer)

  3. Hypodermis (Subcutaneous Layer)

1. The Epidermis: The Body’s First Line of Defense

The epidermis is the outermost layer of skin, providing a waterproof barrier that shields the body from harmful substances, bacteria, and UV radiation. As a first responder, you will often encounter patients with injuries to the epidermis, such as cuts, abrasions, burns, or rashes.

Functions of the Epidermis:

  • Protection: The epidermis acts as the first line of defense against pathogens, chemicals, and physical damage.

  • Barrier to Water Loss: It helps prevent excessive loss of moisture, maintaining hydration in the body.

  • Skin Pigmentation: Melanin, produced in the epidermis, helps protect deeper layers from UV damage.

  • Sensation: The epidermis contains nerve endings that allow the skin to respond to environmental stimuli, like heat or pressure.

Important Considerations for First Responders:

  • Burns: Since the epidermis contains no blood vessels, burns typically affect this layer first, causing redness, swelling, and pain. In severe cases, it may also affect the dermis, leading to more serious injuries.

  • Infections: When the epidermis is compromised (such as in open wounds), there’s a higher risk of infection. Proper cleaning and dressing of wounds are essential to avoid bacterial infiltration.

2. The Dermis: The Skin’s Strength and Support

The dermis lies beneath the epidermis and is responsible for most of the skin's strength, elasticity, and sensation. This layer contains blood vessels, nerves, hair follicles, sweat glands, and connective tissue.

Functions of the Dermis:

  • Structural Support: The dermis contains collagen and elastin, proteins that provide strength and elasticity to the skin, allowing it to stretch and return to its original shape.

  • Temperature Regulation: Blood vessels in the dermis help regulate body temperature by constricting to conserve heat or dilating to release heat.

  • Sensation: The dermis is rich in nerve endings that detect pain, pressure, temperature, and touch.

  • Wound Healing: The dermis plays a critical role in healing skin wounds, as it contains the blood vessels and connective tissue that support tissue repair.

Important Considerations for First Responders:

  • Deep Cuts and Lacerations: When treating deep cuts or lacerations, you may encounter injury to the dermis, which could result in more severe bleeding due to the presence of blood vessels.

  • Blisters and Burns: Severe friction or thermal injuries can cause fluid buildup between the epidermis and dermis, leading to blisters. Burns can also extend into the dermis, causing damage to blood vessels and deeper tissues.

3. The Hypodermis: The Body’s Cushion and Insulator

The hypodermis, or subcutaneous layer, lies below the dermis and is primarily made of fat and connective tissue. This layer plays a significant role in protecting internal organs, insulating the body, and storing energy.

Functions of the Hypodermis:

  • Insulation: The fatty tissue helps regulate body temperature by providing insulation against heat loss.

  • Cushioning: It acts as a shock absorber, protecting bones and organs from injury by absorbing impact.

  • Energy Storage: The hypodermis stores fat, which serves as an energy reserve for the body.

  • Anchoring the Skin: It helps anchor the skin to underlying muscles and bones, giving the skin its flexibility and strength.

Important Considerations for First Responders:

  • Severe Trauma: In cases of deep trauma, such as blunt force injuries, the hypodermis may be damaged. This could lead to bruising or deeper tissue damage, as blood vessels in the hypodermis may rupture.

  • Frostbite: The hypodermis is the most affected area during frostbite, as it is the deepest layer. Severe cold temperatures can cause the fat cells to freeze, potentially leading to tissue death and the need for immediate medical intervention.

Skin Injuries and First Aid: Key Points for First Responders

As a first responder, understanding the anatomy of the skin helps you assess injuries more effectively and provide better care. Here are some common skin injuries and how they relate to the skin’s structure:

  1. Abrasions: These involve damage to the epidermis, often caused by friction. While they are generally not severe, they can lead to infection if not properly cleaned and dressed.

  2. Lacerations: Deep cuts can damage both the epidermis and dermis, leading to bleeding and pain. Proper wound care includes stopping the bleeding, cleaning the wound, and applying appropriate dressings.

  3. Burns: Burns can range from superficial (affecting only the epidermis) to severe (penetrating the dermis and hypodermis). First-degree burns may cause redness and pain, while second-degree burns result in blisters and more intense pain. Third-degree burns involve damage to all layers of the skin and require immediate medical attention.

  4. Frostbite: Exposure to extreme cold can lead to frostbite, which damages the skin, particularly the hypodermis. Treatment includes gradual rewarming and protecting the affected areas from further damage.

  5. Infections: Skin wounds, especially when the epidermis is broken, are susceptible to infection. As a first responder, it’s critical to clean wounds thoroughly, apply sterile dressings, and monitor for signs of infection.

Conclusion: Why Skin Anatomy Matters for First Responders

The skin may seem like a simple barrier, but its structure and functions are far more complex and essential to maintaining overall health. As first responders, understanding the layers of the skin, their functions, and how injuries affect them helps you provide better care to patients. Whether you're dealing with a simple abrasion or a severe burn, this knowledge can guide your decisions on how to treat injuries quickly and effectively, reducing the risk of complications and promoting faster recovery.

By applying this understanding of skin anatomy to your daily work, you can ensure that your patients receive the best care possible in emergency situations.

Read More

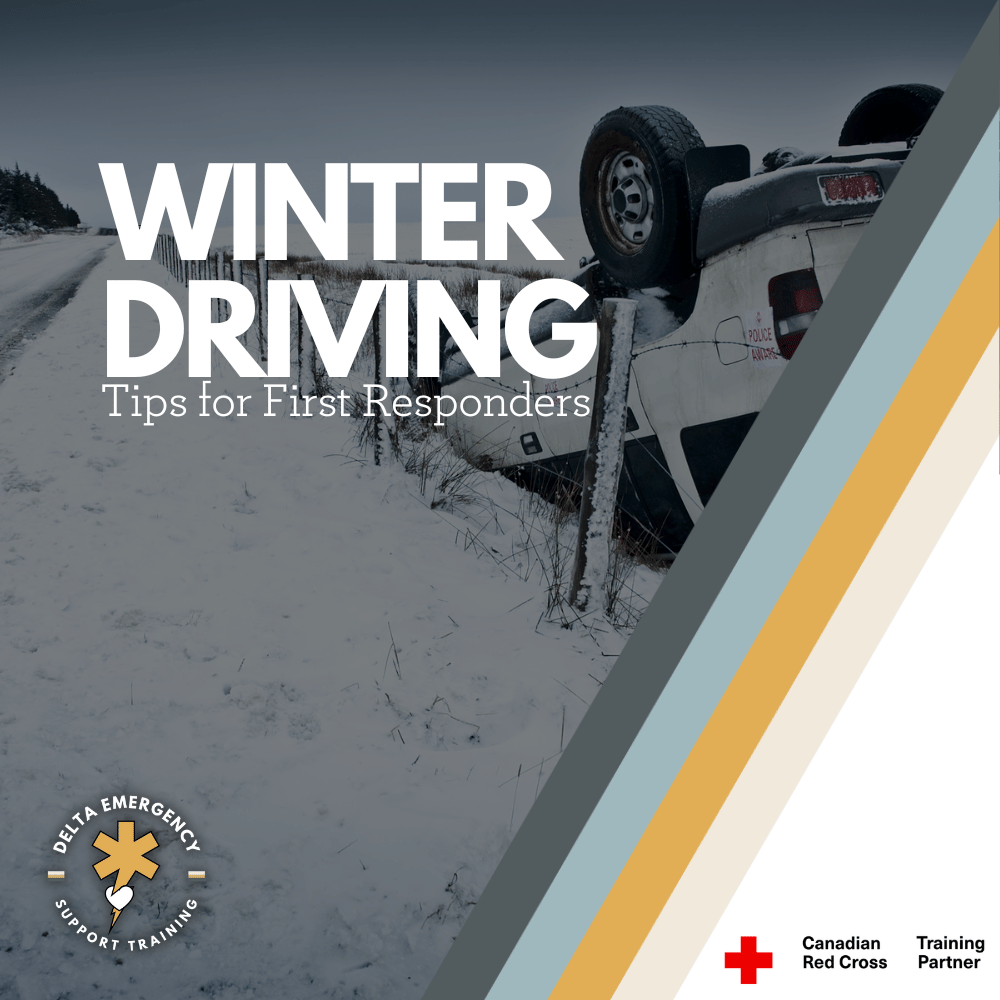
Winter Driving: Tips for First Responders and Everyday Drivers

Winter driving poses unique challenges, especially for future firefighters and first responders. From hidden black ice to snow-covered roads, understanding the risks and knowing how to prepare your vehicle are essential for staying safe on the road. In this blog, we’ll cover key winter driving hazards, share essential tips for safe navigation in harsh conditions, and provide guidance on vehicle maintenance to ensure you're always ready—whether you're heading to an emergency or simply commuting. Stay prepared, stay safe, and learn how to handle winter weather like a pro.

Winter Driving Tips for Future First Responders: Stay Safe and Prepared in Harsh Conditions

Overturned vehicle from driving in icy winter conditions

Winter driving can be treacherous, especially when you’re out on the road in snowy, icy conditions. As a future firefighter, paramedic, or emergency responder, it’s crucial to understand how these winter weather hazards can impact your ability to drive safely and respond effectively in an emergency. Whether you're heading to a call or navigating daily commutes, this guide will provide you with the knowledge and practical tips you need to stay safe during the winter months.

1. Understanding the Risks of Black Ice

Black ice is one of the most insidious dangers of winter driving. It forms when moisture freezes on the road surface, creating a nearly invisible layer of ice that can cause vehicles to lose traction unexpectedly. Black ice is most commonly found on bridges, overpasses, and shaded parts of the road. For first responders, who may need to drive in these conditions during urgent situations, it’s vital to recognize the signs of black ice and respond accordingly.

What to Watch Out For:

  • Bridges and Overpasses: These areas freeze more quickly than regular roads due to their exposure to the air above and below.

  • Shaded Areas: Roads that are shaded by trees, buildings, or mountains are more likely to have black ice, especially early in the morning or after sunset.

  • Intersections and Curves: These areas are more prone to slick conditions as the traffic flow can prevent melting during the day.

How to Drive on Black Ice:

  • Slow Down: Reduce your speed when driving on bridges, overpasses, or during the early morning hours.

  • Gentle Maneuvers: Avoid quick or sharp turns. Steer gently if you begin to slide.

  • Keep a Safe Distance: Maintain extra space between your vehicle and others, as it can take longer to stop on icy surfaces.

2. Snow and Slippery Road Conditions

Snow accumulation not only reduces visibility, but it can also make roads slippery, increasing the likelihood of losing control of your vehicle. Thick snowdrifts and patches of snow can obscure lane markings, making it difficult to navigate the road properly. For firefighters and other emergency personnel, this is particularly hazardous, as getting stuck in the snow or skidding off the road can delay emergency responses.

What to Watch Out For:

  • Snowdrifts: These can accumulate quickly, especially on less-traveled roads.

  • Hidden Potholes: Snow can cover potholes, creating unexpected hazards beneath the snow’s surface.

  • Lack of Lane Visibility: Snow accumulation can hide lane markings, making it difficult to stay in your lane.

Winter Driving Tips for Snowy Roads:

  • Drive Below the Speed Limit: Adapt your speed to the road conditions, not the posted speed limit. Keep your distance from other vehicles, as stopping distances will be much longer.

  • Increase Visibility: Use your headlights during snowfall to make sure other drivers can see you. Avoid high beams, which can reflect off the snow and reduce your visibility.

  • Stay in Tracks: If driving in heavy snow, try to drive in the tracks of other vehicles to avoid becoming stuck in deep snow.

3. Cold Weather and Vehicle Maintenance

Winter driving isn’t just about adjusting your behavior on the road; it’s also about ensuring your vehicle is properly prepared for the cold conditions. The freezing temperatures of winter can cause issues that make your vehicle more susceptible to mechanical failure or an accident. For first responders, this can lead to delays or even dangerous breakdowns.

Winter Vehicle Checklist:

  • Check Tire Pressure and Tread: Cold temperatures cause tire pressure to drop. Check your tire pressure regularly, and ensure that your tires have sufficient tread to maintain grip on icy or snow-covered roads.

  • Battery Health: Batteries lose power in cold weather, so test your battery before winter sets in. Consider replacing older batteries that might fail in the cold.

  • Engine Fluids: Ensure your vehicle is filled with winter-grade oil and coolant. The correct engine fluid prevents freezing and ensures proper functioning.

  • Windshield Wipers: Replace windshield wipers if they are worn. Stock up on windshield washer fluid that won’t freeze at low temperatures, ensuring good visibility in snowy conditions.

Emergency Kit Essentials:

  • Blankets and Warm Clothing: In case of a breakdown or emergency situation, having extra clothing and thermal blankets in your vehicle can be lifesaving.

  • First Aid Kit: Always carry a basic first aid kit, including bandages, antiseptic wipes, and gloves, for addressing minor injuries on the go.

  • Food and Water: Pack non-perishable snacks and bottled water, especially if you're traveling long distances or to remote areas.

4. Responding to Accidents in Winter Conditions

As a future first responder, you may need to respond to emergency calls involving accidents on snowy or icy roads. It's crucial to stay aware of the unique dangers that come with operating in these environments, both for your safety and the safety of the victims.

Hazards to Be Aware Of:

  • Additional Collisions: If the road is icy, there’s a higher likelihood of secondary accidents, so always approach accident scenes cautiously.

  • Cold Weather Injuries: Accidents involving cold temperatures can cause hypothermia, frostbite, or other cold-related injuries, especially if victims are exposed to the elements for long periods.

  • Limited Access: Snow and ice can make it difficult to reach accident scenes or maneuver vehicles into position for a rescue. Be prepared for delays or challenging access.

Tips for First Responders:

  • Slow Approach: Always slow down as you approach the scene of an accident, and be mindful of other vehicles on the road.

  • Road Safety: Set up safety cones or warning lights to alert other drivers and prevent further collisions.

  • Protect Victims: If the victims are in cold conditions, prioritize keeping them warm with blankets or by moving them to a safer location away from the elements.

5. Stay Prepared for Winter Emergencies

The unpredictable nature of winter weather means that being prepared is more important than ever. Having an emergency kit, knowing how to handle various road conditions, and understanding the importance of vehicle maintenance can make a huge difference in staying safe.

Winter Emergency Kit Checklist:

  • Jumper cables and portable power banks

  • Flashlight with extra batteries

  • Shovel, sand, or kitty litter (for traction if you’re stuck)

  • Thermal blankets and extra gloves/hats

  • Non-perishable snacks and water

  • Basic first aid supplies

Conclusion: Be Prepared and Drive Safely This Winter

Winter driving conditions can be dangerous, especially for first responders who need to travel quickly and efficiently to emergencies. By understanding the hazards posed by snow, ice, and freezing temperatures, and by taking proactive steps to maintain your vehicle and adjust your driving behavior, you can reduce the risks associated with winter driving.

For future firefighters and first responders, staying prepared means more than just understanding emergency procedures—it also means staying safe on the road. Drive carefully, maintain your vehicle, and always be prepared for the unexpected.

Read More