The Delta Dispatch

Be Ready for the Unexpected: First Aid Skills Every Hunter Should Know

Hunting is a beloved Canadian tradition, but heading into the bush without first aid training puts you and your group at risk. Learn the importance of being prepared with skills like bleeding control, wound care, and shock management. Whether you hunt with family, friends, or solo—make sure you're ready to protect what matters most.

Why You Should Learn First Aid Before Hunting Season

Be Prepared for the Unexpected in Canada’s Wilderness

Father and son hunting

As the crisp fall air rolls in and leaves begin to turn, thousands of Canadians prepare for one of the most anticipated times of the year—hunting season. For many, it’s more than a pastime. It’s a family tradition, a weekend with friends, or time spent in the backcountry with loved ones—passing down skills, telling stories around the fire, and enjoying the stillness of nature. Hunting is deeply woven into Canadian culture, a proud part of our heritage from coast to coast.

But no matter how experienced or well-prepared you are, the wilderness comes with real risks. And when something goes wrong, you're often far from help, without cell service, and hours from emergency responders.

That’s why first aid training isn’t just helpful—it’s essential.

Whether you’re a weekend hunter or a guide, learning Red Cross-certified First Aid, Advanced First Aid (AFA), Wilderness First Aid, or Emergency Medical Responder (EMR) skills can make all the difference in an emergency. It means being ready—not just for yourself, but for the people who matter most.

At Delta Emergency Support Training, we believe that part of keeping these traditions alive means learning how to protect them.

Hunting Safety in Canada: Know the Risks

Hunting is generally safe when done responsibly, but accidents still occur. According to the Canadian Firearms Program and provincial wildlife agencies:

  • Most firearm-related hunting injuries involve accidental discharges or poor handling technique.

  • Tree stand falls are one of the most common hunting injuries, often resulting in fractures or spinal trauma.

  • Hunters often travel to remote areas with no cell service, delaying access to emergency care.

  • In some provinces, hypothermia is the leading non-injury emergency reported during hunting season.

Each year, hundreds of injuries are reported across the country—many of which are preventable with basic training and better preparation.

🏹 Common Hunting Injuries and Medical Situations

Understanding potential emergencies helps you prepare properly. Here are the most common situations faced in the field:

  • Gunshot wounds or impalement from firearm mishandling or accidents.

  • Knife cuts and lacerations during field dressing or gear use.

  • Falls from tree stands or rocky/uneven ground, resulting in broken bones or head injuries.

  • Cold exposure: frostbite, hypothermia, or trench foot.

  • Heat stress in early season hunts.

  • Allergic reactions to insect stings, animal bites, or plants.

  • Getting lost or separated from your group, increasing the risk of panic, exposure, or dehydration.

🧠 First Aid Skills Every Hunter Should Know

Here’s what every hunter—beginner or seasoned—should know:

  • Bleeding control: How to apply direct pressure, pack a wound, or use a tourniquet.

  • Managing broken bones: Stabilizing with splints and slings.

  • Shock treatment: Recognizing and managing pale, cold, clammy symptoms.

  • CPR and AED use: Cardiac arrest can happen in any setting.

  • Anaphylaxis care: Recognizing severe allergic reactions and administering an EpiPen.

  • Basic wound care: Cleaning and dressing wounds to prevent infection.

  • Spinal motion restriction: Important if someone falls from a height or hits their head.

These lifesaving skills are taught in Red Cross First Aid and Wilderness First Aid programs and are enhanced further in EMR-level training.

🎒 Essential First Aid Items to Pack for the Field

Your hunting first aid kit should be compact, durable, and versatile. Pack:

  • Tourniquet (e.g., CAT or SOFTT models)

  • Gauze pads, trauma dressings, adhesive tape

  • SAM splint and triangular bandage

  • Antiseptic wipes, tweezers, antibiotic ointment

  • Antihistamines and pain relievers

  • CPR mask, gloves, emergency blanket

  • Water purification tablets or filter

  • Whistle, signal mirror, and flashlight

  • Personal locator beacon (PLB) or satellite communicator

Pack gear—but more importantly, know how to use it.

🏔️ Why Location Matters: The Reality of Remote Response

In urban areas, EMS might reach you in under 10 minutes. In the wilderness, it could be hours—or days. Even when you can call 911, delays are common due to:

  • No cell service

  • Impassable terrain

  • Poor visibility or weather conditions

  • Long distances from the nearest ambulance or search-and-rescue base

That’s why wilderness preparedness and basic medical self-reliance are key. The Red Cross Wilderness First Aid program focuses specifically on prolonged care and making decisions when help is hours away.

🧭 Preventing Emergencies: Smart Safety Tips for Hunters

Avoiding an emergency is the best-case scenario. Here’s how to minimize risk:

  • Take a buddy—never hunt alone if you can avoid it.

  • File a trip plan: Leave your route and return time with someone you trust.

  • Carry emergency communication (PLB, satellite text device, or two-way radio).

  • Inspect your gear, especially firearms, knives, and tree stands.

  • Dress appropriately in layers, blaze orange, and waterproof gear.

  • Know the weather and avoid risky conditions (fog, snowstorms, extreme cold).

  • Stay hydrated and take regular breaks.

  • Stay sober while handling firearms—alcohol and hunting don’t mix.

📚 Which First Aid Training Is Right for You?

At Delta Emergency Support Training, we help hunters, outdoor workers, and future first responders get the skills they need. We offer:

  • Standard and Advanced First Aid (AFA) – Learn bleeding control, airway management, CPR, and trauma care.

  • Wilderness First Aid – Specialized for remote environments and delayed help.

  • Emergency Medical Responder (EMR) – For guides, professionals, or those planning a career in emergency services.

All courses follow Red Cross Emergency Care for Professional Responders guidelines.

Conclusion: Be the One Who’s Ready

Hunting isn’t just a hobby—it’s a cherished Canadian tradition, often passed down through generations. Whether you’re heading into the woods with your father, sister, best friend, or your own kids, you’re not just out for the harvest—you’re making memories. You're sharing laughter around the campfire, waking up at dawn with excitement, and carrying on a way of life that means something deeply personal.

But with that comes responsibility.

If something goes wrong—and it can—you want to be the one who knows what to do. Whether it’s treating a serious injury, spotting early signs of hypothermia, or managing an allergic reaction, your actions can save the life of someone you care about.

At Delta Emergency Support Training, we’re here to make sure you’re ready. Our Red Cross-certified Advanced First Aid, Emergency Medical Responder, and Wilderness First Aid programs prepare you not just for emergencies—but for protecting what matters most: your family, your friends, and the memories you’re out there to create.

Let’s keep hunting a safe, proud tradition—for this season, and every season to come.

Read More

Opioid Overdose: Recognizing the Signs

Welcome to our two-part blog series on opioid overdose awareness and intervention. In this first blog post, we will delve into the nature of opioid addiction, the signs and symptoms of overdose, and how this epidemic can impact anyone, regardless of background. Stay tuned for the second blog, where we will focus on naloxone, an opioid antagonist, and provide comprehensive training on its usage.

Opioid Overdose, What is it?

An opioid overdose occurs when an individual takes an excessive amount of opioids, which are a class of drugs that include prescription painkillers like oxycodone, hydrocodone, and fentanyl, as well as illegal substances like heroin. Opioids bind to opioid receptors in the brain and spinal cord, reducing pain sensations and producing feelings of relaxation and euphoria.

However, when too many opioids are consumed, the respiratory system becomes depressed, leading to slowed or shallow breathing. This can result in a dangerous lack of oxygen, causing severe hypoxia, brain damage and death.

Signs and Symptoms

Recognizing the signs and symptoms of an opioid overdose is crucial for timely intervention, as it can mean the difference between life and death. Here are some expanded details on the signs and symptoms to watch for:

  1. Slow or Shallow Breathing:

    One of the hallmark signs of an opioid overdose is slow or shallow breathing. The individual may take abnormally long pauses between breaths or have difficulty taking a full breath. Their breathing may become erratic, weak, or barely noticeable.

  2. Unresponsiveness:

    Opioid overdose can cause loss of consciousness. The person may be unresponsive to stimuli, and have difficulty staying awake. They may appear excessively drowsy, as if in a deep sleep, and have difficulty speaking or interacting.

  3. Pinpoint Pupils:

    A clear indication of an opioid overdose is constricted or pinpoint pupils (pupils that appear very small). This occurs due to the effect opioids have on the muscles controlling the size of the pupils. In normal lighting conditions, the pupils of someone experiencing an overdose will not dilate or respond to changes in light.

  4. Pallor:

    During an opioid overdose, the individual's skin may appear pale, cool, and clammy to the touch. This is due to decreased blood circulation and oxygenation resulting from the suppressed respiratory system.

  5. Cyanosis:

    In severe cases of opioid overdose, the person's lips, nails, or fingertips may turn bluish or purplish. This condition, called cyanosis, indicates a lack of oxygen in the bloodstream, signaling a medical emergency.

  6. Slow or Weak Pulse:

    Opioids can slow down the heart rate, resulting in a slow or weak pulse. The person's pulse may feel faint or difficult to detect.

Understanding and Addressing the Crisis

Opioid addiction is a pervasive issue that knows no boundaries. It can affect individuals from all walks of life, irrespective of age, gender, or social status.

Understanding the underlying risk factors associated with opioid addiction is essential. Chronic pain, often treated with prescription opioids, can increase the likelihood of developing an addiction. Additionally, individuals with a history of substance abuse or mental health disorders may be more susceptible to opioid misuse. Lack of access to healthcare, social isolation, and environmental factors can also contribute to the risk.

Addressing the opioid crisis requires an approach that focuses on prevention, education, and support. It is essential to educate individuals, healthcare professionals, and communities about the risks associated with opioids and alternative pain management strategies. Building strong support systems and promoting access to evidence-based addiction treatment and counseling services is vital. Encouraging open dialogue and reducing the stigma surrounding addiction can help individuals feel comfortable seeking help.

Read More

Drink at Your Own Risk: The Dangers of Untreated Water and How to Purify It in the Backcountry

Drinking untreated water may seem like a good idea when you're out camping or hiking, but it can lead to serious health problems. In this blog, we'll explore the various waterborne illnesses that can be caused by untreated water in Canada, and discuss different water purification methods that you can use in the backcountry to stay safe and hydrated.

When you're out on a camping trip or hiking adventure, the urge to drink from a nearby river or stream can be tempting. After all, what could be more refreshing than crystal-clear water straight from nature? However, drinking untreated water can be a serious health risk, especially in Canada where it can contain harmful bacteria, viruses, and parasites.

A man stands near a lake in the mountains and fills his water bottle with water from the lake.

In this blog, we'll explore the various illnesses and conditions that can be caused by drinking untreated water and discuss the different types of water purification methods that you can use in the backcountry to keep yourself safe and healthy.

We'll cover the pros and cons of different methods, including boiling water, using water filters, chemical treatments, and UV light. By the end of this blog, you'll have all the information you need to make an informed decision about how to purify water on your next outdoor adventure.

Whats the Harm?

That's right - those pristine-looking water sources can contain harmful bacteria, viruses, and parasites that can cause a range of illnesses. From beaver fever to E. coli, we'll take you on a tour of the illnesses that can turn a fun camping trip into a nightmare. After reading this, you won't want to drink out of streams anymore!

Here's a list of the different waterborne illnesses that can be contracted from drinking untreated water:

  1. Beaver Fever:

    This is an infection of the small intestine caused by the parasite Giardia lamblia, found in the intestines of animals, including beavers, that can contaminate water sources. It can cause symptoms such as diarrhea, abdominal pain, bloating, and nausea. It usually takes 1-3 weeks for symptoms to appear after exposure to contaminated water, and the illness can last for several weeks.

  2. Cryptosporidiosis:

    This is an infection of the intestines caused by the parasite Cryptosporidium. The parasite is spread through the fecal-oral route, meaning that it can be contracted by ingesting water or food that has been contaminated with the feces of an infected person or animal. It can cause symptoms such as diarrhea, stomach cramps, nausea, and fever. Symptoms usually start within 2-10 days after exposure to contaminated water and can last for several weeks.

  3. Hepatitis A:

    This is a viral infection that affects the liver. In Canada, Hepatitis A outbreaks have been linked to untreated water sources, particularly in areas with poor sanitation or where sewage systems can overflow into rivers and lakes. When contaminated water is ingested, the virus can enter the body and begin to replicate in the liver. This can lead to symptoms such as fatigue, fever, nausea, and abdominal pain. In severe cases, Hepatitis A can cause jaundice (yellowing of the skin and eyes), dark urine, and pale stools. The illness can last for several weeks to several months, and while most people recover fully, some may develop chronic liver disease. It's important to remember that even in areas with clean-looking water, there may still be a risk of contamination from human or animal fecal matter.

  4. Campylobacteriosis:

    This is a bacterial infection that can cause symptoms such as diarrhea (sometimes bloody), stomach cramps, fever, and nausea. Symptoms usually start within 2-5 days after exposure to contaminated water and can last for several days to several weeks. In some cases, the infection can lead to more serious complications, such as reactive arthritis or Guillain-Barré syndrome, a rare but potentially life-threatening condition that affects the nervous system.

  5. E. coli infection:

    This is a type of bacteria that can cause infections in the intestines. It can cause symptoms such as diarrhea (sometimes bloody), stomach cramps, and fever. Symptoms usually start within 1-8 days after exposure to contaminated water and can last for several days to several weeks. There have been several outbreaks of E. coli linked to untreated water sources, particularly in rural areas where there is a higher risk of contamination.

    Even the most idyllic-looking water sources can be hiding some pretty gross stuff. For example, an animal carcass upstream could be introducing all sorts of bacteria and pathogens into the water, while animal fecal matter can travel downstream and contaminate even the cleanest-looking water sources.

    Water Purification

    Here's an overview of different water purification methods and their pros and cons:

    1. Boiling:

      Boiling water is one of the simplest and most effective ways to kill off harmful bacteria and viruses. By boiling water for at least one minute (or longer at higher altitudes), you can ensure that it's safe to drink.

      Boiling does however require a pot and an effective source of heat. Beware that boiling won't remove any sediment or debris from the water, it requires pre-filtering.

    2. Portable water filters:

      Portable water filters, such as those made by brands like Katadyn or Sawyer, are a popular choice for backcountry adventurers. These filters typically use a combination of ceramic or carbon filters to remove harmful bacteria. They're lightweight, compact, and easy to use, making them a convenient option for outdoor enthusiasts.

      However, they can be relatively expensive, and they can not remove viruses without a chemical component. Cloudy particle rich water may slow down and clog the filter.

    3. Chemical treatments:

      Chemical treatments, such as iodine tablets or chlorine drops, can be an effective way to disinfect water. These treatments typically involve adding a small amount of chemical to the water and waiting a certain amount of time for it to take effect. They're lightweight and easy to pack, making them a popular choice for backpackers and hikers.

      Chemical treatments can leave a chemical taste in the water, and they are not effective against cysts.

    4. UV water purifiers:

      UV water purifiers, such as those made by SteriPen, use ultraviolet light to kill off harmful bacteria and viruses. They're easy and quick to use and require no chemicals or filters.

      Uv water purifiers can be relatively expensive, and they require batteries or a power source to operate.

    Ultimately, the best water purification method will depend on your specific needs and preferences. It's a good idea to research different options and experiment with them before your next outdoor adventure, so that you can find the method that works best for you.

    Emergency Situation

    In a survival situation where you're stranded without access to clean water, it may be necessary to drink untreated water in order to stay hydrated. While this is not ideal, it's important to understand that drinking unpurified water is sometimes necessary for survival.

    If you find yourself in a situation where you need to drink untreated water, there are some precautions you can take to minimize the risk of illness. For example, it's generally safer to drink from fast-moving rivers or streams, as these are less likely to be contaminated with harmful bacteria and pathogens than stagnant bodies of water such as lakes or ponds. If you must drink from a stagnant body of water, try to collect water from the surface rather than the bottom, as this is less likely to contain sediment and debris.

    It's also important to remember that drinking untreated water always carries some risk, and you should be prepared to deal with the consequences if you do get sick.

    Conclusion

    Access to clean drinking water is something that many of us take for granted, but it's important to remember that untreated water can carry harmful bacteria and pathogens.

    By taking the necessary precautions and being prepared, you can ensure that you'll be able to stay hydrated and healthy even in the most challenging of circumstances. So, whether you're planning a weekend camping trip or venturing into the wilderness on a multi-day hike, always be mindful of the risks associated with untreated water and take the steps necessary to protect yourself and stay safe.

Read More

Tourniquets: A Crucial Tool for Managing Severe Bleeding

As a first aider or advanced first aider, being prepared to manage severe bleeding is essential. Tourniquets are a critical tool in managing severe bleeding and can be the difference between life and death in emergency situations. In this blog post, we'll explain what a tourniquet is, when and why to use one, how to properly apply one, and why it's crucial not to remove it once it's on.

As a first aider or advanced first aider, it's important to be prepared to handle a wide range of emergency situations, including severe bleeding that can be life-threatening if not managed quickly and effectively. Tourniquets are an important tool in the first aider's toolkit for managing severe bleeding in emergency situations. In this blog post, we'll explain what a tourniquet is, why and when we might use one, and how to properly apply one. We'll also cover how to make an improvised tourniquet if a commercial one is not available.

Two first aiders are seen applying a tourniquet to a patient's limb in this image. The first aiders are wearing blue gloves, which are an essential part of their personal protective equipment (PPE) when providing medical care in emergency situations.

What is a tourniquet?

A tourniquet is a device used to control bleeding from a limb, typically a long bone. It can be made of a variety of materials such as fabric, rubber or nylon. Modern tourniquets are typically designed to be self-administered and easy to use in high-pressure situations, making them a valuable tool for first aiders and other medical professionals.

When is using a tourniquet warranted?

Tourniquets are used in emergency situations where a person is experiencing a life threatening bleed that cannot be controlled through other means, such as direct pressure. Indication for the use of tourniquet includes soaking through multiple dressings with no slow of blood loss.

It is important to remember that a tourniquet is a last resort and should only be used when direct pressure and other measures have failed to control bleeding.

How does it work?

The tourniquet works by compressing the blood vessels in the limb, which reduces or stops the flow of blood to the area below the device. This helps to prevent further blood loss and can save the patient's life.

Tourniquet application

When applying a tourniquet, it's important to locate the injury and apply the tourniquet at least 2 inches above the injury site or joint. This will ensure that the tourniquet is applied to the correct location and will effectively control the bleeding.

Once the tourniquet is in place, it must be tightened until the blood flow dramatically lessens or stops completely. It's important to monitor the patient closely and record the time the tourniquet was applied. If possible, mark the tourniquet with the time it was applied.

In some cases, multiple tourniquets may need to be applied to control severe bleeding. This may be necessary if the bleeding is occurring in multiple locations or if a single tourniquet is not effective in stopping the bleeding. After a tourniquet is applied it must not be removed.

Removing a tourniquet

Once a tourniquet is applied, it is important not to remove it until medical professionals can take over. Removing a tourniquet prematurely can cause the bleeding to resume and lead to further injury or even death. Instead, note the time that the tourniquet was applied and communicate this information to medical professionals when they arrive on the scene.

Improvised tourniquet

When a commercial tourniquet is unavailable you can create your own with simple everyday items. One method of creating an improvised tourniquet involves using a bandana, scarf, or strip of fabric. The fabric should be about two inches wide and long enough to wrap around the limb at least twice. Place the fabric around the limb, above the wound, and tie a knot to create a loose loop. Then, tie a second knot on top of the first, and continue tying knots until the fabric is snug and there is no more bleeding from the wound. Use a stick or similar object to tighten the knot by twisting it, until the fabric is tight enough to stop the bleeding.

Conclusion

In conclusion, tourniquets are an important tool in managing severe bleeding in emergency situations. As a first aider or advanced first aider, it's important to be prepared to use a tourniquet effectively and efficiently in emergency situations. By understanding what a tourniquet is, why and when we might use one, and how to properly apply one, we can help save lives and prevent further injury.

Training opportunities

At Delta Emergency Support Training, we understand the importance of being prepared for emergency situation. We offer a range of training sessions to help individuals and classes develop the skills and knowledge they need to respond to emergency situations. Our courses include Standard First Aid (SFA), Advanced First Aid (AFA), and Emergency Medical Responder (EMR), and we offer in-person, hybrid, and online options to suit different needs.

If you have any questions about our training sessions, please don't hesitate to reach out to us. You can contact us at info@deltaemergency.com and we'll be happy to assist you.

Read More
911, First Aid Kit, First Aid Kumari Malhotra 911, First Aid Kit, First Aid Kumari Malhotra

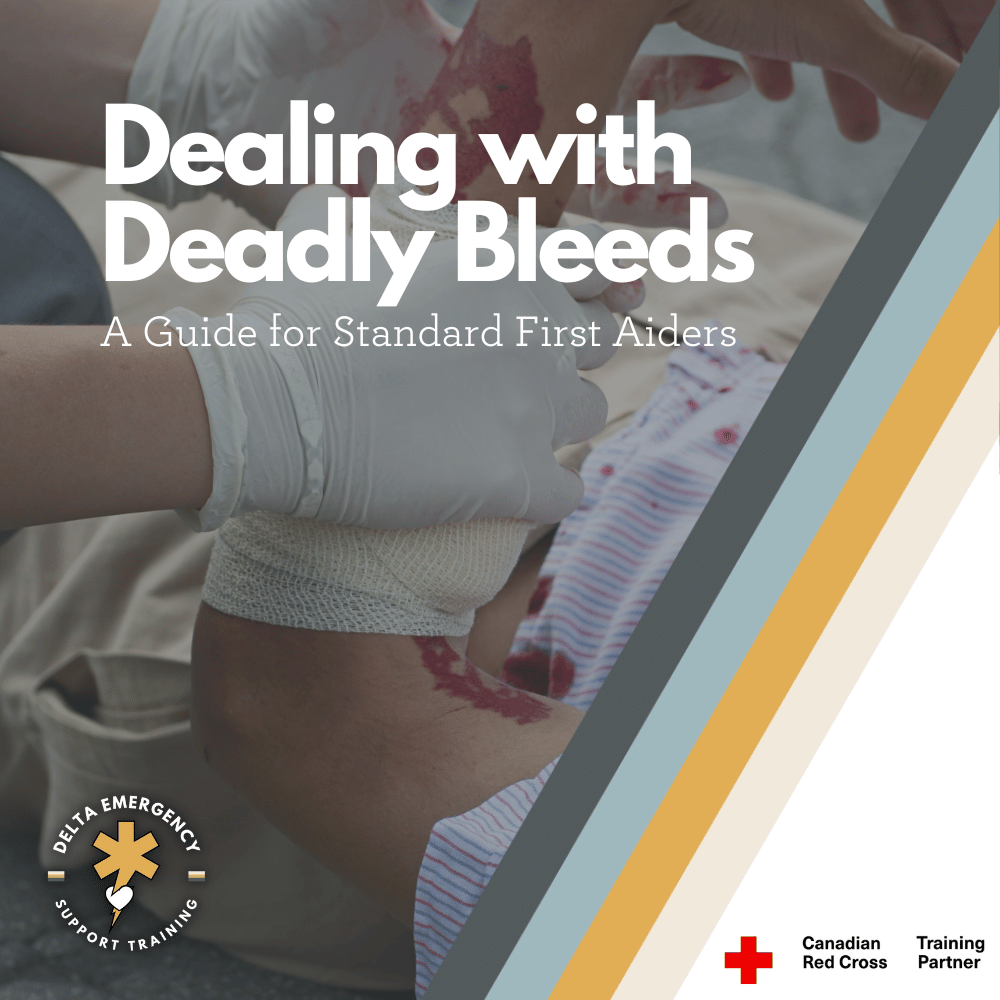
Dealing with Deadly Bleeds: A Guide for Standard First Aiders

Deadly bleeds can happen anytime, anywhere, and being prepared to handle them can mean the difference between life and death. Standard first aiders should be equipped with the knowledge and skills to identify different types of bleeds, as well as the appropriate techniques to manage them.

As a standard first aider, it's important to be prepared to deal with all kinds of emergencies, including deadly bleeds. A deadly bleed, also known as a hemorrhage, is a type of bleeding that is severe enough to threaten a person's life. In this blog post, we'll discuss what makes a bleed deadly, what different types of bleeds look like, and what our treatment options are. We'll also explore the physiology and biology behind what produces the most life-threatening bleeds.

A person in first aid gear is holding a clean, white cloth over a bleeding wound on another person's arm while exerting pressure.

What makes a bleed deadly?

A deadly bleed is usually caused by a significant loss of blood from a major artery or vein. This loss of blood can lead to a drop in blood pressure and, if left untreated, can ultimately result in shock and death. There are several types of bleeds that can be life-threatening, including arterial bleeds, venous bleeds, and internal bleeds.

Arterial bleeds:

Arterial bleeds are the most life-threatening type of bleed because they involve the loss of blood from an artery. Arteries carry oxygenated blood away from the heart to the rest of the body, and a significant loss of blood from an artery can lead to a lack of oxygen in the body's tissues. This can cause damage to vital organs and tissues, and can ultimately result in shock and death. Arterial bleeds are characterized by bright red blood that spurts out of the wound in time with the person's heartbeat. The high pressure of blood flowing from an artery means that a significant amount of blood can be lost quickly, leading to rapid blood loss.

Venous bleeds:

Venous bleeds, on the other hand, involve the loss of blood from a vein. Veins carry deoxygenated blood back to the heart, and a significant loss of blood from a vein can lead to a buildup of carbon dioxide in the body's tissues. This can cause tissue damage and can also lead to shock if the bleeding is not controlled quickly. Venous bleeds have a slower flow of dark red blood compared to arterial bleeds, and the bleeding is usually easier to control than an arterial bleed.

Internal bleeds:

Internal bleeds occur inside the body and may not be visible externally. These types of bleeds can be caused by trauma or medical conditions, and can be life-threatening if left untreated. Internal bleeds can lead to organ damage and shock, and symptoms may include pain, swelling, and bruising. Treatment for internal bleeds may involve surgery or other medical interventions, and it's important to seek medical attention as soon as possible if you suspect someone has an internal bleed.

What do different types of bleeds look like?

Arterial bleeds are characterized by bright red blood that spurts out of the wound in time with the person's heartbeat. Venous bleeds, on the other hand, have a slower flow of dark red blood. Internal bleeds, which occur inside the body, may present as bruising or not be visible externally.

What are our treatment options?

If you encounter a deadly bleed, it's important to act quickly to control the bleeding and prevent further loss of blood. The first step is to apply pressure to the wound using a clean cloth or bandage. If the wound is on an arm or leg, you can also elevate the limb above the level of the heart to help slow the bleeding. If the bleeding does not stop with pressure, a tourniquet may be necessary to stop the blood flow completely. However, tourniquets should only be used as a last resort, as they can cause damage to the tissue and lead to amputation.

Biology of deadly bleeds

The most life-threatening bleeds are those that involve major arteries, such as the femoral artery in the thigh or the carotid artery in the neck. Arteries are under high pressure, which means that a significant loss of blood from an artery can lead to a rapid drop in blood pressure and shock. In addition, the body's clotting system may not be able to keep up with the rapid loss of blood from an arterial bleed.

Personal Protective Equipment

It's important for standard first aiders to have the appropriate personal protective equipment (PPE) when dealing with bleeding emergencies. PPE can include gloves, masks, and eye protection, and is essential for protecting yourself from exposure to bloodborne pathogens such as HIV and hepatitis B and C. It's important to wear PPE whenever you are in contact with blood or bodily fluids to prevent the transmission of infectious diseases. In addition to protecting yourself, wearing PPE also helps prevent the spread of infections to others who may be in the vicinity of the bleeding person. By using the appropriate PPE, standard first aiders can provide care in a safe and effective manner.

Conclusion

In conclusion, as a standard first aider, it's important to be prepared to deal with deadly bleeds. Understanding what makes a bleed life-threatening, what different types of bleeds look like, and how to treat them can help you provide top-notch care in an emergency situation. Remember to act quickly to control the bleeding and seek medical attention as soon as possible.

Training

At Delta Emergency Support Training, we understand the importance of being prepared for emergency situation. We offer a range of training sessions to help individuals and classes develop the skills and knowledge they need to respond to emergency situations. Our courses include Standard First Aid (SFA), Advanced First Aid (AFA), and Emergency Medical Responder (EMR), and we offer in-person, hybrid, and online options to suit different needs.

If you have any questions about our training sessions or deadly bleeds, please don't hesitate to reach out to us. You can contact us at info@deltaemergency.com and we'll be happy to assist you.

Read More

When to Call 911: A Guide for Babysitters

Being a babysitter can be both rewarding and challenging, especially when it comes to keeping children safe in emergency situations. As a babysitter, you are responsible for the well-being of the children in your care, and knowing when to call 911 can be a matter of life and death.

In this guide, we will walk you through the common emergency situations that you may encounter as a babysitter and provide you with practical tips on how to handle them. From injuries and illnesses to fires and natural disasters, we'll cover it all so that you can be prepared for any situation.

By the end of this guide, you'll have the knowledge and confidence to act quickly and appropriately in the event of an emergency, ensuring the safety and well-being of the children in your care.

As a babysitter, one of your most important responsibilities is keeping the children you're caring for safe and healthy. While you may take steps to prevent accidents and injuries, emergencies can still happen, and it's important to know when to seek emergency medical attention. In some situations, calling 911 could mean the difference between life and death. But how do you know when to call for help?

babysitter and a child sitting on a rug in a living room. The babysitter is holding a Jenga tower, and the child is carefully removing a wooden block from the tower.

In this blog post, we'll provide a guide for babysitters on when to call 911, including common emergencies that require immediate attention, and tips for staying calm and responding quickly in an emergency situation. By following these guidelines, you can help ensure that the children you're caring for stay safe and healthy, no matter what emergencies may arise.

In the following sections, we'll discuss some of the most common emergencies that may arise while babysitting, and the situations where you should call 911 for immediate medical attention.


  1. Difficulty breathing:

    If the child is having difficulty breathing, it could be a sign of a serious respiratory issue, such as asthma or anaphylaxis. If the child is struggling to breathe, has trouble speaking or swallowing, or their lips or face turn blue, call 911. It is good practice as a babysitter to know how to administer an EPI-PEN for sever allergic reactions. Ventolin, often referred to as a puffer can also drastically improve the breathing of a patient who is experiencing a asthma attack.

  2. Loss of consciousness:

    If the child becomes unconscious, it's important to call 911. Stay with the child and follow the operator's instructions until help arrives. Keep the child's airway open by lifting the head and tilting the chin back. Check their breathing and pulse, if none is found begin compressions as per the dispatch instruction or previous first aid training.

  3. Severe bleeding:

    The first step in controlling bleeding is to apply direct pressure to the wound. Use a clean cloth or bandage and apply firm direct pressure. If the child has severe bleeding that does not stop after applying pressure or soaks through multiple bandages, call 911 immediately. While waiting for help to arrive, continue to apply direct firm pressure to the wound.

  4. Head injury:

    If the child hits their head and loses consciousness, vomits, or has seizures, call 911 immediately. Keep the child still and comfortable, avoid moving them unless it's necessary. Moving the child could worsen the injury especially if there is a suspected spinal injury, which may lead to further complications. With all trauma continue to monitor their breathing and update dispatch if anything changes.

  5. Choking:

    If the child is choking and cannot breathe, cough, or speak, your first step is to use a combination of 5 abdominal thrusts and 5 back blows, switching between the two, to dislodge the object. If the child becomes unconscious carefully lay them to the ground, call 911 immediately and begin following CPR instructions. A small child may only be able to hold their breath for 30seconds - 1minute, being prepared to call 911 is always good practice.

  6. Seizures:

    If the child has a seizure, call 911 immediately. While waiting for help to arrive, clear the area around the child to prevent injury, and do not try to restrain them or put anything in their mouth. Follow directions given by dispatch.

  7. Allergic reactions:

    If the child is experiencing an allergic reaction and has difficulty breathing, a swollen tongue or throat, or other severe symptoms, call 911 immediately. While waiting for help to arrive, administer any prescribed medication (such as an epinephrine auto-injector) and keep the child calm.

  8. Poisoning:

    If you suspect the child has ingested a poisonous substance, call 911 or poison control immediately. While waiting for help to arrive, try to determine what the child ingested, and if possible, remove any remaining substance from the child's mouth.

  9. Burns:

    If the child has a severe burn, call 911 immediately. While waiting for help to arrive, run cool (not cold) water over the affected area for at least 10-20 minutes, and cover the area with a clean, dry cloth or sterile bandage.

Be prepared:

Before starting a babysitting job, make sure you have all the information you need about the children you will be caring for. This includes things like their ages, any medical conditions, and any specific instructions from the parent. Make sure you have a contact number for the parents in case of an emergency.

Stay focused:

When you're caring for children, it's important to stay focused on their needs. Keep an eye on them at all times, and avoid distractions like your phone or television.

Know basic first aid:

Take a child care first aid class or watch online tutorials to learn basic first aid skills such as CPR and how to stop bleeding.

Know your location:

Make sure you know your location and address so that you can provide it to emergency services when you call 911.

By following these tips, you can provide safe and responsible care for the children you're babysitting.

We offer a variety of resources to help you provide excellent care for the children in your charge, including babysitter courses that cover important topics like child development, safety, and communication. These courses are designed to equip you with the skills and knowledge you need to provide top-notch care for children.

In addition, it's essential to know when to call 911 in an emergency situation. If you are ever in doubt about whether or not to call, it's always better to err on the side of caution and make the call. Some situations that may require calling 911 include medical emergencies, fires, and instances of criminal activity. If you have any questions or concerns about when to call 911, please don't hesitate to reach out to us at info@deltaemergency.com. We're here to support you and the children in your care.

Read More
Textbooks, Clothing, First Aid Kit, Certificates, CPR Mask Jarrett Chisholm Textbooks, Clothing, First Aid Kit, Certificates, CPR Mask Jarrett Chisholm

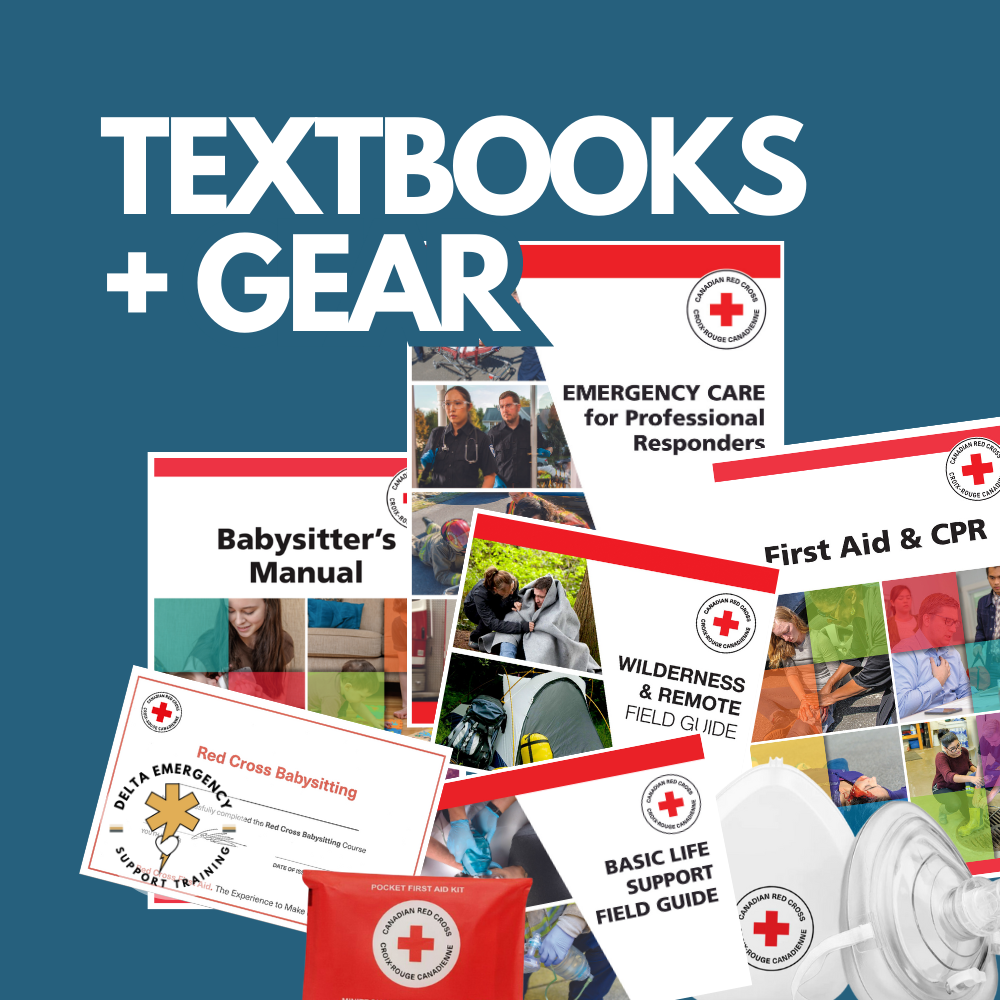
Textbooks: The Foundation of Education

Absorb More Information. Improve Comprehension.

Readers of print books absorb and remember more of the plot than readers of e-books do, according to a study that was presented in Italy in 2014. Studies have also shown it’s less disruptive to turn a page than to scroll down on a tablet or a screen, so your concentration level is higher with text. Printed textbooks also allow…

Printed Textbooks Improve Comprehension

There are many reasons printed textbooks lead to better comprehension. One is that students read at a slower pace when reading from a printed textbook rather than an online version. Reading slowly gives the material more time to sink in.

Studies have also shown it’s less disruptive to turn a page than to scroll down on a tablet or a screen, so your concentration level is higher with text. Printed textbooks also allow for greater engagement with the material. Students can underline facts, highlight key ideas and make notes in the margin, and they can flip back and forth between pages to review material or enhance their learning. (source)

You absorb more information.

Readers of print books absorb and remember more of the plot than readers of e-books do, according to a study that was presented in Italy in 2014. In an earlier study, print readers also scored higher in other areas, such as empathy, immersion in the book, and understanding of the narrative. Scientists believe this effect is related to the tactile sensation of holding a book in your hands.

Seeing and feeling how much progress you’ve made in the story can help readers feel like they’re unfolding the story—both literally and figuratively. Plus, with a print book, it’s easier to go back and confirm information you may be unsure of without losing your place and having to scroll or click back on your device. (source)

Delta Emergency Support Training offers a variety of Red Cross textbooks.

Textbooks include

● Emergency Care for Professional Responders

● Basic Life Support Field Guide

● First Aid and CPR Manual

● Babysitters Manual

● Wilderness and Remote Field Guide

As a Red Cross Training Partner, we offer a 10% discount on most of our textbooks!

Wilderness First Responder Course Package (THREE textbooks together):

Wilderness & Remote Field Guide (164 pages, 13.97cm X 11.43cm; 5.5" X 4.5"), Emergency Care for Professional Responders Reference Text (464 pages 21.5cm X 30.2cm, 8 1/2" X 10 7/8"), and Basic Life Support Field Guide (56 pages, 11.43 cm x 13.97 cm, 4.5" x 5.5").

Wilderness & Remote Field Guide:

A handy quick reference guide for first aid and CPR skills in Canadian remote and wilderness settings. Ideal for those who live or work in a wilderness or remote workplace or community, or who are outdoor recreation enthusiasts. Content includes prevention, causes, signs, assessment and treatment for minor, major and critical emergencies, and how to provide extended care for more than 24 hours including evacuation and transportation. This field guide is a great addition to any wilderness first aid kit. Coil bound on water resistant paper. (164 pages, 13.97 cm X 11.43 cm; 5.5" X 4.5").

Emergency Care for Professional Responders Reference Text:

A comprehensive all-Canadian resource for professional responders. Content organized for progressive learning, real-life scenarios, skills summary, charts and diagrams, and includes hundreds of colour photographs and bio-medical illustrations. Meets Paramedic Association of Canada National Occupational Competency Profile for Emergency Medical Responder and meets Transport Canada Training Program Standards in Marine First Aid. A new English Manual for Professional Responders regarding Emergency Care. Utilized by First Responder, Advanced First Aid, and Emergency Medical Responder course students.

Basic Life Support Field Guide:

A portable, informative guide on BLS skills. Basic Life Support Skills included in the manual are as follows; airway management, oxygen therapy, how to deliver quality CPR, AED protocol and recognition of life threatening emergencies. Coil bound on water resistant paper.

Babysitter’s Manual

A practical guide for babysitters offering checklists, activities and game ideas, sample résumé, and business cards. Presented in a youthful and energetic style, the content covers babysitting for different age-groups and is colour-coded for quick reference.

First Aid and CPR Manual

A step-by-step guide to first aid and CPR for home and work. Content includes responding to emergencies, what to look for and what to do for airway, breathing and circulation emergencies in adults, children and infants, wound care, head and spinal injuries, bone, muscle and joint injuries, sudden medical emergencies and environmental emergencies. This manual is a great addition to any home or workplace first aid kit.

Gear

Stay prepared with the proper First Aid gear. We’re about to release more items for your first aid and Fire/EMS kits, so keep your radios on! Our current gear includes:

● Pocket First Aid Kits

● CPR Masks

● Babysitter Wallet Certificate

Pocket First Aid Kits

The portable first aid kit contains first aid essentials for small wounds. Its small size and lightweight design make it ideal for handbags, backpacks or in the glove box of your car. Its price makes it the perfect give away gift and its quality and content make it desirable for all. Ideal for anyone in a childcare setting, parents and guardians, or simply the prepared individual on the go.

CPR Mask with O2 Inlet

Supplies included; CPR mask with O2 inlet and adjustable head strap, Red Cross branded clamshell and an instruction sheet. The CPR Mask with a one-way valve is used during respiratory and cardiac emergencies as a physical barrier device when administering rescue breaths to a person. The one-way valve prevents bodily fluids and airborne pathogens from reaching the rescuer. The medical-grade thermoplastic mask has a soft inflated cuff for a leakproof seal and adds to the patient’s comfort as well as an elastic head strap allowing the rescuer to secure the mask to the patient’s face. Also included, is an oxygen inlet for optional supplemental oxygen. Complete with a hard shell carrying case easy to carry in its compact size.

Babysitter Certificates

The cost of your first physical Babysitter certificate is included in the course fees. If you lose, damage, or want a second physical copy of your Wall Certificate or Wallet Card, contact us. We always print them on thick card stock! They can be at your house in about 2 weeks - and let us know if you would like a digital Babysitter Certificate in the meantime - we’re here to help.


Upcoming Wisdom Webinar


At Delta Emergency Support Training we are happy to answer any questions you may have about textbooks and gear. We provide training sessions for individuals or classes. We have options for in person, hybrid or online classes for Standard First Aid (SFA) Advanced First Aid (AFA) and Emergency Medical Responder (EMR) courses. For all inquiries please email info@deltaemergency.com

As always thank you for your support, stay safe!

Read More