The Delta Dispatch

CFD Application Guide for Aspiring Firefighters

Dreaming of becoming a Calgary firefighter? This guide walks you through the CFD application process, including essential certifications, physical fitness tips, suggested courses, and how Delta Emergency Support Training can help you succeed.

If you’ve ever dreamed of wearing the Calgary Fire Department uniform, you’re not alone. Every year, countless motivated individuals from all walks of life apply to join one of Canada’s most respected firefighting teams. Whether you’re coming off the rigs, working in the trades, or ready for a meaningful career that serves your community, the CFD recruitment process is both challenging and rewarding.

At Delta Emergency Support Training, we’ve helped many students prepare for that next step, and several of our instructors are currently serving with CFD. So, if you’re serious about applying, here’s what you need to know about the process and how to set yourself up for success.

Step 1: Meeting the Basic Requirements

Before applying, make sure you meet the minimum qualifications. Applicants must:

  • Be at least 18 years old

  • Be legally entitled to work in Canada

  • Have a high school diploma or equivalent

  • Hold a valid Class 5 driver’s licence (with a clean record)

Medical fitness is crucial — you’ll need to pass a comprehensive medical assessment that ensures you can safely perform the physical demands of the job. Strong cardiovascular health, vision, and hearing are essential for operational readiness.

Step 2: Educational and Certification Requirements

To apply for CFD, you’ll need a few essential certifications. One of the most important is Advanced First Aid (AFA), which you can earn through Delta Emergency Support Training.

Our AFA course provides the hands-on medical foundation you’ll rely on every day as a firefighter — from patient assessment and airway management to emergency scene care. We’ve even built rotation-friendly schedules for those still working in camp or on the rigs, so you don’t have to put your career on hold to train.

It’s important to note that CFD does not require applicants to hold NFPA 1001 Level I and II firefighter training, which is often mandatory for many other departments across Canada. This makes CFD an ideal opportunity for motivated individuals looking to make the leap into firefighting without already having that certification.

Step 3: The Application and Testing Process

The CFD recruitment process typically includes several stages:

  • Online Application: Submit your resume, certifications, and supporting documentation.

  • Written Exam: Designed to assess problem-solving, mechanical reasoning, and situational judgment.

  • Physical Fitness Test: A demanding, firefighter-specific test that measures endurance, strength, and agility.

  • Interview: You’ll discuss your motivations, teamwork experience, and understanding of community service.

  • Background Check: Ensures candidates uphold the integrity and professionalism expected of CFD members.

The process is competitive, but with the right preparation and attitude, it’s absolutely achievable.

Step 4: How to Stand Out as an Applicant

Want to stand out in the hiring process? Focus on building the qualities that CFD values most: teamwork, communication, leadership, and resilience.

  • Physical Conditioning: Prioritize strength, endurance, and functional fitness — firefighting is demanding work.

  • Community Involvement: Volunteer with local emergency services, community programs, or charities. It demonstrates commitment and service-mindedness.

  • Communication and Leadership: Practice staying calm under pressure and leading effectively in high-stress situations.

CFD is looking for individuals who bring heart, reliability, and the willingness to learn — not just technical skill.

Step 5: Suggested Courses to Strengthen Your Resume

While CFD doesn’t require NFPA 1001 firefighter certification, there are plenty of valuable courses that can give you a competitive edge and help you hit the ground running once you’re accepted.

Consider training in areas such as:

  • Confined Space Awareness and Rescue – Learn safe entry, monitoring, and rescue techniques.

  • Rope Rescue (Basic & Advanced) – Develop technical rope-handling skills used in high-angle and low-angle rescues.

  • Hazardous Materials Awareness (HAZMAT) – Understand how to recognize and safely respond to dangerous goods incidents.

  • Transportation of Dangerous Goods (TDG) – An important credential for anyone working around hazardous substances.

  • ICS (Incident Command System) Training – Build your understanding of emergency scene management and structure.

Many of these courses are available through technical safety providers or emergency training academies — and they all show CFD that you take professional development seriously.

Step 6: Training and Career Development

Once selected, recruits undergo an intensive 16-week CFD Fire Training Academy program, covering everything from fire suppression and rescue techniques to hazardous materials response and medical care.

Graduation isn’t the end of learning — CFD firefighters continue developing through specialized courses, leadership tracks, and ongoing professional education.

How Delta Can Help You Get There

We know what it takes to succeed in the CFD process because our team has been there. At Delta Emergency Support Training, we’ve helped countless students earn their Advanced First Aid certification and gain the skills and confidence they need to take the next step.

Several of our instructors are active CFD members, offering insider guidance, mentorship, and firsthand insights into the realities of the job. Many of our graduates have successfully transitioned from oilfield work or trades into full-time firefighting careers — proving it’s never too late to make the change.

Your Firefighter Journey Starts Here

Applying for the Calgary Fire Department is a big step, but it’s one that can lead to an incredible career of purpose, teamwork, and community impact.

If you’re ready to make a change — to trade in your rotation schedule for a fire hall shift and a new sense of purpose — start today.

At Delta Emergency Support Training, we offer Advanced First Aid courses, including camp rotation-friendly schedules that fit your lifestyle. You bring the dedication — we’ll help you build the foundation.

Read More

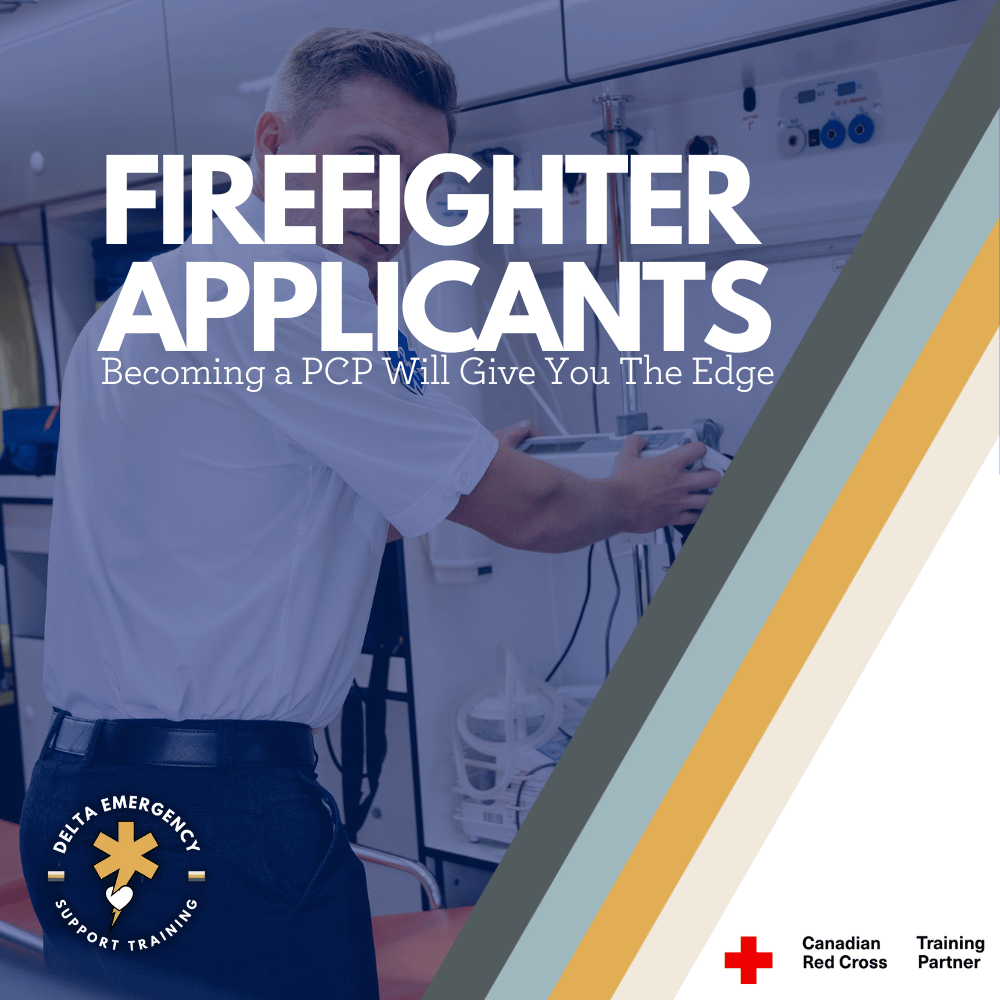
How Paramedic Training Strengthens Your Firefighter Application

Firefighting is no longer just about fire suppression. With most calls now medical in nature, departments seek applicants with paramedic training. Here’s how your Primary Care Paramedic certification can make your firefighter application stand out.

The Modern Firefighter: More Than Fire Suppression

Today’s firefighter is far more than fighting fires. Across Canada, most fire departments respond to far more medical emergencies than structure fires — in many regions, medical calls make up 80% of total responses.

This shift means departments are looking for applicants who can do more than handle a nozzle. They need people trained in patient care, triage, and prehospital decision-making — skills that come directly from Primary Care Paramedic (PCP) training.

Whether you’re pursuing municipal, industrial, or wildland fire service, holding your PCP license can dramatically strengthen your application, credibility, and readiness for the role.

1. Understanding the Overlap: Fire and EMS

The reality of modern fire service is that medical response is integrated into daily operations. Many calls involve:

  • Cardiac arrests

  • Motor vehicle collisions

  • Respiratory emergencies

  • Overdoses and poisonings

  • Falls and traumatic injuries

  • Medication administration

These situations require rapid assessment, airway management, and patient stabilization — core skills of a Primary Care Paramedic.

When fire departments deploy first, a firefighter with PCP training doesn’t just stand by until EMS arrives — they become a vital asset in those first minutes, providing interventions that can mean the difference between life and death.

2. How PCP Training Sets You Apart in the Hiring Process

Fire departments receive hundreds of applications for a handful of positions. Holding your Primary Care Paramedic certification immediately tells recruiters you’re invested, skilled, and capable of independent medical decision-making.

It demonstrates:

  • Commitment to emergency services as a career, not just a job.

  • Medical competency beyond AFA & EMR levels.

  • Ability to handle high-stress environments and maintain composure during critical incidents.

  • Strong understanding of patient care, communication, and documentation.

Departments see PCPs as well-rounded responders — individuals who understand not only rescue operations, but also the continuum of care from the moment of injury to hospital transfer.

3. Bridging Knowledge: Why Paramedic Training Translates So Well

The PCP curriculum goes far beyond what’s taught in AFA or fire recruit programs. It builds:

  • Assessment skills – Scene safety, mechanism of injury, and systematic patient evaluation.

  • Decision-making – When to move, when to treat, and when to call for advanced support.

  • Anatomy and physiology knowledge – Understanding what’s happening inside the body, not just what you see externally.

  • Communication and teamwork – Effective coordination with dispatch, partners, and hospital staff.

  • Leadership under pressure – Taking control when seconds matter.

Every one of these skills directly applies to fireground operations, rescue scenarios, and community medical calls.

When a firefighter-paramedic arrives on scene, they’re already equipped with the mindset of “scene control, patient stabilization, and structured response.”

4. Increased Employability Across Canada

Many fire departments in Canada — including Toronto Fire, Calgary Fire, Edmonton Fire, and Vancouver Fire Rescue Services — now strongly prefer or require applicants to have medical certification at the EMR or PCP level.

Holding your PCP license not only makes you a stronger candidate but also broadens your career options. You can work in EMS while waiting for fire openings, gain field experience, and keep your medical skills sharp.

It also signals to hiring panels that you’re operationally ready, physically prepared, and understand the realities of shift work, patient care, and emergency response culture.

5. Professional Credibility and Community Trust

Firefighters are often the first on scene — before ambulances, before police. The public doesn’t separate the fire service from medical response; they expect competence in both.

Having PCP-level training builds confidence in your peers, your officers, and the community. It shows that you’re not just trained to react, but to think critically and intervene effectively under pressure.

This credibility extends into leadership — many captains, chiefs, and training officers have paramedic backgrounds. Understanding that language early gives you a career-long advantage.

6. The Pathway Forward

If your goal is to become a firefighter, enrolling in a Primary Care Paramedic program is one of the most strategic steps you can take.

Here’s how to integrate it into your career plan:

  1. Earn your EMR or Advanced First Aid certification to build foundational knowledge.

  2. Enroll in an accredited PCP program through a recognized college or training institution.

  3. Register and license through your provincial regulatory body.

  4. Maintain active status — through continuing education and clinical practice hours.

  5. Highlight your PCP credentials in your fire service application and interviews.

By doing this, you’re not only meeting the evolving expectations of the fire service — you’re proving you already live and breathe emergency response.

Final Thought

Firefighting has evolved — and so have the expectations of those who wear the uniform.
Holding a Primary Care Paramedic license shows that you understand that evolution. It proves that you can respond, treat, and think critically in the same high-pressure environments firefighters face daily.

When it comes down to competitive hiring, paramedic training doesn’t just help your chances — it defines them.

Read More

Online Red Cross Babysitter Course: Enroll Your Child Anywhere in Canada

Help your child build confidence and life-saving skills from anywhere in Canada. Delta Emergency Support Training delivers the Red Cross Babysitter Course live online in two sessions—covering baby care, safety, and first aid—so your young teen is ready for babysitting and emergencies alike.

Looking for a meaningful way to build your child’s confidence and independence? The Canadian Red Cross Babysitter Course, offered online through Delta Emergency Support Training , gives youth aged 11–15 the skills to care for children safely and respond to emergencies—all from the comfort of your home, anywhere in Canada.

This isn’t just a babysitting class. It’s leadership training, first aid preparation, and a solid first step toward responsibility and a first job.

Two Engaging Online Sessions

Delta delivers the official Red Cross Babysitter Course in two interactive sessions, making it easy for families across the country to fit training into their schedule.

Session 1: Caring for Babies and Young Children

  • Feeding, diapering, and soothing infants and toddlers

  • Planning fun, age-appropriate activities

  • Child-proofing and preventing household injuries

  • Professional communication with parents and setting rates

Session 2: Babysitter First Aid

  • Treating common injuries: cuts, burns, bumps

  • Choking relief techniques

  • When and how to call 911

  • Staying calm and in control during unexpected situations

Because the course is fully online and instructor-led, your child can learn live with a certified Red Cross trainer, interact with other participants, and practice key skills—no matter where you live.

Why Parents Are Signing Up Across Canada

1. Confidence and Independence

Kids finish the course ready to handle real-world responsibilities and make smart decisions when you’re not around.

2. First Aid That Lasts a Lifetime

Babysitter-level first aid is an invaluable life skill—useful at home, at school, and during sports.

3. A First Job They—and You—Can Trust

Babysitting is often a child’s first paid work. This training covers everything from professional communication to setting fair rates so they’re prepared to succeed.

4. Peace of Mind for Parents

Knowing your child is Red Cross–certified means you can confidently let them care for siblings or neighbor children—and know they’re ready for emergencies.

How to Enroll from Anywhere

Registration is simple:

  1. Visit Delta Emergency Support Training’s website and select the Red Cross Babysitter Course (Online).

  2. Choose your preferred dates—sessions are offered year-round.

  3. Receive your course materials and log-in details, then let your child join the live virtual class from your home computer or tablet.

The Takeaway for Parents

The online Red Cross Babysitter Course with Delta Emergency Support Training is more than childcare instruction. It’s a Canada-wide opportunity to give your child confidence, life-saving first aid skills, and professional babysitting knowledge, all while you relax knowing they’re learning from Red Cross–certified instructors.

Whether your child wants to start earning money, help with younger siblings, or simply gain valuable safety skills, this program is a parent-approved step toward independence and responsibility.

Read More
Advanced First Aid, Alberta, Airway, Child Safety Kumari Malhotra Advanced First Aid, Alberta, Airway, Child Safety Kumari Malhotra

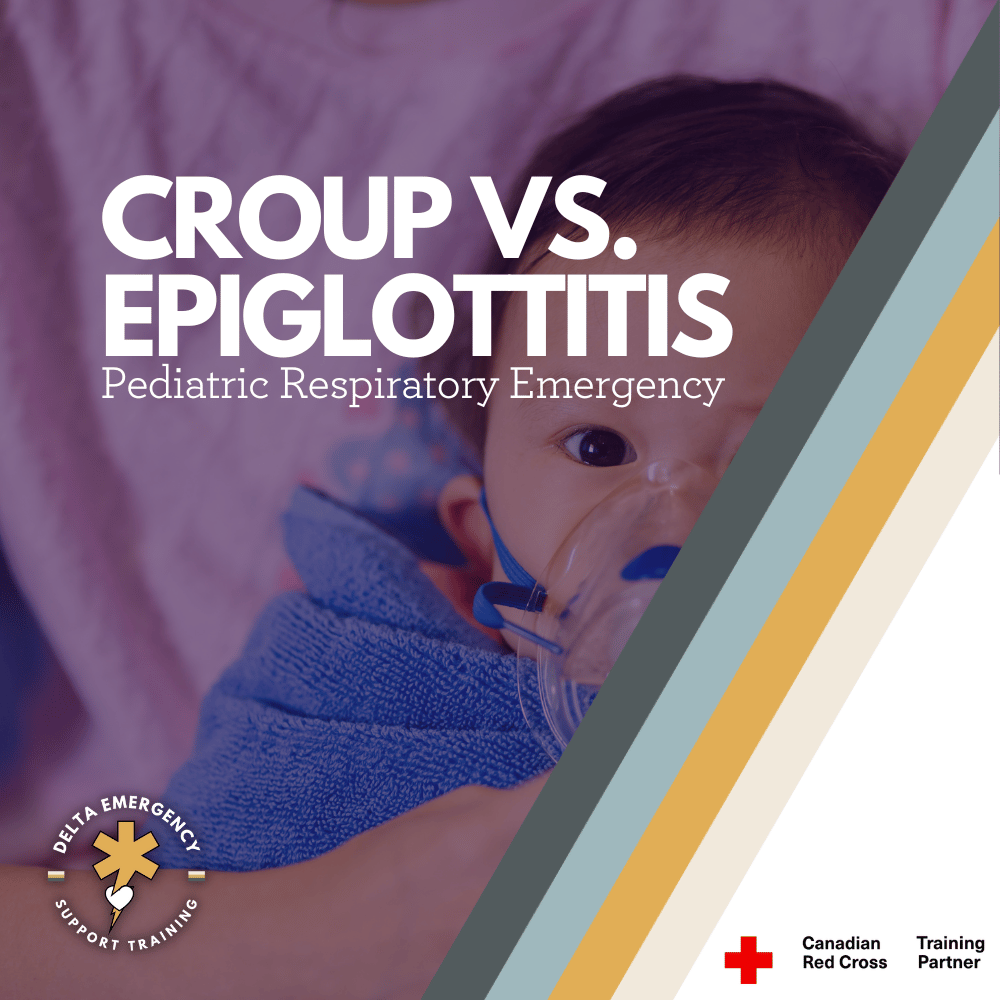
Croup vs. Epiglottitis in Children: What First Responders and Parents Need to Know

Breathing problems in children can be terrifying, and knowing the difference between croup and epiglottitis could save a life. Parents need to know the warning signs, while first responders must act quickly and carefully. Here’s how to tell them apart and what steps to take in an emergency.

When a child has trouble breathing, both parents and first responders feel the urgency. Two conditions often confused with one another are croup and epiglottitis. While both affect the airway, they differ dramatically in severity and required response. For parents, understanding the warning signs can help you know when to call for help. For first responders, recognizing the difference is critical to providing safe and effective care.

Croup: Common but Often Alarming

What it is:
Croup is a viral infection that causes swelling of the larynx and trachea, most often seen in children aged 6 months to 3 years.

Parents may notice:

  • Barking, seal-like cough (especially at night)

  • Hoarse voice

  • Stridor (high-pitched sound on inspiration) when crying or upset

  • Low-grade fever

  • Symptoms often start after a cold

First responder perspective:

  • Most cases are mild, but moderate to severe croup can cause stridor at rest, increased work of breathing (retractions, nasal flaring), or fatigue.

  • Treatment may include humidified oxygen, steroids (e.g., dexamethasone), and nebulized epinephrine in severe cases.

  • Keeping the child calm is key; agitation worsens obstruction.

Epiglottitis: A True Airway Emergency

What it is:
Epiglottitis is a bacterial infection that causes the epiglottis to swell rapidly, threatening complete airway obstruction. Thanks to Hib vaccination, it’s now rare, but still life-threatening when it occurs.

Parents may notice:

  • Sudden onset of high fever

  • Severe sore throat and difficulty swallowing

  • Drooling (child can’t swallow saliva)

  • Muffled voice

  • Child sitting forward, chin out, mouth open (“tripod position”)

  • Appearing very ill, anxious, and struggling to breathe

First responder perspective:

  • This is a do not delay, do not agitate situation.

  • Never attempt to look in the child’s throat — it can trigger complete obstruction.

  • Keep the child upright and calm.

  • Provide high-flow oxygen if tolerated.

  • Be prepared for advanced airway intervention (hospital setting or with ALS backup).

  • Rapid transport is essential.

Quick Comparison

FeatureCroup (Viral)Epiglottitis (Bacterial, Emergency)OnsetGradual, after cold symptomsSudden, rapid progressionCoughBarking, seal-likeRare or absentFeverLow-gradeHighVoiceHoarseMuffled, “hot potato” voiceSwallowingUsually ablePainful, droolingStridorCommon, louder when upsetLate, quieter, concerningSeverityUsually mild-moderateSevere, life-threatening

The Takeaway

For parents:

  • Croup is common and usually manageable, but if your child has stridor at rest, difficulty breathing, or bluish lips, call 911.

  • Epiglottitis is rare but an emergency — if you see drooling, high fever, tripod posture, or sudden severe breathing trouble, call for help immediately.

For first responders:

  • Stay calm and keep the child calm.

  • Differentiate based on history and presentation.

  • Supportive care is often enough for croup, while epiglottitis requires immediate rapid transport and careful airway management.

When it comes to pediatric airway conditions, the rule is simple: if in doubt, treat it like epiglottitis until proven otherwise. Quick recognition and action save lives.

Read More

Alberta Fire Applicants & EMRs: Master the Medical Portion with Paramedics and Firefighters

Succeeding in the medical portion of a firefighter or EMR application in Alberta comes down to mastering the fundamentals under pressure. At Delta Emergency Support Training, active paramedics and firefighters teach you vital patient assessment skills, accurate vitals, effective communication, and safe medication administration.

Why Fire Applicants Fail the Medical Portion (And How to Prepare)

Firefighting is one of Alberta’s most demanding careers, and the medical portion of the application ensures candidates can handle life-or-death situations both trauma and medical, under pressure. Many applicants struggle, not because they lack dedication, but because they underestimate the scenario-based, high-pressure nature of this part of the evaluation. Here’s what to know and how to prepare.

1. Not Understanding the Scenario-Based Format

Applicants may know first aid procedures but are unprepared for realistic simulations. Evaluators look for:

  • Correct prioritization of patient care

  • Efficient use of available equipment

  • Accurate assessment of vitals (pulse, blood pressure, respiration, oxygen saturation)

  • Maintaining composure under pressure

Preparation Tip:
Practice scenarios under timed conditions. Include taking accurate vitals for each patient, documenting them, and adjusting care accordingly. Repetition builds both speed and confidence.

2. Poor Time Management During Simulations

Time pressure is a common challenge during firefighter medical evaluations. Some applicants try to rush through tasks, either spending too long on minor details or speeding through essential steps. This can result in incomplete assessments, inaccurate vitals, missed medication checks, or poor patient communication.

Key Tip:

  • Don’t rush—take your time to work methodically.

  • Focus on the fundamentals of your patient assessment: scene safety → primary survey → airway, breathing, circulation → vitals → medications → secondary survey → ongoing care.

  • If you get stuck or feel pressured, return to the basics and systematically work through each step. Accuracy and thoroughness are more important than speed.

  • Use practice scenarios to balance efficiency with careful, precise assessment.

Preparation Tip:

  • Use a mental checklist: Scene safety → Primary survey → Secondary survey → Ongoing care → Hand-off report.

  • Practice completing your assessment efficiently while still accurately measuring vitals and administering medications.

  • Practice whenever you can! Run calls in your head.

3. Lack of Critical Thinking

Memorized procedures aren’t enough—patients don’t always behave as expected. Evaluators want to see adaptability: can you adjust your care based on vital signs, patient feedback, or medication needs?

Preparation Tip:

  • Train with scenarios including complications like fluctuating vitals, patient distress, or adverse medication reactions.

  • Ask yourself after each practice: “How would I adjust their oxygen saturations fall, or a medication has unexpected effects?”

4. Inadequate Patient Communication

Medical competence isn’t just technical—communicating clearly with patients is critical. Poor communication can make patients anxious or uncooperative, affecting assessment accuracy.

Preparation Tip:

  • Practice explaining what you’re doing and why while performing assessments and administering medications.

  • Use calm, clear language: “I’m going to give you your medication now; it may make you feel drowsy. Let me know if you feel unwell.”

  • Listen and respond to patient concerns—they may give vital clues about their condition.

5. Not Knowing Medications, Indications, and Contraindications

Many applicants fail by being unsure about common medications, their proper use, or when not to administer them. Evaluators want to see that you can safely give medications if required, understand dosage, and recognize contraindications.

Preparation Tip:

  • Study common pre-hospital medications: aspirin, epinephrine auto-injectors, nitroglycerin, oxygen, and glucose.

  • Know the indications (when to use), contraindications (when not to use), dosage, and potential side effects.

  • Practice scenario-based administration with simulated patients.

6. Inadequate Knowledge of Fire-Specific Medical Risks

Alberta applicants face unique hazards: industrial chemicals, wildfires, smoke inhalation, cold-weather trauma. Failing to anticipate these can affect performance.

Preparation Tip:

  • Focus on airway management, burns, smoke inhalation, rapid trauma assessment, vitals monitoring, and safe medication use.

  • Understand environmental impacts: extreme temperatures, long ambulance response times, and remote locations.

7. Overlooking Soft Skills and Professionalism

Evaluators notice panic, poor teamwork, and rushed or inaccurate communication. Both soft skills and technical skills are tested simultaneously.

Preparation Tip:

  • Role-play with peers, focusing on calm, professional communication.

  • Practice reporting vitals and medications verbally and accurately to simulate handoff to paramedics.

  • Debrief after every scenario: identify strengths and areas for improvement.

8. Tips for Final Preparation

  • Simulate Realistic Conditions: Wear PPE, gloves, and work under distractions to mimic real assessments.

  • Practice Accurate Vitals and Medication Use: Include pulse, respiration, oxygen saturation, blood pressure, and scenario-based administration of medications.

  • Time Your Scenarios: Track your completion time without sacrificing accuracy.

  • Review Fundamentals: CPR, airway management, bleeding control, shock recognition, spinal immobilization, and medications.

  • Debrief Every Practice: Discuss patient communication, vital trends, medication decisions, and overall decision-making.

Conclusion

The medical portion of the firefighter application isn’t meant to trip you up—it ensures you’re ready to handle emergencies. By practicing realistic scenarios, taking accurate vitals, communicating effectively with patients, knowing your medications, managing your time, and thinking critically, Alberta applicants can approach the evaluation confidently and maximize their chances of success.

At Delta Emergency Support Training, you’ll be taught by active paramedics and firefighters, gaining real-world insights and practical skills that go beyond the textbook. This hands-on instruction ensures you’re fully prepared for both the medical portion of your firefighter application and real-life emergencies.

Read More

How EMRs Can Succeed in Remote and Isolated Worksites

Working as an Emergency Medical Responder (EMR) on a remote worksite means being ready for anything—from minor injuries to life-threatening emergencies—often with limited resources and no backup nearby. Whether you’re on an oilfield, logging site, or rural road, you may be the only trained responder for hours. Success depends on preparation, strong communication, and the ability to improvise. By mastering these skills, EMRs ensure that patients receive the best possible care until advanced help arrives.

Responding to emergencies in urban areas is often predictable. Backup is usually nearby, communication is reliable, and resources are accessible. In remote locations such as rural roads, oilfields, logging sites, or construction areas, EMRs face unique challenges. You may be the only trained responder for hours, and the environment can complicate every step of patient care. Mastering the skills needed to handle these situations can mean the difference between life and death.

1. Communication Challenges in Remote Environments

One of the first hurdles EMRs encounter in remote areas is staying in contact with dispatch or additional medical resources. Cell service may be spotty or nonexistent, radios may have limited range, and satellite phones are not always available or functioning.

Tips for EMRs:

  • Always verify which communication tools are available on-site before your shift begins.

  • Have a backup communication plan, such as designated runners, signaling methods, or vehicle transport to reach help.

  • Provide clear and concise patient information to dispatch, including the exact location, patient condition, and any hazards.

  • Maintain communication logs to ensure vital information is relayed accurately.

Effective communication is the foundation for safe and efficient patient care, particularly when you are isolated.

2. Prolonged Patient Care

In remote settings, patients often require care for extended periods while waiting for evacuation. This differs significantly from urban EMS responses, where transport is typically quick. EMRs must be prepared to provide prolonged monitoring and treatment.

Key Considerations:

  • Continuously monitor ABCs (airway, breathing, circulation) and reassess frequently.

  • Take regular vital signs and record changes for handoff to higher-level care.

  • Keep the patient warm, comfortable, and hydrated when possible.

  • Maintain situational awareness, including environmental hazards, weather, and your own endurance.

Prolonged care requires a balance of technical skill and mental stamina. Staying calm and organized ensures that patients remain stable until help arrives.

3. Improvised Splints and Tourniquets

Remote worksites often have limited medical equipment. EMRs must be able to improvise with available materials.

Splints:

  • Use boards, poles, tools, or even rolled-up jackets to immobilize fractures.

  • Ensure the splint is secure but does not restrict circulation unnecessarily.

Tourniquets:

  • If a commercial tourniquet is unavailable, sturdy belts, strips of cloth, or webbing can be used in emergencies.

  • Apply properly and monitor distal circulation. Only use when direct pressure is not sufficient to control severe bleeding.

Improvisation is a core skill for EMRs in remote environments and can stabilize injuries until evacuation.

4. Coordinating Helicopter or Ground Extraction

In some cases, evacuation may involve air transport or long-distance ground travel. EMRs must coordinate safely and efficiently.

Preparation and Communication:

  • Ensure landing zones for helicopters are clear, level, and visible.

  • Identify hazards, including wires, uneven terrain, or debris.

  • Keep bystanders at a safe distance and assist with patient loading if necessary.

  • If extraction is delayed, maintain extended patient care: shelter, temperature regulation, and continuous monitoring.

Evacuation requires both technical knowledge and leadership to keep patients and crew safe.

5. Environmental Awareness and Safety

Remote sites often contain additional hazards that can complicate patient care:

  • Heavy machinery and industrial equipment.

  • Wildlife encounters.

  • Extreme weather conditions.

  • Limited lighting or difficult terrain.

EMRs must maintain situational awareness, not only for the patient but for their own safety and that of any team members or bystanders.

6. Mental Preparedness

Extended care in challenging environments can be mentally demanding. EMRs should practice:

  • Staying calm under pressure.

  • Making quick decisions with limited information.

  • Prioritizing patient care while managing multiple hazards.

Being mentally prepared ensures that patient care remains consistent and professional, even in high-stress or prolonged scenarios.

Conclusion

Remote and isolated worksites present unique challenges for EMRs. Success depends on advanced planning, communication, improvisation, and endurance. By mastering these skills, EMRs can provide high-quality care in environments where resources are limited and help may be far away.

Preparedness, adaptability, and confidence are what allow EMRs to save lives, no matter how isolated the scene.

Read More

Be Ready for the Unexpected: First Aid Skills Every Hunter Should Know

Hunting is a beloved Canadian tradition, but heading into the bush without first aid training puts you and your group at risk. Learn the importance of being prepared with skills like bleeding control, wound care, and shock management. Whether you hunt with family, friends, or solo—make sure you're ready to protect what matters most.

Why You Should Learn First Aid Before Hunting Season

Be Prepared for the Unexpected in Canada’s Wilderness

Father and son hunting

As the crisp fall air rolls in and leaves begin to turn, thousands of Canadians prepare for one of the most anticipated times of the year—hunting season. For many, it’s more than a pastime. It’s a family tradition, a weekend with friends, or time spent in the backcountry with loved ones—passing down skills, telling stories around the fire, and enjoying the stillness of nature. Hunting is deeply woven into Canadian culture, a proud part of our heritage from coast to coast.

But no matter how experienced or well-prepared you are, the wilderness comes with real risks. And when something goes wrong, you're often far from help, without cell service, and hours from emergency responders.

That’s why first aid training isn’t just helpful—it’s essential.

Whether you’re a weekend hunter or a guide, learning Red Cross-certified First Aid, Advanced First Aid (AFA), Wilderness First Aid, or Emergency Medical Responder (EMR) skills can make all the difference in an emergency. It means being ready—not just for yourself, but for the people who matter most.

At Delta Emergency Support Training, we believe that part of keeping these traditions alive means learning how to protect them.

Hunting Safety in Canada: Know the Risks

Hunting is generally safe when done responsibly, but accidents still occur. According to the Canadian Firearms Program and provincial wildlife agencies:

  • Most firearm-related hunting injuries involve accidental discharges or poor handling technique.

  • Tree stand falls are one of the most common hunting injuries, often resulting in fractures or spinal trauma.

  • Hunters often travel to remote areas with no cell service, delaying access to emergency care.

  • In some provinces, hypothermia is the leading non-injury emergency reported during hunting season.

Each year, hundreds of injuries are reported across the country—many of which are preventable with basic training and better preparation.

🏹 Common Hunting Injuries and Medical Situations

Understanding potential emergencies helps you prepare properly. Here are the most common situations faced in the field:

  • Gunshot wounds or impalement from firearm mishandling or accidents.

  • Knife cuts and lacerations during field dressing or gear use.

  • Falls from tree stands or rocky/uneven ground, resulting in broken bones or head injuries.

  • Cold exposure: frostbite, hypothermia, or trench foot.

  • Heat stress in early season hunts.

  • Allergic reactions to insect stings, animal bites, or plants.

  • Getting lost or separated from your group, increasing the risk of panic, exposure, or dehydration.

🧠 First Aid Skills Every Hunter Should Know

Here’s what every hunter—beginner or seasoned—should know:

  • Bleeding control: How to apply direct pressure, pack a wound, or use a tourniquet.

  • Managing broken bones: Stabilizing with splints and slings.

  • Shock treatment: Recognizing and managing pale, cold, clammy symptoms.

  • CPR and AED use: Cardiac arrest can happen in any setting.

  • Anaphylaxis care: Recognizing severe allergic reactions and administering an EpiPen.

  • Basic wound care: Cleaning and dressing wounds to prevent infection.

  • Spinal motion restriction: Important if someone falls from a height or hits their head.

These lifesaving skills are taught in Red Cross First Aid and Wilderness First Aid programs and are enhanced further in EMR-level training.

🎒 Essential First Aid Items to Pack for the Field

Your hunting first aid kit should be compact, durable, and versatile. Pack:

  • Tourniquet (e.g., CAT or SOFTT models)

  • Gauze pads, trauma dressings, adhesive tape

  • SAM splint and triangular bandage

  • Antiseptic wipes, tweezers, antibiotic ointment

  • Antihistamines and pain relievers

  • CPR mask, gloves, emergency blanket

  • Water purification tablets or filter

  • Whistle, signal mirror, and flashlight

  • Personal locator beacon (PLB) or satellite communicator

Pack gear—but more importantly, know how to use it.

🏔️ Why Location Matters: The Reality of Remote Response

In urban areas, EMS might reach you in under 10 minutes. In the wilderness, it could be hours—or days. Even when you can call 911, delays are common due to:

  • No cell service

  • Impassable terrain

  • Poor visibility or weather conditions

  • Long distances from the nearest ambulance or search-and-rescue base

That’s why wilderness preparedness and basic medical self-reliance are key. The Red Cross Wilderness First Aid program focuses specifically on prolonged care and making decisions when help is hours away.

🧭 Preventing Emergencies: Smart Safety Tips for Hunters

Avoiding an emergency is the best-case scenario. Here’s how to minimize risk:

  • Take a buddy—never hunt alone if you can avoid it.

  • File a trip plan: Leave your route and return time with someone you trust.

  • Carry emergency communication (PLB, satellite text device, or two-way radio).

  • Inspect your gear, especially firearms, knives, and tree stands.

  • Dress appropriately in layers, blaze orange, and waterproof gear.

  • Know the weather and avoid risky conditions (fog, snowstorms, extreme cold).

  • Stay hydrated and take regular breaks.

  • Stay sober while handling firearms—alcohol and hunting don’t mix.

📚 Which First Aid Training Is Right for You?

At Delta Emergency Support Training, we help hunters, outdoor workers, and future first responders get the skills they need. We offer:

  • Standard and Advanced First Aid (AFA) – Learn bleeding control, airway management, CPR, and trauma care.

  • Wilderness First Aid – Specialized for remote environments and delayed help.

  • Emergency Medical Responder (EMR) – For guides, professionals, or those planning a career in emergency services.

All courses follow Red Cross Emergency Care for Professional Responders guidelines.

Conclusion: Be the One Who’s Ready

Hunting isn’t just a hobby—it’s a cherished Canadian tradition, often passed down through generations. Whether you’re heading into the woods with your father, sister, best friend, or your own kids, you’re not just out for the harvest—you’re making memories. You're sharing laughter around the campfire, waking up at dawn with excitement, and carrying on a way of life that means something deeply personal.

But with that comes responsibility.

If something goes wrong—and it can—you want to be the one who knows what to do. Whether it’s treating a serious injury, spotting early signs of hypothermia, or managing an allergic reaction, your actions can save the life of someone you care about.

At Delta Emergency Support Training, we’re here to make sure you’re ready. Our Red Cross-certified Advanced First Aid, Emergency Medical Responder, and Wilderness First Aid programs prepare you not just for emergencies—but for protecting what matters most: your family, your friends, and the memories you’re out there to create.

Let’s keep hunting a safe, proud tradition—for this season, and every season to come.

Read More
Alberta, Advanced First Aid, Certificates Kumari Malhotra Alberta, Advanced First Aid, Certificates Kumari Malhotra

From Oilfield to Firehall: Why Tradespeople Are Switching to Emergency Services

Many tradespeople in Alberta’s oil and gas sector are transitioning to emergency services careers. At Delta Emergency Support Training in Calgary, our Advanced First Aid course provides the essential skills and certification needed to make that move with confidence.

Alberta has long been known for its oil and gas industry — and rightly so. From Fort McMurray to the foothills outside Calgary, thousands of workers have built careers in the trades, on the rigs, and in the field. But in recent years, a growing number of tradespeople are making a dramatic shift: trading in steel toes and coveralls for bunker gear and medical kits.

At Delta Emergency Support Training, based in Calgary, Alberta, we’ve seen the trend firsthand. More and more of our Advanced First Aid (AFA) students come from backgrounds in the oil patch, construction, or related trades, seeking a new path in firefighting, emergency medical services, or public safety.

Here’s why this transition is becoming so popular—and how Advanced First Aid training can be your first step from the oilfield to the firehall.

Why Tradespeople Are a Natural Fit for Emergency Services

Many of the qualities that make someone successful on a rig or in a trade are the same qualities needed in emergency response:

  • Strong work ethic and long shifts

  • Team-based environments

  • High-pressure problem solving

  • Hands-on technical skills

  • Risk awareness and safety training

  • Comfort in unpredictable or hazardous settings

If you’ve spent time working in the field, you’ve likely already experienced critical thinking during crises, emergency evacuations, or injury responses. That mindset—and real-world toughness—is highly transferable to fire and EMS careers.

Why the Shift Is Happening Now

There’s no doubt the oil and gas industry still offers high-paying work. But for many tradespeople, the physical demands, economic uncertainty, and cyclical layoffs have made them look for more stable, meaningful, or community-focused careers. Emergency services are standing out for a number of reasons:

  • Long-term stability and benefits

  • Purpose-driven work that gives back to the community

  • Opportunity to work closer to home

  • Union support and career advancement pathways

  • Strong demand for trained emergency responders in Alberta

If you're already safety-certified, used to remote work, and calm under pressure, transitioning to a fire department or EMS service might feel like a natural progression.

Advanced First Aid: Your First Step Toward a New Career

At Delta Emergency Support Training, we offer Advanced First Aid certification and recertification, designed for those ready to pursue new roles in emergency services.

Our courses, taught by experienced paramedics and firefighters, give you the skills and credentials to apply to:

  • Municipal fire departments like Calgary or Edmonton Fire

  • Industrial or wildland fire crews

  • Emergency Medical Responder (EMR) or Primary Care Paramedic (PCP) programs

  • Oil and gas site medical teams

  • Search and Rescue or auxiliary fire departments

What You’ll Learn:

Following the Canadian Red Cross curriculum, Advanced First Aid training includes:

  • Scene and patient assessment

  • CPR Level C and AED

  • Airway and breathing emergencies

  • Spinal, head, chest, abdominal, and limb injuries

  • Seizures, strokes, anaphylaxis, diabetic emergencies

  • Multiple casualty management and triage

  • Oxygen administration

  • Legal responsibilities and assisting with medications

This level of training is often the minimum requirement for entry into emergency service programs—and it builds confidence for high-stakes environments.

You're Not Starting Over—You're Building Forward

Switching careers doesn’t mean leaving your skills behind. In fact, your experience in the trades—whether it's welding, electrical, drilling, construction, or industrial safety—equips you with a unique edge.

At Delta Emergency, we’ve seen all kinds of professionals make the leap into emergency services. We’ve trained doctors, nurses, personal trainers, military personnel, and tradespeople who have successfully transitioned into fire, EMS, or rescue careers. The one thing they all had in common? A willingness to start with solid foundational training and a drive to serve.

You don’t need a medical degree or fire academy certificate to get started—just the right training and mindset.

Take the First Step with Delta Emergency Support Training

Emergency services are more than just a job—they're a calling. If you're ready to explore a career that's local, stable, and community-centered, Delta Emergency Support Training in Calgary, Alberta is here to support your journey.

Advanced First Aid is more than a certificate—it’s your starting point. Learn from real paramedics and firefighters and take the first step toward a career with purpose.

Visit our website to learn more about the program and how it can support your next move.

Read More

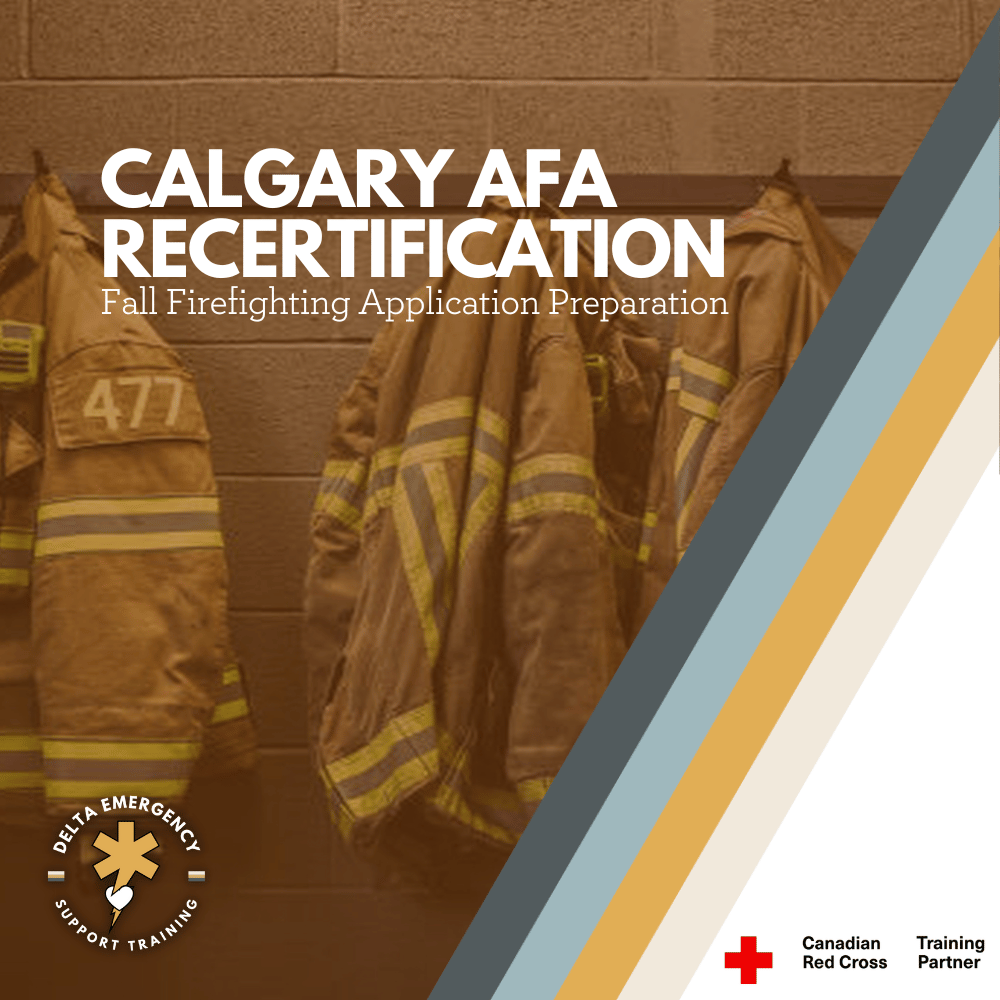
Planning to Apply to Edmonton or Calgary Fire? Why Advanced First Aid Recertification Matters

Planning to apply to Calgary or Edmonton Fire? Delta Emergency Support Training in Calgary offers Advanced First Aid recertification taught by paramedics and firefighters. Choose from weekday or weekend formats between September and November. Build your resume and keep your skills current with this Red Cross-certified course.

If you’re preparing to apply to Calgary or Edmonton Fire Department, you already know how competitive the process can be. These fire services are among the most respected in the country, and applicants are expected to show up well-prepared—both physically and professionally. One key credential that helps you stand out? Advanced First Aid (AFA) certification.

At Delta Emergency Support Training, located in Calgary, Alberta, we offer Advanced First Aid recertification courses taught by experienced paramedics and firefighters. Whether you’re updating your qualifications or preparing for pre-employment testing, our Red Cross-certified courses are designed to build the skills today’s fire services expect.

Why Advanced First Aid Is So Important

Advanced First Aid is not just a requirement—it’s a critical part of the emergency toolkit for any aspiring firefighter. It equips you to respond effectively to medical emergencies in both isolated and urban environments.

Departments like Calgary and Edmonton Fire often look for applicants who:

  • Hold a current Red Cross Advanced First Aid certification

  • Can demonstrate hands-on medical response experience

  • Have up-to-date knowledge of patient care, trauma management, and scene safety

Even if you've already taken the course before, recertifying ensures your skills meet current standards. Red Cross AFA certificates are valid for three years, but many departments recommend recertifying every two years to stay sharp and competitive.

What You’ll Learn in the Red Cross AFA Recertification Course

Our Advanced First Aid recertification course follows the Canadian Red Cross curriculum, providing practical training rooted in the latest national guidelines. Course content includes:

  • Scene assessment and patient surveys (primary and secondary)

  • Airway management and oxygen therapy

  • CPR Level C and AED usage

  • Treatment of traumatic injuries: spinal, chest, head, abdominal, and limb injuries

  • Medical emergencies: diabetic crises, seizures, allergic reactions, strokes, and more

  • Environmental emergencies: heat-related illnesses, cold exposure, poisonings

  • Multiple casualty management and triage

  • Legal considerations and documentation

  • Assisting with emergency medications

This course is designed for individuals who need advanced-level first aid for employment, volunteer service, or career advancement in emergency services.

Course Formats That Fit Your Schedule

We understand that many of our students are working professionals or balancing training, volunteering, and job applications. That’s why we offer two course delivery options:

Weekday Intensive Option

  • Monday to Friday

  • 09:00 to 18:00

  • Complete your recertification in just one week

Weekend Format

  • Friday evenings 18:00 to 22:00

  • Saturdays and Sundays 09:00 to 18:00

  • Spread across multiple weekends

Both formats offer full Red Cross certification and the same high-quality instruction led by frontline emergency responders.

Course Dates: September to November

We offer recurring Advanced First Aid recertification courses from September through November. All upcoming course dates are posted on our registration page. Early registration is recommended as seats fill quickly—especially ahead of common firefighter application and testing periods.

Build Your Resume While You Prepare

Recertifying in Advanced First Aid is one of many ways to strengthen your application. Other ways to build your fire service resume include:

  • Volunteering with local Search and Rescue, Fire Cadet, or community safety programs

  • Completing relevant certifications like NFPA 1001, ICS-100, Wildland Firefighter Training, or CPR Instructor

  • Gaining experience in related jobs such as lifeguarding, EMS, security, or industrial safety

  • Preparing for CPAT or A-PREP testing

Ready to Take the Next Step?

Whether you’re applying this year or planning ahead, Delta Emergency Support Training in Calgary is here to help you meet your goals. Our Advanced First Aid recertification courses are built to help aspiring firefighters like you gain the knowledge, confidence, and credentials you need to succeed.

Spots are limited and fill quickly as fire recruitment ramps up each fall.

Read More

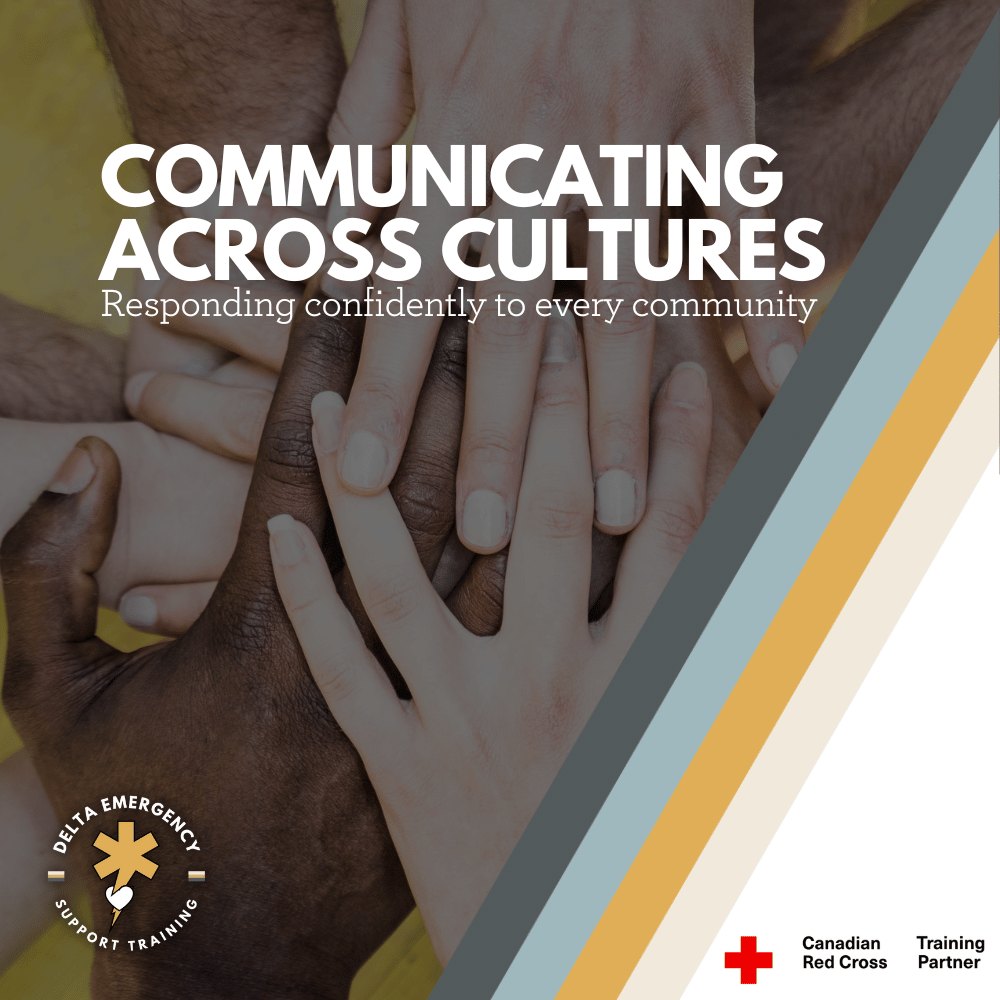
Cultural Differences and Language Barriers: A First Responder’s Guide to Respectful, Effective Care

Emergency calls often involve diverse cultures and languages. First responders face unique challenges in communication and cultural understanding that can impact patient care. This guide offers essential strategies to navigate language barriers respectfully, recognize cultural differences, and deliver compassionate, effective emergency care. Improve your skills and confidence with our practical tips.

As a first responder, you’re trained to act swiftly and decisively—but every emergency call is unique. One of the most important factors that can affect your response is cultural diversity. From language barriers to differing customs, beliefs, and expectations, understanding and respecting cultural differences is essential to providing compassionate and effective emergency care.

This guide explores common challenges you may encounter and offers practical strategies for navigating language barriers and cultural nuances with respect and professionalism.

1. Recognizing the Impact of Cultural Differences

Culture shapes how people perceive health, illness, pain, and emergency care. For example:

  • Some cultures prefer family involvement in medical decisions, while others expect individual autonomy.

  • Eye contact, physical touch, and personal space norms vary widely.

  • Certain gestures, language, or uniforms may be misunderstood or viewed differently.

  • Religious or cultural practices may affect treatment preferences (e.g., gender considerations, modesty, dietary restrictions).

Being aware of these factors helps you approach each situation with sensitivity.

2. Language Barriers: Challenges and Solutions

Language differences can hinder communication, delay treatment, or cause misunderstandings. Common challenges include:

  • Difficulty understanding symptoms or medical history.

  • Inability to explain procedures or gain informed consent.

  • Stress and fear amplified by lack of clear communication.

How to Overcome Language Barriers:

  • Use clear, simple language. Avoid jargon, speak slowly, and use short sentences.

  • Use non-verbal communication. Gestures, facial expressions, and demonstration can help convey meaning.

  • Employ translation tools such as phone interpretation services or translation apps if available.

  • Involve bilingual family members or community members cautiously—ensure they understand medical confidentiality.

  • Be patient and give time for responses. Don’t rush; encourage questions.

3. Showing Respect for Cultural Beliefs and Practices

Respect is the foundation of effective care. To show respect:

  • Ask permission before touching the patient—especially with cultural or religious sensitivities.

  • Respect privacy and modesty. Use same-gender responders when possible.

  • Be mindful of dietary or medical restrictions related to religion or culture.

  • Avoid assumptions or stereotypes. Every individual is unique, even within cultural groups.

  • Listen actively and validate concerns. Even if you can’t fully accommodate, acknowledging beliefs builds trust.

4. Practical Tips for First Responders

  • Prepare ahead: Learn about cultural demographics in your service area and common practices.

  • Use cultural competence training to build awareness and skills.

  • Maintain a calm and compassionate demeanor. Non-verbal cues can ease tension.

  • Clarify understanding: Repeat key information back to ensure comprehension.

  • Document any cultural considerations relevant to treatment or care.

  • Be adaptable: Some situations require flexibility while maintaining safety and protocol.

5. The Role of Empathy and Patience

Responding with empathy can bridge gaps where words fall short. Simple acts—like a reassuring tone, gentle touch (when appropriate), or attentive listening—can make a huge difference. Patience helps you navigate confusion or fear, especially when communication is tough.

6. When to Call for Assistance

If language barriers severely impair communication and immediate care decisions, or if cultural concerns affect treatment, don’t hesitate to:

  • Request professional medical interpreters.

  • Consult supervisors or cultural liaison officers if available.

  • Involve community health workers who understand cultural contexts.

7. Why Cultural Competence Matters

Respectful, culturally aware care leads to:

  • Better patient cooperation and outcomes.

  • Reduced stress and fear for patients and families.

  • Stronger community trust in emergency services.

  • Enhanced professional confidence and effectiveness.

Final Thoughts

Every call is more than just a medical emergency—it’s a human moment shaped by diverse stories and backgrounds. As a first responder, your cultural sensitivity and ability to navigate language barriers not only save lives but honor the dignity of every individual you serve.

By embracing respect, patience, and continuous learning, you make your emergency care truly inclusive and effective.

Read More

Advanced First Aid for Dog Bites: A Firefighter & EMS Responder’s Guide

Dog bites demand swift, skilled care from first responders. Our Red Cross Advanced First Aid & EMR course trains firefighters and EMS personnel in critical skills—from scene safety to wound management and emotional support. Learn to confidently handle dog bite emergencies and more with hands-on training that prepares you for real-world situations.

Dog bites are common and can range from minor injuries to life-threatening wounds. As an advanced first aider—often a firefighter or EMS responder—you’re frequently the first healthcare professional on scene. Your response can significantly impact the victim’s recovery, infection risk, and emotional well-being.

This guide provides an in-depth approach to managing dog bites, emphasizing scene safety, injury treatment, wound care, and patient support with your advanced training and EMS protocols in mind.

1. Scene Safety: Your First Priority

As firefighters and EMS responders, scene safety is non-negotiable. Before attending to the victim:

  • Ensure the dog is secured or removed from the scene.

  • Coordinate with police or animal control if the dog is aggressive or unrestrained.

  • Use situational awareness to spot hazards like traffic, bystanders, or multiple animals.

  • Wear appropriate personal protective equipment (PPE), including gloves and eye protection.

  • Brief your team on potential risks and establish safe zones.

Remember: your safety is critical. You cannot assist others if injured.

2. Rapid Assessment of Injury and Vital Signs

Upon approaching the patient:

  • Perform a quick but thorough assessment:

    • Identify bite locations, wound depth, and bleeding severity.

    • Assess airway, breathing, circulation (ABCs), especially if bites are on the face or neck.

    • Look for signs of shock or distress.

  • Evaluate distal circulation and neurological status if extremities are involved.

  • Prepare for rapid transport if injury severity or patient condition warrants.

3. Managing Bleeding and Stabilizing the Wound

  • Apply direct pressure with sterile dressings to control bleeding.

  • Elevate the injured limb if it does not exacerbate pain or injury.

  • Use hemostatic dressings or pressure bandages if standard methods fail and bleeding is life-threatening.

  • Avoid closing wounds—leave that to hospital staff.

  • If bones are exposed or fractures suspected, immobilize the limb appropriately.

4. Cleaning and Infection Control in the Field

  • Use available clean water or saline to gently irrigate wounds, flushing away debris and contaminants.

  • Avoid harsh scrubbing to prevent tissue damage.

  • Apply sterile, non-adherent dressings loosely to reduce infection risk.

  • Maintain standard precautions—dog bites pose high infection risk from mixed bacterial flora.

5. Addressing Emotional Trauma and Providing Reassurance

  • Understand that dog bite victims, especially children, often experience intense fear or shock.

  • Use your training in crisis intervention to calm and reassure patients and caregivers.

  • Maintain eye contact, speak in a calm voice, and explain procedures as you go.

  • If a child is involved, engage a parent or guardian for comfort, and use age-appropriate communication.

6. Differences in Treatment: Adults vs. Children

  • Children’s smaller anatomy and thinner skin increase risk of deeper injuries. Facial and neck bites require immediate airway assessment.

  • Children may be less cooperative; use gentle distraction and clear, comforting language.

  • Monitor for airway obstruction and signs of respiratory distress in both adults and children, but be especially vigilant with pediatric patients.

  • Adults may underreport pain or injury severity—conduct thorough assessments.

7. When to Activate Advanced Care and Transport

Immediately initiate rapid transport and notify receiving facility if:

  • Bleeding is uncontrolled or severe

  • Patient shows signs of shock or compromised airway

  • Wounds involve face, neck, hands, or joints

  • Suspected fractures or nerve injuries are present

  • Signs of infection or systemic illness are evident

  • Pediatric patients require specialized care

Coordinate transport with EMS and hospital staff for optimal continuity of care.

8. Documentation and Reporting

  • Record detailed information on the bite incident, dog description, and circumstances.

  • Document patient’s vital signs, treatment provided, and response to interventions.

  • Share info with receiving medical personnel and law enforcement/animal control as needed.

  • Proper documentation supports patient care and public safety.

9. Post-Incident Patient Education

  • Advise victims to seek follow-up care for tetanus boosters, rabies prophylaxis, and wound management.

  • Educate on signs of infection to watch for at home.

  • Stress importance of reporting dog bites to local health authorities.

10. Summary for Firefighters & EMS Responders

StepKey ActionsScene SafetySecure environment, coordinate with animal control, PPE use.AssessmentRapid injury and ABC evaluation, assess for shock.Bleeding ControlDirect pressure, elevation, hemostatic dressings if needed.Wound CareGentle irrigation, sterile dressing, infection prevention.Emotional SupportCalm communication, involve caregivers, monitor for shock.Pediatric CareAirway vigilance, gentle approach, watch for distress signs.TransportRapid evacuation for severe cases, notify hospital.DocumentationAccurate records for care and reporting.

As a firefighter or EMS advanced first aider, your training equips you to manage the complex needs of dog bite victims with confidence and professionalism. Your timely intervention saves lives, prevents complications, and supports recovery—physically and emotionally.

Read More

Bee Stings & EpiPens: A Babysitter’s Guide to Life-Threatening Allergies

Bee stings can turn serious fast—especially if the child you’re babysitting has allergies. This guide teaches babysitters how to spot anaphylaxis, safely use an EpiPen, and stay calm in emergencies. At Delta Emergency Support Training, our Red Cross Babysitter Course includes hands-on EpiPen and first aid training—because when you’re babysitting, knowing what to do makes all the difference.

By Delta Emergency Support Training | In Partnership with Red Cross Babysitter Training

When you’re babysitting, you’re responsible for more than just keeping kids entertained—you’re also their first line of defense in an emergency. One common but serious situation babysitters may face is a bee sting that leads to a severe allergic reaction, called anaphylaxis.

This guide will help you understand how to recognize an allergic reaction, treat bee stings, and confidently use an EpiPen—a life-saving tool in a high-stress moment.

🐝 Bee Stings: First Aid Basics

Most bee stings are just a painful annoyance—but in children with allergies, they can be dangerous. Here’s what to do right away:

🩹 If a Child is Stung by a Bee:

  1. Stay calm and help the child stay still.

  2. Remove the stinger quickly—scrape it out with a flat edge like a credit card.
    🚫 Do not use tweezers or squeeze the stinger—it can inject more venom.

  3. Wash the area with soap and water.

  4. Apply a cold compress to reduce swelling and discomfort.

  5. Watch for signs of an allergic reaction over the next 15–30 minutes.

🚨 What Is Anaphylaxis?

Anaphylaxis is a severe, fast-moving allergic reaction that can affect breathing, circulation, and other body systems. It’s a medical emergency that requires immediate action.

⚠️ Common Triggers Include:

  • Bee or wasp stings

  • Peanuts, nuts, shellfish, milk, eggs

  • Medications

  • Latex

⚠️ Signs of Anaphylaxis

Watch for one or more of these symptoms, especially if they appear within minutes of a sting or exposure to a known allergen:

  • Trouble breathing (wheezing, coughing, gasping)

  • Swelling of the lips, face, throat, or tongue

    🔴 Tongue swelling is one of the most dangerous symptoms—it can block the airway

  • Hives, redness, or itching of the skin

  • Vomiting, diarrhea, or severe stomach cramps

  • Dizziness, fainting, or confusion

  • Child says they feel like something bad is happening

🧠 Important: Anaphylaxis can come in waves. A child might improve briefly, then get worse again. Never delay treatment.

💉 How to Use an EpiPen (Epinephrine Auto-Injector)

If the child has a known allergy or develops symptoms of anaphylaxis after a sting or exposure:

✅ Step-by-Step: EpiPen Use

  1. Use the EpiPen immediately.
    Early epinephrine is the best way to stop the reaction.

  2. Call 9-1-1 immediately after using the EpiPen.
    Even if the child looks better, they may need multiple doses. EMS must assess them.

  3. Administer the EpiPen:

    • Remove the blue safety cap ("blue to the sky").

    • Hold the pen in your fist, orange tip pointing down. (“orange to the thigh”

    • Push the orange tip firmly into the outer thigh (can go through clothing).

    • Hold for 10 seconds.

    • Remove and massage the injection site for 30 seconds.

  4. Stay with the child and monitor their condition.

    • If they’re having trouble breathing, keep them upright.

    • If unconscious or vomiting, turn them on their side to protect the airway.

  5. Do not reuse the EpiPen.
    It is a one-time-use device. If symptoms return and a second pen is available.

👶 Babysitter Safety & Preparedness Tips

  • Ask parents about allergies before they leave.

  • Know where the EpiPen is and check the expiry date.

  • Review instructions with parents before they leave.

  • Always call 911 after using an EpiPen—don’t wait.

  • Stay calm—you’ve been trained, and your response can save a life.

🎓 EpiPen Training Is Included in Our Babysitter Course!

At Delta Emergency Support Training, we don’t just teach games and diaper changes—we teach lifesaving skills. Our Red Cross Babysitting Course includes a first aid component, where babysitters learn how to:

  • Recognize anaphylaxis

  • Use an EpiPen correctly and confidently

  • Respond to bee stings, food allergies, and medical emergencies

  • Stay calm under pressure and take control of the situation

We train babysitters to be ready—not just helpful.

🧠 After the Emergency

Once EMS has arrived or the parents return:

  • Tell them exactly what happened and when you used the EpiPen

  • Take time to debrief with an adult or your own parent—emergencies can be stressful

✅ Final Reminders

  • Always ask about allergies

  • Always locate the EpiPen

  • Always call 911 after EpiPen use

  • Always take every reaction seriously—even “mild” ones can become severe fast

📞 Want to Learn More?
Ready to become a confident, Red Cross–trained babysitter?
Sign up for our next Babysitting & First Aid Course at Delta Emergency Support Training.
Because you’re more than a babysitter—you’re someone’s hero in the making.

Read More
Alberta, 911, Awareness, Backcountry, Canada, First Aid Kumari Malhotra Alberta, 911, Awareness, Backcountry, Canada, First Aid Kumari Malhotra

Venomous Snake Bites in Canada: What You Need to Know & Do - First Aid Edition

Venomous snake bites are rare in Canada—but when they happen, knowing how to respond is crucial. From identifying rattlesnakes to administering Red Cross-approved first aid, this guide covers everything you need to stay safe outdoors.

Canada isn’t typically known for dangerous reptiles, but if you hike in BC, camp in Ontario, or explore the Prairies, you might just encounter one of our country’s three venomous snakes. While bites are rare, understanding how to identify venomous snakes, how to respond safely, and what first aid steps to take is essential.

At Delta Emergency Support Training, we prepare Canadians for real-life emergencies—including those that happen far from a hospital. Here’s your complete guide to snake bite prevention, identification, and treatment.

🇨🇦 Venomous Snakes in Canada

Canada is home to three native venomous snake species, all of which are rattlesnakes:

1. Eastern Massasauga Rattlesnake

  • Location: Ontario (Bruce Peninsula, Georgian Bay, Muskoka)

  • Canada’s only venomous snake in the East

  • Generally shy and avoids humans

2. Prairie Rattlesnake

  • Location: Southern Alberta and parts of Saskatchewan

  • Found in dry grasslands and badlands

  • More active in warmer months

3. Western Rattlesnake

  • Location: Southern British Columbia, especially the Okanagan Valley

  • Prefers rocky terrain and dry slopes

🐾 How to Tell if a Snake is Venomous

While identifying a snake in the wild can be difficult, here are common traits of venomous rattlesnakes in Canada:

  • Triangular-shaped head

  • Vertical (slit-like) pupils

  • Thick body with blotchy patterns

  • A rattle on the tail (but sometimes broken or not used)

  • Shaking or buzzing sound when threatened

Be cautious—some non-venomous snakes mimic rattlers by vibrating their tails in leaves.

🩹 First Aid for Snake Bites

All suspected snake bites should be treated as medical emergencies, even if the snake isn’t identified.

✅ What to Do Immediately

  1. Move the person to safety (away from the snake).

  2. Keep them calm—movement and panic can increase venom circulation.

  3. Call 911 immediately.

  4. Remove tight items like rings, bracelets, or watches from the affected limb.

  5. Have them lie down with the bitten limb at or slightly below heart level.

  6. Apply a clean, dry dressing to the bite.

  7. Mark the edge of swelling with a pen and track it over time.

❌ What NOT to Do

  • Do not cut the wound or try to suck out the venom.

  • Do not apply a tourniquet.

  • Do not apply ice or immerse the bite in water.

  • Do not give the person alcohol or caffeine.

  • Do not attempt to capture or kill the snake.

🧬 What Does Snake Venom Do?

Rattlesnake venom is a hemotoxin, which means it can damage tissue, affect blood clotting, and cause intense swelling.

Symptoms may include:

  • Severe pain at the bite site

  • Rapid swelling or bruising

  • Dizziness or nausea

  • Weakness or fainting

  • Difficulty breathing (rare, but serious)

In rare cases, snake bites can lead to shock or even death if untreated.

🗺️ Prevention Tips by Region

Ontario (Massasauga)

  • Stay on designated trails

  • Avoid tall grass and rocky ledges

  • Wear boots and long pants

  • Listen for rattling sounds

Alberta & Saskatchewan (Prairie Rattlesnake)

  • Step carefully in dry, grassy areas

  • Keep pets on a leash

  • Watch where you sit or place your hands

British Columbia (Western Rattlesnake)

  • Avoid rocky hillsides and dry scrub

  • Don’t walk barefoot in wild areas

  • Use a flashlight when hiking at night

General Prevention:

  • Do not approach or handle any snake

  • Keep food sealed and your campsite clean

  • Hike with a buddy

  • Stay alert and educate children on snake safety

🧠 Final Takeaway

Although snake bites in Canada are rare, they do happen—and when they do, quick, calm, and correct first aid can make all the difference. Our native venomous snakes are not aggressive, and most bites occur when they are accidentally stepped on or provoked.

Knowing the signs of a venomous snake, understanding how to avoid dangerous situations, and being ready to act can help keep you—and others—safe.

At Delta Emergency Support Training, we teach first aid skills that prepare you for real emergencies, whether in your home, workplace, or the backcountry. Our courses include Standard First Aid, Advanced First Aid/EMR, and Basic Life Support.

🩺 Ready to be prepared for anything? Train with us and gain the confidence to respond.

Read More

When the Air Turns Hazardous: Protecting Families During Canada’s 2025 Wildfire Smoke Crisis

Canada’s 2025 wildfire season has brought hazardous air—and with it, serious health risks. This guide equips families and caregivers with practical advice: from setting up a clean room and using N95 masks to monitoring air quality and recognizing smoke-induced illness.

Wildfire season in Canada has been worsened by heat, dry conditions, and climate change—with over 1,985 active firesburning nearly 3.9 million hectares as of June 16, 2025. The result? Widespread "very unhealthy" to "hazardous" air across provinces and even beyond—affecting children, people with respiratory conditions, seniors, and other vulnerable groups.

Understanding Canada’s Air Quality Health Index (AQHI)

In Canada, we don’t use the U.S.-style AQI. Instead, we use the Air Quality Health Index (AQHI) to tell us how the air we breathe affects our health on a scale from 1 to 10+, with higher numbers indicating greater health risks.

How the AQHI Works

AQHI ValueHealth RiskAt-Risk PopulationGeneral Population1–3LowIdeal conditions for outdoor activities.Ideal conditions for outdoor activities.4–6ModerateConsider reducing or rescheduling strenuous activities outdoors.No need to modify usual activities unless symptoms occur.7–10HighReduce or avoid strenuous activities outdoors.Consider reducing strenuous outdoor activity.10+Very HighAvoid all physical outdoor activity. Stay indoors.Reduce or reschedule strenuous outdoor activity.

At-Risk Populations include:

  • Children and infants

  • Seniors

  • People with asthma, heart conditions, or other chronic illnesses

  • Pregnant individuals

🌫️ What Does This Mean for Families?

  • 1–3 (Low): Great time for park visits, walks, or outdoor play.

  • 4–6 (Moderate): Children and people with asthma should limit high-energy outdoor activities.

  • 7–10 (High): Everyone—especially vulnerable groups—should stay indoors and use air filtration.

  • 10+ (Very High): Outdoor exposure can cause serious health effects. Stay inside, seal your home, and consider relocating temporarily if the smoke persists.

📲 Where to Check AQHI

Stay informed using trusted Canadian sources:

  • 🔗 Environment Canada – AQHI Main Page

  • 🔗 AQHI by Province (select your region)

  • Mobile Apps: WeatherCAN, AQHI Canada, or your local weather app

🌫️ Why Wildfire Smoke is Dangerous

  1. Fine Particulate Matter (PM2.5):

    • These tiny particles penetrate deep into the lungs and bloodstream.

    • In 2025, several areas recorded PM2.5 levels over 150 µg/m³—more than 6x the WHO's safe 24-hour limit.

    • US studies confirm that smoke PM2.5 from wildfires can be up to 10x more harmful than typical pollution.

  2. Health Effects:
    Exposure can cause:

    • Immediate symptoms: coughing, wheezing, eye irritation, chest tightness.

    • Aggravation of asthma, COPD, bronchitis, and heart disease.

    • Long-term risks: strokes, heart attacks, developmental issues in children, pregnancy complications.

  3. Canada’s Sharp Increase:

    • In Prairie provinces, air quality reached “Unhealthy to Very Unhealthy” levels in early.

    • Cities like Toronto, Ottawa, and Montreal had some of the worst AQIs globally during June 5–6.

👶 Who’s Most at Risk?

  • Infants and young children with developing lungs.

  • Seniors, particularly those with cardiovascular/respiratory conditions.

  • Individuals with asthma, COPD, heart disease, or compromised immunity.

  • Pregnant women - smoke exposure has been linked to preterm births.

  • Those in low-income or remote communities with limited access to clean air resources.

🛡️ How to Protect Your Family

1. Stay Inside & Seal Your Home

  • Keep doors and windows closed; run HVAC on recirculation.

  • Create a DIY clean room by sealing off one area and running a HEPA filter air purifier.

2. Limit Outdoor Exposure

  • Avoid strenuous outdoor activity.

  • For necessary outdoor time, wear a properly fitted N95 mask—cloth masks don't protect against PM2.5

3. Monitor Air Quality

  • Use apps or websites like FireSmoke.ca, AirNow, or AQI.in.

  • Follow local advisories—on very poor days, avoid outdoor time completely

4. Stay Hydrated & Medically Prepared

  • Children and older adults should drink water regularly.

  • Keep inhalers, medications, and emergency contacts handy.

5. Safe Indoor Air Strategies

  • Continue using air purifiers, keep HVAC maintenance current, and avoid indoor activities that pollute air (like smoking or burning candles).

6. Know the Signs of Smoke-Related Illness

Be alert for:

  • Persistent coughing, wheezing, shortness of breath

  • Chest pain, dizziness, fatigue

  • Severe symptoms like bluish lips, confusion, or altered consciousness – seek medical help immediately.

7. When to Seek Help

Call emergency services if someone experiences:

  • Trouble breathing or chest pain

  • Severe allergic reactions (e.g. from ash or irritants)

  • Symptoms of stroke or heart attack

✅ Bonus Tips for Parents & Caregivers

  • Plan indoor activities: crafts, reading, games on high-risk days.

  • Reduce exposure to dust and pollen indoors—vacuum with HEPA filters.

  • If possible, relocate temporarily to cleaner-air areas.

  • Educate older children about the importance of masks and staying indoors.

Final Takeaway

The 2025 wildfire season has shown us air quality can deteriorate rapidly—even hundreds of kilometers away from the flames. For vulnerable families, proactive planning saves lives.

By staying informed and implementing air protection measures, you can shield your loved ones from the hidden threat of wildfire smoke.

Read More

From First Aid to Fireline: Your Path to Wildland Deployment

Canada’s wildfire seasons are getting more intense—so is the demand for skilled wildland firefighters. Learn what the job involves, the certifications you need (like S-100, S-185, and EMR), and how Delta Emergency Support Training helps future responders build a solid foundation in Red Cross-certified Advanced First Aid and Emergency Medical Responder programs.

Into the Flames: Exploring Wildland Firefighting in Canada

Wildland firefighter clearing brush

Canada’s Increasing Need for Wildland Firefighters

With fire seasons growing longer and more intense across Canada, wildland firefighters are more essential than ever. From British Columbia’s dry interior to the boreal forests of Alberta and Northern Ontario, fire crews are called on every summer to battle large, unpredictable blazes that threaten ecosystems, homes, and entire communities.

If you're working toward becoming a first responder, Emergency Medical Responder (EMR), or firefighter, wildland firefighting can be a powerful way to gain experience, build resilience, and serve when it matters most.

What Is Wildland Firefighting?

Wildland firefighting involves controlling and suppressing fires that occur in natural areas—forests, grasslands, or remote terrain. In contrast to urban or structural firefighting, wildland firefighters operate in rugged, undeveloped areas, often far from roads, with limited access to resources.

You might be:

  • Building fire guards (hand-dug trenches to stop fire spread)

  • Conducting controlled burns

  • Monitoring hot spots for reignition

  • Assisting with helicopter bucket drops or pump setups

  • Supporting evacuations of nearby communities

Canadian Training and Requirements

If you're interested in working as a wildland firefighter in Canada, here are the typical requirements:

Required Certifications:

  • S-100: Basic Fire Suppression and Safety

  • S-185: Fire Entrapment Avoidance

  • ICS-100: Introduction to Incident Command System

  • Standard First Aid, Advanced First Aid, or EMR (depending on the role)

🏋️ Fitness Testing:

Many agencies require a physical fitness test (like the WFX-FIT), which includes:

  • Carrying a 25 kg pump

  • Hose pack hikes

  • Grip strength and balance challenges

🧰 Additional Skills That Help:

  • Chainsaw safety certification

  • WHMIS (Workplace Hazardous Materials)

  • Radio communication skills

  • Class 4 or air brake license (for driving fire vehicles)

In Canada, wildland firefighters are employed by:

  • Provincial agencies (e.g., BC Wildfire Service, Alberta Wildfire, Ontario Ministry of Natural Resources and Forestry)

  • Private contractors

  • Federal emergency response teams

Why EMR and AFA Matter on the Fireline

Medical incidents on wildfire deployments are more common than many expect. Team members may face:

  • Heat exhaustion or heat stroke

  • Dehydration or altitude sickness

  • Burns or smoke inhalation

  • Trauma from slips, trips, or falling debris

  • Insect stings or allergic reactions

Having a certified Emergency Medical Responder or someone with Advanced First Aid training on a crew means faster, more effective care until paramedics or air support can arrive. It's also a valuable asset that can make your application stand out.

What Deployment Is Really Like

Canadian wildland fire deployments can last days or even weeks, especially during peak season (June to August). Expect:

  • Camp life (tents, cots, and basic food services)

  • 12+ hour shifts

  • Variable weather (extreme heat, rain, or smoke)

  • Team living — camaraderie and close-knit bonds are key

The work is physically tough, but the environment is incredibly rewarding—many describe it as life-changing.

What to Pack on a Deployment

Most agencies provide essential PPE (boots, helmet, Nomex gear), but your go-bag should include:

  • High-energy snacks

  • Extra socks

  • Lightweight sleeping gear

  • Rehydration tablets or electrolytes

  • Small first aid kit

  • Bug spray and sunscreen

Mental Resilience Is Key

The mental strain of extended deployments, long shifts, and witnessing environmental damage can take its toll. Fireline crews rely heavily on:

  • Peer support

  • Strong leadership

  • Daily briefings and debriefings

  • Mental health resources when needed

How to Get Started in Canada

  1. Take an Advanced First Aid or EMR course to meet hiring and deployment requirements.

  2. Get your S-100 and S-185 certifications (typically offered through wildfire agencies or training providers).

  3. Train physically for endurance, balance, and strength.

  4. Apply to provincial wildfire services or contractors in early spring (applications often open between January and March).

Why Wildland Firefighting Is a Great Step Toward a Fire Service Career

Many municipal firefighters start with wildland contracts. It helps build:

  • Teamwork under pressure

  • Medical and safety experience

  • Exposure to command structures (ICS)

  • Mental and physical readiness for emergency work

🔥 Train With Delta Emergency Support Training

At Delta Emergency Support Training, we support future wildland firefighters with Red Cross-certified Advanced First Aid and EMR training—delivered by real paramedics and firefighters who know what the job demands. If you’re serious about joining the fire service, we’ll help you start strong and stay prepared.

Ready to begin your career on the front lines of Canada’s wildfires? Join Team Delta and let’s get started.

Read More

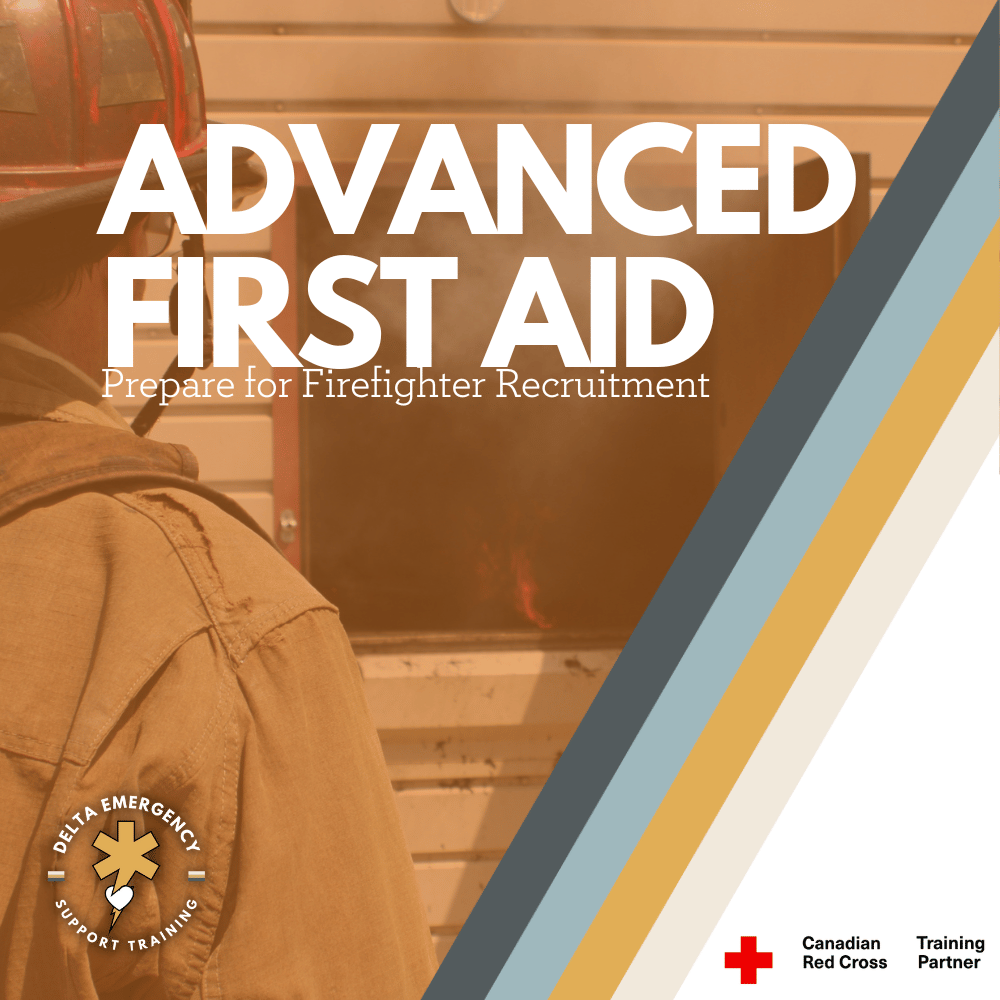
Why Advanced First Aid Is a Must-Have for Future Firefighters: Prepare for Firefighter Recruitment with the Right Medical Training

Thinking of applying to a fire department? Start with Advanced First Aid. Learn how Red Cross-certified training builds your emergency response skills and prepares you for a first responder career.

Firefighter in training.

If you're thinking about becoming a firefighter in Canada, you already know it's more than just battling flames. Firefighters are often the first on scene at medical emergencies, and in many departments, having Advanced First Aid certification is not just helpful—it’s required. As recruitment becomes more competitive, one of the best ways to stand out is to complete your Advanced First Aid training before you apply.

Why Medical Training Matters for Firefighters

Modern firefighting isn’t just fire suppression—it's rescue, emergency medical care, and community safety. Many calls involve:

  • Motor vehicle collisions

  • Cardiac arrests

  • Trauma from falls or accidents

  • Overdoses and breathing emergencies

In these cases, the ability to perform high-quality medical support can mean the difference between life and death.

What You’ll Learn in Advanced First Aid

Advanced First Aid (AFA), based on the Canadian Red Cross Emergency Care for Professional Responders, teaches you skills like:

  • Patient assessment and scene safety

  • Airway management and oxygen administration

  • CPR/AED for all age groups

  • Spinal motion restriction

  • Wound care, bleeding control, and shock management

  • Triage and emergency scenario response

This course gives you the tools to act confidently in real emergencies—a critical part of your firefighter toolkit.

Stand Out in the Hiring Process

Many fire departments prefer or require AFA (or higher-level training) as part of their application process. Having it shows that:

  • You’re serious about the job

  • You understand the physical and mental demands

  • You can contribute on Day 1

It also prepares you for future paramedic training or Primary Care Paramedic (PCP) certification, which many firefighters go on to pursue.

Train with Real Firefighters and Paramedics

At Delta Emergency Support Training, our instructors are experienced firefighters and paramedics who know exactly what departments are looking for. We don’t just teach you how to pass—we prepare you for what it’s really like out in the field.

What’s Next After AFA?

If you're planning your next steps, here’s a path many successful applicants follow:

  1. Complete Advanced First Aid

  2. Start physical fitness prep (like CPAT)

  3. Take a Firefighter Pre-Academy Program or Fire School

  4. Prepare for interviews and aptitude testing

  5. Apply

Final Thoughts

Getting your Advanced First Aid certification isn’t just checking a box—it’s building your confidence and skills to save lives. Whether you’re planning to fight fires in a city or on the front lines of a wildfire, your first aid skills are your foundation.

Want to become a firefighter? Start here. Join one of our Red Cross certified AFA courses and get trained by the professionals who do this work every day.

Read More

Heat Exhaustion, Heat Stroke, and Dehydration: A Guide for Professional Responders

With summer temperatures rising, professional responders including EMRs and AFAs must be prepared to handle heat-related emergencies. This detailed guide follows Red Cross standards to help EMS providers prevent, recognize, and effectively manage heat exhaustion, heat stroke, dehydration, and sunburn, ensuring patient safety during hot weather.

It’s May, and as the weather warms up and summer approaches, the risk of heat-related emergencies naturally increases. Longer, hotter days mean more time outdoors, higher physical activity levels, and greater exposure to the sun and heat. For professional responders—including Emergency Medical Responders (EMRs) and Advanced First Aiders (AFAs) working within EMS—being prepared to prevent and manage heat-related illnesses is essential.

Understanding how heat impacts the body and knowing how to recognize and treat conditions like heat exhaustion, heat stroke, dehydration, and sunburn can make a critical difference in patient outcomes during these warmer months. This guide follows Red Cross Emergency Care for Professional Responders standards to help you deliver confident, effective care when it matters most.

Understanding Heat-Related Emergencies

The body maintains a core temperature near 37°C (98.6°F). When exposed to high heat and humidity, or during exertion, the body’s cooling system can fail, causing heat-related illnesses:

Heat Cramps

  • Muscle spasms from electrolyte loss during heavy sweating.

Heat Exhaustion

  • Result of fluid and salt depletion; symptoms include weakness, heavy sweating, dizziness, nausea, pale skin, rapid pulse.

Heat Stroke (Medical Emergency)

  • Body temperature above 40°C (104°F), with failure to regulate heat. Symptoms include confusion, seizures, hot dry or moist skin, and unconsciousness. Immediate EMS intervention is critical.

Dehydration

  • Inadequate fluid replacement causing thirst, dry mouth, fatigue, and dizziness.

Sunburn

  • UV radiation damage to skin ranging from redness to blistering.

Risk Factors for Heat Emergencies

  • Hot and humid environments

  • Intense physical activity

  • Inadequate acclimatization

  • Heavy or restrictive clothing

  • Certain medications and health conditions

  • Extremes of age (young children, elderly)

  • Alcohol use

Prevention Strategies (Red Cross Recommendations)

Hydration

  • Encourage frequent water intake; avoid diuretics like caffeine and alcohol.

Appropriate Clothing and Shade

  • Wear light, breathable fabrics and protective hats.

  • Seek shade during peak sun hours (10 a.m. to 4 p.m.).

Activity Adjustments

  • Schedule exertion for cooler times; take regular rest breaks.

Sunscreen

  • Use broad-spectrum SPF 30+ and reapply every two hours.

Monitor Vulnerable Individuals

  • Check on children, elderly, and those with medical conditions regularly.

EMS First Aid: Managing Heat Emergencies

Heat Cramps

  • Move the patient to a cool environment.

  • Provide fluids with electrolytes if tolerated.

  • Gently stretch cramped muscles.

Heat Exhaustion

  • Move patient to shade or cool area.

  • Loosen clothing and apply cool compresses.

  • Administer oral fluids cautiously.

  • Monitor airway, breathing, and circulation (ABCs).

  • Prepare for transport if no improvement.

Heat Stroke (Emergency Care)

  • Call advanced medical services immediately.

  • Move patient to cool environment, remove excess clothing.

  • Apply rapid cooling: wet cloths, fans, cool water immersion if safe.

  • Monitor vital signs closely; be ready to provide advanced life support.

  • Do not give fluids if patient is unconscious or vomiting.

Dehydration

  • Provide oral rehydration solutions if alert.

  • Transport if severe symptoms or unable to tolerate fluids.

Sunburn

  • Remove from sun exposure.

  • Apply cool compresses and moisturizing lotions.

  • Monitor for severe reactions requiring medical care.

When to Escalate Care

  • Altered mental status or seizures

  • Unresponsiveness or unconsciousness

  • Persistent vomiting or inability to take fluids

  • Signs of shock

  • Extensive sunburn or blistering

Conclusion

As EMS providers—including EMRs and AFAs—adhering to Red Cross Emergency Care for Professional Responders standards is essential for effective summer care. Preventing heat emergencies through education and early intervention can save lives.

Stay vigilant for signs of heat-related illness, prioritize rapid cooling and hydration, and always escalate care when indicated. Your knowledge and readiness make all the difference.

Want to enhance your EMS skills with Red Cross–approved training? Our instructors are experienced paramedics and firefighters who provide hands-on, practical Advanced First Aid and EMR courses designed to prepare you for real-world emergencies.

Read More
Alberta, Advanced First Aid, 911, EMR, Home Safety Kumari Malhotra Alberta, Advanced First Aid, 911, EMR, Home Safety Kumari Malhotra

Invisible Danger: Red Cross Guide to CO Poisoning Care for AFA + EMR

Aligned with Red Cross standards, this guide prepares Emergency Medical Responders and Advanced First Aiders to recognize and manage carbon monoxide poisoning effectively—from symptoms to scene safety and oxygen treatment.

Carbon monoxide (CO) is a silent killer. As an Advanced First Aider or Emergency Medical Responder (EMR), you're often the first healthcare contact a patient receives. Early recognition and prompt intervention in CO poisoning are crucial and can save lives—especially in settings where access to definitive care may be delayed.

This blog outlines the causes, signs and symptoms, pathophysiology, field assessment, and pre-hospital care strategies relevant to both Advanced First Aiders and EMRs.

What Is Carbon Monoxide?

Carbon monoxide is a colorless, odorless, tasteless gas produced by the incomplete combustion of carbon-based fuels, such as:

  • Gasoline

  • Natural gas

  • Wood

  • Coal

  • Propane

It is often found in:

  • Malfunctioning furnaces and heaters

  • Gas-powered generators

  • Indoor barbecuing or grilling

  • Exhaust from vehicles in enclosed spaces

  • Fires (house, structure, or wildland)

Because CO is undetectable without special equipment, individuals can be poisoned without any obvious warning signs.

Why Is It Dangerous?

CO binds to hemoglobin in red blood cells with 200 to 250 times greater affinity than oxygen, forming carboxyhemoglobin (COHb). This reduces the amount of oxygen that can be transported through the bloodstream and delivered to vital organs. As a result, even small exposures can lead to significant tissue hypoxia, especially in high-demand organs like the brain and heart.

Common Risk Scenarios for First Responders

You may encounter CO poisoning in any of the following situations:

  • Residential emergencies involving fuel-burning appliances

  • People found unconscious in a running vehicle (especially in enclosed garages)

  • Victims rescued from structure fires or enclosed-space fires

  • Use of charcoal grills or fuel heaters indoors

  • Power outages leading to indoor generator use

Your scene awareness and understanding of environmental risks are essential in raising suspicion early.

Signs and Symptoms of CO Poisoning

Mild to Moderate Exposure

  • Headache (often described as dull or pressure-like)

  • Dizziness or lightheadedness

  • Nausea and vomiting

  • Fatigue or weakness

  • Confusion or difficulty concentrating

  • Shortness of breath with minimal exertion

Severe Exposure

  • Altered level of consciousness or unresponsiveness

  • Chest pain (especially in individuals with cardiac history)

  • Tachycardia, hypotension

  • Seizures

  • Loss of coordination or balance

  • Respiratory distress

  • Coma or death

Children, elderly individuals, and pregnant patients are particularly vulnerable, and may deteriorate more quickly.

What About Pulse Oximeter (SpO₂) Readings?

This is a critical point for both EMRs and Advanced First Aiders:

Pulse oximeters are unreliable in carbon monoxide poisoning.

Why?

Pulse oximeters measure the percentage of hemoglobin saturated with something, but they cannot distinguish between:

  • Oxyhemoglobin (HbO₂): hemoglobin bound with oxygen

  • Carboxyhemoglobin (COHb): hemoglobin bound with carbon monoxide

Since COHb absorbs light in a similar way to HbO₂, the device will often display a falsely normal or high oxygen saturation (SpO₂), even if the patient is severely hypoxic.

Example:

A patient may have:

  • A pulse oximeter reading of 98–100%

  • But a COHb level of 30–40%, meaning oxygen delivery is critically impaired

Key Takeaway

Do not rely on SpO₂ readings in suspected carbon monoxide poisoning.

Instead:

  • Focus on the scene context and presenting symptoms

  • Administer high-flow oxygen regardless of oximeter reading

  • Prioritize transport to definitive medical care

Pre-Hospital Management

Your early actions can dramatically improve outcomes. Here's what to do:

1. Ensure Scene Safety

Before entering a potentially contaminated area, ensure it is safe. Never enter confined spaces without proper PPE and backup support.

2. Remove the Patient from Exposure

Move the patient to fresh air immediately, but only if it is safe to do so.

3. Administer High-Flow Oxygen

  • Use a non-rebreather mask at 15 L/min

  • Oxygen accelerates the dissociation of carbon monoxide from hemoglobin:

    • Room air: COHb half-life ~5 hours

    • 100% oxygen: COHb half-life ~1.5 hours

    • Hyperbaric oxygen: COHb half-life ~30 minutes

4. Monitor Vital Signs

  • Expect signs of hypoxia, even with normal SpO₂

  • Monitor for respiratory distress, altered LOC, or shock

5. Rapid Transport

Any symptomatic patient requires prompt transfer to advanced medical care, especially if:

  • They have altered mental status

  • Are pregnant

  • Exhibit neurological or cardiac symptoms

  • Have been exposed for a prolonged period

Notify receiving EMS crews or hospitals of the potential CO exposure.

Special Considerations

Pregnant Patients

Fetal hemoglobin binds CO more readily than adult hemoglobin. CO exposure poses serious risks to the fetus, even if the mother appears only mildly symptomatic.

Pediatric Patients

Children may develop symptoms more quickly due to higher metabolic rates and smaller reserves.

Multiple Casualties

If several people in the same environment report similar symptoms (e.g., headache, dizziness), strongly suspect environmental CO exposure. Treat all individuals as potentially poisoned, even if some are asymptomatic.

Field Clues for CO Exposure

Use this quick field checklist:

  • Is there a fuel-burning device involved?

  • Are multiple people feeling sick in the same location?

  • Do symptoms improve once outdoors?

  • Is there poor ventilation or signs of combustion indoors?

  • Does the patient seem "too sick" for their SpO₂ reading?

If yes to any of the above: suspect carbon monoxide poisoning and treat accordingly.

Quick Reference Table: SpO₂ in CO Poisoning

FactorNormal PatientCO Poisoning PatientPulse Oximeter (SpO₂)97–100%97–100% (falsely normal)Actual Oxygen DeliveryAdequateCritically impairedAppropriate ActionMonitorHigh-flow O₂ + transport

Prevention and Education

As a first responder, you also play a vital role in prevention. Encourage the public to:

  • Install and maintain carbon monoxide detectors

  • Keep fuel-burning appliances properly ventilated

  • Never use outdoor cooking equipment indoors

  • Avoid idling vehicles in enclosed spaces

  • Seek medical attention after any CO alarm activation, especially with symptoms

    Carbon monoxide poisoning is a critical medical emergency that demands rapid recognition and decisive care. Both Advanced First Aiders and Emergency Medical Responders must understand that a normal SpO₂ reading doesn’t rule out danger. Situational awareness, oxygen administration, and timely transport are your most effective tools in the field.

    At our training center, we specialize in Advanced First Aid and EMR education, equipping students with the real-world skills needed to respond confidently to medical emergencies—including CO poisoning. If you're interested in becoming a firefighter or pursuing a career in emergency services, our programs are a strong first step.

    Many of our instructors are experienced paramedics and active-duty firefighters, bringing first-hand insights from the front lines directly into the classroom. You'll learn from professionals who live what they teach—preparing you not only to pass your course but to thrive in high-stakes environments.

    Ready to take the next step? Join a course that goes beyond the textbook.

Read More

Scene Assessment for AFA & EMR: A Step-by-Step Guide

Discover how first responders assess scenes in seconds using real tools like HEMPPA, PWCATS, and SCORTS. We teach it in our EMR course — with real-world scenarios to make it stick.

In emergency medical care, scene assessment is your first critical move. It ensures your safety, guides your approach to the patient, and sets the foundation for triage, treatment, and transport. Whether you’re first on the scene or part of a larger response team, a systematic assessment process helps you stay focused and effective.

🚨 Step 1: Scene Overview – HEMPPA

The acronym HEMPPA helps responders quickly assess for overall scene safety and initial priorities:

H – Hazards

  • Look for anything that could harm you, the patient, or bystanders.

  • Examples: traffic, fire, electricity, gas, violence, sharp objects.

  • Why it matters: A dead rescuer helps no one. Always protect yourself first.

E – Environment

  • Assess conditions like weather, lighting, terrain, and location access.

  • Slippery roads, tight spaces, or poor visibility can impact patient care and evacuation.

M – Mechanism of Injury (MOI) / Nature of Illness (NOI)

  • MOI: What caused the injury? (e.g., fall from height, motor vehicle crash)

  • NOI: For medical calls, what’s wrong? (e.g., chest pain, shortness of breath)

P – Patients (Number)

  • Are there multiple patients?

  • Call for more resources if needed (e.g., MVC with multiple occupants).

P – PPE (Personal Protective Equipment)

  • Gloves, eye protection, masks — wear what’s appropriate to protect from bodily fluids or contaminants.

A – Additional Resources

  • Fire, police, ALS units, specialized rescue — ask early.

  • Helps control the scene, provide support, or manage large-scale incidents.

🧠 Step 2: What Else Should You Ask or Observe?

Here are key scene-based questions that build context before you even touch the patient:

  • Position of the patient: Supine, seated, slumped, or ejected from vehicle?

  • Witness reports: What did bystanders or family see? Events leading up to the incident?

  • Chief complaint: What is bothering the patient most right now?

  • Age & gender: Helps form medical differentials quickly.

  • Is the patient tracking/responding? (Eye contact, awareness)

  • Skin colour and condition: Pale, cyanotic, flushed? Cool, clammy, hot? Clues for perfusion.

🔤 PWCATS: For Immediate Patient Impressions

PWCATS helps EMRs gather critical info during the primary assessment.

P – Position

  • Are they standing, lying, slumped, or fetal?

  • Can indicate level of distress or unconsciousness.

W – Witnesses

  • Ask what happened, timing, onset of symptoms, seizure activity, etc.

  • Helps reconstruct events and guide priorities.

C – Chief Complaint

  • What’s their main issue? Chest pain, difficulty breathing, pain scale?

  • Directs your initial focus and treatment.

A – Age

  • Children and elderly present differently.

  • Age affects vital signs, resilience, and urgency of care.

T – Tracking (eye contact/alertness)

  • Are they focused? Following your movements?

  • Quick check of neurologic status or altered mental state.

S – Skin (colour, condition, temperature)

  • Pale, cool, clammy = shock.

  • Flushed, hot = fever or heat stroke.

  • Cyanosis (blue lips/nails) = hypoxia.

⚠️ SCORTS: Scene-Specific Red Flags

Use SCORTS to identify serious, time-sensitive conditions or complicating factors:

S – Stridor / SOB (Shortness of Breath)

  • Upper airway obstruction or respiratory distress?

  • High priority for airway intervention or oxygenation.

C – C-Spine

  • Suspect spinal injury if trauma involved (falls, MVCs).

  • Apply manual stabilization early if indicated.

O – Obvious Bleeding

  • Life-threatening external bleeds need immediate control — pressure, tourniquet, or dressing.

R – Rural / Remote

  • Consider access to definitive care, transport time, or need for air medevac.

  • Distance may increase urgency for certain interventions.

T – Time from ER

  • How far are you from advanced care?

  • May influence treatment decisions, especially in critical cases.

S – Stable / Unstable

  • Is the patient deteriorating? ABCs intact?

  • Helps you determine the transport priority and whether to initiate rapid extrication.

🧭 Scene Assessment in Action: Example Workflow

  1. Pull up, pause, and scan: Use HEMPPA.

  2. Approach safely with PPE on.

  3. Identify number of patients, call for help if needed.

  4. Walk up, observe PWCATS.

  5. Start ABC assessment and initiate any urgent interventions.

  6. Consider SCORTS: look for red flags or complicating factors.

  7. Report findings and updates using structured handover (e.g., ISBAR or CHART).

📋 Summary Cheat Sheet

AcronymStands ForPurpose HEMPPA Hazards, Environment, MOI/NOI, Patients, PPE, Additional ResourcesScene safety & setup PWCATSPosition, Witness, Chief Complaint, Age, Tracking, SkinInitial impression & focused questioning SCORTS Stridor/SOB, C-Spine, Obvious Bleeding, Rural, Time from ER, Stability Red flags & transport factors

🧑‍🏫 Learn Scene Assessment with Us

We teach all of this — and more — in our AFA and EMR classes. You'll learn to apply these acronyms like HEMPPA, PWCATS, and SCORTS in realistic emergency scenarios, helping you build the confidence to assess any scene quickly and safely. Scene assessment is one of the most critical skills a first responder can have, and we make sure you understand why it matters — not just in theory, but in action.

Read More

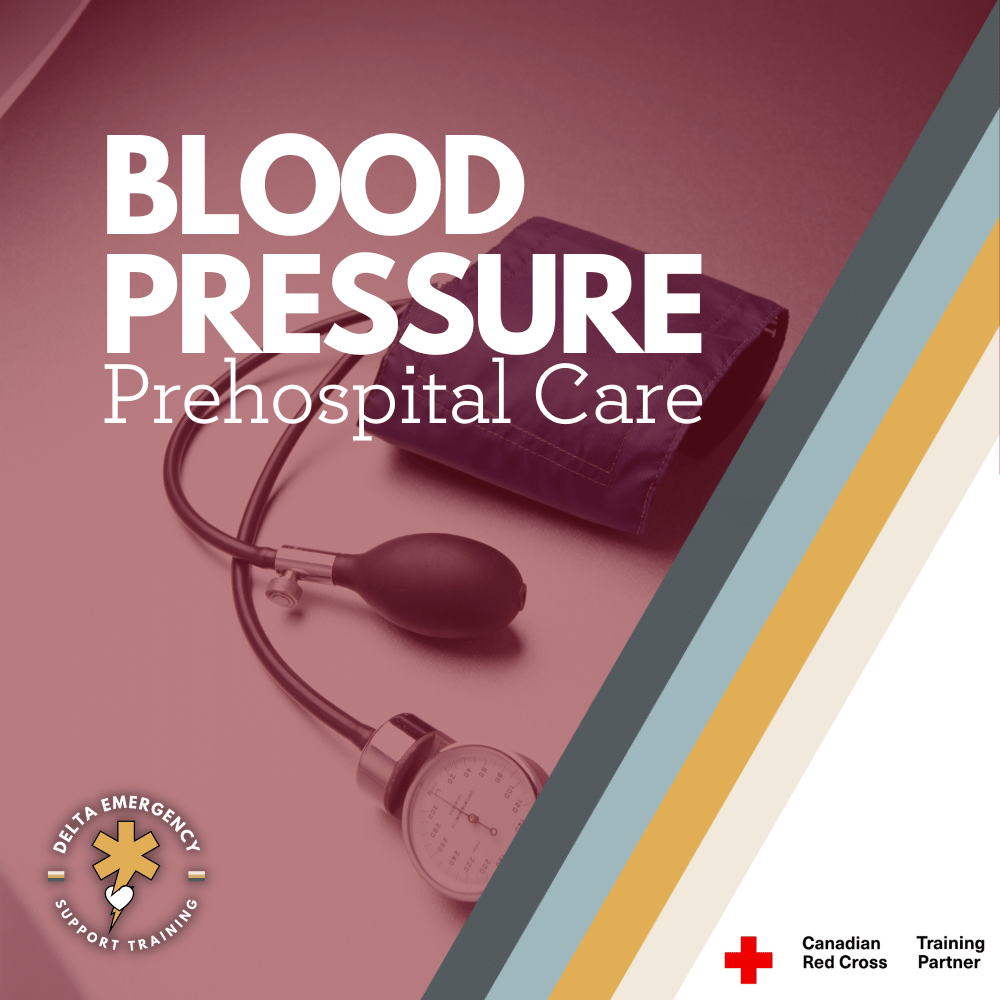
Understanding Blood Pressure: A Critical Guide for Advanced First Aiders & EMRs

Blood pressure isn’t just a number—it’s a key clue to what’s happening inside your patient’s body. Whether it’s shock, stroke, or dehydration, knowing how to take and interpret blood pressure can guide better decisions and faster interventions. This guide walks AFA and EMR students through practical skills, critical signs, and scene-ready tips to sharpen your response.

Blood pressure is one of the most foundational yet powerful tools we have in emergency medical response. For Advanced First Aiders (AFA) and Emergency Medical Responders (EMRs), knowing how to assess and interpret blood pressure can directly influence your patient care decisions and the urgency of interventions.

Whether you're the first responder at a vehicle collision or assisting someone feeling faint at a public event, blood pressure is a window into the circulatory system—and sometimes, the first clue that something critical is happening.

🧠 What Is Blood Pressure, Really?

Blood pressure (BP) measures the force of circulating blood against the artery walls. It reflects two key phases of the heart's cycle:

  • Systolic (top number): The pressure when the heart contracts and pumps blood out.

  • Diastolic (bottom number): The pressure when the heart relaxes and fills with blood.

📊 Standard Ranges (for Adults):

ClassificationSystolicDiastolicNormal90–120 mmHg60–80 mmHgElevated120–129 mmHg<80 mmHgHypertension Stage 1130–139 mmHg80–89 mmHgHypertension Stage 2≥140 mmHg≥90 mmHgHypotension<90 mmHg<60 mmHg

⚠️ Context is everything. A BP of 90/60 might be perfectly normal for one patient, but a sign of decompensated shock in another.

🔍 Why Blood Pressure Is Vital in Prehospital Care

As an AFA or EMR, you rely on vital signs to tell a story. Blood pressure, especially when taken alongside LOC, skin signs, RR, and pulse, can help you:

  • Detect early signs of shock or internal bleeding

  • Monitor for stroke or cardiac complications

  • Differentiate between syncope and seizure

  • Recognize toxic exposure or overdose

  • Identify heat exhaustion or dehydration

  • Understand trends during ongoing assessment

BP is especially important during ongoing monitoring, not just initial assessment.

🛠️ How to Take an Accurate BP (Manual Method)

While digital monitors are useful, manual BP skills are essential for field readiness and clinical accuracy.

✔️ Equipment:

  • Sphygmomanometer (BP cuff)

  • Stethoscope

🧾 Step-by-Step:

  1. Position the patient: Seated or supine with arm supported at heart level.

  2. Wrap the cuff snugly around the upper arm, 2–3 cm above the elbow crease.

  3. Locate the brachial artery and place the stethoscope over it.

  4. Inflate cuff until the pulse is no longer audible (~180–200 mmHg, or 30 above normal).

  5. Slowly deflate the cuff (~2 mmHg/sec).

  6. First sound = Systolic, last sound = Diastolic.

  7. Fully deflate and record the reading with time and side taken (e.g., L arm, 10:05 a.m.).

🔄 Reassess BP every 5 mins for unstable patients, and 10–15 mins for stable ones.

🧠 Interpretation in the Field: What Do Abnormal BPs Tell Us?

⬇️ Low BP (Hypotension)

May indicate:

  • Hemorrhagic or hypovolemic shock

  • Sepsis

  • Dehydration

  • Anaphylaxis

  • Overdose (narcotics, sedatives)

  • Heart failure

Clinical clues:

  • Cool, clammy, pale skin

  • Confusion or altered LOC

  • Weak, thready pulse

  • Increased RR

  • Cap refill >2 seconds

🛑 Action:

  • Lay patient supine

  • Keep warm

  • Provide oxygen (if trained)

  • Activate EMS

  • Monitor vitals and ABCs frequently

⬆️ High BP (Hypertension)

Could indicate:

  • Stroke

  • Head injury

  • Cardiac crisis (e.g., MI)

  • Pain or anxiety

  • Certain toxins or drugs

Clinical clues:

  • Headache

  • Blurred vision

  • Bounding pulse

  • Facial flushing

  • Unequal pupils or confusion

🛑 Action:

  • Keep patient calm and seated

  • Avoid sudden position changes

  • Support ABCs

  • Monitor for neuro signs

  • Rapid transport if stroke is suspected

🛑 Common BP Mistakes to Avoid

  • Cuff too small or too loose = falsely high reading

  • Arm unsupported or above/below heart level = inaccurate reading

  • Talking or moving during reading = unreliable results

  • Only taking one reading = no trend to compare

📎 Always pair BP with a full set of vitals: HR, RR, skin signs, LOC, SpO₂ (if available).

🧰 Practice Tips for AFA/EMR Students

  • Practice BP on real people during calm and active states

  • Use scenario-based learning (e.g., trauma, medical, overdose)

  • Compare manual and digital readings for training purposes

  • Note how BP trends with treatment and patient position

🌡️ BP in Specific Situations

🧓 Elderly:

  • May have higher baseline BPs due to reduced arterial elasticity

  • Monitor for postural hypotension

👶 Children:

  • Use appropriate cuff size

  • Hypotension is a late sign of shock

🤕 Trauma:

  • A falling BP with rising pulse = shock

  • Suspect internal bleeding or volume loss

🧠 Stroke:

  • BP may rise to preserve cerebral perfusion—don’t treat unless trained and authorized

✅ Final Takeaways for First Responders

  • Blood pressure is a critical diagnostic tool, not just a number.

  • Always take it in context with other vitals and the patient’s presentation.

  • Practice often, document clearly, and reassess regularly.

  • Know the red flags and escalate care early if something doesn’t feel right.

Want to sharpen your blood pressure skills?

Join our Advanced First Aid or EMR courses for hands-on practice, real-world scenarios, and guidance from experienced instructors.

Read More