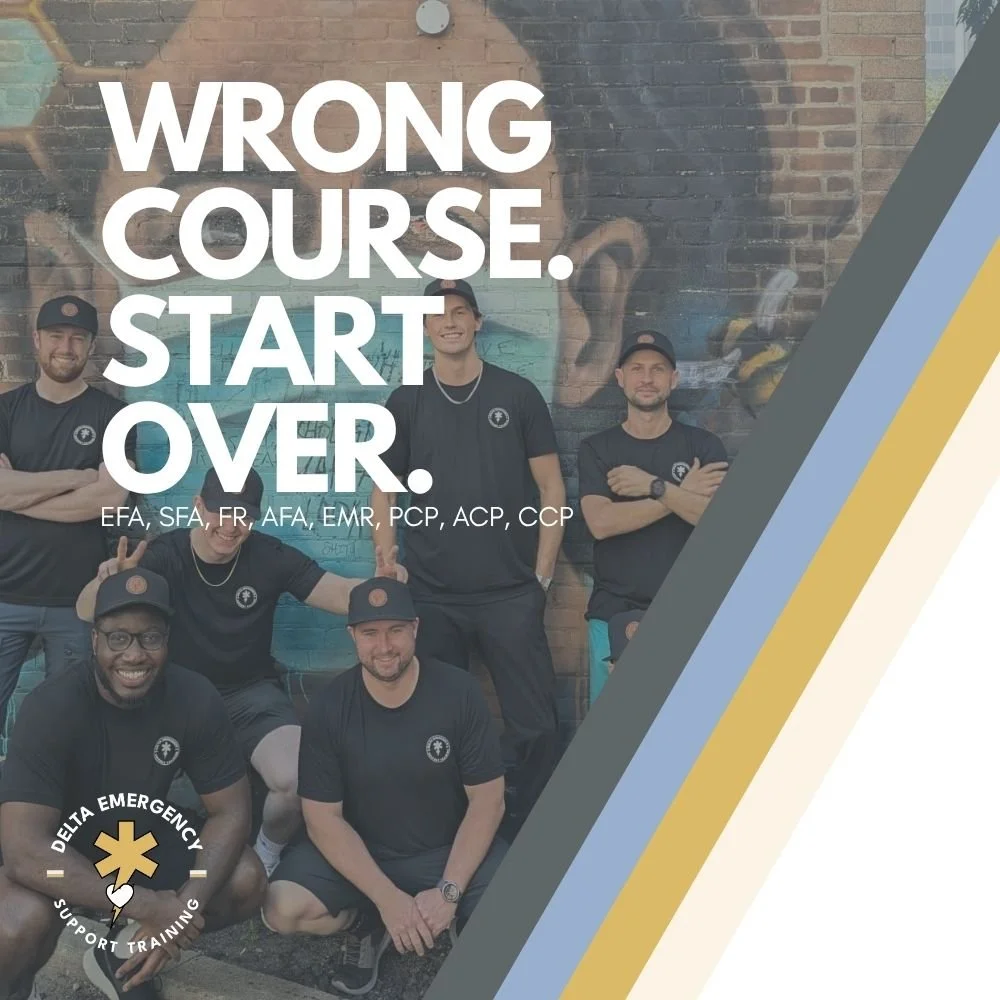
The Delta Dispatch

CFD Application Guide for Aspiring Firefighters

Dreaming of becoming a Calgary firefighter? This guide walks you through the CFD application process, including essential certifications, physical fitness tips, suggested courses, and how Delta Emergency Support Training can help you succeed.

If you’ve ever dreamed of wearing the Calgary Fire Department uniform, you’re not alone. Every year, countless motivated individuals from all walks of life apply to join one of Canada’s most respected firefighting teams. Whether you’re coming off the rigs, working in the trades, or ready for a meaningful career that serves your community, the CFD recruitment process is both challenging and rewarding.

At Delta Emergency Support Training, we’ve helped many students prepare for that next step, and several of our instructors are currently serving with CFD. So, if you’re serious about applying, here’s what you need to know about the process and how to set yourself up for success.

Step 1: Meeting the Basic Requirements

Before applying, make sure you meet the minimum qualifications. Applicants must:

  • Be at least 18 years old

  • Be legally entitled to work in Canada

  • Have a high school diploma or equivalent

  • Hold a valid Class 5 driver’s licence (with a clean record)

Medical fitness is crucial — you’ll need to pass a comprehensive medical assessment that ensures you can safely perform the physical demands of the job. Strong cardiovascular health, vision, and hearing are essential for operational readiness.

Step 2: Educational and Certification Requirements

To apply for CFD, you’ll need a few essential certifications. One of the most important is Advanced First Aid (AFA), which you can earn through Delta Emergency Support Training.

Our AFA course provides the hands-on medical foundation you’ll rely on every day as a firefighter — from patient assessment and airway management to emergency scene care. We’ve even built rotation-friendly schedules for those still working in camp or on the rigs, so you don’t have to put your career on hold to train.

It’s important to note that CFD does not require applicants to hold NFPA 1001 Level I and II firefighter training, which is often mandatory for many other departments across Canada. This makes CFD an ideal opportunity for motivated individuals looking to make the leap into firefighting without already having that certification.

Step 3: The Application and Testing Process

The CFD recruitment process typically includes several stages:

  • Online Application: Submit your resume, certifications, and supporting documentation.

  • Written Exam: Designed to assess problem-solving, mechanical reasoning, and situational judgment.

  • Physical Fitness Test: A demanding, firefighter-specific test that measures endurance, strength, and agility.

  • Interview: You’ll discuss your motivations, teamwork experience, and understanding of community service.

  • Background Check: Ensures candidates uphold the integrity and professionalism expected of CFD members.

The process is competitive, but with the right preparation and attitude, it’s absolutely achievable.

Step 4: How to Stand Out as an Applicant

Want to stand out in the hiring process? Focus on building the qualities that CFD values most: teamwork, communication, leadership, and resilience.

  • Physical Conditioning: Prioritize strength, endurance, and functional fitness — firefighting is demanding work.

  • Community Involvement: Volunteer with local emergency services, community programs, or charities. It demonstrates commitment and service-mindedness.

  • Communication and Leadership: Practice staying calm under pressure and leading effectively in high-stress situations.

CFD is looking for individuals who bring heart, reliability, and the willingness to learn — not just technical skill.

Step 5: Suggested Courses to Strengthen Your Resume

While CFD doesn’t require NFPA 1001 firefighter certification, there are plenty of valuable courses that can give you a competitive edge and help you hit the ground running once you’re accepted.

Consider training in areas such as:

  • Confined Space Awareness and Rescue – Learn safe entry, monitoring, and rescue techniques.

  • Rope Rescue (Basic & Advanced) – Develop technical rope-handling skills used in high-angle and low-angle rescues.

  • Hazardous Materials Awareness (HAZMAT) – Understand how to recognize and safely respond to dangerous goods incidents.

  • Transportation of Dangerous Goods (TDG) – An important credential for anyone working around hazardous substances.

  • ICS (Incident Command System) Training – Build your understanding of emergency scene management and structure.

Many of these courses are available through technical safety providers or emergency training academies — and they all show CFD that you take professional development seriously.

Step 6: Training and Career Development

Once selected, recruits undergo an intensive 16-week CFD Fire Training Academy program, covering everything from fire suppression and rescue techniques to hazardous materials response and medical care.

Graduation isn’t the end of learning — CFD firefighters continue developing through specialized courses, leadership tracks, and ongoing professional education.

How Delta Can Help You Get There

We know what it takes to succeed in the CFD process because our team has been there. At Delta Emergency Support Training, we’ve helped countless students earn their Advanced First Aid certification and gain the skills and confidence they need to take the next step.

Several of our instructors are active CFD members, offering insider guidance, mentorship, and firsthand insights into the realities of the job. Many of our graduates have successfully transitioned from oilfield work or trades into full-time firefighting careers — proving it’s never too late to make the change.

Your Firefighter Journey Starts Here

Applying for the Calgary Fire Department is a big step, but it’s one that can lead to an incredible career of purpose, teamwork, and community impact.

If you’re ready to make a change — to trade in your rotation schedule for a fire hall shift and a new sense of purpose — start today.

At Delta Emergency Support Training, we offer Advanced First Aid courses, including camp rotation-friendly schedules that fit your lifestyle. You bring the dedication — we’ll help you build the foundation.

Read More
Advanced First Aid, IV, Fluid, Pre-hospital, ITLS, EMR, Firefighter Kumari Malhotra Advanced First Aid, IV, Fluid, Pre-hospital, ITLS, EMR, Firefighter Kumari Malhotra

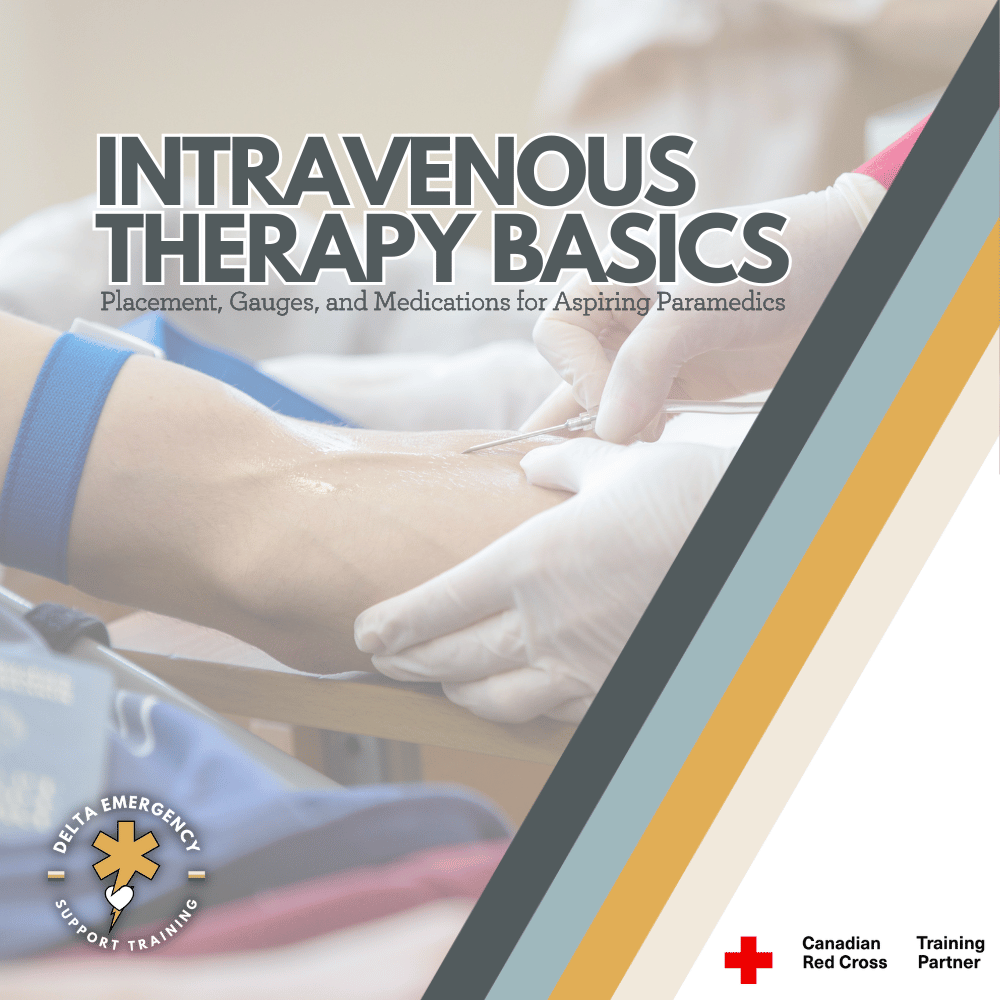
Intravenous Therapy for Beginners: Placement, Gauges & Medications

Intravenous (IV) therapy is a key skill for future paramedics and advanced responders. This beginner’s guide covers vein selection, catheter sizes, and common medications, helping you prepare for PCP training and real-world prehospital care.

For many first responders, advancing from Advanced First Aid or Emergency Medical Responder certification to Primary Care Paramedic training is an exciting milestone. It’s where your skills evolve from basic emergency management to a more advanced approach to prehospital medical care.

One of the essential new skills taught in PCP programs is intravenous (IV) therapy, a procedure that allows responders to deliver fluids and medications directly into the bloodstream for rapid, controlled treatment.

While IV initiation is not within the EMR or AFA scope of practice, understanding what it involves — and how it supports patient care — gives you a valuable head start.

What Is IV Therapy?

IV therapy involves inserting a sterile catheter into a patient’s vein to establish direct access to the circulatory system. This line can then be used to deliver fluids, medications, or draw blood samples. IV access is one of the fastest, most reliable ways to stabilize a patient in critical or emergent situations.

When Are IVs Needed?

Paramedics and advanced responders use IVs in a wide range of medical and trauma calls, such as:

  • Fluid resuscitation: Treating dehydration, burns, or blood loss

  • Medication delivery: For cardiac, allergic, or diabetic emergencies

  • Pain or nausea management: In controlled, monitored settings

  • Cardiac arrest care: To administer life-saving drugs quickly

  • Trauma management: When oral or intramuscular routes aren’t viable

Learning to Start an IV in PCP School

During PCP training, students learn the anatomy of veins, infection control, and catheterization techniques through classroom instruction, practice labs, and clinical placements. You’ll first work on training arms to master vein palpation, needle handling, and aseptic technique before performing supervised IV starts in clinical settings.

The process includes:

  1. Gathering and preparing sterile equipment

  2. Identifying a suitable vein

  3. Cleansing the site

  4. Inserting the catheter bevel-up

  5. Confirming flashback and advancing the catheter

  6. Securing the line and beginning the infusion

Common IV Insertion Sites (and Why They’re Chosen)

Vein selection is critical. Choosing the right site helps reduce complications, ensures proper flow, and keeps the patient comfortable.

Here are the most common IV entry sites used in prehospital and clinical settings:

1. Dorsal Hand Veins

These include the cephalic, basilic, and dorsal metacarpal veins on the back of the hand.

  • Pros: Easy to visualize and access; great for smaller catheters.

  • Cons: More sensitive; can be uncomfortable during movement or fluid administration.

  • Common Uses: General medication or fluid delivery when other veins are less accessible.

2. Forearm Veins

The cephalic and basilic veins along the forearm are often the first choice for IV starts.

  • Pros: Straight path, good flow rate, and easier stabilization with tape.

  • Cons: May roll or collapse if dehydrated; limited space for reattempts.

  • Common Uses: General medical and trauma patients, fluid resuscitation, medication administration.

3. Antecubital Fossa (Inner Elbow)

The median cubital, cephalic, and basilic veins in the crook of the arm are popular for rapid access.

  • Pros: Large veins, high flow rates — ideal for trauma or blood draws.

  • Cons: Restricts arm movement; prone to kinking if patient bends the elbow.

  • Common Uses: Emergency IV access, large-bore lines, or when rapid administration is needed.

4. External Jugular Vein (Neck)

Used in some prehospital or critical care settings when peripheral access isn’t possible.

  • Pros: Easy to locate in patients with difficult peripheral veins; high flow.

  • Cons: Requires skill and patient cooperation; greater risk if improperly managed.

  • Common Uses: Trauma, shock, cardiac arrest, or situations where arm veins are inaccessible.

5. Lower Extremity Veins (Dorsal Foot or Great Saphenous)

Used mainly when upper extremities are unavailable.

  • Pros: Alternative access in infants or patients with poor upper body veins.

  • Cons: Slower flow, higher infection risk, limited mobility.

  • Common Uses: Pediatrics, last-resort adult IV access.

Understanding IV Gauge Sizes

The gauge of an IV catheter refers to its diameter. Smaller numbers mean larger catheters.

  • 14–16G: For trauma or massive fluid resuscitation

  • 18G: For blood administration or major fluid replacement

  • 20G: General adult use; medications and moderate fluid therapy

  • 22–24G: Pediatrics, elderly, or fragile veins

Gauge choice depends on patient size, vein condition, and the urgency of the situation.

Common IV Medications in Paramedic Practice

While specific drug use depends on provincial protocols, IV therapy often supports:

  • Normal Saline (0.9% NaCl) – Fluid replacement or line maintenance

  • Dextrose (D10, D50) – Hypoglycemia management

  • Epinephrine – Cardiac arrest or anaphylaxis (specific concentrations)

  • Morphine / Fentanyl – Pain management (under standing orders)

  • Ondansetron – Nausea control

  • Nitroglycerin (IV form) – Chest pain management (advanced protocols)

Each medication requires strict dosage control, monitoring, and adherence to medical direction — something you’ll master in paramedic pharmacology.

Why IV Skills Matter

For professional responders, starting an IV isn’t just about inserting a catheter — it’s about stabilizing patients efficiently, safely, and confidently. In trauma, shock, or medical crises, IV access can mean the difference between life and death.

If you’re currently an EMR or AFA graduate considering the PCP path, familiarizing yourself with IV principles now will make your transition smoother and your training easier.

Final Thoughts

Learning to start an IV marks a major step forward in your responder journey. Though outside the AFA and EMR scope, it’s a skill that defines advanced prehospital care. As you move toward your Primary Care Paramedic program, understanding IV therapy — from vein anatomy to gauge selection — gives you a solid foundation for success.

Read More

Staying Safe as a Babysitter: What Every Sitter Should Know Before the Job

Babysitting is a big responsibility — and your safety matters, too. Before your next job, make sure you know who you’re babysitting for, tell a trusted adult where you’ll be, keep emergency numbers close, and trust your instincts. Learn more babysitter safety tips to stay confident and prepared.

Babysitting is an incredible way to gain responsibility, earn income, and build trust — but safety should always come first. Whether you’re caring for a neighbour’s toddler or babysitting for a new family, being aware, prepared, and confident in your decisions is key to keeping both yourself and the children safe.

Here are essential safety tips every babysitter should know before taking a job:

1. Know Who You’re Babysitting For

Before accepting a babysitting job, make sure you (and your parents or guardians, if you’re a minor) know exactly who you’re working for. Babysit only for families you or your family trust. If you’re new to babysitting in your community, start with people you know personally — neighbours, family friends, or families recommended by someone you trust.

If it’s a new family, ask to meet them in person beforehand. Use that opportunity to learn about the children, see the home, and confirm important details like emergency contacts and expectations.

2. Always Tell a Parent or Guardian Where You’re Going

If you’re under 18, always let your parent or a trusted adult know:

  • The address of where you’ll be babysitting

  • Who you’ll be with

  • What time you expect to be home

It’s a good idea to share the parents’ contact information with your own guardians in case of an emergency. Even if it seems like a quick or local job, communication ensures someone always knows where you are and can check in if needed.

3. Have a Way to Contact Help

Keep your phone fully charged and within reach at all times — but remember, your focus should stay on the kids. Save key numbers in your contacts and have them written down on paper in case your phone dies.
Include:

  • The parents’ cell numbers

  • A trusted backup contact (like a neighbour or relative)

  • Local emergency services (911, or the local dispatch number if in a rural area)

If something feels off or unsafe — whether it’s a strange noise, an unexpected visitor, or a medical emergency — never hesitate to call for help.

4. Trust Your Gut

One of the most powerful safety tools you have is your intuition. If something doesn’t feel right about a job, a situation, or even the person offering it — listen to your instincts. It’s always okay to say no to a babysitting job or call for help if you feel uncomfortable.

5. Do a Safety Walkthrough

When you arrive, take a quick look around:

  • Identify exits in case of emergency

  • Find out where first aid supplies and flashlights are kept

  • Ask about any safety hazards (pets, pools, unlocked cabinets, etc.)

  • Confirm bedtime routines and any house rules about doors, screens, or alarms

Knowing these small details helps prevent bigger problems later.

6. Keep Emergency Information Close

Always have a written list of:

  • The child’s medical conditions or allergies

  • Medication instructions (if any)

  • Emergency contacts and the home address (so you can relay it quickly to dispatchers)

This list should be provided by the family before they leave — don’t be afraid to ask for it if they forget.

7. Stay Alert — Not Glued to Your Phone

Once the kids are asleep, it’s tempting to scroll or watch a show. But staying alert is part of your job. Keep the volume low, check in periodically, and avoid distractions that could delay your response if a child wakes up or there’s an emergency.

8. Know Basic First Aid and What to Do in Emergencies

Accidents can happen even in the safest homes. Babysitters who take a Babysitter First Aid course (like those offered by Delta Emergency Support Training) learn how to recognize and respond to emergencies confidently — from choking and burns to allergic reactions and falls.

Training helps you stay calm and capable, giving parents peace of mind and making you a more reliable babysitter overall.

Final Tip: Be Professional and Prepared

Show up on time, bring a small notebook or checklist, and always clarify expectations — like bedtime, snacks, and screen time. It’s not just about safety; it’s about building trust and showing parents you take the role seriously.

Bottom Line

Being a babysitter means more than keeping kids entertained — it means being responsible, aware, and ready for anything. Know who you’re working for, communicate with your guardians, trust your instincts, and get the training that helps you handle emergencies confidently.

Because when you’re prepared, you’re not just a babysitter — you’re a leader, a caregiver, and someone parents can truly rely on.

Read More
Advanced First Aid, BLS, Firefighter Kumari Malhotra Advanced First Aid, BLS, Firefighter Kumari Malhotra

From the Rigs to the Fire Hall: Get Your Advanced First Aid Certification in 2026

Thinking about leaving the rigs to pursue firefighting? Our Camp Rotation Advanced First Aid courses for 2026 are designed for rig workers with demanding schedules. Get certified, gain real-world emergency skills, and take the first step toward a career saving lives.

You’ve worked the rigs, long shifts, tough conditions, and no room for hesitation. Now you’re ready for the next challenge: a career in firefighting or emergency response. The skills you’ve built on the rigs — teamwork, problem-solving, and staying cool under pressure — are exactly what fire departments and responder agencies are looking for. All you need is the right certification to start that journey.

That’s where we come in. Our Advanced First Aid (AFA) program is designed to bridge the gap between industrial safety and professional emergency response. You’ll learn how to manage trauma, perform advanced assessments, and provide life-saving care — all skills that will set you apart when applying to firefighter programs or first responder roles.

And because we know your schedule doesn’t stop for training, we’ve launched NEW Camp Rotation AFA Schedules for 2026! Whether you’re on a 2-week rotation or transitioning out of camp work, our courses are built to fit around your shifts — so you can train without losing time on the job.

By earning your AFA certification, you’ll not only meet entry requirements for many emergency services programs, but also gain the confidence and medical readiness expected in the field.

Camp worker on a 2-week rotation? Check out our NEW Camp Rotation AFA Schedules and start preparing for your next chapter — from the rigs to the fire hall.

👉 Register today and take the first step toward a career that puts your experience and drive to work saving lives.

Read More

Wilderness First Aid: What to Pack When Heading Into the Backcountry

When you’re miles from help, your first aid kit becomes your lifeline. Learn what to pack for backcountry safety, from wound care and splints to insulation and emergency gear — so you can respond confidently when emergencies strike in the wild.

Venturing into the backcountry can be one of the most rewarding experiences, breathtaking views, solitude, and connection with nature. But with that freedom comes risk. When you’re hours (or days) away from emergency services, being prepared isn’t just about comfort — it’s about survival.

Having the right gear and a solid understanding of wilderness first aid can turn a dangerous situation into a manageable one. Whether you’re an outdoor enthusiast, guide, or first responder, here’s what you need to know about what to packbefore heading into remote terrain.

🏕️ The Backcountry Reality

In urban environments, medical emergencies are typically minutes from help. In the backcountry, those same minutes can stretch into hours or even days. Terrain, weather, and lack of communication can complicate every decision you make.

That’s why your first aid kit is your lifeline — not a luxury item. It’s not just about having supplies; it’s about carrying the right equipment that you can realistically use in an emergency.

🧰 The Core Wilderness First Aid Kit

When it comes to wilderness first aid, balance is everything — you want to be prepared without carrying unnecessary weight. Here’s a breakdown of essential categories and must-have items:

🩹 1. Wound Care and Bleeding Control

In the wilderness, even small wounds can lead to infection. Having proper wound care supplies ensures you can clean, cover, and protect injuries.

Pack:

  • Adhesive bandages (various sizes)

  • Sterile gauze pads and rolls

  • Elastic (ACE) bandages

  • Medical tape

  • Antiseptic wipes or solution (chlorhexidine or iodine)

  • Antibiotic ointment

Pro Tip: Keep wound supplies in a waterproof bag — even moisture can ruin sterile materials.

💊 2. Medications and Personal Health Supplies

Medications can make the difference between continuing your trip or needing an evacuation. Always pack personal prescriptions, plus some general-purpose medications.

Pack:

  • Personal prescription medications (in labeled containers)

  • Acetaminophen or ibuprofen (pain relief, inflammation)

  • Antihistamines (allergic reactions, insect stings)

  • Loperamide (anti-diarrheal)

  • Glucose tablets or gel for low blood sugar

  • Epinephrine auto-injector (if at risk for severe allergies)

Pro Tip: Store medications in labeled, watertight containers, and check expiration dates before each trip.

🧍‍♂️ 3. Splinting and Immobilization

Sprains, fractures, and dislocations are among the most common backcountry injuries. Be ready to stabilize and immobilize until help arrives.

Pack:

  • SAM splint or moldable splint

  • Triangular bandages (multi-use: slings, ties, padding)

  • Cloth strips or paracord for securing splints

  • Safety pins

Improvisation Tip: Trekking poles, paddles, or sturdy sticks can double as splints when properly padded.

  • 🌡️ 4. Hypothermia and Environmental Protection

Weather can change rapidly in the backcountry. Preventing hypothermia or heat exhaustion is part of wilderness first aid.

Pack:

  • Emergency blanket or bivy sack

  • Lightweight tarp or shelter

  • Extra base layer or thermal clothing

  • Chemical heat packs

  • Hat and gloves (even in summer — mountain weather shifts fast)

Pro Tip: Always carry something to insulate your patient from the ground — a foam pad, backpack, or spare clothing can prevent dangerous heat loss.

💧 5. Hydration and Nutrition

Dehydration and low energy can cloud judgment and slow reaction times — both dangerous in emergencies.

Pack:

  • Water purification system (filter, tablets, or UV pen)

  • Collapsible water bottles or hydration bladder

  • High-calorie snacks (nuts, protein bars, glucose gels)

📡 6. Navigation, Communication, and Documentation

When emergencies happen, knowing where you are — and how to communicate — is critical.

Pack:

  • Map and compass (and know how to use them)

  • GPS or satellite communicator (e.g., Garmin inReach, SPOT device)

  • Whistle and signal mirror

  • Waterproof notebook and pencil (for recording vital signs and events)

🪶 7. Wilderness-Ready Extras

Small, lightweight items that make a big difference:

  • Tweezers (for splinters and ticks)

  • Duct tape (gear repair, blister prevention, splinting aid)

  • Safety pins (securing bandages or improvising slings)

  • Scissors or trauma shears

  • Hand sanitizer

  • Headlamp with extra batteries

🏔️ Balancing Weight vs. Preparedness

Every ounce matters in the backcountry. Your pack should be a balance between medical capability and practicality.
Here’s how to think about it:

  • Day trip? Bring the essentials — bleeding control, wound care, meds, and hypothermia protection.

  • Multi-day trek? Add splinting materials, backup shelter, and communication tools.

  • Remote expedition? Include airway adjuncts, advanced medications (if permitted), and an evacuation plan.

⚕️ Training Matters More Than Gear

Even the best kit won’t help if you don’t know how to use it. Taking a Wilderness First Aid (WFA) or Wilderness First Responder (WFR) course teaches you how to:

  • Prioritize patient care in remote settings

  • Improvise with available gear

  • Make evacuation and triage decisions

  • Treat life-threatening conditions with limited resources

Final Thought

When you’re deep in the wilderness, you are the first responder. A well-stocked and well-thought-out first aid kit gives you the power to act quickly, calmly, and effectively — whether you’re treating a blister, a broken bone, or a life-threatening emergency.

Before you head out, remember: gear doesn’t replace training, but training without gear limits your ability to save lives.
Prepare smart, pack light, and respect the environment — because in the backcountry, preparation truly is protection.

Read More
Awareness, Babysitter, Parent Training Kumari Malhotra Awareness, Babysitter, Parent Training Kumari Malhotra

Child Poisoning Risks in at Homes: Hidden Dangers Parents Overlook

Modern homes are full of hidden dangers that can lead to child poisoning. From medications to gadgets, parents and babysitters need to know the risks, warning signs, and emergency steps to keep children safe.

Child safety isn’t just about covering electrical outlets or installing safety gates. Modern homes are filled with hidden hazards that can lead to accidental poisoning. Every year, thousands of Canadian children are treated in emergency departments for ingestion of harmful substances, many of which are found in everyday household items.

Parents and babysitters must understand these risks, recognize early warning signs, and know how to respond quickly and effectively if an incident occurs. This knowledge can make the difference between a minor scare and a life-threatening emergency.

⚠️ Why Child Poisoning Is a Real Concern

Children, particularly those under five years old, explore their world by putting things in their mouths. This natural curiosity makes them highly vulnerable to poisoning.

Even products that seem harmless — vitamins, essential oils, or decorative plants — can become dangerous in the wrong hands. While public awareness campaigns and childproofing efforts have reduced some risks, new hazards continue to emerge in modern homes.

🏠 Common Poisoning Hazards in Homes

1. Medications

Medications are the most common source of accidental poisoning in children. This includes:

  • Prescription medications: Painkillers, antidepressants, or blood pressure medications

  • Over-the-counter medications: Cough syrups, antihistamines, pain relievers

  • Vitamins and supplements: Especially chewable or gummy forms

Scenario: A toddler finds a bottle of adult multivitamins on the counter and ingests several gummies. Though they taste like candy, these vitamins can contain iron, which can be toxic in large amounts.

Prevention Tips:

  • Store medications in locked cabinets out of reach.

  • Keep medications in original containers with child-resistant caps.

  • Educate older children about the dangers of consuming pills.

2. Cleaning Products and Chemicals

Everyday cleaning supplies can be deadly if ingested or inhaled. Items such as:

  • Laundry pods and detergents

  • Bleach and disinfectants

  • Oven cleaners and drain openers

  • Antifreeze and automotive chemicals

Scenario: A child playing near the laundry room mistakes a brightly colored laundry pod for candy. The pod bursts in their mouth, causing chemical burns and severe vomiting.

Prevention Tips:

  • Always store chemicals in locked cabinets or high shelves.

  • Keep chemicals in original packaging with labels intact.

  • Never transfer chemicals to food or drink containers — this can confuse children and adults alike.

3. Personal Care Items and Cosmetics

Personal care items may seem harmless, but many contain toxic chemicals:

  • Nail polish and polish remover (contains acetone)

  • Perfumes, essential oils, and aromatherapy products

  • Mouthwash or hand sanitizers (contain alcohol)

Scenario: A young child sprays themselves with a bottle of essential oil or drinks hand sanitizer, leading to alcohol poisoning or chemical burns.

Prevention Tips:

  • Keep small bottles and tubes out of reach.

  • Teach children that cosmetics and oils are not safe to taste or drink.

  • Consider using child-proof caps on accessible items if possible.

4. Batteries and Small Electronics

Modern homes have gadgets everywhere — and many contain button batteries or small parts that pose serious risks:

  • Remote controls, toys, hearing aids, and watches

  • Small battery-powered devices like LED lights or calculators

Why It’s Dangerous: If swallowed, button batteries can cause life-threatening internal burns within hours.

Prevention Tips:

  • Secure battery compartments with tape or screws.

  • Keep spare batteries well out of reach.

  • Supervise children when they are near electronics.

5. Plants and Certain Foods

  • Houseplants: Some common plants, like lilies, philodendrons, or dieffenbachia, are toxic if ingested.

  • Mushrooms: Wild mushrooms growing indoors or in yards can be poisonous.

  • Food hazards: Unripe or green potatoes, caffeine, alcohol, or small hard candies can pose risks.

Scenario: A curious child bites into a decorative houseplant leaf, resulting in mouth swelling, vomiting, or diarrhea.

Prevention Tips:

  • Research houseplants for toxicity before bringing them home.

  • Keep wild mushrooms away from children.

  • Store harmful foods well out of reach.

🧸 Prevention Strategies for Parents and Babysitters

  1. Supervision is Key: Children should never be left unsupervised in kitchens, bathrooms, or laundry rooms.

  2. Safe Storage: Keep medications, chemicals, and small electronics in locked cabinets.

  3. Clear Labeling: Clearly label all hazardous substances.

  4. Educate Older Children: Teach older children about what is safe to touch, eat, or taste.

  5. Regular House Checks: Review new gadgets, cleaning products, or cosmetics as they enter your home.

  6. Emergency Prep: Keep the Poison Control number (1-800-268-9017) handy, and ensure all babysitters know how to respond.

🚨 Recognizing Poisoning Early

Poisoning symptoms vary depending on the substance, but common warning signs include:

  • Nausea, vomiting, or diarrhea

  • Drooling or burns around the mouth

  • Difficulty breathing or wheezing

  • Drowsiness, irritability, or agitation

  • Seizures or loss of consciousness

Tip: Many parents or babysitters may overlook subtle signs. Early recognition and swift action can prevent serious injury.

📞 Emergency Response Steps

  1. Stay calm and assess the scene: Ensure your own safety first.

  2. Call 911 immediately if the child is unresponsive, having seizures, or having trouble breathing.

  3. Contact Canada Poison Centre: 1-800-268-9017 for guidance if the child is stable but has ingested a harmful substance.

  4. Provide detailed information: Substance, amount ingested, time, and child’s age/weight.

  5. Follow instructions exactly: Do not induce vomiting unless directed.

  6. Monitor the child until professional help arrives.

Key Takeaways

  • Poisoning can happen even in well-prepared homes.

  • Everyday items, modern gadgets, and seemingly safe foods can all be dangerous.

  • Prevention, supervision, and education are the most effective strategies.

  • Babysitters and parents should recognize early warning signs and know emergency contacts.

  • Being prepared ensures quick response and better outcomes for children.

❤️ Final Thought

Modern homes are full of hidden hazards, but awareness and preparation can make them safe spaces for children. By understanding child poisoning risks, supervising carefully, and knowing how to respond, parents and babysitters can prevent accidents and protect the next generation.

Read More

Rate, Rhythm, and Quality: How to Assess Pulse and Breathing in the Field

Assessing rate, rhythm, and quality of pulse and respirations is essential for identifying serious patient conditions. Learn how to conduct these key evaluations in the field with accuracy.

When assessing a patient, rate, rhythm, and quality are more than routine checklist items — they’re vital indicators of what’s happening beneath the surface. Whether you’re an Advanced First Aider, EMR, or future paramedic, mastering these three elements helps you recognize subtle signs of deterioration before they become life-threatening.

🩺 Assessing the Pulse

1. Rate

The rate refers to how many times the heart beats per minute (bpm).

  • Adult: 60–100 bpm

  • Child: 80–100 bpm

  • Infant: 100–160 bpm

Tachycardia (a rate above normal) may indicate fever, shock, pain, dehydration, or stress.
Bradycardia (a rate below normal) may appear in trained athletes, hypothermia, or head injuries affecting brain function.

👉 Field Tip: Always consider the context — a runner at rest with a pulse of 52 bpm may be fine, while a trauma patient with the same rate might be in serious trouble.

2. Rhythm

Rhythm describes whether the beats occur at regular intervals.

  • Regular rhythm: Evenly spaced beats (normal sinus rhythm).

  • Irregular rhythm: Uneven or skipping beats (possible arrhythmia).

Listen for patterns like regularly irregular or irregularly irregular, which may indicate cardiac abnormalities.

👉 Field Tip: Use your watch’s second hand or a digital timer — count for a full 60 seconds if rhythm appears irregular.

3. Quality

The quality of a pulse tells you about strength and perfusion.

  • Strong / bounding: Common in fever or hypertension.

  • Weak / thready: Seen in shock, blood loss, or dehydration.

  • Absent: Immediate life threat — initiate advanced interventions.

👉 Field Tip: Compare central (carotid) and peripheral (radial) pulses. A weak or absent radial pulse may signal dropping blood pressure or poor perfusion.

🌬️ Assessing Respirations

Just like the pulse, respirations are assessed for rate, rhythm, and quality.

1. Rate

Normal respiratory rates:

  • Adult: 12–20 breaths per minute

  • Child: 20–30 bpm

  • Infant: 30–60 bpm

Tachypnea (rapid breathing) often indicates hypoxia, shock, or anxiety.
Bradypnea (slow breathing) can suggest head injury, narcotic overdose, or severe illness.

👉 Field Tip: Always watch the chest discreetly, so patients don’t alter their breathing pattern.

2. Rhythm

Normal respirations are smooth and regular.

  • Irregular rhythm: May indicate neurological damage, fatigue, or shock.

  • Cheyne-Stokes respirations: Periods of deep breathing alternating with apnea — often seen in brain injury or end-of-life situations.

  • Agonal gasps: Ineffective, irregular breaths seen in cardiac arrest.

👉 Field Tip: If the rhythm looks unusual, describe exactly what you see — “deep, gasping, irregular respirations” gives dispatchers or incoming paramedics more useful information than just “irregular.”

3. Quality

Respiratory quality reflects effort, depth, and sound.

  • Normal: Quiet and effortless.

  • Shallow: May indicate pain, shock, or fatigue.

  • Labored: Look for use of accessory muscles, nasal flaring, or grunting.

  • Noisy: Listen for wheezing (airway constriction), gurgling (fluid), or stridor (upper airway obstruction).

👉 Field Tip: Note any cyanosis (bluish lips or fingertips), which can signal inadequate oxygenation.

🚑 Putting It All Together: Why It Matters

Rate, rhythm, and quality are part of every primary and secondary survey. These details guide your priorities:

  • Recognizing shock early by weak, rapid pulse and shallow respirations.

  • Identifying hypoxia through tachypnea or labored breathing.

  • Catching cardiac irregularities that could indicate impending arrest.

In short, these three simple checks — rate, rhythm, and quality — can reveal complex physiological problems long before advanced tools do.

💡 Key Takeaways for First Responders

  • Always compare findings to baseline vitals and the patient’s overall presentation.

  • Document what you observe, not just normal/abnormal.

  • Repeat assessments frequently — deterioration can happen quickly.

  • Communicate trends to higher-level care providers for continuity.

Final Thought

Assessing rate, rhythm, and quality isn’t about memorizing numbers — it’s about seeing the patient behind the vitals.The best responders know that a weak, irregular pulse or labored breathing tells a story. Learn to listen carefully — it could be the difference between early intervention and missed warning signs.

Read More

Gestational Diabetes Explained: Prehospital Care for Expectant Mothers

Gestational diabetes isn’t just a medical term — it’s a serious condition that can affect both mother and baby. For first responders, understanding the signs, complications, and emergency care priorities can make all the difference during a call involving a pregnant patient.

When called to assist a pregnant patient, responders must recognize that not all complications are immediately visible. One condition that often hides beneath the surface — yet poses significant risk — is gestational diabetes mellitus (GDM).

While it typically develops during the second or third trimester, its effects can influence both maternal stability and fetal well-being, especially in medical emergencies. Recognizing the signs, risk factors, and potential complications can help first responders make better decisions in the field.

🚨 Understanding Gestational Diabetes

Gestational diabetes occurs when the body cannot produce enough insulin to manage the increased glucose demands during pregnancy. Placental hormones naturally create some insulin resistance, but when this becomes excessive, blood sugar levels rise.

The condition usually appears between 24 and 28 weeks of pregnancy and resolves after childbirth. However, it can still cause acute or secondary emergencies requiring prehospital attention.

⚠️ Why It Matters for First Responders

For most of pregnancy, gestational diabetes remains well managed under medical supervision. But when blood glucose levels shift too far in either direction — hypoglycemia or hyperglycemia — both the mother and the fetus are at risk.

Responders may encounter gestational diabetes as:

  • A primary medical call (e.g., dizziness, confusion, syncope)

  • A secondary complication during another event (e.g., trauma, labor)

  • An underlying condition worsening another emergency (e.g., dehydration, infection)

Understanding how to identify, assess, and communicate these findings can make a major difference in patient outcomes.

🧠 Scene Awareness and History Gathering

Early recognition begins with observation and questioning. If the patient is pregnant, always consider gestational diabetes as a possible factor in altered presentations.

Ask or note the following:

  • Gestational age (how far along is she?)

  • Known diagnosis of gestational diabetes

  • Use of insulin or oral diabetic medication

  • Timing of last meal and fluid intake

  • Recent changes in behavior or consciousness

  • Other complications (pre-eclampsia, infection, dehydration, trauma)

Check for medical alert jewelry, glucose monitoring equipment, or insulin pens in the patient’s bag or purse. These clues often confirm a pre-existing diagnosis.

🩸 Recognizing Abnormal Blood Glucose Presentations

Hypoglycemia (Low Blood Sugar)

Can occur due to missed meals, overuse of insulin, or increased physical activity.

Signs and symptoms may include:

  • Pale, cool, clammy skin

  • Shakiness, weakness, or dizziness

  • Headache or blurred vision

  • Confusion, irritability, or unusual behavior

  • Rapid pulse or diaphoresis

  • Possible decreased level of consciousness or seizures

Immediate care:

  • If the patient is alert and able to swallow, administer oral glucose as per local protocol.

  • If unresponsive, manage the airway, check for breathing and circulation, and prepare for rapid transport.

  • Notify receiving staff of the pregnancy and suspected diabetic episode.

Hyperglycemia (High Blood Sugar)

May result from missed insulin doses, illness, infection, or poor dietary control.

Signs and symptoms may include:

  • Warm, dry skin

  • Excessive thirst and urination

  • Nausea and vomiting

  • Weakness or fatigue

  • Fruity or acetone-like breath odor (late sign)

  • Altered level of consciousness

Immediate care:

  • Perform a full primary and secondary assessment.

  • Ensure airway, oxygenation, and hydration as appropriate.

  • Do not administer insulin in the field unless authorized under medical direction.

  • Transport promptly, monitoring vitals closely.

🤰 Possible Complications You May Encounter

Gestational diabetes increases the risk of several emergencies:

  • Pre-eclampsia (high blood pressure, headache, visual changes, edema)

  • Preterm labor

  • Fetal distress

  • Large-for-gestational-age infant (macrosomia) leading to labor complications

  • Neonatal hypoglycemia after delivery

When responding to a pregnancy-related emergency, these background risks should always inform your assessment and report to the hospital.

🧭 Responder Considerations

  • Monitor vitals regularly, especially blood pressure, pulse, respiratory rate, and LOC.

  • Check blood glucose if permitted under your scope of practice.

  • Position the patient on her left side to improve circulation and reduce pressure on the vena cava.

  • Be cautious during transport — supine positioning can worsen hypotension and fetal oxygenation.

  • Always consider dual patient care — every pregnant call involves both mother and baby.

🩺 Communication and Handover

Provide a thorough report that includes:

  • Gestational age

  • Known gestational diabetes diagnosis

  • Any glucose readings or observed symptoms

  • Medications taken (insulin, oral agents)

  • Any complications or abnormal fetal movement reports

Clear, concise information ensures continuity of care and helps hospital staff intervene quickly.

Key Takeaways

  • Gestational diabetes is a temporary diabetic condition that develops during pregnancy.

  • It can cause hypoglycemia or hyperglycemia, each with distinct field presentations.

  • Assessment, airway management, and rapid transport are key responsibilities for first responders.

  • Always consider both maternal and fetal safety in decision-making.

  • Early recognition and communication can prevent serious complications for both patients.

🚑 Final Thought

For first responders, every pregnant patient requires careful observation and informed assessment. Gestational diabetes may not always be obvious, but understanding its potential impact — and knowing how to recognize subtle signs — can mean the difference between a routine call and a critical save.

Read More

Babysitting 101: Emergencies vs. Non-Emergencies — Knowing When to Act

Every babysitter will face unexpected moments — but not every situation is an emergency. Learn how to recognize true emergencies, handle minor issues safely, and respond with confidence during babysitting duties.

When you’re babysitting, you’re the responsible caretaker.
That means when something goes wrong, the child is looking to you — and it’s up to you to decide what to do next.

But not every problem is an emergency. Some situations need calm care and common sense, while others require calling for help immediately. Knowing the difference is one of the most important skills a babysitter can have.

🩹 What’s the Difference?

A non-emergency is a situation that can be handled safely without outside help.
An emergency is any situation that is life-threatening, worsening quickly, or beyond your ability to control.

When in doubt, treat it as an emergency — it’s always better to call for help than to hesitate.

🚨 Examples of Emergencies — and What to Do

Here are common emergencies babysitters might face, and how to respond safely and calmly:

1. The Child Is Unresponsive or Not Breathing

Emergency? Yes — life-threatening.
What to do:

  • Check responsiveness: Tap and shout the child’s name.

  • Call 911 immediately.

  • If trained, start CPR and follow dispatcher instructions.

  • Continue until help arrives.

If you’re babysitting alone, put your phone on speaker so you can listen to instructions while giving care.

2. Choking

Emergency? Yes.
What to do:

  • If the child can cough or speak, encourage them to keep coughing.

  • If the child cannot breathe, speak, or is turning blue, call 911 and begin back blows and abdominal thrusts (if trained).

  • For babies under one year, use five back blows and five chest thrusts.

Stay calm — your training and quick response can save a life.

3. Severe Bleeding

Emergency? Yes.
What to do:

  • Apply firm, direct pressure to the wound with a clean cloth.

  • Call 911 if the bleeding doesn’t stop or the injury is large or deep.

  • Keep pressure on until help arrives.

Never remove large objects stuck in the wound — stabilize them in place.

4. Allergic Reaction or Anaphylaxis

Emergency? Yes — especially if breathing is affected.
What to do:

  • Ask if the child has an epinephrine auto-injector (EpiPen).

  • Use it immediately if they are having trouble breathing, swelling of the lips or throat, or widespread hives.

  • Call 911 right after using the EpiPen.

  • Have the child sit upright to ease breathing.

Even if symptoms improve, they need medical attention — reactions can return.

5. Burns

Emergency? Sometimes.
What to do:

  • For minor burns (red skin, no blisters): Cool the area with cool running water for 10–20 minutes.

  • For severe burns, large areas, or burns on the face, hands, or genitals, call 911.

  • Never pop blisters or apply ice, butter, or creams.

6. Head Injury

Emergency? Possibly.
What to do:

  • If the child loses consciousness, vomits repeatedly, seems confused, or complains of severe headache — call 911.

  • For mild bumps with no serious symptoms, apply a cold compress and monitor closely for changes.

If in doubt, call the parents for guidance — and don’t let the child fall asleep until you’ve spoken to them.

7. Fire or Gas Leak

Emergency? Always.
What to do:

  • Get everyone outside immediately.

  • Do not go back inside.

  • Call 911 from a safe location.

  • Meet parents or emergency responders outside the home.

Remember: your safety and the child’s safety come first.

😌 Non-Emergencies (But Still Important!)

These are situations that babysitters can usually handle without calling 911 — but should still inform parents about.

1. Minor Scrapes and Cuts

  • Wash gently with soap and water.

  • Apply a small bandage.

  • If bleeding continues after 10 minutes, call the parents.

2. Nosebleeds

  • Have the child sit and lean forward, not back.

  • Pinch the soft part of the nose for 10–15 minutes.

  • If bleeding won’t stop or the child hit their head, call the parents.

3. Mild Allergic Reaction (Itchy Skin, Small Rash)

  • Keep the child comfortable.

  • Avoid the trigger if known.

  • Monitor closely for signs of breathing problems — if they develop, call 911 immediately.

4. Stomach Ache or Mild Fever

  • Encourage rest and fluids.

  • Take note of symptoms and temperature.

  • Call the parents to update them and follow their instructions.

If the child vomits repeatedly, becomes very lethargic, or complains of sharp pain — it may be turning into an emergency.

5. Emotional Upset or Tantrums

  • Stay calm, use a soothing voice, and redirect their attention.

  • Offer comfort, but maintain clear boundaries.

  • If the child is inconsolable or asks for their parents, reach out to them — it’s not an emergency, but communication matters.

📞 When to Call 911 vs. When to Call Parents

SituationActionUnresponsive, choking, or not breathingCall 911 first, then parentsSevere bleeding, burns, allergic reaction, head injuryCall 911 firstMinor injury, small cut, nosebleed, upset stomachCall parents firstFire, smoke, gas leakEvacuate and call 911 immediatelyUnsure what to doCall 911 — dispatchers will guide you step-by-step

💡 Pro Tip: Stay Calm, Stay Clear, Stay Connected

During your babysitter training at Delta Emergency Support Training, you’ll learn exactly how to stay composed under pressure, how to communicate clearly with dispatchers, and how to make safe decisions until help arrives.

Remember:

  • Stay calm and confident. Children mirror your emotions.

  • Stay clear on priorities: Safety first, care second.

  • Stay connected: Keep parents informed and never hesitate to call for help.

Final Thought

Emergencies don’t happen often — but when they do, your preparation matters.
Knowing the difference between a small problem and a serious emergency helps you act quickly, correctly, and confidently.

Whether it’s a scraped knee or a choking child, trained babysitters save lives — and that’s what sets you apart.

Read More
EMR, Firefighter, Medical Condition Kumari Malhotra EMR, Firefighter, Medical Condition Kumari Malhotra

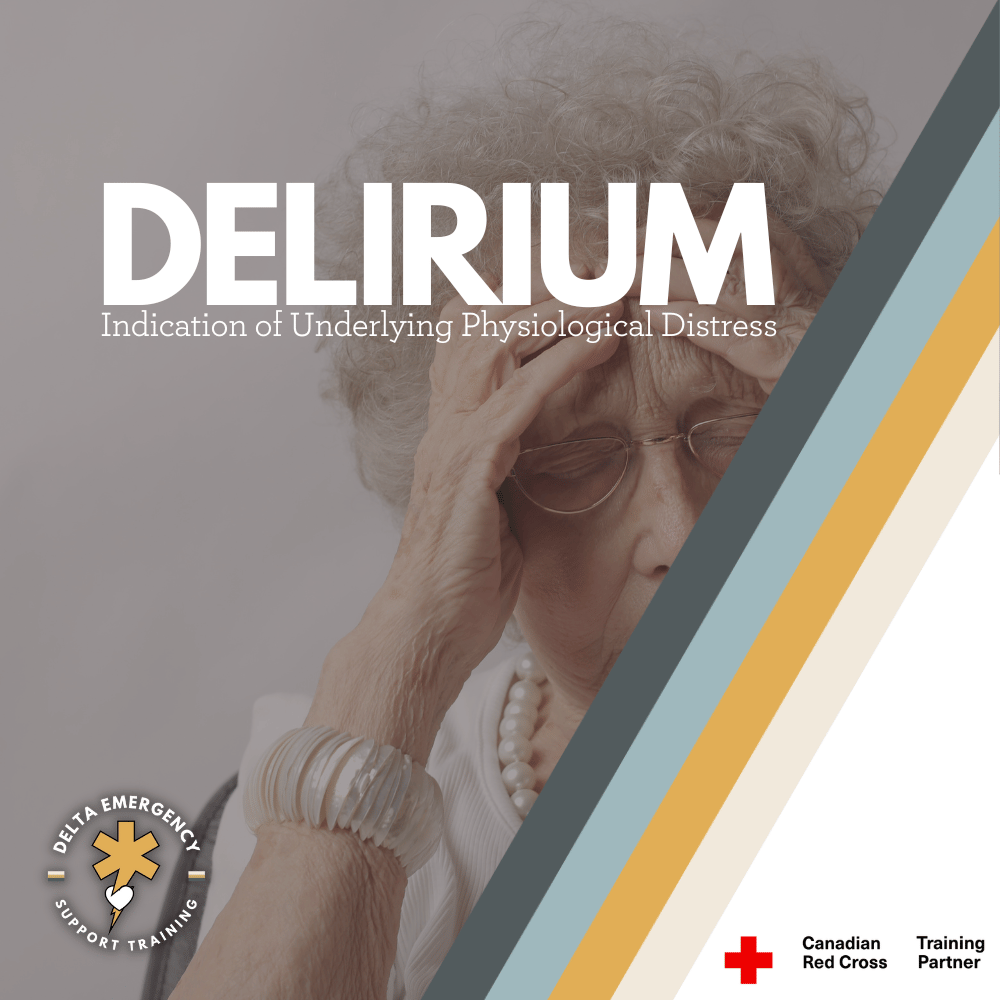
Delirium Explained: A Hidden Medical Emergency in Plain Sight

Delirium isn’t just confusion — it’s a red flag for serious underlying illness. Learn how to identify, assess, and respond to delirium in patients as a first responder or advanced first aider.

When a patient seems confused, disoriented, or agitated, it’s easy to assume they’re suffering from dementia, intoxication, or a mental health crisis. But sometimes, those same signs point to something far more dangerous — delirium, a medical emergency that demands quick recognition and intervention.

For first responders and advanced first aiders, understanding delirium can mean the difference between treating a symptom and addressing a life-threatening cause.

🔍 What Is Delirium?

Delirium is an acute, fluctuating disturbance in mental status characterized by confusion, disorientation, changes in attention, and altered consciousness. It develops rapidly — over hours or days — and usually signals an underlying medical problem that needs immediate attention.

In simple terms, delirium isn’t a disease itself — it’s a sign of something seriously wrong happening in the body or brain.

⚠️ Common Causes of Delirium

Delirium can stem from many triggers, and often multiple factors combine. Some of the most common causes include:

  • Infections (especially urinary tract infections or pneumonia in older adults)

  • Hypoxia (low oxygen levels)

  • Hypoglycemia or hyperglycemia

  • Head injury or trauma

  • Drug or alcohol intoxication or withdrawal

  • Medication reactions or polypharmacy

  • Metabolic disturbances (electrolyte imbalances, dehydration)

  • Post-surgery or ICU environments

🧠 Recognizing the Signs

Key hallmark: The patient’s condition fluctuates — they may seem fine one moment and completely disoriented the next.

🧩 Delirium vs. Dementia vs. Psychiatric Disorders

It’s crucial for responders to differentiate delirium from other conditions that can look similar.

For first responders, it’s crucial to distinguish delirium from other conditions that can appear similar, such as dementia or psychiatric illness. Although they may share signs of confusion or altered behaviour, the onset, course, and awareness level differ significantly.

Delirium

  • Onset: Develops suddenly — within hours or days.

  • Course: Fluctuates throughout the day; the patient may seem clear one moment and severely confused the next.

  • Attention: Markedly impaired; the patient is easily distracted or unable to focus.

  • Awareness and Consciousness: Reduced; patients may drift in and out of awareness.

  • Reversibility: Often reversible if the underlying cause (like infection, hypoxia, or hypoglycemia) is treated.

  • Example: An elderly patient suddenly becomes confused and agitated due to a urinary tract infection.

Dementia

  • Onset: Gradual, developing over months or years.

  • Course: Progressive and steady decline, without the daily fluctuation seen in delirium.

  • Attention: Usually preserved in the early stages, though memory and reasoning decline.

  • Awareness and Consciousness: Typically clear until the late stages of disease progression.

  • Reversibility: Generally permanent; the underlying condition (e.g., Alzheimer’s disease) causes irreversible brain changes.

  • Example: A patient with year-long memory loss, forgetting names and getting lost in familiar places.

Psychiatric Illness

  • Onset: Varies — may appear suddenly or gradually depending on the condition.

  • Course: Usually consistent or episodic rather than fluctuating within a single day.

  • Attention: Variable; may be intact or impaired depending on the episode.

  • Awareness and Consciousness: Typically clear; patients are often alert and oriented to person, place, and time.

  • Reversibility: Variable; some conditions can be managed with treatment or medication.

  • Example: A patient presenting with hallucinations or delusions consistent with schizophrenia or severe depression.

A quick mental check for responders:
🧭 If the confusion developed quickly, fluctuates, and the patient seems physically unwell — think delirium first.

🚨 Why Delirium Is a Medical Emergency

Delirium often indicates underlying physiological distress — hypoxia, infection, hypoglycemia, or organ failure. Left untreated, it can rapidly lead to permanent brain injury or death.

As a first responder or advanced first aider, your goal is to recognize delirium early, perform a rapid assessment, and ensure urgent transport for medical evaluation.

🩺 Assessment Tips for Responders

When you encounter a confused or altered patient:

  1. Check for immediate life threats:

    • Airway, breathing, circulation (ABCs).

    • Rule out hypoxia, hypoglycemia, or trauma.

  2. Assess vitals and look for clues:

    • Fever → infection

    • Low SpO₂ → hypoxia

    • Unequal pupils → neurological event

    • High heart rate → sepsis or withdrawal

  3. Ask family or caregivers:

    • “When did this start?”

    • “Is this normal for them?”

    • “Have there been any medication changes?”

  4. Observe fluctuation:

    • Does the patient drift in and out of awareness during assessment?

  5. Document and communicate:

    • Report the patient’s baseline, sudden change, and possible triggers to paramedics or hospital staff.

🧘 Approaching a Delirious Patient

  • Stay calm and reassuring. Confusion can cause fear and agitation.

  • Use simple, clear sentences. Avoid rapid or complex questioning.

  • Ensure a quiet environment. Reduce sensory overload when possible.

  • Never argue or restrain unnecessarily. Focus on safety and comfort.

Key Takeaways

  • Delirium is acute, fluctuating, and reversible — unlike dementia or chronic psychiatric conditions.

  • It is often a symptom of a life-threatening condition.

  • First responders play a critical role in recognizing and reporting early signs.

  • Always prioritize ABC assessment, vitals, and rapid transport.

🩹 Final Thought

Confusion in a patient should never be dismissed as “just old age” or “they’re acting weird.”
Delirium is the body’s alarm bell — and as a responder, hearing that alarm and acting quickly can save a life.

Read More

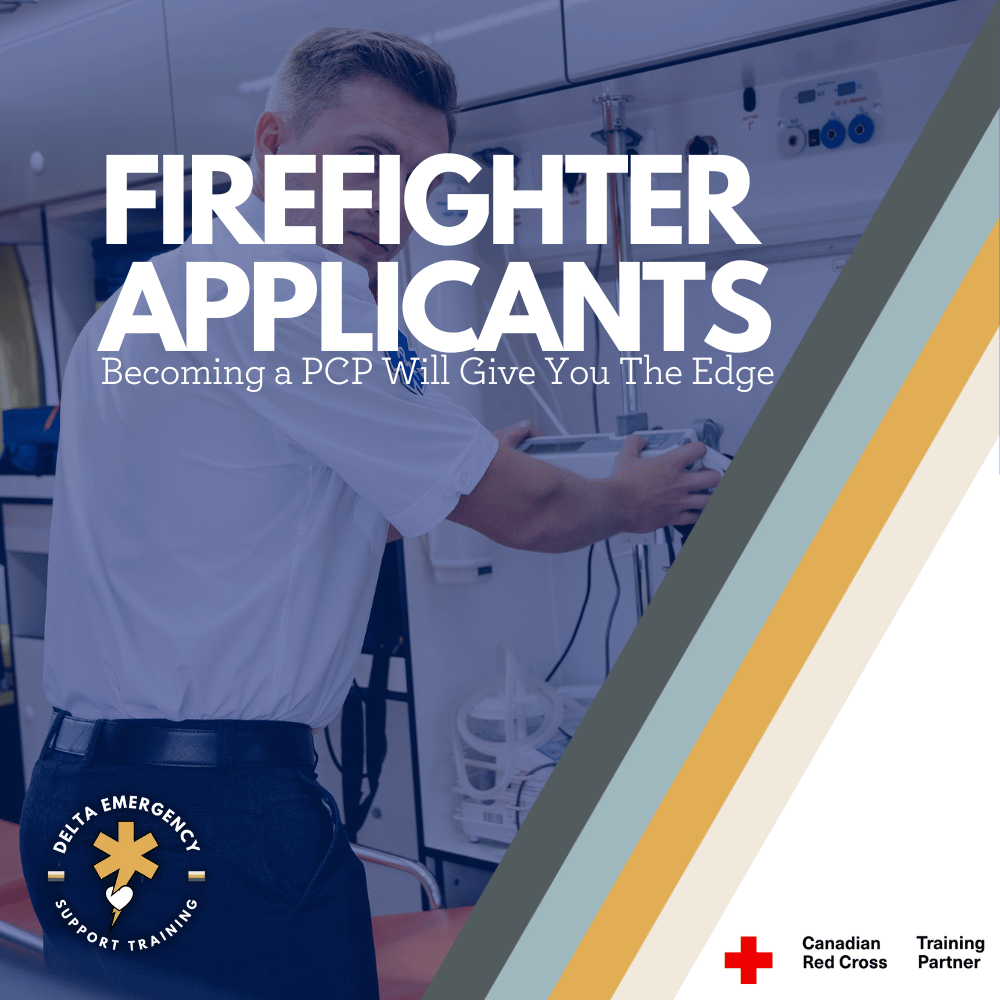
How Paramedic Training Strengthens Your Firefighter Application

Firefighting is no longer just about fire suppression. With most calls now medical in nature, departments seek applicants with paramedic training. Here’s how your Primary Care Paramedic certification can make your firefighter application stand out.

The Modern Firefighter: More Than Fire Suppression

Today’s firefighter is far more than fighting fires. Across Canada, most fire departments respond to far more medical emergencies than structure fires — in many regions, medical calls make up 80% of total responses.

This shift means departments are looking for applicants who can do more than handle a nozzle. They need people trained in patient care, triage, and prehospital decision-making — skills that come directly from Primary Care Paramedic (PCP) training.

Whether you’re pursuing municipal, industrial, or wildland fire service, holding your PCP license can dramatically strengthen your application, credibility, and readiness for the role.

1. Understanding the Overlap: Fire and EMS

The reality of modern fire service is that medical response is integrated into daily operations. Many calls involve:

  • Cardiac arrests

  • Motor vehicle collisions

  • Respiratory emergencies

  • Overdoses and poisonings

  • Falls and traumatic injuries

  • Medication administration

These situations require rapid assessment, airway management, and patient stabilization — core skills of a Primary Care Paramedic.

When fire departments deploy first, a firefighter with PCP training doesn’t just stand by until EMS arrives — they become a vital asset in those first minutes, providing interventions that can mean the difference between life and death.

2. How PCP Training Sets You Apart in the Hiring Process

Fire departments receive hundreds of applications for a handful of positions. Holding your Primary Care Paramedic certification immediately tells recruiters you’re invested, skilled, and capable of independent medical decision-making.

It demonstrates:

  • Commitment to emergency services as a career, not just a job.

  • Medical competency beyond AFA & EMR levels.

  • Ability to handle high-stress environments and maintain composure during critical incidents.

  • Strong understanding of patient care, communication, and documentation.

Departments see PCPs as well-rounded responders — individuals who understand not only rescue operations, but also the continuum of care from the moment of injury to hospital transfer.

3. Bridging Knowledge: Why Paramedic Training Translates So Well

The PCP curriculum goes far beyond what’s taught in AFA or fire recruit programs. It builds:

  • Assessment skills – Scene safety, mechanism of injury, and systematic patient evaluation.

  • Decision-making – When to move, when to treat, and when to call for advanced support.

  • Anatomy and physiology knowledge – Understanding what’s happening inside the body, not just what you see externally.

  • Communication and teamwork – Effective coordination with dispatch, partners, and hospital staff.

  • Leadership under pressure – Taking control when seconds matter.

Every one of these skills directly applies to fireground operations, rescue scenarios, and community medical calls.

When a firefighter-paramedic arrives on scene, they’re already equipped with the mindset of “scene control, patient stabilization, and structured response.”

4. Increased Employability Across Canada

Many fire departments in Canada — including Toronto Fire, Calgary Fire, Edmonton Fire, and Vancouver Fire Rescue Services — now strongly prefer or require applicants to have medical certification at the EMR or PCP level.

Holding your PCP license not only makes you a stronger candidate but also broadens your career options. You can work in EMS while waiting for fire openings, gain field experience, and keep your medical skills sharp.

It also signals to hiring panels that you’re operationally ready, physically prepared, and understand the realities of shift work, patient care, and emergency response culture.

5. Professional Credibility and Community Trust

Firefighters are often the first on scene — before ambulances, before police. The public doesn’t separate the fire service from medical response; they expect competence in both.

Having PCP-level training builds confidence in your peers, your officers, and the community. It shows that you’re not just trained to react, but to think critically and intervene effectively under pressure.

This credibility extends into leadership — many captains, chiefs, and training officers have paramedic backgrounds. Understanding that language early gives you a career-long advantage.

6. The Pathway Forward

If your goal is to become a firefighter, enrolling in a Primary Care Paramedic program is one of the most strategic steps you can take.

Here’s how to integrate it into your career plan:

  1. Earn your EMR or Advanced First Aid certification to build foundational knowledge.

  2. Enroll in an accredited PCP program through a recognized college or training institution.

  3. Register and license through your provincial regulatory body.

  4. Maintain active status — through continuing education and clinical practice hours.

  5. Highlight your PCP credentials in your fire service application and interviews.

By doing this, you’re not only meeting the evolving expectations of the fire service — you’re proving you already live and breathe emergency response.

Final Thought

Firefighting has evolved — and so have the expectations of those who wear the uniform.
Holding a Primary Care Paramedic license shows that you understand that evolution. It proves that you can respond, treat, and think critically in the same high-pressure environments firefighters face daily.

When it comes down to competitive hiring, paramedic training doesn’t just help your chances — it defines them.

Read More
911, Awareness, EMR, Firefighter, Medical Condition Kumari Malhotra 911, Awareness, EMR, Firefighter, Medical Condition Kumari Malhotra

Abdominal Aortic Aneurysm: Understanding the Silent Rupture That Can End a Life in Minutes

Abdominal aortic aneurysms are often symptomless until they rupture — with devastating consequences. Learn how to recognize this silent killer, manage patients safely, and understand what first responders need to do in those crucial first minutes.

What Is an Abdominal Aortic Aneurysm (AAA)?

An abdominal aortic aneurysm (AAA) is a life-threatening condition that occurs when the aorta, the body’s largest artery, responsible for delivering blood from the heart to the rest of the body becomes weakened and bulges in the abdominal section.

Think of it like a balloon forming on a worn garden hose. Over time, the walls of the aorta stretch and thin. If that “balloon” bursts, massive internal bleeding can occur, and without immediate intervention, it’s almost always fatal.

Why It’s So Dangerous

The danger of an AAA lies in its silence.
Most people have no symptoms at all until it’s too late. When rupture happens, it can cause catastrophic bleeding within minutes.

The mortality rate for a ruptured AAA is estimated at 80–90%, and even with rapid surgical care, only about half of patients survive.

That’s why early detection and recognizing the warning signs in emergencies is critical — especially for first responders and advanced first aiders.

Common Risk Factors

While an AAA can develop in anyone, certain factors dramatically increase the risk:

  • Age: Most common in adults over 65

  • Sex: More frequent in men than women

  • Smoking: Major risk factor — it weakens arterial walls

  • High blood pressure (hypertension)

  • Family history of aneurysm

  • Atherosclerosis (plaque buildup in arteries)

  • High cholesterol or obesity

Screening programs in Canada often recommend ultrasound testing for men over 65 who smoke or have smoked — even if they feel perfectly fine.

Recognizing the Signs and Symptoms

In many cases, AAAs are asymptomatic, but if symptoms do appear, they may include:

  • Deep, constant abdominal pain or discomfort

  • Pain radiating to the back, side, or groin

  • A pulsating feeling in the abdomen (like a heartbeat under the skin)

  • Sudden severe pain if rupture occurs

  • Signs of shock after rupture — pale, cool, clammy skin, rapid pulse, weakness, confusion, and collapse

As a first aider or EMR, the key is suspicion.
If a patient — particularly an older male — complains of severe back or abdominal pain without trauma, and presents with shock symptoms but no external bleeding, you should consider AAA as a possible cause.

First Aid and Prehospital Response

If you suspect an abdominal aortic aneurysm, here’s how to respond:

  1. Transport lights and sirens.
    Early transport to a surgical facility is the patient’s only chance.

  2. Do not give the patient food, drink, or oral medications.
    Surgery will likely be required.

  3. Keep the patient still and calm.
    Any increase in heart rate or blood pressure can worsen the rupture.

  4. Lay the patient flat, unless they are having difficulty breathing, in which case, a semi-sitting position may help.

  5. Treat for shock.

    • Maintain body temperature (cover with a blanket).

    • Do not elevate the legs — this may increase pressure on the abdomen.

  6. Monitor ABCs (airway, breathing, circulation) and prepare for deterioration.

    • If trained and equipped, provide high-flow oxygen.

    • Be ready for loss of consciousness and cardiac arrest.

Note: Never palpate (press) the abdomen to “check” for a pulsating mass, this can trigger rupture.

For Medical Professionals

Prehospital care focuses on gentle handling, rapid transport, and minimal interventions that could increase blood pressure.
IV fluids, if used, should be titrated to maintain minimal perfusion (permissive hypotension) — enough for mental alertness and radial pulse, but not to normalize blood pressure.

Diagnosis and Treatment in Hospital

Once at the hospital, diagnosis is typically confirmed by ultrasound or CT scan.
Treatment depends on the aneurysm’s size and stability:

  • Small, stable aneurysms may be monitored regularly.

  • Large or ruptured aneurysms require emergency surgery — either open repair or a stent graft (EVAR).

Prevention and Long-Term Outlook

The good news is that AAAs are preventable — or at least manageable — when detected early.

Preventive steps include:

  • Quitting smoking

  • Managing blood pressure and cholesterol

  • Maintaining a healthy weight

  • Regular screening for those at risk

Why It Matters for First Responders

Abdominal aortic aneurysm may be rare, but it’s one of those “can’t miss” conditions. Recognizing it early, even if you can’t confirm it, it can guide your decisions about patient handling, transport, and communication with paramedics or emergency departments.

For first aiders and EMRs, the pattern of sudden, severe pain, shock, and no obvious trauma should always raise the possibility of AAA.

Final Thought

An abdominal aortic aneurysm is often called the “silent killer” , but silence doesn’t mean invisibility.
With awareness, training, and rapid action, first responders can give patients their best possible chance at survival.

Read More
Kumari Malhotra Kumari Malhotra

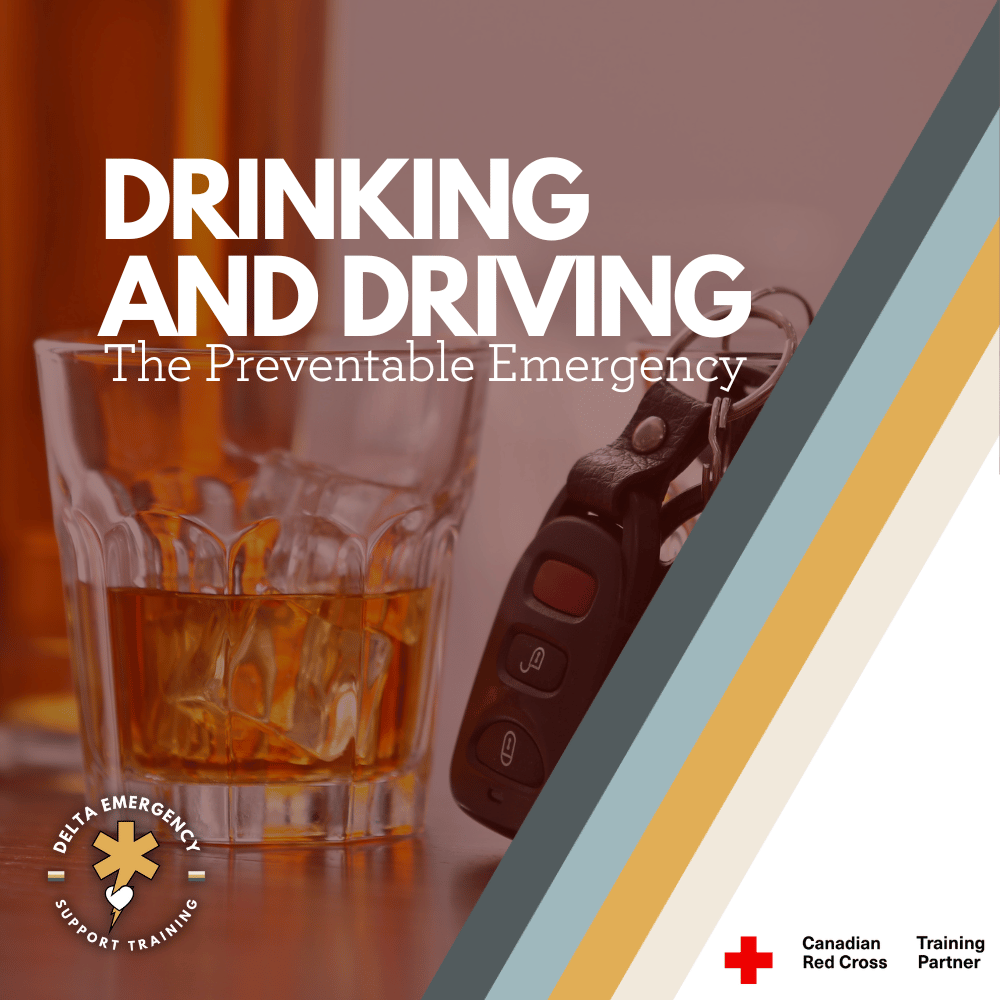
The Dangers of Drinking and Driving: Why Every Decision Counts

Drinking and driving remains one of the most preventable causes of death and injury on Canadian roads. Every year, impaired driving leads to devastating collisions that emergency responders see far too often. Alcohol slows reaction time, impairs judgment, and reduces coordination — turning an ordinary drive into a life-threatening event. This blog explores the dangers of impaired driving, its impact on first responders, and how education, prevention, and responsible choices can save lives before tragedy strikes.

Drinking and driving remains one of the most preventable causes of death and injury on the roads. Despite decades of awareness campaigns and legal consequences, impaired driving continues to claim lives and devastate families across the world, including here in Canada. As emergency responders, we see firsthand the destructive effects of impaired driving. But it's important to not only focus on the aftermath but also the steps we can take to prevent these incidents from happening in the first place.

The Facts: Drinking and Driving in Canada

According to the Traffic Injury Research Foundation (TIRF), alcohol is a factor in approximately 30% of all road deaths in Canada. In 2021 alone, there were over 1,000 fatalities attributed to alcohol-impaired driving. The numbers are just as alarming when it comes to injuries: more than 60,000 Canadians are injured in crashes where alcohol is involved each year.

Impaired driving isn’t just about alcohol, though. Drugs, whether prescription, recreational, or illegal—can also impair judgment, reaction time, and motor skills, making it just as dangerous behind the wheel. With the legalization of cannabis in Canada, more drivers are using cannabis in combination with alcohol, which can have compounding effects on impairment.

Why Alcohol Affects Driving Ability

Alcohol affects the central nervous system (CNS), impairing the brain’s ability to process information, make decisions, and react quickly. Even small amounts of alcohol can reduce reaction time and distort judgment, making drivers:

  • Less able to judge distances and speed: Alcohol reduces your ability to judge the distance between vehicles, the time it will take to stop, and the speed at which you’re traveling.

  • Slower to react: Even moderate levels of alcohol (just one or two drinks) delay reflexes, which could make the difference between avoiding an accident and crashing.

  • Impaired vision: Alcohol reduces depth perception, making it harder to gauge objects at a distance, which affects turning, merging, and parking.

  • Decreased coordination: Alcohol slows muscle function, which can make it more difficult to steer, apply the brakes, or even press the gas pedal.

The Legal Consequences of Drinking and Driving

In Canada, the legal limit for blood alcohol concentration (BAC) is 0.08%, but impairment can begin well before that level is reached. Even at 0.05% BAC, drivers experience decreased ability to control their vehicle, and their reaction time is slowed. The legal penalties for drinking and driving in Canada include fines, license suspension, mandatory education programs, and even jail time for repeat offenders.

But the legal consequences are just one part of the equation. The emotional, financial, and social impacts on the driver, their family, and other victims are often far-reaching and irreversible.

Impact on Emergency Responders

As first responders, we are on the front lines of dealing with the aftermath of drinking and driving accidents. These incidents are often preventable, but we respond to them day in and day out. Some of the impacts we experience from these crashes include:

  • Physical injuries: Drinking and driving accidents often result in serious, life-threatening injuries. Victims may suffer spinal cord injuries, head trauma, broken bones, or internal bleeding.

  • Psychological toll: Responding to the aftermath of a fatal crash, especially one caused by drinking and driving, can take an emotional toll on responders. The stress, grief, and trauma of being involved in these events can affect mental health and well-being.

  • Workplace impact: High-volume crash responses, especially those related to impaired driving, can lead to burnout, fatigue, and long-term psychological consequences for responders who deal with these traumatic situations regularly.

As we know, the consequences are far-reaching, and addressing this public health issue takes a community-based approach.

How to Prevent Drinking and Driving

Prevention is the key to reducing the frequency of impaired driving incidents. Here are a few strategies to help combat this dangerous behavior:

  • Promote designating a driver: Encourage those who plan to drink to arrange a designated driver before heading out. This can be a friend, family member, or rideshare service like Uber or Lyft.

  • Offer alternative transportation options: Ensure there are safe, reliable public transportation options or taxis available for those who need to get home after drinking.

  • Educate the public: Raising awareness about the dangers of drinking and driving through campaigns and community events can help reduce incidents. Targeted education for young drivers is especially critical, as teenagers and young adults are the most likely to engage in risky driving behaviors.

  • Use sobriety checkpoints: Law enforcement agencies should continue to utilize sobriety checkpoints and increased patrols during high-risk periods like weekends and holidays when drinking and driving incidents tend to spike.

  • Implementing stricter penalties: Research shows that stronger legal consequences—such as increased fines and longer suspensions—can deter individuals from drinking and driving.

  • Encourage self-regulation: As a community, we can encourage personal responsibility. Whether it’s in social settings or in conversations with friends and family, it’s important to remind each other that getting behind the wheel after drinking puts everyone at risk.

Key Takeaways

  • Drinking and driving continues to be one of the leading causes of road-related injuries and fatalities in Canada.

  • Even small amounts of alcohol can impair judgment, reaction time, and motor skills, making it dangerous to drive.

  • As emergency responders, we witness the devastating impact of drinking and driving on a daily basis.

  • Prevention is key, and as a community, we must take proactive steps to reduce these preventable accidents.

  • Whether it’s through education, designated drivers, or stricter penalties, we can work together to prevent impaired driving and save lives.

Final Thoughts

As responders, we know that emergency situations are rarely clear-cut, and impaired driving incidents only further complicate the scenario. Whether we’re treating victims, supporting grieving families, or experiencing the emotional toll ourselves, we need to advocate for prevention at every opportunity. It's vital that we continue to speak out about the dangers of drinking and driving — not just as emergency workers but as active participants in a community that values the safety and well-being of all its members.

Read More

Ejection Trauma: What First Responders Need to Know About High-Impact MVCs

Ejection trauma is one of the most catastrophic outcomes of a motor vehicle collision. For first responders, understanding how to assess, stabilize, and prioritize care for these high-impact patients is critical. Here’s how to stay calm, organized, and effective in the moments that matter most.

When a person is ejected from a vehicle during a crash, the outcome is almost always severe. Ejection trauma represents one of the most catastrophic mechanisms of injury emergency responders will encounter. Whether partial or complete, being thrown from a vehicle amplifies the forces acting on the body—turning an already violent impact into a multi-system trauma event.

What Is Ejection Trauma?

Ejection trauma occurs when a vehicle occupant is completely or partially thrown out of the vehicle during a collision. This typically happens when seat belts are not worn or fail, or when the force of impact breaches the vehicle’s structure.

There are two main types:

  • Partial ejection – The patient is partially expelled, often trapped by the seat belt or vehicle frame, resulting in crushing or shearing injuries.

  • Complete ejection – The patient is fully thrown clear of the vehicle, often resulting in secondary impacts with the ground or other objects.

Mechanism of Injury (MOI)

Ejection trauma is classified as a high-mechanism MOI, and responders should immediately suspect:

  • Severe blunt trauma

  • Multiple fractures

  • Spinal, head, and internal injuries

  • Airway compromise or shock

The energy transfer doesn’t stop at the first impact—the patient often experiences multiple points of contact:

  1. The initial crash inside the vehicle

  2. Contact with the vehicle structure on exit

  3. Impact with the ground or another surface

  4. Potential secondary impact with objects (trees, poles, other vehicles)

Each of these contributes to a complex and unpredictable injury pattern.

Common Injuries Associated with Ejection

Responders should anticipate multi-system trauma, including:

  • Head and neck injuries: Concussions, skull fractures, traumatic brain injuries (TBI)

  • Spinal trauma: High risk of spinal fractures or cord damage due to rotational forces

  • Thoracic injuries: Flail chest, pneumothorax, hemothorax, cardiac contusions

  • Abdominal trauma: Liver or spleen lacerations, internal bleeding

  • Orthopedic injuries: Long bone fractures, pelvic fractures, amputations

  • Soft tissue injuries: Severe abrasions, degloving injuries, lacerations

Scene Assessment

When responding to an MVC with possible ejection, scene safety and situational awareness come first.

  • Scan the entire area—patients may be thrown significant distances or hidden in brush, ditches, or behind obstacles.

  • Note patient position relative to the vehicle; it offers key clues about trajectory and energy transfer.

  • Look for additional hazards: leaking fuel, oncoming traffic, downed power lines.

Patient Management in the Field

Ejected patients require rapid, systematic assessment and early activation of advanced care.

1. Scene Safety & Triage

  • Request additional units and air transport early.

  • Perform a global scan for multiple patients.

2. Primary Survey (Check, Call, Care)

  • Airway: Suspect spinal injury—manually stabilize head and neck, use jaw-thrust if needed.

  • Breathing: Expose the chest, check for symmetry and adequate air movement.

  • Circulation: Control major bleeding immediately. Prioritize rapid identification of life-threatening hemorrhage.

3. Secondary Survey

  • Head-to-toe assessment, noting deformities, contusions, abrasions, punctures, burns, tenderness, lacerations, and swelling (DCAP-BTLS).

  • Monitor vitals frequently—changes can indicate internal bleeding or decompensating shock.

  • Maintain spinal motion restriction (SMR) if indicated.

4. Shock Management

  • Treat for hypovolemia: position appropriately, keep warm, and prepare for rapid transport.

  • Oxygen administration and airway management should be prioritized.

The Role of Prehospital Responders

As a first responder, your calm and methodical approach can make all the difference. Recognizing the severity of ejection trauma early allows for:

  • Prioritizing rapid extrication and transport

  • Effective communication with dispatch and incoming EMS

  • Early notification of trauma centers

Ejection = Severe Trauma Until Proven Otherwise.
Never underestimate the forces involved—patients may appear stable initially but can deteriorate quickly.

Key Takeaways

  • Ejection trauma is one of the deadliest outcomes of an MVC.

  • Always assume multi-system trauma and spinal involvement.

  • Focus on airway, breathing, and circulation while minimizing movement.

  • Rapid transport and early hospital notification are essential.

  • Scene safety, teamwork, and clear communication are critical under pressure.

Final Thoughts

Every ejection call reminds responders why scene assessment and mechanism recognition matter so much. Behind every statistic is a human life—one that depends on the calm, structured, and skilled actions of those first on scene. Whether you’re an Advanced First Aider, EMR, or paramedic student, understanding ejection trauma prepares you to manage chaos with confidence and compassion.

Read More

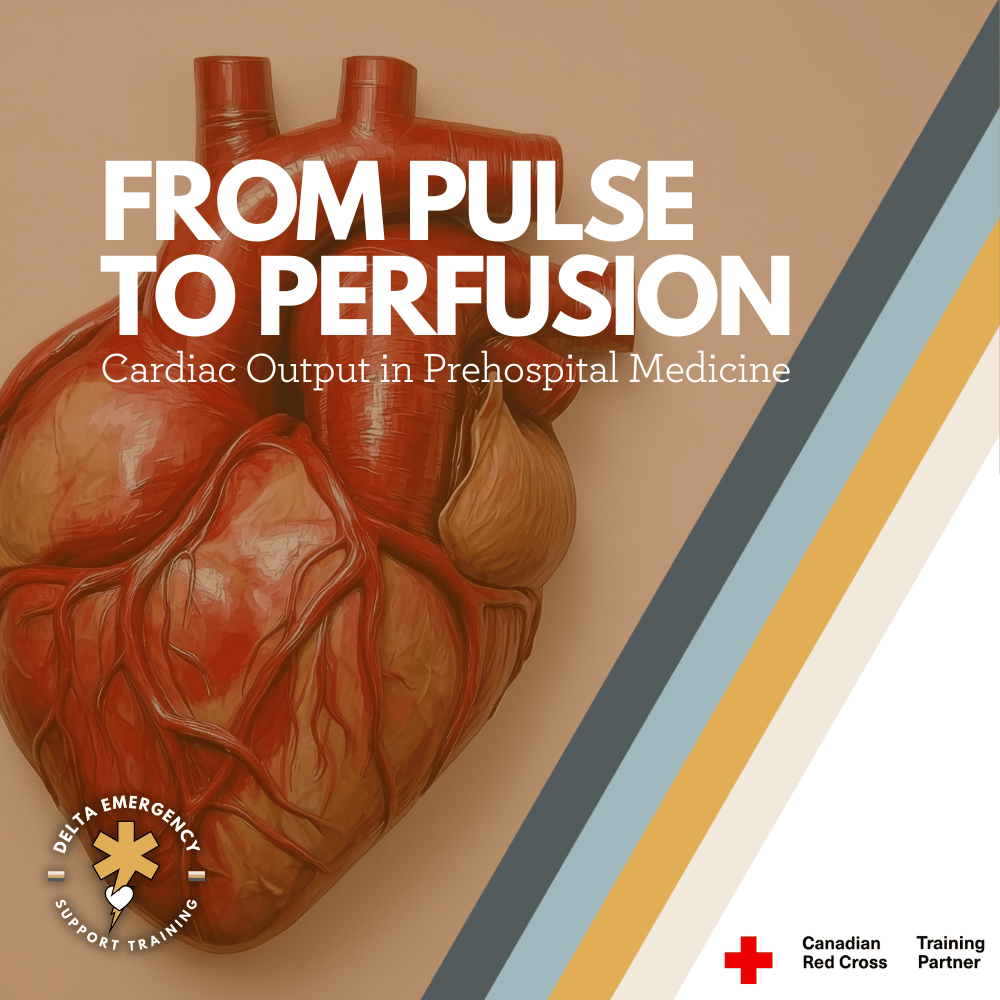
From Pulse to Perfusion: Cardiac Output in Prehospital Medicine

Cardiac output is the foundation of perfusion — the lifeline that keeps every organ functioning. In prehospital care, understanding how heart rate and stroke volume interact helps responders identify shock early, guide treatment, and protect vital organs. This blog breaks down cardiac output in clear, practical terms for EMRs, advanced first aiders, and anyone working in emergency response.

When assessing or treating a patient in the field, one of the most critical yet often overlooked concepts is cardiac output— the amount of blood the heart pumps in one minute. Understanding it helps prehospital providers recognize early signs of shock, guide treatment decisions, and prioritize interventions that can truly make the difference between life and death.

What Is Cardiac Output?

Cardiac Output (CO) = Heart Rate (HR) × Stroke Volume (SV)

  • Heart Rate (HR): The number of heartbeats per minute.

  • Stroke Volume (SV): The amount of blood pumped out of the left ventricle with each beat.

For example, if a patient’s heart rate is 80 bpm and stroke volume is 70 mL, their cardiac output is:
80 × 70 = 5,600 mL/min (5.6 L/min)

This means their heart pumps about 5–6 litres of blood per minute, roughly the body’s total blood volume.

Why It Matters in Prehospital Care

Cardiac output is the foundation of perfusion — how well oxygen and nutrients reach tissues. In the field, recognizing how HR and SV interact can help you determine whether a patient is compensating or decompensating.

When cardiac output drops, tissue hypoxia occurs. Cells switch to anaerobic metabolism, producing lactic acid and leading to shock.

Common causes of decreased cardiac output in the field include:

  • Hypovolemia (bleeding, dehydration)

  • Pump failure (myocardial infarction, cardiomyopathy)

  • Obstruction (cardiac tamponade, tension pneumothorax, pulmonary embolism)

  • Distributive shock (sepsis, anaphylaxis)

Heart Rate and Stroke Volume in Real-Time Assessment

  • Tachycardia: Often the first sign of compensation. The body increases HR to maintain CO when stroke volume drops (like in hemorrhage).

  • Bradycardia: Can be catastrophic in shock, as it limits overall output.

  • Stroke Volume Influencers:

    • Preload: Volume of blood returning to the heart.

    • Contractility: Strength of the heart’s contractions.

    • Afterload: Resistance the heart pumps against.

Understanding how each factor impacts stroke volume helps guide care decisions — for instance, whether a patient needs fluids, vasopressors, or advanced airway management.

In Practice: Assessing Cardiac Output Without a Monitor

Prehospital providers rarely calculate CO directly — instead, you assess it through clinical signs of perfusion:

  • Level of consciousness – is the brain getting enough oxygen?

  • Skin signs – pale, cool, diaphoretic skin suggests poor perfusion.

  • Capillary refill and pulse strength – quick, weak, or absent pulses can all indicate changes in CO.

  • Blood pressure and pulse pressure trends – narrowing pulse pressure (e.g., 90/80) may indicate a drop in stroke volume.

Your hands, eyes, and ears are your diagnostic tools before monitors confirm what you already suspect.

Improving Cardiac Output in the Field

Depending on the cause:

  • Fluid resuscitation restores preload in hypovolemia.

  • Positioning (Trendelenburg or shock position) can temporarily improve venous return.

  • Oxygen therapy supports oxygen delivery when perfusion is limited.

  • CPR and defibrillation are lifesaving when the heart fails to generate output altogether.

Remember — every intervention you perform is ultimately aimed at restoring or maintaining cardiac output to sustain vital organ perfusion.

Final Thoughts

For first responders and EMRs, cardiac output isn’t just a number — it’s the lifeline of your patient.
Understanding how heart rate, stroke volume, and perfusion interact allows you to anticipate deterioration before it becomes irreversible.
Every pulse you feel, every set of vitals you take, tells a story about how effectively the heart is doing its job.

Read More
Advanced First Aid, BLS, BLS CPR, Cardiac Kumari Malhotra Advanced First Aid, BLS, BLS CPR, Cardiac Kumari Malhotra

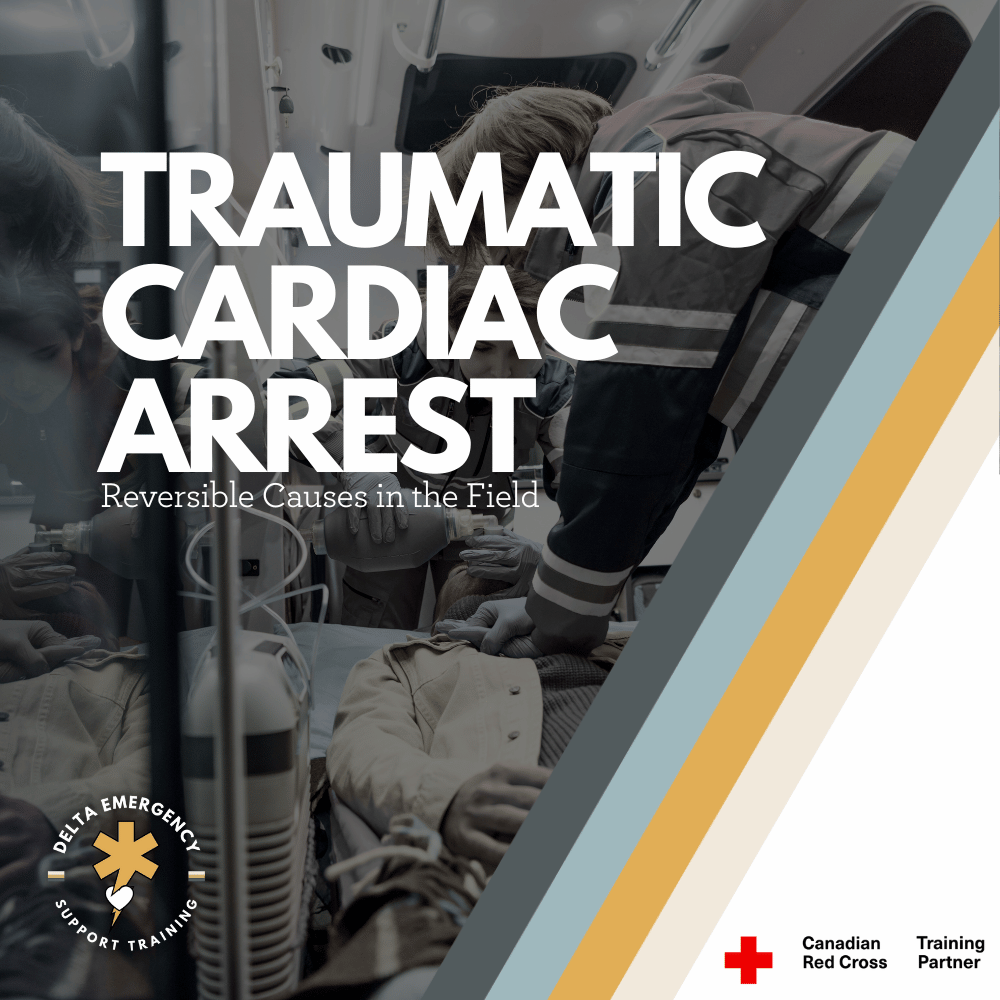
Traumatic Cardiac Arrest: What Every Professional Responder Should Know

Traumatic cardiac arrest is one of the most demanding situations a responder can face. This in-depth guide explains how to rapidly identify reversible causes, manage airway and bleeding, and provide effective field care to improve survival chances in severe trauma cases.

Traumatic cardiac arrest (TCA) represents one of the most challenging situations in prehospital care. Outcomes are often poor, but when managed rapidly and effectively, survival with good neurological recovery is possible. This blog explores what TCA is, its causes, assessment and treatment priorities, and best practices for professional responders in Canada.

What Is Traumatic Cardiac Arrest?

A traumatic cardiac arrest occurs when a patient’s heart stops as a direct result of major trauma. This trauma can be blunt (such as falls or motor vehicle collisions) or penetrating (such as gunshots or stab wounds).

Unlike medical cardiac arrests, TCA often stems from reversible physical causes rather than primary heart dysfunction. The most common reversible causes include:

  • Severe hemorrhage (uncontrolled bleeding)

  • Hypovolemia (loss of circulating volume)

  • Hypoxia (insufficient oxygen supply)

  • Tension pneumothorax (collapsed lung causing pressure on the heart)

  • Cardiac tamponade (blood filling the pericardial sac and compressing the heart)

How Common Is TCA and What Are the Survival Trends?

Traumatic cardiac arrests are less common than medical arrests but are often more complex. Historically, survival rates have been extremely low—typically below 2%. However, in cases where the underlying cause is rapidly identified and corrected, patients can and do survive, especially when there are early signs of life or immediate advanced care.

Outcomes tend to be more favorable in penetrating trauma compared to blunt trauma, largely due to the speed at which reversible causes can be treated.

Key Priorities in Managing TCA

When seconds matter, responders must focus on interventions that directly address reversible causes. The following priorities guide professional care:

PriorityActionPurposeControl Hemorrhage / HypovolemiaApply direct pressure, tourniquets, wound packing, or pelvic binders.Prevent further blood loss and restore perfusion.Airway and OxygenationClear the airway and ventilate effectively. Use supraglottic or advanced airways if trained and authorized.Correct hypoxia, one of the leading causes of TCA.Relieve Mechanical ObstructionsPerform needle decompression for tension pneumothorax or use a chest seal for open chest wounds.Restore normal breathing and heart function.High-Quality CPROnly once reversible causes are being managed. Focus on effective compressions with minimal interruptions.Maintain perfusion if reversible causes have been addressed.Rapid TransportTransport quickly to a trauma centre if signs of life are present.Definitive care is essential for survival.

Trauma Type and Approach

Penetrating Trauma

Penetrating injuries, such as gunshots or stabbings, can cause localized damage but often have a shorter timeline to intervention. Quick chest decompression, bleeding control, and airway management can make a significant difference in survival outcomes.

Blunt Trauma

Blunt trauma, such as from high-impact collisions or falls, often causes widespread internal injuries and massive bleeding. Survival rates are generally lower, and early recognition of futility is crucial when there are no signs of life and prolonged downtime.

Canadian Best Practices and Field Considerations

Canadian EMS and paramedic protocols emphasize a systematic, cause-driven approach to TCA management:

  • Address all reversible causes simultaneously.
    Control bleeding, relieve pneumothorax, and manage airway without delay.

  • Obtain IV/IO access and administer fluids as indicated for hypovolemia.

  • Perform bilateral needle decompressions if chest trauma is suspected.

  • Apply pelvic binders when pelvic fractures or major lower-body trauma are likely.

  • Minimize scene time. Rapid transport to a trauma centre remains a priority.

  • Epinephrine is often deprioritized, as it offers limited benefit when the heart has stopped due to physical injury rather than electrical failure.

  • Termination of Resuscitation (TOR) may be considered if there are no signs of life, asystole, and extended downtime with no reversible cause found.

Common Challenges for Responders

Traumatic cardiac arrests demand rapid thinking and precise teamwork. Common challenges include:

  • Identifying reversible vs. irreversible causes. It can be difficult to determine whether the arrest is trauma-induced or secondary to a medical event.

  • Time pressure. Every second counts, especially when massive hemorrhage or tension pneumothorax is suspected.

  • Limited prehospital tools. Not all regions permit advanced procedures like thoracotomy or pericardiocentesis.

  • Balancing interventions. CPR may worsen bleeding if hemorrhage is uncontrolled, so priorities must be reassessed continually.

  • Transport logistics. Long transport times may influence whether resuscitation efforts continue.

Step-By-Step Approach to Traumatic Cardiac Arrest

  1. Ensure scene safety and don PPE.

  2. Rapidly assess mechanism and timeline (blunt vs. penetrating, time of arrest, signs of life).

  3. Control massive bleeding immediately. Use direct pressure, tourniquets, or wound packing.

  4. Manage the airway and ventilate. Provide oxygen and ensure adequate chest rise.

  5. Relieve chest pressure. Perform needle decompression and apply chest seals as indicated.

  6. Provide fluid resuscitation. Administer IV or IO fluids per protocol.

  7. Perform CPR if appropriate. Begin once reversible causes are actively addressed.

  8. Transport rapidly to a trauma facility if ROSC occurs or if the patient shows any signs of life.

  9. Consider termination if no response and all reversible causes have been managed.

Why TCA Differs from Medical Cardiac Arrest

In medical cardiac arrest, the primary issue is usually electrical or metabolic failure of the heart. In TCA, the heart often stops because of physical factors such as massive bleeding or chest injury. As a result, standard interventions like defibrillation or epinephrine are secondary to correcting the underlying mechanical or circulatory issues.

In short — treat the cause, not just the rhythm.

Realistic Scenarios

  • Penetrating Chest Trauma: A patient with a gunshot wound to the chest is pulseless on arrival. Responders immediately apply a chest seal, decompress the chest, manage the airway, and control external bleeding.

  • Blunt Pelvic Trauma: Following a vehicle collision, the patient has severe pelvic instability and no pulse. A pelvic binder is applied, external bleeding controlled, airway secured, and fluids initiated during transport.

Final Thoughts

Traumatic cardiac arrest demands composure, coordination, and deep understanding of trauma physiology. While survival rates remain low, outcomes improve significantly when responders rapidly identify and correct reversible causes.

Every second counts — and with the right interventions, professional responders can give trauma patients their best chance at survival.

Read More
Advanced First Aid, EMR, First Responder Kumari Malhotra Advanced First Aid, EMR, First Responder Kumari Malhotra

Treating Gunshot Wounds: A Professional Responder’s Guide

Gunshot wounds are life-threatening emergencies that require quick, precise action. This guide for professional responders covers wound assessment, bleeding control, chest seal application for thoracic injuries, and key steps for safe transport to trauma centers.

Gunshot wounds (GSWs) are among the most critical emergencies a responder can encounter. Severity depends on bullet type, trajectory, and location, making rapid assessment and precise intervention essential. Professional responders must be prepared to manage everything from external bleeding to life-threatening internal injuries.

Gunshot Wounds in Canada: Context & Stats

Understanding the prevalence and patterns of firearm injuries in Canada provides important context:

  • Between 2016–2020, Canada saw over 4,000 deaths and thousands of hospitalizations due to firearm injuries.

  • Fatal injuries are most often suicides (~72%), followed by homicides (~23%), with unintentional injuries and law enforcement incidents making up smaller percentages.

  • Non-fatal injuries frequently result from assault or accidental shootings, highlighting the need for skilled first responders.

  • Young adult males (20–34) are most commonly affected, emphasizing the importance of rapid intervention in high-risk scenarios.

Scene Safety & Initial Approach

Before approaching the patient:

  1. Ensure scene safety. Gunshot incidents may occur in violent settings—confirm the area is secure and involve law enforcement if necessary.

  2. Use proper PPE. Gloves, eye protection, and body protection may be required depending on the scene.

  3. Triage and rapid assessment. Identify life-threatening injuries first, especially massive bleeding or airway compromise.

Primary Survey: C-ABCDE Approach

Professional responders often use a C-ABCDE approach, prioritizing massive bleeding first:

  • C – Massive Hemorrhage: Apply direct pressure, hemostatic dressings, or tourniquets (for limbs). Junctional areas may require packing or specialized devices.

  • A – Airway: Ensure airway is clear; use adjuncts if necessary. Be alert for obstructions from blood, tissue, or debris.

  • B – Breathing: Evaluate for chest injuries. Gunshot wounds to the thorax can cause pneumothorax, tension pneumothorax, or hemothorax.

  • C – Circulation: Monitor vitals, assess for shock, establish IV access if in scope, and be ready to administer fluids per protocol.

  • D – Disability: Evaluate neurological status (AVPU or GCS) and look for signs of head or spinal injury.

  • E – Exposure & Environment: Fully assess injuries while keeping the patient warm and preserving dignity.

Treating Gunshot Wounds by Location

Extremities (Arms & Legs)

  • Risks: Severe bleeding, fractures, nerve damage.

  • Intervention: Direct pressure, tourniquets for limbs, immobilize fractures, monitor for shock.

Junctional Areas (Groin, Axilla, Neck)

  • Risks: Major vessel injury; uncontrolled bleeding.

  • Intervention: Use pressure and hemostatic dressings; junctional tourniquet if available.

Chest

Chest injuries are especially dangerous due to risk of lung collapse, cardiac injury, or massive internal bleeding.

  • Signs: Difficulty breathing, sucking chest wound, rapid deterioration, shock.

  • Intervention:

    1. Chest Seal: Apply to open chest wounds to prevent air entry and reduce risk of tension pneumothorax. Venting seals allow trapped air to escape.

    2. Oxygen Support: Provide high-flow oxygen if trained.

    3. Positioning: Keep the patient upright if comfortable to assist breathing.

    4. Rapid Transport: Patients with chest GSWs require urgent trauma care.

Abdomen & Pelvis

  • Risks: Internal organ damage, significant bleeding.

  • Intervention: Cover exposed organs with sterile, moist dressings, avoid manipulation, monitor vitals, rapid transport.

Head & Neck

  • Risks: Airway compromise, brain injury, severe bleeding.

  • Intervention: Protect cervical spine, manage airway, control bleeding, rapid transport.

Special Considerations

  • Bullet Energy & Cavitation: High-velocity bullets create more tissue damage due to cavitation.

  • Shock & Hypovolemia: Internal bleeding may be hidden—monitor vitals closely and maintain patient warmth.

  • Infection Prevention: Stabilize the patient, then follow protocols for wound cleaning, antibiotics, and tetanus prophylaxis.

  • Documentation & Legal Obligations: In Canada, gunshot injuries often must be reported to authorities. Preserve evidence while delivering care.

Tools & Equipment for Responders

  • Hemostatic dressings / pressure dressings

  • Tourniquets for limbs

  • Chest seals for sucking chest wounds

  • Airway adjuncts (OPA/NPA)

  • IV fluids and monitoring equipment (per protocol)

  • High-flow oxygen

  • PPE for responder safety

Transport & Handover

  • Maintain bleeding control, airway, and vital signs during transport.

  • Provide a clear handover to receiving trauma center: wound location, number of shots, interventions performed, and patient vitals.

Summary

Gunshot wounds are complex and life-threatening. Professional responders must:

  • Rapidly control bleeding and manage airways.

  • Use chest seals for thoracic injuries.

  • Monitor for shock and hidden injuries.

  • Provide rapid transport to trauma centers with thorough documentation.

Proper training, situational awareness, and decisive action can significantly improve survival and reduce complications from GSWs.

Read More
Awareness, Bystander, First Aid Kumari Malhotra Awareness, Bystander, First Aid Kumari Malhotra

Overcoming the Bystander Effect: How to Encourage Action in Emergencies

Even when help is needed most, many people hesitate to act. The bystander effect explains why witnesses freeze during emergencies, but simple strategies, like assigning tasks, giving clear instructions, and staying calm can empower anyone to make a difference.

Emergencies can happen anywhere—on the street, at home, or even at work. Yet, despite being physically present, many people fail to act when someone needs help. This phenomenon, known as the bystander effect, can mean the difference between life and death. Understanding why it happens and how to empower witnesses is critical for building safer communities.

At Delta Emergency Support Training, we focus on equipping both first responders and everyday people with the knowledge and confidence to act when it matters most.

What Is the Bystander Effect?

The bystander effect occurs when individuals are less likely to help someone in need because others are present. The presence of other witnesses can create diffusion of responsibility, where everyone assumes someone else will step in.

Common psychological reasons include:

  • Diffusion of responsibility: “Someone else will call 911.”

  • Fear of doing harm: Worry about making the situation worse.

  • Social influence: Looking at others to see how they react.

  • Evaluation apprehension: Fear of judgment if they act incorrectly.

Canadian Statistics on the Bystander Effect

  • According to a 2022 survey by the Canadian Red Cross, over 40% of Canadians have witnessed a medical emergency but did not intervene.

  • Studies show that in public settings, only 1 in 3 people will offer assistance during emergencies if others are present.

  • Time is critical: In cardiac arrests, survival decreases by 7–10% per minute without intervention, making bystander action essential.

Why People Freeze

People don’t always refuse to help out of selfishness—they freeze due to a combination of fear, uncertainty, and social cues. Examples include:

  • Witnessing someone collapse in a crowd and assuming another bystander has already called for help.

  • Seeing a car accident and being unsure whether it’s safe to approach.

  • Feeling overwhelmed by the severity of the situation.

Understanding these psychological barriers is the first step in overcoming them.

How to Encourage Action

  1. Assign Responsibility

    • If you see an emergency, point to someone specifically and instruct them to call 911 or get help.

    • Example: “You in the red jacket, call 911 and get a first aid kit!”

  2. Provide Clear Instructions

    • Direct instructions reduce hesitation and increase confidence.

    • Telling someone exactly what to do—“Check for breathing,” “Begin CPR”—reduces uncertainty.

  3. Model Calm Leadership

    • Calm, confident action encourages others to help rather than freeze.

    • Speak clearly and remain composed to inspire others to step in.

  4. Educate Communities

    • Promote first aid and CPR training for the public.

    • Awareness campaigns and workshops increase willingness to act.

  5. Normalize Small Actions

    • Even simple actions—calling 911, providing basic first aid, or comforting the patient—can save lives.

    • Emphasize that any response is better than none.

The Role of First Aiders

First aiders are often the bridge between bystanders and professional care. By stepping in, first aiders not only provide life-saving support but also encourage others to assist safely, creating a ripple effect in emergencies.

Training in scene assessment, ABCs (airway, breathing, circulation), and communication ensures first aiders are confident, safe, and able to direct others effectively.

Final Thoughts

The bystander effect is a real psychological phenomenon—but it can be overcome. Understanding why people freeze, educating communities, and empowering witnesses to act are key steps in building safer environments. Every action counts. Every second matters.

At Delta Emergency Support Training, we teach Canadians how to respond with confidence, whether it’s performing first aid, calling for help, or guiding bystanders. Together, we can turn hesitation into lifesaving action.

Read More
Canada, First Aid, Trained First Aider Kumari Malhotra Canada, First Aid, Trained First Aider Kumari Malhotra

The Chain of Survival: Your Role as a Trained First Aider

First aid isn’t just about bandages—it’s about recognizing emergencies, acting quickly, and providing care until professional help arrives. Explore the key responsibilities of a first aider and understand why these skills are essential for every workplace and community.

When someone collapses, chokes, or stops breathing, every second counts. Whether you're a parent, a coach, a security guard, or someone who’s recently completed your Standard First Aid certification, you are a vital link in what’s known as the Chain of Survival—a model that outlines the critical steps needed to give someone the best chance of survival in a life-threatening emergency.

This blog explores what the Chain of Survival is, how first aiders fit into it, and why quick, confident action truly saves lives.

🔗 What Is the Chain of Survival?

The Chain of Survival is a concept developed by the American Heart Association and supported by the Canadian Red Cross. It identifies five key links in responding to sudden cardiac arrest or other life-threatening emergencies:

  1. Early recognition and activation of EMS (calling 911)

  2. Early CPR with an emphasis on high-quality chest compressions

  3. Rapid defibrillation (AED use)

  4. Advanced resuscitation by paramedics or emergency healthcare professionals

  5. Post-cardiac arrest care at the hospital

🧠 Why the First Three Links Depend on You

Before paramedics arrive, the first three links are in your hands. This is where Standard First Aid and CPR trainingcomes in.

✅ 1. Early Recognition & Calling 911

You are the first person on scene—whether at home, at work, or in a public space. Recognizing when something is wrong (unresponsiveness, abnormal breathing, signs of a stroke or heart attack) and calling 911 starts the entire chain. Don’t wait. Early recognition can prevent the situation from getting worse.

✅ 2. Early CPR

If the person is not breathing or has no pulse, you need to start CPR immediately. High-quality chest compressions maintain blood flow to the brain and organs, buying time until help arrives. Studies show that bystander CPR can double or triple a person's chances of survival.

✅ 3. Early Defibrillation

An AED (automated external defibrillator) can shock the heart back into a normal rhythm. These are often available in schools, gyms, offices, and malls. Your Standard First Aid training gives you the confidence to use one correctly—and without hesitation.

🚑 Where EMS and Hospitals Take Over

Once paramedics arrive, they begin advanced care: administering medications, airway management, and transport to the hospital. But without your initial response—those first few minutes—their efforts may come too late. Survival rates drop 7–10% for every minute defibrillation is delayed. That’s why your actions matter so much.

👣 Your Role as a Trained First Aider

By taking a Red Cross Standard First Aid course, you’ve become more than just a witness to emergencies—you’ve become someone who can act. You’ve learned to:

  • Assess the scene and ensure safety

  • Check for responsiveness and breathing

  • Call for help and provide clear information to dispatch

  • Start CPR and use an AED

  • Support someone through shock, bleeding, or trauma

  • Recognize and manage common medical emergencies

You’re not a bystander. You are the beginning of the Chain of Survival.

🛠️ Want to Be Even More Prepared?

Whether you’ve taken first aid before or are due for a recertification, refreshing your skills ensures you stay sharp and confident. At Delta Emergency Support Training in Calgary, Alberta, our first aid programs are taught by experienced paramedics and firefighters who know what it’s like to respond in real life.

Read More

Managing Intoxicated Patients in the Field: An EMR Guide

As an Emergency Medical Responder (EMR), you’re trained to provide care in unpredictable situations. One of the more challenging scenarios is responding to patients under the influence of alcohol or drugs. Intoxicated patients can present with unpredictable behavior, altered physiology, and a higher risk of injury—making careful assessment and management critical.

At Delta Emergency Support Training, we emphasize both safety and effective patient care. Here’s a detailed guide for EMRs on safely responding to intoxicated patients, aligned with Alberta Health Services (AHS) guidelines.

Understanding Intoxication

Intoxication can result from alcohol, prescription medications, or illicit drugs. Common effects include:

  • Altered level of consciousness

  • Slurred speech or impaired coordination

  • Agitation, aggression, or unpredictable behavior

  • Nausea, vomiting, or respiratory depression

  • Increased risk of trauma from falls, fights, or accidents

  • Masked pain: Alcohol can dull pain perception, making trauma patients unreliable reporters of injury severity

  • Mimics: Hyperglycemia or hypoglycemia can appear similar to intoxication, making blood glucose assessment crucial

Recognizing the signs early helps EMRs anticipate complications and prioritize patient and responder safety.

Safety First: Protecting Yourself and Others

Intoxicated patients can be unpredictable. Before providing care, ensure:

  • Scene safety: Survey for weapons, hazards, or bystanders that may interfere.

  • Backup: If the patient is aggressive, call law enforcement or additional responders.

  • Personal protective equipment (PPE): Gloves, eye protection, and masks may be necessary.

  • Distance and positioning: Maintain a safe stance and keep an exit route clear.

Never compromise your safety—intoxicated patients may act impulsively, and an aggressive patient can escalate quickly.

Patient Assessment

Assessment of an intoxicated patient may be complicated by their altered state. EMRs should focus on:

  1. Responsiveness: Determine if the patient is fully conscious, verbally responsive, physically responsive, or unresponsive.

  2. Airway, Breathing, Circulation (ABCs): Alcohol and drugs can depress breathing and circulation.

    • Be prepared to clear the airway using suction if the patient vomits.

    • Airway adjuncts (oropharyngeal or nasopharyngeal airway) may be required if the patient’s airway is compromised but spontaneous breathing is present.

  3. Vital signs: Monitor heart rate, blood pressure, respiratory rate, oxygen saturation, and blood glucose.

    • Hyperglycemia or hypoglycemia can mimic intoxication and significantly affect patient management.

  4. Secondary survey: Look for trauma, especially since alcohol can mask pain. A patient may not report broken bones, internal injuries, or head trauma. Monitor carefully for subtle signs.

Common Challenges and How to Manage Them

  • Aggression or agitation: Stay calm, use a non-confrontational tone, and avoid physical confrontation unless absolutely necessary.

  • Vomiting or aspiration risk: Use suction immediately if needed, and position the patient in the recovery positionif unconscious but breathing.

  • Altered decision-making: Intoxicated patients may refuse care. Document refusals and use implied consent in life-threatening situations.

  • Polysubstance use: Patients may have multiple substances in their system, complicating presentation. Monitor closely for unexpected symptoms.

  • Trauma considerations: Be extra vigilant for head injuries, internal bleeding, or fractures. Pain may be unreliable, so rely on vital signs, visual assessment, and mechanism of injury.

  • Glucose considerations: Rapidly check blood glucose in any altered patient; treating hypoglycemia or hyperglycemia may resolve the presentation entirely.

Communication Tips

  • Use simple, clear language.

  • Speak slowly and calmly to reduce confusion.

  • Avoid judgmental language—patients respond better when treated respectfully.

  • Keep bystanders informed, but focus on patient care.

Transport Considerations

  • Monitor continuously: Intoxicated patients can deteriorate rapidly.

  • Secure safely: If aggressive, use restraints only per local protocols and monitor the patient closely.

  • Communicate with receiving facility: Provide details on level of intoxication, suspected substances, vital signs, airway interventions (suction or adjuncts used), trauma concerns, and any interventions performed.

Red Flags: When to Call for Immediate Backup

  • Unresponsiveness or decreased level of consciousness

  • Difficulty breathing or abnormal airway sounds

  • Vomiting with risk of aspiration

  • Seizures or convulsions

  • Severe trauma, especially head or internal injuries

  • Aggressive or violent behavior that cannot be safely managed

  • Hypoglycemia or hyperglycemia causing altered mental status

Final Thoughts

Responding to intoxicated patients requires a balance of emergency care skills, safety awareness, and empathy. Alcohol or drug use can mask pain and complicate assessment, and abnormal blood glucose levels can mimic intoxication. With proper airway management, suction, airway adjuncts, and glucose monitoring, EMRs can provide effective care safely.

At Delta Emergency Support Training, our courses prepare responders to handle complex patient scenarios, including intoxicated and trauma patients so you can provide care with confidence, skill, and safety.

Read More