The Delta Dispatch

Advanced First Aid, BLS, Firefighter Kumari Malhotra Advanced First Aid, BLS, Firefighter Kumari Malhotra

From the Rigs to the Fire Hall: Get Your Advanced First Aid Certification in 2026

Thinking about leaving the rigs to pursue firefighting? Our Camp Rotation Advanced First Aid courses for 2026 are designed for rig workers with demanding schedules. Get certified, gain real-world emergency skills, and take the first step toward a career saving lives.

You’ve worked the rigs, long shifts, tough conditions, and no room for hesitation. Now you’re ready for the next challenge: a career in firefighting or emergency response. The skills you’ve built on the rigs — teamwork, problem-solving, and staying cool under pressure — are exactly what fire departments and responder agencies are looking for. All you need is the right certification to start that journey.

That’s where we come in. Our Advanced First Aid (AFA) program is designed to bridge the gap between industrial safety and professional emergency response. You’ll learn how to manage trauma, perform advanced assessments, and provide life-saving care — all skills that will set you apart when applying to firefighter programs or first responder roles.

And because we know your schedule doesn’t stop for training, we’ve launched NEW Camp Rotation AFA Schedules for 2026! Whether you’re on a 2-week rotation or transitioning out of camp work, our courses are built to fit around your shifts — so you can train without losing time on the job.

By earning your AFA certification, you’ll not only meet entry requirements for many emergency services programs, but also gain the confidence and medical readiness expected in the field.

Camp worker on a 2-week rotation? Check out our NEW Camp Rotation AFA Schedules and start preparing for your next chapter — from the rigs to the fire hall.

👉 Register today and take the first step toward a career that puts your experience and drive to work saving lives.

Read More

Rate, Rhythm, and Quality: How to Assess Pulse and Breathing in the Field

Assessing rate, rhythm, and quality of pulse and respirations is essential for identifying serious patient conditions. Learn how to conduct these key evaluations in the field with accuracy.

When assessing a patient, rate, rhythm, and quality are more than routine checklist items — they’re vital indicators of what’s happening beneath the surface. Whether you’re an Advanced First Aider, EMR, or future paramedic, mastering these three elements helps you recognize subtle signs of deterioration before they become life-threatening.

🩺 Assessing the Pulse

1. Rate

The rate refers to how many times the heart beats per minute (bpm).

  • Adult: 60–100 bpm

  • Child: 80–100 bpm

  • Infant: 100–160 bpm

Tachycardia (a rate above normal) may indicate fever, shock, pain, dehydration, or stress.
Bradycardia (a rate below normal) may appear in trained athletes, hypothermia, or head injuries affecting brain function.

👉 Field Tip: Always consider the context — a runner at rest with a pulse of 52 bpm may be fine, while a trauma patient with the same rate might be in serious trouble.

2. Rhythm

Rhythm describes whether the beats occur at regular intervals.

  • Regular rhythm: Evenly spaced beats (normal sinus rhythm).

  • Irregular rhythm: Uneven or skipping beats (possible arrhythmia).

Listen for patterns like regularly irregular or irregularly irregular, which may indicate cardiac abnormalities.

👉 Field Tip: Use your watch’s second hand or a digital timer — count for a full 60 seconds if rhythm appears irregular.

3. Quality

The quality of a pulse tells you about strength and perfusion.

  • Strong / bounding: Common in fever or hypertension.

  • Weak / thready: Seen in shock, blood loss, or dehydration.

  • Absent: Immediate life threat — initiate advanced interventions.

👉 Field Tip: Compare central (carotid) and peripheral (radial) pulses. A weak or absent radial pulse may signal dropping blood pressure or poor perfusion.

🌬️ Assessing Respirations

Just like the pulse, respirations are assessed for rate, rhythm, and quality.

1. Rate

Normal respiratory rates:

  • Adult: 12–20 breaths per minute

  • Child: 20–30 bpm

  • Infant: 30–60 bpm

Tachypnea (rapid breathing) often indicates hypoxia, shock, or anxiety.
Bradypnea (slow breathing) can suggest head injury, narcotic overdose, or severe illness.

👉 Field Tip: Always watch the chest discreetly, so patients don’t alter their breathing pattern.

2. Rhythm

Normal respirations are smooth and regular.

  • Irregular rhythm: May indicate neurological damage, fatigue, or shock.

  • Cheyne-Stokes respirations: Periods of deep breathing alternating with apnea — often seen in brain injury or end-of-life situations.

  • Agonal gasps: Ineffective, irregular breaths seen in cardiac arrest.

👉 Field Tip: If the rhythm looks unusual, describe exactly what you see — “deep, gasping, irregular respirations” gives dispatchers or incoming paramedics more useful information than just “irregular.”

3. Quality

Respiratory quality reflects effort, depth, and sound.

  • Normal: Quiet and effortless.

  • Shallow: May indicate pain, shock, or fatigue.

  • Labored: Look for use of accessory muscles, nasal flaring, or grunting.

  • Noisy: Listen for wheezing (airway constriction), gurgling (fluid), or stridor (upper airway obstruction).

👉 Field Tip: Note any cyanosis (bluish lips or fingertips), which can signal inadequate oxygenation.

🚑 Putting It All Together: Why It Matters

Rate, rhythm, and quality are part of every primary and secondary survey. These details guide your priorities:

  • Recognizing shock early by weak, rapid pulse and shallow respirations.

  • Identifying hypoxia through tachypnea or labored breathing.

  • Catching cardiac irregularities that could indicate impending arrest.

In short, these three simple checks — rate, rhythm, and quality — can reveal complex physiological problems long before advanced tools do.

💡 Key Takeaways for First Responders

  • Always compare findings to baseline vitals and the patient’s overall presentation.

  • Document what you observe, not just normal/abnormal.

  • Repeat assessments frequently — deterioration can happen quickly.

  • Communicate trends to higher-level care providers for continuity.

Final Thought

Assessing rate, rhythm, and quality isn’t about memorizing numbers — it’s about seeing the patient behind the vitals.The best responders know that a weak, irregular pulse or labored breathing tells a story. Learn to listen carefully — it could be the difference between early intervention and missed warning signs.

Read More
Advanced First Aid, BLS, BLS CPR, Cardiac Kumari Malhotra Advanced First Aid, BLS, BLS CPR, Cardiac Kumari Malhotra

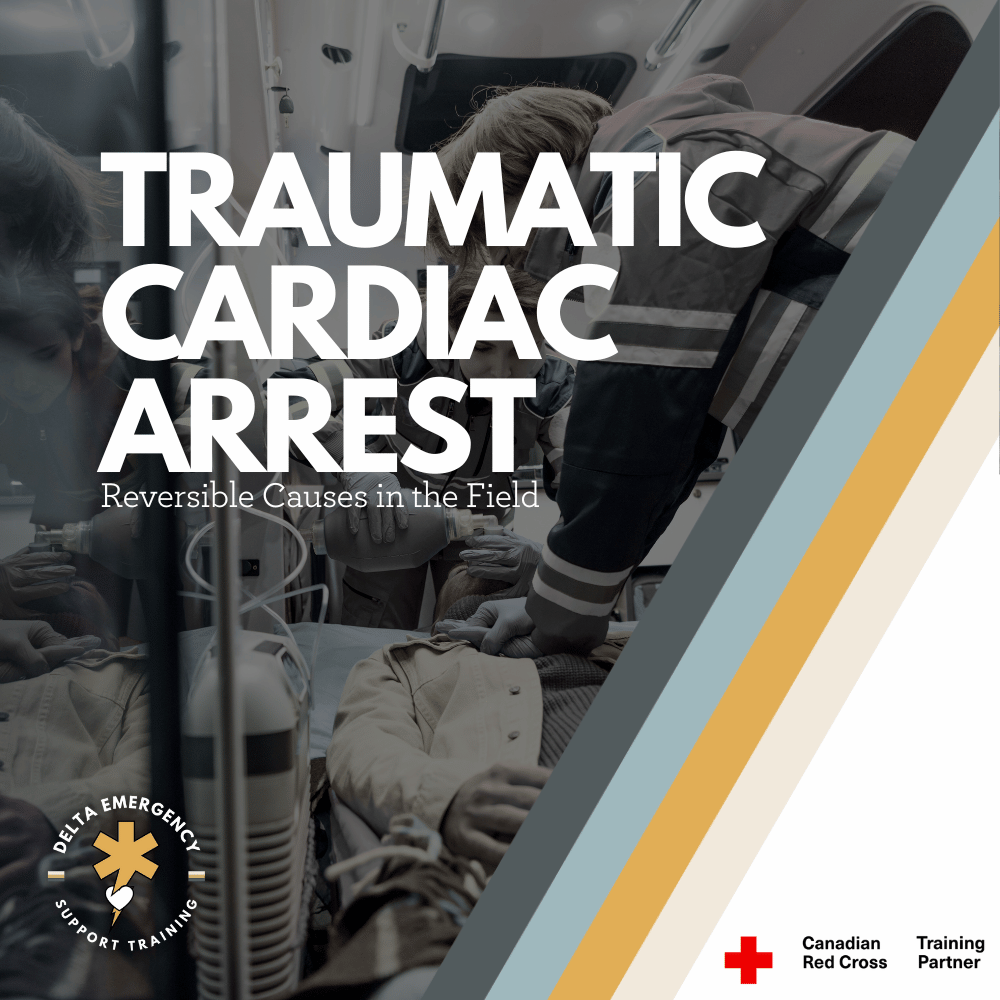
Traumatic Cardiac Arrest: What Every Professional Responder Should Know

Traumatic cardiac arrest is one of the most demanding situations a responder can face. This in-depth guide explains how to rapidly identify reversible causes, manage airway and bleeding, and provide effective field care to improve survival chances in severe trauma cases.

Traumatic cardiac arrest (TCA) represents one of the most challenging situations in prehospital care. Outcomes are often poor, but when managed rapidly and effectively, survival with good neurological recovery is possible. This blog explores what TCA is, its causes, assessment and treatment priorities, and best practices for professional responders in Canada.

What Is Traumatic Cardiac Arrest?

A traumatic cardiac arrest occurs when a patient’s heart stops as a direct result of major trauma. This trauma can be blunt (such as falls or motor vehicle collisions) or penetrating (such as gunshots or stab wounds).

Unlike medical cardiac arrests, TCA often stems from reversible physical causes rather than primary heart dysfunction. The most common reversible causes include:

  • Severe hemorrhage (uncontrolled bleeding)

  • Hypovolemia (loss of circulating volume)

  • Hypoxia (insufficient oxygen supply)

  • Tension pneumothorax (collapsed lung causing pressure on the heart)

  • Cardiac tamponade (blood filling the pericardial sac and compressing the heart)

How Common Is TCA and What Are the Survival Trends?

Traumatic cardiac arrests are less common than medical arrests but are often more complex. Historically, survival rates have been extremely low—typically below 2%. However, in cases where the underlying cause is rapidly identified and corrected, patients can and do survive, especially when there are early signs of life or immediate advanced care.

Outcomes tend to be more favorable in penetrating trauma compared to blunt trauma, largely due to the speed at which reversible causes can be treated.

Key Priorities in Managing TCA

When seconds matter, responders must focus on interventions that directly address reversible causes. The following priorities guide professional care:

PriorityActionPurposeControl Hemorrhage / HypovolemiaApply direct pressure, tourniquets, wound packing, or pelvic binders.Prevent further blood loss and restore perfusion.Airway and OxygenationClear the airway and ventilate effectively. Use supraglottic or advanced airways if trained and authorized.Correct hypoxia, one of the leading causes of TCA.Relieve Mechanical ObstructionsPerform needle decompression for tension pneumothorax or use a chest seal for open chest wounds.Restore normal breathing and heart function.High-Quality CPROnly once reversible causes are being managed. Focus on effective compressions with minimal interruptions.Maintain perfusion if reversible causes have been addressed.Rapid TransportTransport quickly to a trauma centre if signs of life are present.Definitive care is essential for survival.

Trauma Type and Approach

Penetrating Trauma

Penetrating injuries, such as gunshots or stabbings, can cause localized damage but often have a shorter timeline to intervention. Quick chest decompression, bleeding control, and airway management can make a significant difference in survival outcomes.

Blunt Trauma

Blunt trauma, such as from high-impact collisions or falls, often causes widespread internal injuries and massive bleeding. Survival rates are generally lower, and early recognition of futility is crucial when there are no signs of life and prolonged downtime.

Canadian Best Practices and Field Considerations

Canadian EMS and paramedic protocols emphasize a systematic, cause-driven approach to TCA management:

  • Address all reversible causes simultaneously.
    Control bleeding, relieve pneumothorax, and manage airway without delay.

  • Obtain IV/IO access and administer fluids as indicated for hypovolemia.

  • Perform bilateral needle decompressions if chest trauma is suspected.

  • Apply pelvic binders when pelvic fractures or major lower-body trauma are likely.

  • Minimize scene time. Rapid transport to a trauma centre remains a priority.

  • Epinephrine is often deprioritized, as it offers limited benefit when the heart has stopped due to physical injury rather than electrical failure.

  • Termination of Resuscitation (TOR) may be considered if there are no signs of life, asystole, and extended downtime with no reversible cause found.

Common Challenges for Responders

Traumatic cardiac arrests demand rapid thinking and precise teamwork. Common challenges include:

  • Identifying reversible vs. irreversible causes. It can be difficult to determine whether the arrest is trauma-induced or secondary to a medical event.

  • Time pressure. Every second counts, especially when massive hemorrhage or tension pneumothorax is suspected.

  • Limited prehospital tools. Not all regions permit advanced procedures like thoracotomy or pericardiocentesis.

  • Balancing interventions. CPR may worsen bleeding if hemorrhage is uncontrolled, so priorities must be reassessed continually.

  • Transport logistics. Long transport times may influence whether resuscitation efforts continue.

Step-By-Step Approach to Traumatic Cardiac Arrest

  1. Ensure scene safety and don PPE.

  2. Rapidly assess mechanism and timeline (blunt vs. penetrating, time of arrest, signs of life).

  3. Control massive bleeding immediately. Use direct pressure, tourniquets, or wound packing.

  4. Manage the airway and ventilate. Provide oxygen and ensure adequate chest rise.

  5. Relieve chest pressure. Perform needle decompression and apply chest seals as indicated.

  6. Provide fluid resuscitation. Administer IV or IO fluids per protocol.

  7. Perform CPR if appropriate. Begin once reversible causes are actively addressed.

  8. Transport rapidly to a trauma facility if ROSC occurs or if the patient shows any signs of life.

  9. Consider termination if no response and all reversible causes have been managed.

Why TCA Differs from Medical Cardiac Arrest

In medical cardiac arrest, the primary issue is usually electrical or metabolic failure of the heart. In TCA, the heart often stops because of physical factors such as massive bleeding or chest injury. As a result, standard interventions like defibrillation or epinephrine are secondary to correcting the underlying mechanical or circulatory issues.

In short — treat the cause, not just the rhythm.

Realistic Scenarios

  • Penetrating Chest Trauma: A patient with a gunshot wound to the chest is pulseless on arrival. Responders immediately apply a chest seal, decompress the chest, manage the airway, and control external bleeding.

  • Blunt Pelvic Trauma: Following a vehicle collision, the patient has severe pelvic instability and no pulse. A pelvic binder is applied, external bleeding controlled, airway secured, and fluids initiated during transport.

Final Thoughts

Traumatic cardiac arrest demands composure, coordination, and deep understanding of trauma physiology. While survival rates remain low, outcomes improve significantly when responders rapidly identify and correct reversible causes.

Every second counts — and with the right interventions, professional responders can give trauma patients their best chance at survival.

Read More

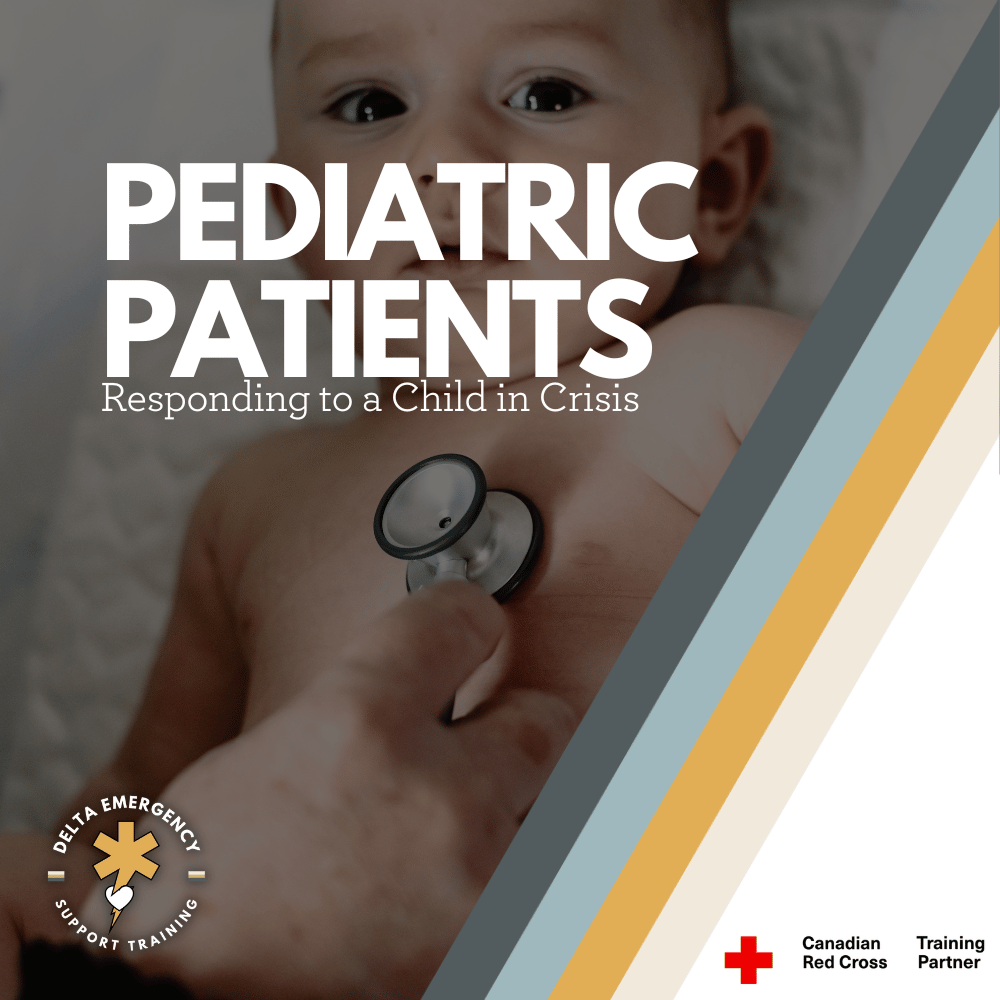
Little Patients, Big Impact: Treating Kids as a First Responder

Pediatric emergencies can be emotionally intense and medically complex, but with the right approach, first responders can provide life-saving care while calming young patients and their families. From airway management to emotional connection, this guide covers key strategies for treating children with confidence and compassion.

Responding to a Child in Crisis—What You Need to Know

As first responders, we train to stay calm in chaos. But nothing tests your nerves quite like a pediatric call. Whether it's a toddler who fell from a swing or a child in respiratory distress, pediatric patients can shift the emotional tone of a scene instantly—for responders, bystanders, and families.

It’s not just about the size difference. Children aren’t just small adults—they have unique anatomy, physiology, and emotional needs. Understanding how to approach, assess, and care for pediatric patients is a must-have skill in your responder toolkit.

Why Pediatric Calls Feel Different

For many first responders, pediatric emergencies hit harder. There's a psychological weight to treating children, especially when parents are panicking, or when the injury or illness is serious. This emotional layer can affect even the most seasoned providers.

Add to that the clinical complexity—like differences in vitals, assessment cues, and treatment options—and pediatric care becomes an area that deserves more attention than many training courses provide.

Pediatric Anatomy & Physiology: The Key Differences

When dealing with kids, knowing how their bodies differ from adults can guide your assessment and treatment:

  • Airways are smaller and more flexible → easier to block with swelling or mucus.

  • Bigger heads and weaker necks → higher risk of head and spinal injuries.

  • Faster breathing and heart rates → normal for them, but watch for signs of decompensation.

  • Limited blood volume → small bleeds can have big consequences.

  • Thermoregulation is immature → kids get cold or overheated quickly.

Communication: The Heart of Pediatric Care

🗣️ With the Child:

  • Get to their eye level.

  • Use calm, simple language.

  • Let them hold a comfort item if safe.

  • Be honest—“This might pinch” is better than surprises.

👨‍👩‍👧 With Parents/Caregivers:

  • Quickly gain their trust—introduce yourself and explain what you're doing.

  • Ask about the child’s medical history, medications, and recent events.

  • Use them as a resource—they know their child best.

  • Let them help soothe the child when appropriate.

Pediatric Assessment Tips (ABCs & More)

  • Airway: Look for retractions, grunting, stridor, or wheezing. Use age-appropriate positioning (neutral for infants, slight extension for older children).

  • Breathing: Count respirations for a full 30–60 seconds. Kids tire out fast.

  • Circulation: Check cap refill (under 2 seconds is good), skin color, and mental status.

  • Disability: Use AVPU (Alert, Voice, Pain, Unresponsive) or the Pediatric Glasgow Coma Scale.

  • Exposure: Undress carefully to find hidden injuries, but keep them warm!

Vital Sign Norms Change With Age! Always refer to age-specific charts for HR, RR, BP, and temperature.

Common Pediatric Emergencies and What to Watch For

  • Fever: Especially with seizures (febrile seizures) in toddlers.

  • Respiratory distress: Asthma, croup, bronchiolitis—kids can crash fast.

  • Trauma: Falls, bike accidents, car seats—always suspect head injury.

  • Choking: Common in toddlers—be ready to perform back blows and chest thrusts.

  • Seizures: Stay calm, protect the airway, and monitor closely.

  • Dehydration: Look for dry lips, sunken fontanelles (in infants), decreased urination.

BLS Considerations

  • Use pediatric-sized BVMs and masks.

  • Adjust compression depth and technique in CPR:

    • 1/3 chest depth

    • Two fingers for infants

    • One or two hands for children depending on size

  • AED pads: Use pediatric pads if available. If not, adult pads can still be used (one front, one back).

Emotional Impact on Responders

Pediatric calls can stay with you. It's okay to feel shaken after a tough one. Debrief with your team, access peer support, and take care of your mental health.

Tips for Real-World Calls

  • 🧸 Carry a teddy bear or sticker in your bag. Distraction helps.

  • 🔊 Narrate your actions gently—kids fear the unknown.

  • 🧼 Wash your hands or change gloves in front of them to model safety.

  • 🪑 Where’s your gear going? Avoid putting bags on beds, couches, or play areas.

  • 🪞 Use humor (when appropriate)—kids can surprise you with their bravery.

Final Thought

Caring for kids in emergencies is one of the most challenging—and rewarding—parts of being a first responder. With the right training, empathy, and communication, you can turn fear into comfort and make a lasting difference in a child’s life.

Even when they’re scared and silent, your presence can be the steady, calming force they need.

Read More

How the Heart Works: A Detailed Look at Cardiac Anatomy and Physiology

The human heart is a powerful, muscular organ central to the circulatory system, responsible for delivering oxygen and nutrients to tissues while removing waste. About the size of a clenched fist, it operates through a coordinated series of electrical and mechanical events that keep blood flowing efficiently throughout the body.

For Emergency Medical Responders (EMRs), a foundational understanding of cardiac anatomy and physiology is essential. The heart has four chambers (two atria and two ventricles), four valves that ensure one-way blood flow, and a conduction system that generates and coordinates each heartbeat. These components work together in two circulatory loops—pulmonary and systemic—to maintain oxygenation and perfusion.

Recognizing early signs of cardiac distress, using tools like ECGs, and performing interventions such as CPR or AED use all depend on a clear understanding of how the heart functions. From arrhythmias to cardiac arrest, EMRs are often the first line of defense in identifying and managing life-threatening cardiac conditions.

The human heart is a muscular organ that lies at the core of the circulatory system. Roughly the size of a clenched fist, it’s responsible for pumping blood throughout the body, supplying oxygen and nutrients while removing carbon dioxide and metabolic waste. For emergency medical responders (EMRs), understanding the anatomy and physiology of the heart is essential for recognizing life-threatening conditions and initiating appropriate interventions.

🫀 Anatomy of the Heart: A Chambered Pump

The heart is divided into four chambers — two upper atria and two lower ventricles.

1. Right Atrium

This chamber receives deoxygenated blood from the body through the superior and inferior vena cava. It acts as a holding tank before pushing the blood through the tricuspid valve into the right ventricle.

2. Right Ventricle

The right ventricle pumps deoxygenated blood through the pulmonary valve into the pulmonary arteries and onward to the lungs, where gas exchange occurs (oxygen in, carbon dioxide out).

3. Left Atrium

After oxygenation in the lungs, blood returns to the heart via the pulmonary veins, entering the left atrium. It then moves through the mitral (bicuspid) valve into the left ventricle.

4. Left Ventricle

The left ventricle is the strongest chamber, as it must pump oxygen-rich blood to the entire body via the aortic valveand aorta. Its thick muscular wall is adapted for high-pressure output.

🧩 The Valves: One-Way Gates of Flow

Valves maintain unidirectional blood flow, preventing backflow and ensuring efficient circulation.

  • Tricuspid valve: Between right atrium and right ventricle.

  • Pulmonary valve: Between right ventricle and pulmonary artery.

  • Mitral (bicuspid) valve: Between left atrium and left ventricle.

  • Aortic valve: Between left ventricle and aorta.

These valves open and close in response to pressure changes within the heart chambers.

🔄 The Cardiac Cycle: How the Heart Beats

Each heartbeat consists of two phases:

  • Systole: Contraction phase — ventricles contract, pushing blood out.

  • Diastole: Relaxation phase — heart fills with blood from the atria.

The cardiac conduction system coordinates this rhythm:

  1. Sinoatrial (SA) node: The “natural pacemaker” that initiates electrical impulses.

  2. Atrioventricular (AV) node: Delays the signal slightly to allow the atria to fully contract.

  3. Bundle of His and Purkinje fibers: Distribute the impulse through the ventricles, causing contraction.

This electrical activity is what we see on an ECG (electrocardiogram), often used in the field to assess heart rhythm and function.

🫁 Heart and Lungs: Partners in Circulation

The heart and lungs work in a dual circuit:

  • Pulmonary circulation (right heart): Sends blood to the lungs to pick up oxygen.

  • Systemic circulation (left heart): Sends oxygenated blood to tissues throughout the body.

A disruption in either circuit — like a pulmonary embolism, heart failure, or myocardial infarction — can be life-threatening and requires prompt assessment and care.

🚑 Why This Matters for EMRs

For EMRs and other frontline providers:

  • Recognizing signs of poor perfusion (e.g., pale skin, weak pulses, altered mental status) relies on understanding heart function.

  • Administering oxygen, performing CPR, or using an AED involves direct intervention in cardiac physiology.

  • Conditions like shock, arrhythmias, and cardiac arrest are rooted in cardiac anatomy and function.

A firm grasp of how the heart works can help EMRs make informed, confident decisions in critical situations.

✅ Key Takeaways

  • The heart has four chambers: right and left atria, and right and left ventricles.

  • Four valves control one-way blood flow: tricuspid, pulmonary, mitral, and aortic.

  • The cardiac cycle consists of systole (contraction) and diastole (filling).

  • Electrical impulses coordinate heartbeats and can be monitored via ECG.

  • EMRs must recognize cardiac signs and symptoms to respond effectively in emergencies.

Read More

The Red Cross: Everything Aspiring First Responders Need to Know Introduction

Thinking about becoming a first responder? The Red Cross provides essential training, from Standard First Aid (SFA) with CPR/AED Level C to Advanced First Aid (AFA), Basic Life Support (BLS), and Emergency Medical Responder (EMR). At Delta Emergency Support Training, we offer all these courses, including bridge programs and recertifications, helping you stay certified and ready to respond. 🚑

If you’re looking to become a first responder or expand your emergency care knowledge, the Red Cross is one of the most recognized and respected organizations for first aid and lifesaving training. Whether you’re starting with Standard First Aid (SFA) with CPR and AED Level C or progressing to Advanced First Aid (AFA) and Basic Life Support (BLS), understanding the training pathway is essential for anyone serious about emergency response.

At Delta Emergency Support Training, we offer all of these courses, including Emergency Medical Responder (EMR), bridge courses, and recertifications to help you stay up to date and advance your skills.

Standard First Aid (SFA) – The Essential Foundation

Before you can progress to advanced emergency medical training, you’ll need a strong foundational knowledge of first aid. Standard First Aid (SFA) with CPR/AED Level C is a prerequisite for more advanced training, making it the first step for aspiring first responders.

What Does Standard First Aid (SFA) Include?

This course covers the essential lifesaving skills needed to respond to common emergencies, including:

  • CPR and AED (Level C): Learn how to perform Cardiopulmonary Resuscitation (CPR) on adults, children, and infants and how to use an Automated External Defibrillator (AED).

  • Choking Response: Techniques for assisting choking victims of all ages.

  • Bleeding Control: Proper wound care, including bandaging, applying direct pressure, and using tourniquets.

  • Shock Management: Recognizing and responding to different types of shock.

  • Burns and Environmental Emergencies: First aid for burns, heat exhaustion, hypothermia, and frostbite.

  • Head, Neck, and Spinal Injuries: How to stabilize an injured person and prevent further harm.

  • Medical Emergencies: Recognizing and responding to diabetic emergencies, seizures, strokes, and allergic reactions.

Why Is Standard First Aid Important?

  • It is a prerequisite for Advanced First Aid and EMR (AFA).

  • It meets workplace safety requirements for many jobs, including healthcare, security, and childcare.

  • It provides practical, hands-on training to build confidence in emergency situations.

At Delta Emergency Support Training, we offer recertification courses to help you maintain your certification and stay prepared.

Advanced First Aid (AFA) vs. Emergency Medical Responder (EMR)

Once you have completed Standard First Aid, you may want to continue with Advanced First Aid (AFA) or Emergency Medical Responder (EMR). Understanding the differences between these two courses is important for choosing the right path.

Advanced First Aid (AFA)

  • Designed for those interested in becoming a first responder as well as workplace first responders, security personnel, and safety officers.

  • Includes oxygen therapy, airway management, and advanced bleeding control.

  • Covers spinal immobilization, fractures, and extended care skills.

  • Focuses on scene management and multi-casualty incidents.

Emergency Medical Responder (EMR)

  • A more advanced course designed for those looking to work in EMS, firefighting, or law enforcement.

  • Includes all AFA content plus advanced medical care, such as patient assessments, pharmacology, and vital signs monitoring.

  • Prepares students to assist paramedics in emergency medical situations.

  • Required for those pursuing a career in emergency services.

At Delta Emergency Support Training, we offer both AFA and EMR, as well as bridge courses to help transition between certifications.

Basic Life Support (BLS) – For Medical Professionals and First Responders

For those pursuing a career in healthcare, paramedicine, or emergency response, Basic Life Support (BLS) is an essential certification. BLS is more intensive than standard CPR training and focuses on high-performance resuscitation techniques used by medical professionals and first responders.

What Does Basic Life Support (BLS) Cover?

  • High-performance CPR with a focus on teamwork.

  • Bag-valve mask (BVM) ventilation for respiratory support.

  • Two-rescuer resuscitation techniques.

  • Management of choking in unresponsive individuals.

  • Use of oxygen equipment and suctioning.

  • AED use in complex medical settings.

Who Needs BLS Certification?

  • Paramedics and emergency medical responders.

  • Nurses, doctors, dental hygenists and other healthcare providers.

  • Firefighters and law enforcement officers.

  • First responders working in high-risk settings.

At Delta Emergency Support Training, we offer BLS courses and recertifications to ensure first responders stay up to date with the latest life-saving techniques.

Choosing the Right Course for Your Goals

If you’re unsure which course is right for you, consider the following pathway:

  1. Start with Standard First Aid (SFA) + CPR/AED Level C → For general emergency preparedness and workplace safety.

  2. Move to Advanced First Aid (AFA) → If you need a higher level of training for emergency response roles.

  3. Complete Basic Life Support (BLS) → If you are pursuing a healthcare or first responder career.

  4. Pursue Emergency Medical Responder (EMR) → If you are looking to work in EMS

Each step builds upon the previous one, ensuring that first responders develop both knowledge and practical skills to handle a wide range of emergencies.

Conclusion

The Red Cross provides essential training for aspiring first responders, workplace safety officers, and healthcare professionals. Whether you’re beginning with Standard First Aid or advancing to AFA, BLS, or EMR, every step prepares you for real-world emergencies where your skills can make a life-saving difference.

At Delta Emergency Support Training, we offer all of these courses, including bridge programs and recertifications, ensuring that you stay trained and ready. Whether you need SFA, AFA, BLS, or EMR, we have the right course for you!

🚑 Be prepared. Get trained. Save lives.

Read More

EMR Guide to Facial Trauma: Airway Management, Bleeding Control, and Injury Assessment

Facial trauma is a serious medical emergency that requires prompt attention. This guide for EMRs covers essential steps for managing facial injuries, including airway management, bleeding control, and fracture stabilization. Learn how to assess and treat patients with maxillofacial trauma to reduce the risk of permanent functional loss and disfigurement.

Facial Trauma - Assessment and Treatment

Tradesmen with laceration to face

Facial trauma refers to injuries involving damage to the bones or soft tissue of the face. These injuries can occur due to a variety of causes such as motor vehicle accidents, assaults (including gunshots), sports injuries, falls, chemical exposures, thermal burns, or animal bites. Because the human face is complex and contains many critical structures, such as bones, blood vessels, nerves, muscles, and sensory organs, untreated facial trauma can lead to permanent functional loss (such as problems with seeing, chewing, speaking, or swallowing) and severe disfigurement. Therefore, rapid and effective assessment and treatment are crucial in preventing long-term complications.

Facial trauma can be categorized into two primary categories: bone and soft tissue injuries. Depending on the type and severity of the trauma, the treatment and management priorities will differ. Let’s explore how to assess, treat, and what to expect when dealing with facial trauma in an emergency setting.

Key Considerations for EMRs Responding to Facial Trauma

When an EMR encounters a patient with facial trauma, the first priority is to assess the patient's airway, control bleeding, and assess for any associated injuries. This is especially critical because facial trauma can lead to airway compromise and severe bleeding, both of which are life-threatening.

Airway Management: The First Priority

One of the most critical aspects of treating facial trauma is securing the airway. The face houses the upper airway structures, and injuries to the face can easily result in obstruction. Up to 42% of patients with severe maxillofacial trauma may require intubation. If airway compromise is not addressed, it can result in hypoxia, shock, or even death.

Airway compromise in facial trauma typically occurs due to:

  • Soiling of the airway: Blood, vomit, or other debris can obstruct the airway, especially in patients with severe bleeding or emesis.

  • Obstruction: This can result from displaced soft tissue (such as the tongue), facial swelling, or foreign bodies (like dislodged teeth).

When assessing for airway compromise, EMRs should prioritize maintaining patency and anticipate potential difficulties with bag-mask ventilation due to the altered facial anatomy. For example, in Le Fort II and Le Fort III fractures, which cause significant facial displacement, it can be challenging to achieve a proper seal with a mask. If bag-mask ventilation becomes difficult, consider using a supraglottic airway device as a temporary bridge to more definitive airway management until advanced care can be provided.

Controlling Bleeding

Facial injuries, especially those involving trauma to the nose, mouth, or eyes, often result in significant bleeding. The face is highly vascular, so controlling bleeding early is vital to avoid shock and further complications. The steps to control bleeding are:

  1. Direct Pressure: Apply direct, firm pressure over the bleeding site using sterile gauze or a clean cloth.

  2. Elevation: If possible, elevate the patient’s head to minimize blood flow to the injury site.

  3. Pressure Points: Use pressure points such as the carotid artery or facial artery to control hemorrhage when direct pressure is insufficient.

  4. Hemostatic Agents: In severe cases, use hemostatic agents or dressings to assist in clotting and bleeding control.

Assessing Associated Injuries

Facial trauma often occurs as part of multi-system injuries. Once the airway is secured and bleeding is controlled, assess for other possible injuries, such as:

  • Head injury: Concussions, skull fractures, or intracranial hemorrhages are common in traumatic incidents that involve facial injury.

  • Spinal injury: Always suspect cervical spine injury in any trauma patient, especially those with altered mental status or facial fractures.

  • Dental injuries: Dislodged teeth or fractures to the jaw may occur in conjunction with facial trauma and may require specific management.

  • Eye injuries: Damage to the eyes, such as orbital fractures, corneal abrasions, or foreign bodies, should be suspected and managed accordingly.

Types of Maxillofacial Fractures

Facial fractures can be complex, and different fractures require different management strategies. Some common types of fractures include:

  1. Le Fort Fractures:

    • Le Fort I: A horizontal fracture of the maxilla (upper jaw), often associated with palate and teeth displacement.

    • Le Fort II: A pyramidal fracture involving the maxilla, nasal bones, and orbit, which may cause significant facial deformity.

    • Le Fort III: A complex fracture involving the maxilla, zygomatic bones, and orbit, resulting in severe facial disfiguration and airway compromise.

  2. Orbital Fractures: These fractures affect the bony orbit surrounding the eye. They may lead to eye injuries and double vision, requiring immediate attention to preserve vision.

  3. Nasal Fractures: Fractures to the nasal bones are common and often associated with bleeding and airway obstruction due to the nasal passages becoming blocked with blood.

  4. Mandible (Jaw) Fractures: Fractures of the mandible may affect the ability to chew, swallow, and speak. In some cases, the fractured jaw may obstruct the airway.

Treatment Considerations

The management of facial trauma depends on the type and severity of the injury. However, the basic principles of care involve airway management, bleeding control, and stabilization of fractures.

Airway Management

As previously mentioned, ensuring airway patency is paramount in facial trauma cases. If there is any suspicion of airway compromise, early intubation should be performed. In some cases, a supraglottic airway device may be used to bridge the gap before definitive airway management. In more severe cases, surgical airway interventions may be required.

Fracture Stabilization

Fractures, particularly those involving the mandible, maxilla, or facial bones, may need to be stabilized. The use of splints, jaw wiring, or other external fixation devices can help keep the fractures in place until surgical intervention by a plastic or maxillofacial surgeon can be performed.

Transportation

Facial trauma victims, particularly those with suspected airway compromise, require rapid transport to a hospital with appropriate resources for managing complex trauma. Transport should be done with the patient’s head elevated and airway support in place to prevent further compromise.

Conclusion

Facial trauma is a serious medical condition that requires prompt and effective intervention. As an EMR, your role in ensuring airway management, bleeding control, and assessment of associated injuries is vital in improving patient outcomes. While facial trauma may be life-threatening, the coordinated efforts of EMRs, emergency doctors, and specialists such as plastic and reconstructive surgeons can significantly reduce the risk of permanent functional loss and disfigurement. By understanding the anatomy of the face, the types of fractures, and the treatment strategies, you can provide critical care that saves lives and improves the long-term recovery of those injured in traumatic incidents.

Stay informed, stay prepared, and continue to prioritize the ABCs (Airway, Breathing, Circulation) in any trauma situation.

Read More

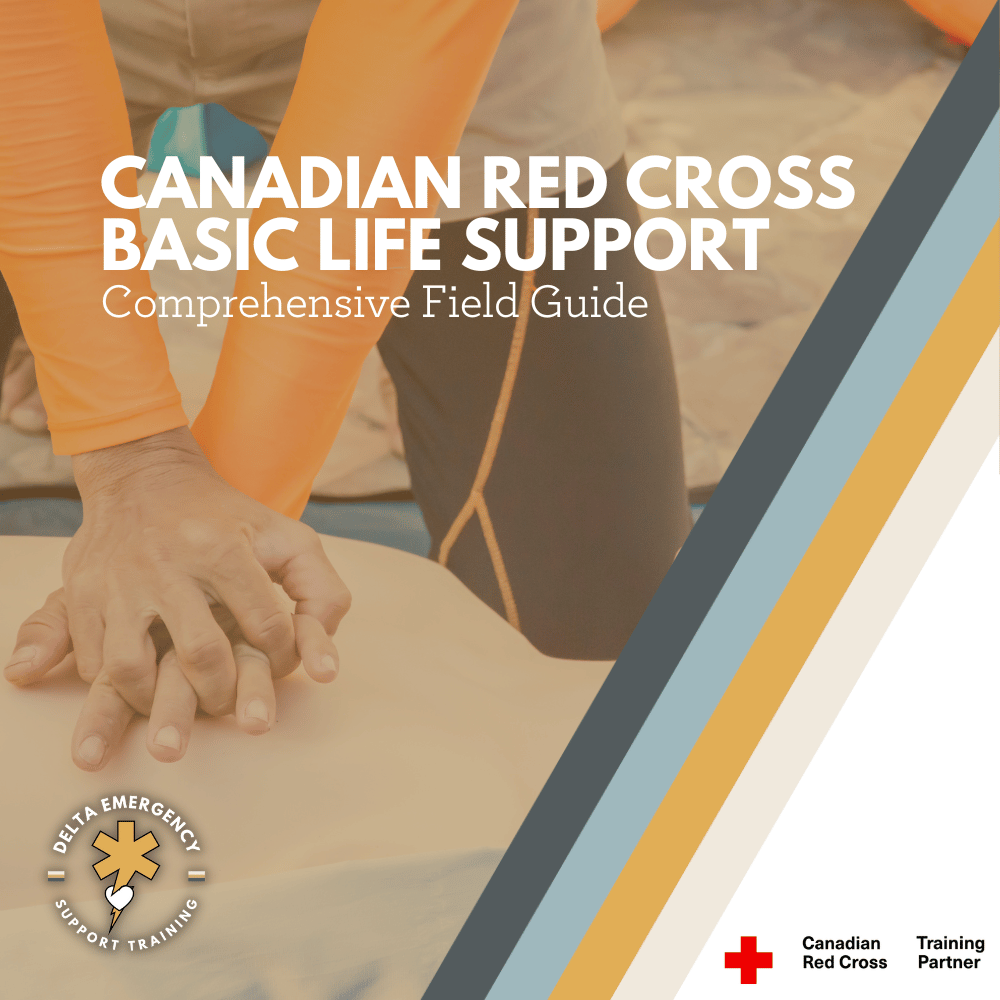
Quick Response, Confident Action: Canadian Red Cross Basic Life Support Field Guide

The "Canadian Red Cross: Basic Life Support Field Guide" is an essential tool for anyone trained in Basic Life Support (BLS). Designed for quick reference, this compact guide provides actionable steps for CPR, choking management, and AED use, ensuring you’re ready to respond in high-pressure situations. With clear illustrations and practical examples, this guide is a must-have for healthcare professionals and anyone certified in BLS.

A Lifesaver in Your Pocket: Essential for Every Responder

In the critical moments of a medical emergency, every second counts. The "Canadian Red Cross: Basic Life Support Field Guide" is an essential resource for anyone certified in Basic Life Support (BLS), from healthcare professionals to lay responders. This compact, easy-to-use guide is designed to be a quick reference in high-pressure situations, ensuring that the fundamental skills of life support are always within reach.

Tailored for Quick Reference and Rapid Recall

This field guide distills complex CPR techniques and emergency responses into concise, actionable steps. It's structured to help you quickly refresh your memory on essential procedures, including:

  • High-quality chest compressions

  • Ventilation skills

  • Management of choking for adults, children, and infants

  • Use of automated external defibrillators (AEDs)

Each section of the guide is accompanied by clear, instructive illustrations that enhance understanding and recall, making it easier to apply the techniques in real-life scenarios.

A Must-Have for a Wide Range of Responders

Whether you're a nurse on the front lines, a paramedic in the field, or a designated first aid provider at your workplace, this guide is made for you. Its comprehensive coverage makes it invaluable not only for professional use but also for anyone trained in BLS who might need to act swiftly to save a life.

Enhancing Skills with Reliable Information

The Basic Life Support Field Guide is more than just a manual; it's a training companion that reinforces your skills through:

  • Scenario-based practice examples

  • Step-by-step guides for both expected and unexpected situations

  • Quick tips for maintaining composure and efficiency in emergency situations

Why Physical Copies Matter

In emergency situations, technology can fail. A physical guide ensures that the information you need is available without concern for battery life, signal, or functionality. Its durable design means it can withstand the rigors of any environment, from a hospital ward to an outdoor adventure.

Conclusion

Ready to enhance your readiness and confidence in critical situations? The Canadian Red Cross Basic Life Support Field Guide is available now at Delta Emergency Support Training. Equip yourself with the knowledge and skills that make a difference when it matters most. Visit Delta Emergency Support Training to get your copy today and stay prepared for any emergency with the best CPR techniques, emergency response tips, and life-saving skills at your fingertips.

Read More
Basic Life Support, BLS, BLS CPR, Work Place First Aid Jarrett Chisholm Basic Life Support, BLS, BLS CPR, Work Place First Aid Jarrett Chisholm

High-Performance CPR: Alberta's New Life-Saving Standards

The landscape of Cardiopulmonary Resuscitation (CPR) has evolved significantly with the introduction of high-performance CPR techniques. Guided by the latest ILCOR (International Liaison Committee on Resuscitation) guidelines, the Alberta Health Services (AHS) Emergency Medical Services (EMS) has updated its training and protocols to enhance the effectiveness of CPR. This blog post delves into these changes, the rationale behind them, and the benefits they offer to patients experiencing cardiac emergencies.

Understanding High-Performance CPR

High-performance CPR emphasizes minimizing interruptions during chest compressions, ensuring adequate depth and rate of compressions, and optimizing ventilation. Key changes include:

  1. Reduced Time Off the Chest: Minimizing pauses in chest compressions is critical. Studies have shown that for every 10-second pause in chest compressions, the chance of survival decreases by 11%.

  2. CPR During AED Charging: Performing chest compressions while the Automated External Defibrillator (AED) is charging helps maintain circulation and increases the likelihood of a successful defibrillation. Research indicates that this practice can improve survival rates by up to 23%.

Why the Changes?

ILCOR's updated guidelines stem from extensive research and evidence-based studies aimed at improving cardiac arrest survival rates. The primary goals are to enhance the quality of CPR and ensure that rescuers can deliver life-saving interventions more effectively. Some of the critical reasons for these changes include:

  • Improved Coronary Perfusion: Continuous chest compressions help maintain coronary perfusion pressure, which is crucial for the return of spontaneous circulation (ROSC). Studies show that maintaining adequate coronary perfusion pressure can double the chances of ROSC.

  • Increased Survival Rates: High-performance CPR techniques have been associated with higher survival rates and better neurological outcomes in cardiac arrest patients. For instance, survival rates with favorable neurological outcomes can increase by up to 50% with continuous high-quality CPR.

  • Consistent Performance: Training rescuers to minimize pauses and perform CPR during AED charging ensures more consistent and effective CPR delivery, reducing variability in the quality of care provided.

Old CPR Effectiveness Statistics

Historically, the effectiveness of CPR has been lower than desired, with several challenges affecting outcomes:

  • Overall Survival Rates: The overall survival rate for out-of-hospital cardiac arrests (OHCA) has been relatively low, typically ranging from 5% to 10%.

  • Quality Variability: The quality of CPR varied significantly, affecting survival rates. Inconsistent compression depth and rate, frequent interruptions, and delayed defibrillation contributed to lower success rates.

  • Neurological Outcomes: Only about 8% of OHCA patients survived with good neurological outcomes, often due to inadequate cerebral perfusion during resuscitation efforts.

New Statistics Supporting High-Performance CPR

Research and real-world data have demonstrated the effectiveness of high-performance CPR, showcasing significant improvements:

  • Higher Survival Rates: Implementation of high-performance CPR techniques has increased survival rates for OHCA to 15%-20%. In some high-performing EMS systems, survival rates have reached up to 40%.

  • Improved ROSC Rates: Continuous high-quality chest compressions and minimal interruptions have been shown to improve ROSC rates by 20%-30%.

  • Enhanced Neurological Outcomes: The focus on maintaining coronary and cerebral perfusion has led to better neurological outcomes, with favorable neurological survival increasing to 25%-30%.

AHS EMS Implementation

The Alberta Health Services EMS has adopted these guidelines and integrated them into their CPR training programs across Alberta, including major centers like Calgary, Edmonton, and Red Deer. Here's how the updated course is structured:

1. Comprehensive Training Modules

AHS EMS training includes detailed modules on high-performance CPR techniques, focusing on:

  • Chest Compression Quality: Emphasizing the importance of compression depth (5-6 cm) and rate (100-120 compressions per minute). Research highlights that correct compression depth can increase survival rates by up to 30%.

  • Minimizing Interruptions: Techniques to reduce pauses, including immediate resumption of compressions after defibrillation. Studies have shown that minimizing interruptions can improve survival rates by 25%.

  • Team Coordination: Ensuring seamless transitions and communication among rescuers to maintain continuous chest compressions.

2. Hands-On Practice

Trainees undergo extensive hands-on practice sessions to perfect their skills. Scenarios are designed to simulate real-life cardiac arrest situations, allowing participants to practice:

  • Performing CPR during AED charging

  • Quickly switching roles without interruptions

  • Effective ventilation techniques with minimal delays

3. Performance Evaluation

Regular assessments are conducted to evaluate the rescuers' proficiency in high-performance CPR. Feedback is provided to ensure continuous improvement and adherence to the guidelines.

Professions That Benefit

The updated CPR training is crucial for a variety of professions, including:

  • Emergency Medical Services: Primary Care Paramedics (PCP) and Advanced Care Paramedics (ACP) are often the first responders in cardiac emergencies and need to be adept at performing high-quality CPR.

  • Firefighters: Frequently the first on the scene in urban areas, firefighters play a critical role in providing immediate care before EMS arrival.

  • Police Officers: First responders who may arrive before EMS and need to perform CPR in critical moments.

  • Healthcare Professionals: Nurses, doctors, dentists, physical therapists, and other healthcare staff must be proficient in high-performance CPR to provide the best care in emergencies.

  • Lifeguards: Responsible for the immediate care of drowning victims and other emergencies in aquatic environments.

  • Teachers and Coaches: In schools and sports settings, teachers and coaches trained in CPR can save lives during athletic events or other activities.

Why Choose Delta Emergency Support Training?

Delta Emergency Support Training stands out as a leader in CPR training for several reasons:

  • Expert Instructors: Our trainers are highly experienced professionals who work in EMS and Fire, and stay updated with the latest guidelines and techniques.

  • Comprehensive Curriculum: We offer a thorough training program that covers all aspects of high-performance CPR, ensuring that participants are well-prepared for real-life emergencies.

  • State-of-the-Art Facilities: Our training centers are equipped with the latest technology and tools to provide the best hands-on learning experience.

  • Proven Track Record: Delta Emergency Support Training has a strong reputation for delivering high-quality training that meets the highest standards of care.

Benefits of High-Performance CPR

Implementing these updated CPR techniques offers several benefits:

  1. Higher Survival Rates: Consistent high-quality CPR improves the chances of survival and favorable outcomes for cardiac arrest patients. Research indicates that high-performance CPR can increase survival rates by up to 60%.

  2. Enhanced Efficiency: Rescuers can deliver more effective interventions, increasing the likelihood of ROSC. Efficient CPR delivery has been shown to improve ROSC rates by 20%.

  3. Better Training Outcomes: EMS personnel trained in high-performance CPR are more prepared and confident in handling cardiac emergencies.

Conclusion

The adoption of high-performance CPR techniques, as per the ILCOR guidelines, marks a significant advancement in cardiac emergency care. Alberta Health Services EMS is at the forefront of this transformation, ensuring that their training equips rescuers with the skills needed to save lives effectively. By minimizing interruptions and performing CPR during AED charging, we can significantly improve survival rates and outcomes for cardiac arrest patients.

Stay informed and updated with the latest in CPR techniques by attending certified training programs. Remember, your ability to perform high-quality CPR can make a crucial difference in an emergency. For more information on CPR training and certification, visit Delta Emergency Support Training.

Read More

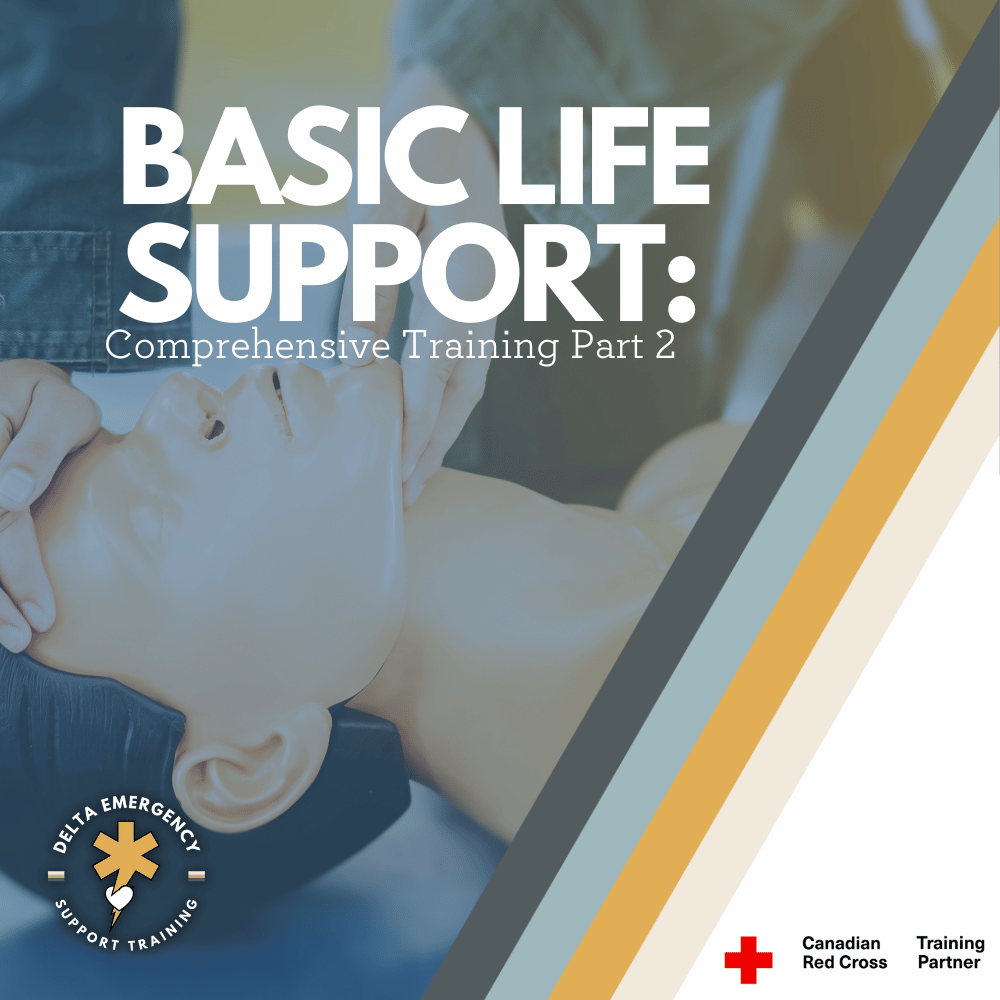
Basic Life Support Training Series: Part 2

Are you prepared to save lives during emergencies? Mastering Basic Life Support (BLS) is crucial, and understanding the key steps for assessing airway, breathing, and circulation is essential. Discover effective techniques like the head tilt-chin lift and jaw thrust for opening the airway, and learn about devices such as oropharyngeal airways (OPA) and nasal cannulas for maintaining clear breathing passages. Find out how to assess circulation through pulse checks, capillary refill, and extremity warmth. Explore these vital BLS skills and be ready to make a difference when it matters most. Boost your life-saving capabilities now!

Welcome back to the second part of our blog series on Basic Life Support (BLS). In the first blog, we discussed scene assessment, the ABC check (Airway, Breathing, and Circulation), and the proper use of CPR and AED. Now, in part two, we will delve into life-saving interventions and devices used within each step of the ABC check. Let's explore the crucial steps that can make a significant difference in saving lives.

Head tilt chin lift in basic life support training class

Life Saving Interventions: Airway

Airway management is a critical component of Basic Life Support (BLS) and plays a crucial role in ensuring the patient's ability to breathe effectively. In addition to the manual maneuvers we discussed earlier, such as the head tilt-chin lift and jaw thrust, there are other devices that can be used to secure and protect the airway. Let's explore two commonly used devices: the Oropharyngeal Airway (OPA) and the Nasopharyngeal Airway (NPA).

  1. Oropharyngeal Airway (OPA):

The oropharyngeal airway, is a curved plastic tube that is inserted into the patient's mouth to maintain the patency of the airway. It serves two main purposes:

a) Clearing Obstructions: The OPA helps to displace the tongue from the back of the throat, preventing it from obstructing the airway and impeding the passage of air. This is used for unconscious patients or those with decreased consciousness.

b) Facilitating Manual Stabilization: By providing a firm structure, the OPA allows rescuers to perform manual stabilization of the patient's head and neck, as it helps maintain the alignment of the airway.

When using an OPA, it is important to select the correct size for the patient to ensure proper placement and prevent complications. Insert the device upside down, rotating it 180 degrees as it reaches the back of the throat. Proper placement should allow the device to sit between the teeth or lips and the base of the tongue.

  1. Nasopharyngeal Airway (NPA):

The nasopharyngeal airway, or nasal airway, is a flexible tube inserted through the nostril into the back of the throat. It is particularly useful in patients who have an intact gag reflex or clenched teeth, making oral insertion difficult or risky. The NPA has several advantages:

1) Improved Comfort: The NPA is generally better tolerated by conscious or semi-conscious patients as it avoids stimulation of the gag reflex.

2) Unobstructed Oral Access: By securing the airway through the nasal passage, the mouth remains free and accessible for other procedures, such as suctioning or oral medication administration.

To insert an NPA, select the appropriate size by measuring from the tip of the nostril to the earlobe or the angle of the jaw. Lubricate the device before gently inserting it along the floor of the nasal passage, aiming towards the back of the throat. Monitor for signs of discomfort or obstruction during insertion and adjust if necessary.

It is important to note that the use of OPAs and NPAs requires proper training and an understanding of the patient's anatomy and potential contraindications. Rescuers should be cautious and attentive to the patient's response while using these devices.

By employing manual maneuvers like the head tilt-chin lift and jaw thrust, along with the use of OPAs and NPAs, rescuers can effectively secure and maintain an open airway for patients in need of Basic Life Support. Remember, accurate assessment and regular practice are essential to ensure proper airway management in emergency situations.

Life Saving Interventions: Breathing

Various devices can be used to provide oxygenation and ventilation support. Let's explore the different devices commonly used in BLS:

  1. Nasal Cannula:

The nasal cannula is a lightweight device that delivers supplemental oxygen through two small prongs inserted into the patient's nostrils. It provides a low to moderate flow rate of 1-4 liters per minute (LPM) with an oxygen concentration ranging from 25% to 45%. The nasal cannula is comfortable and allows patients to speak, and move freely while receiving oxygen.

Simple Face Mask:

The simple face mask is a mask that covers the patient's nose and mouth, delivering oxygen at a flow rate of 6-10 LPM. It provides a higher oxygen concentration compared to the nasal cannula, ranging from 40% to 60%. The simple face mask is commonly used in patients who require higher oxygen levels or when a more precise oxygen concentration is not required. However, it may impede communication and patient comfort.

Non-Rebreather:

The non-rebreather is a mask with a reservoir bag attached, ensuring the delivery of high concentrations of oxygen. It has one-way valves that prevent the patient from inhaling exhaled air and allow for a flow rate of 10-15 LPM. The non-rebreather mask can deliver an oxygen concentration of 90% or higher. It is particularly useful in patients with severe hypoxia or in cases where precise oxygen titration is necessary.

Bag-Valve-Mask (BVM):

The bag-valve-mask (BVM) device, is a manually operated resuscitator used to provide positive pressure ventilation. It consists of a self-inflating bag, a one-way valve, and a mask. The BVM is connected to an oxygen tank with a flow rate of 15 LPM, providing an oxygen concentration close to 100%. The BVM is often used in cases of respiratory distress or respiratory arrest, when the patient is not breathing adequately or requires assisted ventilation.

During assisted ventilation with a BVM, 1/3 of the bag should be compressed once every 5-6 seconds to achieve a target ventilation rate of 10-12 breaths per minute.

Newer BVM’s include a safety valve that makes a noise if you are compressing the bag too hard or fast, allowing for user friendly use.

As you provide assisted ventilation using a BVM, pay close attention to the patient's response. Look for chest rise and fall with each breath delivered. The presence of chest rise indicates that the ventilation is effectively reaching the patient's lungs.

Additionally, observe the patient's overall color. Effective ventilation should help improve the patient's skin color, with a return to a more normal or healthier appearance. If the patient's color improves, it is a positive sign that oxygenation and ventilation are being adequately supported.

It is important to note that when administering oxygen, the flow rate should be carefully adjusted based on the patient's condition and oxygen saturation levels. Oxygen therapy should be monitored closely.

Circulation assessment

Circulation assessment is a crucial step in Basic Life Support (BLS) to determine the adequacy of blood flow. While CPR remains the life-saving intervention when a pulse is not detected, let's explore other methods to assess circulation when a pulse is present.

  1. Capillary Refill: To assess capillary refill, gently press down on the patient's nail bed or the tip of their finger. Upon releasing the pressure, observe how quickly the color returns to the area. A normal capillary refill time is around 2 seconds. If color returns within this timeframe, it indicates good capillary refill and suggests adequate peripheral circulation.

  2. Extremity Warmth: Feeling the temperature of the patient's extremities, such as their hands and feet, can provide valuable information about circulation. Warm extremities indicate good blood flow, while cold extremities may suggest impaired circulation.

It's important to note that these assessments are complementary to the presence of a pulse. If there are concerns about circulation or any signs of poor perfusion, prompt medical attention should be sought.

  1. Circulatory Obstruction: Major blood loss from an injury can obstruct circulation and pose a life-threatening situation. In such cases, immediate action is crucial. If the hemorrhage is external, apply direct pressure to the bleeding site using PPE always. Maintaining pressure helps control the bleeding and promotes clot formation, thereby restoring circulation. If available, consider the use of a tourniquet for severe hemorrhage that cannot be controlled by direct pressure alone.

Remember, it is important to prioritize personal safety and seek professional medical help as soon as possible in cases of significant bleeding or other circulatory emergencies. Timely intervention can make a significant difference in patient outcomes.

Training

Mastering Basic Life Support (BLS) is crucial for healthcare professionals, including nurses, doctors, dentists, firefighters, and other first responders. Understanding the key steps for assessing and applying critical interventions for airway, breathing, and circulation is essential to deliver timely and effective care during emergencies. At Delta, we recognize the importance of BLS training, as it is often required to be completed yearly for professionals in various fields. We are dedicated to providing frequent BLS courses to equip individuals with the life-saving skills they need. Enroll in our BLS courses today and stay prepared to make a difference when it matters most.

Read More

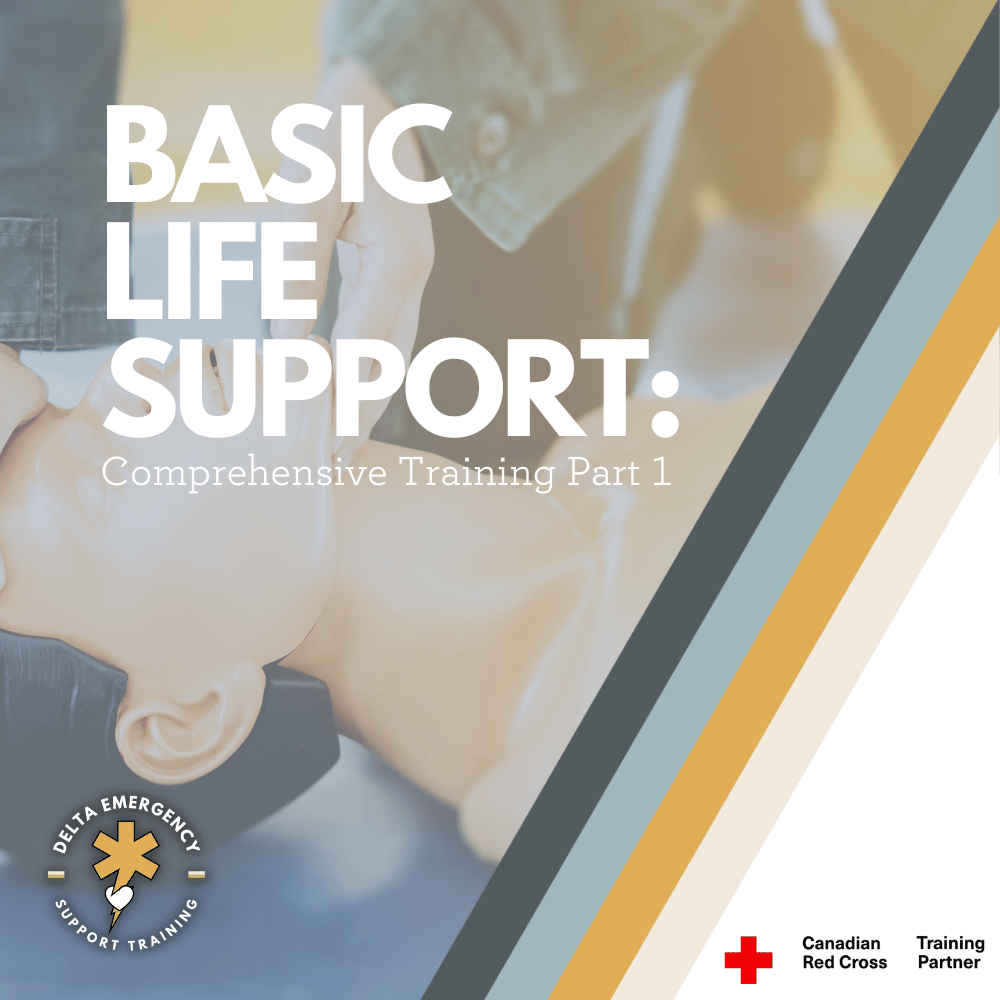
Basic Life Support Training Series: Part 1

In part 1 of our BLS training series, we'll cover the essentials: scene survey, ABC check, CPR, and AED usage. Here's a quick overview:

  • Scene Survey: Assess the emergency scene for safety and determine the nature of the situation.

  • ABC Check: Evaluate the victim's Airway, Breathing, and Circulation. Ensure the airway is clear, check for normal breathing, and assess signs of circulation.

  • CPR: Perform chest compressions and rescue breaths to maintain blood flow and oxygenation. Proper technique is vital for effective compressions and oxygen delivery.

  • AED Usage: Learn to use an AED, a device that analyzes heart rhythm and delivers shocks if needed. Follow clear instructions and visual prompts for proper AED application.

By mastering these skills, you'll be better prepared to respond confidently during emergencies. Remember to practice regularly and stay updated on BLS guidelines for optimal readiness.

Note: BLS training equips you with life-saving techniques. Obtain proper certification and training for comprehensive proficiency.

Basic Life Support (BLS) training encompasses a wide range of essential skills, and there's so much to cover! In this multi-part series, we'll explore the extensive world of BLS in-depth. Part 1 includes scene assessment, ABC check as well as CPR + AED use.

A student is practicing their Basic Life Support (BLS) skills on a mannequin. The student is performing the head tilt-chin lift maneuver to secure the airway. They are carefully holding the mannequin's head and gently tilting it back while lifting the chin upward.

In critical situations where every second counts, having the knowledge and skills of Basic Life Support (BLS) can make all the difference. Whether you're a nurse, dental hygienist, or anyone involved in healthcare or emergency response, mastering BLS is essential.

What is Basic Life Support (BLS)?

BLS (Basic Life Support) encompasses a comprehensive set of life-saving techniques and interventions performed on individuals facing various medical emergencies. These emergencies can range from airway obstructions and respiratory distress to cardiac arrest and more. The goal of BLS is to provide immediate recognition of emergency situations, administer primary assessment, perform CPR, utilize automated external defibrillators (AEDs), manage airway obstructions, provide assisted ventilation, and consider special circumstances that may require tailored approaches.

When it comes to BLS, quick recognition of emergency situations is crucial. Once the emergency is recognized, primary assessment is performed to evaluate the patient's condition, including responsiveness, breathing, and circulation. This assessment helps determine the appropriate course of action and guides subsequent interventions.

Primary Assessment

During a medical emergency, conducting a primary assessment is vital to quickly evaluate a patient's condition and determine the appropriate course of action. This assessment involves checking the patient's level of responsiveness (LOR), assessing the airway, breathing, and circulation (ABCs). Let's break down each step to ensure a thorough primary assessment.

Level of Responsiveness (LOR):

To determine the patient's level of responsiveness, start by verbally asking them if they are okay. If there is no response, gently tap the patient's shoulder and ask again. It's important to assess the patient's conscious state as it helps gauge the severity of the situation.

Airway:

If the patient is unconscious or unresponsive, assessing and securing the airway becomes crucial. The goal is to ensure that the airway is open and unobstructed. For an unconscious patient without suspected spinal injury, utilize the head tilt chin lift technique. Place one hand on the patient's forehead, gently tilt their head back, and lift the chin upward. This helps maintain an open airway by lifting the tongue away from the back of the throat.

However, if there is a possibility of a spinal injury, such as from a traumatic incident, use the jaw thrust technique instead. Place both hands on either side of the patient's jaw and lift it forward, while keeping the neck in a neutral position. This technique ensures the airway is protected while minimizing movement of the cervical spine.

Breathing and Circulation:

Once the airway is secured, it's crucial to assess breathing and circulation simultaneously. Spend about ten seconds observing the patient's chest rise and fall while listening and feeling for breath. Look for signs of normal breathing, such as chest rise and fall, and listen for any abnormal sounds like gasping or gurgling.

While assessing breathing, also check for the carotid pulse. Place your index and middle fingers on the patient's neck, alongside the windpipe, and feel for the pulse. Assessing circulation in conjunction with breathing helps determine if the patient's heart is pumping effectively.

CPR + AED

BLS (Basic Life Support) training goes hand in hand with comprehensive CPR (Cardiopulmonary Resuscitation) techniques, including the use of an AED (Automated External Defibrillator). Let's explore this essential aspect of BLS training in more detail.

CPR (Cardiopulmonary Resuscitation):

CPR is a crucial component of BLS, focusing on maintaining blood circulation and oxygenation when the heart has stopped or is not functioning properly. BLS training provides in-depth instruction on performing CPR effectively, including the following steps:

Chest Compressions:

BLS teaches the correct technique for performing chest compressions. This involves placing the heel of one hand on the center of the victim's chest (lower half of the sternum), stacking the other hand on top, interlocking the fingers, and keeping the arms straight. BLS emphasizes the importance of delivering compressions at the proper depth, typically about 2 inches for adults, with a rate of around 100-120 compressions per minute.

Rescue Breaths:

BLS training also covers rescue breaths, which involve delivering breaths into the victim's airway to supply oxygen. The ratio of chest compressions to rescue breaths may vary depending on the age group being treated. For adults, the ratio is typically 30 compressions to 2 breaths.

Chest Recoil:

BLS emphasizes the significance of allowing for complete chest recoil between compressions. This allows the heart to refill with blood before the next compression, improving the effectiveness of CPR.

AED (Automated External Defibrillator) Usage:

BLS training includes instruction on the proper use of an AED, a portable device that can analyze the heart's rhythm and deliver electrical shocks if necessary. Here's how AED usage is typically incorporated into BLS training:

  1. AED Placement: BLS teaches the importance of quickly accessing an AED and placing it near the victim. AEDs are typically equipped with easy-to-follow visual and auditory prompts to guide the user through the process.

  2. Electrode Pad Placement: BLS training covers the correct placement of the AED electrode pads on the victim's bare chest. One pad is usually placed on the upper right chest, just below the collarbone, while the other pad is positioned on the lower left side of the chest.

  3. Analysis and Shock Delivery: The AED will analyze the victim's heart rhythm and prompt the user to stand clear while it delivers an electric shock if it detects a shockable rhythm such as ventricular fibrillation or ventricular tachycardia.

  4. CPR Integration: BLS emphasizes the integration of CPR with AED usage. After each shock, it is essential to immediately resume CPR, beginning with chest compressions, as directed by the AED.

Congratulations on completing Part 1 of our comprehensive BLS training series! By exploring the foundational elements of scene survey, ABC check, CPR and AED usage, you've taken significant steps towards becoming a skilled responder in life-threatening situations. But don't worry, our BLS journey is far from over!

Stay tuned for Part 2, where we'll delve into life-saving interventions for airway obstruction, airway management, assisted ventilations, and oxygen therapy. These critical techniques will equip you with the knowledge and skills to tackle a broader range of medical emergencies confidently.

BLS Training and Certification

To take your BLS training to the next level, consider enrolling in our Delta Emergency Support Training BLS course. Our experienced instructors will guide you through hands-on training, ensuring you gain the confidence and expertise needed to make a positive impact in emergency situations. Whether you're a healthcare professional, dental hygienist, or anyone seeking to enhance their emergency response skills, our courses are tailored to meet your needs.

Don't delay in becoming a certified BLS practitioner with Delta Emergency Support Training. Reach out to us today at info@deltaemergency.com to learn more about our courses and take the first step towards becoming a capable and confident lifesaver.

Read More

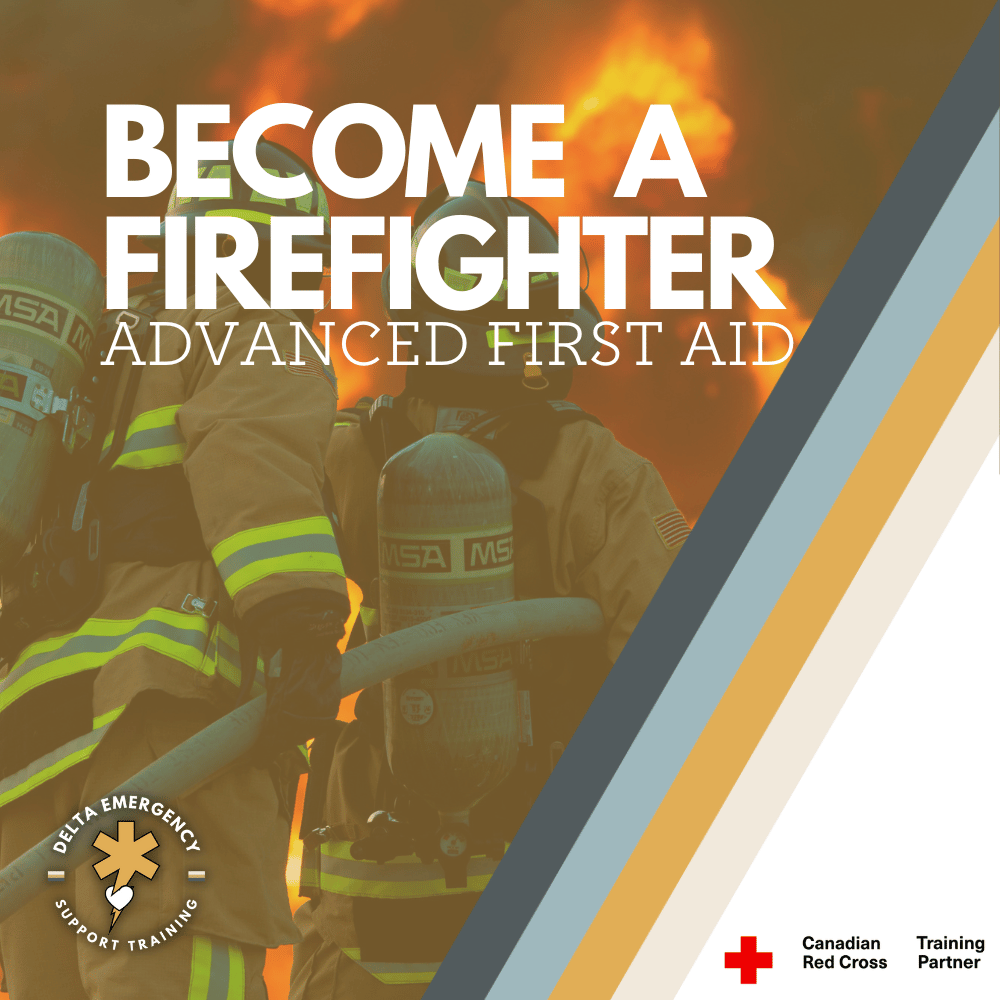
Becoming a Firefighter: Advanced First Aid with Delta

As a firefighter, you will be called upon to respond to a variety of emergency situations, ranging from minor injuries to life-threatening illnesses. That's why AFA training is so important for firefighters - it equips them with the skills and knowledge they need to handle these emergencies effectively and provide the best possible care to patients. AFA training covers a wide range of topics, including scene safety, basic life support, airway management, breathing management, in-depth CPR training, thorough body survey, packaging patients onto spine boards, dealing with life-threatening injuries, taking vitals, administering life-saving medications, and running calls from start to finish.

Becoming a firefighter is a career path that is both challenging and rewarding. It requires a unique set of skills and qualifications to effectively protect the public and their property from the dangers of fire, natural disasters, and other emergencies. One of the essential prerequisites for Calgary Fire Department or Edmonton Fire Rescue Services, is having advanced first aid (AFA) training.

Two firefighters certified in aAdvanced First Aid battling a blaze.

Two firefighters with advanced first aid training, in full gear fighting a fire, with their backs turned to the camera.

AFA training equips firefighters with the skills and knowledge they need to handle these emergencies effectively and provide the best possible care to patients. As a firefighter, you may be required to perform advanced procedures such as administering medication, bagging patients, and providing advanced airway management. AFA training provides firefighters with the advanced skills and knowledge necessary to perform these procedures safely and effectively, ensuring the best possible outcomes for patients.

In this blog, we'll take a closer look at AFA training and why it's a must for firefighters. We'll explore what AFA training is, why it's important for firefighters to have, and how to obtain this training.

If you're considering a career as a firefighter or are already working in this field, read on to learn more about how AFA training can make you a better responder in medical emergencies.

Scene Safety

The first step in any emergency situation is to ensure scene safety. As part of AFA training, firefighters learn how to assess a scene for potential hazards and risks, ensuring that they can safely and effectively provide care to patients. Using Delta’s acronyms to assist in efficient learning.

C-Spine

AFA students will learn about C-spine and Spinal Motion Restriction (SMR). What mechanisms of injury indicates the use of SMR, how to apply a cervical collar as well as packaging a patient with a suspected spinal injury.

Basic Life Support

Basic life support (BLS) is a critical component of AFA training. Firefighters learn how to perform cardiopulmonary resuscitation (CPR) and use automated external defibrillators (AEDs) to help patients in cardiac arrest. Within the completion of AFA, students will receive a BLS certificate.

Airway Management

Maintaining a patient's airway is essential in emergency situations. AFA training covers a range of airway management techniques, including using oropharyngeal and nasopharyngeal airways, as well as different manual airway management maneuvers.

Breathing Management

In addition to airway management, AFA training covers breathing management techniques. Firefighters learn how to use nasal cannulas, non-rebreather masks and bag-valve-masks as well as how to correlate each apparatus to the oxygen tank while regulating flow rate.

In-Depth CPR Training

CPR is a critical life-saving skill that all firefighters must be proficient in. AFA training covers CPR in-depth, including chest compressions, rescue breathing, and AED use.

Rapid Body Survey

As part of AFA training, firefighters learn how to conduct a thorough rapid body survey, which checks for injuries that require immediate attention. This includes checking and treating for life-threatening injuries such as bleeding, flail chest, and broken pelvis.

Vital Signs

AFA training covers how to take vital signs, including manual blood pressure, heart rate, respiratory rate, pupils, blood glucose, Glasgow Coma Scale, skin and temperature. Firefighters learn what the normal and abnormal ranges are and how to interpret vital sign readings to assess a patient's condition.

Life-Saving Medications

Firefighters may need to administer life-saving medications in emergency situations. AFA training covers how to administer medications such as naloxone, aspirin, and epinephrine, as well as how to assist with administering other medications as needed.

Patient Packaging

Packaging a patient for transport is a critical part of providing advanced first aid. AFA training covers how to package a patient onto a spine board or scoop.

Running a Call

AFA training also covers how to run a call as the primary responder from start to finish. This includes assessing the scene, providing care to patients, communicating with and delegating other responders and medical personnel.

Read More
BLS, Airway, Oxygen, Healthcare, Dentist Jarrett Chisholm BLS, Airway, Oxygen, Healthcare, Dentist Jarrett Chisholm

Becoming Proficient in Oxygen Therapy: A Guide to Canadian Red Cross Oxygen Admiration Training with Delta Emergency in Calgary

If you're looking to become proficient in oxygen therapy, the Canadian Red Cross Oxygen Therapy course is the perfect choice. With Delta Emergency in Calgary, you'll get comprehensive training on how to safely administer supplemental oxygen in various emergency scenarios. Their experienced instructors bring real-world expertise and practical insights to the course, ensuring you receive the best education possible. Plus, with flexible scheduling options and on-site training available, you can easily fit the training into your busy schedule. Learn more about the Canadian Red Cross Oxygen Therapy course with Delta Emergency and take the first step towards enhancing your emergency response skills.

Are you ready to become proficient in oxygen therapy? Look no further than the Canadian Red Cross Oxygen Therapy course, offered by Delta Emergency in Calgary. Whether you're an industrial first aid worker, a health care provider, or part of a pre-hospital care group, this training will equip you with the essential knowledge and skills to confidently administer supplemental oxygen when needed. In this blog post, we'll delve into the details of the Canadian Red Cross Oxygen Therapy course and how Delta Emergency is your go-to expert for O2 training in Calgary. Let's get started!

close-up view of an oxygen tank with a non-rebreather mask attached to it. The tank has a pressure gauge, flow meter, and a regulator attached to it.

What is the Canadian Red Cross Oxygen Therapy Course?

The Canadian Red Cross Oxygen Therapy course is designed to provide participants with comprehensive training on how to properly and safely administer supplemental oxygen. The course covers a wide range of topics, including pulse oximetry, handling and assembly of oxygen equipment, oxygen delivery devices, and administering oxygen. Participants will learn the correct techniques for delivering oxygen to patients of different ages and conditions, and how to monitor its effectiveness. The course is based on the guidelines and standards set by the Canadian Red Cross, a trusted organization with a long history of providing high-quality first aid and emergency response training.

Why Choose Delta Emergency for O2 Training in Calgary?

Delta Emergency is a leading provider of first aid and emergency response training in Calgary, and their expertise extends to oxygen therapy training as well. Here are some reasons why Delta Emergency is the go-to choice for O2 training in Calgary:

  1. Experienced Instructors: Delta Emergency instructors are highly experienced and knowledgeable in oxygen therapy and other emergency response techniques. They bring real-world expertise and practical insights to their training, ensuring participants receive the best education possible.

  2. Comprehensive Course Content: Delta Emergency's Canadian Red Cross Oxygen Therapy course covers all the essential topics needed to master oxygen therapy, including pulse oximetry, handling and assembly of equipment, oxygen delivery devices, and administering oxygen. The course is designed to be comprehensive and relevant to various professional settings.

  3. Flexibility and Convenience: Delta Emergency offers flexible scheduling options for their courses, making it easy for participants to find a training session that fits their busy schedule. They also provide training at their state-of-the-art training facility in Calgary or can arrange on-site training at your location for added convenience.

  4. Customized Training Solutions: Delta Emergency understands that different professionals have different needs, and they can customize their training to meet specific requirements. Whether you're part of an industrial first aid team or a health care provider, Delta Emergency can tailor their training to suit your needs and ensure you get the most out of the course.

  5. Accreditation and Certification: Upon successful completion of the Canadian Red Cross Oxygen Therapy course with Delta Emergency, participants will receive certification that is recognized nationally and meets industry standards. This certification can enhance your professional credentials and give you a competitive edge in your field.

How long will my Oxygen Tank last?

Oxygen tanks have a specific numeric value called a factor, that correlates with the tank size. There is a simple calculation that tells us how long a tank of oxygen will last before it is empty - based on the liter flow of the oxygen regulator. A “D tank” (the common used in EMS/Fire) has a factor of 0.16.

Oxygen Calculation Samples:

Here are some sample calculations for a D tank with 2000 psi, using different devices and flow rates, to estimate the minutes left in the tank:

  1. With a Nasal Cannula at 2 LPM: The flow rate for a nasal cannula is typically between 1-6 LPM. Let's calculate for 2 LPM.

Formula: (Tank Pressure in psi / Flow rate in LPM) x Constant Factor = Minutes Left

Calculation: (2000 psi / 2 LPM) x 0.16 = 160 minutes

So, with a nasal cannula at 2 LPM, you can estimate that the D tank will last approximately 160 minutes or 2 hours and 40 minutes.

  1. With a Non-Rebreather Mask at 10 LPM: The flow rate for a non-rebreather mask is typically between 10-15 LPM. Let's calculate for 10 LPM.

Formula: (Tank Pressure in psi / Flow rate in LPM) x Constant Factor = Minutes Left

Calculation: (2000 psi / 10 LPM) x 0.16 = 32 minutes

So, with a non-rebreather mask at 10 LPM, you can estimate that the D tank will last approximately 32 minutes.

  1. With a Bag-Valve-Mask (BVM) at 15 LPM: The flow rate for a BVM is typically between 10-15 LPM, depending on the specific device and oxygen concentration desired. Let's calculate for 15 LPM.

Formula: (Tank Pressure in psi / Flow rate in LPM) x Constant Factor = Minutes Left

Calculation: (2000 psi / 15 LPM) x 0.16 = 21.33 minutes

So, with a BVM at 15 LPM, you can estimate that the D tank will last approximately 21.33 minutes or approximately 21 minutes and 20 seconds.

Note: The constant factor of 0.16 is an estimated conversion factor used to convert tank pressure (psi) to minutes of oxygen supply remaining. It may vary slightly depending on factors such as temperature, altitude, and type of oxygen delivery device used. It's always important to refer to the manufacturer's guidelines and consult with a healthcare professional for accurate calculations and usage of oxygen therapy.

The Tank Factor

Tank factor, also known as the constant factor, is a value used to estimate the remaining minutes of oxygen supply in a compressed gas cylinder based on its pressure and the flow rate of oxygen being administered. The tank factor is specific to the type of gas cylinder being used and is determined by the manufacturer.

The tank factor is used in the formula:

Minutes Left = (Tank Pressure in psi / Flow rate in LPM) x Tank Factor

The tank factor is a constant value that is multiplied by the ratio of the tank pressure to the flow rate to estimate the remaining minutes of oxygen supply. It takes into account the volume of gas stored in the cylinder and the flow rate of oxygen being delivered to the patient.

For example, a tank factor of 0.16 means that for every 1 psi decrease in tank pressure, approximately 0.16 minutes (or 9.6 seconds) of oxygen supply is used when delivering oxygen at a flow rate of 1 LPM. So, if you have a tank pressure of 2000 psi and you are delivering oxygen at a flow rate of 1 LPM, the estimated time remaining in the tank would be approximately 320 minutes (or 5 hours and 20 minutes) using the tank factor of 0.16.

It's important to note that the tank factor may vary depending on factors such as temperature, altitude, and type of oxygen delivery device used. Therefore, it's crucial to refer to the manufacturer's guidelines and consult with a healthcare professional for accurate calculations and usage of oxygen therapy.

If you're looking to master oxygen therapy and enhance your emergency response skills, the Canadian Red Cross Oxygen Therapy course with Delta Emergency in Calgary is the perfect choice. With experienced instructors, comprehensive course content, flexibility, customization options, and accreditation, Delta Emergency is your trusted expert in O2 training. Enroll in their course today and take a step towards becoming a pro in oxygen therapy. You can breathe easy knowing you're in capable hands with Delta Emergency.

At Delta Emergency Support Training we are happy to answer any questions you may have about oxygen training. We provide training sessions for individuals or classes. We have options for in person, hybrid or online classes for Oxygen Therapy, Standard First Aid (SFA), Advanced First Aid (AFA), Emergency Medical Responder (EMR), and more courses. For all inquiries please email info@deltaemergency.com

Read More

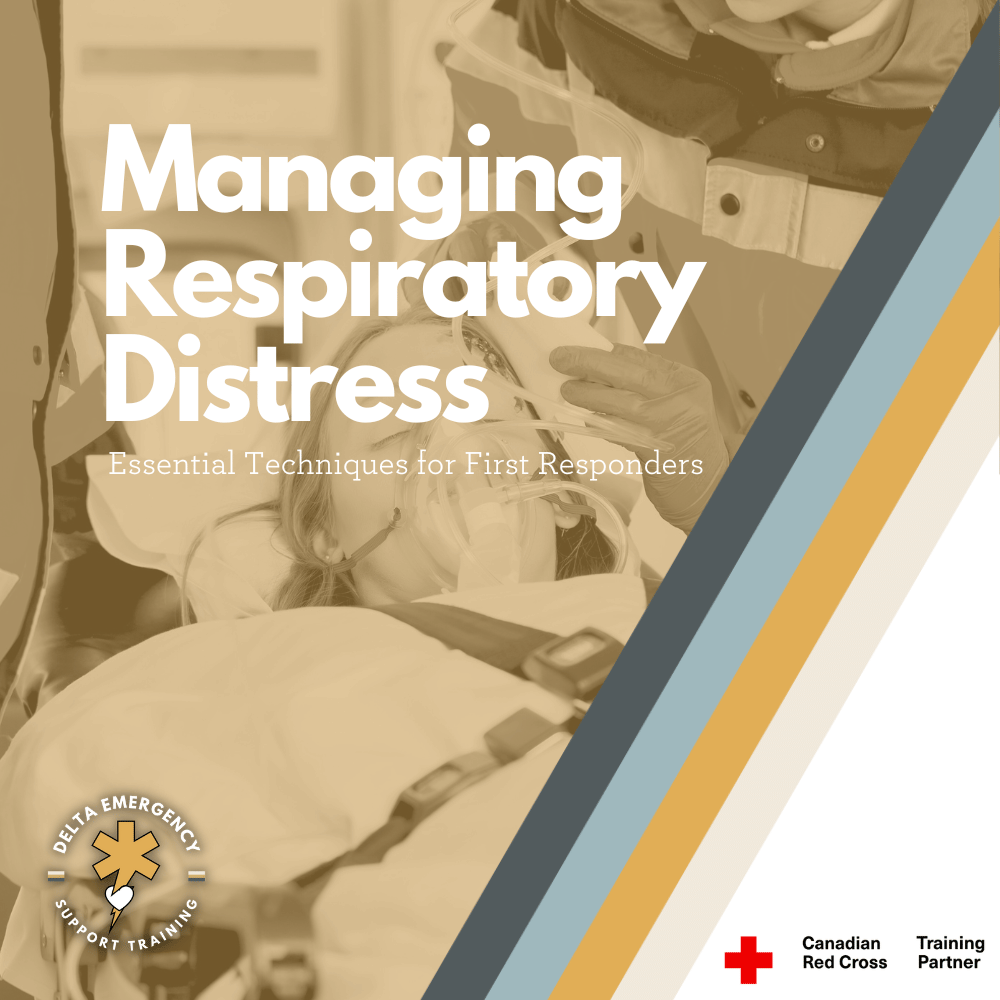
Managing Respiratory Distress: Essential Techniques for First Responders

First responders play a critical role in emergency situations, including managing the breathing of patients. In this blog, we will discuss the importance of breathing management for first responders and provide tips for ensuring the best possible outcomes for patients.

As a first responder, proper breathing management is essential for providing effective care to patients in respiratory distress. Understanding the anatomy of the respiratory system, recognizing signs and symptoms of respiratory distress, and maintaining normal breathing rates are all important aspects of breathing management. In this post, we'll explore these topics in the context of first responders.

The first responder has placed an oxygen mask, known as a non-rebreather, over the patient's nose and mouth. The non-rebreather has a bag that fills with oxygen, which allows the patient to receive a high concentration of oxygen with each breath. The non-rebreather mask is used to treat patients who are experiencing respiratory distress or who require high levels of oxygen.

Anatomy of the Respiratory System

As a first responder, it's important to have a basic understanding of the anatomy of the respiratory system. The respiratory system consists of several parts that work together to facilitate breathing. The main organs involved in breathing are the lungs, which are located in the chest. The lungs are made up of millions of tiny air sacs called alveoli, which are responsible for exchanging gases with the blood. The trachea, or windpipe, connects the lungs to the mouth and nose, while the diaphragm is a muscle that helps with breathing by contracting and relaxing. The bronchi are the tubes that branch off from the trachea and lead to the lungs, and the bronchioles are smaller tubes that branch off from the bronchi and lead to the alveoli.

Signs and Symptoms of Respiratory Distress

As a first responder, it's important to recognize the signs and symptoms of respiratory distress. These may include:

  1. Shortness of breath:

    Feeling like you can't get enough air, or struggling to breathe, is a common symptom of respiratory distress.

  2. Rapid breathing:

    Breathing faster than normal, or taking shallow breaths, may be a sign of respiratory distress.

  3. Chest pain:

    Pain or discomfort in the chest can be a sign of a serious respiratory problem.

  4. Wheezing/Stridor:

    A high-pitched whistling sound when breathing may indicate narrowing of the airways.

  5. Cyanosis:

    This can indicate a lack of oxygen in the blood.

  6. Confusion:

    Lack of oxygen can cause confusion or disorientation.

  7. Fatigue:

    Difficulty breathing can cause fatigue or weakness.

Maintaining Normal Breathing Rates

As a first responder, it's important to know the normal breathing rates for adults and children. The normal breathing rate for an adult is around 12-20 breaths per minute, while the normal breathing rate for a child is higher, around 20-40 breaths per minute. However, certain conditions can cause abnormal breathing rates. For example, respiratory distress can cause rapid, shallow breathing, while other conditions, such as sleep apnea, can cause periods of slowed or paused breathing.

Breathing Management

Proper breathing management is essential for providing effective care to patients in respiratory distress. As a first responder, here are some tips for managing breathing:

  1. Administer oxygen:

    Depending on the severity of the patient's respiratory distress, administering oxygen may be necessary. The appropriate oxygen delivery device should be used based on the patient's level of respiratory distress.

  2. Position the patient:

    Positioning the patient in a way that maximizes their breathing capacity can be helpful. For example, placing the patient in a sitting position with their head slightly elevated may make it easier for them to breathe.

  3. Provide assisted ventilation:

    In some cases, conscious bagging with a bag valve mask may be necessary to help the patient normalize their breathing rate.

  4. Transport the patient to a medical facility:

    If the patient's respiratory distress is severe, transport them to a medical facility for further treatment.

Oxygen masks and flow rates

Breathing masks are a crucial piece of equipment for first responders, as they allow them to provide oxygen to patients in respiratory distress. There are several types of breathing masks available, each with its own specific use and oxygen flow rate. In this post, we'll explore the different types of breathing masks commonly used by first responders, including the nasal cannula, simple face mask, non-rebreather mask, and bag valve mask.

Nasal Cannula

The nasal cannula is a type of oxygen delivery device that is used to provide oxygen to patients with mild to moderate respiratory distress. It is a thin tube that is inserted into the nostrils and is held in place by a strap that goes around the patient's head. The nasal cannula is typically used to deliver low to medium oxygen flow rates, typically ranging from 1 to 6 liters per minute (LPM).

Simple Face Mask

The simple face mask is another type of oxygen delivery device that is used to provide oxygen to patients with respiratory distress. It covers the nose and mouth and is held in place by an elastic strap that goes around the patient's head. The simple face mask is typically used to deliver medium to high oxygen flow rates, typically ranging from 5 to 10 LPM.

Non-Rebreather Mask

The non-rebreather mask is a type of face mask that is used to deliver high concentrations of oxygen to patients with severe respiratory distress. It covers both the nose and mouth and has a one-way valve that allows the patient to inhale oxygen from a reservoir bag. The non-rebreather mask is typically used to deliver high oxygen flow rates, ranging from 10 to 15 LPM.

Bag Valve Mask

The bag valve mask, also known as a manual resuscitator, is a handheld device that is used to provide positive pressure ventilation to patients in respiratory distress. It consists of a bag that is attached to a mask and is used to deliver oxygen to the patient's lungs. The bag valve mask is typically used to deliver high oxygen flow rates, ranging from 10 to 15 LPM.

By following proper breathing management techniques, first responders can help ensure that patients receive the oxygen they need to survive, while also ensuring their own safety in emergency situations.

At Delta Emergency Support Training, we understand the importance of being prepared for medical emergencies. We offer a range of training sessions to help individuals and classes develop the skills and knowledge they need to respond to emergency situations. Our courses include Standard First Aid (SFA), Advanced First Aid (AFA), and Emergency Medical Responder (EMR), and we offer in-person, hybrid, and online options to suit different needs.

If you have any questions about our training sessions or medical emergencies in general, please don't hesitate to reach out to us. You can contact us at info@deltaemergency.com and we'll be happy to assist you.

Read More

Firefighter Training: OPA's and NPA's for Airway Management

Nasopharyngeal airways (NPA) and oropharyngeal airways (OPA) are commonly used in healthcare settings to maintain a patient's airway and assist with breathing.When used correctly, NPAs can help clients who may be experiencing respiratory distress during certain treatments. However, it's important to have the necessary knowledge and protocols in place to safely insert and monitor the device. At Delta Emergency Support Training, we can help you learn how to safely use NPAs in spa settings and beyond. Our training sessions include a range of courses, including Standard First Aid (SFA), Advanced First Aid (AFA), and Emergency Medical Responder (EMR), and we offer in-person, hybrid, and online options to suit different needs. Contact us at info@deltaemergency.com to learn more about our training sessions and how we can help you develop the skills and knowledge you need to respond to emergency situations effectively.

As a firefighter, you need to be prepared to respond to emergency situations, including those involving airway management for an unconscious patients airway. Two commonly used tools for airway management are oropharyngeal airways (OPA's) and nasopharyngeal airways (NPA's). Today we'll discuss what these devices are, why they are used, and how to properly insert them as a first responder.

Four colour coded Oropharyngeal airways lay across a medical sheet.

What are OPA's and NPA's?

Oropharyngeal airways (OPA's) and nasopharyngeal airways (NPA's) are medical devices used to keep an airway open in patients who can’t secure it themselves. They are used when the patient is unable to maintain their own airway due to injury, illness, or drug overdose and become unconscious. OPA's and NPA's are both designed to be inserted into the patient's airway to help keep it open.

An OPA is a curved plastic device that is inserted into the patient's mouth and extends into the pharynx. It helps to prevent the tongue from obstructing the airway and allows air to pass freely into the lungs. OPA's are available in different sizes to accommodate patients of different ages and sizes.

An NPA is a flexible, hollow tube that is inserted into the patient's nostril and extends into the nasopharynx. It helps to keep the airway open and can be used in patients who are unable to tolerate an OPA due to gag reflex or other reasons.

Why do we use OPA's and NPA's?

The primary reason for using OPA's and NPA's is to maintain a patient's airway and ensure that they are able to breathe. When a patient's airway is obstructed, it can quickly lead to hypoxia, which is a dangerous condition where the body's tissues do not receive enough oxygen. OPA's and NPA's are used to prevent this from happening by keeping the airway open and allowing oxygen to flow freely into the lungs.

Testing for LOC (Level Of Consciousness)

Before inserting an OPA, it is important to assess the patient's level of consciousness. The AVPU scale is a simple and quick method for assessing a patient's level of consciousness based on their response to stimuli. The scale has four categories:

  • A: Alert

  • V: Verbal response

  • P: Pain response

  • U: Unresponsive

To use the AVPU scale, a healthcare provider would first try to get the patient's attention by speaking to them in a normal tone of voice. If the patient responds appropriately, they would be classified as "A" for alert. If the patient responds to verbal stimuli but is not fully alert, they would be classified as "V" for verbal response. If the patient only responds to painful/physical stimuli, such as a trap squeeze or nail bed pressure, they would be classified as "P" for pain/physical response. If the patient does not respond to any stimuli, they would be classified as "U" for unresponsive.

If a patient is assessed as being unresponsive or only responding to painful stimuli, an OPA may need to be inserted to maintain their airway. However, if the patient is alert or responding to verbal stimuli, an OPA may not be necessary.

How to insert OPA's and NPA's as a first responder

Proper insertion of OPA's and NPA's is crucial to their effectiveness and patient safety. Here are some general steps for inserting OPA's and NPA's:

Inserting an OPA:

  1. Choose the appropriate size OPA for the patient based on their age and size. Measure from the corner of the mouth to the angle of the jaw.

  2. Position the patient's head in a neutral position.

  3. Open the patient's mouth using the cross finger technique.

  4. Insert the OPA into the patient's mouth, with the curved end facing the roof of the mouth.

  5. Gently rotate the device 180 degrees as you insert it, until it is in a anatomical position.

Inserting an NPA:

  1. Choose the appropriate size NPA for the patient based on their age and size by measuring the tip of the nose to the corner of the jaw.

  2. Lubricate the NPA with a water-soluble lubricant.

  3. Position the patient's head in a neutral position.

  4. Insert the NPA into the patient's nostril starting with the right nostril. Bevelled edge facing the septum.

  5. Gently advance the device until it reaches the back of the nasopharynx

At Delta Emergency Support Training, we understand the importance of being prepared for medical emergencies. We offer a range of training sessions to help individuals and classes develop the skills and knowledge they need to respond to emergency situations. Our courses include Standard First Aid (SFA), Advanced First Aid (AFA), and Emergency Medical Responder (EMR), and we offer in-person, hybrid, and online options to suit different needs.

If you have any questions about our training sessions or medical emergencies in general, please don't hesitate to reach out to us. You can contact us at info@deltaemergency.com and we'll be happy to assist you.

Read More
BLS, Cardiac, Dental, Healthcare, Physio, Chiropractor Jarrett Chisholm BLS, Cardiac, Dental, Healthcare, Physio, Chiropractor Jarrett Chisholm

Critical Skills for Physiotherapists: The Canadian Red Cross BLS Certification Course for Life-Threatening Emergencies

The Canadian Red Cross Basic Life Support (BLS) recertification course is designed to provide physiotherapists with the latest training and techniques to manage emergency situations effectively. This course covers a wide range of topics, including the assessment of vital signs, airway management, cardiopulmonary resuscitation (CPR), and automated external defibrillation (AED).

One of the key features of this course is the use of a Simulaids Airway Trainer, which allows participants to practice the insertion of various airway devices, such as oropharyngeal and nasopharyngeal airways. This tool helps participants gain hands-on experience in managing airway obstruction and ensures they are comfortable handling airway devices in real-life situations.

Another valuable tool utilized in this course is the Prestan Professional Mannikins, which come equipped with a Bluetooth app for CPR results. This app allows participants to track their CPR performance and receive immediate feedback, enabling them to adjust their technique accordingly.

Through a combination of practical and theoretical training, this course provides physiotherapists with the confidence and skills needed to respond to life-threatening emergencies effectively. By completing the Canadian Red Cross BLS recertification course, physiotherapists can ensure they are fully prepared to provide the highest level of care to their patients.

Physiotherapists Register for the Canadian Red Cross Basic Life Support Recertification Course

As a physiotherapist, you are dedicated to improving the health and well-being of your patients. In order to be fully prepared to handle any emergency situation, it's important to have a solid understanding of basic life support (BLS) techniques. The Canadian Red Cross BLS certification course offered by Delta Emergency provides the necessary training to equip physiotherapists with the skills needed to handle life-threatening emergencies. In this blog post, we'll explore the details of this course, including the use of a Simulaids Airway Trainer, Prestan Professional Mannikins with a Bluetooth app for CPR results.

a bls trained Physiotherapist working in a cardiac recovery centre in calgary. Blood pressure being taken while a patient walks on a treadmill for a stress test.

As a physiotherapist, you may encounter patients who are at risk of experiencing cardiac arrest or respiratory arrest. Here are a few examples:

  1. Patients with chronic obstructive pulmonary disease (COPD): COPD is a chronic lung disease that can cause shortness of breath and difficulty breathing. Patients with COPD may be at risk of respiratory arrest, especially during exacerbations of their condition.

  2. Patients with neuromuscular disorders: Patients with conditions such as muscular dystrophy or amyotrophic lateral sclerosis (ALS) may experience respiratory failure due to weakness of the respiratory muscles.

  3. Patients undergoing surgery: Anesthesia and surgical procedures can increase the risk of cardiac arrest or respiratory arrest. Physiotherapists may be involved in the post-operative care of these patients and may need to respond to emergencies.

  4. Patients with heart disease: Patients with conditions such as coronary artery disease, heart failure, or arrhythmias may be at risk of cardiac arrest. Physiotherapists may encounter these patients during cardiac rehabilitation or in other settings.


It's important for physiotherapists to be prepared to respond to emergencies in any patient population they may encounter. The Canadian Red Cross BLS certification course provides valuable training in basic life support techniques that can be applied to a variety of patient situations.

Overview of the Canadian Red Cross BLS Certification Course:

The Canadian Red Cross BLS certification course is designed to provide healthcare professionals with the knowledge and skills necessary to recognize and respond to life-threatening emergencies. The course covers a range of topics, including basic life support techniques such as CPR, the use of automated external defibrillators (AEDs), and how to manage airway and breathing emergencies.

The course is taught by experienced instructors who are certified by the Canadian Red Cross. It consists of a combination of online learning and in-person skills training. The online portion covers the theoretical aspects of the course, including the principles of BLS, the Chain of Survival, and the steps involved in performing CPR. The in-person skills training component focuses on hands-on practice with the use of Simulaids Airway Trainer and Prestan Professional Mannikins.

Use of Simulaids Airway Trainer:

The Simulaids Airway Trainer is a sophisticated device used to simulate airway management scenarios. It provides a realistic experience for trainees and allows them to practice a range of airway management techniques, such as intubation and suctioning, in a safe and controlled environment. The Airway Trainer is an excellent tool for physiotherapists who may be called upon to manage airway emergencies in their practice.

Use of Prestan Professional Mannikins with a Bluetooth app:

The Prestan Professional Mannikins are high-quality CPR training mannequins that provide realistic feedback on the effectiveness of chest compressions. They feature a built-in Bluetooth app that allows trainees to monitor and track their CPR performance in real-time. This technology is a valuable tool for physiotherapists who want to ensure they are providing the highest quality of care to their patients in an emergency situation.

Empowering Physiotherapists to Save Lives: Conclusion

The Canadian Red Cross BLS certification course offered by Delta Emergency is an excellent resource for physiotherapists looking to enhance their emergency response skills. With a combination of online learning and hands-on training with the use of Simulaids Airway Trainer and Prestan Professional Mannikins, this course provides a comprehensive understanding of basic life support techniques. By completing this course, physiotherapists will be better equipped to handle life-threatening emergencies and provide their patients with the highest quality of care.

At Delta Emergency Support Training we are happy to answer any questions you may have about Basic Life Support. We provide training sessions for individuals or classes. We have options for in person, hybrid or online classes for Standard First Aid (SFA), Advanced First Aid (AFA), Emergency Medical Responder (EMR), Basic Life Support (BLS) and more courses. For all inquiries please email info@deltaemergency.com

Read More

Responding to Mass Casualty Incidents: A Guide for First Responders

Responding to Mass Casualty Incidents is a critical aspect of emergency preparedness and response. Whether it's a natural disaster, a terrorist attack, or an accident, the ability to quickly and effectively manage large numbers of injured victims can mean the difference between life and death. In such situations, emergency responders must work together to triage, treat, and transport the injured to medical facilities. They must also ensure that the scene is secure and that all necessary resources are available to address the needs of those affected.

Mass casualty incidents (MCIs) are situations where a large number of people are injured or killed at the same time. These incidents can be caused by natural disasters such as earthquakes, floods, or hurricanes, as well as by human-made events such as terrorist attacks or shootings. First responders play a crucial role in responding to these incidents and saving lives.

emergency responders in action, tending to multiple injured victims in a mass casualty incident. The responders are wearing protective gear and are working together to triage, treat, and transport the injured to medical facilities. The scene is chaotic, with debris and injured victims scattered around, highlighting the urgency and importance of effective mass casualty incident response.

Ensuring Safety: When responding to an MCI, the first priority for first responders is to ensure their own safety. They should always approach the scene with caution and be aware of potential hazards such as fires, explosions, or collapsing buildings. Once they have determined that it is safe to enter the area, they should quickly assess the situation and determine the number of casualties, the severity of injuries, and the resources needed to provide care.

Establishing Command: The first responders should then establish a command center to coordinate the response efforts. This center should be located in a safe area outside the immediate danger zone and should have clear communication channels with all response teams. The command center should also have access to emergency medical services (EMS) and transportation resources to move patients to hospitals or other care facilities.

Phases of Response: The response efforts should be organized into three main phases: triage, treatment, and transportation. During the triage phase, first responders should quickly assess each patient's condition and assign them to one of four categories: immediate (red), delayed (yellow), minimal (green), or expectant (black). Patients who are classified as immediate require immediate medical attention and should be transported to a hospital as soon as possible. Patients who are classified as delayed require medical attention but can wait for treatment. Patients who are classified as minimal require little or no medical attention, and patients who are classified as expectant are unlikely to survive even with treatment.

During the treatment phase, first responders should provide medical care to patients based on their triage category. Patients who are classified as immediate should receive the most urgent care, such as controlling bleeding, opening airways, or stabilizing fractures. Patients who are classified as delayed should receive medical attention as soon as possible, but their injuries are not life-threatening. Patients who are classified as minimal may receive basic first aid, such as bandages or pain relief. Patients who are classified as expectant should receive comfort care to minimize their suffering. During the treatment phase of a mass casualty incident, first responders should provide medical care to patients based on their triage category, which is determined during the triage phase. The triage categories are immediate (red), delayed (yellow), minimal (green), and expectant (black).

Patients who are classified as immediate require the most urgent care as their injuries are life-threatening and require immediate attention. First responders should prioritize stabilizing these patients by controlling any bleeding, opening their airways to ensure they can breathe properly, and stabilizing fractures or other injuries as quickly as possible. This may include the use of tourniquets, airway management devices, and splints.

Patients who are classified as delayed have injuries that are not immediately life-threatening but still require medical attention. First responders should provide medical care to these patients as soon as possible, but the urgency is not as high as it is for patients classified as immediate. For example, delayed patients may need pain relief, wound care, or treatment for broken bones.

Patients who are classified as minimal have injuries that are minor and may only require basic first aid, such as bandages or pain relief. These patients do not require immediate medical attention and can wait for treatment while more urgent cases are addressed.

Patients who are classified as expectant have injuries that are so severe that they are unlikely to survive even with medical treatment. First responders should provide comfort care to these patients to minimize their suffering, which may include pain relief, emotional support, and communication with family members or loved ones.

In summary, during the treatment phase, first responders should prioritize patients based on their triage category and provide the appropriate level of medical care to each patient. By following these guidelines, first responders can provide efficient and effective care to those in need during a mass casualty incident.

During the transportation phase, first responders should transport patients to hospitals or other care facilities based on their triage category. Patients who are classified as immediate should be transported first, followed by delayed patients. Minimal patients can be transported later or given transportation advice. Patients who are classified as expectant may not be transported, depending on the available resources and the patient's condition.

In conclusion, first responders play a critical role in responding to mass casualty incidents. They should always prioritize their own safety and quickly assess the situation to determine the resources needed to provide care. By following a structured approach that includes triage, treatment, and transportation, first responders can efficiently and effectively provide medical care to patients and save lives.

Read More