The Delta Dispatch

Halloween Night Safety: Preventing Accidents and Injuries
Halloween should be about costumes, candy, and community—not accidents. From safe costumes and candy checks to driver awareness and first aid preparedness, here are key safety tips every family needs for a safe and fun Halloween.
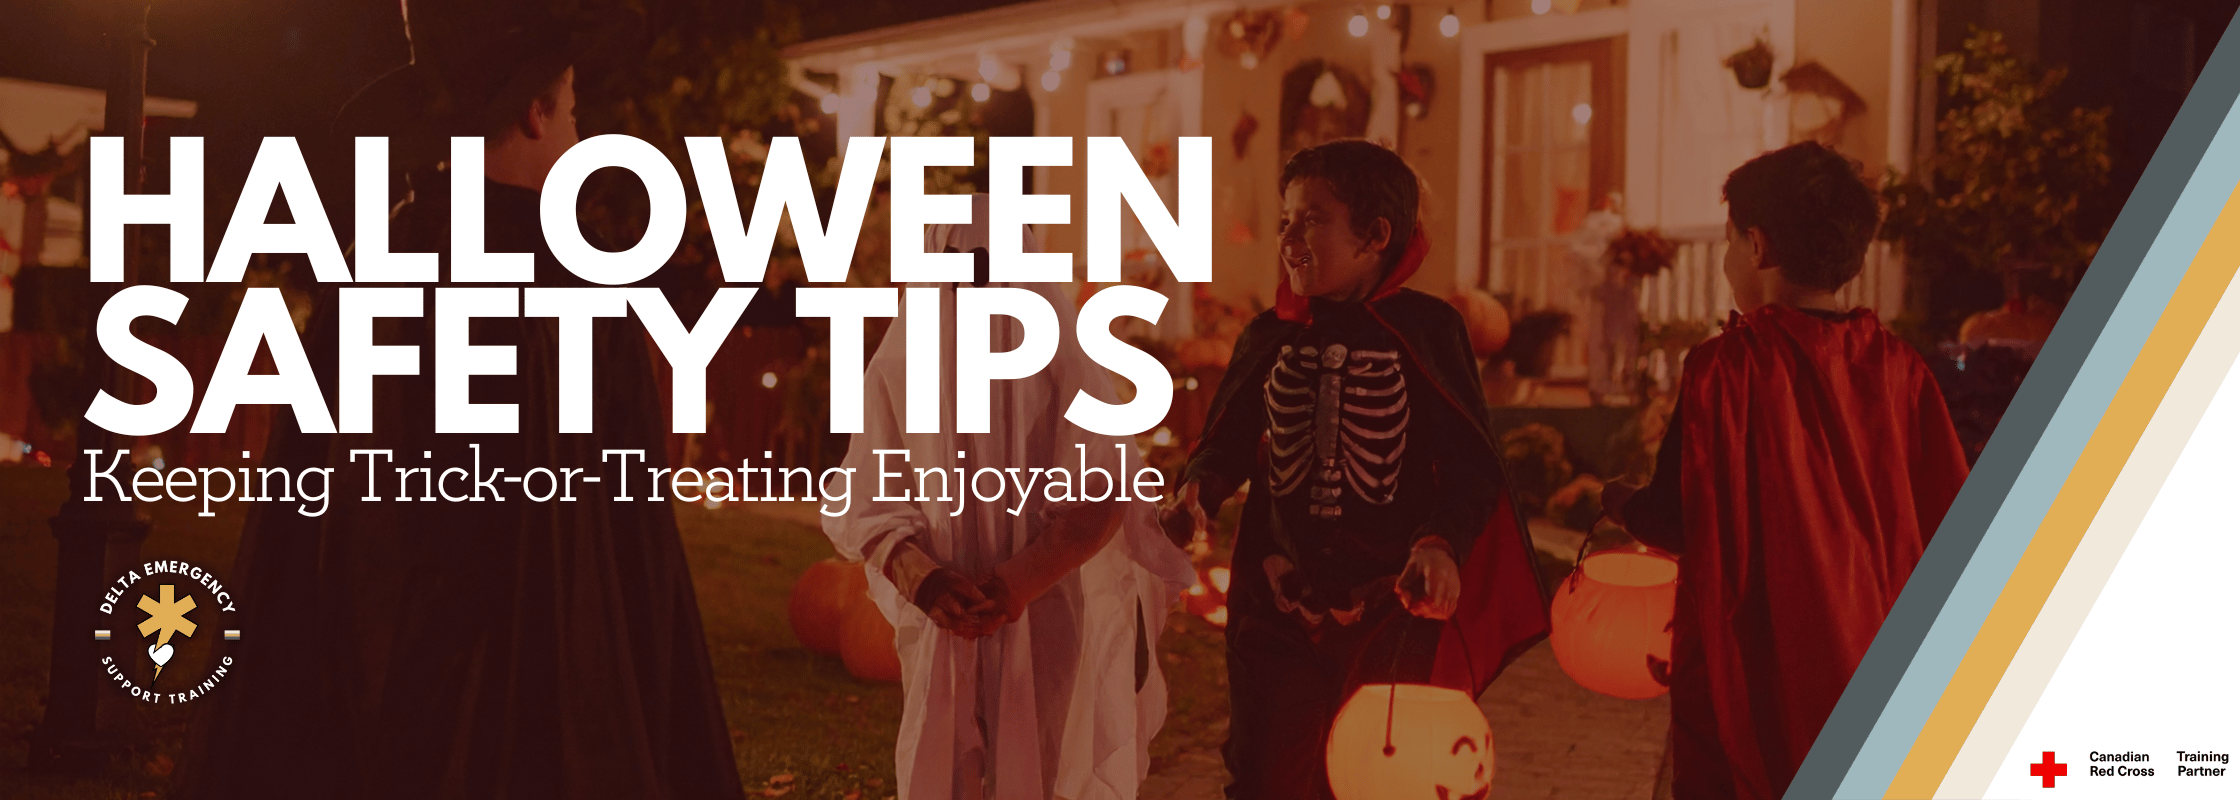
Halloween is one of the most exciting nights of the year, filled with costumes, candy, and community fun. But behind the laughter and decorations, this holiday also brings unique safety risks that parents, caregivers, and even drivers should keep in mind. At Delta Emergency Support Training, we know emergencies don’t wait for the right time—being prepared is the key to keeping Halloween safe, fun, and free of unwanted scares.
Costume Safety: More Than Just Dress-Up
Costumes should be fun, but they also need to be safe. The wrong outfit can lead to injuries, trips, or even fire hazards.
Visibility first: Add reflective tape or glow sticks to costumes and treat bags. Dark clothing blends into the night, making kids nearly invisible to drivers.
Proper fit: Oversized costumes and long capes cause tripping. Hem long outfits and secure loose parts.
Mask vs. makeup: Masks often limit vision and peripheral awareness. Non-toxic face paint is a safer option.
Flame resistance: Choose costumes made from flame-retardant fabrics, especially since candles are common in jack-o’-lanterns.
Trick-or-Treating Safety: Rules That Save Lives
Excited children often forget about safety, making them more vulnerable to accidents.
Adult supervision: Children under 12 should not trick-or-treat alone. Older kids should stay in groups and have a set route.
Crosswalks only: Instruct kids to cross at intersections, never mid-block, and to look both ways even if the street looks clear.
Stay visible: Equip kids with flashlights, glow bracelets, or reflective gear.
Neighborhood awareness: Visit only well-lit homes and avoid houses where walkways are unsafe or unlit.
Plan ahead: Set a curfew for older kids and ensure they carry a fully charged cell phone.
Candy Hazards: More Than a Sweet Treat
What’s inside the candy bag can sometimes be risky.
Inspect first: Parents should examine all treats. Discard unwrapped or suspicious-looking items.
Watch for allergens: With food allergies on the rise, teach children to check labels for peanuts, tree nuts, milk, or gluten. Carry an epinephrine auto-injector if prescribed.
Choking hazards: Hard candy, gum, and small toys in treat bags pose risks for children under five. Supervise younger kids while eating.
Driver Awareness: Sharing the Road With Trick-or-Treaters
Halloween is one of the most dangerous nights of the year for pedestrian accidents.
Slow down: Reduce speed in residential areas and school zones.
Expect the unexpected: Kids may run out between parked cars or cross without warning.
Stay alert: Avoid distractions like phones or loud music.
Peak hours caution: Most trick-or-treating happens between 5 p.m. and 9 p.m.—be extra cautious during this time.
Home Safety for Hosts
If you’re handing out treats, your home should be as safe as the candy you give out.
Clear walkways: Remove garden hoses, decorations, and wet leaves that could cause slips or trips.
Lighting matters: Keep paths and porches well-lit to reduce falls and discourage mischief.
Pet precautions: Excited pets may scare or injure children. Keep dogs and cats safely indoors during peak hours.
First Aid Preparedness: Responding When Things Go Wrong
Even with precautions, accidents can still happen. Knowing what to do can make the difference between a minor scare and a serious emergency.
Cuts and scrapes: Clean with water, cover with a sterile bandage.
Burns from candles or lanterns: Cool with clean, cool water for at least 10 minutes and cover with a sterile, non-stick dressing.
Choking: For children, know how to perform abdominal thrusts and back blows. For infants, use back blows and chest thrusts.
Allergic reactions: Know how to recognize signs of anaphylaxis (difficulty breathing, swelling, hives) and use an epinephrine auto-injector if available.
Emergency kit: Carry basic first aid supplies, a flashlight, and a phone to call 911 if needed.
Final Word
Halloween is meant to be a night of joy, not a trip to the emergency room. With a little preparation and awareness, families and communities can enjoy a safe celebration. Costumes, candy, and spooky fun don’t have to come at the cost of safety.
At Delta Emergency Support Training, we believe that prevention and preparedness are the real treats of Halloween.
Stay visible. Stay safe. Stay spooky. 🎃

Online Red Cross Babysitter Course: Enroll Your Child Anywhere in Canada
Help your child build confidence and life-saving skills from anywhere in Canada. Delta Emergency Support Training delivers the Red Cross Babysitter Course live online in two sessions—covering baby care, safety, and first aid—so your young teen is ready for babysitting and emergencies alike.

Looking for a meaningful way to build your child’s confidence and independence? The Canadian Red Cross Babysitter Course, offered online through Delta Emergency Support Training , gives youth aged 11–15 the skills to care for children safely and respond to emergencies—all from the comfort of your home, anywhere in Canada.
This isn’t just a babysitting class. It’s leadership training, first aid preparation, and a solid first step toward responsibility and a first job.
Two Engaging Online Sessions
Delta delivers the official Red Cross Babysitter Course in two interactive sessions, making it easy for families across the country to fit training into their schedule.
Session 1: Caring for Babies and Young Children
Feeding, diapering, and soothing infants and toddlers
Planning fun, age-appropriate activities
Child-proofing and preventing household injuries
Professional communication with parents and setting rates
Session 2: Babysitter First Aid
Treating common injuries: cuts, burns, bumps
Choking relief techniques
When and how to call 911
Staying calm and in control during unexpected situations
Because the course is fully online and instructor-led, your child can learn live with a certified Red Cross trainer, interact with other participants, and practice key skills—no matter where you live.
Why Parents Are Signing Up Across Canada
1. Confidence and Independence
Kids finish the course ready to handle real-world responsibilities and make smart decisions when you’re not around.
2. First Aid That Lasts a Lifetime
Babysitter-level first aid is an invaluable life skill—useful at home, at school, and during sports.
3. A First Job They—and You—Can Trust
Babysitting is often a child’s first paid work. This training covers everything from professional communication to setting fair rates so they’re prepared to succeed.
4. Peace of Mind for Parents
Knowing your child is Red Cross–certified means you can confidently let them care for siblings or neighbor children—and know they’re ready for emergencies.
How to Enroll from Anywhere
Registration is simple:
Visit Delta Emergency Support Training’s website and select the Red Cross Babysitter Course (Online).
Choose your preferred dates—sessions are offered year-round.
Receive your course materials and log-in details, then let your child join the live virtual class from your home computer or tablet.
The Takeaway for Parents
The online Red Cross Babysitter Course with Delta Emergency Support Training is more than childcare instruction. It’s a Canada-wide opportunity to give your child confidence, life-saving first aid skills, and professional babysitting knowledge, all while you relax knowing they’re learning from Red Cross–certified instructors.
Whether your child wants to start earning money, help with younger siblings, or simply gain valuable safety skills, this program is a parent-approved step toward independence and responsibility.

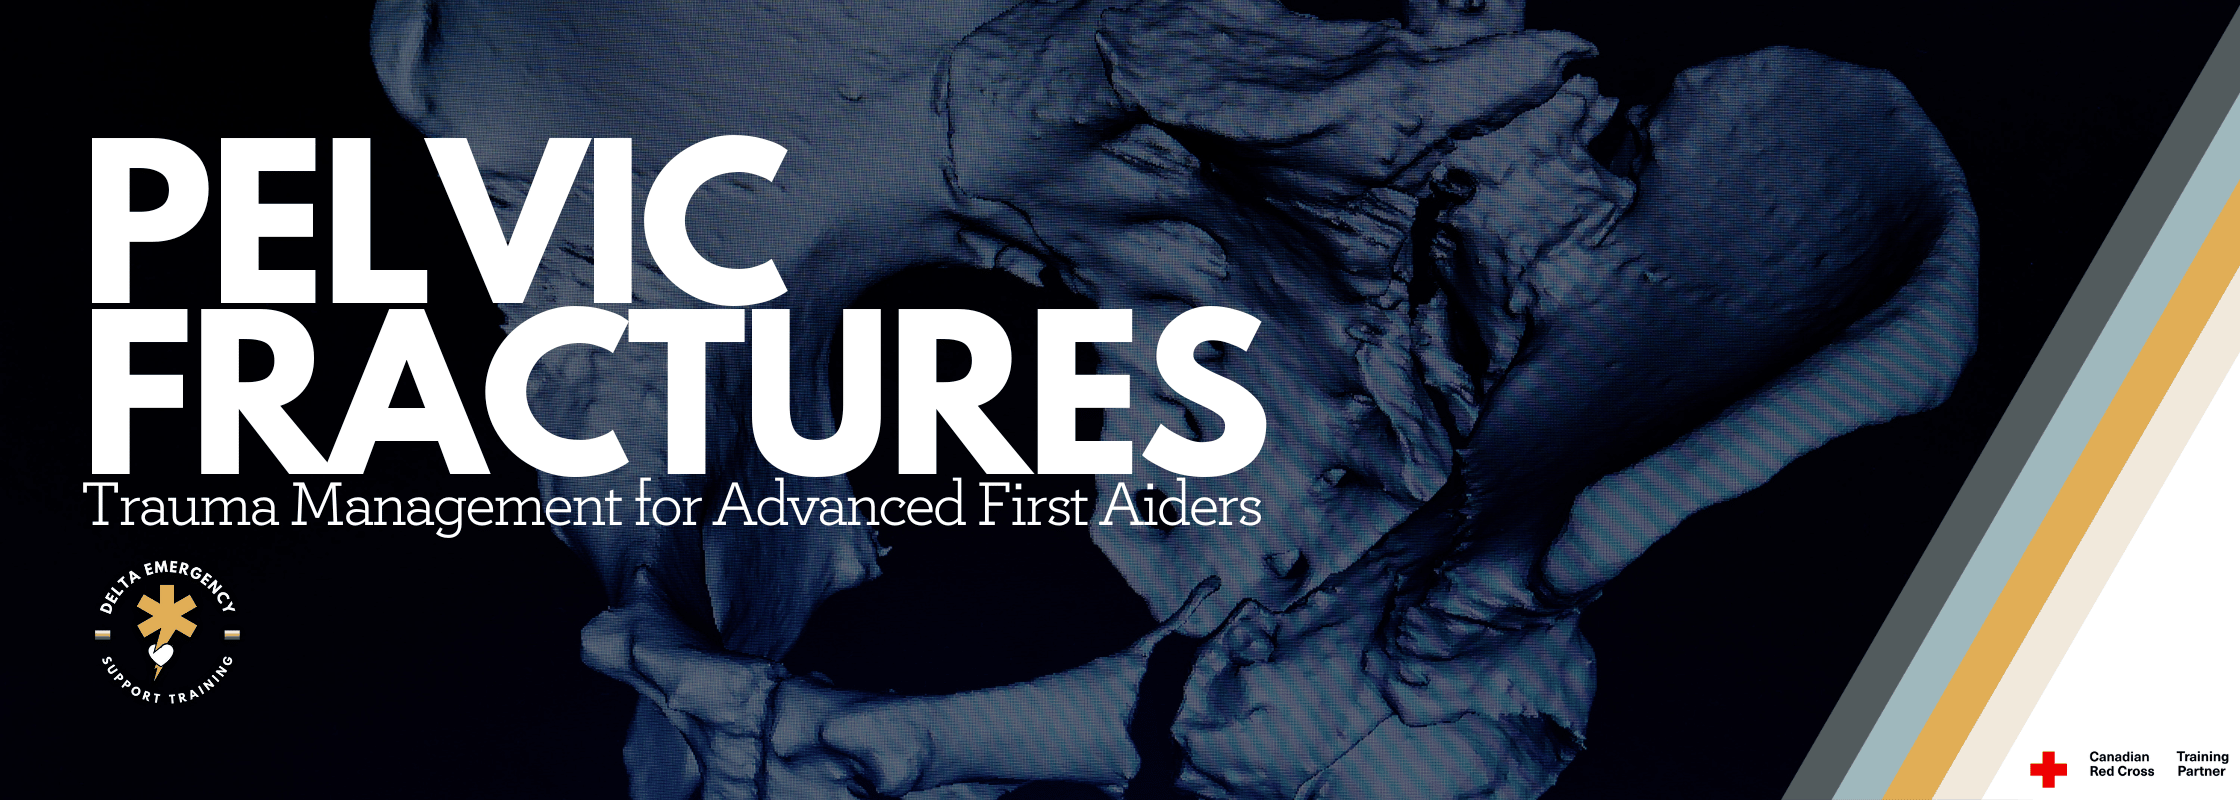
Suspected Pelvic Fractures: A Guide for Advanced First Aiders
Pelvic fractures are serious injuries that can lead to life-threatening internal bleeding. This guide for advanced first aiders covers common causes such as vehicle collisions and falls from height, how to recognize signs and symptoms in the field, and step-by-step instructions for proper pelvic immobilization, including correct binder placement over the iliac crests. Learn how to provide effective prehospital care while minimizing complications and preparing for rapid transport.
Pelvic fractures are potentially life-threatening injuries that require prompt recognition and careful management in the field. While not as common as limb fractures, they can result in significant internal bleeding, organ injury, and long-term disability. For advanced first aiders, understanding the mechanisms of injury (MOIs), assessment priorities, and prehospital management strategies is critical to improving patient outcomes.
Understanding Pelvic Fractures
The pelvis is a ring-shaped bony structure that supports the spine and houses major organs, blood vessels, and nerves. Fractures can range from minor, stable cracks to severe, unstable disruptions. Because of the pelvis's proximity to major vessels, even a closed fracture can result in life-threatening hemorrhage.
Key Points for AFAs:
Pelvic fractures are high-risk injuries, often associated with significant trauma.
Internal bleeding may not be immediately visible but can lead to shock.
Early recognition and proper immobilization can save lives.
Common Mechanisms of Injury (MOIs)
Advanced first aiders should be aware of the circumstances that often lead to pelvic fractures. These include:
Motor Vehicle Collisions (MVCs)
Frontal, side, or rollover impacts can transmit high forces to the pelvis.
Pedestrians struck by vehicles are particularly susceptible.
Falls from Height
Falling from a significant height (e.g., ladders, scaffolding, or buildings) can result in vertical compression injuries.
Landing on feet or buttocks can drive force into the pelvic ring.
Crush Injuries
Heavy objects falling on the pelvis or entrapment in machinery can cause unstable fractures.
Often associated with other musculoskeletal and internal injuries.
Sports and High-Impact Activities
Extreme sports, skiing, horseback riding, or cycling accidents can occasionally result in pelvic trauma.
Industrial or Workplace Accidents
Falls, heavy machinery accidents, or scaffolding collapses are common MOIs in occupational settings.
Recognizing Pelvic Fractures
Symptoms may include:
Severe pain in the hip, groin, or lower back
Inability to bear weight or move legs
Swelling, bruising, or deformity in the pelvic area
Shortened or externally rotated leg (in cases of hip involvement)
Signs of shock (pale, clammy skin, rapid pulse, hypotension)
Red Flags for AFAs:
Hemodynamic instability (low blood pressure, rapid heart rate)
Abdominal or perineal bruising
Blood at the urethral meatus
Unexplained hypotension following trauma
Field Assessment
Advanced first aiders should prioritize scene safety, mechanism awareness, and rapid assessment:
Scene Size-Up:
Ensure the environment is safe.
Consider high-energy trauma scenarios where pelvic injury is likely.
Primary Survey (ABCs):
Assess airway, breathing, and circulation immediately.
Treat life-threatening conditions first.
Pelvic Assessment:
Avoid direct manipulation or "pushing" on the pelvis. This can worsen bleeding.
Look for external signs of injury: bruising, swelling, deformity.
Check for associated injuries (spinal, femoral, abdominal).
Pelvic Immobilization: Correct Application of a Pelvic Binder
Pelvic fractures can cause life-threatening internal bleeding. Stabilizing the pelvis with a pelvic binder is one of the most important interventions you can perform in the field. Proper placement is critical—incorrect positioning can worsen bleeding or fail to stabilize the fracture.
Why Immobilization Matters
Reduces movement of the fractured pelvic ring, minimizing further tissue and vessel damage.
Helps control internal hemorrhage by reducing pelvic volume and tamponading bleeding vessels.
Provides pain relief and prevents further injury during transport.
Step-by-Step Application of Pelvic Binding
1. Preparation:
Assess the patient and confirm suspected pelvic fracture.
If available, use a commercial pelvic binder (e.g., T-Pod). If not, an improvised binder (e.g., folded sheet) can be used.
Ensure the patient is supine on a firm surface before applying the binder.
2. Correct Positioning:
Placement should be over the bony prominences of the iliac crests..
Improper placement can fail to stabilize the pelvic ring.
The binder should wrap firmly around the pelvis, encircling the pelvis snugly.
3. Application:
Slide the binder under the patient if using a sheet or sling.
Center the binder over the iliac crests on both sides.
Tighten evenly to compress the pelvis.
4. After Application:
Reassess distal circulation and lower limb alignment.
Monitor for signs of worsening pain, numbness, or compromised circulation.
Keep the patient immobilized and transfer carefully to EMS.
Key Points for Advanced First Aiders:
Always assume high-energy trauma could involve a pelvic fracture, even if external signs are minimal.
Never manipulate or “palpate” the pelvis excessively; use stabilization devices instead.
Reassess hemodynamics continuously; immobilization helps but does not replace urgent transport and shock management.
Associated Complications
Advanced first aiders must monitor for:
Hemorrhagic shock – the leading cause of death in unstable pelvic fractures.
Urogenital injuries – bladder or urethral trauma may be present.
Neurological compromise – nerve injuries affecting lower limbs.
Long-term mobility issues – delayed or improper treatment can lead to chronic pain or gait abnormalities.
Key Takeaways for Advanced First Aiders
High-energy trauma or certain MOIs should raise suspicion of pelvic fractures.
Avoid unnecessary movement of the pelvis; stabilize with a binder.
Monitor for shock and provide supportive care.
Rapid assessment and transport save lives.
Communication with EMS and the receiving hospital is critical.
Conclusion:
Pelvic fractures are high-risk injuries with potentially life-threatening complications. For advanced first aiders, recognizing high-risk MOIs, performing a careful assessment, stabilizing the patient, and preparing for rapid transport are essential steps in the chain of survival. By understanding the complexities of pelvic trauma in the field, AFAs can play a vital role in improving patient outcomes.

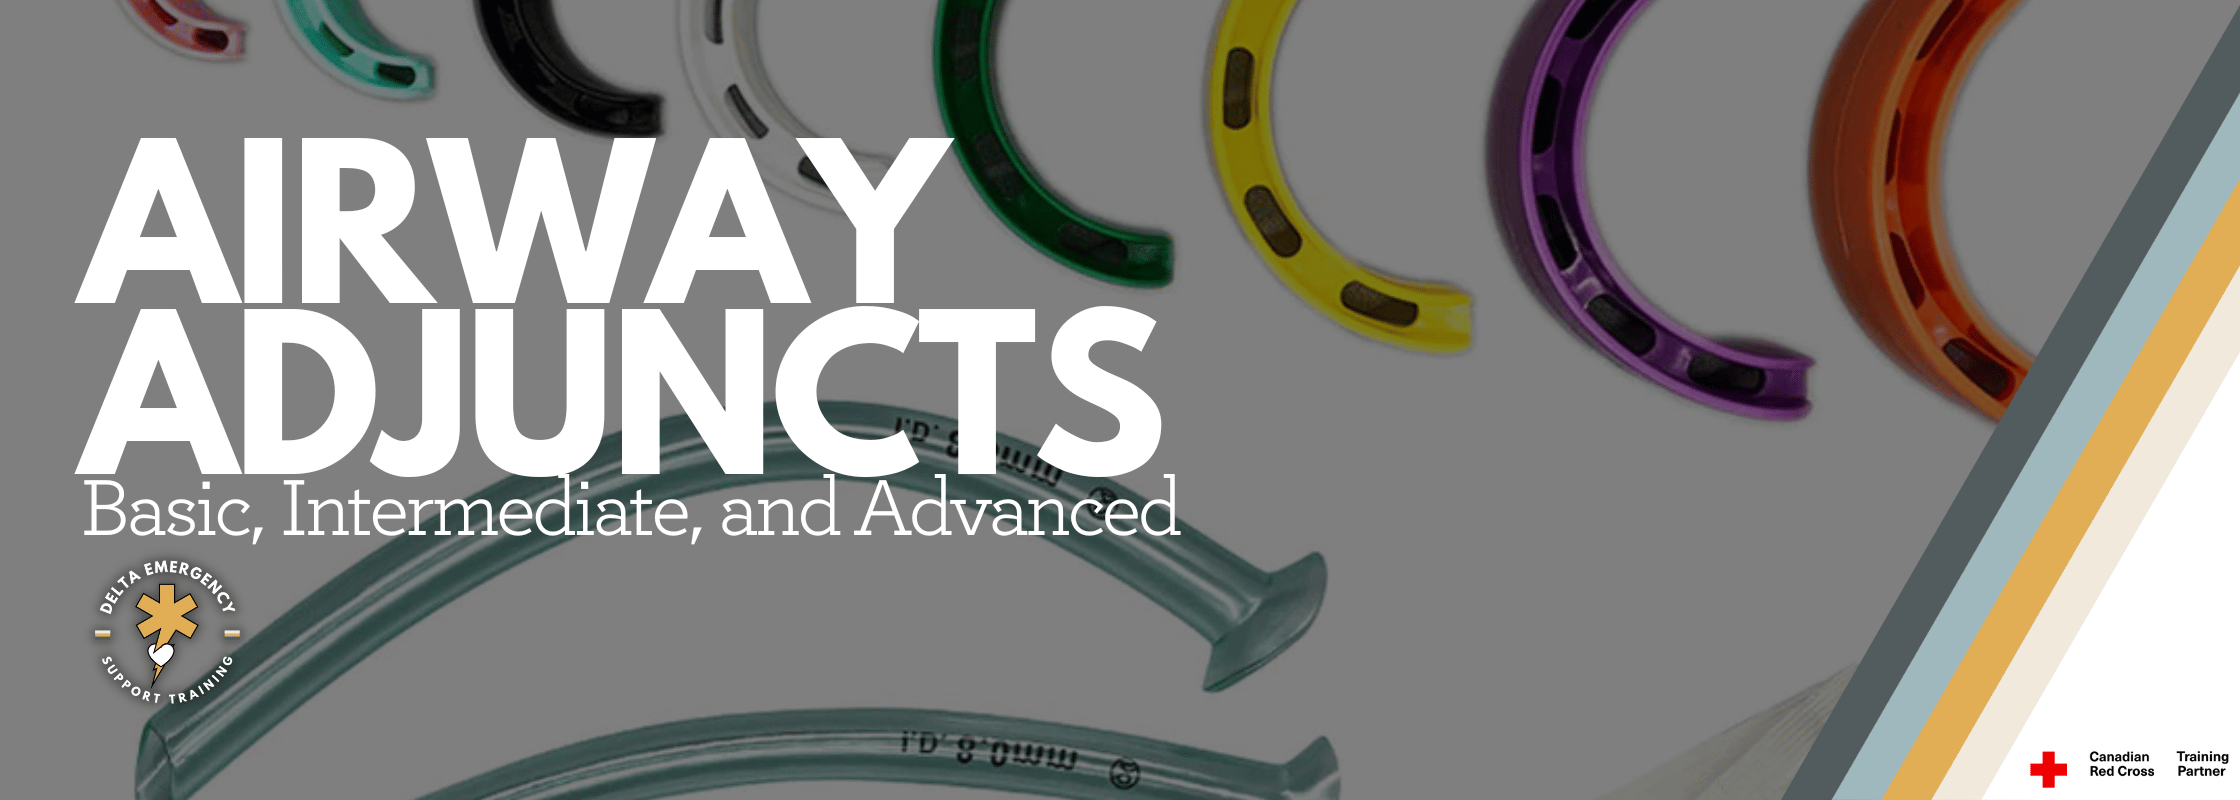
Understanding Basic, Intermediate, and Advanced Airway Adjuncts in Prehospital Care
Airway management is the cornerstone of emergency care. From simple oropharyngeal and nasopharyngeal airways to supraglottic devices and endotracheal intubation, prehospital providers need to know when—and how—to use each tool. This guide explains the essential skills and decision-making strategies for basic, intermediate, and advanced airway adjuncts to help responders keep patients breathing and safe.
Securing and maintaining a patient’s airway is the cornerstone of prehospital medicine. Whether you are an Emergency Medical Responder (EMR), Primary Care Paramedic (PCP), or Advanced Care Paramedic (ACP), understanding the range of airway adjuncts—and when to use them—is critical for optimal patient outcomes. Airway adjuncts are commonly grouped into three categories: basic, intermediate, and advanced.
1. Basic Airway Adjuncts
These devices are non-invasive and require minimal training, yet they can be lifesaving.
Oropharyngeal Airway (OPA)
Use: Unconscious patients without a gag reflex to keep the tongue from obstructing the airway.
Key Points: Measure from the corner of the mouth to the angle of the jaw; insert upside down then rotate 180° (or sideways with a tongue depressor in children).Nasopharyngeal Airway (NPA)
Use: Patients with an intact gag reflex or trismus (jaw clenching).
Key Points: Lubricate well; size from nostril to earlobe. Contraindicated in suspected basilar skull fractures.Suction Equipment
Use: Clears secretions, blood, or vomit to maintain a patent airway.
Clinical Pearl: Basic adjuncts buy time. Always reassess and be ready to escalate if ventilation or oxygenation remains inadequate.
2. Intermediate Airway Adjuncts
These devices provide more definitive control without requiring endotracheal intubation skills.
Supraglottic Airway Devices (SADs) such as:
Laryngeal Mask Airway (LMA)
King LT or i-gel
Use: For unconscious patients when bag-valve-mask (BVM) ventilation is inadequate or prolonged transport is expected.
Key Points: Rapid insertion, minimal training compared to intubation, and useful when laryngoscopy is not feasible.
3. Advanced Airway Adjuncts
These procedures require specialized training and are often reserved for paramedics with advanced certification or physicians.
Endotracheal Intubation (ETI)
Use: To provide definitive airway protection and control ventilation.
Key Points: Requires laryngoscopy, confirmation of tube placement (capnography is gold standard), and ongoing monitoring for dislodgement.Surgical Airway (Cricothyrotomy or Needle Cricothyrotomy)
Use: “Cannot ventilate, cannot intubate” scenarios such as severe facial trauma or airway obstruction.
Key Points: High-stakes, last-resort procedure with strict indications.
Airway Decision-Making in the Field
When deciding which airway adjunct to use, consider:
Level of provider certification and local protocols.
Patient condition: Consciousness, gag reflex, trauma, and potential for rapid deterioration.
Environment: Limited space, lighting, or access may guide your choice.
Tip: Airway management is dynamic. Start with the least invasive method and escalate as needed while continually reassessing breathing and oxygenation.
Training and Maintenance
Regular Practice: Skills such as BVM ventilation and intubation degrade quickly without use.
Equipment Checks: Verify availability, integrity, and proper sizes of adjuncts at the start of every shift.
Bottom Line
From OPAs and NPAs to supraglottic devices and endotracheal tubes, airway adjuncts form a spectrum of tools for professional responders. Mastery of their indications, insertion techniques, and limitations ensures that you can match the right device to the right patient, improving survival and reducing complications in the prehospital setting.
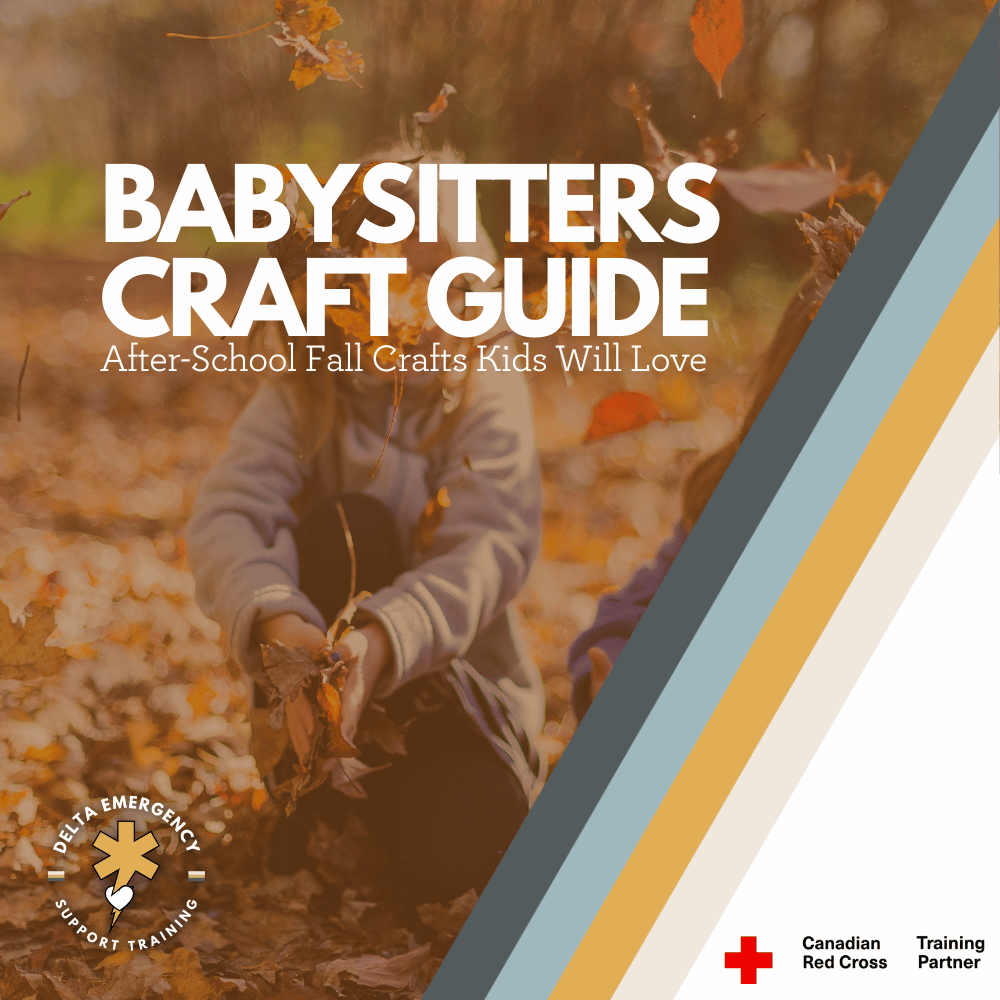
Fun Fall Craft Ideas for Babysitters: Creative Weekend & After-School Activities
Keep kids happy and creative after school this fall! As the weather cools and evenings come earlier, babysitters can turn ordinary afternoons into cozy craft sessions. These fun, budget-friendly fall projects—like leaf prints, pinecone animals, and pumpkin paper lanterns—are easy to set up with simple supplies and little mess. Perfect for after-school babysitting or weekend care, these activities give children a screen-free way to relax, build fine-motor skills, and celebrate the colors of the season while making your babysitting time both enjoyable and memorable.

As the days get cooler and the leaves start to change, babysitters everywhere begin looking for cozy, creative ways to keep kids entertained after school or on crisp weekend afternoons. Fall is the perfect season for indoor crafts—there’s plenty of inspiration right outside the door and the weather practically invites a warm, creative vibe. Here are some easy, low-mess craft ideas that will keep little hands busy and imaginations active.
1. Leaf Printing & Rubbings
Supplies: Freshly fallen leaves, crayons, paper, and optional paint.
How to: Place a leaf under a sheet of paper and rub a crayon over it to reveal the veins and shape. For a twist, dip leaves in paint and press them onto paper for bold prints.
Why Kids Love It: Every leaf is unique, and children enjoy seeing the hidden patterns emerge.
2. Pinecone Bird Feeders
Supplies: Pinecones, peanut butter (or sunflower butter for allergies), birdseed, string.
How to: Tie a string to the pinecone, spread on peanut butter, then roll it in birdseed. Hang outdoors to invite feathered friends.
Tip for Sitters: This activity doubles as a science lesson—kids can track which birds visit.
3. Mini Pumpkin Decorating
Supplies: Small pumpkins, stickers, markers, or washable paint.
How to: Instead of carving, let children paint faces or apply stickers.
Why It Works: It’s safer than carving and can be done inside on a rainy day.
4. Homemade Autumn Playdough
Supplies: Standard playdough recipe, food coloring, cinnamon or pumpkin pie spice.
How to: Add warm fall colors like orange and red, plus a sprinkle of spice for a cozy scent.
Sensory Fun: The smell and texture add an extra layer of enjoyment.
5. Nature Collage Art
Supplies: Paper, glue, and natural materials—twigs, acorns, dried flowers.
How to: Go on a short “nature hunt,” then glue your finds onto paper to create seasonal art.
Bonus: A quick outdoor walk helps kids burn energy before settling down.
Babysitter Tips for a Smooth Craft Session
Prep in Advance: Set out supplies before the kids arrive or while they’re having a snack.
Use a Drop Cloth: Old tablecloths or trash bags keep clean-up simple.
Age Matters: Pair younger kids with simpler tasks (sticking leaves), while older children can handle paint or more detailed designs.
Why Fall Crafts Are a Babysitter’s Best Friend
Craft time keeps children engaged, helps them develop fine motor skills, and creates keepsakes parents will love. With the weather cooling down and more indoor time ahead, these projects offer a perfect balance of creativity and seasonal fun.
So as autumn settles in, gather some leaves, pumpkins, and a dash of imagination. These easy activities will make your babysitting gigs memorable—and keep kids happily crafting all season long.

Responding to Patients with Schizophrenia: De-escalation and Best Practices
Discover how first responders and healthcare providers can use calm communication and evidence-based techniques to safely assist patients experiencing schizophrenia.
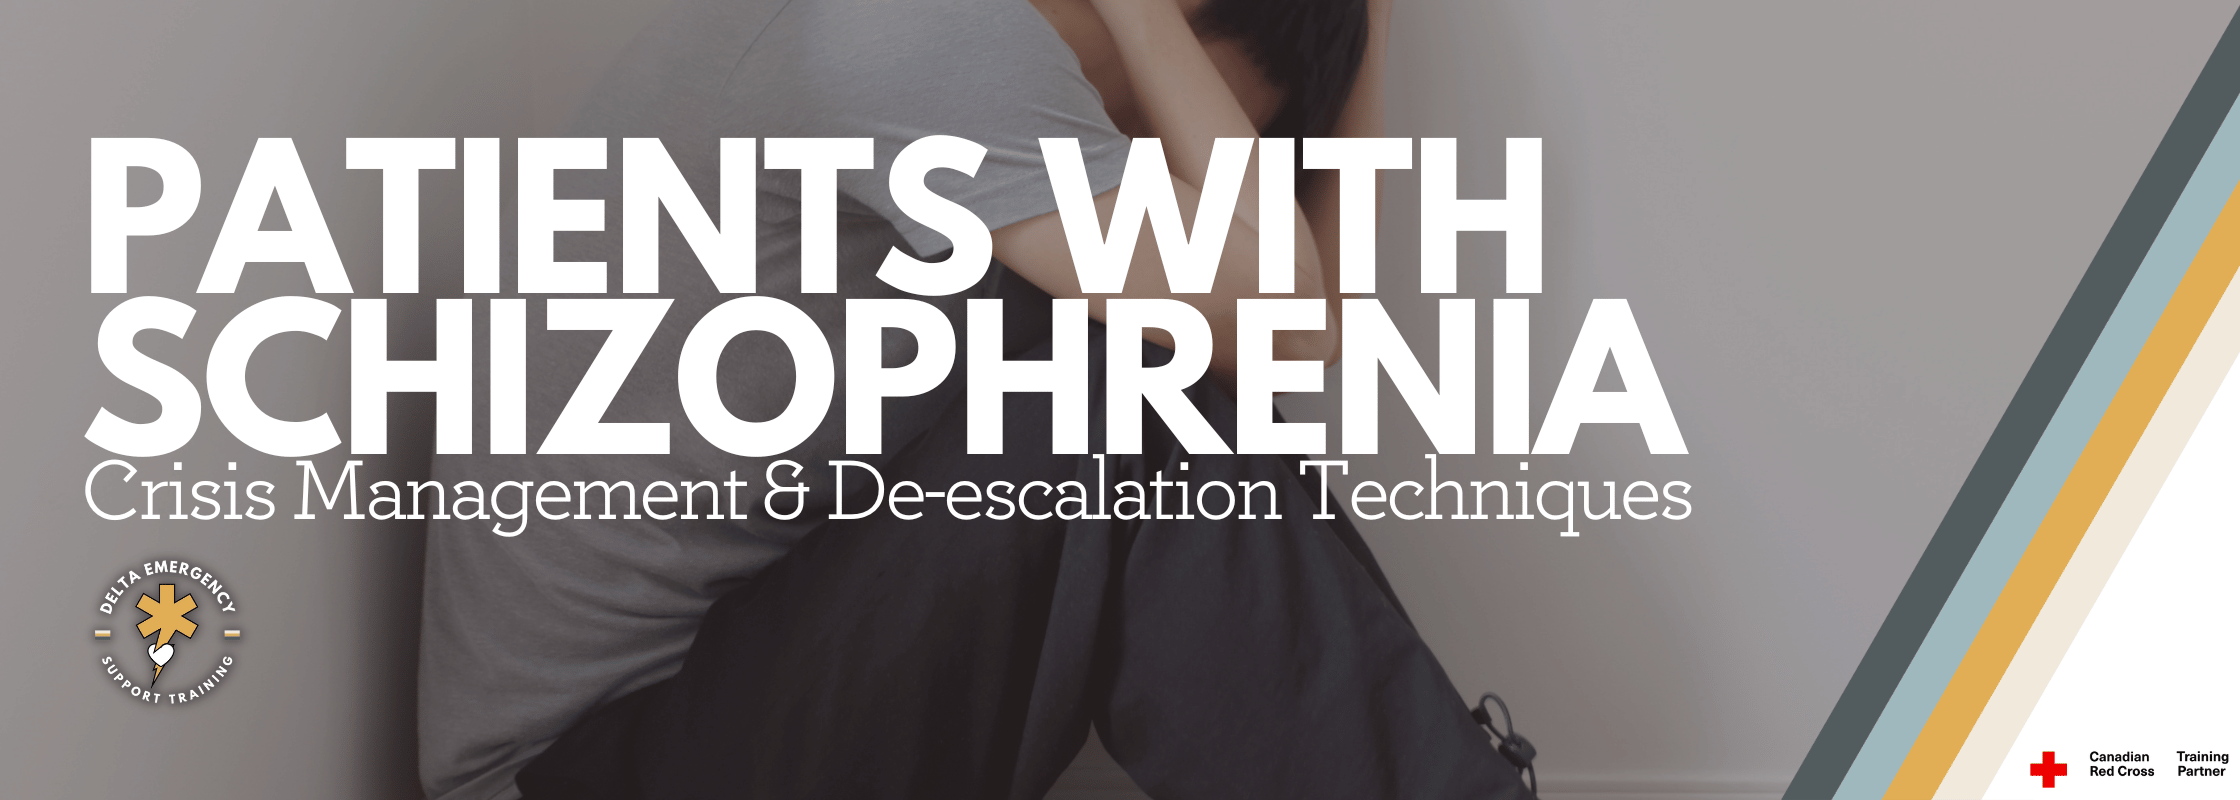
Caring for patients with schizophrenia can present unique challenges, particularly for first responders and healthcare professionals. Schizophrenia is a chronic mental health disorder characterized by distortions in thinking, perception, emotions, language, sense of self, and behavior. While patients are often not violent, they may experience agitation, paranoia, or confusion, especially during psychotic episodes. Understanding effective communication and de-escalation strategies is crucial for ensuring safety and promoting positive outcomes.
Understanding Schizophrenia in Emergency Settings
Patients may present with a range of symptoms, including:
Positive Symptoms: Hallucinations, delusions, thought disorders, and disorganized speech or behavior.
Negative Symptoms: Lack of motivation, social withdrawal, flattened affect, and reduced communication.
Cognitive Symptoms: Impaired memory, attention, and executive function.
Key considerations for responders: Symptoms vary between individuals and over time. Rapid changes in behavior may indicate stress, medication effects, or environmental triggers.
Initial Approach and Assessment
1. Ensure Scene Safety
Assess the environment for hazards before engaging.
Maintain a safe distance until the patient is calm or additional support arrives.
2. Observe and Listen
Look for verbal or nonverbal cues of distress or agitation.
Avoid making assumptions about behavior; schizophrenia symptoms can be misunderstood as aggression.
3. Identify Triggers
Common triggers include loud noises, crowded spaces, sudden movements, or stressful interactions.
Minimize environmental stressors whenever possible.
De-escalation Techniques
De-escalation is a patient-centered approach that reduces risk of harm while fostering cooperation. Techniques include:
1. Verbal De-escalation
Calm Tone: Speak slowly, softly, and clearly.
Simple Language: Avoid complex instructions or medical jargon.
Active Listening: Reflect and validate feelings without judgment.
Set Boundaries: Politely but firmly explain what behaviors are safe or unsafe.
2. Non-Verbal Communication
Maintain an open, relaxed posture; avoid sudden movements.
Respect personal space—standing too close can increase anxiety.
Maintain eye contact appropriately; avoid staring which may feel threatening.
3. Engagement and Choice
Offer small choices to empower the patient (e.g., “Would you like to sit over here or there?”).
Avoid arguing about delusions; focus on safety and immediate needs.
4. Team-Based Support
If multiple responders are present, coordinate actions silently to avoid confusing the patient.
Have a plan for safe removal or restraint only if absolutely necessary and in accordance with protocols.
Medication and Medical Considerations
Some patients may be on antipsychotic medications, which can cause sedation, movement disorders, or other side effects.
Sudden medication non-compliance or missed doses may trigger psychotic symptoms.
Monitor vital signs, mental status, and any signs of medical emergencies such as self-harm or aggression.
Crisis Management and Emergency Protocols
Safety First: Prioritize the patient’s and responders’ safety.
Call for Assistance: Engage mental health crisis teams or police trained in crisis intervention if needed.
Avoid Physical Restraints When Possible: Physical restraint should be a last resort, only when the patient is an imminent risk to themselves or others, and should be performed according to your agency’s protocols.
Documentation: Record observations, behaviors, interventions, and the patient’s response.
Promoting Trust and Respect
Approach with empathy, patience, and respect.
Recognize the person behind the disorder—avoid labeling or stigmatizing language.
Building trust may reduce agitation and improve cooperation for assessment or transport.
Conclusion
Responding to patients with schizophrenia requires awareness, patience, and effective communication skills. By understanding the disorder, using evidence-based de-escalation techniques, and prioritizing safety, medical professionals and first responders can provide compassionate care, reduce risk, and promote better outcomes.
Remember: Every patient is unique, and flexible, patient-centered strategies are key. Continuous training in mental health crisis intervention can significantly enhance safety and confidence in these encounters
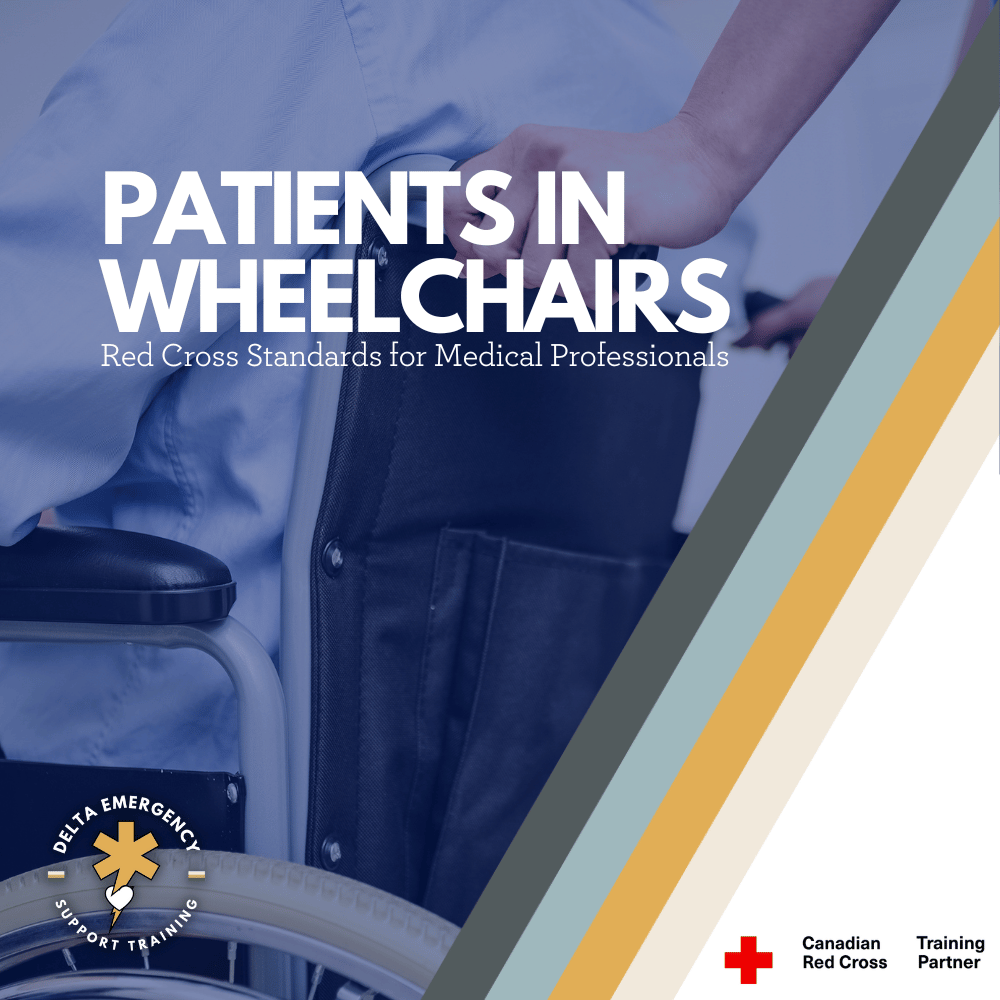
Caring for Patients in Wheelchairs: Best Practices for Medical Professionals
Adhering to Red Cross standards and integrating clinical best practices ensures the safety, comfort, and dignity of wheelchair users. By assessing needs, using safe transfer techniques, monitoring clinical risks, and maintaining open communication, medical professionals and first responders can provide care that is both effective and compassionate. Every patient is unique, so observe, ask, and adapt to individual needs while prioritizing safety and respect.
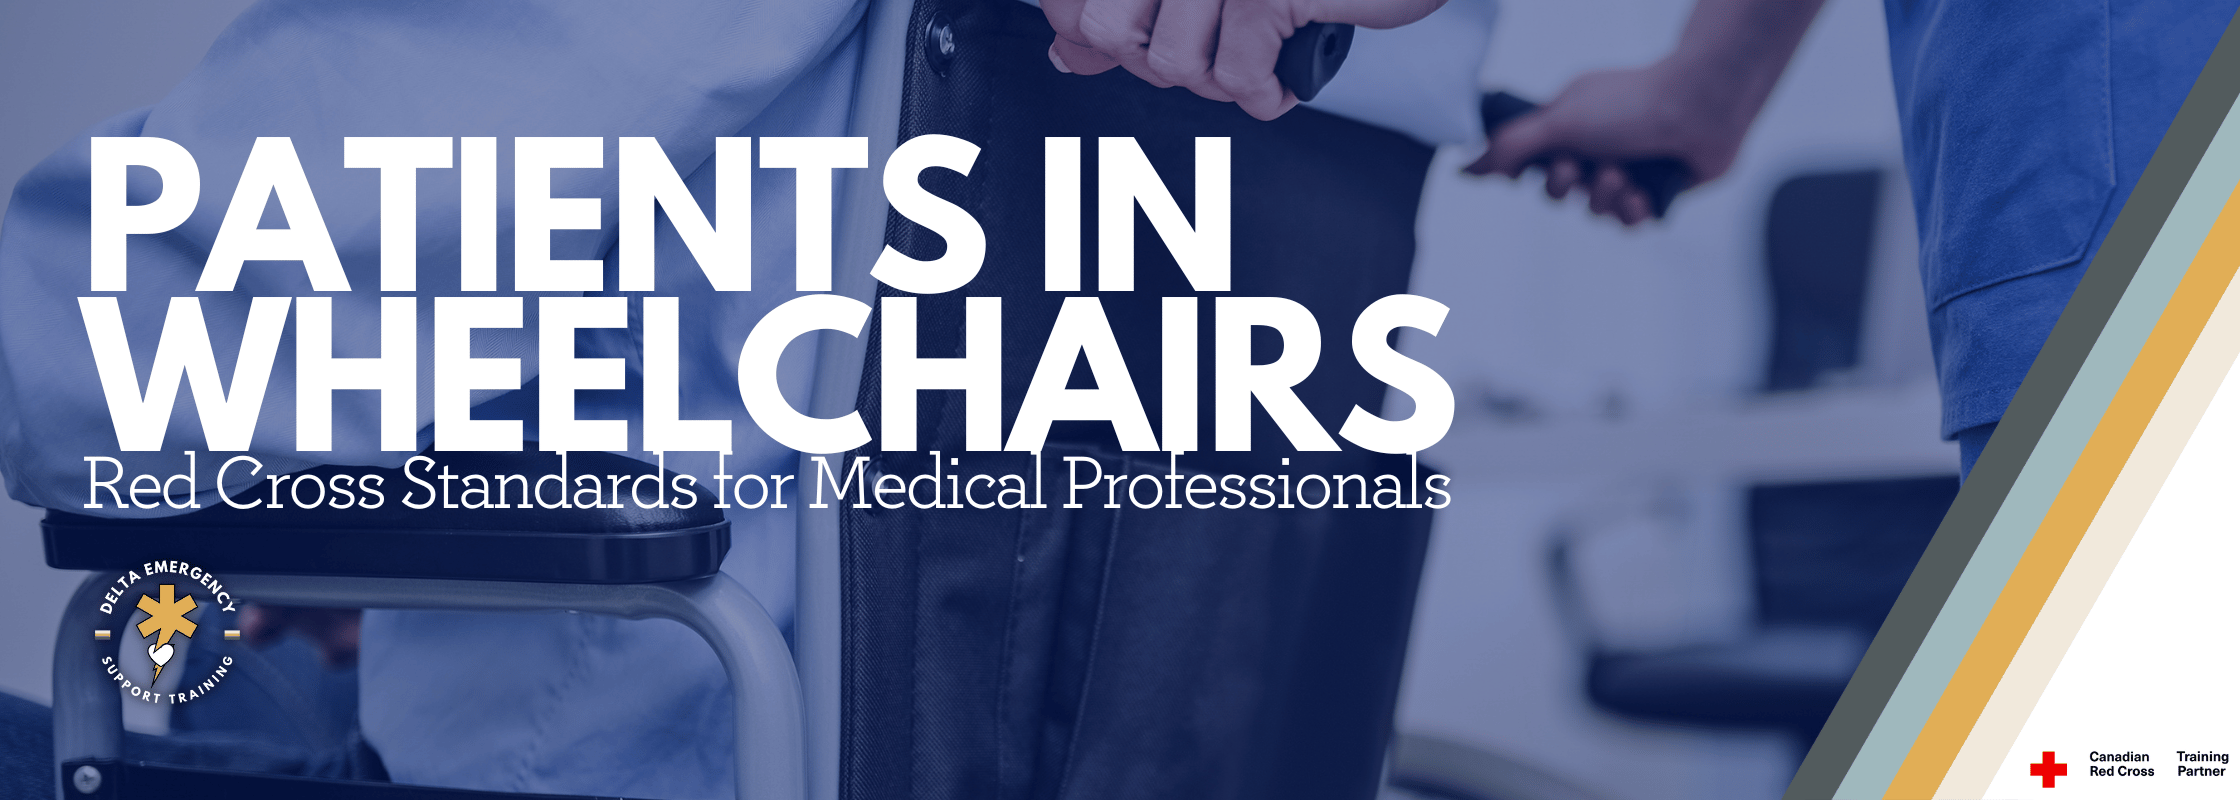
Caring for patients who use wheelchairs requires a combination of clinical expertise, empathy, and adherence to established standards. Whether you’re a first responder, nurse, or clinician, understanding proper assessment, safe transfers, and patient-centered care can significantly improve outcomes and comfort. The Canadian Red Cross provides guidelines that are essential for ensuring both safety and dignity when caring for wheelchair users.
Understanding Wheelchair Use and Patient Needs
Patients may rely on wheelchairs for various reasons: neurological conditions, musculoskeletal injuries, chronic illness, or temporary mobility limitations. Each patient’s needs differ, so care must be personalized:
Manual Wheelchairs: Propelled by the patient or caregiver; requires upper body strength.
Powered/Electric Wheelchairs: Used by patients with limited upper body function.
Specialty Wheelchairs: Bariatric, pediatric, or standing wheelchairs designed for specific medical or physical requirements.
Key consideration: Ask the patient about their preferred seating, positioning, and transfer methods. Respecting their routines promotes autonomy and safety.
Assessment Before Providing Care
Before assisting, conduct a comprehensive assessment:
Patient Condition: Pain, recent surgeries, injuries, or limited mobility may impact care.
Wheelchair Type and Features: Observe brakes, armrests, footrests, and electronic controls.
Environment: Ensure enough space for maneuvering; identify hazards like uneven surfaces or narrow doorways.
Assistance Needs: Determine whether the patient can self-transfer or requires full assistance.
Tip for first responders: Never assume a patient can transfer independently. Always ask first.
Red Cross Guidelines for Safe Wheelchair Care
1. Wheelchair Stability and Preparation
Engage Brakes: Always lock the brakes before transferring or adjusting the patient.
Confirm Full Opening: Ensure the wheelchair is fully open and stable before any care.
Remove Obstacles: Swing away or remove footrests and armrests as needed for transfers.
2. Safe Transfer Techniques
Sit-to-Stand Transfers: For patients who can bear weight; support at the waist and knees, maintain proper body mechanics.
Sliding Board Transfers: For patients with limited weight-bearing; use a transfer board under the thigh to guide movement.
Two-Person Lifts: Only when necessary, with coordinated effort; one caregiver supports the upper body, another the lower body.
Communication is key: Explain each step to the patient to reduce anxiety and improve cooperation.
3. Navigating Obstacles
Curbs: Approach squarely; tip the wheelchair back to lift front wheels onto the curb, then raise back wheels. Reverse for descending.
Ramps and Slopes: Avoid inclines greater than 9 degrees without assistance.
Escalators: Never use; they pose high risk.
4. Maintenance and Safety
Routine Checks: Inspect brakes, tires, and moving parts regularly.
Cleaning: Keep wheelchairs clean to maintain hygiene and functionality.
Clinical Considerations
Skin Integrity: Patients with limited mobility are prone to pressure sores. Reposition regularly and use cushions or padding.
Circulation: Monitor for edema in lower extremities; elevate feet when appropriate.
Respiratory Support: Position patients to optimize lung expansion and monitor for respiratory distress.
Fall Prevention: Always anticipate sudden movements; keep brakes engaged before transfers.
Emergency Response for Wheelchair Patients
Evacuation: Use proper lifts or equipment; ensure patient and attached devices (oxygen, catheters) are safe.
Patient Communication: Explain every step during emergencies to reduce anxiety and gain cooperation.
Documentation: Record any injuries, interventions, and patient complaints.
Patient Comfort and Dignity
Posture: Ensure proper spinal alignment and support.
Clothing and Privacy: Maintain warmth and modesty.
Empowerment: Allow patients to perform tasks independently when possible, like adjusting footrests or reaching items.
Key principle: Respect and empathy are as important as technical skill. A patient-centered approach reduces anxiety, prevents injury, and improves outcomes.
Conclusion
Adhering to Red Cross standards and integrating clinical best practices ensures the safety, comfort, and dignity of wheelchair users. By assessing needs, using safe transfer techniques, monitoring clinical risks, and maintaining open communication, medical professionals and first responders can provide care that is both effective and compassionate. Every patient is unique, so observe, ask, and adapt to individual needs while prioritizing safety and respect.

Hypoxia 101: Symptoms, Causes, and First Aid Tips
Hypoxia can lead to irreversible brain damage within minutes. Rapid recognition, airway management, aggressive oxygenation, and swift treatment of the underlying cause—especially opioid-related respiratory depression—are essential to preserving neurological function and improving outcomes.
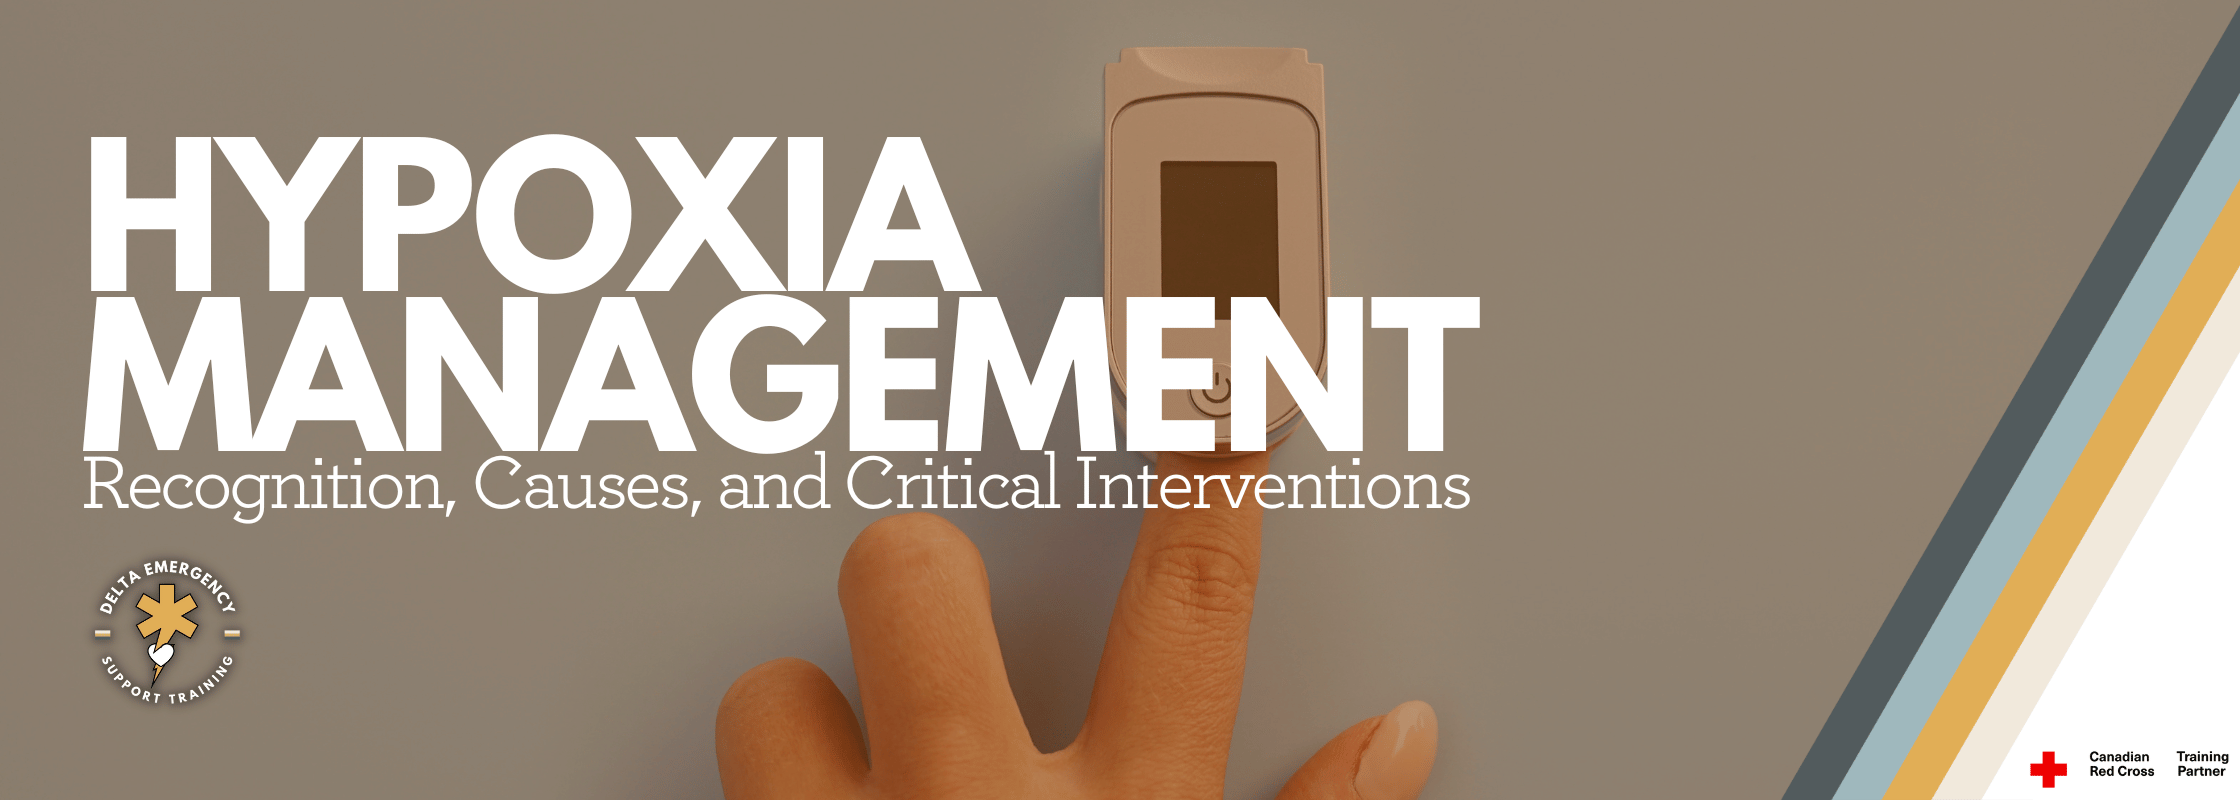
Oxygen is the brain’s primary fuel, and even a short interruption can trigger irreversible injury. Understanding how hypoxia develops—and staying current with evolving science—is critical for anyone providing emergency medical care.
Current Causes of Hypoxia
Hypoxia can result from a wide range of emergencies, with some trends growing more prominent:
Opioid Overdose: Canadian surveillance data through 2024 show that potent synthetic opioids (including illicit fentanyl analogues) are driving an increase in severe respiratory depression and sudden apnea.
Respiratory Compromise: Severe asthma, COPD exacerbations, airway obstruction, and anaphylaxis remain frequent triggers. Climate-related wildfire smoke has also increased smoke-inhalation hypoxia incidents.
Circulatory Emergencies: Cardiac arrest, massive hemorrhage, and shock reduce perfusion and oxygen delivery to the brain.
Brain Pathophysiology: What’s New
Recent neuroimaging research highlights how quickly hypoxia damages neurons:
First 1–2 Minutes: Early synaptic failure leads to measurable cognitive impairment even before loss of consciousness.
4–6 Minutes: MRI studies confirm the hippocampus—essential for memory—is especially vulnerable, making early intervention vital for long-term cognitive outcomes.
Beyond 6 Minutes: Widespread cortical cell death often leads to permanent neurologic deficits.
Key Clinical Indicators
Altered mental status: confusion, agitation, sudden lethargy
Central cyanosis of lips or tongue
Hypoventilation or apnea, particularly in opioid overdose
SpO₂ decline despite supplemental oxygen, suggesting perfusion or carbon monoxide issues
Seizure activity or abnormal pupillary responses
Field Management Priorities
Airway & Ventilation
Rapid airway assessment and maintenance with OPA/NPA or supraglottic airway as indicated.
Bag-valve-mask ventilation if hypoventilation or apnea is present.
Oxygenation
Deliver high-concentration oxygen via the appropriate device.
Monitor with pulse oximetry and end-tidal CO₂ for early detection of ventilation problems—portable capnography is now standard in many Canadian ambulances.
Cause-Specific Interventions
Opioid Overdose: Administer naloxone per protocol while providing ventilatory support. Early naloxone use significantly reduces hypoxic brain injury.
Asthma/COPD: Supportive bronchodilator therapy if within scope.
Shock or Hemorrhage: Rapid bleeding control and perfusion support.
Neurologic Monitoring
Frequent Glasgow Coma Scale checks, pupillary assessments, and continuous reassessment during transport or care.
New Guidance Highlights
Avoid Hyperoxia: Updated resuscitation guidelines emphasize maintaining SpO₂ between 94–98% to prevent oxygen toxicity.
Delayed Effects: Evidence shows even brief hypoxia can lead to delayed neurocognitive changes, underscoring the importance of early recognition and thorough documentation for hospital teams.
Simulation Training: Advanced simulation with real-time capnography is increasingly used in training programs to prepare responders to identify subtle respiratory decline.
Key Take away Hypoxia can lead to irreversible brain damage within minutes. Rapid recognition, airway management, aggressive oxygenation, and swift treatment of the underlying cause—especially opioid-related respiratory depression—are essential to preserving neurological function and improving outcomes.
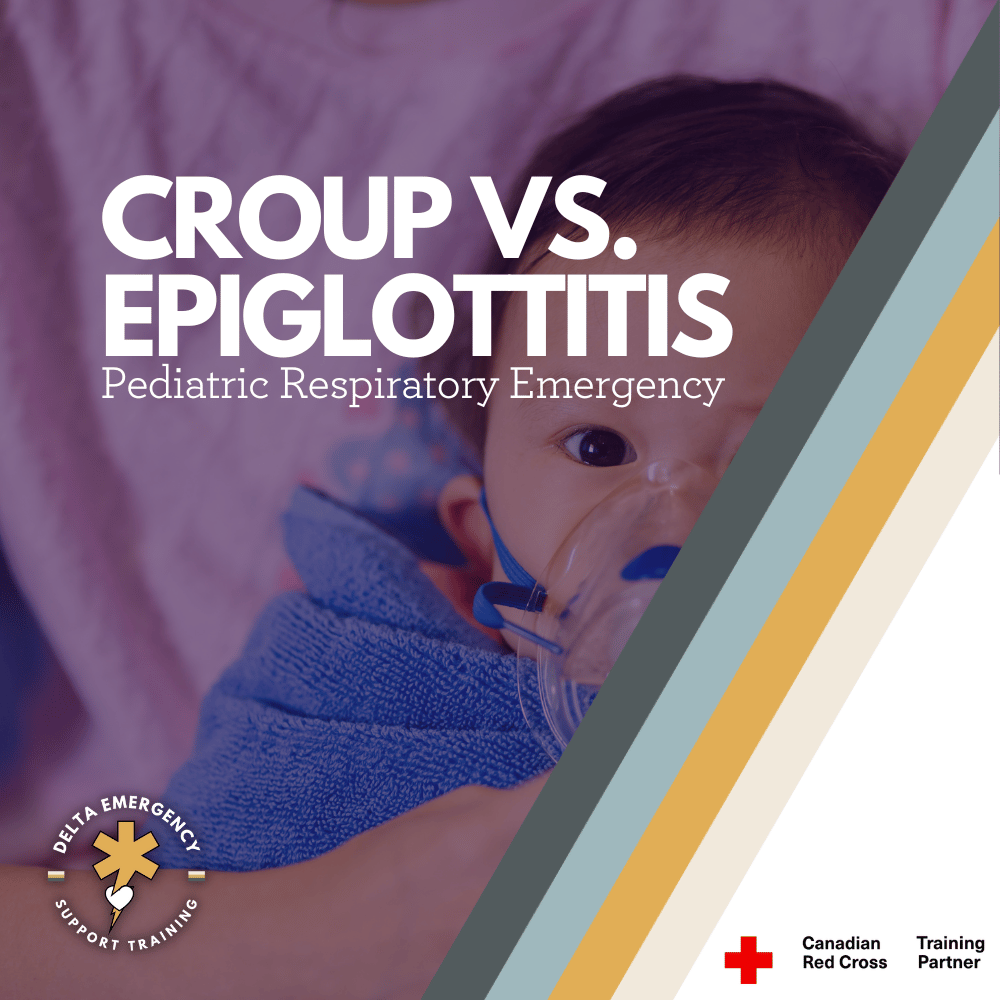
Croup vs. Epiglottitis in Children: What First Responders and Parents Need to Know
Breathing problems in children can be terrifying, and knowing the difference between croup and epiglottitis could save a life. Parents need to know the warning signs, while first responders must act quickly and carefully. Here’s how to tell them apart and what steps to take in an emergency.
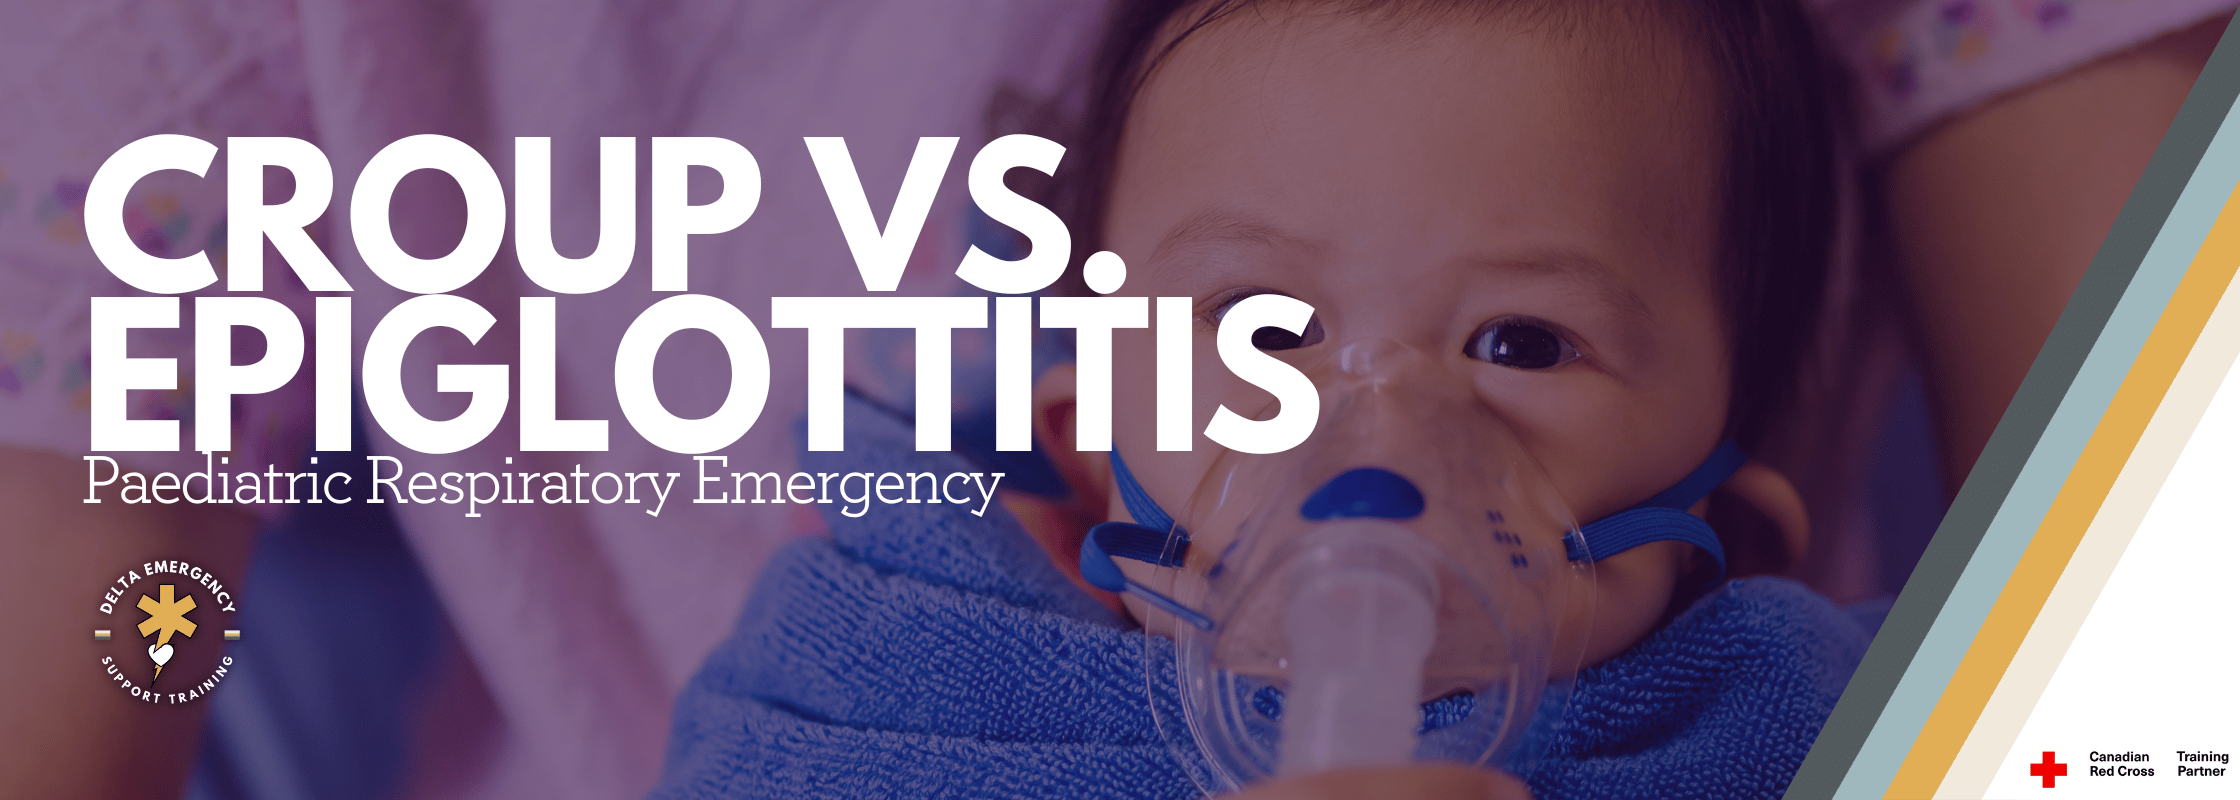
When a child has trouble breathing, both parents and first responders feel the urgency. Two conditions often confused with one another are croup and epiglottitis. While both affect the airway, they differ dramatically in severity and required response. For parents, understanding the warning signs can help you know when to call for help. For first responders, recognizing the difference is critical to providing safe and effective care.
Croup: Common but Often Alarming
What it is:
Croup is a viral infection that causes swelling of the larynx and trachea, most often seen in children aged 6 months to 3 years.
Parents may notice:
Barking, seal-like cough (especially at night)
Hoarse voice
Stridor (high-pitched sound on inspiration) when crying or upset
Low-grade fever
Symptoms often start after a cold
First responder perspective:
Most cases are mild, but moderate to severe croup can cause stridor at rest, increased work of breathing (retractions, nasal flaring), or fatigue.
Treatment may include humidified oxygen, steroids (e.g., dexamethasone), and nebulized epinephrine in severe cases.
Keeping the child calm is key; agitation worsens obstruction.
Epiglottitis: A True Airway Emergency
What it is:
Epiglottitis is a bacterial infection that causes the epiglottis to swell rapidly, threatening complete airway obstruction. Thanks to Hib vaccination, it’s now rare, but still life-threatening when it occurs.
Parents may notice:
Sudden onset of high fever
Severe sore throat and difficulty swallowing
Drooling (child can’t swallow saliva)
Muffled voice
Child sitting forward, chin out, mouth open (“tripod position”)
Appearing very ill, anxious, and struggling to breathe
First responder perspective:
This is a do not delay, do not agitate situation.
Never attempt to look in the child’s throat — it can trigger complete obstruction.
Keep the child upright and calm.
Provide high-flow oxygen if tolerated.
Be prepared for advanced airway intervention (hospital setting or with ALS backup).
Rapid transport is essential.
Quick Comparison
FeatureCroup (Viral)Epiglottitis (Bacterial, Emergency)OnsetGradual, after cold symptomsSudden, rapid progressionCoughBarking, seal-likeRare or absentFeverLow-gradeHighVoiceHoarseMuffled, “hot potato” voiceSwallowingUsually ablePainful, droolingStridorCommon, louder when upsetLate, quieter, concerningSeverityUsually mild-moderateSevere, life-threatening
The Takeaway
For parents:
Croup is common and usually manageable, but if your child has stridor at rest, difficulty breathing, or bluish lips, call 911.
Epiglottitis is rare but an emergency — if you see drooling, high fever, tripod posture, or sudden severe breathing trouble, call for help immediately.
For first responders:
Stay calm and keep the child calm.
Differentiate based on history and presentation.
Supportive care is often enough for croup, while epiglottitis requires immediate rapid transport and careful airway management.
When it comes to pediatric airway conditions, the rule is simple: if in doubt, treat it like epiglottitis until proven otherwise. Quick recognition and action save lives.

Distracting Injuries: Pulling Focus and Masking Pain
In trauma care, some injuries grab all the attention—but they aren’t always the deadliest. Distracting injuries can mislead responders and mask life-threatening conditions. Here’s what every first responder needs to know about spotting them, staying systematic, and keeping patient safety the top priority.
When trauma calls come in, it’s easy to fixate on the most obvious wound, the open fracture, the deep laceration, the heavy bleeding. But those are often distracting injuries: visible traumas that can obscure other, more dangerous threats. Recognizing them and continuing to assess systematically is what separates a good response from a lifesaving one.
What Is a Distracting Injury?
A distracting injury is one that draws your attention so strongly that both responders and patients may overlook other serious but less obvious issues. In paramedic protocols, these injuries can make a patient “unreliable” for clinical clearance of the cervical spine because they may mask neck pain or tenderness. As a result, spinal precautions should be maintained unless more definitive assessment rules them out.
Why They Matter
The danger of distracting injuries is twofold:
They pull focus – A gruesome fracture or large bleed grabs everyone’s attention, often overshadowing a more subtle but life-threatening issue like a compromised airway or spinal injury.
They mask pain – A patient in severe pain from a major injury may not report or even notice neck or back pain, leading responders to miss critical red flags for spinal trauma.
Evidence-Based Insights
Studies show distracting injuries are often upper-torso or limb injuries that change how a patient perceives or reports pain:
Heffernan et al. (2005) found that some patients with cervical spine fractures had no neck tenderness—but all had upper torso injuries like chest trauma, which likely distracted from the pain.
Common Examples
Long bone fractures (femur, humerus)
Major burns
Crushing or degloving wounds
Profuse bleeding or amputations
Severe chest or upper torso injuries
First Responder Priorities
Stick to the primary survey (ABCs)
No matter how distracting a wound looks, airway, breathing, and circulation must always come first.Protect the spine when in doubt
If a distracting injury is present, assume the patient cannot reliably clear their spine. Apply spinal precautions unless imaging or protocols say otherwise.Reassess constantly
A distracting injury may not only occupy the patient’s attention but yours as well. Don’t let tunnel vision take over.Think systematically, not emotionally
The most dramatic injuries are not always the deadliest. Quiet but hidden injuries like internal bleeding or spinal cord compromise, may be far more dangerous.
The Bottom Line
Distracting injuries are more than just dramatic wounds—they can hide life-threatening problems and mislead both responders and patients. The best protection is discipline: follow a structured assessment, protect the spine when necessary, and never let your focus shift entirely to the injury that looks worst. A calm, systematic approach can make the difference between managing trauma and saving a life.
Becoming a Paramedic in Canada: How EMR Training Fits Into the Bigger Picture
Thinking about becoming a paramedic in Canada? It starts with understanding the paramedicine pathway. This blog explains where EMR training fits into the journey and why it’s a key first step toward a rewarding career in emergency services.
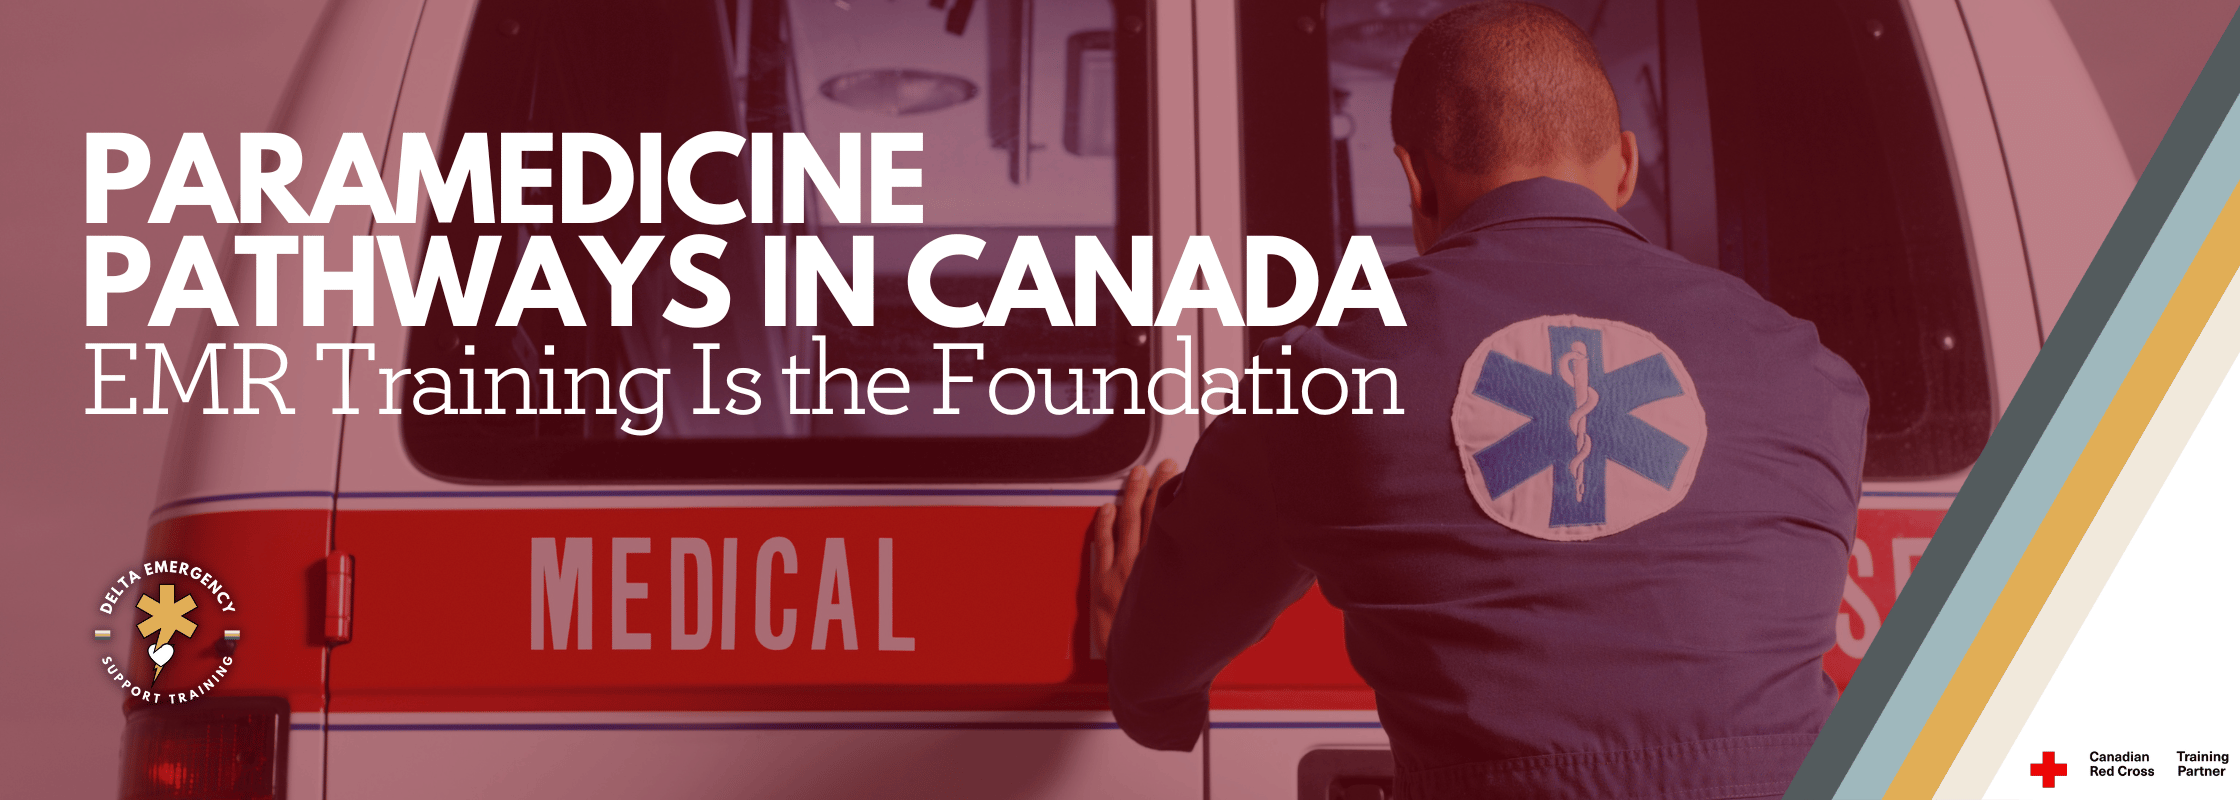
Across Canada, the demand for trained paramedics continues to rise. Communities rely on first responders not only for life-threatening emergencies but also for urgent care, transport, and support in times of crisis. If you’ve ever thought about a career in emergency services, you may be wondering: where do I start?
The answer for many is Emergency Medical Responder (EMR) training. This entry-level program provides the essential skills you need to help patients and also acts as a stepping stone into the professional paramedicine pathway. To understand why EMR is such a valuable first step, it helps to look at how the paramedicine system is structured in Canada.
1. The Paramedicine Ladder in Canada
In Canada, paramedicine is organized into different levels of training and certification. Each step builds on the one before it, adding more advanced knowledge, clinical skills, and responsibilities.
Emergency Medical Responder (EMR)
Entry-level certification recognized across many provinces.
Focuses on patient assessment, CPR and AED use, airway management, bleeding control, and trauma care.
EMRs may work in industrial safety, event medical services, rural response, and are often a requirement for admission into Primary Care Paramedic programs.
Training is usually short and focused, making it an accessible first step.
Primary Care Paramedic (PCP)
The first professional paramedic level in Canada.
PCPs are qualified to work on ambulances and provide advanced pre-hospital care.
Skills include medication administration, advanced airway management, and cardiac monitoring.
Typically requires 1–2 years of college-level education, depending on the province.
Advanced Care Paramedic (ACP)
Builds on the PCP scope of practice with advanced skills.
Includes procedures such as intubation, IV therapy, advanced cardiac interventions, and expanded medication options.
Training usually takes an additional 1–2 years beyond PCP.
Critical Care Paramedic (CCP)
The highest level of paramedic training in Canada.
Specializes in transporting and treating critically ill or injured patients, often by air ambulance or in hospital transfer situations.
CCPs provide intensive care support outside the hospital environment.
This tiered approach means that every paramedic, no matter how advanced, started with the same fundamentals—and that usually begins with EMR.
2. Why EMR Training Matters
Even though EMR is the entry-level program, it’s far more than a “basic” course. Here’s why it matters:
Foundational Skills: You’ll learn how to assess patients systematically, manage airways, perform CPR, use AEDs, and provide lifesaving first aid for medical and trauma emergencies.
Confidence in Emergencies: EMR training prepares you to step into real-world situations calmly and effectively, whether you’re responding at work, volunteering, or helping in your community.
A Career Sampler: Many people use EMR training as a way to “test drive” paramedicine before committing to the longer PCP or ACP programs. It’s a great way to discover if this career path is right for you.
Admission Requirement: In several provinces, completion of an EMR program is a mandatory prerequisite for applying to PCP programs.
In short, EMR is both a valuable certification on its own and a launching pad for more advanced paramedic training.
3. Career Opportunities After EMR
Some students complete EMR training because they want to work right away, while others use it as preparation for PCP school. Either way, opportunities exist.
Industrial and Remote Work: Oil and gas sites, mining operations, and construction companies often employ EMRs to provide on-site medical support.
Event Medical Services: Concerts, festivals, and sporting events need trained responders to manage emergencies on the ground.
Volunteer Roles: Many communities welcome EMRs as part of first responder programs, especially in rural or remote areas.
Pathway to PCP: EMR graduates have the foundation to move directly into Primary Care Paramedic education, making it a strategic step toward a long-term career.
4. The Canadian Context
Paramedicine is provincially regulated in Canada, which means that the scope of practice and educational requirements vary depending on where you live. For example:
In British Columbia and Alberta, EMR certification is a recognized entry point for working in certain EMS systems.
In Ontario, EMR may not be a licensed level, but training still provides an advantage for those entering PCP programs.
Across the country, EMR certification is widely respected as a sign of commitment to the field and readiness to pursue paramedic studies.
Regardless of the province, EMR training signals that you’ve mastered essential lifesaving skills and are prepared for the next step.
5. A Pathway, Not a Shortcut
One of the most important things to understand about paramedicine in Canada is that there are no shortcuts. Every level of training is rigorous and builds on the last. But EMR offers a pathway—an accessible starting point that opens doors, whether you want to work immediately or advance further.
By taking EMR, you’re not just learning a skillset. You’re joining a community of first responders who play a vital role in Canada’s healthcare system.
Conclusion
Becoming a paramedic in Canada is a journey. It starts with building a solid foundation—and for most students, that foundation is Emergency Medical Responder training. EMR equips you with lifesaving skills, gives you real-world confidence, and provides the stepping stone needed for higher levels of paramedicine like PCP, ACP, and CCP.
If you’re considering a career in emergency services, EMR training is the best way to begin. It’s the first step on a ladder of learning that leads to one of the most rewarding careers in healthcare.
👉 Ready to start your journey? Enroll in our EMR program today and take the first step toward becoming a paramedic in Canada.

Stay Safe 101: Teaching Your Children Safety Basics
Teaching children safety rules helps them make confident choices. This guide covers stranger safety, road and vehicle rules, home hazards, water awareness, first aid, and online safety tips for parents.
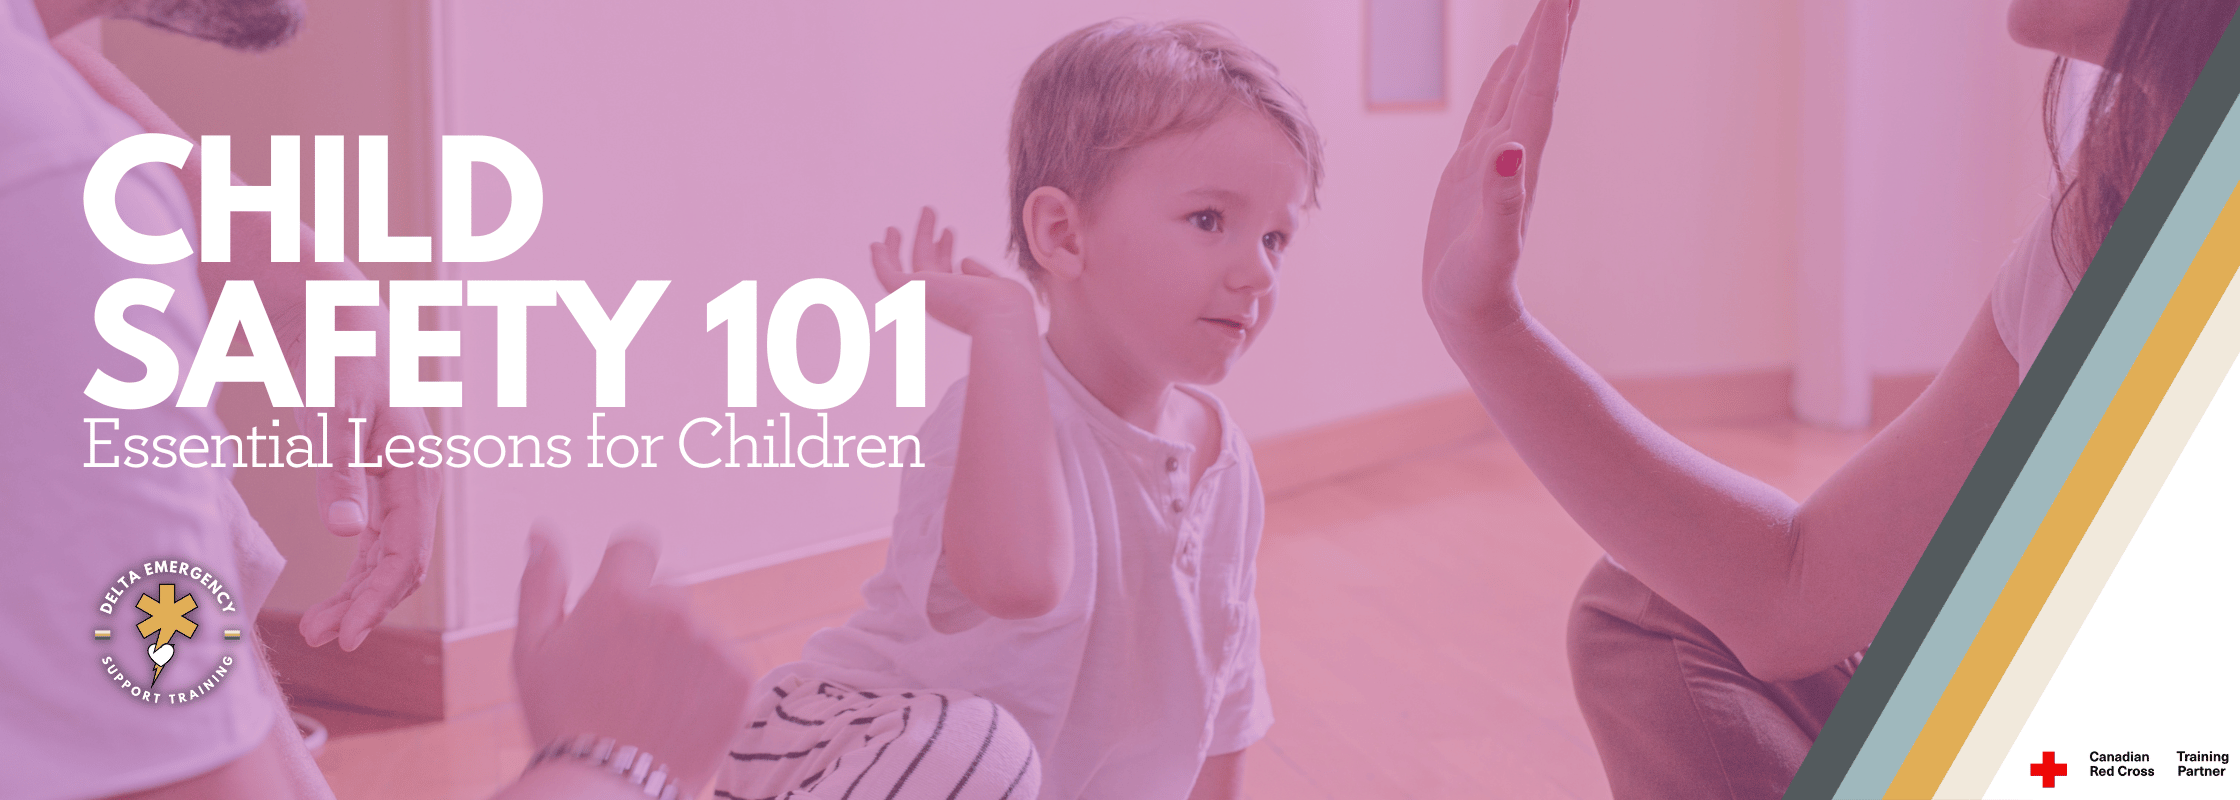
Keeping children safe is a top priority for every parent. While accidents can happen, teaching kids simple safety rules can help them make good choices and respond confidently in tricky situations. Here is a guide for parents to help children learn essential safety skills.
1. Personal Information
Children should know how to share essential information if needed:
Full name
Parent or guardian names
Home address
Phone number
Practice this regularly in fun ways, like memory games or songs. Repetition helps kids remember under stress.
2. Stranger Safety
Stranger safety is one of the most important lessons for children. Teach them to:
Never get into a vehicle with someone they do not know, even if the person says it is an emergency or offers treats.
Avoid accepting gifts, candy, or toys from strangers.
Use the rule “No, Go, Yell, Tell”: refuse, leave the area, make noise, and tell a trusted adult.
Stay close to a parent, guardian, or trusted adult in public spaces.
Know which adults are safe to approach for help, such as teachers, police officers, or event staff.
Role-play scenarios like someone asking for directions or help so they can practice safe responses.
3. Road and Street Safety
Teach children how to stay safe around traffic:
Stop, look both ways, and listen before crossing streets.
Use crosswalks whenever possible and obey traffic signals.
Wear helmets and protective gear while biking, scootering, or skating.
Avoid running into streets or playing near traffic.
4. Vehicle Safety
Always buckle seat belts properly in cars or booster seats.
Never open doors or get into a car without a parent or trusted adult.
Teach children to sit quietly and follow rules in taxis, rideshares, or buses.
Make sure children know to ask permission before leaving with anyone, even relatives they do not see often.
5. Home Safety
Keep sharp objects, matches, and cleaning supplies out of reach.
Teach children not to touch hot surfaces or appliances.
Fire safety includes teaching stop, drop, and roll, and explaining the importance of smoke alarms.
Practice family escape plans in case of fire or other emergencies.
6. Water Safety
Never swim alone; always have adult supervision.
Wear life jackets in pools, lakes, or boats.
Set rules for pools, beaches, and water parks, like staying within designated areas.
Teach children to reach or throw, but not go in, when helping someone in distress.
Practice water drills and teach them to recognize dangerous currents or deep water.
7. First Aid Awareness
Teach children how to clean minor cuts, apply bandages, and notify an adult.
Show them how to recognize emergencies and when to call for help.
Encourage calm thinking and step-by-step responses even when nervous.
8. Online Safety
Never share personal information online, including full name, address, school, or phone number.
Avoid talking to strangers or accepting friend requests from people they do not know.
Never agree to meet online acquaintances in person.
Encourage children to tell a parent or guardian immediately if something online feels wrong or uncomfortable.
9. Practice and Reinforcement
Role-play emergency situations to build confidence.
Make drills fun, like fire drills or lost child games.
Praise children for following safety rules. Positive reinforcement encourages lasting habits.
Conclusion
Teaching children safety rules is not about scaring them. It is about empowering them to make good decisions. Start with small steps, practice regularly, and introduce more advanced concepts as children grow.
By practicing personal safety, stranger awareness, road and vehicle safety, water safety, and online safety, parents can help children develop habits that last a lifetime.
Prepared children are safer children, and confident children can act wisely in emergencies.

ETCO₂: What It Is and Why It Matters for First Responders
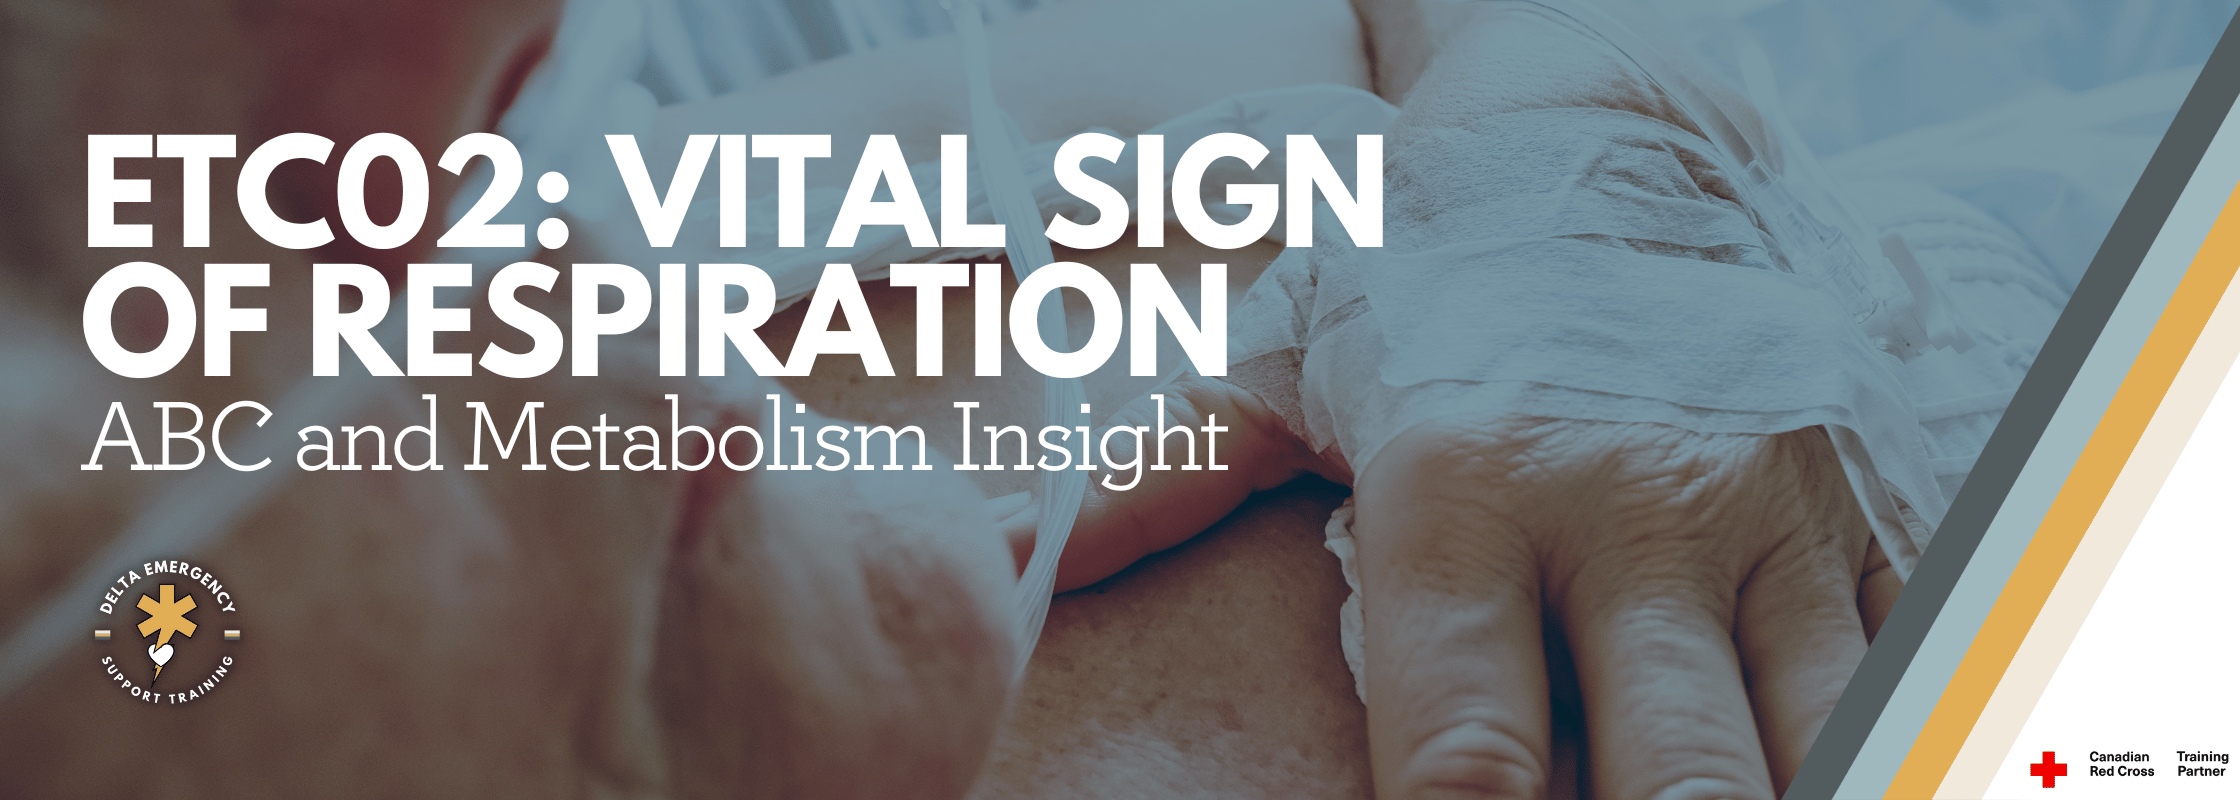
When you first hear the term ETCO₂, it might sound like complicated medical jargon. But in reality, it’s a simple concept that every professional responder should understand — and once you do, it can completely change the way you see your patients.
Let’s break it down step by step.
What Does ETCO₂ Mean?
ETCO₂ stands for End-Tidal Carbon Dioxide.
End-Tidal = the very end of an exhaled breath.
Carbon Dioxide (CO₂) = the waste gas your body produces when it uses oxygen for energy.
So, ETCO₂ is literally the measurement of how much CO₂ is in the air a patient breathes out at the very end of their breath.
This number tells us an incredible amount about what’s going on inside the body — with both the lungs and the heart.
How Do We Measure ETCO₂?
ETCO₂ is measured using a device called capnography.
In simple terms, it’s a little sensor attached to a mask, nasal cannula, or an airway device.
It continuously analyzes the breath coming out and gives two things:
A number (usually measured in mmHg, with normal being about 35–45 mmHg).
A waveform (a little graph showing how the CO₂ rises and falls with each breath).
Why Is ETCO₂ Important?
Here’s the key: ETCO₂ reflects how well a patient is ventilating (moving air), but it also gives clues about circulationand metabolism. That’s why responders call it the “vital sign of ventilation.”
Think of it as a window into three systems at once:
Airway & Breathing
Low or absent ETCO₂ can mean the patient isn’t breathing well, has an obstructed airway, or isn’t ventilated properly with a bag-valve mask.
Circulation (Blood Flow)
In cardiac arrest, ETCO₂ is a powerful indicator of CPR quality. Good chest compressions circulate blood, and ETCO₂ rises.
A sudden spike in ETCO₂ can even mean return of spontaneous circulation (ROSC) — the patient’s heart has started beating again.
Metabolism
Conditions like sepsis, diabetic emergencies, or shock can alter CO₂ levels. ETCO₂ helps responders piece together the bigger clinical picture.
Real-World Examples for Responders
Cardiac Arrest: ETCO₂ below 10 mmHg during CPR often means compressions aren’t effective. When it jumps above 35 suddenly, it may mean you’ve got ROSC.
Airway Management: If you intubate a patient and see a nice ETCO₂ waveform, you know the tube is in the trachea (not the stomach).
Respiratory Emergencies: In asthma or COPD, ETCO₂ waveforms can show “shark fin” patterns, helping you confirm and monitor the severity.
Sedation & Monitoring: If a patient is given pain medication, ETCO₂ helps detect if their breathing slows down before oxygen levels drop.
Why Should EMRs and Fire Applicants Care?
As an Emergency Medical Responder (EMR) or a firefighter applicant, understanding ETCO₂ gives you an edge. It shows you’re not just memorizing steps, but actually thinking about what’s happening inside the body.
It ties together your knowledge of the respiratory system and cardiovascular system.
It reinforces the importance of ventilation, circulation, and metabolic function.
And most importantly, it helps you make better decisions in high-pressure situations.
The Bottom Line
ETCO₂ might sound technical, but at its core it’s simple: it’s how we measure how well a patient is breathing and circulating. For responders, it’s one of the most valuable tools you can use to guide patient care, especially in emergencies where seconds matter.
At Delta Emergency Support Training, we break down concepts like ETCO₂ in plain language and then show you how to apply them in real-world scenarios. Our courses are taught by active paramedics and firefighters, so you’ll learn not just the “what,” but the “why” and “how” behind every skill.
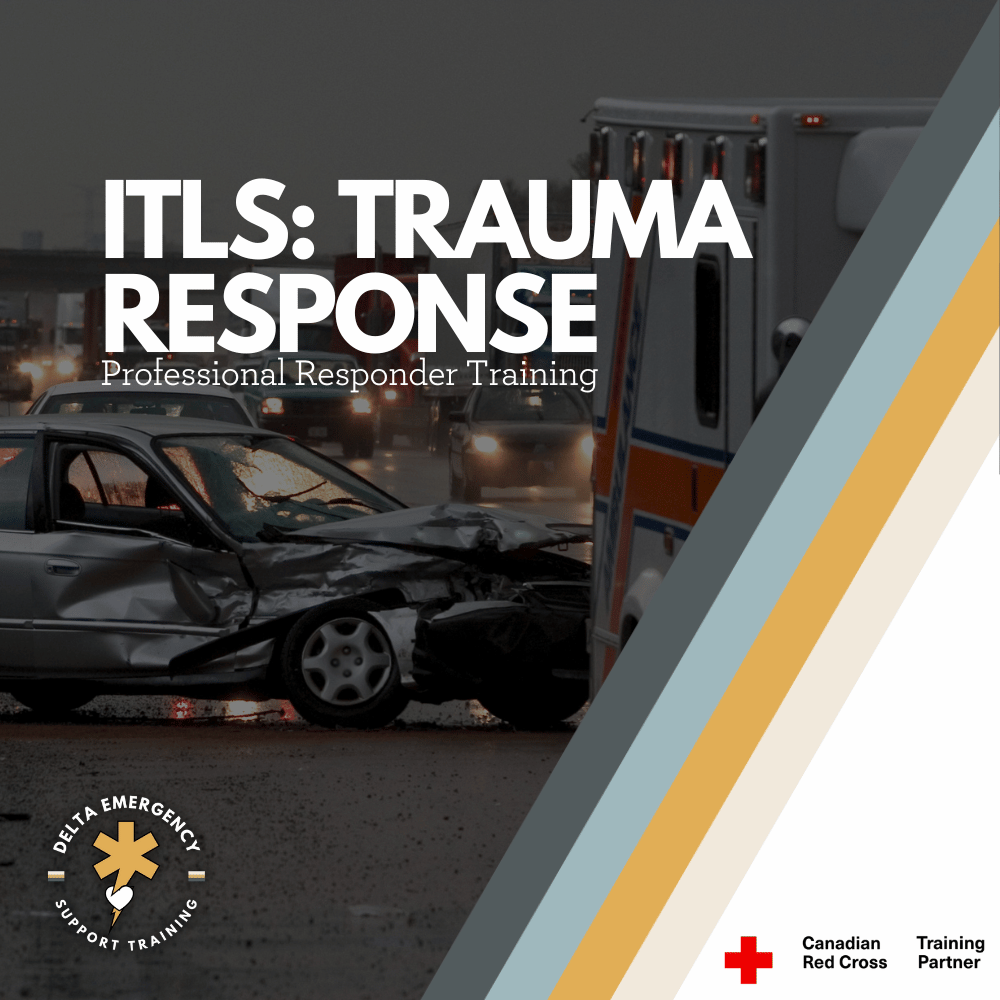
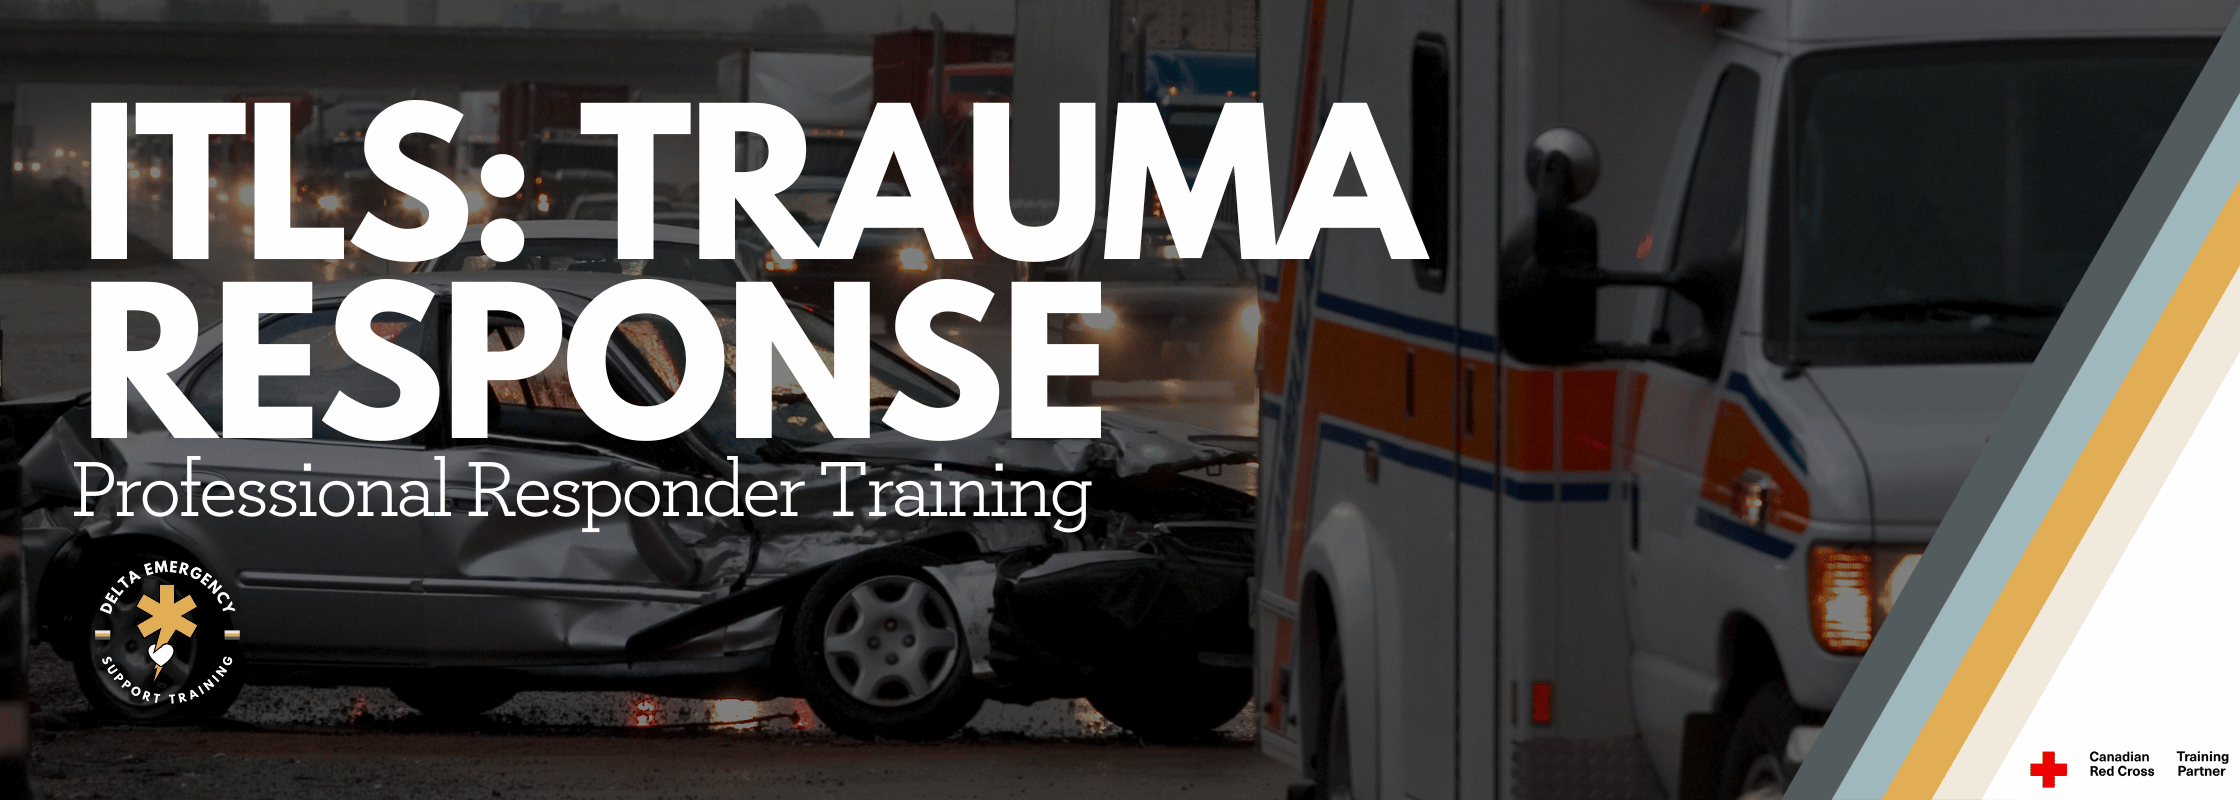
International Trauma Life Support: A Structural Approach to Trauma
Need to take ITLS but not sure what it entails? We’ll break it down for you. International Trauma Life Support (ITLS) gives professional responders the tools to quickly assess, stabilize, and manage trauma patients in high-stress situations. From airway management to bleeding control and spinal care, this course equips you with practical, hands-on skills that could save lives when every second counts.
When emergencies happen, paramedics, firefighters, and advanced first aid responders, having the right tools and knowledge can make the difference between life and death. International Trauma Life Support (ITLS) is a specialized training program that equips professional responders with the skills to rapidly assess, stabilize, and manage trauma patients in high-pressure situations.
If you’re a responder required to take ITLS, here’s what you need to know.
The Purpose of ITLS
ITLS focuses on a structured approach to trauma care. The goal is to give responders a proven framework for:
Quickly identifying life-threatening injuries.
Performing rapid, effective interventions.
Preventing further harm while preparing for transport.
Working within professional guidelines and medical protocols.
This training bridges the gap between classroom learning and the unpredictable realities of trauma scenes.
Core Learning in ITLS
Here’s a breakdown of the key skill areas covered in ITLS and what they mean in practice.
1. Patient Assessment & Initial Survey
Responders learn a systematic way to approach every trauma patient:
Hazards, Environment, MOI, Patient count and Assistance.
Primary survey (C-Spine, LOC, ABCs, RBS,).
Identifying life threats in the first few minutes.
Why it matters: A structured assessment ensures nothing is missed under pressure.
2. Airway Management & Adjuncts
Maintaining an open airway is priority number one. ITLS covers:
Manual maneuvers (jaw thrust, head-tilt chin-lift).
Airway adjuncts (OPA, NPA).
Advanced options (supraglottic airways, endotracheal intubation where permitted).
Recognizing and managing obstructions.
Why it matters: Without a clear airway, nothing else matters — oxygen can’t reach the body.
3. Breathing & Ventilation Support
Responders are trained to:
Recognize respiratory distress and failure.
Provide rescue breaths and ventilations with a bag-valve mask.
Use oxygen.
Identify and treat life-threatening chest injuries (tension pneumothorax, sucking chest wound).
Why it matters: Oxygen delivery is essential to survival, recognizing and treating chest trauma is lifesaving.
4. Circulation & Hemorrhage Control
Stopping major bleeding and supporting circulation includes:
Direct pressure and wound packing.
Tourniquet application.
Recognizing shock and initiating care.
Intravenous (IV) or intraosseous (IO) fluid administration (where scope allows).
Why it matters: Uncontrolled bleeding is one of the top causes of preventable trauma deaths.
5. Spinal Motion Restriction (SMR)
Trauma often comes with potential spinal injuries. ITLS emphasizes:
Patient assessment for spinal risk.
Manual stabilization and cervical collars.
Log rolls and backboard use.
Updated evidence-based approaches to SMR.
Why it matters: Proper handling prevents permanent paralysis from secondary injury.
6. Head & Chest Trauma Management
Specific scenarios covered include:
Managing traumatic brain injuries and increased intracranial pressure.
Recognizing chest trauma (flail chest, open chest wounds).
Interventions like occlusive dressings, fracture stabilization and deadly bleed control.
Why it matters: These injuries are time-sensitive and require immediate, precise intervention.
7. Protocols & Teamwork
Beyond individual skills, ITLS teaches responders to:
Work under medical protocols and established guidelines.
Communicate effectively in teams.
Prioritize transport decisions (“load and go” vs. “stay and play”).
Why it matters: Trauma care is never solo — effective teamwork saves lives.
Why Professional Responders Need ITLS
For those moving into advanced roles (Advanced First Aid, EMR, PCP, paramedic), ITLS is often a required certification. It ensures all responders use the same language, protocols, and structured assessment, which makes coordination seamless during emergencies.
With ITLS, you’re not just checking a box — you’re developing:
Confidence in high-stress scenarios.
Competence in trauma management skills.
Credibility as a trained professional who can handle life-threatening situations.
Final Takeaway
If you’re required to take ITLS, think of it as more than a course — it’s a survival toolkit for the real world of trauma response. You’ll learn how to rapidly assess patients, manage airways, stop life-threatening bleeds, stabilize spines, and follow trauma protocols effectively.
For professional responders, ITLS is not just training. It’s a commitment to ensuring that when seconds count, you can act decisively, safely, and in line with the best trauma care standards worldwide.
Life on the Rig: What It Really Means to Be an Oilfield Medic
Being an oilfield medic is a common career step for new EMRs in Alberta. The job can feel slow and uneventful at times, but when emergencies happen, every second matters. Staying sharp, keeping medical equipment updated, and preparing for long stretches of remote care are what make oilfield medics a critical lifeline for workers far from advanced medical support.
When most people picture the oilfield, they think heavy iron, long shifts, and big sky. Tucked off to the side, there’s usually a medic unit or a small clinic trailer—and a single clinician quietly watching over the crew. That’s the oilfield medic: part emergency responder, part occupational health lead, part logistics coordinator.
It’s a role that blends EMR/AFA skills, scene safety, and long-haul problem-solving in remote, industrial environments where help can be hours away. And yes—it can be slow and boring… until it isn’t. The calm is deceptive; when something happens, it happens fast, and your preparation in the “quiet” hours determines how the next 10 minutes go.
The Job in Plain Terms
Oilfield medics provide immediate medical care on site, manage patient stabilization for delayed transport, and keep workers healthy enough to finish their hitch. Depending on the site and contractor, the role can include:
Immediate response to injuries and medical complaints
Prolonged care while waiting for ground or air evac
Daily readiness: gear checks, drug/expiry audits, documentation
Occupational health tasks: return-to-work guidance, minor wound care, dehydration/heat/cold management
Safety integration: toolbox talks, hazard identification, incident reporting
In remote camps, you may be the only healthcare provider within hours. Your reliability, calm demeanor, and readiness become the safety net for everyone on site.
“Slow and Boring… Until It’s Not”
Oilfield tempo is unique: long stretches of routine—paperwork, checks, hydration talks—punctuated by intense, high-stakes events. The professionals who thrive in this environment treat the quiet hours as their advantage:
Study while it’s calm: Review protocols, practice critical skills (airway setups, splinting, tourniquets), and rehearse handovers.
Run scenarios solo: “What if” drills for crush injuries, H2S exposure, cardiac chest pain, rollover MVCs, hypothermia, heat illness.
Map your evacuation plan: Who do you call, in what order, with what info? How do you get from Site A to the LZ at night in bad weather?
Preparation is the difference-maker—not adrenaline.
Readiness Is a Discipline: Gear, Drugs, Docs
Your kit is your lifeline. Remote medicine punishes complacency. Build a daily rhythm:
Daily Medic Trailer/Truck Checks
Airway: OPA/NPA sizes restocked; BVM intact; suction charged and tested
Oxygen: Cylinder pressures logged; regulators, masks, tubing functional
Bleeding: Tourniquets (min. two), pressure dressings, hemostatic agent, triangular bandages
IV/IO (if within scope/protocol): Cannulas, fluids, disposables, sharps container
Splinting/Immobilization: SAMs, board, C-collars (sizes), blankets
Monitoring: BP cuffs (adult/peds), stethoscope, pulse ox (spare batteries), thermometer
Meds: Check expiry dates and lot numbers; rotate stock; log temps if required
PPE/BSI: Gloves, eye protection, masks, hand hygiene, spill kit
Comms: Radios programmed/charged; spare batteries; sat phone test call
Docs: Incident forms, vitals sheets, treatment logs, WCB/occupational reports ready
Non-negotiable: “Make sure all gear and med equipment is up to date and working—and nothing is expired.”
Keep an expiry tracker (simple spreadsheet or whiteboard). Do a weekly deep-dive on inventories.
Prolonged Field Care: What Changes Outside the City
Urban EMS is built around rapid transport. On the rig, you may be with your patient for 30–120+ minutes. That shifts your priorities:
Airway/Breathing: Reassess frequently; position, humidified O₂ if available, watch fatigue
Circulation: Hemorrhage control first; frequent vitals; keep warm (hypothermia worsens outcomes)
Pain & Comfort: Within scope/protocol—pain control, splint well, pad pressure points
Environment: Shade/cooling or shelter/heat; wind and weather matter
Documentation: Trending vitals tell the story to the receiving team; write while you monitor
Think systems: patient, team, communications, extraction, environment.
Improvisation—Smartly
Remote sites don’t always have exactly what you want. Use what you do have—safely:
Splints: SAM + padding is gold; in a pinch, boards, poles, or rolled jackets
Slings/Swathes: Triangular bandages or high-vis vests
Tourniquets: Use commercial first; improvised only when necessary and applied correctly
Lighting/Visibility: Headlamps, vehicle lights, cones for scene safety at night
Always reassess circulation, sensation, and movement after immobilization.
Extraction: Ground or Air
You may coordinate helicopter or long-distance ground evacuation:
Landing Zone (LZ): Flat, firm, clear 30×30 m (or per provider), mark wind, secure loose items
Hazards: Wires, fuel/exhaust, uneven ground, blowing debris
Comms: Location (lat/long if possible), hazards, patient condition, mechanism, trend
If delayed: Shelter, temp regulation, continuous monitoring, controlled scene
Leadership matters—assign roles, control the perimeter, keep it calm.
Environmental Realities
Oilfield injuries and illnesses often relate to:
Mechanical: Crush, pinch, lacerations, fractures, sprains/strains
Weather: Hypothermia, frostbite, heat cramps/exhaustion, dehydration
Respiratory: Dust, smoke, possible H2S exposure (site-dependent; follow H2S protocols)
Fatigue: Long shifts, night work → slower reactions, more mistakes
Mitigate with hydration stations, heat/cold plans, rest breaks, and constant hazard awareness.
Communication: Your Other Lifeline
Remote means comms can fail. Build redundancy:
Before shift: Confirm primary/secondary radio channels, sat phone numbers, dead zones, relay points
During calls: Clear, concise patient updates—location, access route, mechanism, status, trending vitals
After: Log times, actions, meds, who you notified, and responses received
Your documentation becomes the backbone of continuity when the patient hands off hours later.
Mental Game and Professionalism
The isolation, monotony, and sudden surges of intensity are real. Protect your headspace:
Routines: Checklists, study blocks, exercise, sleep hygiene
After tough calls: Short debrief, peer support, use employer resources
Boundaries: You’re the medic and a safety partner—not the project foreman
Training, Study, and Career Notes (Alberta)
In Alberta, oilfield medic roles are a common entry point for new EMRs, especially for those building remote-care experience while pursuing additional certifications. Employers value:
Current EMR (or higher) certification and BLS/CPR
Strong documentation and radio discipline
Safety mindset and familiarity with industrial hazards
Use the quieter periods to study: review protocols, practice documentation, refresh anatomy/physiology, and stay sharp on shock, trauma, chest pain, respiratory distress, and environmental exposure care. The oilfield rewards medics who keep learning.
A Practical Starter Kit (Save/Adapt)
Pre-Shift Five:
Oxygen pressures logged and regulators tested
Suction powered and functional check complete
Tourniquets ×2, hemostatic, pressure dressings accessible
Monitor and spare batteries ready; pulse ox verified
Comms check: primary/backup radios and sat phone test call
First Five Minutes on Scene:
Scene safe? PPE on? Stop the bleed.
Airway, breathing, circulation—correct life threats now.
Get a set of vitals; repeat every 5–10 minutes if unstable.
Decide transport plan early; notify sooner rather than later.
Document as you go—time stamps matter.
Why People Choose This Path
Oilfield medicine is demanding, but it offers experience you can’t get in the city: independent decision-making, remote coordination, and prolonged patient care. You’ll learn to think ahead, manage limited resources, and be the steady presence everyone counts on when things go sideways.
It’s not glamorous. It’s often quiet. And then—it’s everything at once. If you’ve kept your skills sharp, your gear perfect, and your head clear, you’ll be ready.
Preparedness, adaptability, and professionalism—that’s how oilfield medics save lives, miles from the nearest hospital.

Alberta Fire Applicants & EMRs: Master the Medical Portion with Paramedics and Firefighters
Succeeding in the medical portion of a firefighter or EMR application in Alberta comes down to mastering the fundamentals under pressure. At Delta Emergency Support Training, active paramedics and firefighters teach you vital patient assessment skills, accurate vitals, effective communication, and safe medication administration.
Why Fire Applicants Fail the Medical Portion (And How to Prepare)
Firefighting is one of Alberta’s most demanding careers, and the medical portion of the application ensures candidates can handle life-or-death situations both trauma and medical, under pressure. Many applicants struggle, not because they lack dedication, but because they underestimate the scenario-based, high-pressure nature of this part of the evaluation. Here’s what to know and how to prepare.
1. Not Understanding the Scenario-Based Format
Applicants may know first aid procedures but are unprepared for realistic simulations. Evaluators look for:
Correct prioritization of patient care
Efficient use of available equipment
Accurate assessment of vitals (pulse, blood pressure, respiration, oxygen saturation)
Maintaining composure under pressure
Preparation Tip:
Practice scenarios under timed conditions. Include taking accurate vitals for each patient, documenting them, and adjusting care accordingly. Repetition builds both speed and confidence.
2. Poor Time Management During Simulations
Time pressure is a common challenge during firefighter medical evaluations. Some applicants try to rush through tasks, either spending too long on minor details or speeding through essential steps. This can result in incomplete assessments, inaccurate vitals, missed medication checks, or poor patient communication.
Key Tip:
Don’t rush—take your time to work methodically.
Focus on the fundamentals of your patient assessment: scene safety → primary survey → airway, breathing, circulation → vitals → medications → secondary survey → ongoing care.
If you get stuck or feel pressured, return to the basics and systematically work through each step. Accuracy and thoroughness are more important than speed.
Use practice scenarios to balance efficiency with careful, precise assessment.
Preparation Tip:
Use a mental checklist: Scene safety → Primary survey → Secondary survey → Ongoing care → Hand-off report.
Practice completing your assessment efficiently while still accurately measuring vitals and administering medications.
Practice whenever you can! Run calls in your head.
3. Lack of Critical Thinking
Memorized procedures aren’t enough—patients don’t always behave as expected. Evaluators want to see adaptability: can you adjust your care based on vital signs, patient feedback, or medication needs?
Preparation Tip:
Train with scenarios including complications like fluctuating vitals, patient distress, or adverse medication reactions.
Ask yourself after each practice: “How would I adjust their oxygen saturations fall, or a medication has unexpected effects?”
4. Inadequate Patient Communication
Medical competence isn’t just technical—communicating clearly with patients is critical. Poor communication can make patients anxious or uncooperative, affecting assessment accuracy.
Preparation Tip:
Practice explaining what you’re doing and why while performing assessments and administering medications.
Use calm, clear language: “I’m going to give you your medication now; it may make you feel drowsy. Let me know if you feel unwell.”
Listen and respond to patient concerns—they may give vital clues about their condition.
5. Not Knowing Medications, Indications, and Contraindications
Many applicants fail by being unsure about common medications, their proper use, or when not to administer them. Evaluators want to see that you can safely give medications if required, understand dosage, and recognize contraindications.
Preparation Tip:
Study common pre-hospital medications: aspirin, epinephrine auto-injectors, nitroglycerin, oxygen, and glucose.
Know the indications (when to use), contraindications (when not to use), dosage, and potential side effects.
Practice scenario-based administration with simulated patients.
6. Inadequate Knowledge of Fire-Specific Medical Risks
Alberta applicants face unique hazards: industrial chemicals, wildfires, smoke inhalation, cold-weather trauma. Failing to anticipate these can affect performance.
Preparation Tip:
Focus on airway management, burns, smoke inhalation, rapid trauma assessment, vitals monitoring, and safe medication use.
Understand environmental impacts: extreme temperatures, long ambulance response times, and remote locations.
7. Overlooking Soft Skills and Professionalism
Evaluators notice panic, poor teamwork, and rushed or inaccurate communication. Both soft skills and technical skills are tested simultaneously.
Preparation Tip:
Role-play with peers, focusing on calm, professional communication.
Practice reporting vitals and medications verbally and accurately to simulate handoff to paramedics.
Debrief after every scenario: identify strengths and areas for improvement.
8. Tips for Final Preparation
Simulate Realistic Conditions: Wear PPE, gloves, and work under distractions to mimic real assessments.
Practice Accurate Vitals and Medication Use: Include pulse, respiration, oxygen saturation, blood pressure, and scenario-based administration of medications.
Time Your Scenarios: Track your completion time without sacrificing accuracy.
Review Fundamentals: CPR, airway management, bleeding control, shock recognition, spinal immobilization, and medications.
Debrief Every Practice: Discuss patient communication, vital trends, medication decisions, and overall decision-making.
Conclusion
The medical portion of the firefighter application isn’t meant to trip you up—it ensures you’re ready to handle emergencies. By practicing realistic scenarios, taking accurate vitals, communicating effectively with patients, knowing your medications, managing your time, and thinking critically, Alberta applicants can approach the evaluation confidently and maximize their chances of success.
At Delta Emergency Support Training, you’ll be taught by active paramedics and firefighters, gaining real-world insights and practical skills that go beyond the textbook. This hands-on instruction ensures you’re fully prepared for both the medical portion of your firefighter application and real-life emergencies.

How EMRs Can Succeed in Remote and Isolated Worksites
Working as an Emergency Medical Responder (EMR) on a remote worksite means being ready for anything—from minor injuries to life-threatening emergencies—often with limited resources and no backup nearby. Whether you’re on an oilfield, logging site, or rural road, you may be the only trained responder for hours. Success depends on preparation, strong communication, and the ability to improvise. By mastering these skills, EMRs ensure that patients receive the best possible care until advanced help arrives.
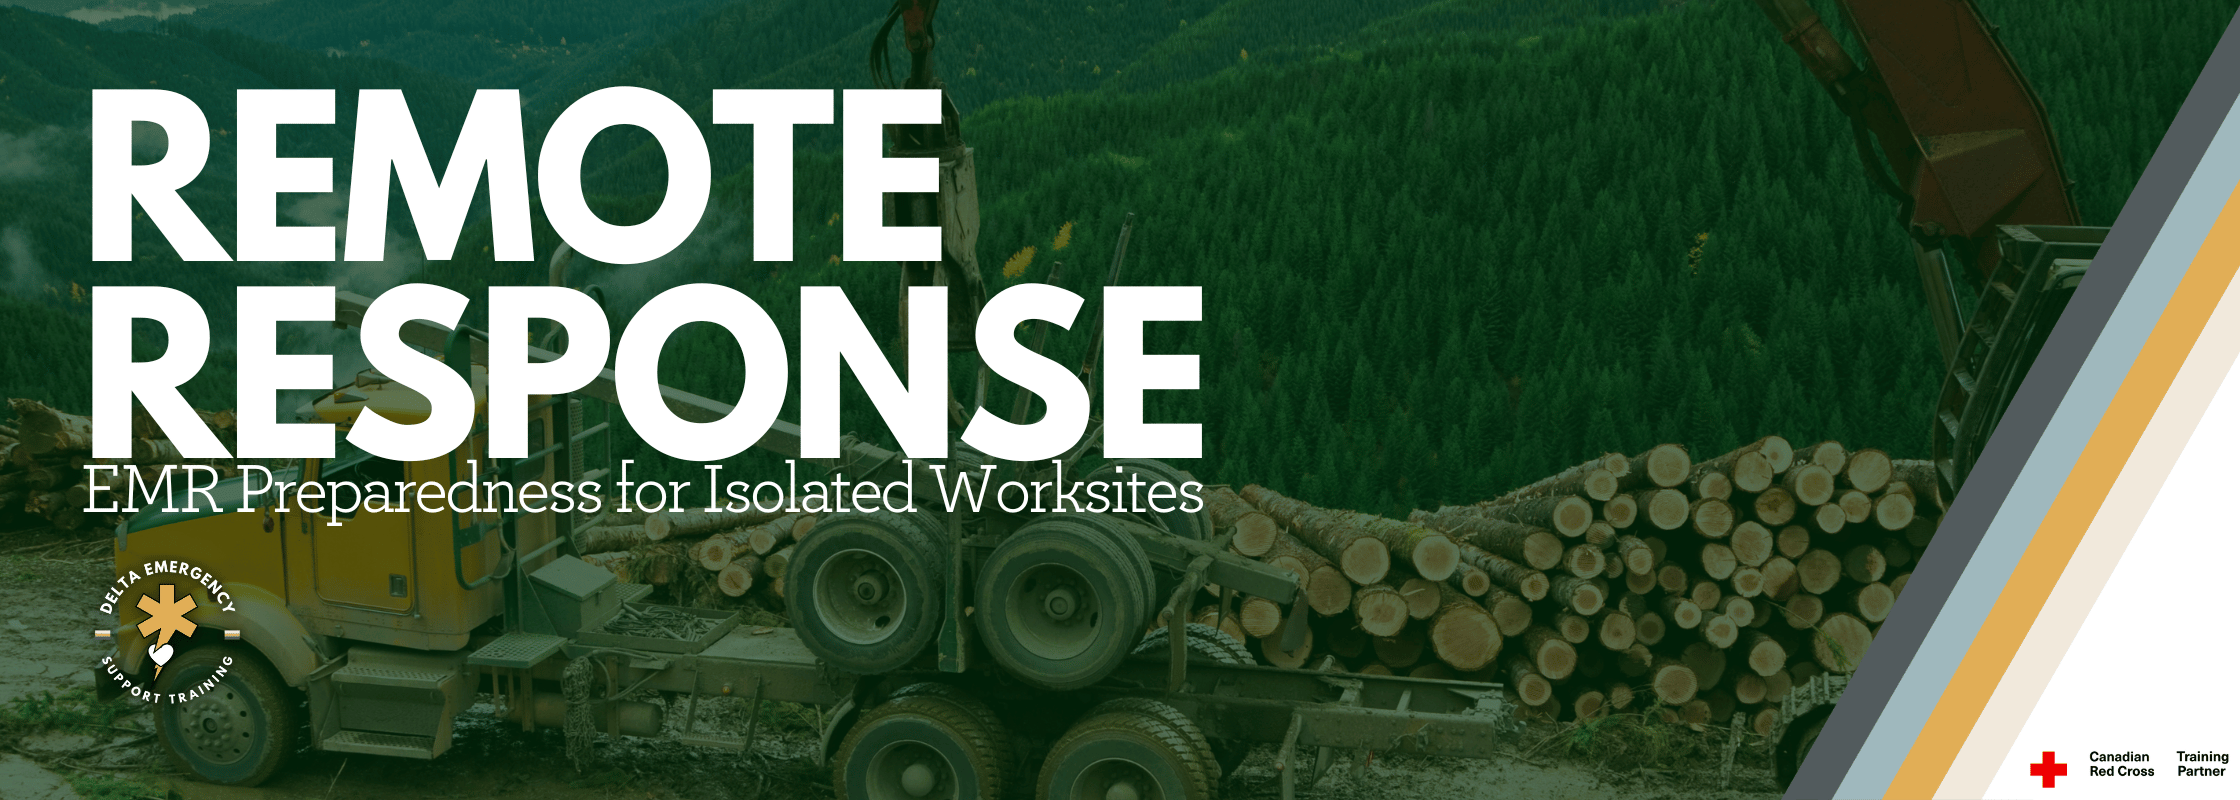
Responding to emergencies in urban areas is often predictable. Backup is usually nearby, communication is reliable, and resources are accessible. In remote locations such as rural roads, oilfields, logging sites, or construction areas, EMRs face unique challenges. You may be the only trained responder for hours, and the environment can complicate every step of patient care. Mastering the skills needed to handle these situations can mean the difference between life and death.
1. Communication Challenges in Remote Environments
One of the first hurdles EMRs encounter in remote areas is staying in contact with dispatch or additional medical resources. Cell service may be spotty or nonexistent, radios may have limited range, and satellite phones are not always available or functioning.
Tips for EMRs:
Always verify which communication tools are available on-site before your shift begins.
Have a backup communication plan, such as designated runners, signaling methods, or vehicle transport to reach help.
Provide clear and concise patient information to dispatch, including the exact location, patient condition, and any hazards.
Maintain communication logs to ensure vital information is relayed accurately.
Effective communication is the foundation for safe and efficient patient care, particularly when you are isolated.
2. Prolonged Patient Care
In remote settings, patients often require care for extended periods while waiting for evacuation. This differs significantly from urban EMS responses, where transport is typically quick. EMRs must be prepared to provide prolonged monitoring and treatment.
Key Considerations:
Continuously monitor ABCs (airway, breathing, circulation) and reassess frequently.
Take regular vital signs and record changes for handoff to higher-level care.
Keep the patient warm, comfortable, and hydrated when possible.
Maintain situational awareness, including environmental hazards, weather, and your own endurance.
Prolonged care requires a balance of technical skill and mental stamina. Staying calm and organized ensures that patients remain stable until help arrives.
3. Improvised Splints and Tourniquets
Remote worksites often have limited medical equipment. EMRs must be able to improvise with available materials.
Splints:
Use boards, poles, tools, or even rolled-up jackets to immobilize fractures.
Ensure the splint is secure but does not restrict circulation unnecessarily.
Tourniquets:
If a commercial tourniquet is unavailable, sturdy belts, strips of cloth, or webbing can be used in emergencies.
Apply properly and monitor distal circulation. Only use when direct pressure is not sufficient to control severe bleeding.
Improvisation is a core skill for EMRs in remote environments and can stabilize injuries until evacuation.
4. Coordinating Helicopter or Ground Extraction
In some cases, evacuation may involve air transport or long-distance ground travel. EMRs must coordinate safely and efficiently.
Preparation and Communication:
Ensure landing zones for helicopters are clear, level, and visible.
Identify hazards, including wires, uneven terrain, or debris.
Keep bystanders at a safe distance and assist with patient loading if necessary.
If extraction is delayed, maintain extended patient care: shelter, temperature regulation, and continuous monitoring.
Evacuation requires both technical knowledge and leadership to keep patients and crew safe.
5. Environmental Awareness and Safety
Remote sites often contain additional hazards that can complicate patient care:
Heavy machinery and industrial equipment.
Wildlife encounters.
Extreme weather conditions.
Limited lighting or difficult terrain.
EMRs must maintain situational awareness, not only for the patient but for their own safety and that of any team members or bystanders.
6. Mental Preparedness
Extended care in challenging environments can be mentally demanding. EMRs should practice:
Staying calm under pressure.
Making quick decisions with limited information.
Prioritizing patient care while managing multiple hazards.
Being mentally prepared ensures that patient care remains consistent and professional, even in high-stress or prolonged scenarios.
Conclusion
Remote and isolated worksites present unique challenges for EMRs. Success depends on advanced planning, communication, improvisation, and endurance. By mastering these skills, EMRs can provide high-quality care in environments where resources are limited and help may be far away.
Preparedness, adaptability, and confidence are what allow EMRs to save lives, no matter how isolated the scene.

Weathering the Storm: Responding to Emergencies in Harsh Conditions
Bad weather doesn’t stop emergencies, and it shouldn’t stop responders from being ready. From icy roads to scorching heat, first responders face unique challenges that affect both their safety and their patients’ well-being. This guide explores how weather impacts patient care, what responders can do to prepare, and key strategies to ensure safety when working in rain, snow, heat, or storms.
When emergencies happen, they rarely wait for good weather. For first responders, answering a call in the middle of a snowstorm, torrential rain, blistering heat, or icy wind is all part of the job. But harsh weather does more than just make your job uncomfortable — it can directly affect your safety, your ability to provide care, and the condition of your patient. Responding effectively requires preparation, adaptability, and a clear understanding of how environmental conditions influence both rescuer and patient.
The Impact of Weather on Emergency Response
Heat and Humidity
Responders face the risk of dehydration, heat exhaustion, and heat stroke while working outdoors in full PPE.
Patients may present with worsened medical conditions such as heat stroke, dehydration, cardiac stress, or exacerbations of chronic illness.
Equipment like defibrillator pads may struggle to stick in high humidity or sweaty environments.
Cold and Snow
Hypothermia and frostbite can develop quickly in patients exposed to freezing temperatures.
Cold weather can mask shock symptoms, as pale, cool skin may be overlooked.
Snow and ice increase response times, limit vehicle access, and create hazardous conditions for both responders and patients.
Rain and Flooding
Roads may be blocked or unsafe, delaying response times.
Hypothermia can occur even in above-freezing temperatures if patients are wet for prolonged periods.
Rain complicates wound care, bandaging, and spinal immobilization by making surfaces slippery and gear harder to handle.
Wind and Storms
Strong winds can scatter debris, down power lines, and create unsafe working environments.
Patient extrication in windy conditions can become dangerous, requiring constant vigilance for falling hazards.
Patient Care Considerations
Thermal Management: Keep patients warm in cold weather with blankets, heat packs, and by minimizing exposure. In hot weather, prioritize shade, cooling, and hydration.
Airway Protection: Wind, dust, or heavy rain may obstruct airways or complicate breathing. Position patients to minimize exposure and suction as needed.
Mobility & Evacuation: Moving patients on icy ground, through mud, or during high heat requires extra teamwork and slower, more controlled movements.
Prolonged Care: Severe weather can delay transport. Be prepared to provide extended on-scene care, monitoring vitals, and reassessing frequently until transport is possible.
Safety Tips for First Responders
Dress and Gear for the Environment
Layered clothing, moisture-wicking fabrics, and insulated gear for cold weather.
Hydration packs, cooling towels, and shade structures in extreme heat.
Waterproof bags for medical equipment during rain or snow.
Scene Safety First
Assess for weather-related hazards like icy ground, floodwaters, or falling debris.
Ensure vehicles are parked safely and not at risk of becoming immobilized.
Team Communication
Radios may cut out in storms — establish clear communication protocols.
Always check in with command when operating in remote or high-risk environments.
Self-Care is Patient Care
Monitor your own hydration, nutrition, and fatigue levels.
Remember, a responder who becomes a patient adds strain to the whole scene.
How Weather Affects Patients Differently
Children and elderly are more vulnerable to heat stress and hypothermia.
Cardiac patients may experience more strain in cold environments where vasoconstriction elevates blood pressure.
Diabetics may be more prone to hypoglycemia during prolonged exposure in extreme conditions.
Trauma patients can deteriorate rapidly if environmental exposure worsens shock.
Final Thoughts
Unfavorable weather will always be a factor in emergency response. First responders who understand how to adapt their approach — from personal preparation to patient care — are better equipped to handle the added challenges of rain, snow, heat, or storms. At the end of the day, staying safe and anticipating the impact of the environment is just as important as the medical care you provide.

Festival First Aid: How Fun Can Turn Dangerous Fast
Festivals are all about music, friends, and unforgettable moments — but fun can turn dangerous fast if you’re not prepared. From heat exhaustion and crowd surges to substance use and stranger risks, knowing the basics of festival first aid and safety can make the difference between a great time and a trip to the medical tent. Stay safe, look out for your friends, and keep the good vibes going all weekend long.

Summer festivals, concerts, and community events are some of the best ways to make memories — music, food, friends, and fun. But in the excitement of large crowds, it’s easy to forget that these environments can also pose unique safety risks. Medical emergencies at festivals can be more complicated than in everyday life: response times may be slower, exits can be blocked, and environmental factors like heat or alcohol can make situations worse.
The good news? With a little preparation and basic first aid know-how, you can help ensure the only thing you remember about your festival experience is the music — not the medical emergency.
Common Emergencies at Festivals
Large events come with specific risks. Some of the most common include:
Dehydration & Heat Illness – Long hours in the sun, dancing, alcohol, and limited shade create the perfect storm for dehydration, heat exhaustion, and heatstroke.
Crowd-Related Injuries – Falls, trampling, or being crushed in tightly packed spaces are real dangers, especially near main stages.
Alcohol & Substance Issues – Overuse can lead to fainting, confusion, altered consciousness, or overdose.
Minor Injuries – Blisters, sprains, burns (from fireworks, cooking, or campfires), and small cuts are common in outdoor environments.
Hearing Problems – Standing near speakers without protection can cause permanent hearing loss.
Prevention Is the Best First Aid
The easiest emergency to treat is the one that never happens. A few simple precautions can make all the difference:
Hydrate regularly — alternate alcohol or energy drinks with water.
Dress smart — sunscreen, hats, breathable clothing, and proper shoes.
Have a plan — choose a meeting spot in case you and your group get separated.
Locate safety resources — know where the exits and first aid tents are before you need them.
Pace yourself — festivals often last hours (or days). Take breaks, eat, and rest when you can.
Quick First Aid Tips You Should Know
If something does happen, here are a few ways you can help until professionals arrive:
Heat Emergencies → Move the person to shade, loosen tight clothing, offer small sips of water, and cool them with damp cloths.
Fainting → Lay the person flat, elevate their legs, and give them space to recover.
Bleeding → Apply firm, direct pressure with a clean cloth or bandage until bleeding slows.
Sprains → Rest the injury, apply ice if available, and use compression if you can.
Possible Overdose → Place the person on their side in the recovery position, monitor breathing, and get medical help immediately.
Crowd Safety: Protecting Yourself and Others
Being aware of your surroundings in large groups is just as important as knowing first aid.
Avoid being in the middle of dense crowds, stick to the sides for quicker exits.
Keep your phone charged and bring a portable battery pack.
Wear earplugs designed for concerts to prevent hearing damage.
Stay calm and move diagonally if you need to exit a packed area.
Trust your instincts — if a situation feels unsafe, leave early.
When to Call for Help
Never hesitate to seek professional medical attention at a festival. Call for help or alert staff if:
Someone is unconscious, seizing, or not breathing.
Severe bleeding doesn’t stop with direct pressure after 10 minutes.
You suspect heatstroke, heart attack, or overdose.
A person is in danger due to the density or movement of a crowd.
Final Note: Be Prepared Before You Go
Festivals are about fun, freedom, and community but staying safe should always be part of the plan. The best way to feel confident in a crowd is to know you’re prepared to help, not just yourself but others too.
Taking a First Aid or CPR course before attending major events is one of the smartest investments you can make. You never know when you might be the difference between a minor scare and a life-saving moment.

Stranger Danger: The Tough but Necessary Talks Every Parent Must Have
Talking to kids about stranger danger is never easy, but it’s necessary in today’s world. From identifying unsafe situations to knowing the rule of “never go anywhere without permission,” these conversations can empower children to stay safe and know when to act.
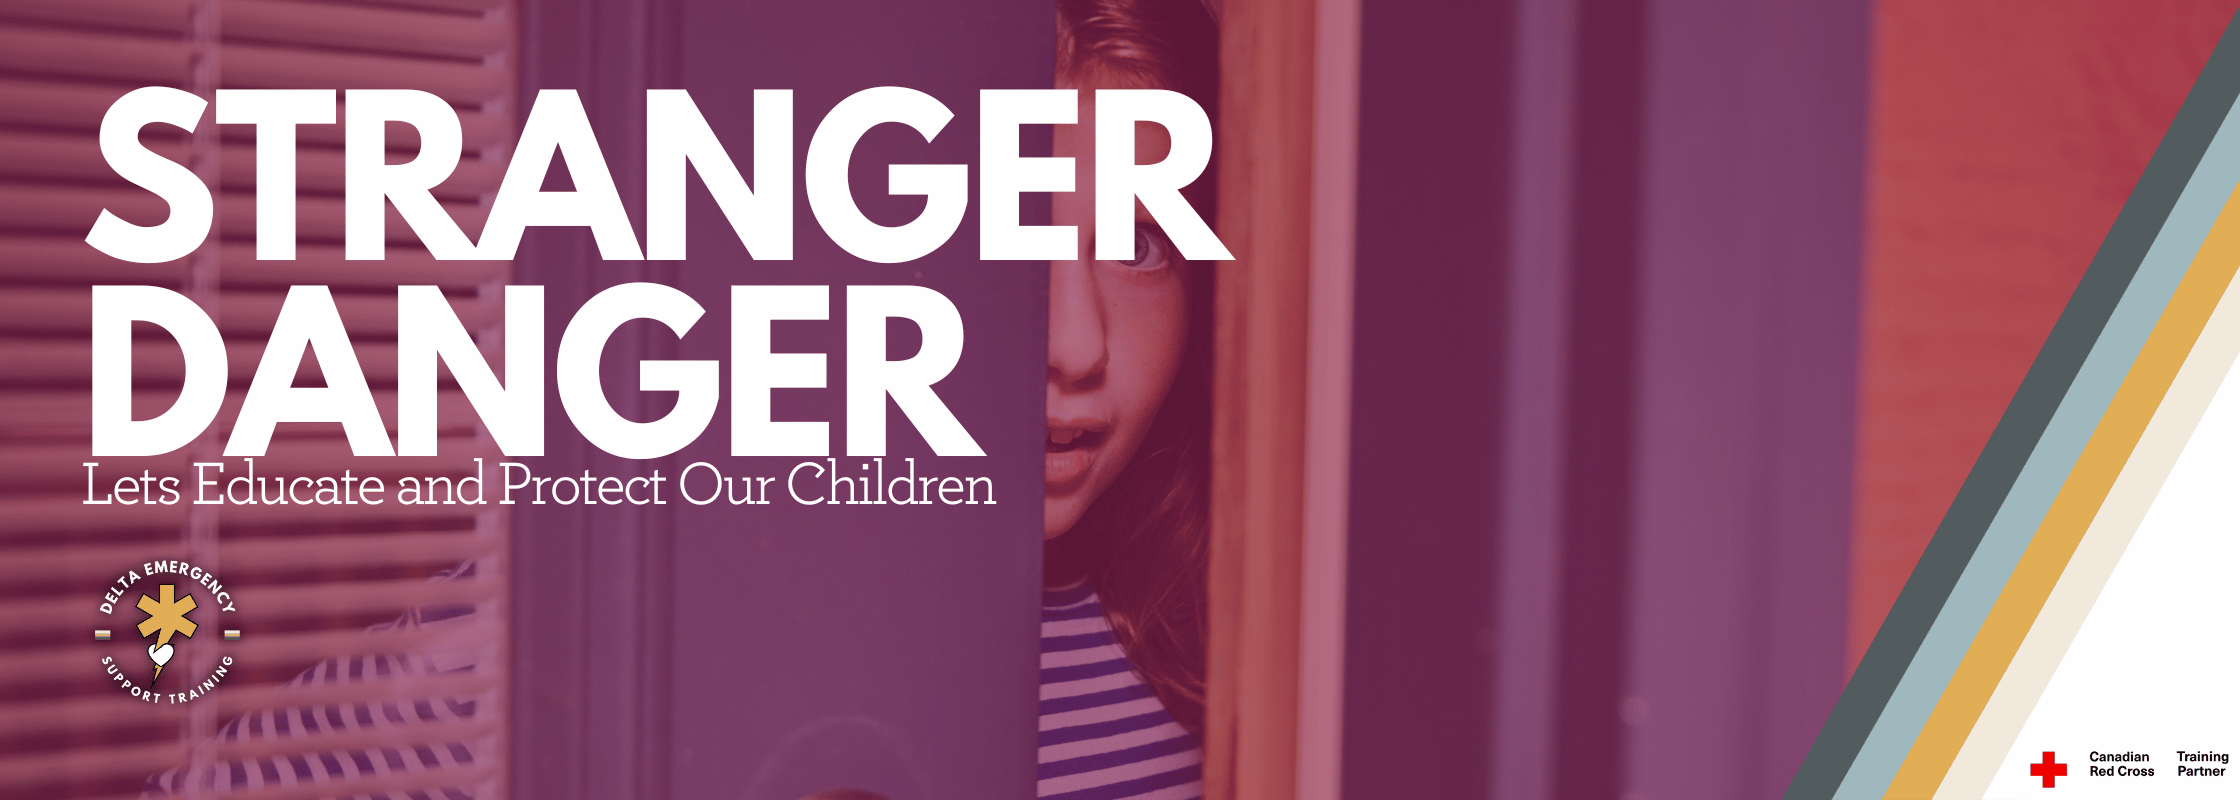
When we were kids, many of us roamed the neighbourhood freely. Today, the world is very different, and parenting has to change with it. Children need real, practical rules to stay safe because strangers are everywhere and danger does not always look obvious.
We are all strangers to someone. The police officer visiting your child’s school is a stranger. The new pediatrician is a stranger. The principal at your child’s new school is a stranger. And yes, the person down the street with bad intentions is also a stranger. There is nothing in a child’s mind that separates the safe from the unsafe.
Society often teaches children that strangers are dangerous and familiar people are safe. Yet statistics show that most cases of child abuse, sexual abuse, and abductions are committed by someone the child knows, such as a family friend, relative, or neighbour. According to the National Society for the Prevention of Cruelty to Children, around 90 percent of child sexual abuse cases involve someone known to the child.
This is why children need to focus on the action, not the person. If someone touches them inappropriately, tries to lure them, or offers rides, money, candy, toys, or clothes to get them to go somewhere, it does not matter if that person seems nice or familiar. Focusing on the behaviour empowers children to report it to a safe adult without confusion or hesitation.
Teach Appropriate vs. Inappropriate Touch
Children should learn to recognize inappropriate touch no matter who it comes from. Even touch from a family member or friend can be wrong. Teaching children to identify unsafe actions rather than judging the person helps them respond correctly.
Prevent Luring and Abduction
Children need clear rules to recognize unsafe situations. One simple, effective rule is:
Never go anywhere with anyone without permission.
No matter who asks them, unless a trusted adult gives explicit permission, children should not leave with anyone. This rule applies to strangers, neighbours, or even family members who might not have current authority. It also applies if someone offers rides, money, clothing, or other gifts. Permission should come from the adult responsible for the child at that moment, such as a parent, daycare worker, or teacher. This puts the judgement where it belongs with the adult.
Practice and Educate
Parents should talk to their children about safety regularly. Role-playing realistic situations helps kids practice saying no, leaving unsafe areas, and telling a trusted adult. Discuss scenarios where strangers may try to tempt them with gifts, rides, or promises. Courses, books, and safety resources can reinforce these lessons in age-appropriate ways.
Children who understand these rules are not scared. They are empowered. Parents who teach these lessons are taking one of the most important steps to protect their children in today’s world.