The Delta Dispatch
Little Patients, Big Impact: Treating Kids as a First Responder
Pediatric emergencies can be emotionally intense and medically complex, but with the right approach, first responders can provide life-saving care while calming young patients and their families. From airway management to emotional connection, this guide covers key strategies for treating children with confidence and compassion.
Responding to a Child in Crisis—What You Need to Know

As first responders, we train to stay calm in chaos. But nothing tests your nerves quite like a pediatric call. Whether it's a toddler who fell from a swing or a child in respiratory distress, pediatric patients can shift the emotional tone of a scene instantly—for responders, bystanders, and families.
It’s not just about the size difference. Children aren’t just small adults—they have unique anatomy, physiology, and emotional needs. Understanding how to approach, assess, and care for pediatric patients is a must-have skill in your responder toolkit.
Why Pediatric Calls Feel Different
For many first responders, pediatric emergencies hit harder. There's a psychological weight to treating children, especially when parents are panicking, or when the injury or illness is serious. This emotional layer can affect even the most seasoned providers.
Add to that the clinical complexity—like differences in vitals, assessment cues, and treatment options—and pediatric care becomes an area that deserves more attention than many training courses provide.
Pediatric Anatomy & Physiology: The Key Differences
When dealing with kids, knowing how their bodies differ from adults can guide your assessment and treatment:
Airways are smaller and more flexible → easier to block with swelling or mucus.
Bigger heads and weaker necks → higher risk of head and spinal injuries.
Faster breathing and heart rates → normal for them, but watch for signs of decompensation.
Limited blood volume → small bleeds can have big consequences.
Thermoregulation is immature → kids get cold or overheated quickly.
Communication: The Heart of Pediatric Care
🗣️ With the Child:
Get to their eye level.
Use calm, simple language.
Let them hold a comfort item if safe.
Be honest—“This might pinch” is better than surprises.
👨👩👧 With Parents/Caregivers:
Quickly gain their trust—introduce yourself and explain what you're doing.
Ask about the child’s medical history, medications, and recent events.
Use them as a resource—they know their child best.
Let them help soothe the child when appropriate.
Pediatric Assessment Tips (ABCs & More)
Airway: Look for retractions, grunting, stridor, or wheezing. Use age-appropriate positioning (neutral for infants, slight extension for older children).
Breathing: Count respirations for a full 30–60 seconds. Kids tire out fast.
Circulation: Check cap refill (under 2 seconds is good), skin color, and mental status.
Disability: Use AVPU (Alert, Voice, Pain, Unresponsive) or the Pediatric Glasgow Coma Scale.
Exposure: Undress carefully to find hidden injuries, but keep them warm!
✅ Vital Sign Norms Change With Age! Always refer to age-specific charts for HR, RR, BP, and temperature.
Common Pediatric Emergencies and What to Watch For
Fever: Especially with seizures (febrile seizures) in toddlers.
Respiratory distress: Asthma, croup, bronchiolitis—kids can crash fast.
Trauma: Falls, bike accidents, car seats—always suspect head injury.
Choking: Common in toddlers—be ready to perform back blows and chest thrusts.
Seizures: Stay calm, protect the airway, and monitor closely.
Dehydration: Look for dry lips, sunken fontanelles (in infants), decreased urination.
BLS Considerations
Use pediatric-sized BVMs and masks.
Adjust compression depth and technique in CPR:
1/3 chest depth
Two fingers for infants
One or two hands for children depending on size
AED pads: Use pediatric pads if available. If not, adult pads can still be used (one front, one back).
Emotional Impact on Responders
Pediatric calls can stay with you. It's okay to feel shaken after a tough one. Debrief with your team, access peer support, and take care of your mental health.
Tips for Real-World Calls
🧸 Carry a teddy bear or sticker in your bag. Distraction helps.
🔊 Narrate your actions gently—kids fear the unknown.
🧼 Wash your hands or change gloves in front of them to model safety.
🪑 Where’s your gear going? Avoid putting bags on beds, couches, or play areas.
🪞 Use humor (when appropriate)—kids can surprise you with their bravery.
Final Thought
Caring for kids in emergencies is one of the most challenging—and rewarding—parts of being a first responder. With the right training, empathy, and communication, you can turn fear into comfort and make a lasting difference in a child’s life.
Even when they’re scared and silent, your presence can be the steady, calming force they need.

Be Ready for the Unexpected: First Aid Skills Every Hunter Should Know
Hunting is a beloved Canadian tradition, but heading into the bush without first aid training puts you and your group at risk. Learn the importance of being prepared with skills like bleeding control, wound care, and shock management. Whether you hunt with family, friends, or solo—make sure you're ready to protect what matters most.
Why You Should Learn First Aid Before Hunting Season
Be Prepared for the Unexpected in Canada’s Wilderness
Father and son hunting
As the crisp fall air rolls in and leaves begin to turn, thousands of Canadians prepare for one of the most anticipated times of the year—hunting season. For many, it’s more than a pastime. It’s a family tradition, a weekend with friends, or time spent in the backcountry with loved ones—passing down skills, telling stories around the fire, and enjoying the stillness of nature. Hunting is deeply woven into Canadian culture, a proud part of our heritage from coast to coast.
But no matter how experienced or well-prepared you are, the wilderness comes with real risks. And when something goes wrong, you're often far from help, without cell service, and hours from emergency responders.
That’s why first aid training isn’t just helpful—it’s essential.
Whether you’re a weekend hunter or a guide, learning Red Cross-certified First Aid, Advanced First Aid (AFA), Wilderness First Aid, or Emergency Medical Responder (EMR) skills can make all the difference in an emergency. It means being ready—not just for yourself, but for the people who matter most.
At Delta Emergency Support Training, we believe that part of keeping these traditions alive means learning how to protect them.
Hunting Safety in Canada: Know the Risks
Hunting is generally safe when done responsibly, but accidents still occur. According to the Canadian Firearms Program and provincial wildlife agencies:
Most firearm-related hunting injuries involve accidental discharges or poor handling technique.
Tree stand falls are one of the most common hunting injuries, often resulting in fractures or spinal trauma.
Hunters often travel to remote areas with no cell service, delaying access to emergency care.
In some provinces, hypothermia is the leading non-injury emergency reported during hunting season.
Each year, hundreds of injuries are reported across the country—many of which are preventable with basic training and better preparation.
🏹 Common Hunting Injuries and Medical Situations
Understanding potential emergencies helps you prepare properly. Here are the most common situations faced in the field:
Gunshot wounds or impalement from firearm mishandling or accidents.
Knife cuts and lacerations during field dressing or gear use.
Falls from tree stands or rocky/uneven ground, resulting in broken bones or head injuries.
Cold exposure: frostbite, hypothermia, or trench foot.
Heat stress in early season hunts.
Allergic reactions to insect stings, animal bites, or plants.
Getting lost or separated from your group, increasing the risk of panic, exposure, or dehydration.
🧠 First Aid Skills Every Hunter Should Know
Here’s what every hunter—beginner or seasoned—should know:
Bleeding control: How to apply direct pressure, pack a wound, or use a tourniquet.
Managing broken bones: Stabilizing with splints and slings.
Shock treatment: Recognizing and managing pale, cold, clammy symptoms.
CPR and AED use: Cardiac arrest can happen in any setting.
Anaphylaxis care: Recognizing severe allergic reactions and administering an EpiPen.
Basic wound care: Cleaning and dressing wounds to prevent infection.
Spinal motion restriction: Important if someone falls from a height or hits their head.
These lifesaving skills are taught in Red Cross First Aid and Wilderness First Aid programs and are enhanced further in EMR-level training.
🎒 Essential First Aid Items to Pack for the Field
Your hunting first aid kit should be compact, durable, and versatile. Pack:
Tourniquet (e.g., CAT or SOFTT models)
Gauze pads, trauma dressings, adhesive tape
SAM splint and triangular bandage
Antiseptic wipes, tweezers, antibiotic ointment
Antihistamines and pain relievers
CPR mask, gloves, emergency blanket
Water purification tablets or filter
Whistle, signal mirror, and flashlight
Personal locator beacon (PLB) or satellite communicator
Pack gear—but more importantly, know how to use it.
🏔️ Why Location Matters: The Reality of Remote Response
In urban areas, EMS might reach you in under 10 minutes. In the wilderness, it could be hours—or days. Even when you can call 911, delays are common due to:
No cell service
Impassable terrain
Poor visibility or weather conditions
Long distances from the nearest ambulance or search-and-rescue base
That’s why wilderness preparedness and basic medical self-reliance are key. The Red Cross Wilderness First Aid program focuses specifically on prolonged care and making decisions when help is hours away.
🧭 Preventing Emergencies: Smart Safety Tips for Hunters
Avoiding an emergency is the best-case scenario. Here’s how to minimize risk:
Take a buddy—never hunt alone if you can avoid it.
File a trip plan: Leave your route and return time with someone you trust.
Carry emergency communication (PLB, satellite text device, or two-way radio).
Inspect your gear, especially firearms, knives, and tree stands.
Dress appropriately in layers, blaze orange, and waterproof gear.
Know the weather and avoid risky conditions (fog, snowstorms, extreme cold).
Stay hydrated and take regular breaks.
Stay sober while handling firearms—alcohol and hunting don’t mix.
📚 Which First Aid Training Is Right for You?
At Delta Emergency Support Training, we help hunters, outdoor workers, and future first responders get the skills they need. We offer:
Standard and Advanced First Aid (AFA) – Learn bleeding control, airway management, CPR, and trauma care.
Wilderness First Aid – Specialized for remote environments and delayed help.
Emergency Medical Responder (EMR) – For guides, professionals, or those planning a career in emergency services.
All courses follow Red Cross Emergency Care for Professional Responders guidelines.
Conclusion: Be the One Who’s Ready
Hunting isn’t just a hobby—it’s a cherished Canadian tradition, often passed down through generations. Whether you’re heading into the woods with your father, sister, best friend, or your own kids, you’re not just out for the harvest—you’re making memories. You're sharing laughter around the campfire, waking up at dawn with excitement, and carrying on a way of life that means something deeply personal.
But with that comes responsibility.
If something goes wrong—and it can—you want to be the one who knows what to do. Whether it’s treating a serious injury, spotting early signs of hypothermia, or managing an allergic reaction, your actions can save the life of someone you care about.
At Delta Emergency Support Training, we’re here to make sure you’re ready. Our Red Cross-certified Advanced First Aid, Emergency Medical Responder, and Wilderness First Aid programs prepare you not just for emergencies—but for protecting what matters most: your family, your friends, and the memories you’re out there to create.
Let’s keep hunting a safe, proud tradition—for this season, and every season to come.
Water Safety for Parents: From Swimwear to Supervision
Summer Water Safety: What Every Parent Should Know Before Pool or Lake Days
When the sun is shining, water becomes a natural playground for kids — pools, lakes, rivers, and oceans offer endless summer fun. But for parents, water is also one of the most dangerous environments your child will be exposed to. Drowning is fast, silent, and all too common — especially in Canada, where thousands of natural bodies of water lie just beyond backyard fences and cottage docks.
The Reality: Drowning Is a Leading Cause of Death for Canadian Children
Drowning is the second leading cause of preventable death for children under age 10 in Canada.
According to the Lifesaving Society of Canada, nearly 500 Canadians die from drowning every year, and almost one-third are under the age of 19.
Children aged 1 to 4 are at the highest risk, most often drowning in pools, while older children are more at risk in open water like lakes and rivers.
88% of child drownings happen when a parent or caregiver is supervising — but distracted.
These tragedies are preventable with layers of protection: supervision, swimming skills, proper safety gear, and informed adults.
1. Enroll in Swimming Lessons Early
Formal swimming lessons reduce drowning risk by up to 88% for children ages 1–4, according to the Canadian Pediatric Society. The Red Cross and Lifesaving Society both emphasize the value of age-appropriate water safety education from toddlerhood.
Look for programs that teach:
Entering and exiting water safely
Floating, treading water, and self-rescue
Using lifejackets and understanding currents
Knowing when to call for help
Even for strong swimmers, refreshing skills before each summer season helps reinforce safety habits.
2. Supervision Saves Lives — But Only if It’s Active
Drowning happens in as little as 20 seconds. It is quiet — no splashing, no screaming. A child can slip under the water while you're answering a text.
Good supervision means:
You're within arm's reach for young or weak swimmers
You're not distracted by your phone, books, or alcohol
You rotate with other adults every 15–30 minutes if needed
You avoid relying on older children to supervise younger siblings
Tip: Use a “Water Watcher” card or lanyard to clearly identify the supervising adult at any given time.
3. Know the Risks in Different Environments
Each setting has unique dangers, especially in Alberta where cold lakes and rivers are common.
Pools
Install fences with self-latching gates
Use pool alarms or covers when not in use
Never rely on inflatable toys or floaties for safety
Lakes and Rivers
Use properly fitting lifejackets
Be aware of drop-offs, weeds, and sudden cold
Water visibility is often poor — stay close and alert
Oceans
Only swim in lifeguard-supervised zones
Learn to identify rip currents and how to escape (swim parallel to shore)
Watch for tides, jellyfish, and sharp shells
4. Dress for Water Safety — Including the Right Colours
Lifejackets:
Always wear Transport Canada-approved lifejackets when boating, paddling, or playing near open water.
Swimwear Colour Matters:
A 2022 study by ALIVE Solutions tested how well different swimsuit colours showed up underwater — especially in murky or sun-glared conditions. Results showed that bright neon colours like orange, pink, and lime green were most visible. Earth tones, blue, and even white blended into water and became invisible within just a few feet.
Best for visibility:
Neon orange
Hot pink
Lime green
Bright yellow
Avoid:
Blue, grey, white, or pastels (especially in natural water)
5. Take a CPR & First Aid Course
In emergencies, seconds matter. CPR, rescue breathing, and basic first aid skills can make the difference between life and death while you wait for EMS.
We recommend:
CPR-C or Emergency First Aid with CPR
Child & Infant CPR refresher courses for babysitters, older siblings, and grandparents
Courses offered by trusted organizations like the Canadian Red Cross or Lifesaving Society
At Delta Emergency Support Training in Calgary, we offer family-friendly and babysitter-focused Red Cross courses year-round.
6. Teach Kids Water Safety at Every Age
Make water safety part of your regular parenting conversations:
Always ask permission before going near water
Never swim alone — even with a lifejacket
Get out when cold or tired
If in trouble: call for help, float, and don’t panic
Teach older children how to help safely without jumping in themselves
Water should be fun — but it should also be respected.
Final Thoughts: Don’t Let a Preventable Tragedy Ruin Your Summer
Most childhood drownings are not freak accidents — they are preventable. Supervision, the right gear, swimming skills, and training create the strongest safety net.
This summer, be proactive — and make sure water memories are joyful ones.
Looking for Babysitter or CPR Courses in Calgary?
Delta Emergency Support Training offers:
Babysitter Certification (Red Cross)
Emergency First Aid & CPR for Families
Private bookings for friend groups or community groups
All classes are taught by real paramedics and emergency responders who know what works in real life.
Spots fill fast during summer — contact us today to learn more!

Pulmonary Embolism for EMR Students: Signs, Symptoms, and Action Steps
Pulmonary embolisms are among the most serious complications post-surgery—and often go unnoticed until it’s too late. For Emergency Medical Responders, especially those working in Alberta’s high-risk environments, knowing the subtle signs and acting fast can make all the difference. This blog breaks down what to look for, how to respond, and why early recognition matters.
Pulmonary Embolism in Post-Surgical Patients
What Every Emergency Medical Responder Needs to Know
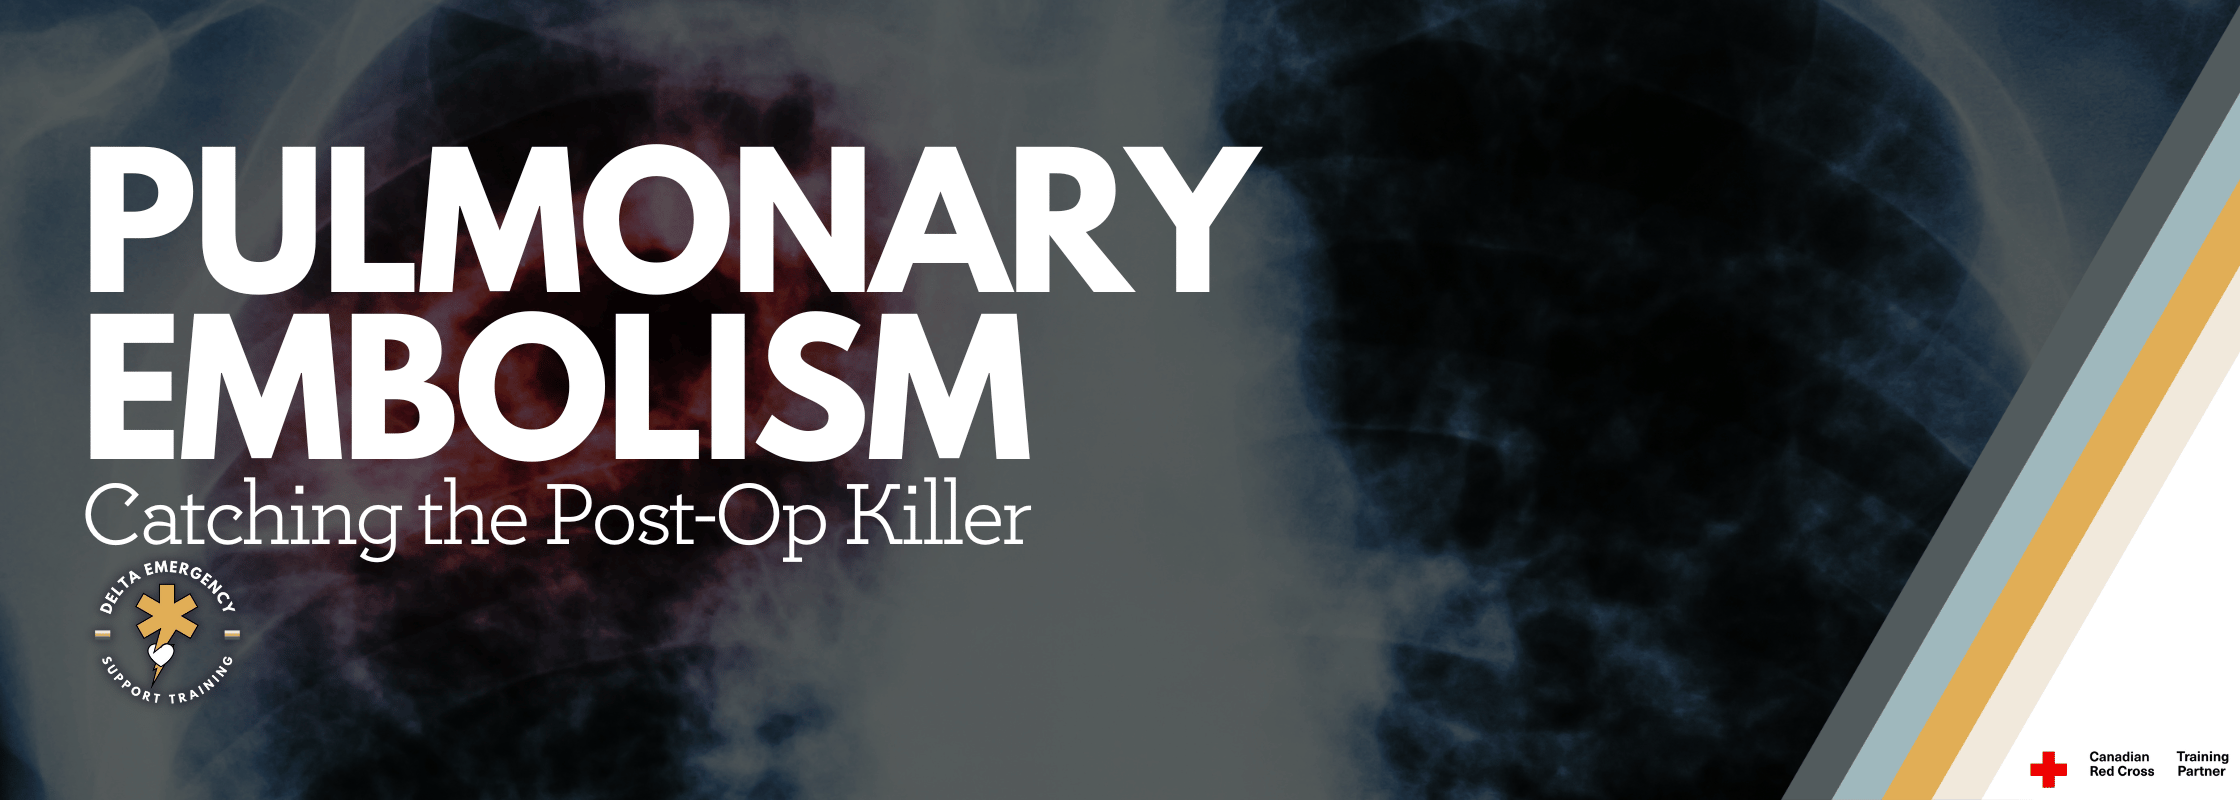
Pulmonary embolisms (PEs) are a leading cause of sudden, preventable death—especially in post-operative patients. As Emergency Medical Responders (EMRs) or Advanced First Aiders, understanding the signs, complications, and red flags of a PE can be the difference between life and death during a call.
While many PEs occur silently, those that do present can deteriorate rapidly. In the prehospital environment, your scene awareness, history taking, and rapid recognition play a crucial role in early intervention.
What Is a Pulmonary Embolism (PE)?
A pulmonary embolism is a blockage of one or more pulmonary arteries in the lungs, usually caused by a blood clot (thrombus) that travels from the legs (deep vein thrombosis or DVT) or pelvis. When that clot reaches the lungs, it obstructs blood flow, strains the heart, and impairs gas exchange—all of which can lead to hypoxia, shock, or cardiac arrest.
Why Are Post-Surgical Patients at Risk?
Surgical patients, particularly those recovering from major operations like orthopedic, abdominal, or pelvic procedures, face multiple risk factors:
Immobility during and after surgery → reduced circulation
Tissue trauma → activates the clotting cascade
Dehydration or blood loss → increases blood viscosity
Compression of veins during long procedures
Pre-existing conditions like obesity, smoking, cancer, or clotting disorders
Even young, otherwise healthy patients can develop PEs after surgery if proper precautions aren't followed.
Red Flags EMRs Should Watch For
A post-surgical patient complaining of vague symptoms may not look critical—but here are PE signs that demand immediate attention:
🫁 Respiratory Signs:
Sudden shortness of breath (unexplained)
Tachypnea (rapid breathing)
Chest pain (sharp, pleuritic — worsens with inspiration)
Cough (may be dry or produce blood-tinged sputum)
Low SpO₂ despite oxygen administration
❤️ Cardiovascular Signs:
Tachycardia
Hypotension
Lightheadedness or fainting
Cyanosis
Cool, clammy skin
🧠 Neurological & Other Signs:
Anxiety or impending sense of doom
Altered LOC in severe cases
Leg pain/swelling (DVT signs)
Recent history of surgery or long immobilization
Field Priorities for EMRs
Scene Size-Up and History Taking
Ask about recent surgeries, travel, hospitalizations, or prior blood clots
Look for signs of immobility, compression devices, or anticoagulants
Primary Assessment
Focus on airway, breathing, and circulation
Supplemental high-flow oxygen immediately if signs of hypoxia
Vitals and Rapid Transport
Monitor vitals frequently; deterioration can be fast
Transport urgently with pre-alert to hospital if PE is suspected
Reassessment
Watch for declining mental status or respiratory fatigue
Prepare for deterioration — cardiac arrest is possible in large PEs
What Makes PEs So Dangerous?
They can present subtly and escalate rapidly
Not all patients show textbook symptoms
Once the heart begins to strain or fail from the blockage, the window for intervention narrows quickly
Anticoagulant therapy or thrombolytics are hospital treatments, so early recognition and rapid transport are critical
Real-World Example
You’re dispatched to a 54-year-old woman 5 days post-knee replacement complaining of shortness of breath. She’s alert but anxious, SpO₂ is 88% on room air, heart rate 116, and she has mild leg swelling. She says it started suddenly and she feels “off.”
As an EMR, this is a classic red flag scenario: post-op, tachycardia, respiratory distress, possible DVT. This is when your training matters most.
Conclusion: What You Do Matters
Pulmonary embolisms in post-surgical patients are time-sensitive medical emergencies. As a responder, your ability to identify concerning symptoms, gather relevant history, and prioritize rapid care can drastically improve patient outcomes.
Always consider PE when a post-op patient presents with unexplained respiratory or circulatory compromise—even if it seems mild at first. Trust your instincts, act fast, and escalate early.
Delta Emergency Support Training
Based in Calgary, Alberta, we train EMRs and Advanced First Aiders with real-world scenarios and paramedic-led instruction to prepare you for critical cases like this. Whether you're working industrial, remote, or public events, our training prepares you for what truly matters.
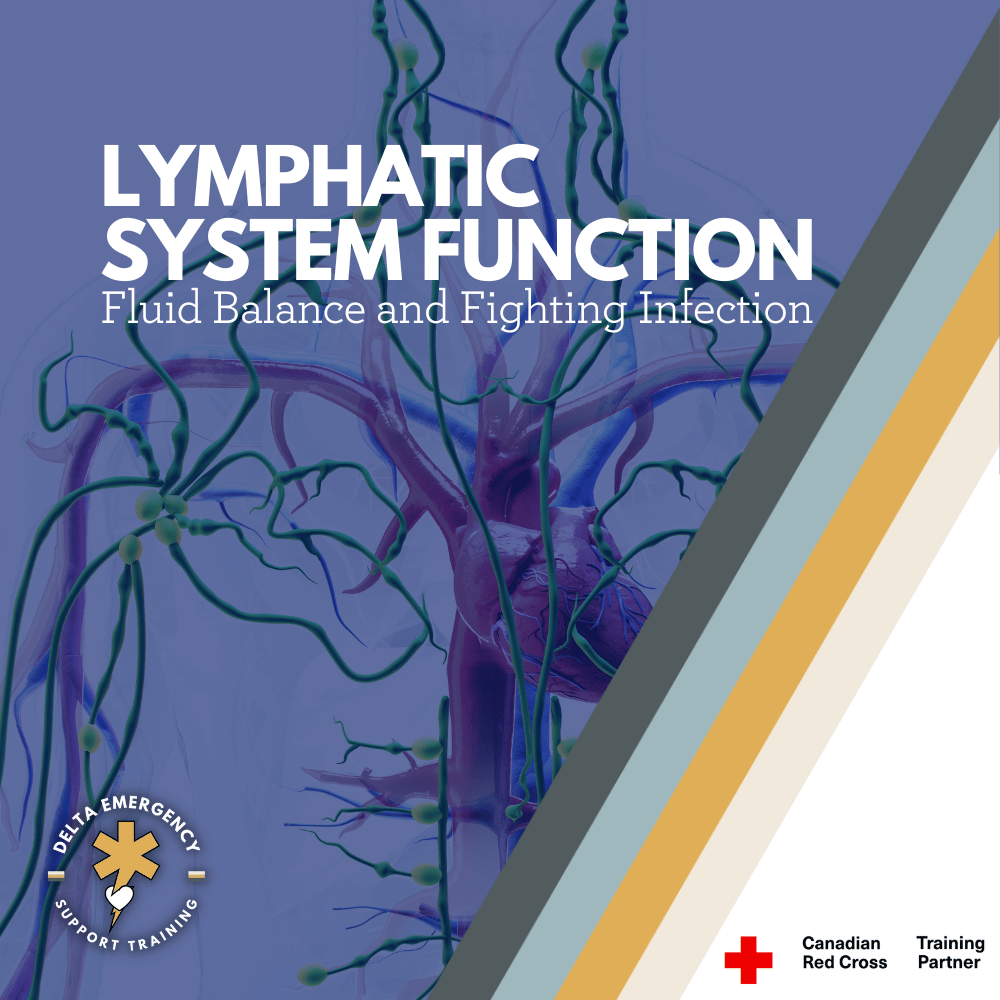
The Lymphatic System: Your Body’s Built-In Defense Network

When most people think about vital systems in the human body, they picture the heart pumping blood or the lungs drawing in oxygen. But behind the scenes, the lymphatic system plays a critical and often overlooked role in keeping us healthy—especially when it comes to fighting infection, maintaining fluid balance, and supporting the immune system.
For first aiders, EMRs, and other frontline responders, understanding the lymphatic system can deepen your knowledge of the body's response to injury, infection, and inflammation. It also helps explain why we sometimes see swollen lymph nodes, fevers, and inflammatory reactions during patient assessments.
🔬 What Is the Lymphatic System?
The lymphatic system is a complex network of vessels, nodes, organs, and tissues that work together to:
Drain excess fluid from tissues and return it to the bloodstream
Filter harmful substances, like bacteria, viruses, and toxins
Produce and transport immune cells, such as lymphocytes
Absorb and transport fats from the digestive system
Think of it as the body’s sanitation and security team, quietly working alongside the circulatory system.
🧠 Key Components of the Lymphatic System
1. Lymph Fluid
A clear or pale yellow fluid made up of water, proteins, white blood cells (especially lymphocytes), and waste products.
Forms from fluid that leaks out of capillaries into tissues (called interstitial fluid) and is then collected by lymphatic vessels.
2. Lymphatic Vessels
A network of thin tubes that run throughout the body, similar to veins.
These vessels carry lymph fluid in one direction—toward the heart—using valves and muscular contractions to keep the fluid moving.
They eventually drain into two major ducts:
Thoracic duct (left side of body)
Right lymphatic duct (right side of head, arm, chest)
3. Lymph Nodes
Small, bean-shaped structures located along lymph vessels.
Filter lymph fluid and trap pathogens, foreign particles, and cancer cells.
Contain immune cells (B cells and T cells) that destroy harmful substances.
Common clusters are found in the neck, armpits, and groin—these may swell during infections.
4. Lymphoid Organs
Spleen: Filters blood, removes old red blood cells, and stores white blood cells.
Thymus: Located in the chest; where T cells mature (especially active in children).
Tonsils and adenoids: Located in the throat; protect against pathogens entering via mouth and nose.
Peyer’s patches: Found in the small intestine; monitor intestinal bacteria and immune responses in the gut.
🛡️ Lymphatic System and Immunity
The lymphatic system is deeply integrated into the immune response. It helps the body recognize, attack, and eliminate threats like viruses, bacteria, and cancer cells.
Key immune system cells found in lymphatic tissues include:
B lymphocytes (B cells): Produce antibodies to neutralize pathogens.
T lymphocytes (T cells): Attack infected cells and coordinate immune responses.
Macrophages: Engulf and digest cellular debris, pathogens, and dead cells.
When the body detects an invader, immune cells gather in nearby lymph nodes—causing localized swelling and tenderness, which you might feel in the neck or armpit during illness.
💉 Lymphatic System in Emergency Medicine and First Aid
While the lymphatic system itself doesn’t often present as a primary emergency, it plays a supporting role in many situations:
1. Infection
Swollen, tender lymph nodes can signal localized or systemic infection.
This is common in throat infections, skin abscesses, or infected wounds.
2. Sepsis
When infection spreads into the bloodstream, the lymphatic system may become overwhelmed.
Understanding its role helps responders recognize systemic responses like fever, elevated heart rate, and altered mental status.
3. Cancer
Lymph nodes are often used in staging cancers, as some malignancies (e.g., lymphoma or breast cancer) spread via the lymphatic system.
Responders may encounter patients with known lymphatic involvement or lymphedema from past cancer treatment.
4. Trauma and Swelling
Impaired lymph drainage can contribute to edema in injured limbs.
Compression injuries, surgical removal of nodes, or severe inflammation may damage lymphatic flow.
🧠 Fast Facts for First Aiders and EMRs
The lymphatic system has no central pump like the heart; it relies on movement, breathing, and muscle contractions.
Swollen lymph nodes are usually not painful unless infected.
Lymph nodes larger than 1 cm that persist for more than a few weeks should be evaluated by a physician.
Lymph fluid eventually returns to the bloodstream, helping maintain fluid balance and blood volume.
Conditions like lymphedema, often seen in cancer survivors, are caused by damage or blockage in lymph vessels.
🩺 Support the System
While you won’t be treating the lymphatic system directly in most emergency calls, here are ways first responders support it indirectly:
Encourage early treatment of infections to reduce the burden on lymph nodes
Recognize swollen lymph nodes as a sign of localized infection
Position patients properly to promote lymph drainage and circulation
Understand underlying conditions like lymphoma or lymphedema when assessing patients
📚 Conclusion: Small System, Big Impact
The lymphatic system may be quiet, but it’s crucial—working around the clock to remove waste, protect against illness, and support your immune defenses. For first responders, a working knowledge of the lymphatic system helps sharpen your assessment skills, especially in cases involving fever, infection, or unexplained swelling.
Whether you’re taking Advanced First Aid or working as an EMR, understanding this system adds another layer to your ability to assess and care for patients holistically.

Your Mental Checklist for Altered Level of Consciousness Calls
Altered level of consciousness (LOC) can signal everything from trauma to stroke, overdose, or diabetic emergencies. For EMRs and Advanced First Aiders, quick assessment using tools like AVPU and GCS is essential. Learn how to approach LOC calls with confidence and clinical clarity.

Altered level of consciousness (LOC) is a broad but critical presentation that can signal anything from head trauma to medical emergencies like hypoglycemia, stroke, or overdose. As an Emergency Medical Responder (EMR) or Advanced First Aider (AFA), your role in the initial assessment can directly influence the outcome for the patient.
These calls can be unpredictable, high-stress, and require fast decision-making. That’s why having structured tools like AVPU and GCS (Glasgow Coma Scale) in your mental toolbox is essential.
What Is Altered Level of Consciousness?
Altered LOC refers to any state where a person’s awareness, responsiveness, or orientation is impaired. It ranges from confusion or disorientation to full unresponsiveness.
Some common causes include:
Head trauma
Stroke or transient ischemic attack (TIA)
Seizures or postictal states
Hypoglycemia or hyperglycemia
Drug or alcohol overdose
Shock
Infection (e.g., sepsis or meningitis)
Psychiatric conditions
Because the causes are so diverse, your initial assessment plays a key role in identifying red flags, ruling out life threats, and communicating clearly with paramedics or dispatch.
Using the AVPU Scale
The AVPU scale is a quick and simple way to assess responsiveness in the field:
A – Alert: The person is awake and oriented to person, place, time, and event.
V – Verbal: The person responds to verbal stimuli but is not fully oriented.
P – Pain: The person does not respond to voice but reacts to pain (e.g., sternal rub).
U – Unresponsive: No response to voice or pain.
When to Use AVPU:
AVPU is ideal for initial assessments, especially during your primary survey. It gives you a quick snapshot of how serious the situation may be, helping prioritize transport and care.
Glasgow Coma Scale (GCS)
While AVPU is fast, the Glasgow Coma Scale provides a more detailed and objective assessment of neurological function.
The GCS evaluates three categories:
Eye Opening (E) – out of 4
Verbal Response (V) – out of 5
Motor Response (M) – out of 6
CategoryScore BreakdownEye Opening4 – Spontaneous
3 – To voice
2 – To pain
1 – NoneVerbal Response5 – Oriented
4 – Confused
3 – Inappropriate words
2 – Incomprehensible sounds
1 – NoneMotor Response6 – Obeys commands
5 – Localizes pain
4 – Withdraws from pain
3 – Flexion (decorticate)
2 – Extension (decerebrate)
1 – None
GCS Scoring:
13–15 = Mild impairment
9–12 = Moderate
≤8 = Severe; often indicates need for airway management
Even at the EMR or AFA level, familiarity with the GCS can help you provide accurate handovers and assist higher-level responders in decision-making.
Approach to the Call: LOC Management Steps
1. Scene Assessment & Safety
Scan for hazards (especially if drugs, trauma, or violent behavior suspected)
Note environmental clues (needles, alcohol, medications, crash helmets, etc.)
2. Primary Survey (ABCs)
Ensure Airway is open — unresponsive patients may need manual airway maneuvers or placement in recovery position.
Check Breathing — rate, effort, and quality.
Assess Circulation — skin signs, pulse, and potential bleeding.
3. Level of Consciousness Assessment
Use AVPU for rapid triage.
Apply GCS when appropriate and time allows.
Assess orientation to person, place, time, and event.
4. Vital Signs
Monitor pulse, respiration rate, blood pressure, temperature, SpO₂, and blood glucose (if within your scope).
5. Secondary Survey
Look for trauma (especially head/neck)
Check pupils (size, equality, reactivity)
Review SAMPLE history:
Signs and symptoms
Allergies
Medications (especially insulin, seizure meds, psych meds)
Past medical history
Last oral intake
Events leading up to incident
Communication Is Key
LOC calls often require rapid handover to EMS or transport to hospital. A strong report includes:
AVPU or GCS score
Vitals and changes in LOC
Pertinent SAMPLE history
On-scene findings (e.g., signs of overdose, trauma, seizure activity)
Using clear, clinical language shows professionalism and ensures continuity of care.
Why This Matters
Altered LOC may be the first sign of a life-threatening emergency. Whether you’re the first responder on a highway or treating someone at a workplace or remote site, your ability to assess, document, and respond effectively can help save a life—or prevent rapid deterioration.
Train with Confidence at Delta Emergency Support Training
At Delta Emergency Support Training in Calgary, our Advanced First Aid and EMR-level courses prepare students to manage complex scenes—including those involving altered LOC. Taught by experienced paramedics and firefighters, our training focuses on real-world decision-making, hands-on assessments, and scenario-based practice.
Whether you're renewing your skills or building toward a career in EMS or firefighting, we’re here to help you respond with clarity, confidence, and care.

From Oilfield to Firehall: Why Tradespeople Are Switching to Emergency Services
Many tradespeople in Alberta’s oil and gas sector are transitioning to emergency services careers. At Delta Emergency Support Training in Calgary, our Advanced First Aid course provides the essential skills and certification needed to make that move with confidence.
Alberta has long been known for its oil and gas industry — and rightly so. From Fort McMurray to the foothills outside Calgary, thousands of workers have built careers in the trades, on the rigs, and in the field. But in recent years, a growing number of tradespeople are making a dramatic shift: trading in steel toes and coveralls for bunker gear and medical kits.
At Delta Emergency Support Training, based in Calgary, Alberta, we’ve seen the trend firsthand. More and more of our Advanced First Aid (AFA) students come from backgrounds in the oil patch, construction, or related trades, seeking a new path in firefighting, emergency medical services, or public safety.
Here’s why this transition is becoming so popular—and how Advanced First Aid training can be your first step from the oilfield to the firehall.
Why Tradespeople Are a Natural Fit for Emergency Services
Many of the qualities that make someone successful on a rig or in a trade are the same qualities needed in emergency response:
Strong work ethic and long shifts
Team-based environments
High-pressure problem solving
Hands-on technical skills
Risk awareness and safety training
Comfort in unpredictable or hazardous settings
If you’ve spent time working in the field, you’ve likely already experienced critical thinking during crises, emergency evacuations, or injury responses. That mindset—and real-world toughness—is highly transferable to fire and EMS careers.
Why the Shift Is Happening Now
There’s no doubt the oil and gas industry still offers high-paying work. But for many tradespeople, the physical demands, economic uncertainty, and cyclical layoffs have made them look for more stable, meaningful, or community-focused careers. Emergency services are standing out for a number of reasons:
Long-term stability and benefits
Purpose-driven work that gives back to the community
Opportunity to work closer to home
Union support and career advancement pathways
Strong demand for trained emergency responders in Alberta
If you're already safety-certified, used to remote work, and calm under pressure, transitioning to a fire department or EMS service might feel like a natural progression.
Advanced First Aid: Your First Step Toward a New Career
At Delta Emergency Support Training, we offer Advanced First Aid certification and recertification, designed for those ready to pursue new roles in emergency services.
Our courses, taught by experienced paramedics and firefighters, give you the skills and credentials to apply to:
Municipal fire departments like Calgary or Edmonton Fire
Industrial or wildland fire crews
Emergency Medical Responder (EMR) or Primary Care Paramedic (PCP) programs
Oil and gas site medical teams
Search and Rescue or auxiliary fire departments
What You’ll Learn:
Following the Canadian Red Cross curriculum, Advanced First Aid training includes:
Scene and patient assessment
CPR Level C and AED
Airway and breathing emergencies
Spinal, head, chest, abdominal, and limb injuries
Seizures, strokes, anaphylaxis, diabetic emergencies
Multiple casualty management and triage
Oxygen administration
Legal responsibilities and assisting with medications
This level of training is often the minimum requirement for entry into emergency service programs—and it builds confidence for high-stakes environments.
You're Not Starting Over—You're Building Forward
Switching careers doesn’t mean leaving your skills behind. In fact, your experience in the trades—whether it's welding, electrical, drilling, construction, or industrial safety—equips you with a unique edge.
At Delta Emergency, we’ve seen all kinds of professionals make the leap into emergency services. We’ve trained doctors, nurses, personal trainers, military personnel, and tradespeople who have successfully transitioned into fire, EMS, or rescue careers. The one thing they all had in common? A willingness to start with solid foundational training and a drive to serve.
You don’t need a medical degree or fire academy certificate to get started—just the right training and mindset.
Take the First Step with Delta Emergency Support Training
Emergency services are more than just a job—they're a calling. If you're ready to explore a career that's local, stable, and community-centered, Delta Emergency Support Training in Calgary, Alberta is here to support your journey.
Advanced First Aid is more than a certificate—it’s your starting point. Learn from real paramedics and firefighters and take the first step toward a career with purpose.
Visit our website to learn more about the program and how it can support your next move.
Planning to Apply to Edmonton or Calgary Fire? Why Advanced First Aid Recertification Matters
Planning to apply to Calgary or Edmonton Fire? Delta Emergency Support Training in Calgary offers Advanced First Aid recertification taught by paramedics and firefighters. Choose from weekday or weekend formats between September and November. Build your resume and keep your skills current with this Red Cross-certified course.

If you’re preparing to apply to Calgary or Edmonton Fire Department, you already know how competitive the process can be. These fire services are among the most respected in the country, and applicants are expected to show up well-prepared—both physically and professionally. One key credential that helps you stand out? Advanced First Aid (AFA) certification.
At Delta Emergency Support Training, located in Calgary, Alberta, we offer Advanced First Aid recertification courses taught by experienced paramedics and firefighters. Whether you’re updating your qualifications or preparing for pre-employment testing, our Red Cross-certified courses are designed to build the skills today’s fire services expect.
Why Advanced First Aid Is So Important
Advanced First Aid is not just a requirement—it’s a critical part of the emergency toolkit for any aspiring firefighter. It equips you to respond effectively to medical emergencies in both isolated and urban environments.
Departments like Calgary and Edmonton Fire often look for applicants who:
Hold a current Red Cross Advanced First Aid certification
Can demonstrate hands-on medical response experience
Have up-to-date knowledge of patient care, trauma management, and scene safety
Even if you've already taken the course before, recertifying ensures your skills meet current standards. Red Cross AFA certificates are valid for three years, but many departments recommend recertifying every two years to stay sharp and competitive.
What You’ll Learn in the Red Cross AFA Recertification Course
Our Advanced First Aid recertification course follows the Canadian Red Cross curriculum, providing practical training rooted in the latest national guidelines. Course content includes:
Scene assessment and patient surveys (primary and secondary)
Airway management and oxygen therapy
CPR Level C and AED usage
Treatment of traumatic injuries: spinal, chest, head, abdominal, and limb injuries
Medical emergencies: diabetic crises, seizures, allergic reactions, strokes, and more
Environmental emergencies: heat-related illnesses, cold exposure, poisonings
Multiple casualty management and triage
Legal considerations and documentation
Assisting with emergency medications
This course is designed for individuals who need advanced-level first aid for employment, volunteer service, or career advancement in emergency services.
Course Formats That Fit Your Schedule
We understand that many of our students are working professionals or balancing training, volunteering, and job applications. That’s why we offer two course delivery options:
Weekday Intensive Option
Monday to Friday
09:00 to 18:00
Complete your recertification in just one week
Weekend Format
Friday evenings 18:00 to 22:00
Saturdays and Sundays 09:00 to 18:00
Spread across multiple weekends
Both formats offer full Red Cross certification and the same high-quality instruction led by frontline emergency responders.
Course Dates: September to November
We offer recurring Advanced First Aid recertification courses from September through November. All upcoming course dates are posted on our registration page. Early registration is recommended as seats fill quickly—especially ahead of common firefighter application and testing periods.
Build Your Resume While You Prepare
Recertifying in Advanced First Aid is one of many ways to strengthen your application. Other ways to build your fire service resume include:
Volunteering with local Search and Rescue, Fire Cadet, or community safety programs
Completing relevant certifications like NFPA 1001, ICS-100, Wildland Firefighter Training, or CPR Instructor
Gaining experience in related jobs such as lifeguarding, EMS, security, or industrial safety
Preparing for CPAT or A-PREP testing
Ready to Take the Next Step?
Whether you’re applying this year or planning ahead, Delta Emergency Support Training in Calgary is here to help you meet your goals. Our Advanced First Aid recertification courses are built to help aspiring firefighters like you gain the knowledge, confidence, and credentials you need to succeed.
Spots are limited and fill quickly as fire recruitment ramps up each fall.
Cultural Differences and Language Barriers: A First Responder’s Guide to Respectful, Effective Care
Emergency calls often involve diverse cultures and languages. First responders face unique challenges in communication and cultural understanding that can impact patient care. This guide offers essential strategies to navigate language barriers respectfully, recognize cultural differences, and deliver compassionate, effective emergency care. Improve your skills and confidence with our practical tips.
As a first responder, you’re trained to act swiftly and decisively—but every emergency call is unique. One of the most important factors that can affect your response is cultural diversity. From language barriers to differing customs, beliefs, and expectations, understanding and respecting cultural differences is essential to providing compassionate and effective emergency care.
This guide explores common challenges you may encounter and offers practical strategies for navigating language barriers and cultural nuances with respect and professionalism.
1. Recognizing the Impact of Cultural Differences
Culture shapes how people perceive health, illness, pain, and emergency care. For example:
Some cultures prefer family involvement in medical decisions, while others expect individual autonomy.
Eye contact, physical touch, and personal space norms vary widely.
Certain gestures, language, or uniforms may be misunderstood or viewed differently.
Religious or cultural practices may affect treatment preferences (e.g., gender considerations, modesty, dietary restrictions).
Being aware of these factors helps you approach each situation with sensitivity.
2. Language Barriers: Challenges and Solutions
Language differences can hinder communication, delay treatment, or cause misunderstandings. Common challenges include:
Difficulty understanding symptoms or medical history.
Inability to explain procedures or gain informed consent.
Stress and fear amplified by lack of clear communication.
How to Overcome Language Barriers:
Use clear, simple language. Avoid jargon, speak slowly, and use short sentences.
Use non-verbal communication. Gestures, facial expressions, and demonstration can help convey meaning.
Employ translation tools such as phone interpretation services or translation apps if available.
Involve bilingual family members or community members cautiously—ensure they understand medical confidentiality.
Be patient and give time for responses. Don’t rush; encourage questions.
3. Showing Respect for Cultural Beliefs and Practices
Respect is the foundation of effective care. To show respect:
Ask permission before touching the patient—especially with cultural or religious sensitivities.
Respect privacy and modesty. Use same-gender responders when possible.
Be mindful of dietary or medical restrictions related to religion or culture.
Avoid assumptions or stereotypes. Every individual is unique, even within cultural groups.
Listen actively and validate concerns. Even if you can’t fully accommodate, acknowledging beliefs builds trust.
4. Practical Tips for First Responders
Prepare ahead: Learn about cultural demographics in your service area and common practices.
Use cultural competence training to build awareness and skills.
Maintain a calm and compassionate demeanor. Non-verbal cues can ease tension.
Clarify understanding: Repeat key information back to ensure comprehension.
Document any cultural considerations relevant to treatment or care.
Be adaptable: Some situations require flexibility while maintaining safety and protocol.
5. The Role of Empathy and Patience
Responding with empathy can bridge gaps where words fall short. Simple acts—like a reassuring tone, gentle touch (when appropriate), or attentive listening—can make a huge difference. Patience helps you navigate confusion or fear, especially when communication is tough.
6. When to Call for Assistance
If language barriers severely impair communication and immediate care decisions, or if cultural concerns affect treatment, don’t hesitate to:
Request professional medical interpreters.
Consult supervisors or cultural liaison officers if available.
Involve community health workers who understand cultural contexts.
7. Why Cultural Competence Matters
Respectful, culturally aware care leads to:
Better patient cooperation and outcomes.
Reduced stress and fear for patients and families.
Stronger community trust in emergency services.
Enhanced professional confidence and effectiveness.
Final Thoughts
Every call is more than just a medical emergency—it’s a human moment shaped by diverse stories and backgrounds. As a first responder, your cultural sensitivity and ability to navigate language barriers not only save lives but honor the dignity of every individual you serve.
By embracing respect, patience, and continuous learning, you make your emergency care truly inclusive and effective.

Advanced First Aid for Dog Bites: A Firefighter & EMS Responder’s Guide
Dog bites demand swift, skilled care from first responders. Our Red Cross Advanced First Aid & EMR course trains firefighters and EMS personnel in critical skills—from scene safety to wound management and emotional support. Learn to confidently handle dog bite emergencies and more with hands-on training that prepares you for real-world situations.

Dog bites are common and can range from minor injuries to life-threatening wounds. As an advanced first aider—often a firefighter or EMS responder—you’re frequently the first healthcare professional on scene. Your response can significantly impact the victim’s recovery, infection risk, and emotional well-being.
This guide provides an in-depth approach to managing dog bites, emphasizing scene safety, injury treatment, wound care, and patient support with your advanced training and EMS protocols in mind.
1. Scene Safety: Your First Priority
As firefighters and EMS responders, scene safety is non-negotiable. Before attending to the victim:
Ensure the dog is secured or removed from the scene.
Coordinate with police or animal control if the dog is aggressive or unrestrained.
Use situational awareness to spot hazards like traffic, bystanders, or multiple animals.
Wear appropriate personal protective equipment (PPE), including gloves and eye protection.
Brief your team on potential risks and establish safe zones.
Remember: your safety is critical. You cannot assist others if injured.
2. Rapid Assessment of Injury and Vital Signs
Upon approaching the patient:
Perform a quick but thorough assessment:
Identify bite locations, wound depth, and bleeding severity.
Assess airway, breathing, circulation (ABCs), especially if bites are on the face or neck.
Look for signs of shock or distress.
Evaluate distal circulation and neurological status if extremities are involved.
Prepare for rapid transport if injury severity or patient condition warrants.
3. Managing Bleeding and Stabilizing the Wound
Apply direct pressure with sterile dressings to control bleeding.
Elevate the injured limb if it does not exacerbate pain or injury.
Use hemostatic dressings or pressure bandages if standard methods fail and bleeding is life-threatening.
Avoid closing wounds—leave that to hospital staff.
If bones are exposed or fractures suspected, immobilize the limb appropriately.
4. Cleaning and Infection Control in the Field
Use available clean water or saline to gently irrigate wounds, flushing away debris and contaminants.
Avoid harsh scrubbing to prevent tissue damage.
Apply sterile, non-adherent dressings loosely to reduce infection risk.
Maintain standard precautions—dog bites pose high infection risk from mixed bacterial flora.
5. Addressing Emotional Trauma and Providing Reassurance
Understand that dog bite victims, especially children, often experience intense fear or shock.
Use your training in crisis intervention to calm and reassure patients and caregivers.
Maintain eye contact, speak in a calm voice, and explain procedures as you go.
If a child is involved, engage a parent or guardian for comfort, and use age-appropriate communication.
6. Differences in Treatment: Adults vs. Children
Children’s smaller anatomy and thinner skin increase risk of deeper injuries. Facial and neck bites require immediate airway assessment.
Children may be less cooperative; use gentle distraction and clear, comforting language.
Monitor for airway obstruction and signs of respiratory distress in both adults and children, but be especially vigilant with pediatric patients.
Adults may underreport pain or injury severity—conduct thorough assessments.
7. When to Activate Advanced Care and Transport
Immediately initiate rapid transport and notify receiving facility if:
Bleeding is uncontrolled or severe
Patient shows signs of shock or compromised airway
Wounds involve face, neck, hands, or joints
Suspected fractures or nerve injuries are present
Signs of infection or systemic illness are evident
Pediatric patients require specialized care
Coordinate transport with EMS and hospital staff for optimal continuity of care.
8. Documentation and Reporting
Record detailed information on the bite incident, dog description, and circumstances.
Document patient’s vital signs, treatment provided, and response to interventions.
Share info with receiving medical personnel and law enforcement/animal control as needed.
Proper documentation supports patient care and public safety.
9. Post-Incident Patient Education
Advise victims to seek follow-up care for tetanus boosters, rabies prophylaxis, and wound management.
Educate on signs of infection to watch for at home.
Stress importance of reporting dog bites to local health authorities.
10. Summary for Firefighters & EMS Responders
StepKey ActionsScene SafetySecure environment, coordinate with animal control, PPE use.AssessmentRapid injury and ABC evaluation, assess for shock.Bleeding ControlDirect pressure, elevation, hemostatic dressings if needed.Wound CareGentle irrigation, sterile dressing, infection prevention.Emotional SupportCalm communication, involve caregivers, monitor for shock.Pediatric CareAirway vigilance, gentle approach, watch for distress signs.TransportRapid evacuation for severe cases, notify hospital.DocumentationAccurate records for care and reporting.
As a firefighter or EMS advanced first aider, your training equips you to manage the complex needs of dog bite victims with confidence and professionalism. Your timely intervention saves lives, prevents complications, and supports recovery—physically and emotionally.

Bee Stings & EpiPens: A Babysitter’s Guide to Life-Threatening Allergies
Bee stings can turn serious fast—especially if the child you’re babysitting has allergies. This guide teaches babysitters how to spot anaphylaxis, safely use an EpiPen, and stay calm in emergencies. At Delta Emergency Support Training, our Red Cross Babysitter Course includes hands-on EpiPen and first aid training—because when you’re babysitting, knowing what to do makes all the difference.
By Delta Emergency Support Training | In Partnership with Red Cross Babysitter Training

When you’re babysitting, you’re responsible for more than just keeping kids entertained—you’re also their first line of defense in an emergency. One common but serious situation babysitters may face is a bee sting that leads to a severe allergic reaction, called anaphylaxis.
This guide will help you understand how to recognize an allergic reaction, treat bee stings, and confidently use an EpiPen—a life-saving tool in a high-stress moment.
🐝 Bee Stings: First Aid Basics
Most bee stings are just a painful annoyance—but in children with allergies, they can be dangerous. Here’s what to do right away:
🩹 If a Child is Stung by a Bee:
Stay calm and help the child stay still.
Remove the stinger quickly—scrape it out with a flat edge like a credit card.
🚫 Do not use tweezers or squeeze the stinger—it can inject more venom.Wash the area with soap and water.
Apply a cold compress to reduce swelling and discomfort.
Watch for signs of an allergic reaction over the next 15–30 minutes.
🚨 What Is Anaphylaxis?
Anaphylaxis is a severe, fast-moving allergic reaction that can affect breathing, circulation, and other body systems. It’s a medical emergency that requires immediate action.
⚠️ Common Triggers Include:
Bee or wasp stings
Peanuts, nuts, shellfish, milk, eggs
Medications
Latex
⚠️ Signs of Anaphylaxis
Watch for one or more of these symptoms, especially if they appear within minutes of a sting or exposure to a known allergen:
Trouble breathing (wheezing, coughing, gasping)
Swelling of the lips, face, throat, or tongue
🔴 Tongue swelling is one of the most dangerous symptoms—it can block the airway
Hives, redness, or itching of the skin
Vomiting, diarrhea, or severe stomach cramps
Dizziness, fainting, or confusion
Child says they feel like something bad is happening
🧠 Important: Anaphylaxis can come in waves. A child might improve briefly, then get worse again. Never delay treatment.
💉 How to Use an EpiPen (Epinephrine Auto-Injector)
If the child has a known allergy or develops symptoms of anaphylaxis after a sting or exposure:
✅ Step-by-Step: EpiPen Use
Use the EpiPen immediately.
Early epinephrine is the best way to stop the reaction.Call 9-1-1 immediately after using the EpiPen.
Even if the child looks better, they may need multiple doses. EMS must assess them.Administer the EpiPen:
Remove the blue safety cap ("blue to the sky").
Hold the pen in your fist, orange tip pointing down. (“orange to the thigh”
Push the orange tip firmly into the outer thigh (can go through clothing).
Hold for 10 seconds.
Remove and massage the injection site for 30 seconds.
Stay with the child and monitor their condition.
If they’re having trouble breathing, keep them upright.
If unconscious or vomiting, turn them on their side to protect the airway.
Do not reuse the EpiPen.
It is a one-time-use device. If symptoms return and a second pen is available.
👶 Babysitter Safety & Preparedness Tips
✅ Ask parents about allergies before they leave.
✅ Know where the EpiPen is and check the expiry date.
✅ Review instructions with parents before they leave.
✅ Always call 911 after using an EpiPen—don’t wait.
✅ Stay calm—you’ve been trained, and your response can save a life.
🎓 EpiPen Training Is Included in Our Babysitter Course!
At Delta Emergency Support Training, we don’t just teach games and diaper changes—we teach lifesaving skills. Our Red Cross Babysitting Course includes a first aid component, where babysitters learn how to:
Recognize anaphylaxis
Use an EpiPen correctly and confidently
Respond to bee stings, food allergies, and medical emergencies
Stay calm under pressure and take control of the situation
We train babysitters to be ready—not just helpful.
🧠 After the Emergency
Once EMS has arrived or the parents return:
Tell them exactly what happened and when you used the EpiPen
Take time to debrief with an adult or your own parent—emergencies can be stressful
✅ Final Reminders
Always ask about allergies
Always locate the EpiPen
Always call 911 after EpiPen use
Always take every reaction seriously—even “mild” ones can become severe fast
📞 Want to Learn More?
Ready to become a confident, Red Cross–trained babysitter?
Sign up for our next Babysitting & First Aid Course at Delta Emergency Support Training.
Because you’re more than a babysitter—you’re someone’s hero in the making.

The Critical Role of BSI: Protecting Yourself First as a First Responder
Body Substance Isolation (BSI) is more than just wearing gloves—it's a life-saving habit for every first responder. From bloodborne pathogens to airborne illnesses, BSI protects you from invisible threats on every call. At Delta Emergency Support Training, we emphasize BSI in every scenario because your safety comes first. Learn what PPE to wear, how to use it, and why BSI is essential in every emergency situation.
When responding to emergencies, your focus is naturally on saving others. But as a first responder, your own safety must come first. That’s where Body Substance Isolation (BSI) comes in—a fundamental part of emergency medical care that often gets overlooked, especially by new responders.

BSI is more than just gloves—it's a mindset, a habit, and a crucial layer of protection against invisible but dangerous threats like bloodborne pathogens, bacteria, and bodily fluids.
At Delta Emergency Support Training, we emphasize BSI in every scenario because if you’re not safe, you can’t help anyone else.
🚨 What Is BSI?
Body Substance Isolation (BSI) is a set of precautions used to prevent contact with potentially infectious body fluids. This includes blood, vomit, saliva, urine, feces, and respiratory secretions.
BSI is part of Standard Precautions, a cornerstone of infection control recommended by health authorities and the Canadian Red Cross. BSI assumes that anyone could be carrying an infectious disease, whether or not symptoms are visible.
🦠 Diseases & Infections That Can Be Transmitted
Here are some of the infections you risk exposure to during first aid or emergency response:
Bloodborne Pathogens
Hepatitis B (HBV): Can survive in dried blood for up to a week
Hepatitis C (HCV): No vaccine, often leads to chronic liver issues
HIV/AIDS: Though lower risk, exposure via blood or sexual fluids can occur
Airborne & Droplet Diseases
COVID-19
Influenza
Tuberculosis
Contact-Transmissible Infections
MRSA (Methicillin-resistant Staphylococcus aureus)
Norovirus
C. difficile
These diseases can be transmitted through:
Cuts or broken skin
Mucous membranes (eyes, mouth)
Inhalation (coughs, sneezes)
Contaminated surfaces or medical equipment
🧰 What BSI Gear to Use—and When
🔹 Gloves (Always)
Used on every call. Always don gloves before patient contact, even when no fluids are visible. Use nitrile gloves for latex-sensitive patients and for better chemical resistance.
🔹 Eye Protection & Face Shield
For any situation involving splash risk (e.g., severe bleeding, childbirth, vomiting). Goggles or a full face shield help protect your mucous membranes from exposure.
🔹 Gowns/Aprons
For major trauma, childbirth, or mass-casualty events with heavy blood loss or body fluid exposure.
🔹 Masks (Surgical/N95)
Surgical Mask: For droplet protection during coughing, vomiting, or respiratory distress.
N95 Respirator: Use during airborne illness calls (e.g., suspected TB, COVID-19) and when performing aerosol-generating procedures like CPR or suctioning.
🧠 Scenario-Based BSI Examples
Scenario 1: Motor Vehicle Collision
Patient bleeding heavily from the scalp and face.
You wear: Gloves, goggles/face shield, gown if time permits.
Tip: Be cautious kneeling near broken glass or on spilled fuel.
Scenario 2: Unconscious Overdose
Risk of vomit, saliva, or needle sticks.
You wear: Gloves, mask, eye protection.
Tip: Never blindly reach into pockets or under the person—use tools and visual checks.
Scenario 3: Respiratory Distress in a Child
Coughing, drooling, rapid breathing.
You wear: Gloves, surgical or N95 mask, eye protection.
Tip: Keep your face out of the line of the patient’s airway.
Scenario 4: Diabetic Emergency with Vomiting
Patient is responsive but disoriented and vomiting.
You wear: Gloves, eye protection.
Tip: Position yourself behind or to the side—not in front—when managing vomiting to avoid splash.
⚠️ Hidden Dangers: BSI Tips from the Field
🔸 Where You Put Your Bag Matters
Keep gear off the ground and away from pools of fluid.
Use tarps, bags with plastic bottoms, or place equipment on elevated surfaces like a bench or chair.
🔸 Watch Where You Kneel
Glass, needles, body fluids, and animal waste can all be on the ground.
Wear durable, washable uniforms and clean gear after every shift.
🔸 Double Glove for Safety
In high-risk situations (e.g., trauma, unknown environment), wear two pairs of gloves and peel the outer layer off after initial contact.
🔸 Avoid Touching Your Face
It's a reflex, but it’s dangerous. You could unknowingly transfer pathogens to your eyes, nose, or mouth.
🔸 Proper Doffing Technique
Removing PPE incorrectly can contaminate you. Practice safe removal: gloves off first, then goggles, then gown, then mask.
🔸 Use a Buddy System
Have a partner check you for contamination before you remove gear or re-enter a clean zone.
🧽 After the Call: BSI Doesn’t End on Scene
Disinfect your equipment: Stethoscopes, trauma shears, radios, pens, and patient monitors all carry pathogens.
Change uniforms: Always bring an extra change of clothing. Launder contaminated items ASAP.
Hand hygiene: Wash thoroughly or use alcohol-based sanitizer (60–90%) after glove removal—even if your hands “feel clean.”
👩⚕️ Why BSI Isn’t Optional—It’s Life-Saving
BSI isn’t about paranoia—it’s about routine protection in an unpredictable world. Even minor exposures can result in career-altering infections, transmission to loved ones, or weeks of medical follow-up.
At Delta Emergency Support Training, we train first responders to treat every scene like it matters—because it does. From our Standard First Aid and Advanced First Aid/EMR courses to BLS and professional response training, we focus on real-world practices that protect you and your patients.
✅ Final Reminder
Always wear gloves.
Always assess the scene for fluid or sharp hazards.
Always treat every person as potentially infectious.
🩺 You’re no help to anyone if you’re not protected. BSI is not just protocol—it’s your first layer of survival on every call.

Venomous Snake Bites in Canada: What You Need to Know & Do - First Aid Edition
Venomous snake bites are rare in Canada—but when they happen, knowing how to respond is crucial. From identifying rattlesnakes to administering Red Cross-approved first aid, this guide covers everything you need to stay safe outdoors.

Canada isn’t typically known for dangerous reptiles, but if you hike in BC, camp in Ontario, or explore the Prairies, you might just encounter one of our country’s three venomous snakes. While bites are rare, understanding how to identify venomous snakes, how to respond safely, and what first aid steps to take is essential.
At Delta Emergency Support Training, we prepare Canadians for real-life emergencies—including those that happen far from a hospital. Here’s your complete guide to snake bite prevention, identification, and treatment.
🇨🇦 Venomous Snakes in Canada
Canada is home to three native venomous snake species, all of which are rattlesnakes:
1. Eastern Massasauga Rattlesnake
Location: Ontario (Bruce Peninsula, Georgian Bay, Muskoka)
Canada’s only venomous snake in the East
Generally shy and avoids humans
2. Prairie Rattlesnake
Location: Southern Alberta and parts of Saskatchewan
Found in dry grasslands and badlands
More active in warmer months
3. Western Rattlesnake
Location: Southern British Columbia, especially the Okanagan Valley
Prefers rocky terrain and dry slopes
🐾 How to Tell if a Snake is Venomous
While identifying a snake in the wild can be difficult, here are common traits of venomous rattlesnakes in Canada:
Triangular-shaped head
Vertical (slit-like) pupils
Thick body with blotchy patterns
A rattle on the tail (but sometimes broken or not used)
Shaking or buzzing sound when threatened
Be cautious—some non-venomous snakes mimic rattlers by vibrating their tails in leaves.
🩹 First Aid for Snake Bites
All suspected snake bites should be treated as medical emergencies, even if the snake isn’t identified.
✅ What to Do Immediately
Move the person to safety (away from the snake).
Keep them calm—movement and panic can increase venom circulation.
Call 911 immediately.
Remove tight items like rings, bracelets, or watches from the affected limb.
Have them lie down with the bitten limb at or slightly below heart level.
Apply a clean, dry dressing to the bite.
Mark the edge of swelling with a pen and track it over time.
❌ What NOT to Do
Do not cut the wound or try to suck out the venom.
Do not apply a tourniquet.
Do not apply ice or immerse the bite in water.
Do not give the person alcohol or caffeine.
Do not attempt to capture or kill the snake.
🧬 What Does Snake Venom Do?
Rattlesnake venom is a hemotoxin, which means it can damage tissue, affect blood clotting, and cause intense swelling.
Symptoms may include:
Severe pain at the bite site
Rapid swelling or bruising
Dizziness or nausea
Weakness or fainting
Difficulty breathing (rare, but serious)
In rare cases, snake bites can lead to shock or even death if untreated.
🗺️ Prevention Tips by Region
Ontario (Massasauga)
Stay on designated trails
Avoid tall grass and rocky ledges
Wear boots and long pants
Listen for rattling sounds
Alberta & Saskatchewan (Prairie Rattlesnake)
Step carefully in dry, grassy areas
Keep pets on a leash
Watch where you sit or place your hands
British Columbia (Western Rattlesnake)
Avoid rocky hillsides and dry scrub
Don’t walk barefoot in wild areas
Use a flashlight when hiking at night
General Prevention:
Do not approach or handle any snake
Keep food sealed and your campsite clean
Hike with a buddy
Stay alert and educate children on snake safety
🧠 Final Takeaway
Although snake bites in Canada are rare, they do happen—and when they do, quick, calm, and correct first aid can make all the difference. Our native venomous snakes are not aggressive, and most bites occur when they are accidentally stepped on or provoked.
Knowing the signs of a venomous snake, understanding how to avoid dangerous situations, and being ready to act can help keep you—and others—safe.
At Delta Emergency Support Training, we teach first aid skills that prepare you for real emergencies, whether in your home, workplace, or the backcountry. Our courses include Standard First Aid, Advanced First Aid/EMR, and Basic Life Support.
🩺 Ready to be prepared for anything? Train with us and gain the confidence to respond.

Check, Call, Care: The First Aid Formula That Saves Lives
Emergencies happen fast. Learn how to act quickly and safely using the Red Cross Check, Call, Care model. From assessing scene safety to checking ABCs and calling 911, this guide breaks it down step-by-step.
A Red Cross-aligned guide to recognizing and responding to medical emergencies with clarity and confidence
In a real emergency, adrenaline kicks in. You may feel frozen or overwhelmed—but a simple, proven three-step approach helps cut through the chaos:
🟥 Check
🟧 Call
🟩 Care
This method, taught by the Canadian Red Cross, provides a clear framework that anyone—whether trained in basic or advanced first aid—can follow. At Delta Emergency Support Training, we use this model to help our learners build real-world readiness in life’s most urgent moments.
Let’s break down each step, including when and how to act, what to say to 911, and how to begin providing lifesaving care.
🔴 STEP 1: CHECK
Scene Safety Comes First—Always
Before you rush in to help, pause and assess the scene. Why? Because your safety matters, too.
Ask yourself:
Is the scene safe for me?
What hazards might be present? (e.g., live wires, traffic, aggressive individuals, hazardous materials)
What happened here? Can I tell how the person got injured?
Are there other people hurt? Do I need more help?
You can't help anyone if you become the second victim. Scene safety isn't optional—it’s essential.
Example: If someone has collapsed on the sidewalk near a construction site, your first thought might be “Help them!” But first, ask: Could there be falling debris? Is it safe to approach?
Check the Person
Once the scene is safe, approach the person from the side and check for responsiveness.
Start by speaking to them:
“Hi, can you hear me?”
“My name is ____. I’m trained in first aid. I’m here to help.”
No response? Try physical stimulation:
Tap them firmly on the shoulder and ask, “Are you okay?”
If they do not respond to voice or touch, they are unconscious.
At this point, it's time to move to step two: CALL 911.
🟧 STEP 2: CALL
Calling for Help: Alone or With Others
Your next move depends on your situation.
If you’re alone:
For an unresponsive person, call 911 immediately before starting care.
If you don’t have a phone and you can safely move the person, take them with you. If not, leave briefly to call for help.
If someone is with you:
Assign them directly: “You, in the blue shirt—call 911 now and come back to tell me what they say.”
This direct command avoids the bystander effect and ensures help is on the way.
What to Tell the Dispatcher
Stay calm and provide the following:
Your exact location (address, landmarks, GPS if possible)
What happened (e.g., “A person collapsed and is unresponsive.”)
The condition of the person (conscious? breathing?)
Any care you are providing (e.g., “I’m starting CPR.”)
Your phone number in case the call drops
Follow their instructions and do not hang up until told to.
🟩 STEP 3: CARE
Now it’s time to help.
Check ABCs – Airway, Breathing, Circulation
Kneel beside the person. Begin your primary assessment:
🔹 Airway
If the person is unresponsive, assume their airway could be blocked.
Perform a head-tilt, chin-lift:
Place one hand on the forehead, two fingers under the chin, and gently tilt the head back.
This opens the airway unless a spinal injury is suspected.
🔹 Breathing
Place your ear close to their mouth and nose, facing their feet.
Look for chest movement, listen for breath sounds, and feel for breath on your cheek.
Check for 5 to 10 seconds.
If they are not breathing normally, prepare to begin CPR.
🔹 Circulation
As you check breathing, scan the body for major bleeding.
Look under the body if safe to do so.
Severe, visible bleeding must be addressed immediately—use direct pressure with gloved hands or a clean dressing.
Provide Appropriate Care Based on the Assessment
Depending on what you discover:
If unresponsive and not breathing:
Start CPR (30 compressions, 2 breaths) immediately.If unresponsive but breathing normally:
Place the person in the recovery position to keep their airway clear and continue to monitor them.If responsive and bleeding heavily:
Apply direct pressure, use a dressing if available, and keep them calm and still.If a spinal injury is suspected:
Do not move the person unless they are in immediate danger. Support their head and neck in the position foundand wait for EMS.
🔁 Continue to Monitor and Support
Stay with the person until EMS arrives. Provide emotional support if they’re conscious. If their condition changes, recheck ABCs and adjust your care.
🧠 Final Thoughts
"Check, Call, Care" isn’t just a slogan—it’s a lifesaving sequence that gives ordinary people the power to respond to emergencies with clarity and confidence.
At Delta Emergency Support Training, we teach this model as the foundation of all our Red Cross-aligned courses—from Standard First Aid and CPR/AED Level C to Advanced First Aid / EMR.
📣 Take Action
🩺 Ready to learn more than just theory?
🧰 Want real skills from experienced paramedics and certified Red Cross instructors?
Enroll in a Standard First Aid course with Delta Emergency Support Training and be prepared to step up—safely, smartly, and confidently.
The Most Overlooked First Aid Skills—And Why They Matter in Real Emergencies
First aid isn’t just CPR and bandages. Learn why overlooked skills like scene assessment, gaining consent, and offering emotional support are often the most important actions in an emergency—and how they can save lives before you even touch a patient.
It's not just about CPR and bandages—it's about what you do before you even touch the patient.

When people think of first aid, they often imagine chest compressions, gauze pads, or applying a splint. And yes—those technical skills matter. But the truth is, some of the most important first aid actions happen before any physical care begins. Whether you're a parent, a coach, a bystander, or someone with formal training, these lesser-known skills can make all the difference in how well an emergency is handled.
At Delta Emergency Support Training, we teach more than just the hands-on techniques. We train you to think, assess, and respond with confidence, clarity, and care—because the decisions you make in the first 30 seconds often shape the entire outcome.
Let’s talk about the three most overlooked first aid skills—and why every responder, no matter their experience level, should master them.
1. 🧠 Scene Assessment: The First Skill That Saves Lives
Before you rush to help, you need to stop, look, and listen.
Scene assessment is the skill of surveying your environment quickly and safely. It's the very first step in the Check, Call, Care model taught by the Canadian Red Cross, and it can prevent you from becoming the next casualty.
Why it matters:
Hazards like live wires, traffic, fire, or aggressive animals can put you in danger.
Understanding what happened helps determine what kind of help the person may need (e.g., fall, electrocution, overdose).
Identifying how many people are involved helps you plan your next steps.
What to look for:
Is it safe for me to enter?
What caused the injury or illness?
How many people are hurt?
Are there bystanders who can help?
Real-world example:
A lineman falls from a bucket after being electrocuted. Before you touch him, you need to consider: Is the power line still live? Is there a risk of arc flash or fire? Should you wait for the utility crew? Your instinct to help is noble—but your ability to pause and assess might be what truly saves lives.
2. 🗣️ Consent: The Ethical and Legal Foundation of First Aid
You might be surprised to learn that you can't legally just walk up and start treating someone—even if they're bleeding or unconscious. Consent is critical. It protects the rights of the injured person and the legal liability of the responder.
Types of consent:
Expressed consent: The person says yes or nods when you ask, “Can I help you?”
Implied consent: If the person is unconscious, confused, or unable to respond—and a reasonable person would accept help—you are legally allowed to proceed.
Why it matters:
It respects the autonomy and dignity of the patient.
It builds trust between you and the injured person.
It protects you under Canadian Good Samaritan laws.
Teaching tip: Always introduce yourself with your level of training:
“Hi, my name is Alex. I’m trained in first aid. Can I help you?”
In a crisis, this calm, respectful approach can lower panic and allow better cooperation.
3. 🤝 Emotional Support: The Human Side of First Response
First aid isn’t just physical. Emergencies can be terrifying, disorienting, and traumatic—for both the injured person and those around them. Your ability to provide calm, emotional reassurance is just as important as your ability to stop bleeding.
What emotional support looks like:
Making eye contact and speaking in a calm, steady voice.
Acknowledging the person’s fear: “I know this is scary, but you’re not alone. I’m here to help.”
Guiding them through what’s happening: “I’m checking your breathing. Help is on the way.”
Why it matters:
It reduces panic and shock, which improves outcomes.
It builds trust between the patient and responder.
It helps you stay calm and focused.
Bonus: This is especially important with children, elderly individuals, or people with cognitive or language barriers. A calm presence can make all the difference.
💡 So Why Are These Skills Overlooked?
Because they aren’t flashy. They’re not on TV dramas. They don’t involve gadgets or gear. But these are the moments that create safety, consent, and connection. These are the skills that turn someone with training into someone truly effective.
👩⚕️ Want to Learn These Skills—and So Much More?
At Delta Emergency Support Training, we believe first aid training should be real, relatable, and relevant. Whether you're taking Standard First Aid, Advanced First Aid / EMR, or Basic Life Support, you’ll gain both the clinical and human skills needed to respond with confidence.
We train with current Red Cross standards, and our instructors include experienced Advanced Care Paramedics who share what actually happens in the field.
🧭 Final Takeaway
It’s not just what you do—it’s how you do it.
Scene safety, consent, and emotional support might not be the first skills you think of—but they’re often the first ones that count.
📅 Ready to learn? Register for a course today and start your journey as a confident, capable responder.

When the Air Turns Hazardous: Protecting Families During Canada’s 2025 Wildfire Smoke Crisis
Canada’s 2025 wildfire season has brought hazardous air—and with it, serious health risks. This guide equips families and caregivers with practical advice: from setting up a clean room and using N95 masks to monitoring air quality and recognizing smoke-induced illness.

Wildfire season in Canada has been worsened by heat, dry conditions, and climate change—with over 1,985 active firesburning nearly 3.9 million hectares as of June 16, 2025. The result? Widespread "very unhealthy" to "hazardous" air across provinces and even beyond—affecting children, people with respiratory conditions, seniors, and other vulnerable groups.
Understanding Canada’s Air Quality Health Index (AQHI)
In Canada, we don’t use the U.S.-style AQI. Instead, we use the Air Quality Health Index (AQHI) to tell us how the air we breathe affects our health on a scale from 1 to 10+, with higher numbers indicating greater health risks.
How the AQHI Works
AQHI ValueHealth RiskAt-Risk PopulationGeneral Population1–3LowIdeal conditions for outdoor activities.Ideal conditions for outdoor activities.4–6ModerateConsider reducing or rescheduling strenuous activities outdoors.No need to modify usual activities unless symptoms occur.7–10HighReduce or avoid strenuous activities outdoors.Consider reducing strenuous outdoor activity.10+Very HighAvoid all physical outdoor activity. Stay indoors.Reduce or reschedule strenuous outdoor activity.
At-Risk Populations include:
Children and infants
Seniors
People with asthma, heart conditions, or other chronic illnesses
Pregnant individuals
🌫️ What Does This Mean for Families?
1–3 (Low): Great time for park visits, walks, or outdoor play.
4–6 (Moderate): Children and people with asthma should limit high-energy outdoor activities.
7–10 (High): Everyone—especially vulnerable groups—should stay indoors and use air filtration.
10+ (Very High): Outdoor exposure can cause serious health effects. Stay inside, seal your home, and consider relocating temporarily if the smoke persists.
📲 Where to Check AQHI
Stay informed using trusted Canadian sources:
🔗 Environment Canada – AQHI Main Page
🔗 AQHI by Province (select your region)
Mobile Apps: WeatherCAN, AQHI Canada, or your local weather app
🌫️ Why Wildfire Smoke is Dangerous
Fine Particulate Matter (PM2.5):
These tiny particles penetrate deep into the lungs and bloodstream.
In 2025, several areas recorded PM2.5 levels over 150 µg/m³—more than 6x the WHO's safe 24-hour limit.
US studies confirm that smoke PM2.5 from wildfires can be up to 10x more harmful than typical pollution.
Health Effects:
Exposure can cause:Immediate symptoms: coughing, wheezing, eye irritation, chest tightness.
Aggravation of asthma, COPD, bronchitis, and heart disease.
Long-term risks: strokes, heart attacks, developmental issues in children, pregnancy complications.
Canada’s Sharp Increase:
In Prairie provinces, air quality reached “Unhealthy to Very Unhealthy” levels in early.
Cities like Toronto, Ottawa, and Montreal had some of the worst AQIs globally during June 5–6.
👶 Who’s Most at Risk?
Infants and young children with developing lungs.
Seniors, particularly those with cardiovascular/respiratory conditions.
Individuals with asthma, COPD, heart disease, or compromised immunity.
Pregnant women - smoke exposure has been linked to preterm births.
Those in low-income or remote communities with limited access to clean air resources.
🛡️ How to Protect Your Family
1. Stay Inside & Seal Your Home
Keep doors and windows closed; run HVAC on recirculation.
Create a DIY clean room by sealing off one area and running a HEPA filter air purifier.
2. Limit Outdoor Exposure
Avoid strenuous outdoor activity.
For necessary outdoor time, wear a properly fitted N95 mask—cloth masks don't protect against PM2.5
3. Monitor Air Quality
Use apps or websites like FireSmoke.ca, AirNow, or AQI.in.
Follow local advisories—on very poor days, avoid outdoor time completely
4. Stay Hydrated & Medically Prepared
Children and older adults should drink water regularly.
Keep inhalers, medications, and emergency contacts handy.
5. Safe Indoor Air Strategies
Continue using air purifiers, keep HVAC maintenance current, and avoid indoor activities that pollute air (like smoking or burning candles).
6. Know the Signs of Smoke-Related Illness
Be alert for:
Persistent coughing, wheezing, shortness of breath
Chest pain, dizziness, fatigue
Severe symptoms like bluish lips, confusion, or altered consciousness – seek medical help immediately.
7. When to Seek Help
Call emergency services if someone experiences:
Trouble breathing or chest pain
Severe allergic reactions (e.g. from ash or irritants)
Symptoms of stroke or heart attack
✅ Bonus Tips for Parents & Caregivers
Plan indoor activities: crafts, reading, games on high-risk days.
Reduce exposure to dust and pollen indoors—vacuum with HEPA filters.
If possible, relocate temporarily to cleaner-air areas.
Educate older children about the importance of masks and staying indoors.
Final Takeaway
The 2025 wildfire season has shown us air quality can deteriorate rapidly—even hundreds of kilometers away from the flames. For vulnerable families, proactive planning saves lives.
By staying informed and implementing air protection measures, you can shield your loved ones from the hidden threat of wildfire smoke.

From First Aid to Fireline: Your Path to Wildland Deployment
Canada’s wildfire seasons are getting more intense—so is the demand for skilled wildland firefighters. Learn what the job involves, the certifications you need (like S-100, S-185, and EMR), and how Delta Emergency Support Training helps future responders build a solid foundation in Red Cross-certified Advanced First Aid and Emergency Medical Responder programs.
Into the Flames: Exploring Wildland Firefighting in Canada
Wildland firefighter clearing brush
Canada’s Increasing Need for Wildland Firefighters
With fire seasons growing longer and more intense across Canada, wildland firefighters are more essential than ever. From British Columbia’s dry interior to the boreal forests of Alberta and Northern Ontario, fire crews are called on every summer to battle large, unpredictable blazes that threaten ecosystems, homes, and entire communities.
If you're working toward becoming a first responder, Emergency Medical Responder (EMR), or firefighter, wildland firefighting can be a powerful way to gain experience, build resilience, and serve when it matters most.
What Is Wildland Firefighting?
Wildland firefighting involves controlling and suppressing fires that occur in natural areas—forests, grasslands, or remote terrain. In contrast to urban or structural firefighting, wildland firefighters operate in rugged, undeveloped areas, often far from roads, with limited access to resources.
You might be:
Building fire guards (hand-dug trenches to stop fire spread)
Conducting controlled burns
Monitoring hot spots for reignition
Assisting with helicopter bucket drops or pump setups
Supporting evacuations of nearby communities
Canadian Training and Requirements
If you're interested in working as a wildland firefighter in Canada, here are the typical requirements:
✅ Required Certifications:
S-100: Basic Fire Suppression and Safety
S-185: Fire Entrapment Avoidance
ICS-100: Introduction to Incident Command System
Standard First Aid, Advanced First Aid, or EMR (depending on the role)
🏋️ Fitness Testing:
Many agencies require a physical fitness test (like the WFX-FIT), which includes:
Carrying a 25 kg pump
Hose pack hikes
Grip strength and balance challenges
🧰 Additional Skills That Help:
Chainsaw safety certification
WHMIS (Workplace Hazardous Materials)
Radio communication skills
Class 4 or air brake license (for driving fire vehicles)
In Canada, wildland firefighters are employed by:
Provincial agencies (e.g., BC Wildfire Service, Alberta Wildfire, Ontario Ministry of Natural Resources and Forestry)
Private contractors
Federal emergency response teams
Why EMR and AFA Matter on the Fireline
Medical incidents on wildfire deployments are more common than many expect. Team members may face:
Heat exhaustion or heat stroke
Dehydration or altitude sickness
Burns or smoke inhalation
Trauma from slips, trips, or falling debris
Insect stings or allergic reactions
Having a certified Emergency Medical Responder or someone with Advanced First Aid training on a crew means faster, more effective care until paramedics or air support can arrive. It's also a valuable asset that can make your application stand out.
What Deployment Is Really Like
Canadian wildland fire deployments can last days or even weeks, especially during peak season (June to August). Expect:
Camp life (tents, cots, and basic food services)
12+ hour shifts
Variable weather (extreme heat, rain, or smoke)
Team living — camaraderie and close-knit bonds are key
The work is physically tough, but the environment is incredibly rewarding—many describe it as life-changing.
What to Pack on a Deployment
Most agencies provide essential PPE (boots, helmet, Nomex gear), but your go-bag should include:
High-energy snacks
Extra socks
Lightweight sleeping gear
Rehydration tablets or electrolytes
Small first aid kit
Bug spray and sunscreen
Mental Resilience Is Key
The mental strain of extended deployments, long shifts, and witnessing environmental damage can take its toll. Fireline crews rely heavily on:
Peer support
Strong leadership
Daily briefings and debriefings
Mental health resources when needed
How to Get Started in Canada
Take an Advanced First Aid or EMR course to meet hiring and deployment requirements.
Get your S-100 and S-185 certifications (typically offered through wildfire agencies or training providers).
Train physically for endurance, balance, and strength.
Apply to provincial wildfire services or contractors in early spring (applications often open between January and March).
Why Wildland Firefighting Is a Great Step Toward a Fire Service Career
Many municipal firefighters start with wildland contracts. It helps build:
Teamwork under pressure
Medical and safety experience
Exposure to command structures (ICS)
Mental and physical readiness for emergency work
🔥 Train With Delta Emergency Support Training
At Delta Emergency Support Training, we support future wildland firefighters with Red Cross-certified Advanced First Aid and EMR training—delivered by real paramedics and firefighters who know what the job demands. If you’re serious about joining the fire service, we’ll help you start strong and stay prepared.
Ready to begin your career on the front lines of Canada’s wildfires? Join Team Delta and let’s get started.

Keeping Your Infant Safe This Summer: A Parent’s Guide
Summer can be wonderful—but it also comes with hidden dangers for infants. From sunburn to overheating, learn how to keep your baby safe with Red Cross-aligned tips from Delta Emergency Support Training.

Summer brings sunshine, fresh air, and outdoor adventures—but for parents of infants, it also brings a unique set of safety challenges. Babies are more vulnerable to heat, sun, dehydration, and environmental hazards, so it's essential to know how to protect your little one during the warmer months.
At Delta Emergency Support Training, we support families and caregivers through Red Cross first aid training. Below are essential summer safety tips for infants, based on Canadian Red Cross recommendations and best practices for infant care.
☀️ 1. Sun Safety: Babies Burn Faster
Infants under six months should be kept out of direct sunlight as much as possible. Their skin is too sensitive for sunscreen and can burn quickly—even on cloudy days.
Red Cross-Recommended Tips:
Seek shade whenever possible: under trees, umbrellas, or stroller canopies.
Dress babies in lightweight, long-sleeved clothing with a wide-brimmed hat.
Avoid peak sun hours between 11 a.m. and 3 p.m.
For babies over six months, apply a broad-spectrum, baby-safe sunscreen to small exposed areas (like face and hands).
💧 2. Hydration: Watch for Signs of Dehydration
Babies can’t tell you when they’re thirsty—and because they have a higher surface area-to-body-weight ratio, they’re more prone to dehydration and heat exhaustion.
Tips to Keep Them Hydrated:
Breastfeed or bottle-feed more frequently in hot weather.
Watch for signs of dehydration: fewer wet diapers, dark yellow urine, dry lips, or lethargy.
Never give water to babies under 6 months unless advised by your healthcare provider.
🌡️ 3. Heat Protection: Prevent Overheating
A baby’s body isn’t as efficient at regulating temperature, so they can overheat quickly in hot environments—even indoors.
How to Keep Baby Cool:
Dress your baby in light cotton clothing.
Use fans or air conditioning to keep the indoor space between 20–22°C.
Avoid using heavy blankets during naps or bedtime.
Never leave your baby in a parked car, not even for a minute. Temperatures rise quickly and can be fatal.
💦 4. Water Safety: Stay Close, Stay Safe
Infants should never be left unattended near water, even for a second. This includes pools, bathtubs, splash pads, or buckets.
Red Cross Water Safety Advice:
Always use designated infant floatation devices with supervision.
Be within arm’s reach of your baby in or near water.
Empty any buckets or containers with standing water after use.
Enroll in Red Cross Baby & Me water orientation classes to introduce water safely.
🦟 5. Bug Bites and Allergies: Watch for Reactions
Mosquitoes, bees, and other summer bugs can pose a danger to babies—especially if they have allergic reactions.
Tips for Protection:
Use mosquito netting over strollers and carriers.
Avoid using chemical insect repellents on infants under 6 months.
Keep baby away from flowering plants, standing water, or places with lots of insects.
If a bite causes swelling, trouble breathing, or hives, seek emergency medical help immediately.
🧳 6. Travel and Outdoor Time: Be Prepared
Whether you’re headed to a picnic, hike, or road trip, bring a baby-focused emergency kit with:
Diapers and wipes
Extra clothing
Infant-safe sunscreen (6+ months)
Cold packs and a thermometer
Emergency contact info
A small Red Cross-approved first aid kit
❤️ 7. Know Infant First Aid
Emergencies can happen. Being trained in infant CPR and first aid can give you the confidence to act quickly and correctly.
🔴 At Delta Emergency Support Training:
We offer Red Cross Standard First Aid and CPR courses that include modules on infant and child care, covering topics like:
Choking and CPR
Allergic reactions
Heat-related emergencies
Recognizing serious symptoms
These skills are lifesaving and empowering for any parent or caregiver.
Final Takeaway
Summer should be a time of joy and bonding—not stress and emergency. By planning ahead and understanding how to protect your infant from seasonal hazards, you can enjoy the season with peace of mind.
Be prepared. Be informed. Be confident.
Take a Red Cross-certified first aid course with Delta Emergency Support Training and make summer safer for your family.
Why Advanced First Aid Is a Must-Have for Future Firefighters: Prepare for Firefighter Recruitment with the Right Medical Training
Thinking of applying to a fire department? Start with Advanced First Aid. Learn how Red Cross-certified training builds your emergency response skills and prepares you for a first responder career.

Firefighter in training.
If you're thinking about becoming a firefighter in Canada, you already know it's more than just battling flames. Firefighters are often the first on scene at medical emergencies, and in many departments, having Advanced First Aid certification is not just helpful—it’s required. As recruitment becomes more competitive, one of the best ways to stand out is to complete your Advanced First Aid training before you apply.
Why Medical Training Matters for Firefighters
Modern firefighting isn’t just fire suppression—it's rescue, emergency medical care, and community safety. Many calls involve:
Motor vehicle collisions
Cardiac arrests
Trauma from falls or accidents
Overdoses and breathing emergencies
In these cases, the ability to perform high-quality medical support can mean the difference between life and death.
What You’ll Learn in Advanced First Aid
Advanced First Aid (AFA), based on the Canadian Red Cross Emergency Care for Professional Responders, teaches you skills like:
Patient assessment and scene safety
Airway management and oxygen administration
CPR/AED for all age groups
Spinal motion restriction
Wound care, bleeding control, and shock management
Triage and emergency scenario response
This course gives you the tools to act confidently in real emergencies—a critical part of your firefighter toolkit.
Stand Out in the Hiring Process
Many fire departments prefer or require AFA (or higher-level training) as part of their application process. Having it shows that:
You’re serious about the job
You understand the physical and mental demands
You can contribute on Day 1
It also prepares you for future paramedic training or Primary Care Paramedic (PCP) certification, which many firefighters go on to pursue.
Train with Real Firefighters and Paramedics
At Delta Emergency Support Training, our instructors are experienced firefighters and paramedics who know exactly what departments are looking for. We don’t just teach you how to pass—we prepare you for what it’s really like out in the field.
What’s Next After AFA?
If you're planning your next steps, here’s a path many successful applicants follow:
Complete Advanced First Aid
Start physical fitness prep (like CPAT)
Take a Firefighter Pre-Academy Program or Fire School
Prepare for interviews and aptitude testing
Apply
Final Thoughts
Getting your Advanced First Aid certification isn’t just checking a box—it’s building your confidence and skills to save lives. Whether you’re planning to fight fires in a city or on the front lines of a wildfire, your first aid skills are your foundation.
Want to become a firefighter? Start here. Join one of our Red Cross certified AFA courses and get trained by the professionals who do this work every day.

Essential First Aid Supplies for Backcountry & Wilderness Adventures
Heading into the backcountry this summer? Don’t go unprepared. This Red Cross-informed guide breaks down the essential first aid items every outdoor enthusiast should pack — from splints and bandages to water purification. Whether you're hiking alone, with friends, or just want to be ready to help, this blog equips you with smart packing tips and survival insight, backed by expert instruction from paramedics and firefighters.
Be Prepared for the Unexpected — A Guide for Outdoor Enthusiasts and Future First Responders

backpacker hiking through forest
The Value of Preparedness in the Outdoors
As we move into the warmer months, more people head into the backcountry for hiking, paddling, camping, and exploration. While the outdoors can be incredibly rewarding, it also brings real risks — injuries, illness, environmental exposure, or getting stranded far from help.
When you’re hours or days from emergency services, your first aid kit — and your ability to use it — becomes your lifeline. Whether you’re solo, with a group, or come across someone in distress, having the right supplies and wilderness first aid knowledge is critical.
At Delta Emergency Support Training, we encourage all outdoor adventurers to be equipped with a kit based on Red Cross Wilderness First Aid standards, and to pursue formal training if you plan to spend time off-grid.
🧭 What to Pack: Wilderness First Aid Essentials
Here’s a practical, space-efficient list of items to pack. It covers a wide range of common outdoor emergencies without weighing down your pack. Every item is selected for its usefulness, multi-purpose capability, and portability.
🩹 Wound & Injury Management
Adhesive bandages (various sizes): For cuts, blisters, and scrapes.
Sterile gauze pads & medical tape: To dress and protect larger wounds.
Antiseptic spray or wipes: To clean wounds and reduce infection risk.
Antibacterial ointment (e.g., Polysporin): Helps with healing and infection prevention.
Butterfly bandages or wound closure strips: For minor lacerations.
SAM splint: Lightweight, moldable aluminum splint for fractures or sprains.
Triangular bandage: Versatile for slings, head wraps, pressure dressings, or tying splints.
Elastic (tensor) bandage: For wrapping sprains or compressing joints.
Nitrile gloves (2 pairs): Essential for infection control when treating others.
🧰 Tools & Utilities
Tweezers: For removing ticks, splinters, or debris.
Trauma shears or compact scissors: For cutting bandages or clothing.
Safety pins: For securing triangular bandages or improvised gear.
CPR mask or face shield: If you're trained to give rescue breaths.
Emergency blanket (Mylar): For warmth, treating shock, or creating shelter.
Whistle: For signaling help in low-visibility areas.
Headlamp or flashlight (with extra batteries): For nighttime first aid or navigation.
💊 Medications & Health
Ibuprofen or acetaminophen: For pain, inflammation, or fever.
Antihistamines (e.g., diphenhydramine/Benadryl): For allergic reactions to bites, plants, or foods.
Anti-diarrheal tablets: For managing dehydration-related illness.
Oral rehydration salts or electrolyte tabs: Prevents dehydration during exertion or illness.
Personal medications: In clearly labeled containers (e.g., epinephrine auto-injector, asthma inhaler).
🌿 Environmental Care
Sunscreen (small tube): Prevents burns and overheating.
Lip balm with SPF: Protects lips from wind and sun.
Bug repellent wipes or spray: Helps prevent bites and insect-borne illness.
Aloe vera gel or hydrocortisone cream: Treats sunburns or itchy skin.
💧 Survival & Hydration
Water purification tablets or mini filter straw: For treating questionable water sources.
Ziploc bags or dry bag: To keep supplies dry and organized.
Duct tape (small roll or wrapped around water bottle): Useful for gear repair or even medical splinting.
🧠 Field Use Tips: Improvising with What You Have
In the wilderness, you may not have every tool — but you likely have items that can double as medical gear in a pinch. Here’s how:
Everyday ItemEmergency UseBandana or BuffSling, tourniquet, or head wrapDuct tapeSplinting, securing bandages, sealing woundsCredit cardScraping insect stingersT-shirt or towelPressure dressing, padding, or bandageZip-tie or cordSecuring splints or gearTampons/sanitary padAbsorbing blood from wounds or nosebleeds
🧭 Why All of This Matters
When you're out of cell range or deep in remote areas, help isn't minutes away — it could be hours or days. You could be:
Alone and injured
Caring for a friend or family member in distress
Stumbling across a stranger in need of help
Without service, your training and your kit are your best tools.
📚 Train with the Red Cross & Delta Emergency Support Training
Want to be ready for emergencies in the outdoors — or even take the first step toward a career as a paramedic or firefighter? We offer:
Red Cross Wilderness & Remote First Aid
Advanced First Aid (AFA)
Emergency Medical Responder (EMR)
Led by active paramedics and firefighters, our programs go beyond the basics and prepare you for real-world emergencies.
🚑 Be the Help Until Help Arrives
You don’t need to carry a hospital in your backpack. But with a smartly packed kit and the right training, you can respond confidently in critical moments — until rescue arrives or help is found.