The Delta Dispatch

The Most Overlooked First Aid Skills—And Why They Matter in Real Emergencies

First aid isn’t just CPR and bandages. Learn why overlooked skills like scene assessment, gaining consent, and offering emotional support are often the most important actions in an emergency—and how they can save lives before you even touch a patient.

It's not just about CPR and bandages—it's about what you do before you even touch the patient.

When people think of first aid, they often imagine chest compressions, gauze pads, or applying a splint. And yes—those technical skills matter. But the truth is, some of the most important first aid actions happen before any physical care begins. Whether you're a parent, a coach, a bystander, or someone with formal training, these lesser-known skills can make all the difference in how well an emergency is handled.

At Delta Emergency Support Training, we teach more than just the hands-on techniques. We train you to think, assess, and respond with confidence, clarity, and care—because the decisions you make in the first 30 seconds often shape the entire outcome.

Let’s talk about the three most overlooked first aid skills—and why every responder, no matter their experience level, should master them.

1. 🧠 Scene Assessment: The First Skill That Saves Lives

Before you rush to help, you need to stop, look, and listen.

Scene assessment is the skill of surveying your environment quickly and safely. It's the very first step in the Check, Call, Care model taught by the Canadian Red Cross, and it can prevent you from becoming the next casualty.

Why it matters:

  • Hazards like live wires, traffic, fire, or aggressive animals can put you in danger.

  • Understanding what happened helps determine what kind of help the person may need (e.g., fall, electrocution, overdose).

  • Identifying how many people are involved helps you plan your next steps.

What to look for:

  • Is it safe for me to enter?

  • What caused the injury or illness?

  • How many people are hurt?

  • Are there bystanders who can help?

Real-world example:
A lineman falls from a bucket after being electrocuted. Before you touch him, you need to consider: Is the power line still live? Is there a risk of arc flash or fire? Should you wait for the utility crew? Your instinct to help is noble—but your ability to pause and assess might be what truly saves lives.

2. 🗣️ Consent: The Ethical and Legal Foundation of First Aid

You might be surprised to learn that you can't legally just walk up and start treating someone—even if they're bleeding or unconscious. Consent is critical. It protects the rights of the injured person and the legal liability of the responder.

Types of consent:

  • Expressed consent: The person says yes or nods when you ask, “Can I help you?”

  • Implied consent: If the person is unconscious, confused, or unable to respond—and a reasonable person would accept help—you are legally allowed to proceed.

Why it matters:

  • It respects the autonomy and dignity of the patient.

  • It builds trust between you and the injured person.

  • It protects you under Canadian Good Samaritan laws.

Teaching tip: Always introduce yourself with your level of training:
“Hi, my name is Alex. I’m trained in first aid. Can I help you?”

In a crisis, this calm, respectful approach can lower panic and allow better cooperation.

3. 🤝 Emotional Support: The Human Side of First Response

First aid isn’t just physical. Emergencies can be terrifying, disorienting, and traumatic—for both the injured person and those around them. Your ability to provide calm, emotional reassurance is just as important as your ability to stop bleeding.

What emotional support looks like:

  • Making eye contact and speaking in a calm, steady voice.

  • Acknowledging the person’s fear: “I know this is scary, but you’re not alone. I’m here to help.”

  • Guiding them through what’s happening: “I’m checking your breathing. Help is on the way.”

Why it matters:

  • It reduces panic and shock, which improves outcomes.

  • It builds trust between the patient and responder.

  • It helps you stay calm and focused.

Bonus: This is especially important with children, elderly individuals, or people with cognitive or language barriers. A calm presence can make all the difference.

💡 So Why Are These Skills Overlooked?

Because they aren’t flashy. They’re not on TV dramas. They don’t involve gadgets or gear. But these are the moments that create safety, consent, and connection. These are the skills that turn someone with training into someone truly effective.

👩‍⚕️ Want to Learn These Skills—and So Much More?

At Delta Emergency Support Training, we believe first aid training should be real, relatable, and relevant. Whether you're taking Standard First Aid, Advanced First Aid / EMR, or Basic Life Support, you’ll gain both the clinical and human skills needed to respond with confidence.

We train with current Red Cross standards, and our instructors include experienced Advanced Care Paramedics who share what actually happens in the field.

🧭 Final Takeaway

It’s not just what you do—it’s how you do it.
Scene safety, consent, and emotional support might not be the first skills you think of—but they’re often the first ones that count.

📅 Ready to learn? Register for a course today and start your journey as a confident, capable responder.

Read More

When the Air Turns Hazardous: Protecting Families During Canada’s 2025 Wildfire Smoke Crisis

Canada’s 2025 wildfire season has brought hazardous air—and with it, serious health risks. This guide equips families and caregivers with practical advice: from setting up a clean room and using N95 masks to monitoring air quality and recognizing smoke-induced illness.

Wildfire season in Canada has been worsened by heat, dry conditions, and climate change—with over 1,985 active firesburning nearly 3.9 million hectares as of June 16, 2025. The result? Widespread "very unhealthy" to "hazardous" air across provinces and even beyond—affecting children, people with respiratory conditions, seniors, and other vulnerable groups.

Understanding Canada’s Air Quality Health Index (AQHI)

In Canada, we don’t use the U.S.-style AQI. Instead, we use the Air Quality Health Index (AQHI) to tell us how the air we breathe affects our health on a scale from 1 to 10+, with higher numbers indicating greater health risks.

How the AQHI Works

AQHI ValueHealth RiskAt-Risk PopulationGeneral Population1–3LowIdeal conditions for outdoor activities.Ideal conditions for outdoor activities.4–6ModerateConsider reducing or rescheduling strenuous activities outdoors.No need to modify usual activities unless symptoms occur.7–10HighReduce or avoid strenuous activities outdoors.Consider reducing strenuous outdoor activity.10+Very HighAvoid all physical outdoor activity. Stay indoors.Reduce or reschedule strenuous outdoor activity.

At-Risk Populations include:

  • Children and infants

  • Seniors

  • People with asthma, heart conditions, or other chronic illnesses

  • Pregnant individuals

🌫️ What Does This Mean for Families?

  • 1–3 (Low): Great time for park visits, walks, or outdoor play.

  • 4–6 (Moderate): Children and people with asthma should limit high-energy outdoor activities.

  • 7–10 (High): Everyone—especially vulnerable groups—should stay indoors and use air filtration.

  • 10+ (Very High): Outdoor exposure can cause serious health effects. Stay inside, seal your home, and consider relocating temporarily if the smoke persists.

📲 Where to Check AQHI

Stay informed using trusted Canadian sources:

  • 🔗 Environment Canada – AQHI Main Page

  • 🔗 AQHI by Province (select your region)

  • Mobile Apps: WeatherCAN, AQHI Canada, or your local weather app

🌫️ Why Wildfire Smoke is Dangerous

  1. Fine Particulate Matter (PM2.5):

    • These tiny particles penetrate deep into the lungs and bloodstream.

    • In 2025, several areas recorded PM2.5 levels over 150 µg/m³—more than 6x the WHO's safe 24-hour limit.

    • US studies confirm that smoke PM2.5 from wildfires can be up to 10x more harmful than typical pollution.

  2. Health Effects:
    Exposure can cause:

    • Immediate symptoms: coughing, wheezing, eye irritation, chest tightness.

    • Aggravation of asthma, COPD, bronchitis, and heart disease.

    • Long-term risks: strokes, heart attacks, developmental issues in children, pregnancy complications.

  3. Canada’s Sharp Increase:

    • In Prairie provinces, air quality reached “Unhealthy to Very Unhealthy” levels in early.

    • Cities like Toronto, Ottawa, and Montreal had some of the worst AQIs globally during June 5–6.

👶 Who’s Most at Risk?

  • Infants and young children with developing lungs.

  • Seniors, particularly those with cardiovascular/respiratory conditions.

  • Individuals with asthma, COPD, heart disease, or compromised immunity.

  • Pregnant women - smoke exposure has been linked to preterm births.

  • Those in low-income or remote communities with limited access to clean air resources.

🛡️ How to Protect Your Family

1. Stay Inside & Seal Your Home

  • Keep doors and windows closed; run HVAC on recirculation.

  • Create a DIY clean room by sealing off one area and running a HEPA filter air purifier.

2. Limit Outdoor Exposure

  • Avoid strenuous outdoor activity.

  • For necessary outdoor time, wear a properly fitted N95 mask—cloth masks don't protect against PM2.5

3. Monitor Air Quality

  • Use apps or websites like FireSmoke.ca, AirNow, or AQI.in.

  • Follow local advisories—on very poor days, avoid outdoor time completely

4. Stay Hydrated & Medically Prepared

  • Children and older adults should drink water regularly.

  • Keep inhalers, medications, and emergency contacts handy.

5. Safe Indoor Air Strategies

  • Continue using air purifiers, keep HVAC maintenance current, and avoid indoor activities that pollute air (like smoking or burning candles).

6. Know the Signs of Smoke-Related Illness

Be alert for:

  • Persistent coughing, wheezing, shortness of breath

  • Chest pain, dizziness, fatigue

  • Severe symptoms like bluish lips, confusion, or altered consciousness – seek medical help immediately.

7. When to Seek Help

Call emergency services if someone experiences:

  • Trouble breathing or chest pain

  • Severe allergic reactions (e.g. from ash or irritants)

  • Symptoms of stroke or heart attack

✅ Bonus Tips for Parents & Caregivers

  • Plan indoor activities: crafts, reading, games on high-risk days.

  • Reduce exposure to dust and pollen indoors—vacuum with HEPA filters.

  • If possible, relocate temporarily to cleaner-air areas.

  • Educate older children about the importance of masks and staying indoors.

Final Takeaway

The 2025 wildfire season has shown us air quality can deteriorate rapidly—even hundreds of kilometers away from the flames. For vulnerable families, proactive planning saves lives.

By staying informed and implementing air protection measures, you can shield your loved ones from the hidden threat of wildfire smoke.

Read More

Handling Bone Fractures: Essential Tips for First Responders

At Delta Emergency Support Training, we ensure that our students are fully prepared to handle emergencies with confidence. Through our Red Cross workbooks, teaching resources, study tips, and in-person classes for EMR and AFA, we provide the practical knowledge necessary to deal with fractures and other emergencies.

XRAY OF BROKEN TIB FIB

Fractures are common injuries that medical first responders frequently encounter, and proper management is critical in ensuring the patient's safety and minimizing long-term complications. This guide covers essential protocols for handling fractures, emphasizes the importance of checking distal pulses, and provides specific management tips for different types of fractures. At Delta Emergency Support Training, we provide access to Red Cross workbooks, hands-on training, and in-person classes for EMR and AFA, ensuring that you're well-prepared to manage fractures effectively.

General Approach to Fracture Management

  1. Assess the Scene: Ensure your safety first and perform a quick primary assessment. Look for life-threatening conditions (e.g., breathing, bleeding, and consciousness).

  2. Immobilize the Injury: Fractured bones must be stabilized to prevent further injury. Do not attempt to realign a displaced bone unless it is absolutely necessary to restore circulation.

  3. Check Circulation: Always check for a distal pulse (e.g., radial pulse for upper limbs, dorsalis pedis pulse for lower limbs). The absence of a pulse could indicate compromised circulation and require immediate intervention.

  4. Pain Management: Administer pain relief within your scope of practice and ensure comfort during transport.

Fracture Types and Management Protocols

Upper Limb Fractures

Clavicle Fracture

  • Symptoms: Pain, visible bump, limited range of motion.

  • Management: Use a sling or figure-eight bandage to immobilize. Check for a radial pulse to assess circulation. If no pulse, realign gently to restore blood flow.

Humerus Fracture

  • Symptoms: Pain, swelling, abnormal positioning.

  • Management: Immobilize with a splint or sling. Check radial pulse. A lack of pulse suggests potential nerve or vessel damage, requiring immediate intervention.

Radius and Ulna Fractures

  • Symptoms: Swelling, bruising, and inability to move the wrist or fingers.

  • Management: Use a splint, ensuring the wrist and elbow are stabilized. Always check the radial pulse; absence of pulse indicates compromised circulation and requires urgent realignment.

Lower Limb Fractures

Femur Fracture

  • Symptoms: Severe pain, swelling, inability to move.

  • Management: Use a traction splint to stabilize. Check the femoral pulse. Absence of pulse demands immediate medical intervention.

Tibia and Fibula Fractures

  • Symptoms: Pain, bruising, and difficulty moving.

  • Management: Apply a splint to stabilize the leg. Check the dorsalis pedis pulse; absence indicates possible vascular damage and requires urgent attention.

Ankle and Foot Fractures

  • Symptoms: Pain, swelling, deformity.

  • Management: Stabilize with a splint. Check pulses at the dorsalis pedis and posterior tibial sites. Absence of pulse requires immediate action to restore blood flow and prevent limb loss.

Spinal and Pelvic Fractures

Spinal Fractures

  • Symptoms: Neck or back pain, possible numbness or tingling in limbs.

  • Management: Immobilize the spine with a cervical collar and prevent movement. Check femoral and radial pulses. Absence of pulses may indicate spinal cord injury or severe vascular damage.

Pelvic Fractures

  • Symptoms: Severe pelvic pain, bruising, difficulty moving.

  • Management: Apply a pelvic binder to reduce movement. Check femoral pulse. Absence of pulse indicates potential severe internal bleeding and requires immediate medical intervention.

Why Checking for Distal Pulse is Critical

When dealing with fractures, checking for distal pulses is a vital step in ensuring the injured limb is receiving adequate blood flow. Absence of a pulse can suggest that a major artery or vein is compromised, risking tissue necrosis or limb loss. Repositioning the limb or gently realigning the fracture can sometimes restore circulation, but if pulses are absent, it's important to seek advanced medical help immediately.

Delta Emergency Support Training

At Delta Emergency Support Training, we ensure that our students are fully prepared to handle emergencies with confidence. Through our Red Cross workbooks, teaching resources, study tips, and in-person classes for EMR and AFA, we provide the practical knowledge necessary to deal with fractures and other emergencies. Our training will guide you through how to assess injuries, check circulation, immobilize fractures, and effectively manage patients in critical situations.

Whether you're just starting out or looking to sharpen your skills, our comprehensive training resources will give you the expertise needed to provide quality care in high-pressure situations.

Read More

Free Lifesaving Knowledge at Your Fingertips: Introducing Our Comprehensive Guide for First Aid & CPR

Delta Emergency Support Training is excited to offer the "Comprehensive Guide for First Aid & CPR" as a free digital resource, empowering Canadians with the skills to handle emergencies confidently. This guide covers everything from CPR techniques to injury management and legal considerations, making it a vital tool for anyone looking to be better prepared in critical situations. Download your free copy today and help create a safer, more prepared community.

Ensuring Safety and Preparedness Across Canada

In our commitment to fostering a safer and more prepared community, Delta Emergency Support Training is proud to introduce a groundbreaking resource: the "Comprehensive Guide for First Aid & CPR." This extensive, digital book is offered entirely free of charge, aimed at equipping Canadians from all walks of life with the essential skills needed to respond effectively to emergencies.

What's Inside the Guide?

Our digital guide is a thorough compilation covering all aspects of first aid and CPR. Here are just a few sections that could make a critical difference in an emergency situation:

  • Emergency Preparedness: Learn how to equip your home and office to handle emergencies, from basic first aid kits to understanding the signs of medical distress.

  • CPR Techniques: Our guide provides step-by-step instructions for performing CPR on adults, children, and infants, ensuring you can act confidently when seconds count.

  • Managing Medical Emergencies: Whether it's dealing with severe allergic reactions, cardiac arrests, or other medical emergencies, our guide has you covered with expert advice.

  • Injury Prevention and Management: From treating burns to handling fractures, learn the most effective techniques to manage and mitigate injuries.

  • Legal Considerations: Understand the Good Samaritan laws that protect you when providing emergency aid and the responsibilities you hold as a caregiver or first responder.

Why a Free Digital Book?

Accessibility is key in emergency preparedness. By making this guide available digitally at no cost, we ensure that every individual, family, and organization in Canada has the opportunity to learn lifesaving techniques. This initiative is part of our mission to enhance community safety and empower individuals through education.

How to Access the Guide

Getting your copy of the "Comprehensive Guide for First Aid & CPR" is easy and instant. Simply visit our website at Delta Emergency Support Training, navigate to our resources section, and download your free copy today. Keep it on your mobile devices, computers, or print it out for quick reference.

Conclusion

We believe that knowledge is power, especially when it comes to saving lives. That's why we are thrilled to offer this valuable resource for free. Whether you're a parent, teacher, professional responder, or a concerned citizen, this guide is for you. Download your free copy today, and take a significant step toward becoming a more prepared, capable, and confident member of your community. Let's work together to keep Canada safe, one informed individual at a time!

Read More

Essential Gear for the Trail: The Canadian Red Cross Wilderness and Remote Field Guide

The "Canadian Red Cross: Wilderness and Remote Field Guide" is a must-have resource for anyone venturing into the great outdoors. Designed for durability and quick reference, this waterproof and tear-resistant guide covers everything from first aid techniques to survival strategies. Compact and easy to use, it's perfect for outdoor enthusiasts, professionals, and anyone responsible for safety in remote areas. Equip yourself with the knowledge and confidence to handle wilderness emergencies—get your copy today at Delta Emergency Support Training.

The Ultimate Companion for Outdoor Safety and Emergency Preparedness

When venturing into the great outdoors, whether you're an avid hiker, a professional guide, or a part of a search and rescue team, having the right tools at your disposal is crucial. The "Canadian Red Cross: Wilderness and Remote Field Guide" is not just any textbook; it's a vital resource designed for the realities of outdoor challenges and emergencies.

Designed for Durability and Accessibility

Understanding that nature's elements can be unforgiving, this field guide is built to last. With waterproof and tear-resistant pages, it stands up to the toughest conditions, ensuring that you have access to critical information regardless of weather or terrain. Its compact design allows it to easily fit into any backpack or emergency kit, making it a practical choice for any outdoor enthusiast.

Quick Reference for Fast Action

Time is of the essence when dealing with emergencies in remote locations. This field guide is organized for quick access, allowing you to rapidly find the information you need when every moment counts. Detailed yet concise, the guide covers a wide range of situations from minor injuries to critical emergency responses.

A Tool for Every Wilderness Scenario

The guide includes comprehensive sections on:

  • Basic first aid techniques

  • Emergency procedures specific to remote settings

  • Navigation tips for lost or disoriented individuals

  • Survival strategies for various climates and terrains

These topics are illustrated with clear, easy-to-understand diagrams and instructions, making the guide an indispensable educational tool for anyone responsible for safety in wilderness areas.

Enhancing Your Outdoor Safety Skills

In addition to its practical applications, the Wilderness and Remote Field Guide serves as an educational resource that enhances your skills and confidence. It supports your outdoor activities by providing essential knowledge that can prevent emergencies or help manage them effectively until professional help is available.

Ideal for Both Enthusiasts and Professionals

Whether you're a casual nature lover or a professional working in challenging environments, this field guide is tailored to support your needs. It's an essential part of any safety training for outdoor professionals and a reliable resource for adventurers who take their wilderness activities seriously.

Conclusion

Invest in your safety and preparedness with the Canadian Red Cross Wilderness and Remote Field Guide. Available at Delta Emergency Support Training at competitive prices, this guide is not just a purchase—it's an investment in your ability to handle the unexpected with expertise and confidence.

Prepare for your next adventure by securing your copy today at Delta Emergency Support Training. Equip yourself with the knowledge to navigate the wilderness safely and respond effectively in emergencies. Your adventure awaits, and with the right preparation, you're ready to meet it head-on.

Read More

Meningitis: What Every First Responder Needs to Know

Meningitis is a serious infection that can escalate rapidly. As a medical first responder, understanding the types and symptoms of meningitis is essential for effective care. At Delta Emergency, we provide advanced first aid training across Canada, particularly in Edmonton and Calgary, to equip fire fighters and emergency responders with life-saving knowledge.

At Delta Emergency, we train individuals in advanced first aid as an essential step in preparing them for fire fighting and other high-pressure, life-threatening situations. As part of our training, we emphasize the importance of being well-versed in a variety of medical conditions, including those that can escalate rapidly and require swift, decisive action. One such condition is meningitis, a serious infection that can affect the brain and spinal cord and may require urgent intervention.

In this post, we’ll delve into what meningitis is, the different types, and why understanding this condition is critical for medical first responders.

What is Meningitis?

Meningitis is the inflammation of the meninges, the protective membranes covering the brain and spinal cord. It is a potentially life-threatening condition because it can cause permanent damage to the nervous system if not treated quickly. The inflammation is usually caused by infection, but it can also be a result of other factors, such as certain medications or illnesses.

Symptoms of meningitis can develop suddenly, and in many cases, they resemble the flu. However, if left untreated, it can rapidly progress to more severe complications, including seizures, brain damage, and even death.

Types of Meningitis

Meningitis is classified into several different types based on the cause of the infection. The most common types are bacterial, viral, and fungal, but there are also other rarer causes that require different treatments.

1. Bacterial Meningitis

Bacterial meningitis is the most severe form and can be fatal if not treated immediately. It is caused by a bacterial infection that typically enters the bloodstream and spreads to the brain and spinal cord. The most common bacteria that cause meningitis are Neisseria meningitidis (meningococcal), Streptococcus pneumoniae (pneumococcal), and Haemophilus influenzae.

Symptoms:

  • Sudden high fever

  • Severe headache

  • Stiff neck

  • Nausea or vomiting

  • Sensitivity to light

  • Skin rashes (in some cases)

Bacterial meningitis requires immediate medical attention and is usually treated with intravenous antibiotics. Early intervention is key to preventing life-threatening complications.

2. Viral Meningitis

Viral meningitis is less severe than bacterial meningitis but can still be serious, particularly in infants and those with weakened immune systems. It is typically caused by viruses such as enteroviruses, herpes simplex virus, and the mumps virus.

Symptoms:

  • Mild fever

  • Headache

  • Stiff neck

  • Nausea

  • Sensitivity to light

  • Fatigue

Viral meningitis often resolves on its own without the need for specific treatment, although antiviral medications may be used in certain cases. Rest and supportive care are the mainstay of treatment.

3. Fungal Meningitis

Fungal meningitis is relatively rare and occurs when a fungal infection spreads to the meninges, usually in individuals with weakened immune systems, such as those with HIV/AIDS or who are undergoing chemotherapy. It is caused by fungi like Cryptococcus and Histoplasma.

Symptoms:

  • Headache

  • Fever

  • Nausea and vomiting

  • Sensitivity to light

  • Neck stiffness

  • Confusion

Fungal meningitis is treated with antifungal medications, but early detection is critical due to its potential to cause severe damage.

4. Parasitic Meningitis

Parasitic meningitis is a rare but serious type of infection caused by parasites. The most common example is Naegleria fowleri, a brain-eating amoeba found in warm freshwater environments. Though rare, this type of meningitis is almost always fatal.

Symptoms:

  • Severe headache

  • Nausea and vomiting

  • Stiff neck

  • Seizures

Why Is Meningitis Important for Medical First Responders to Recognize?

As a medical first responder, understanding meningitis is vital for several reasons:

  1. Rapid Assessment: When faced with a potential case of meningitis, especially bacterial meningitis, the symptoms can escalate quickly. The faster a first responder can assess and recognize the condition, the quicker they can initiate life-saving interventions and transport the patient to a medical facility.

  2. Preventing Spread: Certain types of meningitis, particularly bacterial meningitis, are contagious. First responders need to take immediate precautions to prevent the spread of the infection to others, especially in crowded environments like schools, hospitals, or emergency scenes.

  3. Accurate Communication with Medical Teams: As an advanced first aider, you’ll need to provide accurate and detailed information to the hospital staff or paramedics. Recognizing the key symptoms of meningitis will help ensure that the patient receives the correct treatment as soon as possible.

  4. Prevention Measures: In some cases, such as viral meningitis, vaccinations or antiviral medications may be available. Being able to educate the public on these prevention measures is also a critical aspect of first aid training.

  5. Making Informed Decisions in High-Pressure Situations: In emergency situations, especially during a fire or rescue operation, medical first responders often need to make quick decisions. Having a solid understanding of conditions like meningitis allows responders to make informed choices about treatment and triage priorities.

Meningitis and Fire Fighting: Why This Matters for You

For fire fighters and other emergency personnel, the ability to recognize and respond to meningitis is particularly important. Fire fighters often work in high-risk environments where exposure to infectious diseases is a possibility. Additionally, the physical and mental stress of responding to emergencies, including traumatic events, can weaken the immune system, making individuals more susceptible to infections.

Training in advanced first aid equips fire fighters with the tools they need to recognize signs of meningitis, protect themselves from exposure, and provide immediate care to victims. Knowing when to initiate emergency treatment, when to call for higher medical support, and how to prevent cross-contamination is essential in keeping both responders and the community safe.

Conclusion

Meningitis is a serious and potentially life-threatening infection that can affect anyone, but with the right knowledge and preparation, medical first responders can make a significant difference in the outcomes of those affected. At Delta Emergency, we ensure that our trainees are well-prepared to recognize the signs and symptoms of meningitis and take the appropriate action. Whether you are responding to an emergency as a fire fighter or any other medical first responder, being equipped with the knowledge of how to handle meningitis could save lives.

If you're looking to advance your first aid training or get involved in fire fighting, understanding the signs and treatments for conditions like meningitis should be a key part of your learning journey. Stay prepared, stay safe, and always be ready to respond with confidence.

Read More

Common Gynecological Medical Emergencies Every First Responder Should Know

Gynecological emergencies, such as ovarian torsion, ectopic pregnancy, and toxic shock syndrome, require quick action and careful handling. For first responders, understanding the symptoms, knowing how to prioritize care, and maintaining patient comfort and dignity are essential. This blog explores common gynecological emergencies, providing essential information for responders to manage these situations with professionalism, especially when male responders are involved. Learn how to respond effectively and respectfully to ensure the best outcomes for your patients.

Gynecological emergencies require quick assessments, clear decision-making, and fast intervention. For first responders, understanding these conditions is essential for providing the right care and support. While some gynecological issues may seem daunting, being knowledgeable about these emergencies can make all the difference in saving lives and minimizing long-term complications.

In this blog, we’ll dive deeper into some of the most common gynecological emergencies, including endometriosis, ovarian torsion, ectopic pregnancy, toxic shock syndrome, and more. Additionally, we’ll discuss how first responders can handle these situations efficiently, with a focus on maintaining patient comfort and professionalism, particularly when male responders are involved.

1. Endometriosis: Managing Acute Flare-Ups

What It Is:
Endometriosis is a chronic condition where tissue similar to the lining of the uterus grows outside of it, often affecting the ovaries, fallopian tubes, or other organs in the pelvic region. While it’s usually a long-term condition, flare-ups can create acute pain and other complications.

Emergency Symptoms:

  • Intense pelvic pain, especially during menstruation

  • Nausea, vomiting, or dizziness

  • Heavy menstrual bleeding

  • Pain during intercourse

What to Do:
First responders should focus on pain management, as the acute pain associated with endometriosis flare-ups can be overwhelming. Administer analgesics as per protocol and assess vital signs. If bleeding is severe, treat for shock and prepare for transport to the nearest medical facility for further treatment, including possible imaging and evaluation by a gynecologist.

2. Ovarian Torsion: A Time-Sensitive Surgical Emergency

What It Is:
Ovarian torsion occurs when an ovary twists on its supporting ligaments, cutting off its blood supply. This is a surgical emergency and, if not treated promptly, can lead to ovarian necrosis (death of the ovary).

Emergency Symptoms:

  • Sudden, severe pelvic pain, often localized to one side

  • Nausea or vomiting

  • Abdominal tenderness

  • Possible fever

What to Do:
Time is critical in ovarian torsion. The primary action for first responders is pain management and stabilization. Administer pain relief (IV or oral as per protocol) and monitor for signs of shock. Rapid transport to a surgical facility is essential for surgical intervention to save the ovary. Delaying treatment could result in permanent damage or loss of the ovary.

3. Miscarriage: Spontaneous Pregnancy Loss

What It Is:
A miscarriage refers to the loss of a pregnancy before the 20th week. Miscarriages are often associated with heavy bleeding and pain, and they can lead to emotional distress for the patient.

Emergency Symptoms:

  • Heavy bleeding or passing of tissue

  • Cramping or abdominal pain

  • Lower back pain

  • Dizziness or fainting

What to Do:
For first responders, it’s important to manage bleeding and monitor for signs of shock. Heavy bleeding can result in hypovolemic shock, so maintaining the patient’s blood volume with IV fluids is critical. Emotional support is also key—be compassionate and empathetic, as this is often a traumatic experience. Transport the patient to a medical facility for further evaluation, including an ultrasound to confirm the miscarriage and assess for any retained tissue.

4. Ectopic Pregnancy: A Life-Threatening Condition

What It Is:
An ectopic pregnancy occurs when a fertilized egg implants outside the uterus, usually in a fallopian tube. This is a dangerous condition because the fallopian tube can rupture, leading to significant internal bleeding.

Emergency Symptoms:

  • Severe abdominal pain, often on one side

  • Vaginal bleeding or spotting

  • Dizziness, fainting, or low blood pressure

  • Shoulder pain (referred pain due to internal bleeding)

What to Do:
Ectopic pregnancy is a medical emergency that requires immediate transport to the hospital. First responders should stabilize the patient, monitor vitals, and treat for shock if necessary. If an ectopic pregnancy is suspected, it is critical to get the patient to a surgical facility as quickly as possible, as a ruptured ectopic pregnancy can be fatal.

5. Uterine Fibroids: Managing Complications from Benign Tumors

What It Is:
Uterine fibroids are non-cancerous growths in the muscle of the uterus. In many cases, they don’t cause symptoms, but in some women, they can result in heavy menstrual bleeding or pain, especially during pregnancy or menopause.

Emergency Symptoms:

  • Heavy vaginal bleeding, potentially leading to shock

  • Pelvic or abdominal pain

  • Pressure on the bladder or rectum

  • Painful intercourse

What to Do:
If a patient with uterine fibroids presents with heavy bleeding, assess the degree of bleeding and treat for shock if necessary. Administer fluids to maintain blood pressure and transport the patient to a medical facility for further evaluation and treatment. In severe cases, surgical intervention may be needed to manage bleeding or remove the fibroids.

6. Vulvar Abscess: Infection and Inflammation of the Vulva

What It Is:
A vulvar abscess is a localized collection of pus caused by infection. It may occur due to bacteria entering the vulvar glands, leading to swelling, pain, and tenderness.

Emergency Symptoms:

  • Painful swelling or tenderness in the vulva

  • Redness and warmth in the affected area

  • Fever

  • Drainage of pus

What to Do:
While vulvar abscesses typically require drainage and antibiotics, first responders should focus on pain relief and preventing the infection from spreading. Administer pain relief and fluids as per protocol and prepare for rapid transport to a hospital where surgical drainage may be needed.

7. Toxic Shock Syndrome (TSS): A Severe Bacterial Infection

What It Is:
Toxic Shock Syndrome is caused by bacterial toxins, usually from Staphylococcus aureus or Streptococcus pyogenes. Though it’s rare, it can progress rapidly and lead to organ failure and death.

Emergency Symptoms:

  • Sudden high fever

  • Vomiting and diarrhea

  • A red, sunburn-like rash

  • Low blood pressure, confusion, or shock

What to Do:
TSS is a critical emergency requiring immediate intervention. First responders should administer fluids to combat shock, manage the fever, and prepare for transport to a medical facility. Treatment typically includes IV antibiotics and supportive care to prevent organ failure.

8. The Challenges of Responding to Gynecological Emergencies, Especially for Male Responders

Patient Comfort and Professionalism:
Handling gynecological emergencies can be particularly sensitive, especially if the responding team is composed of male responders. As a first responder, it’s essential to be aware of the patient’s emotional and physical comfort while still prioritizing their care.

Key Considerations for Male Responders:

  • Maintain Decency: Ensure that the patient’s privacy is respected at all times. Use blankets or gowns to cover them as much as possible, especially during transport or examination.

  • Provide Clear Communication: Always explain the procedures you’re performing and why they are necessary. Patients may feel vulnerable during gynecological emergencies, so explaining what is happening at each stage can help reduce anxiety.

  • Offer Emotional Support: Gynecological emergencies often come with an emotional component. Be compassionate and understanding, offering reassurance and support throughout the process.

  • If Possible, Involve Female Responders: If you’re a male responder and the situation involves intimate care, offer the patient the option to be attended to by a female responder, if available, to maintain comfort and dignity.

First responders should always prioritize patient safety and dignity. Being sensitive to these issues helps build trust and ensures that you are providing the best care possible, especially in potentially traumatic situations.

Conclusion: Efficient, Respectful Care for Gynecological Emergencies

Gynecological emergencies can present unique challenges for first responders, but with the right knowledge and skills, you can manage these situations effectively and compassionately. Whether dealing with ovarian torsion, toxic shock syndrome, or ectopic pregnancy, understanding the symptoms and knowing the right actions to take will ensure better patient outcomes. Responding with professionalism, sensitivity, and respect for the patient’s dignity is just as important as delivering medical care.

At Delta Emergency Support Training, we equip first responders with the knowledge and skills necessary to handle all types of emergencies, including gynecological ones. Our comprehensive training prepares you to respond with confidence, ensuring you provide the best care in critical situations.

Read More

Understanding Medical Terminology: A Guide to Prefixes, Suffixes, and Roots for First Responders

Mastering medical terminology is essential for first responders. Understanding common prefixes, suffixes, and roots will help you communicate more effectively, make informed decisions, and provide quicker, more effective care. In this guide, we break down essential medical terms that will boost your confidence on the job and improve patient outcomes.

In the fast-paced world of Emergency Medical Services (EMS), effective communication and quick thinking are crucial. One way to improve both is by mastering medical terminology. As a first responder, understanding the building blocks of medical terms — prefixes, suffixes, and roots — will allow you to interpret unfamiliar terms quickly, leading to better patient care and more effective communication with other healthcare professionals.

In this guide, we’ll break down the most common prefixes, suffixes, and roots in medical terminology, with a focus on how these parts come together to help you understand the language of medicine. By familiarizing yourself with these building blocks, you’ll be equipped to navigate the world of medical terminology with confidence.

What Are Prefixes, Suffixes, and Roots?

Medical terms often seem complex, but most are built from smaller components that convey specific meanings. Understanding how these components work will help you quickly decode medical terms.

  • Prefix: A prefix is added at the beginning of a word to modify its meaning. It typically indicates time, location, quantity, or status.

  • Suffix: A suffix is placed at the end of a word to alter its meaning. It often refers to a condition, disease, procedure, or part of the body.

  • Root Word: The root is the central part of the word that provides the core meaning. It typically refers to a body part, function, or medical concept.

By breaking down terms into these components, you can understand what a word means without needing to memorize every single term.

Why EMS Professionals Need to Understand Prefixes, Suffixes, and Roots

As a first responder, you’ll often encounter long, unfamiliar medical terms during patient care. Breaking these terms down into their prefixes, suffixes, and roots helps you:

  1. Interpret Symptoms Faster: For example, recognizing terms like “tachypnea” (rapid breathing) or “bradycardia” (slow heart rate) allows you to quickly assess the situation and respond accordingly.

  2. Improve Communication: Whether you’re talking to a doctor, paramedic, or other healthcare professionals, using the correct medical terminology ensures clear, efficient communication, which leads to better patient outcomes.

  3. Streamline Documentation: Accurate medical documentation is essential in EMS. Knowing medical terms ensures you can write reports that are both precise and comprehensive.

Common Medical Prefixes Every First Responder Should Know

Here are some of the most common prefixes you’ll encounter in EMS. These prefixes provide important information about the patient's condition and can help you make quicker decisions in the field.

1. “Hyper-”

  • Meaning: Excessive, above normal

  • Example: Hypertension (high blood pressure)

2. “Hypo-”

  • Meaning: Below normal, deficient

  • Example: Hypoglycemia (low blood sugar)

3. “Brady-”

  • Meaning: Slow

  • Example: Bradycardia (slow heart rate)

4. “Tachy-”

  • Meaning: Fast

  • Example: Tachypnea (rapid breathing)

5. “Pre-”

  • Meaning: Before

  • Example: Preoperative (before surgery)

6. “Post-”

  • Meaning: After

  • Example: Post-traumatic (after trauma)

7. “Sub-”

  • Meaning: Under, beneath

  • Example: Subcutaneous (beneath the skin)

8. “Inter-”

  • Meaning: Between

  • Example: Intercostal (between the ribs)

9. “Intra-”

  • Meaning: Within

  • Example: Intravenous (within the vein)

10. “Exo-”

  • Meaning: Outside, outward

  • Example: Exoskeleton (external skeleton)

Common Medical Suffixes for EMS Professionals

Suffixes are essential for understanding the nature of a medical condition, procedure, or diagnosis. Below are key suffixes that are frequently used in EMS:

1. “-itis”

  • Meaning: Inflammation

  • Example: Arthritis (inflammation of the joints)

2. “-ectomy”

  • Meaning: Surgical removal

  • Example: Appendectomy (removal of the appendix)

3. “-algia”

  • Meaning: Pain

  • Example: Neuralgia (nerve pain)

4. “-pathy”

  • Meaning: Disease or condition

  • Example: Neuropathy (nerve disease)

5. “-emia”

  • Meaning: Blood condition

  • Example: Anemia (low red blood cell count)

6. “-plasty”

  • Meaning: Surgical repair

  • Example: Rhinoplasty (surgical repair of the nose)

7. “-scopy”

  • Meaning: Viewing or examination using a scope

  • Example: Endoscopy (examination of a body cavity)

8. “-logy”

  • Meaning: The study of

  • Example: Cardiology (study of the heart)

9. “-osis”

  • Meaning: Abnormal condition or disease

  • Example: Cirrhosis (a liver disease)

10. “-graphy”

  • Meaning: The process of recording

  • Example: Cardiography (recording heart activity)

Common Medical Roots in EMS Terminology

Roots form the core of medical terms and typically describe body parts, organs, or functions. Here are some important roots you’ll encounter in your training and practice:

1. “Cardi/o”

  • Meaning: Heart

  • Example: Cardiology (study of the heart)

2. “Gastr/o”

  • Meaning: Stomach

  • Example: Gastritis (inflammation of the stomach lining)

3. “Hemat/o”

  • Meaning: Blood

  • Example: Hemorrhage (excessive bleeding)

4. “Neuro/o”

  • Meaning: Nerve, nervous system

  • Example: Neurology (study of the nervous system)

5. “Oste/o”

  • Meaning: Bone

  • Example: Osteoarthritis (arthritis of the bone)

6. “Pulmon/o”

  • Meaning: Lungs

  • Example: Pulmonary edema (fluid buildup in the lungs)

7. “My/o”

  • Meaning: Muscle

  • Example: Myocardial (related to the heart muscle)

8. “Derm/a”

  • Meaning: Skin

  • Example: Dermatitis (inflammation of the skin)

9. “Ren/o”

  • Meaning: Kidney

  • Example: Renal failure (kidney failure)

10. “Rhin/o”

  • Meaning: Nose

  • Example: Rhinoplasty (surgical procedure on the nose)

Study Strategies for Mastering Medical Terminology

While learning prefixes, suffixes, and roots can seem overwhelming, there are several effective study techniques to help you retain and apply these concepts:

1. Use Flashcards

Flashcards are an excellent way to reinforce your understanding of prefixes, suffixes, and roots. Use physical cards or apps like Quizlet to test your knowledge on the go. Write the term on one side and its meaning on the other.

2. Create Mnemonics

To help remember terms, create memorable associations. For example, remember “tachy-” by thinking of “tachometer,” which measures speed (fast). For “brady-” (slow), think of Brady the tortoise from the classic story.

3. Break Down Terms

Whenever you encounter an unfamiliar term, break it down. Start with the root word, then look at the prefix and suffix. For example, Tachycardia:

  • Tachy- = fast

  • Cardi/o = heart

  • -ia = condition So, Tachycardia = a condition of a fast heart rate.

4. Group Study and Practice

Group study sessions help reinforce what you've learned. Discuss terms with classmates or colleagues and quiz each other regularly to ensure you understand the material.

5. Use Interactive Tools

Interactive quizzes and apps can make learning more engaging. Tools like Anki or MedTerm offer practice exercises that reinforce your understanding of medical terminology in a fun, interactive way.

Conclusion: Mastering Medical Terminology for EMS Professionals

In EMS, quick decision-making and clear communication can save lives. Understanding medical terminology, including prefixes, suffixes, and roots, allows you to decode complex terms on the fly and makes you a more effective responder. It’s a skill that will improve your ability to assess patients, document care, and work with your team efficiently.

At Delta Emergency Support Training, we understand the importance of a solid foundation in medical terminology. Our comprehensive Red Cross Babysitting course and First Aid training cover essential medical concepts that will set you up for success in the field. Whether you're just getting started or looking to advance your skills, mastering medical terminology is a key step in becoming a top-tier first responder.

Read More

How Babysitters Can Handle Emergencies: When to Call 911 and What to Do

Emergencies can happen unexpectedly, and as a babysitter, knowing how to respond quickly is essential. One of the most important skills is knowing when to call 911. Whether it’s a child choking, having a seizure, or becoming unconscious, your quick action could save a life. It’s crucial to always know the address of the home you’re babysitting at, as this information can help emergency responders reach you faster. Remember, better to call 911 and not need them than to not call and need them—911 call-takers are there to guide you through the process and ensure help arrives as quickly as possible. Stay calm, stay prepared, and always trust your instincts when it comes to emergencies.

Emergencies can happen at any time, and when you're babysitting, it’s important to know how to respond quickly. Whether you're watching kids at home, looking after younger siblings, or taking care of someone else’s children, you have to be prepared for anything. Knowing when and how to call 911 is especially important because your quick action could save a life.

In this blog, we'll talk about common emergencies, how to stay calm, and why knowing your address and how to call 911 is so critical.

Why It’s So Important to Know How to Call 911

As a babysitter, you might be the first person to handle an emergency. If something happens—a child gets hurt, gets sick, or something else goes wrong—you might need to call 911 for help.

One of the most important things to remember when calling 911 is knowing where you are. If you can’t tell the dispatcher your address, it can delay help. That means it’s crucial to always know the address of the home where you’re babysitting, including the apartment number if applicable. Make sure you have this info handy in case you need it quickly!

When to Call 911: What Counts as an Emergency?

Some situations can be handled with basic first aid, but others are more serious and require immediate help. Here are some examples of when you need to call 911 without hesitation:

1. The Child is Unconscious or Not Responding

If the child or anyone you’re caring for becomes unresponsive, it’s a big emergency. If they’re not waking up, won’t talk, or are just unresponsive, you need to get help right away.

What to Do:

  • Check if the child is breathing. If they are not breathing or are gasping, call 911 immediately. If you're trained in CPR, you may be able to help the child before emergency responders arrive.

  • If they are breathing but still unconscious, gently lay them on their side (recovery position) and call 911 right away.

2. Serious Bleeding

If the child has a large cut or wound that won’t stop bleeding, that’s a serious emergency. You need to stop the bleeding and get help right away.

What to Do:

  • Apply a clean cloth or bandage to the wound and press down to stop the bleeding.

  • If the wound is really deep, or you can’t stop the bleeding, call 911 and keep pressure on the wound until help arrives.

3. Choking

Choking is a life-threatening emergency, especially if the child can’t breathe or speak. If you are trained in back blows and abdominal thrusts, you should perform these techniques as you were taught. If the child becomes unconscious, you should immediately call 911.

What to Do:

  • If you are trained in abdominal thrusts and back blows (to help expel the object blocking their airway), perform these techniques as you’ve been taught.

  • If the child becomes unconscious, call 911 immediately. If you are trained to save a choking person, you have a good chance of saving them.

  • Keep performing your life-saving techniques until the child can breathe or emergency help arrives.

4. Severe Allergic Reaction (Anaphylaxis)

Severe allergic reactions (also known as anaphylaxis) can cause swelling in the throat and make breathing difficult. Common triggers include bee stings, food allergies (like peanuts), or certain medications.

What to Do:

  • If the child has an epinephrine auto-injector (EpiPen), use it right away.

  • Then, call 911 immediately to get professional help.

5. Seizures

If the child has a seizure, especially if they’ve never had one before, you should call 911. This is important because first-time seizures can be a sign of something serious, and even if the seizure doesn’t last long, it’s better to get medical help.

What to Do:

  • Move objects out of the way to prevent injury.

  • Gently cushion their head and lay them on their side if possible.

  • If the child has never had a seizure before, or if it lasts more than a minute, call 911 right away.

6. Trouble Breathing or Chest Pain

If the child is having trouble breathing, or complains of chest pain, these could be signs of a serious medical condition like a heart attack or a severe asthma attack.

What to Do:

  • Help them sit up and stay calm.

  • If they have an inhaler, help them use it.

  • If they are still having trouble breathing or in pain, call 911 immediately.

How to Call 911: What You Need to Tell Them

When you call 911, it’s important to speak clearly and calmly. Here’s what to do:

1. Know Your Address

You must know the address where you're babysitting, including the street name, apartment number (if applicable), and any nearby landmarks. Make sure you have this info written down or memorized before the emergency happens so you can give it to 911 right away.

2. Speak Clearly

When you’re panicked, it can be hard to talk clearly. Take a deep breath, stay calm, and explain what’s going on as best as you can. Tell the dispatcher the emergency, the condition of the child, and the address where help is needed.

3. Describe the Situation

Tell the dispatcher what happened and the child’s condition. For example:

  • “The child is unconscious and not breathing.”

  • “They’re choking on food and can’t breathe.”

4. Follow the Dispatcher’s Instructions

The dispatcher might give you advice on what to do while you wait for emergency help to arrive. Listen carefully and do your best to follow their instructions.

5. Stay on the Line

Don't hang up until the dispatcher tells you it's okay. They may need more information or updates as emergency responders get closer.

When in Doubt, Call 911

If you're ever unsure whether something is an emergency, it’s always better to call 911. Better to call and not need them than to not call and need them. 911 call-takers are there to help and guide you through the situation. They won’t judge you for calling and are trained to assist you no matter what the emergency is. Trust your instincts—if you feel the child’s health or safety is at risk, don’t hesitate to call for professional help.

Conclusion: Be Prepared, Stay Calm, and Get Help

Babysitting comes with a lot of responsibility. Emergencies can happen quickly, but being prepared can make all the difference. The key is staying calm, knowing when to call 911, and having the information you need to guide emergency responders.

At Delta Emergency Support Training, we offer Red Cross Babysitting courses that cover all the important topics you need to be ready for anything. Our course is taught by paramedics and includes one session on caring for babies and another session dedicated to babysitter first aid, where you’ll learn life-saving techniques like CPR, how to handle injuries, and what to do in different emergency situations. You’ll leave our course with the skills and confidence to handle any emergency that comes your way.

Read More

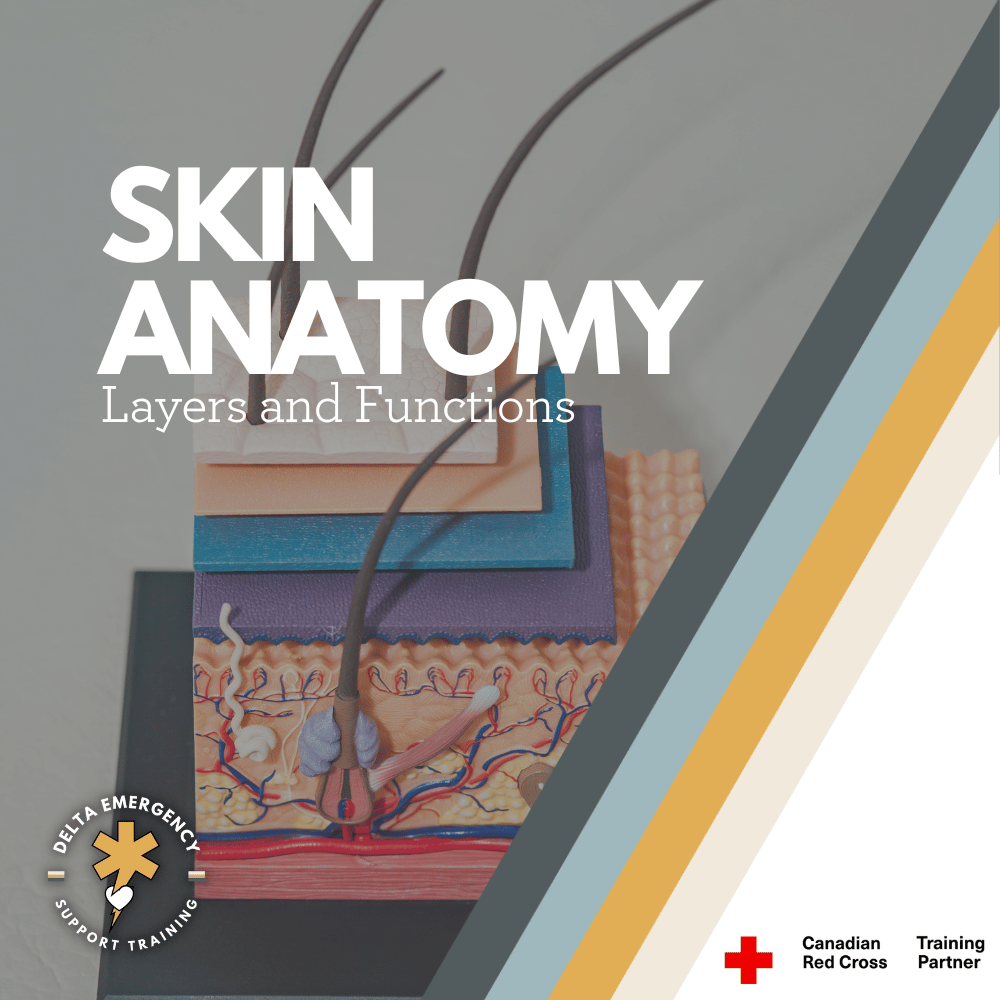
Skin Anatomy Overview for First Responders: Layers and Functions

Understanding the anatomy of the skin is essential for first responders. The skin serves as the body’s first line of defense, regulating temperature and protecting against infection. In this blog, we’ll break down the three layers of skin—epidermis, dermis, and hypodermis—and explore their functions, common injuries, and how this knowledge can help you provide better care in emergency situations.

As a first responder, you're trained to respond to a variety of emergencies, from burns and cuts to more complex trauma situations. Understanding the anatomy of the skin is crucial, as it plays a vital role in protecting the body from infection, regulating temperature, and healing injuries. In this blog, we’ll break down the layers of the skin, their functions, and how this knowledge helps you in your critical role as a first responder.

medical skin layer model

The Basics of Skin Anatomy

The skin is the body's largest organ, serving as the primary barrier between the internal systems and the outside world. It protects against physical damage, pathogens, and dehydration, while also playing a key role in temperature regulation. The skin is made up of three main layers, each with its own distinct function:

  1. Epidermis (Outer Layer)

  2. Dermis (Middle Layer)

  3. Hypodermis (Subcutaneous Layer)

1. The Epidermis: The Body’s First Line of Defense

The epidermis is the outermost layer of skin, providing a waterproof barrier that shields the body from harmful substances, bacteria, and UV radiation. As a first responder, you will often encounter patients with injuries to the epidermis, such as cuts, abrasions, burns, or rashes.

Functions of the Epidermis:

  • Protection: The epidermis acts as the first line of defense against pathogens, chemicals, and physical damage.

  • Barrier to Water Loss: It helps prevent excessive loss of moisture, maintaining hydration in the body.

  • Skin Pigmentation: Melanin, produced in the epidermis, helps protect deeper layers from UV damage.

  • Sensation: The epidermis contains nerve endings that allow the skin to respond to environmental stimuli, like heat or pressure.

Important Considerations for First Responders:

  • Burns: Since the epidermis contains no blood vessels, burns typically affect this layer first, causing redness, swelling, and pain. In severe cases, it may also affect the dermis, leading to more serious injuries.

  • Infections: When the epidermis is compromised (such as in open wounds), there’s a higher risk of infection. Proper cleaning and dressing of wounds are essential to avoid bacterial infiltration.

2. The Dermis: The Skin’s Strength and Support

The dermis lies beneath the epidermis and is responsible for most of the skin's strength, elasticity, and sensation. This layer contains blood vessels, nerves, hair follicles, sweat glands, and connective tissue.

Functions of the Dermis:

  • Structural Support: The dermis contains collagen and elastin, proteins that provide strength and elasticity to the skin, allowing it to stretch and return to its original shape.

  • Temperature Regulation: Blood vessels in the dermis help regulate body temperature by constricting to conserve heat or dilating to release heat.

  • Sensation: The dermis is rich in nerve endings that detect pain, pressure, temperature, and touch.

  • Wound Healing: The dermis plays a critical role in healing skin wounds, as it contains the blood vessels and connective tissue that support tissue repair.

Important Considerations for First Responders:

  • Deep Cuts and Lacerations: When treating deep cuts or lacerations, you may encounter injury to the dermis, which could result in more severe bleeding due to the presence of blood vessels.

  • Blisters and Burns: Severe friction or thermal injuries can cause fluid buildup between the epidermis and dermis, leading to blisters. Burns can also extend into the dermis, causing damage to blood vessels and deeper tissues.

3. The Hypodermis: The Body’s Cushion and Insulator

The hypodermis, or subcutaneous layer, lies below the dermis and is primarily made of fat and connective tissue. This layer plays a significant role in protecting internal organs, insulating the body, and storing energy.

Functions of the Hypodermis:

  • Insulation: The fatty tissue helps regulate body temperature by providing insulation against heat loss.

  • Cushioning: It acts as a shock absorber, protecting bones and organs from injury by absorbing impact.

  • Energy Storage: The hypodermis stores fat, which serves as an energy reserve for the body.

  • Anchoring the Skin: It helps anchor the skin to underlying muscles and bones, giving the skin its flexibility and strength.

Important Considerations for First Responders:

  • Severe Trauma: In cases of deep trauma, such as blunt force injuries, the hypodermis may be damaged. This could lead to bruising or deeper tissue damage, as blood vessels in the hypodermis may rupture.

  • Frostbite: The hypodermis is the most affected area during frostbite, as it is the deepest layer. Severe cold temperatures can cause the fat cells to freeze, potentially leading to tissue death and the need for immediate medical intervention.

Skin Injuries and First Aid: Key Points for First Responders

As a first responder, understanding the anatomy of the skin helps you assess injuries more effectively and provide better care. Here are some common skin injuries and how they relate to the skin’s structure:

  1. Abrasions: These involve damage to the epidermis, often caused by friction. While they are generally not severe, they can lead to infection if not properly cleaned and dressed.

  2. Lacerations: Deep cuts can damage both the epidermis and dermis, leading to bleeding and pain. Proper wound care includes stopping the bleeding, cleaning the wound, and applying appropriate dressings.

  3. Burns: Burns can range from superficial (affecting only the epidermis) to severe (penetrating the dermis and hypodermis). First-degree burns may cause redness and pain, while second-degree burns result in blisters and more intense pain. Third-degree burns involve damage to all layers of the skin and require immediate medical attention.

  4. Frostbite: Exposure to extreme cold can lead to frostbite, which damages the skin, particularly the hypodermis. Treatment includes gradual rewarming and protecting the affected areas from further damage.

  5. Infections: Skin wounds, especially when the epidermis is broken, are susceptible to infection. As a first responder, it’s critical to clean wounds thoroughly, apply sterile dressings, and monitor for signs of infection.

Conclusion: Why Skin Anatomy Matters for First Responders

The skin may seem like a simple barrier, but its structure and functions are far more complex and essential to maintaining overall health. As first responders, understanding the layers of the skin, their functions, and how injuries affect them helps you provide better care to patients. Whether you're dealing with a simple abrasion or a severe burn, this knowledge can guide your decisions on how to treat injuries quickly and effectively, reducing the risk of complications and promoting faster recovery.

By applying this understanding of skin anatomy to your daily work, you can ensure that your patients receive the best care possible in emergency situations.

Read More

First Aid Essentials for Water Sports Enthusiasts: Handling Common Injuries

Are you an avid water sports enthusiast? Whether you're gliding through waves on a surfboard, paddling down a scenic river in a kayak, windsurfing across a lake, or navigating whitewater rapids in a raft, water sports offer exhilarating experiences in nature. However, along with the thrills come the risks of injury. In this blog series, we'll explore common injuries associated with various water sports and provide essential first aid tips to help you stay safe and prepared for any unexpected situations.

Kyaker on the open water at sunrise

Kayaking

Kayaking offers a serene way to explore waterways while providing a great upper body workout. However, it's essential to be prepared for potential injuries. Here are some common ones and how to manage them:

  1. Capsizing: Capsizing is a common occurrence in kayaking, especially for beginners. If you capsize, stay calm and try to re-enter your kayak or swim to shore if necessary. If someone in your group capsizes, assist them by providing a flotation device and helping them back into their kayak.

  2. Muscle Strains: Paddling requires repetitive motion, which can strain muscles in your arms, shoulders, and back. If you experience muscle strain, take a break from paddling, stretch gently, and apply ice packs to reduce inflammation. Over-the-counter pain relievers can also help alleviate discomfort.

  3. Hypothermia: Cold water can quickly lead to hypothermia, especially in colder climates or during long paddling sessions. Dress appropriately for the water temperature, wear a wetsuit or drysuit if needed, and carry spare clothes in a waterproof bag. If you or someone in your group shows signs of hypothermia (such as shivering, confusion, or numbness), get out of the water, remove wet clothing, and wrap them in warm, dry blankets or clothing.

By being prepared and knowing how to respond to common injuries, kayakers can enjoy their time on the water safely.

Surfing

Surfing is an exhilarating water sport that challenges both body and mind. While riding the waves, surfers may encounter various injuries. Here's how to address some common ones:

  1. Surfboard Injuries: Surfboards can cause cuts, bruises, and lacerations if surfers fall or collide with them. Clean the wound with antiseptic wipes or soap and water, apply pressure to stop any bleeding, and cover it with a sterile bandage or gauze. Seek medical attention for deep cuts or wounds that won't stop bleeding.

  2. Surfer's Ear: Prolonged exposure to cold water and wind can lead to surfer's ear, a condition where bony growths develop in the ear canal. To prevent surfer's ear, wear earplugs while surfing, especially in cold or windy conditions. If you experience symptoms such as ear pain, water trapped in the ear, or hearing loss, consult a doctor for proper diagnosis and treatment.

  3. Drowning: While rare, drowning is a serious risk associated with surfing, particularly in rough seas or strong currents. Practice water safety by surfing within your skill level, never surfing alone, and being aware of your surroundings. If you or someone else is struggling in the water, call for help immediately and attempt a rescue if it's safe to do so.

Stay tuned for the next part of our series where we'll explore injuries in windsurfing!

Windsurfing

Windsurfing combines elements of sailing and surfing, offering a thrilling experience on the water. However, it also comes with its share of potential injuries. Here's how to manage some common ones:

  1. Windsurfing Equipment Injuries: Windsurfing gear, including the board, mast, and sail, can cause injuries if mishandled or if there's a collision with other surfers or objects in the water. If you sustain an injury from windsurfing equipment, assess the severity of the injury, administer first aid as needed, and seek medical attention if the injury is severe or if there's any doubt.

  2. Sunburn: Spending hours on the water under the sun can lead to painful sunburns. Protect your skin by wearing sunscreen with a high SPF, covering up with rash guards or wetsuits, and wearing a hat and sunglasses to shield your face and eyes from the sun's rays.

  3. Hypothermia: Cold water and wind can lead to hypothermia, especially in cooler climates or during prolonged sessions on the water. Dress appropriately for the conditions, wear a wetsuit or drysuit if needed, and take regular breaks to warm up if you start feeling cold.

By being aware of the risks and taking precautions, windsurfers can enjoy their time on the water safely.

Rafting

Rafting offers an adrenaline-filled adventure as you navigate through rapids and cascading waterfalls. While it's an exciting activity, it's essential to be prepared for potential injuries. Here are some common ones and how to address them:

  1. Strains and Sprains: Maneuvering the raft and paddling through rough waters can strain muscles and ligaments. If you sustain a strain or sprain, rest the affected area, apply ice packs to reduce swelling, and elevate the injured limb if possible. Over-the-counter pain relievers can help alleviate discomfort.

  2. Whitewater Rafting Injuries: Rafting in whitewater rivers carries inherent risks, including collisions with rocks, overturning the raft, and getting pinned under the water. If you're thrown from the raft, try to stay calm, float on your back with your feet downstream, and swim towards the shore if possible. Follow your guide's instructions and use proper safety equipment, including helmets and life jackets, to minimize the risk of injury.

  3. Dehydration: Spending hours on the water under the sun can lead to dehydration, especially in warmer climates. Drink plenty of water before, during, and after your rafting trip to stay hydrated. Consider bringing electrolyte-rich drinks or snacks to replenish lost fluids and minerals.

By being prepared and knowing how to respond to common injuries, rafters can enjoy their time on the water safely.

With these first aid tips in mind, water sports enthusiasts can navigate the challenges of their chosen activities while staying safe and prepared for any unexpected situations. Stay tuned for more articles in our First Aid Essentials series, where we'll continue to explore safety tips and injury management for various outdoor activities.

Read More

Child Safety: The Essential Guide to Correct Car Seats

In a world where safety is everything, your child is truly precious cargo. That's why our comprehensive guide to child car seats is essential for every parent and caregiver. From understanding the different types of seats to mastering proper installation techniques, we've got you covered. Whether it's selecting the right seat for your child's age and size or ensuring compliance with safety regulations, our expert advice will help you navigate the road with confidence, knowing your little one is protected every mile of the way.

Little girl being buckled into car seat by her father

Ensuring the safety of our children is a responsibility that transcends all others, especially when it comes to travel in vehicles. The choice of car seat and the manner in which it's used can make all the difference in safeguarding our precious passengers. Let's delve into the crucial aspects of selecting and utilizing the right car seat for your child's age, weight, and height.

Understanding the Types of Car Seats

Rear-Facing Car Seat:

For infants, a rear-facing car seat is non-negotiable. It provides optimal protection for delicate heads, necks, and spines during sudden stops or crashes. As your child grows, transitioning to a larger rear-facing seat, and continuing its use until they reach the manufacturer's weight and height limits, ensures their safety until the age of 2, 3, or even 4 years old.

Forward-Facing Car Seat:

Once your child outgrows the rear-facing seat and reaches at least 2 years old, they can graduate to a forward-facing car seat equipped with a 5-point harness. It's crucial to keep them in this harness until they weigh at least 18 kg (40 lb) and can sit upright without slouching or unbuckling—a milestone typically achieved around 4, 5, or even 6 years old.

Booster Seat:

Upon outgrowing the forward-facing seat, usually around 4 years old and at least 18 kg (40 lb), transitioning to a belt-positioning booster seat is the next step. However, it's paramount that your child can sit correctly in the booster seat, ensuring the lap belt rests snugly across their hips and the shoulder belt lies across their chest and collarbone, between the neck and shoulder.

Seat Belt:

Once your child reaches a height of at least 145 cm (4’ 9”), they may be ready to transition to using an adult seat belt. However, it's imperative that the belt fits them properly—knees bent comfortably, lap belt low and snug across the hips, and shoulder belt positioned between the neck and shoulder without causing discomfort.

Installation and Usage Guidelines

Installing a Car Seat with a 5-Point Harness:

  1. Place the car seat in the back seat and secure it using the Universal Anchorage System (UAS) or the vehicle seat belt.

  2. Ensure the seat is tightly secured, with minimal movement.

  3. Follow the manufacturer's instructions for recline angle adjustment (for rear-facing seats) and tether strap usage (for forward-facing seats).

Securing Your Child in a 5-Point Harness:

  • For rear-facing children, adjust harness straps to be level with or just below the shoulders.

  • For forward-facing children, position harness straps at shoulder level or just above.

  • Tighten harness straps snugly, ensuring no slack or twists, and place the chest clip at armpit level.

  • Avoid bulky clothing or snowsuits, as they can interfere with proper harness fit.

Using a Booster Seat:

  • Ensure the lap belt fits low and snug across the hips and the shoulder belt rests over the chest and collarbone.

  • Follow manufacturer instructions for routing the seat belt through any guides or armrests.

Ensuring Safety and Compliance

  • Always check for the National Safety Mark and review age, weight, and height limits specified by the manufacturer.

  • Replace car seats involved in any crash, even minor ones, and be mindful of expiration dates.

  • Regularly check for recalls and register the seat with the manufacturer for updates.

  • Utilize online resources, community car seat clinics, and manufacturer tutorials for guidance and support.

Additional Safety Tips

  • Never leave a child unattended in a car and use memory aids to prevent unintentional forgetfulness.

  • Avoid using unauthorized accessories and ensure the infant carrier is securely placed and never on elevated surfaces.

  • Prioritize safe sleep practices by removing the child from the car seat upon arrival.

In conclusion, correct car seat usage is paramount for ensuring the safety and well-being of our children during travel. By adhering to safety regulations, following installation and usage guidelines, and staying informed about safety updates, we can mitigate risks and provide the highest level of protection for our precious passengers. Let's commit to prioritizing child safety on the road, one journey at a time.

Read More

Navigating Spring's Wild Weather: Road Safety Essentials

As spring breathes new life into the world, travelers are lured by the promise of warmer days and blooming landscapes. Yet, amidst the beauty of this season's renewal lies a dynamic interplay of weather patterns that can catch even the most seasoned adventurers off guard. From the lingering threat of late-season snowstorms to the sudden deluge of spring rains, navigating the hazards of spring demands vigilance and preparation. In this excerpt, we'll delve into essential tips to ensure your safety on the road during this transitional season.

As the grip of winter begins to loosen and the vibrant colors of spring emerge, travelers are drawn to explore the ever-changing landscape with anticipation. However, amidst the beauty of this season's renewal, spring brings forth a myriad of potential hazards that can catch even the most seasoned adventurers off guard. From unpredictable snowstorms to flash floods and unexpected encounters with wildlife, navigating the challenges of spring demands not only preparedness but also a sharp awareness of first aid and safety protocols.

Unpredictable Weather Fluctuations

Spring's transitionary nature brings about a mix of weather conditions, often surprising even the most experienced adventurers. While the days may grow warmer, the lingering presence of snow and the onset of rainstorms underscore the need for caution on the roads. Here are some essential tips to ensure safe travels during this dynamic season:

  • Monitor Weather Forecasts: Stay informed about upcoming weather patterns and road conditions before setting out on your journey. Be prepared for sudden changes in weather and adjust your plans accordingly.

  • Pack a Comprehensive First Aid Kit: Equip your vehicle with a well-stocked first aid kit containing essentials such as bandages, antiseptic wipes, pain relievers, emergency blankets, and any necessary medications.

  • Dress Appropriately: Despite the promise of warmer days, keep rain gear and snow coats in your vehicle. Spring weather can be unpredictable, and having these items on hand can provide crucial protection in unexpected downpours or sudden snowfall.

  • Maintain Vehicle Readiness: Ensure your vehicle is in optimal condition for spring travel. Check tire tread and pressure regularly, and inspect brakes, lights, and wiper blades for proper functionality. Consider fitting your vehicle with all-weather tires for enhanced traction in varying conditions.

  • Watch for Wildlife: Be vigilant for wildlife crossing signs, especially in rural or wooded areas. Reduce your speed and exercise caution to avoid collisions with animals on the road. If a collision occurs, assess the situation carefully and provide assistance as needed, while prioritizing safety for all parties involved.

    Plan for Emergencies: Prepare for unforeseen circumstances by carrying essential emergency supplies in your vehicle, such as a flashlight, batteries, a multipurpose tool, a portable phone charger, and non-perishable snacks.

    Stay Connected: Keep a fully charged mobile phone with you at all times and inform someone of your travel plans, including your route and expected arrival time. In the event of an emergency, having communication and a designated contact can expedite assistance.

Flash Floods and Mudslides:

Spring's thaw brings melting snow and heavy rains, increasing the risk of flash floods and mudslides, particularly in areas with steep terrain or poor drainage systems. If you encounter a flooded road while driving, do not attempt to cross it. Even shallow water can sweep vehicles away, putting you and your passengers in grave danger. Instead, turn around and find an alternate route to safety. If you find yourself trapped in a mudslide, stay inside your vehicle and await rescue, using your first aid kit to address any injuries sustained during the ordeal.

Wildlife Encounters:

As spring arrives, wildlife emerges from hibernation and begins to roam in search of food and mates. This increased activity can lead to more frequent encounters between animals and vehicles, posing a risk to both drivers and animals alike. If you encounter wildlife while driving, reduce your speed and use caution, particularly in areas known for animal crossings. If a collision occurs, assess the situation carefully and use your first aid skills to provide assistance to any injured parties, including both humans and animals.

In conclusion, navigating spring's hazards requires a combination of preparedness, awareness, and first aid skills. By staying informed about potential dangers, packing a well-stocked first aid kit, and remaining vigilant behind the wheel, travelers can minimize the risks associated with springtime travel and enjoy a safe and memorable journey. Remember, when it comes to road safety, being prepared can make all the difference in the world. Safe travels!

Read More