The Delta Dispatch

Advanced First Aid for Dog Bites: A Firefighter & EMS Responder’s Guide

Dog bites demand swift, skilled care from first responders. Our Red Cross Advanced First Aid & EMR course trains firefighters and EMS personnel in critical skills—from scene safety to wound management and emotional support. Learn to confidently handle dog bite emergencies and more with hands-on training that prepares you for real-world situations.

Dog bites are common and can range from minor injuries to life-threatening wounds. As an advanced first aider—often a firefighter or EMS responder—you’re frequently the first healthcare professional on scene. Your response can significantly impact the victim’s recovery, infection risk, and emotional well-being.

This guide provides an in-depth approach to managing dog bites, emphasizing scene safety, injury treatment, wound care, and patient support with your advanced training and EMS protocols in mind.

1. Scene Safety: Your First Priority

As firefighters and EMS responders, scene safety is non-negotiable. Before attending to the victim:

  • Ensure the dog is secured or removed from the scene.

  • Coordinate with police or animal control if the dog is aggressive or unrestrained.

  • Use situational awareness to spot hazards like traffic, bystanders, or multiple animals.

  • Wear appropriate personal protective equipment (PPE), including gloves and eye protection.

  • Brief your team on potential risks and establish safe zones.

Remember: your safety is critical. You cannot assist others if injured.

2. Rapid Assessment of Injury and Vital Signs

Upon approaching the patient:

  • Perform a quick but thorough assessment:

    • Identify bite locations, wound depth, and bleeding severity.

    • Assess airway, breathing, circulation (ABCs), especially if bites are on the face or neck.

    • Look for signs of shock or distress.

  • Evaluate distal circulation and neurological status if extremities are involved.

  • Prepare for rapid transport if injury severity or patient condition warrants.

3. Managing Bleeding and Stabilizing the Wound

  • Apply direct pressure with sterile dressings to control bleeding.

  • Elevate the injured limb if it does not exacerbate pain or injury.

  • Use hemostatic dressings or pressure bandages if standard methods fail and bleeding is life-threatening.

  • Avoid closing wounds—leave that to hospital staff.

  • If bones are exposed or fractures suspected, immobilize the limb appropriately.

4. Cleaning and Infection Control in the Field

  • Use available clean water or saline to gently irrigate wounds, flushing away debris and contaminants.

  • Avoid harsh scrubbing to prevent tissue damage.

  • Apply sterile, non-adherent dressings loosely to reduce infection risk.

  • Maintain standard precautions—dog bites pose high infection risk from mixed bacterial flora.

5. Addressing Emotional Trauma and Providing Reassurance

  • Understand that dog bite victims, especially children, often experience intense fear or shock.

  • Use your training in crisis intervention to calm and reassure patients and caregivers.

  • Maintain eye contact, speak in a calm voice, and explain procedures as you go.

  • If a child is involved, engage a parent or guardian for comfort, and use age-appropriate communication.

6. Differences in Treatment: Adults vs. Children

  • Children’s smaller anatomy and thinner skin increase risk of deeper injuries. Facial and neck bites require immediate airway assessment.

  • Children may be less cooperative; use gentle distraction and clear, comforting language.

  • Monitor for airway obstruction and signs of respiratory distress in both adults and children, but be especially vigilant with pediatric patients.

  • Adults may underreport pain or injury severity—conduct thorough assessments.

7. When to Activate Advanced Care and Transport

Immediately initiate rapid transport and notify receiving facility if:

  • Bleeding is uncontrolled or severe

  • Patient shows signs of shock or compromised airway

  • Wounds involve face, neck, hands, or joints

  • Suspected fractures or nerve injuries are present

  • Signs of infection or systemic illness are evident

  • Pediatric patients require specialized care

Coordinate transport with EMS and hospital staff for optimal continuity of care.

8. Documentation and Reporting

  • Record detailed information on the bite incident, dog description, and circumstances.

  • Document patient’s vital signs, treatment provided, and response to interventions.

  • Share info with receiving medical personnel and law enforcement/animal control as needed.

  • Proper documentation supports patient care and public safety.

9. Post-Incident Patient Education

  • Advise victims to seek follow-up care for tetanus boosters, rabies prophylaxis, and wound management.

  • Educate on signs of infection to watch for at home.

  • Stress importance of reporting dog bites to local health authorities.

10. Summary for Firefighters & EMS Responders

StepKey ActionsScene SafetySecure environment, coordinate with animal control, PPE use.AssessmentRapid injury and ABC evaluation, assess for shock.Bleeding ControlDirect pressure, elevation, hemostatic dressings if needed.Wound CareGentle irrigation, sterile dressing, infection prevention.Emotional SupportCalm communication, involve caregivers, monitor for shock.Pediatric CareAirway vigilance, gentle approach, watch for distress signs.TransportRapid evacuation for severe cases, notify hospital.DocumentationAccurate records for care and reporting.

As a firefighter or EMS advanced first aider, your training equips you to manage the complex needs of dog bite victims with confidence and professionalism. Your timely intervention saves lives, prevents complications, and supports recovery—physically and emotionally.

Read More

The Critical Role of BSI: Protecting Yourself First as a First Responder

Body Substance Isolation (BSI) is more than just wearing gloves—it's a life-saving habit for every first responder. From bloodborne pathogens to airborne illnesses, BSI protects you from invisible threats on every call. At Delta Emergency Support Training, we emphasize BSI in every scenario because your safety comes first. Learn what PPE to wear, how to use it, and why BSI is essential in every emergency situation.

When responding to emergencies, your focus is naturally on saving others. But as a first responder, your own safety must come first. That’s where Body Substance Isolation (BSI) comes in—a fundamental part of emergency medical care that often gets overlooked, especially by new responders.

BSI is more than just gloves—it's a mindset, a habit, and a crucial layer of protection against invisible but dangerous threats like bloodborne pathogens, bacteria, and bodily fluids.

At Delta Emergency Support Training, we emphasize BSI in every scenario because if you’re not safe, you can’t help anyone else.

🚨 What Is BSI?

Body Substance Isolation (BSI) is a set of precautions used to prevent contact with potentially infectious body fluids. This includes blood, vomit, saliva, urine, feces, and respiratory secretions.

BSI is part of Standard Precautions, a cornerstone of infection control recommended by health authorities and the Canadian Red Cross. BSI assumes that anyone could be carrying an infectious disease, whether or not symptoms are visible.

🦠 Diseases & Infections That Can Be Transmitted

Here are some of the infections you risk exposure to during first aid or emergency response:

Bloodborne Pathogens

  • Hepatitis B (HBV): Can survive in dried blood for up to a week

  • Hepatitis C (HCV): No vaccine, often leads to chronic liver issues

  • HIV/AIDS: Though lower risk, exposure via blood or sexual fluids can occur

Airborne & Droplet Diseases

  • COVID-19

  • Influenza

  • Tuberculosis

Contact-Transmissible Infections

  • MRSA (Methicillin-resistant Staphylococcus aureus)

  • Norovirus

  • C. difficile

These diseases can be transmitted through:

  • Cuts or broken skin

  • Mucous membranes (eyes, mouth)

  • Inhalation (coughs, sneezes)

  • Contaminated surfaces or medical equipment

🧰 What BSI Gear to Use—and When

🔹 Gloves (Always)

Used on every call. Always don gloves before patient contact, even when no fluids are visible. Use nitrile gloves for latex-sensitive patients and for better chemical resistance.

🔹 Eye Protection & Face Shield

For any situation involving splash risk (e.g., severe bleeding, childbirth, vomiting). Goggles or a full face shield help protect your mucous membranes from exposure.

🔹 Gowns/Aprons

For major trauma, childbirth, or mass-casualty events with heavy blood loss or body fluid exposure.

🔹 Masks (Surgical/N95)

  • Surgical Mask: For droplet protection during coughing, vomiting, or respiratory distress.

  • N95 Respirator: Use during airborne illness calls (e.g., suspected TB, COVID-19) and when performing aerosol-generating procedures like CPR or suctioning.

🧠 Scenario-Based BSI Examples

Scenario 1: Motor Vehicle Collision

  • Patient bleeding heavily from the scalp and face.

  • You wear: Gloves, goggles/face shield, gown if time permits.

  • Tip: Be cautious kneeling near broken glass or on spilled fuel.

Scenario 2: Unconscious Overdose

  • Risk of vomit, saliva, or needle sticks.

  • You wear: Gloves, mask, eye protection.

  • Tip: Never blindly reach into pockets or under the person—use tools and visual checks.

Scenario 3: Respiratory Distress in a Child

  • Coughing, drooling, rapid breathing.

  • You wear: Gloves, surgical or N95 mask, eye protection.

  • Tip: Keep your face out of the line of the patient’s airway.

Scenario 4: Diabetic Emergency with Vomiting

  • Patient is responsive but disoriented and vomiting.

  • You wear: Gloves, eye protection.

  • Tip: Position yourself behind or to the side—not in front—when managing vomiting to avoid splash.

⚠️ Hidden Dangers: BSI Tips from the Field

🔸 Where You Put Your Bag Matters

  • Keep gear off the ground and away from pools of fluid.

  • Use tarps, bags with plastic bottoms, or place equipment on elevated surfaces like a bench or chair.

🔸 Watch Where You Kneel

  • Glass, needles, body fluids, and animal waste can all be on the ground.

  • Wear durable, washable uniforms and clean gear after every shift.

🔸 Double Glove for Safety

  • In high-risk situations (e.g., trauma, unknown environment), wear two pairs of gloves and peel the outer layer off after initial contact.

🔸 Avoid Touching Your Face

  • It's a reflex, but it’s dangerous. You could unknowingly transfer pathogens to your eyes, nose, or mouth.

🔸 Proper Doffing Technique

  • Removing PPE incorrectly can contaminate you. Practice safe removal: gloves off first, then goggles, then gown, then mask.

🔸 Use a Buddy System

  • Have a partner check you for contamination before you remove gear or re-enter a clean zone.

🧽 After the Call: BSI Doesn’t End on Scene

  • Disinfect your equipment: Stethoscopes, trauma shears, radios, pens, and patient monitors all carry pathogens.

  • Change uniforms: Always bring an extra change of clothing. Launder contaminated items ASAP.

  • Hand hygiene: Wash thoroughly or use alcohol-based sanitizer (60–90%) after glove removal—even if your hands “feel clean.”

👩‍⚕️ Why BSI Isn’t Optional—It’s Life-Saving

BSI isn’t about paranoia—it’s about routine protection in an unpredictable world. Even minor exposures can result in career-altering infections, transmission to loved ones, or weeks of medical follow-up.

At Delta Emergency Support Training, we train first responders to treat every scene like it matters—because it does. From our Standard First Aid and Advanced First Aid/EMR courses to BLS and professional response training, we focus on real-world practices that protect you and your patients.

✅ Final Reminder

  • Always wear gloves.

  • Always assess the scene for fluid or sharp hazards.

  • Always treat every person as potentially infectious.

🩺 You’re no help to anyone if you’re not protected. BSI is not just protocol—it’s your first layer of survival on every call.

Read More

From First Aid to Fireline: Your Path to Wildland Deployment

Canada’s wildfire seasons are getting more intense—so is the demand for skilled wildland firefighters. Learn what the job involves, the certifications you need (like S-100, S-185, and EMR), and how Delta Emergency Support Training helps future responders build a solid foundation in Red Cross-certified Advanced First Aid and Emergency Medical Responder programs.

Into the Flames: Exploring Wildland Firefighting in Canada

Wildland firefighter clearing brush

Canada’s Increasing Need for Wildland Firefighters

With fire seasons growing longer and more intense across Canada, wildland firefighters are more essential than ever. From British Columbia’s dry interior to the boreal forests of Alberta and Northern Ontario, fire crews are called on every summer to battle large, unpredictable blazes that threaten ecosystems, homes, and entire communities.

If you're working toward becoming a first responder, Emergency Medical Responder (EMR), or firefighter, wildland firefighting can be a powerful way to gain experience, build resilience, and serve when it matters most.

What Is Wildland Firefighting?

Wildland firefighting involves controlling and suppressing fires that occur in natural areas—forests, grasslands, or remote terrain. In contrast to urban or structural firefighting, wildland firefighters operate in rugged, undeveloped areas, often far from roads, with limited access to resources.

You might be:

  • Building fire guards (hand-dug trenches to stop fire spread)

  • Conducting controlled burns

  • Monitoring hot spots for reignition

  • Assisting with helicopter bucket drops or pump setups

  • Supporting evacuations of nearby communities

Canadian Training and Requirements

If you're interested in working as a wildland firefighter in Canada, here are the typical requirements:

Required Certifications:

  • S-100: Basic Fire Suppression and Safety

  • S-185: Fire Entrapment Avoidance

  • ICS-100: Introduction to Incident Command System

  • Standard First Aid, Advanced First Aid, or EMR (depending on the role)

🏋️ Fitness Testing:

Many agencies require a physical fitness test (like the WFX-FIT), which includes:

  • Carrying a 25 kg pump

  • Hose pack hikes

  • Grip strength and balance challenges

🧰 Additional Skills That Help:

  • Chainsaw safety certification

  • WHMIS (Workplace Hazardous Materials)

  • Radio communication skills

  • Class 4 or air brake license (for driving fire vehicles)

In Canada, wildland firefighters are employed by:

  • Provincial agencies (e.g., BC Wildfire Service, Alberta Wildfire, Ontario Ministry of Natural Resources and Forestry)

  • Private contractors

  • Federal emergency response teams

Why EMR and AFA Matter on the Fireline

Medical incidents on wildfire deployments are more common than many expect. Team members may face:

  • Heat exhaustion or heat stroke

  • Dehydration or altitude sickness

  • Burns or smoke inhalation

  • Trauma from slips, trips, or falling debris

  • Insect stings or allergic reactions

Having a certified Emergency Medical Responder or someone with Advanced First Aid training on a crew means faster, more effective care until paramedics or air support can arrive. It's also a valuable asset that can make your application stand out.

What Deployment Is Really Like

Canadian wildland fire deployments can last days or even weeks, especially during peak season (June to August). Expect:

  • Camp life (tents, cots, and basic food services)

  • 12+ hour shifts

  • Variable weather (extreme heat, rain, or smoke)

  • Team living — camaraderie and close-knit bonds are key

The work is physically tough, but the environment is incredibly rewarding—many describe it as life-changing.

What to Pack on a Deployment

Most agencies provide essential PPE (boots, helmet, Nomex gear), but your go-bag should include:

  • High-energy snacks

  • Extra socks

  • Lightweight sleeping gear

  • Rehydration tablets or electrolytes

  • Small first aid kit

  • Bug spray and sunscreen

Mental Resilience Is Key

The mental strain of extended deployments, long shifts, and witnessing environmental damage can take its toll. Fireline crews rely heavily on:

  • Peer support

  • Strong leadership

  • Daily briefings and debriefings

  • Mental health resources when needed

How to Get Started in Canada

  1. Take an Advanced First Aid or EMR course to meet hiring and deployment requirements.

  2. Get your S-100 and S-185 certifications (typically offered through wildfire agencies or training providers).

  3. Train physically for endurance, balance, and strength.

  4. Apply to provincial wildfire services or contractors in early spring (applications often open between January and March).

Why Wildland Firefighting Is a Great Step Toward a Fire Service Career

Many municipal firefighters start with wildland contracts. It helps build:

  • Teamwork under pressure

  • Medical and safety experience

  • Exposure to command structures (ICS)

  • Mental and physical readiness for emergency work

🔥 Train With Delta Emergency Support Training

At Delta Emergency Support Training, we support future wildland firefighters with Red Cross-certified Advanced First Aid and EMR training—delivered by real paramedics and firefighters who know what the job demands. If you’re serious about joining the fire service, we’ll help you start strong and stay prepared.

Ready to begin your career on the front lines of Canada’s wildfires? Join Team Delta and let’s get started.

Read More

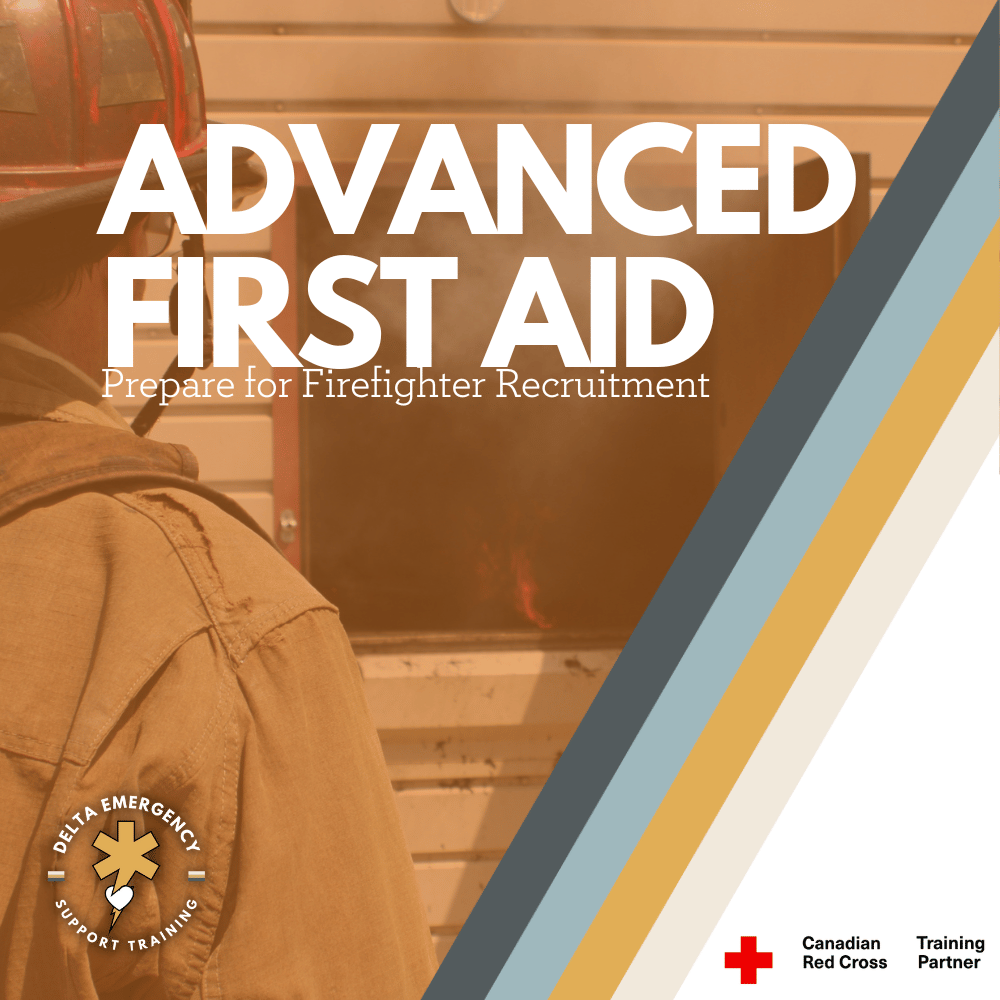
Why Advanced First Aid Is a Must-Have for Future Firefighters: Prepare for Firefighter Recruitment with the Right Medical Training

Thinking of applying to a fire department? Start with Advanced First Aid. Learn how Red Cross-certified training builds your emergency response skills and prepares you for a first responder career.

Firefighter in training.

If you're thinking about becoming a firefighter in Canada, you already know it's more than just battling flames. Firefighters are often the first on scene at medical emergencies, and in many departments, having Advanced First Aid certification is not just helpful—it’s required. As recruitment becomes more competitive, one of the best ways to stand out is to complete your Advanced First Aid training before you apply.

Why Medical Training Matters for Firefighters

Modern firefighting isn’t just fire suppression—it's rescue, emergency medical care, and community safety. Many calls involve:

  • Motor vehicle collisions

  • Cardiac arrests

  • Trauma from falls or accidents

  • Overdoses and breathing emergencies

In these cases, the ability to perform high-quality medical support can mean the difference between life and death.

What You’ll Learn in Advanced First Aid

Advanced First Aid (AFA), based on the Canadian Red Cross Emergency Care for Professional Responders, teaches you skills like:

  • Patient assessment and scene safety

  • Airway management and oxygen administration

  • CPR/AED for all age groups

  • Spinal motion restriction

  • Wound care, bleeding control, and shock management

  • Triage and emergency scenario response

This course gives you the tools to act confidently in real emergencies—a critical part of your firefighter toolkit.

Stand Out in the Hiring Process

Many fire departments prefer or require AFA (or higher-level training) as part of their application process. Having it shows that:

  • You’re serious about the job

  • You understand the physical and mental demands

  • You can contribute on Day 1

It also prepares you for future paramedic training or Primary Care Paramedic (PCP) certification, which many firefighters go on to pursue.

Train with Real Firefighters and Paramedics

At Delta Emergency Support Training, our instructors are experienced firefighters and paramedics who know exactly what departments are looking for. We don’t just teach you how to pass—we prepare you for what it’s really like out in the field.

What’s Next After AFA?

If you're planning your next steps, here’s a path many successful applicants follow:

  1. Complete Advanced First Aid

  2. Start physical fitness prep (like CPAT)

  3. Take a Firefighter Pre-Academy Program or Fire School

  4. Prepare for interviews and aptitude testing

  5. Apply

Final Thoughts

Getting your Advanced First Aid certification isn’t just checking a box—it’s building your confidence and skills to save lives. Whether you’re planning to fight fires in a city or on the front lines of a wildfire, your first aid skills are your foundation.

Want to become a firefighter? Start here. Join one of our Red Cross certified AFA courses and get trained by the professionals who do this work every day.

Read More

Heat Exhaustion, Heat Stroke, and Dehydration: A Guide for Professional Responders

With summer temperatures rising, professional responders including EMRs and AFAs must be prepared to handle heat-related emergencies. This detailed guide follows Red Cross standards to help EMS providers prevent, recognize, and effectively manage heat exhaustion, heat stroke, dehydration, and sunburn, ensuring patient safety during hot weather.

It’s May, and as the weather warms up and summer approaches, the risk of heat-related emergencies naturally increases. Longer, hotter days mean more time outdoors, higher physical activity levels, and greater exposure to the sun and heat. For professional responders—including Emergency Medical Responders (EMRs) and Advanced First Aiders (AFAs) working within EMS—being prepared to prevent and manage heat-related illnesses is essential.

Understanding how heat impacts the body and knowing how to recognize and treat conditions like heat exhaustion, heat stroke, dehydration, and sunburn can make a critical difference in patient outcomes during these warmer months. This guide follows Red Cross Emergency Care for Professional Responders standards to help you deliver confident, effective care when it matters most.

Understanding Heat-Related Emergencies

The body maintains a core temperature near 37°C (98.6°F). When exposed to high heat and humidity, or during exertion, the body’s cooling system can fail, causing heat-related illnesses:

Heat Cramps

  • Muscle spasms from electrolyte loss during heavy sweating.

Heat Exhaustion

  • Result of fluid and salt depletion; symptoms include weakness, heavy sweating, dizziness, nausea, pale skin, rapid pulse.

Heat Stroke (Medical Emergency)

  • Body temperature above 40°C (104°F), with failure to regulate heat. Symptoms include confusion, seizures, hot dry or moist skin, and unconsciousness. Immediate EMS intervention is critical.

Dehydration

  • Inadequate fluid replacement causing thirst, dry mouth, fatigue, and dizziness.

Sunburn

  • UV radiation damage to skin ranging from redness to blistering.

Risk Factors for Heat Emergencies

  • Hot and humid environments

  • Intense physical activity

  • Inadequate acclimatization

  • Heavy or restrictive clothing

  • Certain medications and health conditions

  • Extremes of age (young children, elderly)

  • Alcohol use

Prevention Strategies (Red Cross Recommendations)

Hydration

  • Encourage frequent water intake; avoid diuretics like caffeine and alcohol.

Appropriate Clothing and Shade

  • Wear light, breathable fabrics and protective hats.

  • Seek shade during peak sun hours (10 a.m. to 4 p.m.).

Activity Adjustments

  • Schedule exertion for cooler times; take regular rest breaks.

Sunscreen

  • Use broad-spectrum SPF 30+ and reapply every two hours.

Monitor Vulnerable Individuals

  • Check on children, elderly, and those with medical conditions regularly.

EMS First Aid: Managing Heat Emergencies

Heat Cramps

  • Move the patient to a cool environment.

  • Provide fluids with electrolytes if tolerated.

  • Gently stretch cramped muscles.

Heat Exhaustion

  • Move patient to shade or cool area.

  • Loosen clothing and apply cool compresses.

  • Administer oral fluids cautiously.

  • Monitor airway, breathing, and circulation (ABCs).

  • Prepare for transport if no improvement.

Heat Stroke (Emergency Care)

  • Call advanced medical services immediately.

  • Move patient to cool environment, remove excess clothing.

  • Apply rapid cooling: wet cloths, fans, cool water immersion if safe.

  • Monitor vital signs closely; be ready to provide advanced life support.

  • Do not give fluids if patient is unconscious or vomiting.

Dehydration

  • Provide oral rehydration solutions if alert.

  • Transport if severe symptoms or unable to tolerate fluids.

Sunburn

  • Remove from sun exposure.

  • Apply cool compresses and moisturizing lotions.

  • Monitor for severe reactions requiring medical care.

When to Escalate Care

  • Altered mental status or seizures

  • Unresponsiveness or unconsciousness

  • Persistent vomiting or inability to take fluids

  • Signs of shock

  • Extensive sunburn or blistering

Conclusion

As EMS providers—including EMRs and AFAs—adhering to Red Cross Emergency Care for Professional Responders standards is essential for effective summer care. Preventing heat emergencies through education and early intervention can save lives.

Stay vigilant for signs of heat-related illness, prioritize rapid cooling and hydration, and always escalate care when indicated. Your knowledge and readiness make all the difference.

Want to enhance your EMS skills with Red Cross–approved training? Our instructors are experienced paramedics and firefighters who provide hands-on, practical Advanced First Aid and EMR courses designed to prepare you for real-world emergencies.

Read More
Advanced First Aid, First Responder, Red Cross Kumari Malhotra Advanced First Aid, First Responder, Red Cross Kumari Malhotra

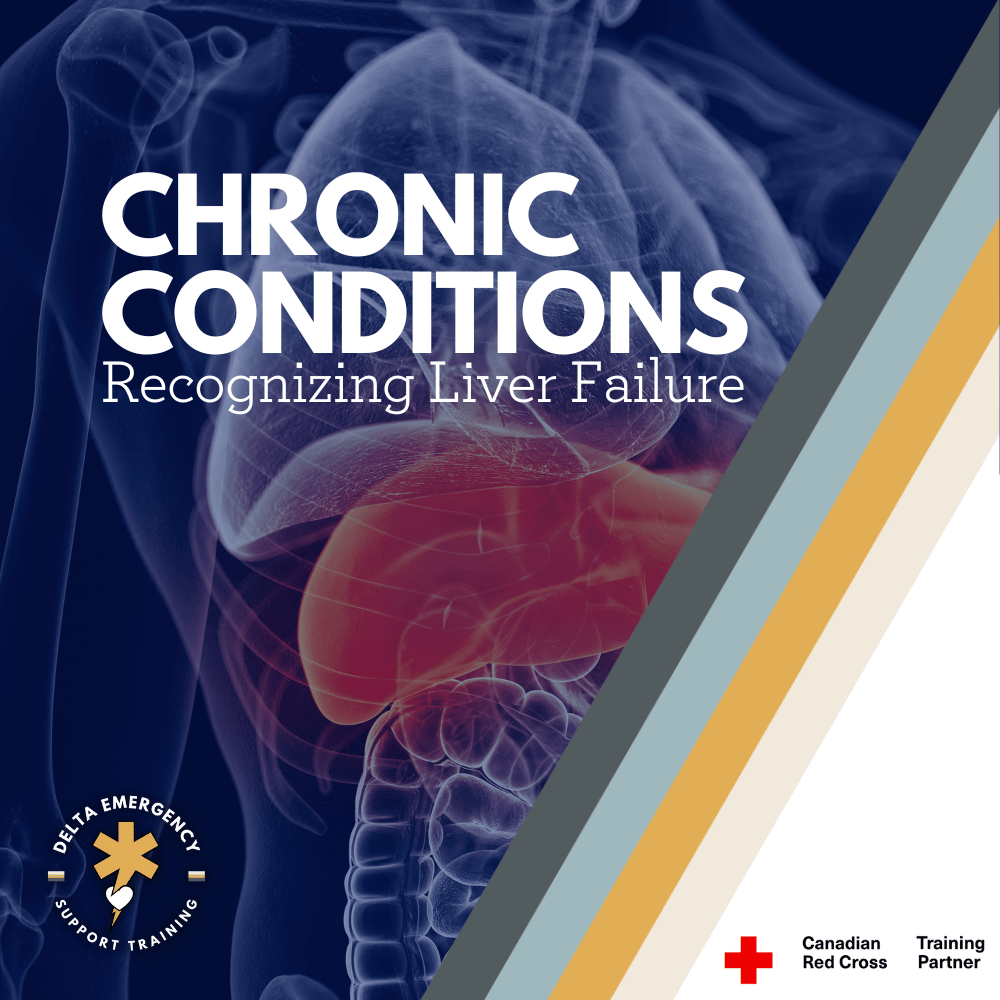
Liver Failure: What Every Future First Responder Should Know

Liver failure is a life-threatening condition that every future first responder should be able to recognize. This in-depth guide covers liver function, causes of failure, patient symptoms, and how firefighters and EMRs can respond—based on Red Cross emergency care standards.

The liver is one of the most vital organs in the human body, responsible for a wide range of essential functions. As a first responder—whether you're training as a firefighter, Emergency Medical Responder, or preparing for a healthcare career—it’s important to understand what liver failure is, how it presents, and what role you can play in early recognition and supportive care.

This blog post is designed for students and professionals taking Advanced First Aid or Red Cross EMR courses who are beginning their journey into emergency services. Whether you’re on a call with your fire crew or treating a patient as part of EMS, knowing how to recognize and respond to liver failure can save lives.

The Role of the Liver in the Human Body

The liver has more than 500 known functions. Key responsibilities include:

  • Detoxification: Filtering toxins from the blood (including medications, alcohol, and waste byproducts).

  • Metabolism: Processing carbohydrates, fats, and proteins.

  • Storage: Storing glycogen, vitamins, and iron.

  • Bile Production: Aiding digestion by producing bile for fat absorption.

  • Clotting Factors: Synthesizing proteins necessary for blood clotting.

When liver cells become damaged or overwhelmed, these processes break down—leading to liver failure, which can progress rapidly.

What Is Liver Failure?

Liver failure occurs when the liver loses its ability to function adequately. It can be acute (develops quickly over days or weeks) or chronic (progresses over months or years).

Types of Liver Failure:

  • Acute Liver Failure (ALF): Often caused by overdose, viral hepatitis, or toxins. Patients may have had no prior liver disease.

  • Chronic Liver Failure (CLF): Usually due to long-term conditions like alcoholism, hepatitis C, or nonalcoholic fatty liver disease (NAFLD).

Stages of Liver Failure

  1. Inflammation: Liver becomes swollen or inflamed.

  2. Fibrosis: Scar tissue begins to form.

  3. Cirrhosis: Scar tissue replaces healthy tissue, impeding function.

  4. End-Stage Liver Disease (ESLD): Liver stops functioning effectively.

  5. Hepatic Encephalopathy: Toxins affect brain function due to liver's inability to filter.

Common Causes of Liver Failure

  • Alcohol abuse

  • Hepatitis A, B, and C

  • Acetaminophen overdose

  • Autoimmune liver disease

  • Genetic conditions (e.g., Wilson’s disease)

  • Fatty liver disease

  • Toxin exposure (mushrooms, industrial chemicals)

Signs and Symptoms

As a first responder, here are the signs you may observe:

Early Signs:

  • Fatigue

  • Loss of appetite

  • Nausea and vomiting

  • Right upper quadrant abdominal pain

Progressing Symptoms:

  • Jaundice: Yellowing of the skin and eyes

  • Bruising or bleeding easily (due to loss of clotting factors)

  • Swelling in legs and abdomen (ascites)

  • Dark urine, pale stool

  • Confusion or personality changes (hepatic encephalopathy)

  • Fetor hepaticus: A sweet, musty breath odor

How These Patients Present to EMS:

  • Altered level of consciousness

  • Seizures or unresponsiveness in severe encephalopathy

  • Abdominal pain and distention

  • Visible jaundice or bruising

  • History of alcohol use, medication use (especially acetaminophen), or hepatitis

  • Possible GI bleeding (hematemesis or melena)

Treatment Overview

While definitive treatment often includes hospitalization, liver transplant, or intensive supportive care, first responders can play a crucial early role:

Emergency Priorities:

  • Airway, Breathing, Circulation (ABCs): Always your first step.

  • Monitor LOC: Liver failure can rapidly lead to encephalopathy and unconsciousness.

  • Manage bleeding: These patients bleed easily due to impaired clotting.

  • Prevent further harm: Minimize medications and toxins.

  • Rapid transport: Time is critical in acute liver failure.

How Firefighters, EMRs, and Paramedics Respond

For Firefighters:

  • Be aware during medical assist calls, particularly for unconscious individuals.

  • Look for signs of jaundice or a known history of liver disease.

  • Support EMS with lifting and extrication in swollen or weakened patients.

For EMRs:

  • Take a clear history if possible (alcohol, drug use, known liver issues).

  • Use primary and secondary survey techniques to identify symptoms.

  • Support airway and manage LOC as needed.

  • Understand your role in ongoing assessment and timely transport.

For Paramedics:

  • Initiate IV access if within scope.

  • Administer oxygen and prepare for airway intervention.

  • Check glucose levels—hypoglycemia is common.

  • Be prepared for seizures or altered mental status.

  • Notify receiving hospital of suspected liver failure.

Why Liver Knowledge Matters for First Responders

Liver failure is often underrecognized in the pre-hospital setting, especially in its early stages. However, responders with advanced first aid or EMR training can spot the red flags and advocate for timely care.

Understanding the liver’s role in the body, the signs of dysfunction, and how these patients deteriorate can help you:

  • Communicate effectively with paramedics and hospital staff.

  • Make informed decisions during assessment.

  • Improve outcomes by acting early.

Join the Front Lines: Train with Confidence

At Delta Emergency Support Training, we specialize in Red Cross-certified Advanced First Aid and Emergency Medical Responder (EMR) courses for individuals looking to start a career in emergency services.

Whether you're working toward a future as a paramedic, firefighter, or healthcare professional, our instructors—many of whom are active EMS providers and firefighters—are here to prepare you for real-world scenarios, including recognizing critical conditions like liver failure.

Final Thoughts

Liver failure may not be the first thing that comes to mind during a call—but for the trained eye, it's a condition that demands attention. As a first responder, being equipped with the knowledge to recognize and respond can make all the difference.

Take the first step in your emergency services career by enrolling in one of our Red Cross-certified training programs. Learn to recognize more than symptoms—learn to save lives.

Read More
Alberta, Advanced First Aid, 911, EMR, Home Safety Kumari Malhotra Alberta, Advanced First Aid, 911, EMR, Home Safety Kumari Malhotra

Invisible Danger: Red Cross Guide to CO Poisoning Care for AFA + EMR

Aligned with Red Cross standards, this guide prepares Emergency Medical Responders and Advanced First Aiders to recognize and manage carbon monoxide poisoning effectively—from symptoms to scene safety and oxygen treatment.

Carbon monoxide (CO) is a silent killer. As an Advanced First Aider or Emergency Medical Responder (EMR), you're often the first healthcare contact a patient receives. Early recognition and prompt intervention in CO poisoning are crucial and can save lives—especially in settings where access to definitive care may be delayed.

This blog outlines the causes, signs and symptoms, pathophysiology, field assessment, and pre-hospital care strategies relevant to both Advanced First Aiders and EMRs.

What Is Carbon Monoxide?

Carbon monoxide is a colorless, odorless, tasteless gas produced by the incomplete combustion of carbon-based fuels, such as:

  • Gasoline

  • Natural gas

  • Wood

  • Coal

  • Propane

It is often found in:

  • Malfunctioning furnaces and heaters

  • Gas-powered generators

  • Indoor barbecuing or grilling

  • Exhaust from vehicles in enclosed spaces

  • Fires (house, structure, or wildland)

Because CO is undetectable without special equipment, individuals can be poisoned without any obvious warning signs.

Why Is It Dangerous?

CO binds to hemoglobin in red blood cells with 200 to 250 times greater affinity than oxygen, forming carboxyhemoglobin (COHb). This reduces the amount of oxygen that can be transported through the bloodstream and delivered to vital organs. As a result, even small exposures can lead to significant tissue hypoxia, especially in high-demand organs like the brain and heart.

Common Risk Scenarios for First Responders

You may encounter CO poisoning in any of the following situations:

  • Residential emergencies involving fuel-burning appliances

  • People found unconscious in a running vehicle (especially in enclosed garages)

  • Victims rescued from structure fires or enclosed-space fires

  • Use of charcoal grills or fuel heaters indoors

  • Power outages leading to indoor generator use

Your scene awareness and understanding of environmental risks are essential in raising suspicion early.

Signs and Symptoms of CO Poisoning

Mild to Moderate Exposure

  • Headache (often described as dull or pressure-like)

  • Dizziness or lightheadedness

  • Nausea and vomiting

  • Fatigue or weakness

  • Confusion or difficulty concentrating

  • Shortness of breath with minimal exertion

Severe Exposure

  • Altered level of consciousness or unresponsiveness

  • Chest pain (especially in individuals with cardiac history)

  • Tachycardia, hypotension

  • Seizures

  • Loss of coordination or balance

  • Respiratory distress

  • Coma or death

Children, elderly individuals, and pregnant patients are particularly vulnerable, and may deteriorate more quickly.

What About Pulse Oximeter (SpO₂) Readings?

This is a critical point for both EMRs and Advanced First Aiders:

Pulse oximeters are unreliable in carbon monoxide poisoning.

Why?

Pulse oximeters measure the percentage of hemoglobin saturated with something, but they cannot distinguish between:

  • Oxyhemoglobin (HbO₂): hemoglobin bound with oxygen

  • Carboxyhemoglobin (COHb): hemoglobin bound with carbon monoxide

Since COHb absorbs light in a similar way to HbO₂, the device will often display a falsely normal or high oxygen saturation (SpO₂), even if the patient is severely hypoxic.

Example:

A patient may have:

  • A pulse oximeter reading of 98–100%

  • But a COHb level of 30–40%, meaning oxygen delivery is critically impaired

Key Takeaway

Do not rely on SpO₂ readings in suspected carbon monoxide poisoning.

Instead:

  • Focus on the scene context and presenting symptoms

  • Administer high-flow oxygen regardless of oximeter reading

  • Prioritize transport to definitive medical care

Pre-Hospital Management

Your early actions can dramatically improve outcomes. Here's what to do:

1. Ensure Scene Safety

Before entering a potentially contaminated area, ensure it is safe. Never enter confined spaces without proper PPE and backup support.

2. Remove the Patient from Exposure

Move the patient to fresh air immediately, but only if it is safe to do so.

3. Administer High-Flow Oxygen

  • Use a non-rebreather mask at 15 L/min

  • Oxygen accelerates the dissociation of carbon monoxide from hemoglobin:

    • Room air: COHb half-life ~5 hours

    • 100% oxygen: COHb half-life ~1.5 hours

    • Hyperbaric oxygen: COHb half-life ~30 minutes

4. Monitor Vital Signs

  • Expect signs of hypoxia, even with normal SpO₂

  • Monitor for respiratory distress, altered LOC, or shock

5. Rapid Transport

Any symptomatic patient requires prompt transfer to advanced medical care, especially if:

  • They have altered mental status

  • Are pregnant

  • Exhibit neurological or cardiac symptoms

  • Have been exposed for a prolonged period

Notify receiving EMS crews or hospitals of the potential CO exposure.

Special Considerations

Pregnant Patients

Fetal hemoglobin binds CO more readily than adult hemoglobin. CO exposure poses serious risks to the fetus, even if the mother appears only mildly symptomatic.

Pediatric Patients

Children may develop symptoms more quickly due to higher metabolic rates and smaller reserves.

Multiple Casualties

If several people in the same environment report similar symptoms (e.g., headache, dizziness), strongly suspect environmental CO exposure. Treat all individuals as potentially poisoned, even if some are asymptomatic.

Field Clues for CO Exposure

Use this quick field checklist:

  • Is there a fuel-burning device involved?

  • Are multiple people feeling sick in the same location?

  • Do symptoms improve once outdoors?

  • Is there poor ventilation or signs of combustion indoors?

  • Does the patient seem "too sick" for their SpO₂ reading?

If yes to any of the above: suspect carbon monoxide poisoning and treat accordingly.

Quick Reference Table: SpO₂ in CO Poisoning

FactorNormal PatientCO Poisoning PatientPulse Oximeter (SpO₂)97–100%97–100% (falsely normal)Actual Oxygen DeliveryAdequateCritically impairedAppropriate ActionMonitorHigh-flow O₂ + transport

Prevention and Education

As a first responder, you also play a vital role in prevention. Encourage the public to:

  • Install and maintain carbon monoxide detectors

  • Keep fuel-burning appliances properly ventilated

  • Never use outdoor cooking equipment indoors

  • Avoid idling vehicles in enclosed spaces

  • Seek medical attention after any CO alarm activation, especially with symptoms

    Carbon monoxide poisoning is a critical medical emergency that demands rapid recognition and decisive care. Both Advanced First Aiders and Emergency Medical Responders must understand that a normal SpO₂ reading doesn’t rule out danger. Situational awareness, oxygen administration, and timely transport are your most effective tools in the field.

    At our training center, we specialize in Advanced First Aid and EMR education, equipping students with the real-world skills needed to respond confidently to medical emergencies—including CO poisoning. If you're interested in becoming a firefighter or pursuing a career in emergency services, our programs are a strong first step.

    Many of our instructors are experienced paramedics and active-duty firefighters, bringing first-hand insights from the front lines directly into the classroom. You'll learn from professionals who live what they teach—preparing you not only to pass your course but to thrive in high-stakes environments.

    Ready to take the next step? Join a course that goes beyond the textbook.

Read More

Scene Assessment for AFA & EMR: A Step-by-Step Guide

Discover how first responders assess scenes in seconds using real tools like HEMPPA, PWCATS, and SCORTS. We teach it in our EMR course — with real-world scenarios to make it stick.

In emergency medical care, scene assessment is your first critical move. It ensures your safety, guides your approach to the patient, and sets the foundation for triage, treatment, and transport. Whether you’re first on the scene or part of a larger response team, a systematic assessment process helps you stay focused and effective.

🚨 Step 1: Scene Overview – HEMPPA

The acronym HEMPPA helps responders quickly assess for overall scene safety and initial priorities:

H – Hazards

  • Look for anything that could harm you, the patient, or bystanders.

  • Examples: traffic, fire, electricity, gas, violence, sharp objects.

  • Why it matters: A dead rescuer helps no one. Always protect yourself first.

E – Environment

  • Assess conditions like weather, lighting, terrain, and location access.

  • Slippery roads, tight spaces, or poor visibility can impact patient care and evacuation.

M – Mechanism of Injury (MOI) / Nature of Illness (NOI)

  • MOI: What caused the injury? (e.g., fall from height, motor vehicle crash)

  • NOI: For medical calls, what’s wrong? (e.g., chest pain, shortness of breath)

P – Patients (Number)

  • Are there multiple patients?

  • Call for more resources if needed (e.g., MVC with multiple occupants).

P – PPE (Personal Protective Equipment)

  • Gloves, eye protection, masks — wear what’s appropriate to protect from bodily fluids or contaminants.

A – Additional Resources

  • Fire, police, ALS units, specialized rescue — ask early.

  • Helps control the scene, provide support, or manage large-scale incidents.

🧠 Step 2: What Else Should You Ask or Observe?

Here are key scene-based questions that build context before you even touch the patient:

  • Position of the patient: Supine, seated, slumped, or ejected from vehicle?

  • Witness reports: What did bystanders or family see? Events leading up to the incident?

  • Chief complaint: What is bothering the patient most right now?

  • Age & gender: Helps form medical differentials quickly.

  • Is the patient tracking/responding? (Eye contact, awareness)

  • Skin colour and condition: Pale, cyanotic, flushed? Cool, clammy, hot? Clues for perfusion.

🔤 PWCATS: For Immediate Patient Impressions

PWCATS helps EMRs gather critical info during the primary assessment.

P – Position

  • Are they standing, lying, slumped, or fetal?

  • Can indicate level of distress or unconsciousness.

W – Witnesses

  • Ask what happened, timing, onset of symptoms, seizure activity, etc.

  • Helps reconstruct events and guide priorities.

C – Chief Complaint

  • What’s their main issue? Chest pain, difficulty breathing, pain scale?

  • Directs your initial focus and treatment.

A – Age

  • Children and elderly present differently.

  • Age affects vital signs, resilience, and urgency of care.

T – Tracking (eye contact/alertness)

  • Are they focused? Following your movements?

  • Quick check of neurologic status or altered mental state.

S – Skin (colour, condition, temperature)

  • Pale, cool, clammy = shock.

  • Flushed, hot = fever or heat stroke.

  • Cyanosis (blue lips/nails) = hypoxia.

⚠️ SCORTS: Scene-Specific Red Flags

Use SCORTS to identify serious, time-sensitive conditions or complicating factors:

S – Stridor / SOB (Shortness of Breath)

  • Upper airway obstruction or respiratory distress?

  • High priority for airway intervention or oxygenation.

C – C-Spine

  • Suspect spinal injury if trauma involved (falls, MVCs).

  • Apply manual stabilization early if indicated.

O – Obvious Bleeding

  • Life-threatening external bleeds need immediate control — pressure, tourniquet, or dressing.

R – Rural / Remote

  • Consider access to definitive care, transport time, or need for air medevac.

  • Distance may increase urgency for certain interventions.

T – Time from ER

  • How far are you from advanced care?

  • May influence treatment decisions, especially in critical cases.

S – Stable / Unstable

  • Is the patient deteriorating? ABCs intact?

  • Helps you determine the transport priority and whether to initiate rapid extrication.

🧭 Scene Assessment in Action: Example Workflow

  1. Pull up, pause, and scan: Use HEMPPA.

  2. Approach safely with PPE on.

  3. Identify number of patients, call for help if needed.

  4. Walk up, observe PWCATS.

  5. Start ABC assessment and initiate any urgent interventions.

  6. Consider SCORTS: look for red flags or complicating factors.

  7. Report findings and updates using structured handover (e.g., ISBAR or CHART).

📋 Summary Cheat Sheet

AcronymStands ForPurpose HEMPPA Hazards, Environment, MOI/NOI, Patients, PPE, Additional ResourcesScene safety & setup PWCATSPosition, Witness, Chief Complaint, Age, Tracking, SkinInitial impression & focused questioning SCORTS Stridor/SOB, C-Spine, Obvious Bleeding, Rural, Time from ER, Stability Red flags & transport factors

🧑‍🏫 Learn Scene Assessment with Us

We teach all of this — and more — in our AFA and EMR classes. You'll learn to apply these acronyms like HEMPPA, PWCATS, and SCORTS in realistic emergency scenarios, helping you build the confidence to assess any scene quickly and safely. Scene assessment is one of the most critical skills a first responder can have, and we make sure you understand why it matters — not just in theory, but in action.

Read More

How the Heart Works: A Detailed Look at Cardiac Anatomy and Physiology

The human heart is a powerful, muscular organ central to the circulatory system, responsible for delivering oxygen and nutrients to tissues while removing waste. About the size of a clenched fist, it operates through a coordinated series of electrical and mechanical events that keep blood flowing efficiently throughout the body.

For Emergency Medical Responders (EMRs), a foundational understanding of cardiac anatomy and physiology is essential. The heart has four chambers (two atria and two ventricles), four valves that ensure one-way blood flow, and a conduction system that generates and coordinates each heartbeat. These components work together in two circulatory loops—pulmonary and systemic—to maintain oxygenation and perfusion.

Recognizing early signs of cardiac distress, using tools like ECGs, and performing interventions such as CPR or AED use all depend on a clear understanding of how the heart functions. From arrhythmias to cardiac arrest, EMRs are often the first line of defense in identifying and managing life-threatening cardiac conditions.

The human heart is a muscular organ that lies at the core of the circulatory system. Roughly the size of a clenched fist, it’s responsible for pumping blood throughout the body, supplying oxygen and nutrients while removing carbon dioxide and metabolic waste. For emergency medical responders (EMRs), understanding the anatomy and physiology of the heart is essential for recognizing life-threatening conditions and initiating appropriate interventions.

🫀 Anatomy of the Heart: A Chambered Pump

The heart is divided into four chambers — two upper atria and two lower ventricles.

1. Right Atrium

This chamber receives deoxygenated blood from the body through the superior and inferior vena cava. It acts as a holding tank before pushing the blood through the tricuspid valve into the right ventricle.

2. Right Ventricle

The right ventricle pumps deoxygenated blood through the pulmonary valve into the pulmonary arteries and onward to the lungs, where gas exchange occurs (oxygen in, carbon dioxide out).

3. Left Atrium

After oxygenation in the lungs, blood returns to the heart via the pulmonary veins, entering the left atrium. It then moves through the mitral (bicuspid) valve into the left ventricle.

4. Left Ventricle

The left ventricle is the strongest chamber, as it must pump oxygen-rich blood to the entire body via the aortic valveand aorta. Its thick muscular wall is adapted for high-pressure output.

🧩 The Valves: One-Way Gates of Flow

Valves maintain unidirectional blood flow, preventing backflow and ensuring efficient circulation.

  • Tricuspid valve: Between right atrium and right ventricle.

  • Pulmonary valve: Between right ventricle and pulmonary artery.

  • Mitral (bicuspid) valve: Between left atrium and left ventricle.

  • Aortic valve: Between left ventricle and aorta.

These valves open and close in response to pressure changes within the heart chambers.

🔄 The Cardiac Cycle: How the Heart Beats

Each heartbeat consists of two phases:

  • Systole: Contraction phase — ventricles contract, pushing blood out.

  • Diastole: Relaxation phase — heart fills with blood from the atria.

The cardiac conduction system coordinates this rhythm:

  1. Sinoatrial (SA) node: The “natural pacemaker” that initiates electrical impulses.

  2. Atrioventricular (AV) node: Delays the signal slightly to allow the atria to fully contract.

  3. Bundle of His and Purkinje fibers: Distribute the impulse through the ventricles, causing contraction.

This electrical activity is what we see on an ECG (electrocardiogram), often used in the field to assess heart rhythm and function.

🫁 Heart and Lungs: Partners in Circulation

The heart and lungs work in a dual circuit:

  • Pulmonary circulation (right heart): Sends blood to the lungs to pick up oxygen.

  • Systemic circulation (left heart): Sends oxygenated blood to tissues throughout the body.

A disruption in either circuit — like a pulmonary embolism, heart failure, or myocardial infarction — can be life-threatening and requires prompt assessment and care.

🚑 Why This Matters for EMRs

For EMRs and other frontline providers:

  • Recognizing signs of poor perfusion (e.g., pale skin, weak pulses, altered mental status) relies on understanding heart function.

  • Administering oxygen, performing CPR, or using an AED involves direct intervention in cardiac physiology.

  • Conditions like shock, arrhythmias, and cardiac arrest are rooted in cardiac anatomy and function.

A firm grasp of how the heart works can help EMRs make informed, confident decisions in critical situations.

✅ Key Takeaways

  • The heart has four chambers: right and left atria, and right and left ventricles.

  • Four valves control one-way blood flow: tricuspid, pulmonary, mitral, and aortic.

  • The cardiac cycle consists of systole (contraction) and diastole (filling).

  • Electrical impulses coordinate heartbeats and can be monitored via ECG.

  • EMRs must recognize cardiac signs and symptoms to respond effectively in emergencies.

Read More

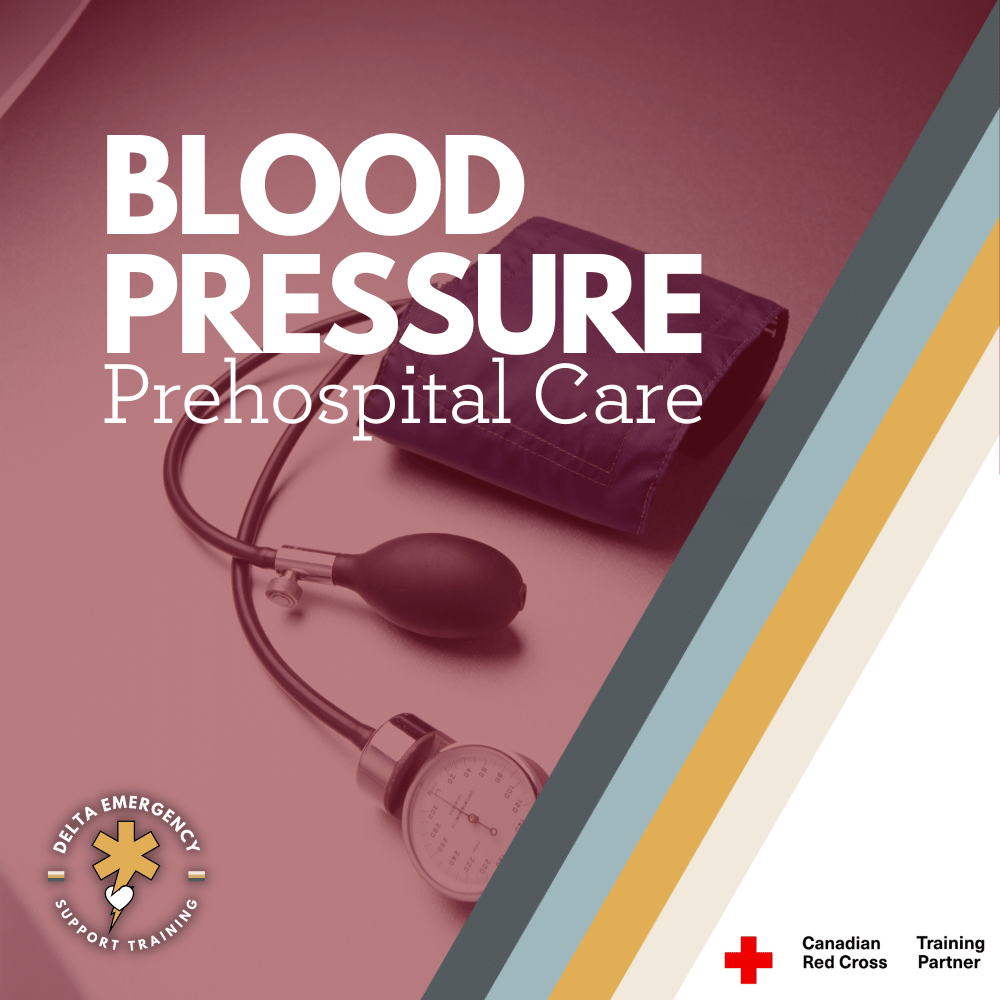
Understanding Blood Pressure: A Critical Guide for Advanced First Aiders & EMRs

Blood pressure isn’t just a number—it’s a key clue to what’s happening inside your patient’s body. Whether it’s shock, stroke, or dehydration, knowing how to take and interpret blood pressure can guide better decisions and faster interventions. This guide walks AFA and EMR students through practical skills, critical signs, and scene-ready tips to sharpen your response.

Blood pressure is one of the most foundational yet powerful tools we have in emergency medical response. For Advanced First Aiders (AFA) and Emergency Medical Responders (EMRs), knowing how to assess and interpret blood pressure can directly influence your patient care decisions and the urgency of interventions.

Whether you're the first responder at a vehicle collision or assisting someone feeling faint at a public event, blood pressure is a window into the circulatory system—and sometimes, the first clue that something critical is happening.

🧠 What Is Blood Pressure, Really?

Blood pressure (BP) measures the force of circulating blood against the artery walls. It reflects two key phases of the heart's cycle:

  • Systolic (top number): The pressure when the heart contracts and pumps blood out.

  • Diastolic (bottom number): The pressure when the heart relaxes and fills with blood.

📊 Standard Ranges (for Adults):

ClassificationSystolicDiastolicNormal90–120 mmHg60–80 mmHgElevated120–129 mmHg<80 mmHgHypertension Stage 1130–139 mmHg80–89 mmHgHypertension Stage 2≥140 mmHg≥90 mmHgHypotension<90 mmHg<60 mmHg

⚠️ Context is everything. A BP of 90/60 might be perfectly normal for one patient, but a sign of decompensated shock in another.

🔍 Why Blood Pressure Is Vital in Prehospital Care

As an AFA or EMR, you rely on vital signs to tell a story. Blood pressure, especially when taken alongside LOC, skin signs, RR, and pulse, can help you:

  • Detect early signs of shock or internal bleeding

  • Monitor for stroke or cardiac complications

  • Differentiate between syncope and seizure

  • Recognize toxic exposure or overdose

  • Identify heat exhaustion or dehydration

  • Understand trends during ongoing assessment

BP is especially important during ongoing monitoring, not just initial assessment.

🛠️ How to Take an Accurate BP (Manual Method)

While digital monitors are useful, manual BP skills are essential for field readiness and clinical accuracy.

✔️ Equipment:

  • Sphygmomanometer (BP cuff)

  • Stethoscope

🧾 Step-by-Step:

  1. Position the patient: Seated or supine with arm supported at heart level.

  2. Wrap the cuff snugly around the upper arm, 2–3 cm above the elbow crease.

  3. Locate the brachial artery and place the stethoscope over it.

  4. Inflate cuff until the pulse is no longer audible (~180–200 mmHg, or 30 above normal).

  5. Slowly deflate the cuff (~2 mmHg/sec).

  6. First sound = Systolic, last sound = Diastolic.

  7. Fully deflate and record the reading with time and side taken (e.g., L arm, 10:05 a.m.).

🔄 Reassess BP every 5 mins for unstable patients, and 10–15 mins for stable ones.

🧠 Interpretation in the Field: What Do Abnormal BPs Tell Us?

⬇️ Low BP (Hypotension)

May indicate:

  • Hemorrhagic or hypovolemic shock

  • Sepsis

  • Dehydration

  • Anaphylaxis

  • Overdose (narcotics, sedatives)

  • Heart failure

Clinical clues:

  • Cool, clammy, pale skin

  • Confusion or altered LOC

  • Weak, thready pulse

  • Increased RR

  • Cap refill >2 seconds

🛑 Action:

  • Lay patient supine

  • Keep warm

  • Provide oxygen (if trained)

  • Activate EMS

  • Monitor vitals and ABCs frequently

⬆️ High BP (Hypertension)

Could indicate:

  • Stroke

  • Head injury

  • Cardiac crisis (e.g., MI)

  • Pain or anxiety

  • Certain toxins or drugs

Clinical clues:

  • Headache

  • Blurred vision

  • Bounding pulse

  • Facial flushing

  • Unequal pupils or confusion

🛑 Action:

  • Keep patient calm and seated

  • Avoid sudden position changes

  • Support ABCs

  • Monitor for neuro signs

  • Rapid transport if stroke is suspected

🛑 Common BP Mistakes to Avoid

  • Cuff too small or too loose = falsely high reading

  • Arm unsupported or above/below heart level = inaccurate reading

  • Talking or moving during reading = unreliable results

  • Only taking one reading = no trend to compare

📎 Always pair BP with a full set of vitals: HR, RR, skin signs, LOC, SpO₂ (if available).

🧰 Practice Tips for AFA/EMR Students

  • Practice BP on real people during calm and active states

  • Use scenario-based learning (e.g., trauma, medical, overdose)

  • Compare manual and digital readings for training purposes

  • Note how BP trends with treatment and patient position

🌡️ BP in Specific Situations

🧓 Elderly:

  • May have higher baseline BPs due to reduced arterial elasticity

  • Monitor for postural hypotension

👶 Children:

  • Use appropriate cuff size

  • Hypotension is a late sign of shock

🤕 Trauma:

  • A falling BP with rising pulse = shock

  • Suspect internal bleeding or volume loss

🧠 Stroke:

  • BP may rise to preserve cerebral perfusion—don’t treat unless trained and authorized

✅ Final Takeaways for First Responders

  • Blood pressure is a critical diagnostic tool, not just a number.

  • Always take it in context with other vitals and the patient’s presentation.

  • Practice often, document clearly, and reassess regularly.

  • Know the red flags and escalate care early if something doesn’t feel right.

Want to sharpen your blood pressure skills?

Join our Advanced First Aid or EMR courses for hands-on practice, real-world scenarios, and guidance from experienced instructors.

Read More

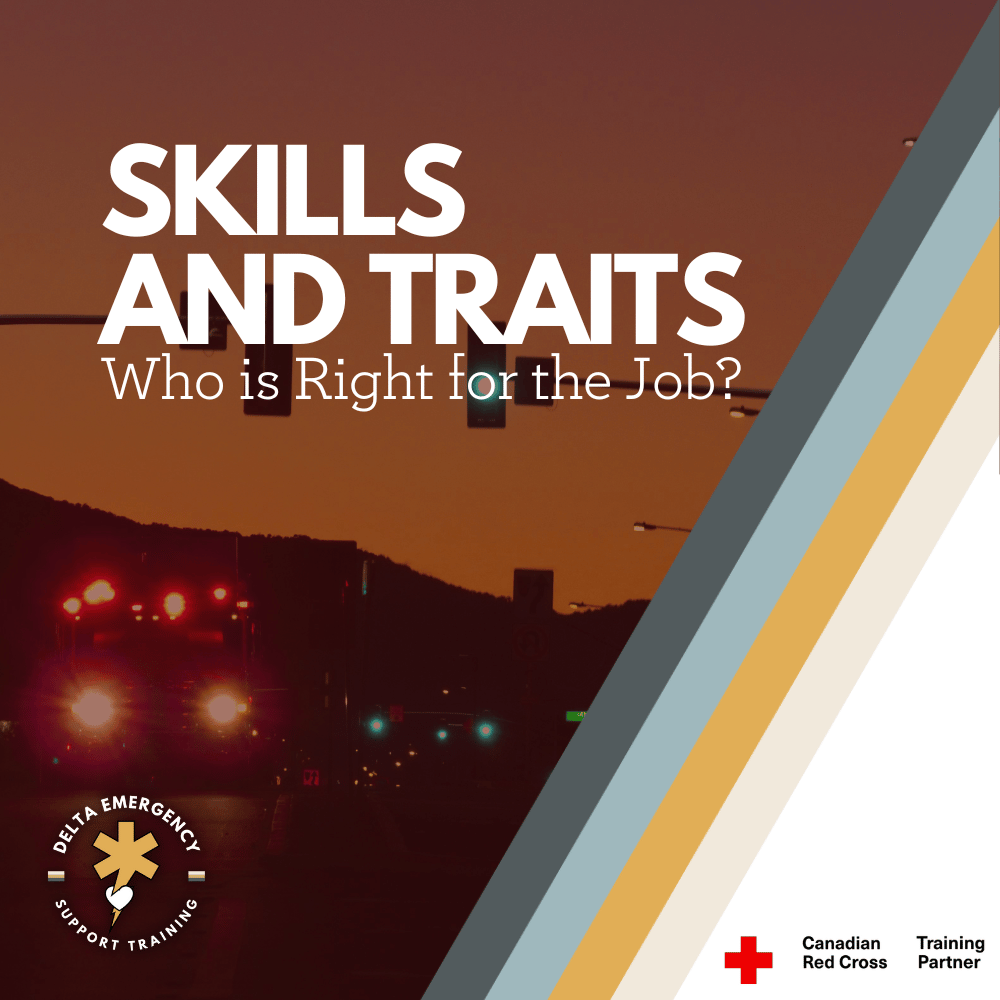
Can I be a First Responder? The Skills and Traits You Need

Being a first responder requires more than just medical knowledge—it’s about having the right qualities. From staying calm under pressure to having a deep desire to help others, discover the traits that make someone a good fit for this rewarding career.

Being a first responder is not just a job—it’s a commitment to saving lives, helping others in crisis, and staying calm under pressure. Whether you’re considering a career in emergency medical services (EMS), firefighting, law enforcement, or emergency response, it’s essential to understand what it takes to succeed in this demanding yet rewarding field.

At Delta Emergency Support Training, we offer Standard First Aid (SFA), Advanced First Aid/Emergency Medical Responder (AFA/EMR), and Basic Life Support (BLS) training—all essential steps for those looking to enter the world of emergency response. But beyond training, what kind of person thrives in this role?

Let’s break down the qualities, skills, and career options available for first responders.

What is a First Responder?

A first responder is someone trained to provide immediate medical care and assistance at the scene of an emergency. This includes stabilizing patients, administering life-saving procedures, and preparing them for transport to a hospital.

Common First Responder Careers:

  • Emergency Medical Responder (EMR) – First on the scene in pre-hospital settings, providing basic medical care before paramedics arrive.

  • Paramedic – Performs advanced medical procedures, including airway management, IV therapy, and medication administration.

  • Firefighter – Responds to fires, medical emergencies, and rescues.

  • Police Officer – Handles emergency situations, often providing basic medical assistance until EMS arrives.

  • Search and Rescue (SAR) Team Member – Locates and rescues individuals in distress in urban, wilderness, and disaster settings.

Who is a Good Fit for a First Responder Role?

1. You Stay Calm Under Pressure

Emergencies are high-stress, high-intensity situations. A first responder must remain level-headed, focused, and decisive, even when dealing with serious injuries or life-threatening circumstances.

2. You Have Strong Problem-Solving Skills

Every emergency is different, and responders must think on their feet, making quick decisions that can mean the difference between life and death.

3. You Work Well in a Team

First responders don’t work alone—they are part of a highly coordinated team. Effective communication and collaboration are essential, whether you’re in an ambulance, a fire truck, or on a search-and-rescue mission.

4. You Are Physically and Mentally Resilient

The job can be physically demanding—lifting patients, performing CPR, and carrying heavy equipment. Mental resilience is just as important, as responders often witness traumatic and stressful situations.

5. You Have a Strong Sense of Duty and Compassion

First responders are driven by a desire to help others. Whether treating an injured patient, rescuing someone from danger, or providing reassurance in a crisis, compassion and empathy are at the core of what they do.

6. You Have Strong Communication Skills

First responders must be able to quickly and clearly communicate with team members, medical professionals, and those in distress. Good listening skills and the ability to give clear instructions can make all the difference in an emergency.

7. You Are Adaptable and Quick to Learn

The field of emergency response is always evolving, and first responders must stay up to date with the latest protocols, medical advancements, and response techniques. That’s why continuous training and recertifications are crucial.

8. You Can Handle High-Stakes Situations

The reality of emergency response work is that lives are at stake. A first responder must be able to handle pressure, process information quickly, and take decisive action—even when situations are unpredictable.

Training and Certifications Required

At Delta Emergency Support Training, we offer a clear pathway for those looking to become first responders. Here’s what you’ll need:

1. Standard First Aid (SFA) + CPR/AED Level C

  • The foundational certification for emergency response.

  • Covers CPR, choking response, bleeding control, and medical emergencies.

  • A prerequisite for Advanced First Aid/Emergency Medical Responder (AFA/EMR).

2. Advanced First Aid (AFA) / Emergency Medical Responder (EMR)

  • AFA and EMR provide more in-depth training than Standard First Aid.

  • Covers oxygen therapy, airway management, patient assessment, spinal immobilization, and emergency scene management.

  • Required for many workplace first responders and those entering EMS or firefighting.

3. Basic Life Support (BLS)

  • Essential for healthcare providers and first responders.

  • Focuses on high-performance CPR, airway management, and resuscitation techniques.

Conclusion

A career as a first responder is challenging but deeply rewarding. It requires courage, resilience, teamwork, and a strong desire to help others. If you’re ready to take the first step, start with Standard First Aid (SFA) and CPR/AED Level C, then progress through AFA/EMR and BLS.

At Delta Emergency Support Training, we provide all of these courses and recertifications, ensuring you’re well-prepared for this critical role.

🚑 Are you ready to answer the call? Get trained, get certified, and start your journey as a first responder today!

Read More

The Red Cross: Everything Aspiring First Responders Need to Know Introduction

Thinking about becoming a first responder? The Red Cross provides essential training, from Standard First Aid (SFA) with CPR/AED Level C to Advanced First Aid (AFA), Basic Life Support (BLS), and Emergency Medical Responder (EMR). At Delta Emergency Support Training, we offer all these courses, including bridge programs and recertifications, helping you stay certified and ready to respond. 🚑

If you’re looking to become a first responder or expand your emergency care knowledge, the Red Cross is one of the most recognized and respected organizations for first aid and lifesaving training. Whether you’re starting with Standard First Aid (SFA) with CPR and AED Level C or progressing to Advanced First Aid (AFA) and Basic Life Support (BLS), understanding the training pathway is essential for anyone serious about emergency response.

At Delta Emergency Support Training, we offer all of these courses, including Emergency Medical Responder (EMR), bridge courses, and recertifications to help you stay up to date and advance your skills.

Standard First Aid (SFA) – The Essential Foundation

Before you can progress to advanced emergency medical training, you’ll need a strong foundational knowledge of first aid. Standard First Aid (SFA) with CPR/AED Level C is a prerequisite for more advanced training, making it the first step for aspiring first responders.

What Does Standard First Aid (SFA) Include?

This course covers the essential lifesaving skills needed to respond to common emergencies, including:

  • CPR and AED (Level C): Learn how to perform Cardiopulmonary Resuscitation (CPR) on adults, children, and infants and how to use an Automated External Defibrillator (AED).

  • Choking Response: Techniques for assisting choking victims of all ages.

  • Bleeding Control: Proper wound care, including bandaging, applying direct pressure, and using tourniquets.

  • Shock Management: Recognizing and responding to different types of shock.

  • Burns and Environmental Emergencies: First aid for burns, heat exhaustion, hypothermia, and frostbite.

  • Head, Neck, and Spinal Injuries: How to stabilize an injured person and prevent further harm.

  • Medical Emergencies: Recognizing and responding to diabetic emergencies, seizures, strokes, and allergic reactions.

Why Is Standard First Aid Important?

  • It is a prerequisite for Advanced First Aid and EMR (AFA).

  • It meets workplace safety requirements for many jobs, including healthcare, security, and childcare.

  • It provides practical, hands-on training to build confidence in emergency situations.

At Delta Emergency Support Training, we offer recertification courses to help you maintain your certification and stay prepared.

Advanced First Aid (AFA) vs. Emergency Medical Responder (EMR)

Once you have completed Standard First Aid, you may want to continue with Advanced First Aid (AFA) or Emergency Medical Responder (EMR). Understanding the differences between these two courses is important for choosing the right path.

Advanced First Aid (AFA)

  • Designed for those interested in becoming a first responder as well as workplace first responders, security personnel, and safety officers.

  • Includes oxygen therapy, airway management, and advanced bleeding control.

  • Covers spinal immobilization, fractures, and extended care skills.

  • Focuses on scene management and multi-casualty incidents.

Emergency Medical Responder (EMR)

  • A more advanced course designed for those looking to work in EMS, firefighting, or law enforcement.

  • Includes all AFA content plus advanced medical care, such as patient assessments, pharmacology, and vital signs monitoring.

  • Prepares students to assist paramedics in emergency medical situations.

  • Required for those pursuing a career in emergency services.

At Delta Emergency Support Training, we offer both AFA and EMR, as well as bridge courses to help transition between certifications.

Basic Life Support (BLS) – For Medical Professionals and First Responders

For those pursuing a career in healthcare, paramedicine, or emergency response, Basic Life Support (BLS) is an essential certification. BLS is more intensive than standard CPR training and focuses on high-performance resuscitation techniques used by medical professionals and first responders.

What Does Basic Life Support (BLS) Cover?

  • High-performance CPR with a focus on teamwork.

  • Bag-valve mask (BVM) ventilation for respiratory support.

  • Two-rescuer resuscitation techniques.

  • Management of choking in unresponsive individuals.

  • Use of oxygen equipment and suctioning.

  • AED use in complex medical settings.

Who Needs BLS Certification?

  • Paramedics and emergency medical responders.

  • Nurses, doctors, dental hygenists and other healthcare providers.

  • Firefighters and law enforcement officers.

  • First responders working in high-risk settings.

At Delta Emergency Support Training, we offer BLS courses and recertifications to ensure first responders stay up to date with the latest life-saving techniques.

Choosing the Right Course for Your Goals

If you’re unsure which course is right for you, consider the following pathway:

  1. Start with Standard First Aid (SFA) + CPR/AED Level C → For general emergency preparedness and workplace safety.

  2. Move to Advanced First Aid (AFA) → If you need a higher level of training for emergency response roles.

  3. Complete Basic Life Support (BLS) → If you are pursuing a healthcare or first responder career.

  4. Pursue Emergency Medical Responder (EMR) → If you are looking to work in EMS

Each step builds upon the previous one, ensuring that first responders develop both knowledge and practical skills to handle a wide range of emergencies.

Conclusion

The Red Cross provides essential training for aspiring first responders, workplace safety officers, and healthcare professionals. Whether you’re beginning with Standard First Aid or advancing to AFA, BLS, or EMR, every step prepares you for real-world emergencies where your skills can make a life-saving difference.

At Delta Emergency Support Training, we offer all of these courses, including bridge programs and recertifications, ensuring that you stay trained and ready. Whether you need SFA, AFA, BLS, or EMR, we have the right course for you!

🚑 Be prepared. Get trained. Save lives.

Read More

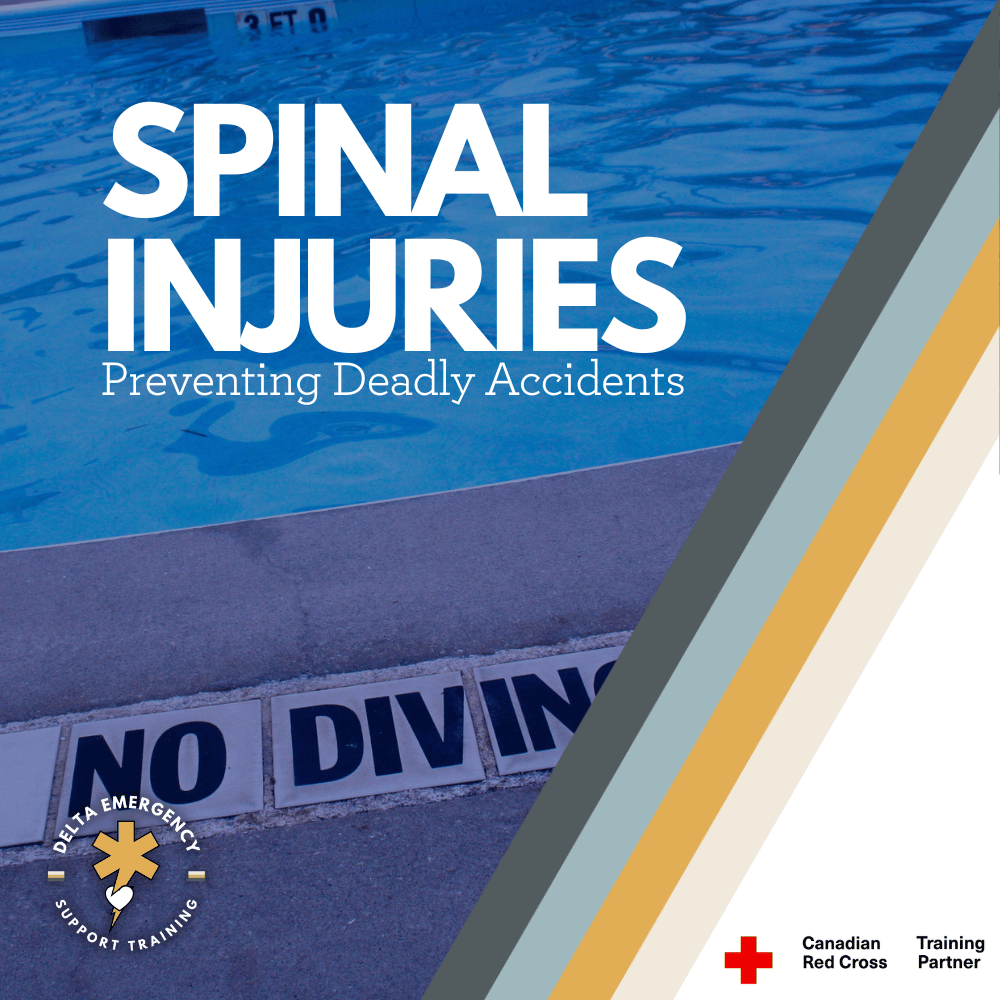
How to Prevent Spinal Injuries: Essential Steps for Safety

Spinal injuries can have devastating consequences, from paralysis to lifelong medical complications. Fortunately, many of these injuries are preventable. In this blog, we explore the top causes of spinal injuries, shocking statistics, and expert-approved safety measures to help you stay protected. Whether it’s safe driving, fall prevention, or sports safety, taking proactive steps can make all the difference. Plus, learn how Delta Emergency Support Training, a Red Cross Training Partner, provides essential first aid training to equip you with life-saving skills.

Preventing Spinal Injuries: Facts, Stats, and Essential Safety Measures

Spinal injuries are among the most severe and life-altering injuries a person can experience. Damage to the spinal cord can result in permanent paralysis, loss of sensation, and significant lifestyle changes. Understanding how these injuries occur and taking steps to prevent them is crucial for personal safety and public health.

In this blog, we will explore the causes, statistics, and preventive measures related to spinal injuries, helping you stay informed and protected.

Understanding Spinal Injuries

The spine is a complex structure made up of vertebrae, nerves, muscles, and ligaments that provide support and mobility to the body. When the spinal cord sustains damage, it can disrupt communication between the brain and the rest of the body, potentially leading to temporary or permanent disability.

Common Causes of Spinal Injuries

Spinal injuries can result from various traumatic and non-traumatic events, including:

  • Motor Vehicle Accidents – The leading cause of spinal cord injuries worldwide, accounting for nearly 38% of cases.

  • Falls – Responsible for about 32% of spinal injuries, particularly among older adults.

  • Sports and Recreation Accidents – Diving into shallow water, high-impact sports, and extreme activities contribute to 14% of spinal injuries.

  • Violence and Assaults – Gunshot wounds, stabbings, and physical attacks lead to approximately 13% of spinal cord injuries.

  • Medical Conditions and Diseases – Arthritis, osteoporosis, cancer, and infections can also cause spinal damage over time.

Spinal Injury Statistics

  • An estimated 17,900 new spinal cord injuries occur in the United States every year (National Spinal Cord Injury Statistical Center).

  • Males account for about 78% of spinal cord injury cases, often due to high-risk behaviors and sports activities.

  • The average age of a spinal injury patient has increased from 29 in the 1970s to 43 today, due to longer life expectancy and aging populations.

  • Lifetime costs for a spinal cord injury can range from $1.2 million to over $5 million, depending on the severity and level of paralysis.

  • Wearing a seatbelt and using proper vehicle restraints reduce the risk of spinal injuries in crashes by 60%.

How to Prevent Spinal Injuries

While some accidents are unavoidable, many spinal injuries can be prevented by taking proper precautions. Here are some essential strategies:

1. Safe Driving Practices

  • Always wear a seatbelt when driving or riding in a vehicle.

  • Never drive under the influence of alcohol or drugs.

  • Avoid distracted driving, such as texting or using a phone.

  • Ensure children are in proper car seats or booster seats.

2. Fall Prevention

  • Use handrails on stairs and install grab bars in bathrooms.

  • Remove tripping hazards like loose rugs and clutter.

  • Wear appropriate footwear with good grip.

  • Older adults should have regular vision check-ups and use mobility aids as needed.

3. Sports and Recreation Safety

  • Always wear protective gear such as helmets and padding in contact sports.

  • Avoid diving into shallow or unknown waters.

  • Use proper techniques and training for high-impact sports like football, gymnastics, and wrestling.

  • Follow safety rules when engaging in outdoor activities like rock climbing and skiing.

4. Workplace Safety

  • Use ergonomic lifting techniques to avoid back injuries.

  • Wear appropriate safety harnesses when working at heights.

  • Ensure workplaces follow OSHA safety regulations.

5. Preventing Violence-Related Injuries

  • Be aware of your surroundings and personal security.

  • Avoid high-risk areas and de-escalate confrontations when possible.

  • Support anti-violence initiatives and gun safety laws.

What to Do If You Suspect a Spinal Injury

If you suspect someone has a spinal injury, follow these emergency steps:

  1. Do Not Move the Person unless they are in immediate danger.

  2. Call 911 immediately.

  3. Keep the Person Still by placing your hands on either side of their head to prevent movement.

  4. Monitor Breathing and provide CPR if necessary.

  5. Provide Comfort and Reassurance until professional help arrives.

Delta Emergency Support Training – A Red Cross Training Partner

At Delta Emergency Support Training, we provide Standard First Aid training as a Red Cross Training Partner. Our courses teach essential lifesaving skills, including how to recognize and respond to spinal injuries safely.

By taking a first aid course, you can gain hands-on experience and certified knowledge to protect yourself and others in emergencies.

Conclusion

Spinal injuries can have life-changing consequences, but many of them are preventable with proper precautions and awareness. By following safe driving habits, fall prevention strategies, and sports safety guidelines, you can significantly reduce your risk.

To be fully prepared, consider taking a first aid and injury prevention course with Delta Emergency Support Training. Being informed and trained can help you protect lives and prevent serious injuries.

Read More

What It Means to Be a First Responder: A Lifelong Commitment to Service, Compassion, and Community

Being a first responder is a calling to serve your community during times of crisis. It's about earning the trust of the people you help, offering support during their worst days, and making life-saving decisions under pressure. In this blog, we explore the profound responsibility and emotional commitment that comes with being a first responder, and how these professionals are the heart of their communities.

What It Means to Be a First Responder: A Commitment to Service, Compassion, and Community

Being a first responder is much more than a job—it’s a calling. It’s about showing up for people when they need it the most, often on their worst day, and providing the care, support, and attention they need during a crisis. Whether you’re an EMR, paramedic, firefighter, or law enforcement officer, first responders are the first line of defense in emergencies, and their impact on the community is immeasurable.

In this blog, we’ll explore what it truly means to be a first responder, the deep responsibility that comes with the role, and how first responders are integral to the communities they serve.

Being Part of the Community

First responders are the heart and soul of the communities they serve. They are often the first people to arrive during times of need—whether it’s a medical emergency, a natural disaster, or a traumatic accident. But it’s not just about responding to emergencies; being a first responder means being present, accountable, and connected to the people you serve.

As a first responder, you’re not just a worker or a service provider; you are a trusted member of the community. People rely on you when they’re facing their toughest moments. That trust is something you work hard to earn and carry with you throughout your career. Your role is about providing both expert care and human compassion when it matters most.

The Trust of the Community

As a first responder, you hold the trust of the people you serve. This trust is built over time, often during moments of crisis, when your skills, calm demeanor, and ability to act swiftly can make the difference between life and death.

When someone calls 911, they are not just asking for help—they are placing their trust in your hands. They trust that you will handle the situation with expertise, compassion, and efficiency, no matter how chaotic or intense it may be. You have their trust in your ability to make the right decisions, stay calm under pressure, and act swiftly and decisively.

This trust extends beyond the patient to their families and loved ones. When you arrive at a scene, whether it’s a car accident, heart attack, or house fire, families rely on you to provide care, comfort, and clear communication. For many, you are the first face of help and hope in an otherwise overwhelming situation.

Helping People on Their Worst Days

One of the most profound aspects of being a first responder is being present for people during their worst days. Whether it’s the aftermath of an accident, a sudden medical emergency, or a devastating natural disaster, first responders are there to provide critical care, emotional support, and reassurance.

In these high-stress moments, first responders do more than just diagnose and treat injuries. They offer emotional care, providing comfort to patients and their families who may be in shock, fear, or despair. Sometimes, a few comforting words or simply holding someone's hand can make all the difference when everything feels uncertain.

Your role goes beyond just providing medical care—it’s about offering people a sense of safety and stability when they are at their most vulnerable. You are there to reassure them, guide them through the trauma, and do everything possible to ease their pain and suffering.

Being a Medical Professional with a Unique Role

First responders are highly trained medical professionals, but what sets them apart is the environment in which they work. Unlike hospital settings, where resources are readily available, first responders work in high-pressure, fast-paced environments, often with limited equipment and time.

First responders must be prepared to make life-or-death decisions in the field, with limited support. Whether it’s providing CPR, stabilizing a critical patient, or managing complex trauma, the skills and knowledge you apply in these moments can save lives. Every decision you make counts, and the ability to stay calm, focused, and clear-headed is vital.

But it’s not just about technical skills—it’s about empathy, too. Being able to connect with patients, their families, and your team members in moments of intense stress requires compassion, active listening, and emotional intelligence. This balance of medical expertise and human connection is what makes a first responder truly exceptional.

Facing Challenges: The Emotional Side of the Job

While the privilege of helping others is a core aspect of being a first responder, there is an emotional toll that comes with it. First responders often witness situations that are traumatic—severe injuries, death, suffering, and emotional pain. Over time, these experiences can build up and affect mental health.

That’s why it’s critical for first responders to prioritize their own mental health. Support systems within teams, including colleagues, supervisors, and mental health professionals, are essential. Many agencies now provide resources and counseling for first responders to help them process the challenges of their role and prevent burnout.

Self-care and mental well-being are just as important as physical health when it comes to sustaining a long and healthy career in emergency services.

A Lifelong Commitment to Service

Being a first responder is a commitment that goes beyond the uniform or the hours worked. It’s a commitment to serve your community, to always be ready when someone needs you, and to carry the responsibility of life-saving decisionsevery day.

It’s a commitment to resilience, empathy, and duty, knowing that your role is essential in preserving life and well-being. Being a first responder is not just about responding to emergencies—it’s about making a difference, one person at a time.

At Delta Emergency, we understand the responsibility of being a first responder, and we’re here to equip you with the training and knowledge you need to rise to the challenge. Our team of experienced paramedics provides hands-on, real-life training so you can be prepared for anything. We don’t just teach skills; we prepare you for the moments when it counts the most.

Read More

How to Handle Eviscerations in Trauma: A Guide for EMRs and AFA Responders

Evisceration is a serious, life-threatening injury where internal organs protrude through an abdominal wound. As an EMR or AFA responder, it's crucial to provide immediate care by controlling bleeding, protecting exposed organs, and stabilizing the patient for transport. This blog outlines key steps and considerations to manage eviscerations effectively.

Evisceration: How EMRs and AFA Responders Should Handle Traumatic Abdominal Injuries

Evisceration is a severe and life-threatening injury that occurs when internal organs are displaced and protrude through a wound in the abdomen. As an EMR or AFA responder, managing eviscerations is critical to preventing further complications, such as infection, shock, or organ damage. Understanding how to assess and treat these injuries quickly and effectively is vital in preserving life and improving patient outcomes.

This blog will guide you through what evisceration is, how to recognize it, and how to manage the situation as a first responder.

What is Evisceration?

Evisceration refers to the protrusion of internal organs (such as the intestines or stomach) through an open wound in the abdominal area. This injury is often caused by trauma, such as:

  • Motor vehicle accidents

  • Stabbing or gunshot wounds

  • Blunt force trauma

  • Falls or industrial accidents

Unlike hernia injuries, where tissue bulges through a weak spot in the abdominal wall, evisceration involves the complete displacement of organs outside of the body. This type of injury is not only physically traumatic but also life-threatening.

Signs and Symptoms of Evisceration

The most significant sign of evisceration is the visible protrusion of internal organs through the abdominal wound. Some additional symptoms may include:

  • Visible intestines, stomach, or other organs outside the body.

  • Pain in the abdominal area.

  • Severe bleeding or a blood-soaked wound.

  • Signs of shock, such as pale skin, rapid heartbeat, and low blood pressure.

It is important to note that the presence of evisceration does not always indicate internal bleeding; however, trauma-related injuries often involve bleeding internally and externally, making it a critical condition to address.

Immediate Actions for EMRs and AFA Responders

As an EMR or AFA responder, your primary objective when managing evisceration is to prevent further harm and stabilize the patient for transport to a medical facility. Here are the key steps you should take:

1. Ensure Scene Safety

Before you begin treatment, always ensure that the scene is safe for both you and the patient. Assess any potential hazards, such as traffic, fire, or other dangerous conditions.

2. Assess Airway, Breathing, and Circulation (ABCs)

Perform a primary assessment of the patient’s airway, breathing, and circulation:

  • Airway: Make sure the patient’s airway is open and clear. If the patient is unconscious or struggling to breathe, perform the necessary airway interventions (e.g., head-tilt-chin-lift, suction, or intubation if trained).

  • Breathing: Ensure the patient is breathing effectively. If the patient is in respiratory distress, provide supplemental oxygen as needed.

  • Circulation: Check for signs of shock, such as weak pulse, low blood pressure, or cool, clammy skin. Severe blood loss from the abdominal organs can lead to shock, which requires immediate intervention.

3. Control Bleeding

If there is significant bleeding, it’s critical to control the hemorrhage:

  • Apply sterile dressings or clean cloths to the open wound. Do not attempt to push the exposed organs back into the body, as this can cause additional damage and increase the risk of infection.

  • Apply direct pressure around the edges of the wound to control bleeding, but do not apply pressure directly to the exposed organs.

  • Keep the organs moist. If sterile saline or clean water is available, dampen a sterile dressing or clean cloth and place it over the exposed organs to prevent them from drying out. Dry organs are more vulnerable to infection and damage.

4. Protect the Exposed Organs

It is crucial to protect the exposed organs from contamination, injury, and environmental elements:

  • Cover the organs with a sterile dressing or clean cloth moistened with sterile saline or clean water. Avoid using dry materials, which could dehydrate the organs.

  • Do not attempt to reinsert the organs into the body. This could cause more harm and increase the risk of further damage.

5. Position the Patient

Proper positioning is key in minimizing additional trauma:

  • Place the patient flat on their back (supine position) to prevent movement that could worsen the injury. Ensure the patient's head is slightly elevated if they are conscious and experiencing difficulty breathing.

  • If the patient is in shock, elevate their legs slightly to promote blood flow to vital organs, unless contraindicated by spinal or head injury concerns.

6. Monitor Vital Signs

Monitor the patient's vital signs closely, including pulse, blood pressure, and respiratory rate. Watch for signs of shock, such as a rapid or weak pulse, pale skin, and altered mental status. Shock is a common complication in evisceration cases, especially due to blood loss or damage to vital organs.

7. Prepare for Transport

Eviscerations require immediate transport to a hospital for surgical intervention. The patient should be rapidly transported to a trauma center or medical facility with surgical capabilities:

  • Alert the receiving facility about the patient’s condition, so the trauma team can be prepared for immediate action upon arrival.

  • Keep the patient warm to prevent hypothermia, a common complication of trauma. Use blankets or any available materials to maintain body temperature.

Complications to Watch For

Eviscerations often occur in conjunction with other serious injuries, such as:

  • Internal bleeding: Blood loss from damaged internal organs or blood vessels can lead to hypovolemic shock, where there is insufficient blood volume to maintain circulation.

  • Infection: Exposed organs are highly susceptible to infection. Keeping the wound sterile and moist is essential to minimize this risk.

  • Severe pain: Due to the nature of the injury, patients may experience extreme pain. If trained, provide pain relief in accordance with your scope of practice.

Conclusion

Evisceration is a traumatic and potentially fatal injury that requires quick and effective action from EMRs and AFA responders. By following the steps outlined above—controlling bleeding, protecting the exposed organs, and stabilizing the patient for transport—you can provide life-saving care and improve patient outcomes.

At Delta Emergency, our EMR and AFA training equips you with the skills needed to respond to critical injuries like evisceration. Led by experienced paramedics, we offer hands-on training to ensure you are prepared to handle any emergency situation with confidence and competence.

Read More

Pulse Rates and How to Assess Them: Essential Skills for EMR and AFA Students

Understanding how to assess a patient's pulse is a fundamental skill for anyone pursuing EMR or AFA certification. In this blog, we cover everything you need to know about checking pulse rates, including normal ranges for adults, children, and infants, how to locate key pulse points, and how to accurately assess pulse rhythm and quality. Learn about tachycardia, bradycardia, and the significance of a weak or absent pulse, especially in trauma situations.

Understanding Pulse and Heart Rate: Key Concepts for EMRs and AFA Students

In emergency medical response (EMR) or advanced first aid (AFA), one of the essential skills you will learn is how to assess a patient's pulse or heart rate. A person's pulse provides valuable information about their circulatory status, and understanding how to measure it accurately is crucial for diagnosing and managing a variety of medical conditions.

This blog will guide you through the basics of pulse and heart rate, including normal rates for children, adults, and infants. We’ll also dive into how to accurately check a pulse, how to interpret its rhythm and quality, and the significance of an absent or weak pulse, especially in cases of trauma.

What is Pulse?

The pulse is the rhythmic expansion and contraction of an artery as blood is pumped through it by the heart. This beat is felt in various areas of the body known as pulse points. The pulse gives critical information about heart rate, rhythm, and strength.

Normal Pulse Rates by Age

It’s important to know the typical pulse rates for different age groups. The rate can vary based on the individual’s age, activity level, and overall health. Here’s a breakdown of normal resting pulse rates:

  • Infants (0-1 year): 100-160 beats per minute (bpm)

  • Children (1-10 years): 70-120 bpm

  • Adults (11+ years): 60-100 bpm

  • Well-conditioned Athletes: 40-60 bpm (can be normal for some athletes due to a lower resting heart rate)

As you become more familiar with pulse assessment during your EMR or AFA training, you’ll quickly learn how to identify what’s normal for your patient population.

Main Pulse Points and How to Check a Pulse Accurately

As an EMR or AFA student, knowing where to check for a pulse is a fundamental skill. You’ll need to be able to check for a pulse at several key points on the body. Here are the primary pulse points, along with instructions on how to check them accurately:

  1. Radial Pulse (Wrist)

    • Location: On the thumb side of the wrist.

    • How to Check: Place your index and middle fingers on the patient’s wrist, just below the base of the thumb. Apply gentle pressure until you feel the pulse.

    • Position: The patient should be seated or lying down in a relaxed position. It is important not to use your thumb, as it has its own pulse that could interfere with the assessment.

  2. Carotid Pulse (Neck)

    • Location: In the groove of the neck, just to the side of the windpipe.

    • How to Check: Place your index and middle fingers on the side of the patient’s neck, between the trachea and the muscle. Do not press too hard, as it can cause discomfort or interfere with blood flow.

    • Position: The patient can be seated or lying down. If the patient is unresponsive, the carotid pulse is typically the first point to check in an emergency.

  3. Brachial Pulse (Upper Arm)

    • Location: On the inner side of the upper arm, near the elbow.

    • How to Check: Place your index and middle fingers on the inside of the patient’s arm, midway between the shoulder and elbow. Apply gentle pressure to feel the pulse.

    • Position: This pulse is often used to assess infants, as it’s the most reliable pulse point in children under one year old.

  4. Femoral Pulse (Groin)

    • Location: In the crease of the groin, just below the inguinal ligament.

    • How to Check: Place your fingers on the upper thigh, near the groin. Apply firm but gentle pressure to detect the pulse.

    • Position: The patient should be lying down, preferably in a supine position. This pulse is often used in cases of severe trauma or shock.

  5. Posterior Tibial Pulse (Ankle)

    • Location: Behind the medial malleolus (the bony prominence on the inner side of the ankle).

    • How to Check: Place your fingers behind the ankle bone and press gently to feel the pulse.

    • Position: The patient should be lying or sitting with the foot relaxed.

  6. Dorsalis Pedis Pulse (Foot)

    • Location: On the top of the foot, between the first and second metatarsals.

    • How to Check: Place your fingers on the top of the foot, slightly to the medial side, and gently press to feel the pulse.

    • Position: The patient should be in a seated or supine position, with the foot relaxed.

How to Assess Pulse Rhythm and Quality

When assessing a pulse, it’s essential to evaluate not only the rate but also the rhythm and quality:

  • Rhythm: The rhythm of the pulse refers to the regularity of the heartbeat. It can be classified as:

    • Regular: The pulse follows a consistent, steady pattern.

    • Irregular: The pulse has an erratic or uneven rhythm, which could indicate an arrhythmia or other heart conditions.

  • Quality: The quality of the pulse refers to its strength. A pulse can be:

    • Strong and Bounding: A pulse that is easy to feel and forceful, which could indicate conditions such as fever, anxiety, or hyperthyroidism.

    • Weak or Thready: A pulse that is faint and difficult to feel, often indicating shock, blood loss, or dehydration.

    • Absent: If no pulse is felt at a pulse point, it may suggest severe trauma, a blocked artery, or cardiac arrest.

Tachycardia and Bradycardia

When evaluating pulse, you may encounter conditions such as tachycardia (a rapid heart rate) or bradycardia (a slow heart rate):

  • Tachycardia: A heart rate that exceeds 100 bpm in adults. Tachycardia can be caused by fever, stress, anemia, or cardiovascular problems.

  • Bradycardia: A heart rate below 60 bpm in adults. Bradycardia can indicate heart conduction issues, but it is also common in well-conditioned athletes.

Weak or Absent Pulse in Trauma

In trauma cases, an absent or weak pulse can be a critical sign. Trauma, especially internal bleeding or blocked arteries, can lead to a diminished pulse. If there is significant internal hemorrhaging, the pulse may become weaker in the lower extremities or other areas far from the heart. In cases of severe blood loss, the body shunts blood away from the extremities to maintain circulation to vital organs, resulting in weak or absent pulses in the arms or legs.

A blocked artery due to a clot, injury, or constriction can also result in an absent pulse distal to the blockage. Immediate intervention is needed in these cases to restore blood flow and stabilize the patient.

Conclusion

As an EMR or AFA student, learning to assess a patient’s pulse accurately is essential to providing effective care in emergency situations. Understanding the normal pulse rates, knowing how to check a pulse at key locations, and being able to interpret pulse rhythm and quality will greatly improve your ability to assess a patient’s condition. Additionally, recognizing the significance of weak, absent, or irregular pulses can help you identify life-threatening conditions like trauma, internal bleeding, or blocked arteries.

At Delta Emergency, we teach our students how to properly assess and respond to real-life emergencies. With expert instructors who are experienced paramedics, our courses ensure that you're prepared to make quick and informed decisions during critical situations.

Read More

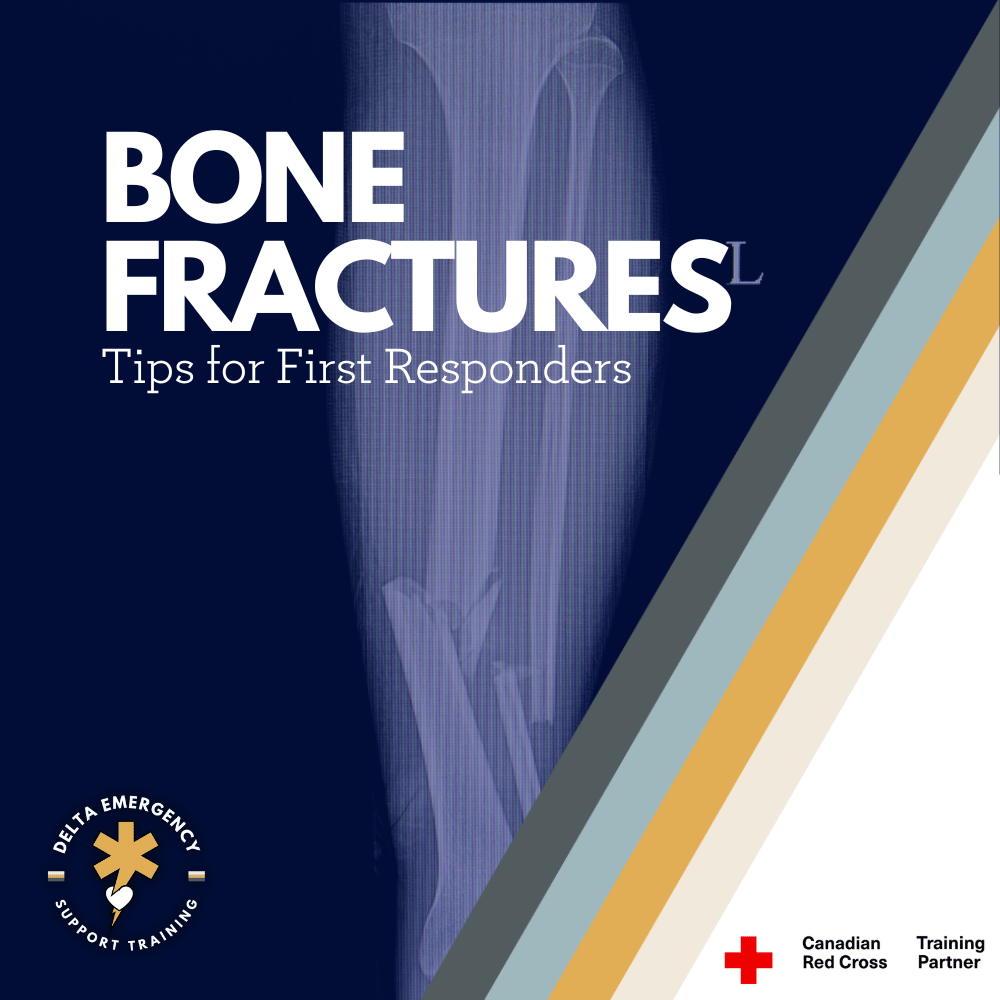
Handling Bone Fractures: Essential Tips for First Responders

At Delta Emergency Support Training, we ensure that our students are fully prepared to handle emergencies with confidence. Through our Red Cross workbooks, teaching resources, study tips, and in-person classes for EMR and AFA, we provide the practical knowledge necessary to deal with fractures and other emergencies.

XRAY OF BROKEN TIB FIB

Fractures are common injuries that medical first responders frequently encounter, and proper management is critical in ensuring the patient's safety and minimizing long-term complications. This guide covers essential protocols for handling fractures, emphasizes the importance of checking distal pulses, and provides specific management tips for different types of fractures. At Delta Emergency Support Training, we provide access to Red Cross workbooks, hands-on training, and in-person classes for EMR and AFA, ensuring that you're well-prepared to manage fractures effectively.

General Approach to Fracture Management

  1. Assess the Scene: Ensure your safety first and perform a quick primary assessment. Look for life-threatening conditions (e.g., breathing, bleeding, and consciousness).

  2. Immobilize the Injury: Fractured bones must be stabilized to prevent further injury. Do not attempt to realign a displaced bone unless it is absolutely necessary to restore circulation.

  3. Check Circulation: Always check for a distal pulse (e.g., radial pulse for upper limbs, dorsalis pedis pulse for lower limbs). The absence of a pulse could indicate compromised circulation and require immediate intervention.

  4. Pain Management: Administer pain relief within your scope of practice and ensure comfort during transport.

Fracture Types and Management Protocols

Upper Limb Fractures

Clavicle Fracture

  • Symptoms: Pain, visible bump, limited range of motion.

  • Management: Use a sling or figure-eight bandage to immobilize. Check for a radial pulse to assess circulation. If no pulse, realign gently to restore blood flow.

Humerus Fracture

  • Symptoms: Pain, swelling, abnormal positioning.

  • Management: Immobilize with a splint or sling. Check radial pulse. A lack of pulse suggests potential nerve or vessel damage, requiring immediate intervention.

Radius and Ulna Fractures

  • Symptoms: Swelling, bruising, and inability to move the wrist or fingers.

  • Management: Use a splint, ensuring the wrist and elbow are stabilized. Always check the radial pulse; absence of pulse indicates compromised circulation and requires urgent realignment.

Lower Limb Fractures

Femur Fracture

  • Symptoms: Severe pain, swelling, inability to move.

  • Management: Use a traction splint to stabilize. Check the femoral pulse. Absence of pulse demands immediate medical intervention.

Tibia and Fibula Fractures

  • Symptoms: Pain, bruising, and difficulty moving.

  • Management: Apply a splint to stabilize the leg. Check the dorsalis pedis pulse; absence indicates possible vascular damage and requires urgent attention.

Ankle and Foot Fractures

  • Symptoms: Pain, swelling, deformity.

  • Management: Stabilize with a splint. Check pulses at the dorsalis pedis and posterior tibial sites. Absence of pulse requires immediate action to restore blood flow and prevent limb loss.

Spinal and Pelvic Fractures

Spinal Fractures

  • Symptoms: Neck or back pain, possible numbness or tingling in limbs.

  • Management: Immobilize the spine with a cervical collar and prevent movement. Check femoral and radial pulses. Absence of pulses may indicate spinal cord injury or severe vascular damage.

Pelvic Fractures

  • Symptoms: Severe pelvic pain, bruising, difficulty moving.

  • Management: Apply a pelvic binder to reduce movement. Check femoral pulse. Absence of pulse indicates potential severe internal bleeding and requires immediate medical intervention.

Why Checking for Distal Pulse is Critical

When dealing with fractures, checking for distal pulses is a vital step in ensuring the injured limb is receiving adequate blood flow. Absence of a pulse can suggest that a major artery or vein is compromised, risking tissue necrosis or limb loss. Repositioning the limb or gently realigning the fracture can sometimes restore circulation, but if pulses are absent, it's important to seek advanced medical help immediately.

Delta Emergency Support Training

At Delta Emergency Support Training, we ensure that our students are fully prepared to handle emergencies with confidence. Through our Red Cross workbooks, teaching resources, study tips, and in-person classes for EMR and AFA, we provide the practical knowledge necessary to deal with fractures and other emergencies. Our training will guide you through how to assess injuries, check circulation, immobilize fractures, and effectively manage patients in critical situations.

Whether you're just starting out or looking to sharpen your skills, our comprehensive training resources will give you the expertise needed to provide quality care in high-pressure situations.

Read More

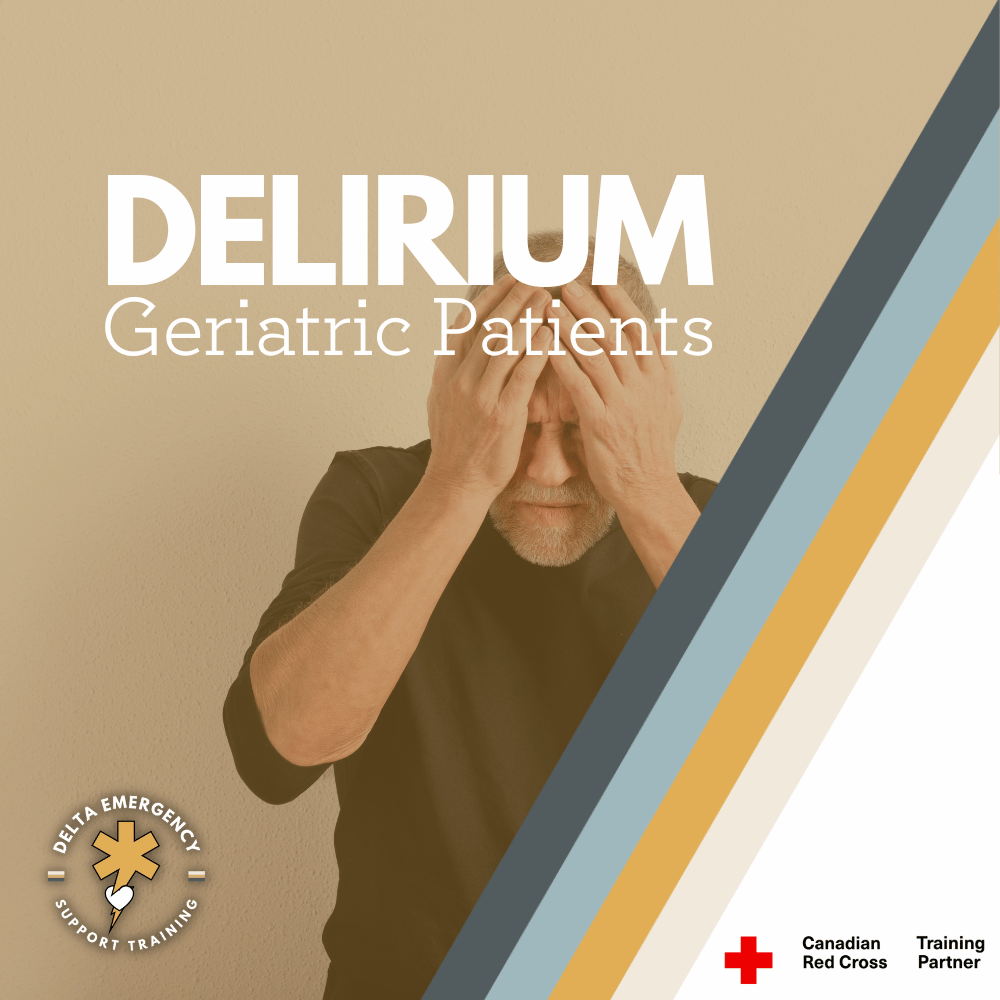
How to Manage Delirium in Geriatric Patients: Essential Skills for EMRs and Firefighters

Delirium is an acute medical condition that often affects geriatric patients, causing confusion, disorganized thinking, and altered levels of awareness. As an EMR or firefighter, it's crucial to identify delirium early and manage it effectively. This guide explains how to assess, treat, and respond to elderly patients showing signs of delirium, ensuring optimal care in critical situations.

Delirium in the Geriatric Patient: How EMRs and Firefighters Can Identify and Respond

Delirium is a serious medical condition, particularly in the elderly, and as an EMR or firefighter, it’s crucial to recognize the signs early and act swiftly. Unlike dementia, which progresses slowly over time, delirium can develop acutely and rapidly change the patient’s mental status, presenting significant challenges for first responders. In geriatric patients, delirium is a medical emergency that often requires urgent intervention.

This blog will guide you on how to recognize delirium, understand its underlying causes, and effectively manage geriatric patients experiencing it.

What is Delirium?

Delirium is defined as an acute and fluctuating onset of inattention, disorganized thinking, and/or altered levels of awareness. It differs from dementia in that it is temporary and occurs suddenly, often in response to an underlying medical condition or environmental trigger.

The symptoms of delirium typically appear suddenly and may fluctuate throughout the day. Common signs include:

  • Inattention: Difficulty maintaining focus, distracted, or unable to follow a conversation.

  • Disorganized Thinking: Incoherent or illogical speech, trouble forming coherent thoughts.

  • Altered Awareness: The patient may be either overly drowsy (hypoactive) or agitated (hyperactive). In many elderly patients, hypoactive delirium is most common and can often go undetected in emergency situations.

Why is Delirium Common in Geriatric Patients?

The elderly population is particularly susceptible to delirium for several reasons, including:

  • Age-Related Physical Changes: Aging can cause changes in the brain that make older adults more vulnerable to confusion and mental disturbances.

  • Underlying Medical Conditions: Chronic health issues like heart disease, diabetes, or kidney failure may predispose the elderly to developing delirium.

  • Medications: Certain medications, especially in combination, can trigger delirium in older patients. Common culprits include sedatives, narcotics, and anticholinergics.

  • Infections: Conditions like urinary tract infections (UTIs) and pneumonia are known triggers of delirium in the elderly.

  • Environmental Factors: Hospitalizations, changes in routine, or unfamiliar environments (e.g., new settings after an injury) can exacerbate confusion and lead to delirium.

Recognizing Delirium in the Elderly

As an EMR or firefighter, recognizing delirium is a crucial skill that can improve patient outcomes. Delirium may not be as obvious as other acute conditions, especially since the elderly are often at risk of hypoactive delirium, which can manifest as lethargy or withdrawal rather than agitation.

Key Symptoms to Look For:

  • Inability to focus: The patient may appear "spacey," unable to follow a conversation, or may forget what they were just talking about.

  • Confusion: They may be disoriented, unable to recall where they are, or confused about the time and date.

  • Fluctuating alertness: The patient's level of awareness may change rapidly, ranging from excessive sleepiness to periods of hyperactivity or aggression.

  • Hallucinations or Delusions: While less common, some patients may see or hear things that aren’t there, or they may have false beliefs (e.g., believing they’re in a completely different location).

Hypoactive Delirium: A Hidden Danger

It’s important to note that 70% of delirium cases in elderly patients are hypoactive, meaning the patient may seem unusually drowsy, withdrawn, or lethargic. This subtle form can often go undiagnosed in the emergency department (ED) or in the field because the patient may not exhibit the typical signs of agitation. As a first responder, you must be aware that any older adult exhibiting lethargy or confusion after a recent trauma or medical event could be suffering from delirium.

Common Causes of Delirium in the Geriatric Patient

Several medical conditions or factors may trigger delirium in older adults, making them more vulnerable to changes in their cognitive state. As an EMR or firefighter, understanding these causes can help you quickly identify potential underlying issues:

  1. Infections: UTIs, pneumonia, or sepsis can quickly lead to delirium in elderly patients.

  2. Dehydration and Malnutrition: Inadequate fluid or nutrition intake can significantly affect brain function.

  3. Medications: Polypharmacy, or the use of multiple medications, is common in elderly patients and can interact to cause confusion or delirium. Pay special attention to narcotics, sedatives, and antihistamines.

  4. Pain or Injury: Trauma, especially head injuries, can trigger delirium, as can untreated pain.

  5. Hospitalization: Elderly patients who are hospitalized for an acute illness or injury may experience delirium due to the stress of hospitalization, changes in routine, and medication side effects.

  6. Alcohol Withdrawal: If the elderly patient has a history of alcohol use and suddenly stops drinking, delirium may occur.

How EMRs and Firefighters Can Respond to Delirium in the Elderly

When faced with a patient exhibiting signs of delirium, quick and effective action is critical. Below are steps for managing these patients:

1. Initial Assessment

  • Ensure Safety: The first priority is ensuring the safety of the patient. Patients experiencing delirium may be disoriented or agitated, so they could put themselves or others at risk. Ensure a safe environment and avoid sudden movements that might escalate confusion.

  • Take a Comprehensive History: If possible, gather a thorough history from caregivers, family, or bystanders. Ask about the patient’s recent health changes, medications, and any prior cognitive issues.

  • Rule Out Life-Threatening Causes: Delirium can be a sign of a serious condition such as an infection, stroke, or head injury. Check vital signs and assess for any signs of a critical underlying cause (e.g., hypotension, fever, abnormal heart rate, etc.).

2. Address Underlying Causes

  • If the delirium is due to a known cause (e.g., an infection), it is critical to treat the underlying issue as soon as possible.

  • Consider the possibility of hypoxia, hypoglycemia, or medication-related causes, which can often be quickly addressed in the field.

  • If the patient is in pain or has a known medical condition that could be contributing to confusion (like dehydration), take steps to manage it immediately.

3. Monitor the Patient

  • If the patient is not yet stable, keep a close watch on their mental status. Delirium can fluctuate, so continuous assessment is key.

  • Stay calm and provide reassurance to the patient. If they are agitated, offer clear explanations and avoid confrontational responses.

  • Transport to the hospital promptly, ensuring that the medical team is aware of the patient’s delirium so they can investigate and treat the underlying cause quickly.

4. Engage Family or Caregivers

  • When possible, engage family members or caregivers to help assess the patient's baseline mental status and to provide relevant medical history, including recent changes or new medications.

Conclusion

Delirium in geriatric patients is a common, often undiagnosed condition that presents a unique challenge for EMRs and firefighters. Because it can rapidly change from one moment to the next, it's essential to recognize the signs of delirium early and manage the underlying causes. Prompt action, effective communication with medical teams, and ensuring patient safety are key components in improving patient outcomes.

As a first responder, your ability to identify delirium and intervene early can mean the difference between a successful recovery and long-term complications. By staying vigilant and informed, you can ensure that older patients receive the timely, life-saving care they need.

Delta Emergency is taught by a well-versed group of instructors and owners who are experienced paramedics. We teach you not only the necessary skills but also how to be prepared for real-life emergencies. Our hands-on training ensures you're equipped to handle any critical situation with confidence, improving both your ability to respond and your patient outcomes.

Read More

EMR Guide to Facial Trauma: Airway Management, Bleeding Control, and Injury Assessment

Facial trauma is a serious medical emergency that requires prompt attention. This guide for EMRs covers essential steps for managing facial injuries, including airway management, bleeding control, and fracture stabilization. Learn how to assess and treat patients with maxillofacial trauma to reduce the risk of permanent functional loss and disfigurement.

Facial Trauma - Assessment and Treatment

Tradesmen with laceration to face

Facial trauma refers to injuries involving damage to the bones or soft tissue of the face. These injuries can occur due to a variety of causes such as motor vehicle accidents, assaults (including gunshots), sports injuries, falls, chemical exposures, thermal burns, or animal bites. Because the human face is complex and contains many critical structures, such as bones, blood vessels, nerves, muscles, and sensory organs, untreated facial trauma can lead to permanent functional loss (such as problems with seeing, chewing, speaking, or swallowing) and severe disfigurement. Therefore, rapid and effective assessment and treatment are crucial in preventing long-term complications.

Facial trauma can be categorized into two primary categories: bone and soft tissue injuries. Depending on the type and severity of the trauma, the treatment and management priorities will differ. Let’s explore how to assess, treat, and what to expect when dealing with facial trauma in an emergency setting.

Key Considerations for EMRs Responding to Facial Trauma

When an EMR encounters a patient with facial trauma, the first priority is to assess the patient's airway, control bleeding, and assess for any associated injuries. This is especially critical because facial trauma can lead to airway compromise and severe bleeding, both of which are life-threatening.

Airway Management: The First Priority

One of the most critical aspects of treating facial trauma is securing the airway. The face houses the upper airway structures, and injuries to the face can easily result in obstruction. Up to 42% of patients with severe maxillofacial trauma may require intubation. If airway compromise is not addressed, it can result in hypoxia, shock, or even death.

Airway compromise in facial trauma typically occurs due to:

  • Soiling of the airway: Blood, vomit, or other debris can obstruct the airway, especially in patients with severe bleeding or emesis.

  • Obstruction: This can result from displaced soft tissue (such as the tongue), facial swelling, or foreign bodies (like dislodged teeth).

When assessing for airway compromise, EMRs should prioritize maintaining patency and anticipate potential difficulties with bag-mask ventilation due to the altered facial anatomy. For example, in Le Fort II and Le Fort III fractures, which cause significant facial displacement, it can be challenging to achieve a proper seal with a mask. If bag-mask ventilation becomes difficult, consider using a supraglottic airway device as a temporary bridge to more definitive airway management until advanced care can be provided.

Controlling Bleeding

Facial injuries, especially those involving trauma to the nose, mouth, or eyes, often result in significant bleeding. The face is highly vascular, so controlling bleeding early is vital to avoid shock and further complications. The steps to control bleeding are:

  1. Direct Pressure: Apply direct, firm pressure over the bleeding site using sterile gauze or a clean cloth.

  2. Elevation: If possible, elevate the patient’s head to minimize blood flow to the injury site.

  3. Pressure Points: Use pressure points such as the carotid artery or facial artery to control hemorrhage when direct pressure is insufficient.

  4. Hemostatic Agents: In severe cases, use hemostatic agents or dressings to assist in clotting and bleeding control.

Assessing Associated Injuries

Facial trauma often occurs as part of multi-system injuries. Once the airway is secured and bleeding is controlled, assess for other possible injuries, such as:

  • Head injury: Concussions, skull fractures, or intracranial hemorrhages are common in traumatic incidents that involve facial injury.

  • Spinal injury: Always suspect cervical spine injury in any trauma patient, especially those with altered mental status or facial fractures.

  • Dental injuries: Dislodged teeth or fractures to the jaw may occur in conjunction with facial trauma and may require specific management.

  • Eye injuries: Damage to the eyes, such as orbital fractures, corneal abrasions, or foreign bodies, should be suspected and managed accordingly.

Types of Maxillofacial Fractures

Facial fractures can be complex, and different fractures require different management strategies. Some common types of fractures include:

  1. Le Fort Fractures:

    • Le Fort I: A horizontal fracture of the maxilla (upper jaw), often associated with palate and teeth displacement.

    • Le Fort II: A pyramidal fracture involving the maxilla, nasal bones, and orbit, which may cause significant facial deformity.

    • Le Fort III: A complex fracture involving the maxilla, zygomatic bones, and orbit, resulting in severe facial disfiguration and airway compromise.

  2. Orbital Fractures: These fractures affect the bony orbit surrounding the eye. They may lead to eye injuries and double vision, requiring immediate attention to preserve vision.

  3. Nasal Fractures: Fractures to the nasal bones are common and often associated with bleeding and airway obstruction due to the nasal passages becoming blocked with blood.

  4. Mandible (Jaw) Fractures: Fractures of the mandible may affect the ability to chew, swallow, and speak. In some cases, the fractured jaw may obstruct the airway.

Treatment Considerations

The management of facial trauma depends on the type and severity of the injury. However, the basic principles of care involve airway management, bleeding control, and stabilization of fractures.

Airway Management

As previously mentioned, ensuring airway patency is paramount in facial trauma cases. If there is any suspicion of airway compromise, early intubation should be performed. In some cases, a supraglottic airway device may be used to bridge the gap before definitive airway management. In more severe cases, surgical airway interventions may be required.

Fracture Stabilization

Fractures, particularly those involving the mandible, maxilla, or facial bones, may need to be stabilized. The use of splints, jaw wiring, or other external fixation devices can help keep the fractures in place until surgical intervention by a plastic or maxillofacial surgeon can be performed.

Transportation

Facial trauma victims, particularly those with suspected airway compromise, require rapid transport to a hospital with appropriate resources for managing complex trauma. Transport should be done with the patient’s head elevated and airway support in place to prevent further compromise.

Conclusion

Facial trauma is a serious medical condition that requires prompt and effective intervention. As an EMR, your role in ensuring airway management, bleeding control, and assessment of associated injuries is vital in improving patient outcomes. While facial trauma may be life-threatening, the coordinated efforts of EMRs, emergency doctors, and specialists such as plastic and reconstructive surgeons can significantly reduce the risk of permanent functional loss and disfigurement. By understanding the anatomy of the face, the types of fractures, and the treatment strategies, you can provide critical care that saves lives and improves the long-term recovery of those injured in traumatic incidents.

Stay informed, stay prepared, and continue to prioritize the ABCs (Airway, Breathing, Circulation) in any trauma situation.

Read More

Elevating Emergency Response: The Canadian Red Cross Emergency Care for Professional Responders Textbook

The "Canadian Red Cross: Emergency Care for Professional Responders" textbook is a must-have resource for those working in high-pressure environments like emergency medical services, firefighting, and law enforcement. Packed with in-depth medical content and real-world scenarios, this guide equips professionals with the advanced skills needed to handle critical emergencies effectively. Whether you're performing airway management or assessing trauma, this textbook ensures you're ready to respond with confidence in any situation.

Advanced First Aid Knowledge for Those Who Face the Most Demanding Situations

In the fast-paced world of emergency medical services, having the right knowledge can make the difference between life and death. The "Canadian Red Cross: Emergency Care for Professional Responders" textbook is specifically designed for individuals who operate in high-stakes environments where advanced first aid and emergency care are required. This textbook is an indispensable resource for firefighters, police officers, lifeguards, and advanced first aid personnel.

Depth of Medical Content

This textbook dives deep into the complex and critical conditions that professional responders encounter. With chapters written by experts in emergency care, the content covers a broad spectrum of medical emergencies, from trauma to acute medical conditions, providing detailed procedures for each. This comprehensive approach ensures that responders have the depth of knowledge necessary to make informed decisions quickly.

Real-World Scenarios and Techniques

One of the standout features of this guide is its emphasis on practical, real-world application. It includes:

  • Detailed scenario-based training examples that simulate actual emergency situations.

  • Step-by-step guides for advanced techniques such as airway management, support for spinal injuries, and emergency childbirth.

  • Best practices for scene management and patient assessment to ensure effective and efficient care.

These elements are designed to prepare responders not just to perform their duties, but to excel in their roles with confidence and competence.

Tailored for Professional Use

Each section of the textbook is tailored to the needs of professional responders, with considerations for the challenges they face in the field. The material is not only comprehensive but also accessible, with clear diagrams, quick-reference tables, and bullet points that make crucial information easy to locate and recall under pressure.

Why Choose This Textbook?

  • Expertise: Authored by leading medical professionals with extensive experience in emergency response.

  • Relevance: Updated regularly to include the latest techniques and best practices in emergency medical care.

  • Durability: Manufactured to withstand the rigors of field use, ensuring reliability when it’s needed most.

Conclusion

For those in demanding and critical roles, the Canadian Red Cross Emergency Care for Professional Responders textbook is more than just a learning tool—it's a crucial ally in the field. By integrating this textbook into your training program, you ensure that your team is equipped with the knowledge and skills to handle complex emergencies effectively.

Elevate your professional response capabilities today by obtaining your copy from Delta Emergency Support Training at Delta Emergency Support Training. Equip your team with the knowledge that saves lives, enhances safety, and ensures that when the call comes, you are ready to respond with the best care possible.

Read More