The Delta Dispatch

Check, Call, Care: The First Aid Formula That Saves Lives

Emergencies happen fast. Learn how to act quickly and safely using the Red Cross Check, Call, Care model. From assessing scene safety to checking ABCs and calling 911, this guide breaks it down step-by-step.

A Red Cross-aligned guide to recognizing and responding to medical emergencies with clarity and confidence

In a real emergency, adrenaline kicks in. You may feel frozen or overwhelmed—but a simple, proven three-step approach helps cut through the chaos:

🟥 Check
🟧 Call
🟩 Care

This method, taught by the Canadian Red Cross, provides a clear framework that anyone—whether trained in basic or advanced first aid—can follow. At Delta Emergency Support Training, we use this model to help our learners build real-world readiness in life’s most urgent moments.

Let’s break down each step, including when and how to act, what to say to 911, and how to begin providing lifesaving care.

🔴 STEP 1: CHECK

Scene Safety Comes First—Always

Before you rush in to help, pause and assess the scene. Why? Because your safety matters, too.

Ask yourself:

  • Is the scene safe for me?

  • What hazards might be present? (e.g., live wires, traffic, aggressive individuals, hazardous materials)

  • What happened here? Can I tell how the person got injured?

  • Are there other people hurt? Do I need more help?

You can't help anyone if you become the second victim. Scene safety isn't optional—it’s essential.

Example: If someone has collapsed on the sidewalk near a construction site, your first thought might be “Help them!” But first, ask: Could there be falling debris? Is it safe to approach?

Check the Person

Once the scene is safe, approach the person from the side and check for responsiveness.

Start by speaking to them:

  • “Hi, can you hear me?”

  • “My name is ____. I’m trained in first aid. I’m here to help.”

No response? Try physical stimulation:

  • Tap them firmly on the shoulder and ask, “Are you okay?”

If they do not respond to voice or touch, they are unconscious.

At this point, it's time to move to step two: CALL 911.

🟧 STEP 2: CALL

Calling for Help: Alone or With Others

Your next move depends on your situation.

  • If you’re alone:

    • For an unresponsive person, call 911 immediately before starting care.

    • If you don’t have a phone and you can safely move the person, take them with you. If not, leave briefly to call for help.

  • If someone is with you:

    • Assign them directly: “You, in the blue shirt—call 911 now and come back to tell me what they say.”

This direct command avoids the bystander effect and ensures help is on the way.

What to Tell the Dispatcher

Stay calm and provide the following:

  1. Your exact location (address, landmarks, GPS if possible)

  2. What happened (e.g., “A person collapsed and is unresponsive.”)

  3. The condition of the person (conscious? breathing?)

  4. Any care you are providing (e.g., “I’m starting CPR.”)

  5. Your phone number in case the call drops

Follow their instructions and do not hang up until told to.

🟩 STEP 3: CARE

Now it’s time to help.

Check ABCs – Airway, Breathing, Circulation

Kneel beside the person. Begin your primary assessment:

🔹 Airway

  • If the person is unresponsive, assume their airway could be blocked.

  • Perform a head-tilt, chin-lift:

    • Place one hand on the forehead, two fingers under the chin, and gently tilt the head back.

    • This opens the airway unless a spinal injury is suspected.

🔹 Breathing

  • Place your ear close to their mouth and nose, facing their feet.

  • Look for chest movement, listen for breath sounds, and feel for breath on your cheek.

  • Check for 5 to 10 seconds.

If they are not breathing normally, prepare to begin CPR.

🔹 Circulation

  • As you check breathing, scan the body for major bleeding.

  • Look under the body if safe to do so.

  • Severe, visible bleeding must be addressed immediately—use direct pressure with gloved hands or a clean dressing.

Provide Appropriate Care Based on the Assessment

Depending on what you discover:

  • If unresponsive and not breathing:
    Start CPR (30 compressions, 2 breaths) immediately.

  • If unresponsive but breathing normally:
    Place the person in the recovery position to keep their airway clear and continue to monitor them.

  • If responsive and bleeding heavily:
    Apply direct pressure, use a dressing if available, and keep them calm and still.

  • If a spinal injury is suspected:
    Do not move the person unless they are in immediate danger. Support their head and neck in the position foundand wait for EMS.

🔁 Continue to Monitor and Support

Stay with the person until EMS arrives. Provide emotional support if they’re conscious. If their condition changes, recheck ABCs and adjust your care.

🧠 Final Thoughts

"Check, Call, Care" isn’t just a slogan—it’s a lifesaving sequence that gives ordinary people the power to respond to emergencies with clarity and confidence.

At Delta Emergency Support Training, we teach this model as the foundation of all our Red Cross-aligned courses—from Standard First Aid and CPR/AED Level C to Advanced First Aid / EMR.

📣 Take Action

🩺 Ready to learn more than just theory?
🧰 Want real skills from experienced paramedics and certified Red Cross instructors?

Enroll in a Standard First Aid course with Delta Emergency Support Training and be prepared to step up—safely, smartly, and confidently.

Read More
911, Alberta, First Aid Kumari Malhotra 911, Alberta, First Aid Kumari Malhotra

First Aid 101: Mastering the Check, Call, Care

Emergencies happen when we least expect them. The Check, Call, Care method is a simple yet vital approach to handling medical crises. Learn how to assess the scene, contact emergency services, and provide immediate first aid. Delta Emergency Support Training, a Red Cross Training Partner, offers Standard First Aid training to help you be ready for any emergency.

Check, Call, Care: The Lifesaving Steps of First Aid

Emergencies can happen anytime, anywhere. Whether it’s a car accident, a sudden collapse, or a choking incident, knowing how to respond can mean the difference between life and death. This is where the Check, Call, Care method, endorsed by the Red Cross, comes into play. It provides a simple yet effective framework for bystanders to take action in an emergency.

In this blog, we will break down the three essential steps—Check, Call, and Care—so you can feel confident in responding to emergencies and potentially saving lives.

Step 1: Check the Scene and the Person

The first step in any emergency situation is checking the scene and the individual in distress.

Why Check the Scene?

Before rushing to help, you must ensure that it’s safe for you to do so. If the scene is dangerous, you could put yourself at risk and become a second victim. Here’s what to look for:

  • Hazards – Fire, water, live electrical wires, falling debris, or violent individuals.

  • Number of Victims – Are there multiple injured people who need assistance?

  • Bystanders – Can someone else help call 911 or assist you?

Checking the Person

Once you determine that it’s safe to approach, check the individual:

  • Tap and Shout – Tap the person’s shoulder and ask, "Are you okay?" If there’s no response, they may be unconscious.

  • Check for Breathing – Look, listen, and feel for breathing for no more than 10 seconds.

  • Identify Life-Threatening Conditions – Severe bleeding, trouble breathing, or unresponsiveness require immediate action.

If the person is unconscious or experiencing a medical emergency, move on to the next step: Call 911.

Step 2: Call for Emergency Help

When a person is in distress, time is critical. Calling 911 connects you to professional emergency responders who can provide further instructions and dispatch medical personnel.

When Should You Call 911?

  • The person is unconscious or unresponsive.

  • They are not breathing or gasping for air.

  • They have severe bleeding that won’t stop.

  • They have symptoms of a stroke (facial drooping, slurred speech, arm weakness).

  • They are experiencing chest pain or signs of a heart attack.

  • You suspect a head, neck, or spinal injury.

What to Say to the Dispatcher

  • Location – Give the exact address or describe the surroundings.

  • Nature of the Emergency – Explain what happened and the condition of the victim.

  • Number of Victims – Let them know if more than one person needs help.

  • Follow Instructions – The dispatcher may provide instructions, such as how to perform CPR.

After calling, return to the injured person and begin providing care until professional help arrives.

Step 3: Care for the Injured Person

After checking the scene and calling for help, it’s time to provide immediate care. Your actions can keep the person stable and improve their chances of survival.

Caring for an Unresponsive Person

  • If Breathing: Place them in the recovery position (on their side) to keep their airway open and prevent choking.

  • If Not Breathing: Begin CPR immediately – 30 chest compressions followed by 2 rescue breaths, repeating until help arrives.

Caring for Severe Bleeding

  • Apply direct pressure with a clean cloth or bandage.

  • If the bleeding doesn’t stop, add more dressing without removing the first one.

  • If necessary and trained, use a tourniquet on limb injuries.

Caring for a Suspected Head, Neck, or Spinal Injury

  • Do not move the person unless they are in immediate danger.

  • Place your hands on both sides of their head to keep them still.

  • Encourage them to remain calm and wait for emergency responders.

Delta Emergency Support Training – A Red Cross Training Partner

At Delta Emergency Support Training, we are proud to be a Red Cross Training Partner offering Standard First Aid training. Our courses teach essential lifesaving skills, including CPR, AED use, and first aid techniques, ensuring that you are fully prepared to respond in an emergency.

If you’re interested in learning these skills in a hands-on environment, contact us today to sign up for a course! Being trained means being ready to save a life.

Conclusion: Anyone Can Be a Lifesaver

The Check, Call, Care method is a simple but powerful way to respond to emergencies. By taking a few minutes to check the scene, call for help, and provide basic first aid, you can make a life-saving difference.

Want to learn more? Consider taking a certified first aid and CPR course through Delta Emergency Support Trainingor another accredited Red Cross partner. Being prepared means having the confidence and skills to step up in an emergency!

What’s your experience with first aid? Have you ever had to use these steps in real life? Share your thoughts in the comments below!

Read More
Gear, First Aid, Work Place First Aid Jarrett Chisholm Gear, First Aid, Work Place First Aid Jarrett Chisholm

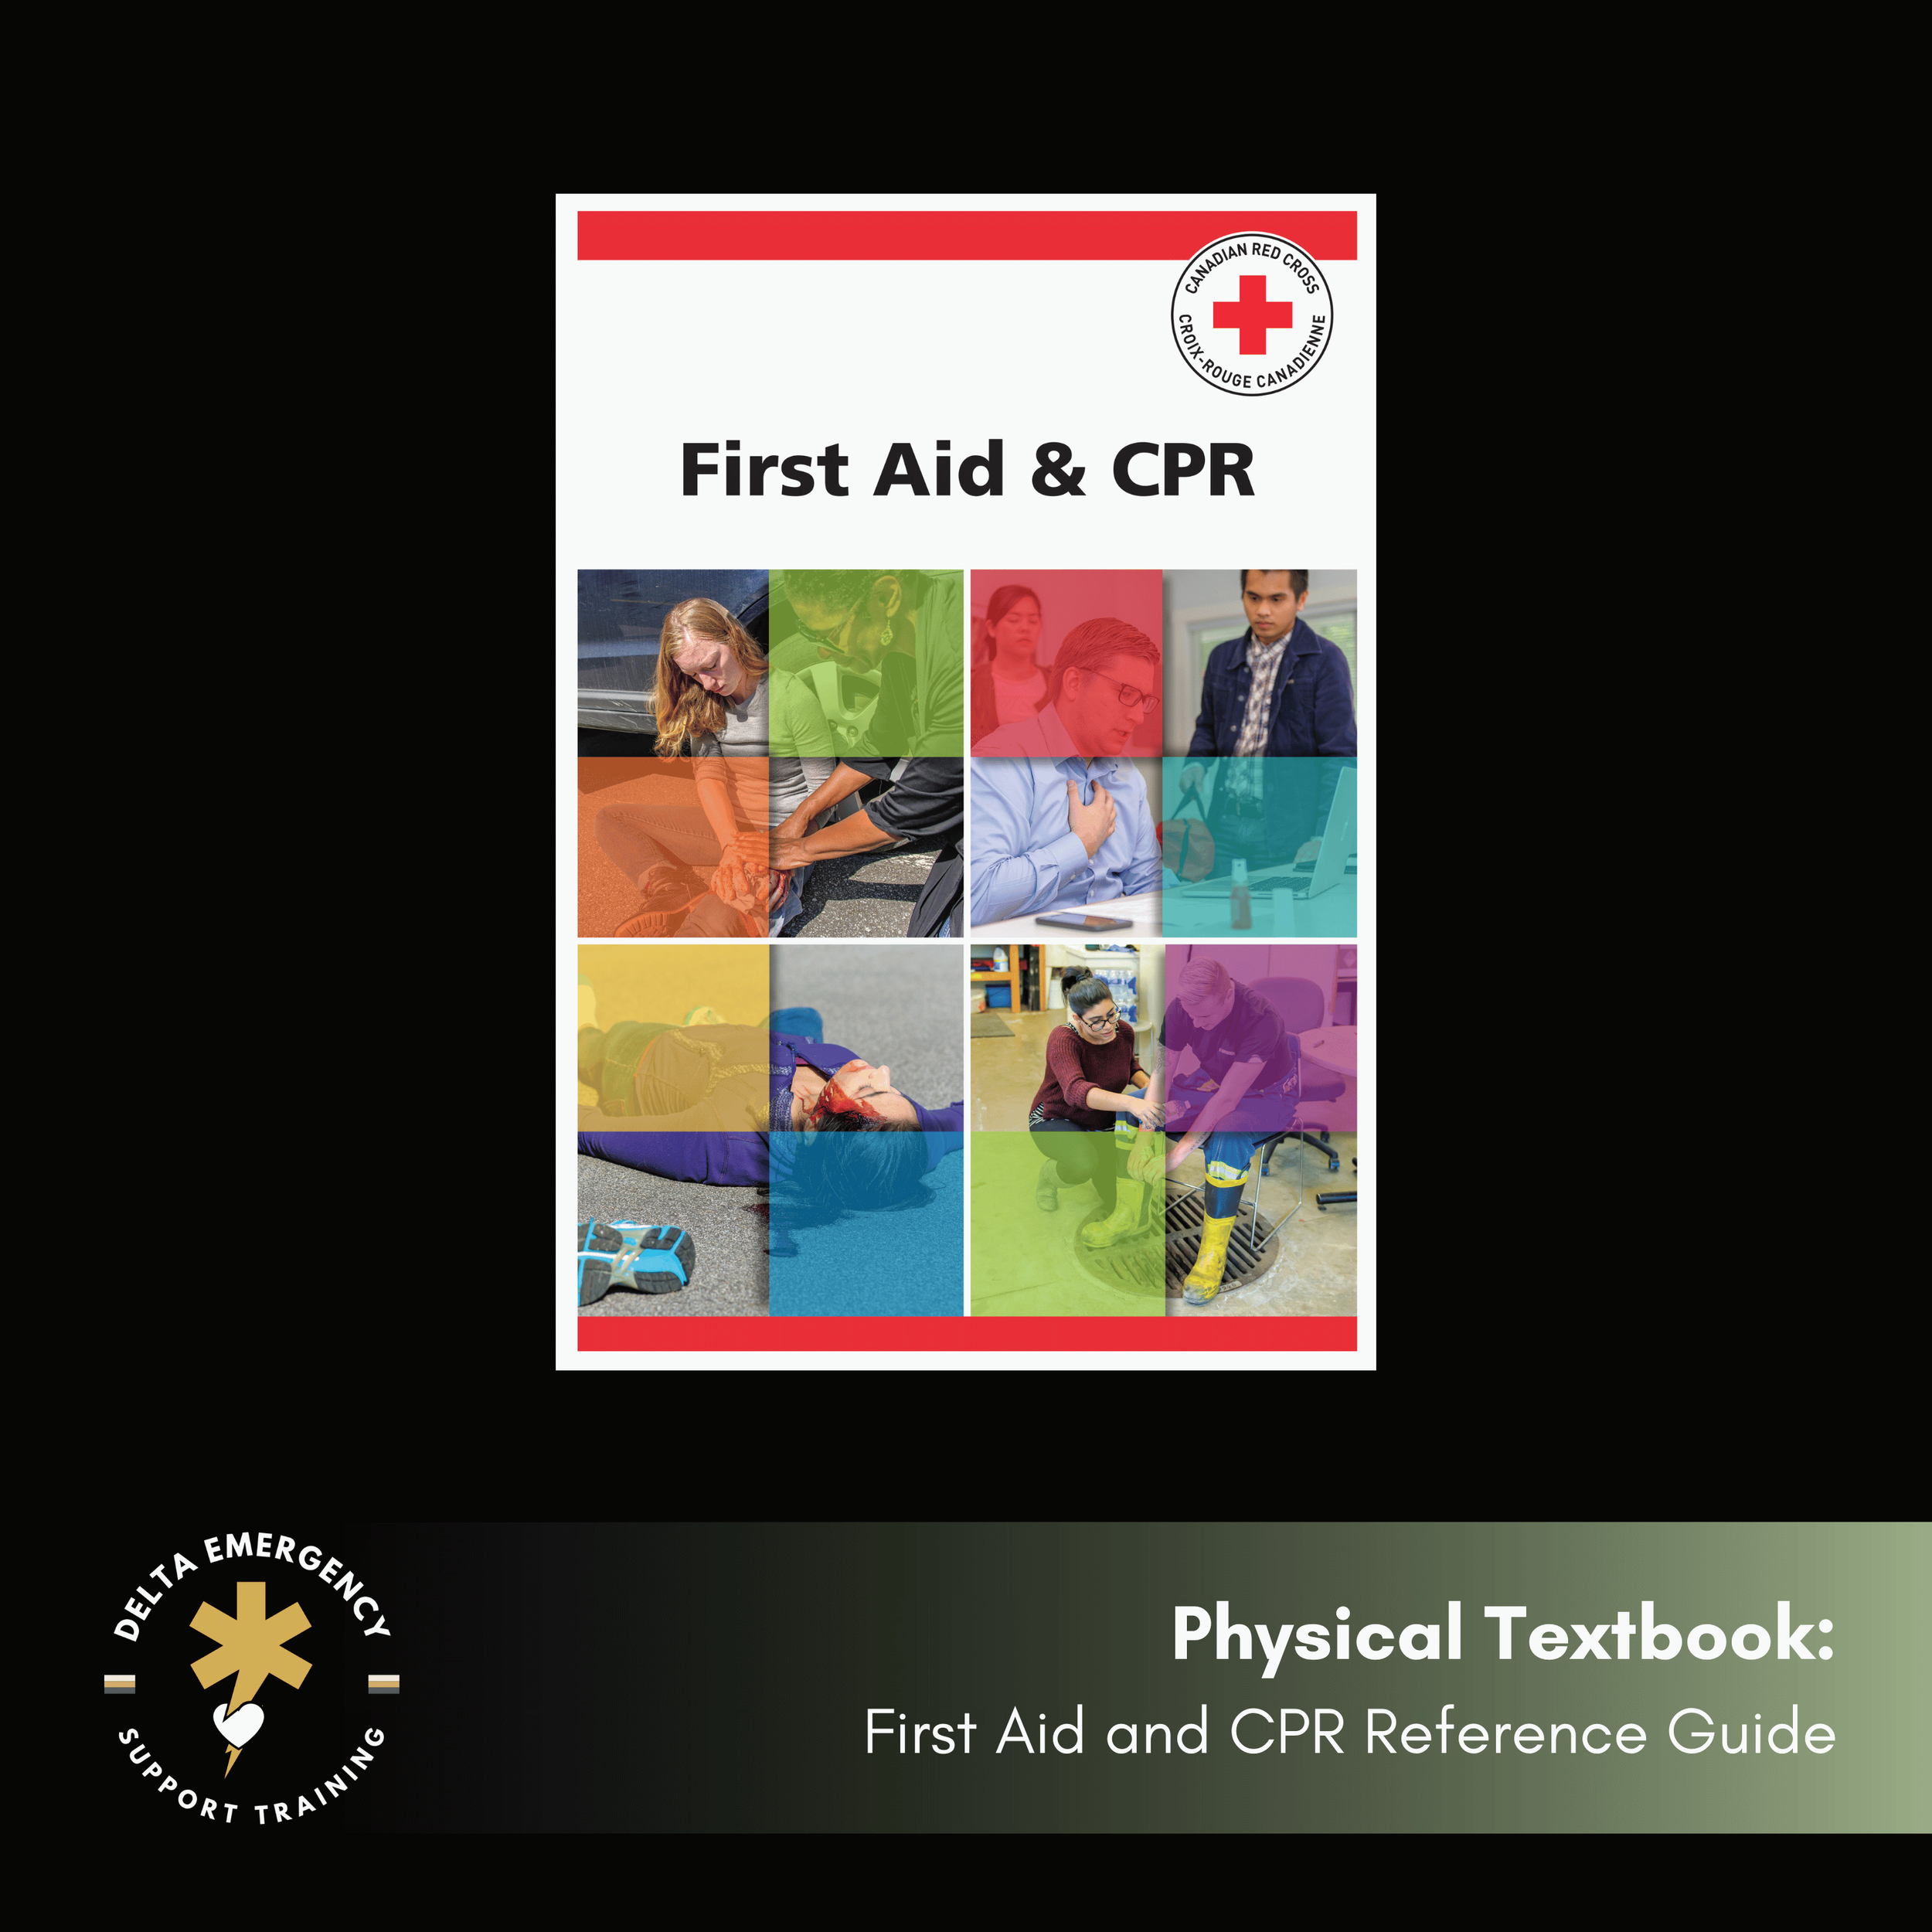
Essential Skills for Everyone: The Canadian Red Cross First Aid and CPR Textbook

Emergencies can happen anywhere—at home, at work, or in public spaces. Being prepared is key, and the Canadian Red Cross: First Aid and CPR textbook is the essential guide for anyone who wants to gain that preparedness.

The Ultimate Guide to Lifesaving Techniques

Emergencies can happen anywhere—at home, at work, or in public spaces. Being prepared is key, and the Canadian Red Cross: First Aid and CPR textbook is the essential guide for anyone who wants to gain that preparedness. Whether you're a family looking to enhance home safety, an educator responsible for students, or a business ensuring workplace readiness, this textbook is your comprehensive resource for learning how to handle common medical emergencies and perform lifesaving CPR.

The Canadian Red Cross First Aid and CPR Textbook

The Canadian Red Cross First Aid and CPR Textbook for all Core First Aid Certification Programs

Comprehensive Coverage of First Aid and CPR

This manual covers a wide range of topics crucial for effective emergency response, including:

  • Techniques for performing CPR on adults, children, and infants

  • Step-by-step guidance on dealing with choking, burns, fractures, bleeding, and more

  • Strategies for responding to emergencies involving poisoning, stroke, and heart attacks

  • Preventative measures to maintain safety in homes and workplaces

Each topic is presented with clear, concise instructions and supported by high-quality illustrations and diagrams that make learning both easy and effective.

Designed for Quick Access in Emergency Situations

One of the standout features of this textbook is its design for quick access:

  • Tabbed sections allow for fast navigation to the needed information during an emergency.

  • Durable, spill-proof pages ensure the book can be used in a variety of settings, including during actual emergency situations where quick reference is vital.

A Reliable Resource at Your Fingertips

The physical format of the First Aid and CPR textbook offers several advantages over digital alternatives, especially in emergency scenarios:

  • No dependency on electronic devices or internet access, which might be unavailable or unreliable during emergencies.

  • Easier to handle, especially for those who are less comfortable with technology, which can be an added stressor in a high-pressure situation.

Ideal for a Wide Audience

This textbook isn't just for medical professionals—it's designed for anyone who wants to have lifesaving knowledge. It's an excellent resource for:

  • Families wanting to ensure a safe home environment

  • Teachers and school staff responsible for the well-being of students

  • Corporate health and safety officers tasked with workplace safety training

  • Community centers and non-profit organizations providing health and safety education

Conclusion

Prepare yourself to respond confidently to medical emergencies with the Canadian Red Cross First Aid and CPR Textbook. Available now at Delta Emergency Support Training, this guide is an invaluable addition to any home, school, or workplace.

Secure your copy today from Delta Emergency Support Training and empower yourself with the skills to save lives and maintain safety, wherever you are.
First Aid and CPR Manual

Read More

Meningitis: What Every First Responder Needs to Know

Meningitis is a serious infection that can escalate rapidly. As a medical first responder, understanding the types and symptoms of meningitis is essential for effective care. At Delta Emergency, we provide advanced first aid training across Canada, particularly in Edmonton and Calgary, to equip fire fighters and emergency responders with life-saving knowledge.

At Delta Emergency, we train individuals in advanced first aid as an essential step in preparing them for fire fighting and other high-pressure, life-threatening situations. As part of our training, we emphasize the importance of being well-versed in a variety of medical conditions, including those that can escalate rapidly and require swift, decisive action. One such condition is meningitis, a serious infection that can affect the brain and spinal cord and may require urgent intervention.

In this post, we’ll delve into what meningitis is, the different types, and why understanding this condition is critical for medical first responders.

What is Meningitis?

Meningitis is the inflammation of the meninges, the protective membranes covering the brain and spinal cord. It is a potentially life-threatening condition because it can cause permanent damage to the nervous system if not treated quickly. The inflammation is usually caused by infection, but it can also be a result of other factors, such as certain medications or illnesses.

Symptoms of meningitis can develop suddenly, and in many cases, they resemble the flu. However, if left untreated, it can rapidly progress to more severe complications, including seizures, brain damage, and even death.

Types of Meningitis

Meningitis is classified into several different types based on the cause of the infection. The most common types are bacterial, viral, and fungal, but there are also other rarer causes that require different treatments.

1. Bacterial Meningitis

Bacterial meningitis is the most severe form and can be fatal if not treated immediately. It is caused by a bacterial infection that typically enters the bloodstream and spreads to the brain and spinal cord. The most common bacteria that cause meningitis are Neisseria meningitidis (meningococcal), Streptococcus pneumoniae (pneumococcal), and Haemophilus influenzae.

Symptoms:

  • Sudden high fever

  • Severe headache

  • Stiff neck

  • Nausea or vomiting

  • Sensitivity to light

  • Skin rashes (in some cases)

Bacterial meningitis requires immediate medical attention and is usually treated with intravenous antibiotics. Early intervention is key to preventing life-threatening complications.

2. Viral Meningitis

Viral meningitis is less severe than bacterial meningitis but can still be serious, particularly in infants and those with weakened immune systems. It is typically caused by viruses such as enteroviruses, herpes simplex virus, and the mumps virus.

Symptoms:

  • Mild fever

  • Headache

  • Stiff neck

  • Nausea

  • Sensitivity to light

  • Fatigue

Viral meningitis often resolves on its own without the need for specific treatment, although antiviral medications may be used in certain cases. Rest and supportive care are the mainstay of treatment.

3. Fungal Meningitis

Fungal meningitis is relatively rare and occurs when a fungal infection spreads to the meninges, usually in individuals with weakened immune systems, such as those with HIV/AIDS or who are undergoing chemotherapy. It is caused by fungi like Cryptococcus and Histoplasma.

Symptoms:

  • Headache

  • Fever

  • Nausea and vomiting

  • Sensitivity to light

  • Neck stiffness

  • Confusion

Fungal meningitis is treated with antifungal medications, but early detection is critical due to its potential to cause severe damage.

4. Parasitic Meningitis

Parasitic meningitis is a rare but serious type of infection caused by parasites. The most common example is Naegleria fowleri, a brain-eating amoeba found in warm freshwater environments. Though rare, this type of meningitis is almost always fatal.

Symptoms:

  • Severe headache

  • Nausea and vomiting

  • Stiff neck

  • Seizures

Why Is Meningitis Important for Medical First Responders to Recognize?

As a medical first responder, understanding meningitis is vital for several reasons:

  1. Rapid Assessment: When faced with a potential case of meningitis, especially bacterial meningitis, the symptoms can escalate quickly. The faster a first responder can assess and recognize the condition, the quicker they can initiate life-saving interventions and transport the patient to a medical facility.

  2. Preventing Spread: Certain types of meningitis, particularly bacterial meningitis, are contagious. First responders need to take immediate precautions to prevent the spread of the infection to others, especially in crowded environments like schools, hospitals, or emergency scenes.

  3. Accurate Communication with Medical Teams: As an advanced first aider, you’ll need to provide accurate and detailed information to the hospital staff or paramedics. Recognizing the key symptoms of meningitis will help ensure that the patient receives the correct treatment as soon as possible.

  4. Prevention Measures: In some cases, such as viral meningitis, vaccinations or antiviral medications may be available. Being able to educate the public on these prevention measures is also a critical aspect of first aid training.

  5. Making Informed Decisions in High-Pressure Situations: In emergency situations, especially during a fire or rescue operation, medical first responders often need to make quick decisions. Having a solid understanding of conditions like meningitis allows responders to make informed choices about treatment and triage priorities.

Meningitis and Fire Fighting: Why This Matters for You

For fire fighters and other emergency personnel, the ability to recognize and respond to meningitis is particularly important. Fire fighters often work in high-risk environments where exposure to infectious diseases is a possibility. Additionally, the physical and mental stress of responding to emergencies, including traumatic events, can weaken the immune system, making individuals more susceptible to infections.

Training in advanced first aid equips fire fighters with the tools they need to recognize signs of meningitis, protect themselves from exposure, and provide immediate care to victims. Knowing when to initiate emergency treatment, when to call for higher medical support, and how to prevent cross-contamination is essential in keeping both responders and the community safe.

Conclusion

Meningitis is a serious and potentially life-threatening infection that can affect anyone, but with the right knowledge and preparation, medical first responders can make a significant difference in the outcomes of those affected. At Delta Emergency, we ensure that our trainees are well-prepared to recognize the signs and symptoms of meningitis and take the appropriate action. Whether you are responding to an emergency as a fire fighter or any other medical first responder, being equipped with the knowledge of how to handle meningitis could save lives.

If you're looking to advance your first aid training or get involved in fire fighting, understanding the signs and treatments for conditions like meningitis should be a key part of your learning journey. Stay prepared, stay safe, and always be ready to respond with confidence.

Read More

Ejections from Vehicles: What Every First Responder Should Know

Vehicle ejections are one of the most dangerous and traumatic incidents first responders encounter. This blog provides vital insights into the causes, injuries, and best practices for responding to ejections, as well as how advanced first aid training can help firefighters and emergency responders handle these high-risk situations effectively.

Ejections from vehicles are among the most traumatic and severe incidents that first responders—including advanced first aid professionals—encounter. These types of accidents are especially dangerous for both the ejected individual and the responders who must navigate potentially hazardous environments. In Alberta, advanced first aid training is a prerequisite for firefighters and emergency medical responders (EMRs), equipping them with the skills needed to handle these high-risk emergencies effectively.

In this blog, we’ll explore what vehicle ejections are, why they happen, the injuries that often result, and how firefighters and first responders should approach such incidents. We’ll also highlight the importance of advanced first aid training in such high-stakes situations.

What is a Vehicle Ejection?

A vehicle ejection occurs when a person is thrown from their vehicle during a crash. This can happen in a variety of ways: high-speed crashes, rollovers, or when seatbelts aren’t used or fail. Ejections are dangerous because victims often land on hard surfaces, like the road, which increases the risk of life-threatening injuries. Immediate and proper intervention is critical to give these victims the best chance of survival and recovery.

Injuries caused by ejections can range from head trauma and spinal injuries to broken bones and internal bleeding. The consequences of such injuries can be catastrophic without timely and professional care.

Causes of Ejections

  1. Lack of Seatbelt Use: A major cause of ejections is the failure to wear seatbelts. Seatbelts significantly reduce the risk of ejection by keeping passengers securely in place during a crash.

  2. Rollover Accidents: In rollover crashes, passengers are more likely to be ejected as the vehicle tumbles, increasing the chances of being thrown out.

  3. High-Speed Collisions: High-speed crashes, especially when hitting stationary objects, create enough force to propel occupants out of the vehicle.

  4. Side-Impact (T-Bone) Collisions: When a vehicle is struck from the side, particularly with high impact, the risk of ejection increases as the side windows may shatter and the force can throw an occupant from the car.

Injuries from Ejections

Ejected vehicle victims can suffer a range of injuries, many of which are life-threatening:

  • Head and Brain Injuries: Traumatic brain injuries (TBI) are common and can range from concussions to severe skull fractures, leading to long-term disabilities or death.

  • Spinal Cord Injuries: Damage to the spine can result in paralysis or death, especially if the spinal cord is compromised during the ejection.

  • Internal Injuries: Blunt force trauma can cause internal bleeding, ruptured organs, and significant damage to internal structures. Rapid recognition and treatment of internal injuries are essential.

  • Fractures and Limb Injuries: Broken limbs, ribs, and pelvis are frequent in ejected patients, especially as they come into contact with the road or surrounding objects.

  • Soft Tissue Injuries: Scrapes, cuts, and bruises from the force of ejection and contact with surfaces are common and can add to the patient’s overall trauma.

How to Approach Vehicle Ejections: First Responder Steps

1. Start Your Size-Up at Dispatch

The time to start assessing the situation is before you even arrive on the scene. The dispatch information provides vital clues about the nature of the crash, the type of road (residential or highway), the speed of the impact, and any hazards that may be present, like industrial vehicles or hazardous materials. This early information helps responders prepare mentally and strategically for what lies ahead.

2. Perform an Inner Circle Survey

Upon arriving at the scene, conduct a quick 360-degree assessment of the incident—what we call the "inner circle survey." Walk around the wreckage to gather information about the number of victims, vehicle conditions (engine running, fluids leaking), and possible hazards (e.g., fuel, electrical lines, airbags). Noticing these details early will help guide your approach and ensure responder safety.

Safety systems such as airbags, rollover protection devices, and seatbelt pretensioners may have deployed, which can present both advantages and hazards during rescue operations. Recognizing these features will help prevent accidental injury to responders.

3. Stabilize the Victim and the Scene

Severe Bleeding Control: Ejected victims often suffer significant blood loss due to trauma. Controlling bleeding should be your first priority. Apply direct pressure to visible wounds and use tourniquets if needed to control extremity bleeding. Hemorrhage control is vital to prevent shock and further complications.

Spinal Stabilization: Always assume spinal injury in ejected patients until proven otherwise. Quickly immobilize the head and neck using cervical collars and spinal boards, ensuring minimal movement to prevent further damage.

Treat for Shock: Victims of vehicle ejections are at a high risk for shock, due to the trauma they’ve sustained. Keep the victim warm, elevate their legs (unless there’s suspected spinal injury), and monitor their vital signs.

4. Coordinate with EMS for Transport

Once the victim has been stabilized, prepare for rapid transport. Ensure that EMS has been notified, and keep in mind that time is critical in cases involving vehicle ejections. While waiting for EMS, continue to monitor the victim and provide necessary care.

Why Advanced First Aid Is Crucial for Firefighters

In Alberta, firefighters must undergo advanced first aid training as part of their professional certification. This training is invaluable when responding to high-risk incidents like vehicle ejections, where rapid, effective care can significantly impact patient outcomes.

Advanced first aid courses equip firefighters with skills such as:

  • Trauma assessment and management

  • Spinal immobilization techniques

  • CPR and airway management

  • Hemorrhage control and shock management

Having this expertise ensures that firefighters are prepared to handle the complex and often dangerous nature of vehicle ejection incidents. The ability to recognize signs of serious injury, apply the right interventions, and work safely around hazards can be the difference between life and death for the patient.

Conclusion

Vehicle ejections are some of the most challenging and dangerous situations first responders will face. Understanding how to assess, stabilize, and transport these patients is essential for their survival and recovery. With advanced first aid training, firefighters and emergency responders are better equipped to handle the complexities of vehicle ejections, ensuring they provide the best care possible in high-pressure situations.

At Delta Emergency Support Training, we offer specialized advanced first aid courses designed to prepare firefighters, paramedics, and emergency responders for these high-stakes incidents. Our training is hands-on, scenario-based, and tailored to the specific challenges you face in the field. Reach out to us today to find out how we can help your team be prepared for anything.

About Us

At Delta Emergency Support Training, we specialize in providing advanced first aid training for firefighters and emergency responders in Alberta. Our training ensures that you have the knowledge and hands-on experience to handle complex medical emergencies, from vehicle ejections to cardiac arrest. Contact us to learn more about our training programs and how we can help you be prepared for any emergency.

Read More

Understanding Medical Terminology: A Guide to Prefixes, Suffixes, and Roots for First Responders

Mastering medical terminology is essential for first responders. Understanding common prefixes, suffixes, and roots will help you communicate more effectively, make informed decisions, and provide quicker, more effective care. In this guide, we break down essential medical terms that will boost your confidence on the job and improve patient outcomes.

In the fast-paced world of Emergency Medical Services (EMS), effective communication and quick thinking are crucial. One way to improve both is by mastering medical terminology. As a first responder, understanding the building blocks of medical terms — prefixes, suffixes, and roots — will allow you to interpret unfamiliar terms quickly, leading to better patient care and more effective communication with other healthcare professionals.

In this guide, we’ll break down the most common prefixes, suffixes, and roots in medical terminology, with a focus on how these parts come together to help you understand the language of medicine. By familiarizing yourself with these building blocks, you’ll be equipped to navigate the world of medical terminology with confidence.

What Are Prefixes, Suffixes, and Roots?

Medical terms often seem complex, but most are built from smaller components that convey specific meanings. Understanding how these components work will help you quickly decode medical terms.

  • Prefix: A prefix is added at the beginning of a word to modify its meaning. It typically indicates time, location, quantity, or status.

  • Suffix: A suffix is placed at the end of a word to alter its meaning. It often refers to a condition, disease, procedure, or part of the body.

  • Root Word: The root is the central part of the word that provides the core meaning. It typically refers to a body part, function, or medical concept.

By breaking down terms into these components, you can understand what a word means without needing to memorize every single term.

Why EMS Professionals Need to Understand Prefixes, Suffixes, and Roots

As a first responder, you’ll often encounter long, unfamiliar medical terms during patient care. Breaking these terms down into their prefixes, suffixes, and roots helps you:

  1. Interpret Symptoms Faster: For example, recognizing terms like “tachypnea” (rapid breathing) or “bradycardia” (slow heart rate) allows you to quickly assess the situation and respond accordingly.

  2. Improve Communication: Whether you’re talking to a doctor, paramedic, or other healthcare professionals, using the correct medical terminology ensures clear, efficient communication, which leads to better patient outcomes.

  3. Streamline Documentation: Accurate medical documentation is essential in EMS. Knowing medical terms ensures you can write reports that are both precise and comprehensive.

Common Medical Prefixes Every First Responder Should Know

Here are some of the most common prefixes you’ll encounter in EMS. These prefixes provide important information about the patient's condition and can help you make quicker decisions in the field.

1. “Hyper-”

  • Meaning: Excessive, above normal

  • Example: Hypertension (high blood pressure)

2. “Hypo-”

  • Meaning: Below normal, deficient

  • Example: Hypoglycemia (low blood sugar)

3. “Brady-”

  • Meaning: Slow

  • Example: Bradycardia (slow heart rate)

4. “Tachy-”

  • Meaning: Fast

  • Example: Tachypnea (rapid breathing)

5. “Pre-”

  • Meaning: Before

  • Example: Preoperative (before surgery)

6. “Post-”

  • Meaning: After

  • Example: Post-traumatic (after trauma)

7. “Sub-”

  • Meaning: Under, beneath

  • Example: Subcutaneous (beneath the skin)

8. “Inter-”

  • Meaning: Between

  • Example: Intercostal (between the ribs)

9. “Intra-”

  • Meaning: Within

  • Example: Intravenous (within the vein)

10. “Exo-”

  • Meaning: Outside, outward

  • Example: Exoskeleton (external skeleton)

Common Medical Suffixes for EMS Professionals

Suffixes are essential for understanding the nature of a medical condition, procedure, or diagnosis. Below are key suffixes that are frequently used in EMS:

1. “-itis”

  • Meaning: Inflammation

  • Example: Arthritis (inflammation of the joints)

2. “-ectomy”

  • Meaning: Surgical removal

  • Example: Appendectomy (removal of the appendix)

3. “-algia”

  • Meaning: Pain

  • Example: Neuralgia (nerve pain)

4. “-pathy”

  • Meaning: Disease or condition

  • Example: Neuropathy (nerve disease)

5. “-emia”

  • Meaning: Blood condition

  • Example: Anemia (low red blood cell count)

6. “-plasty”

  • Meaning: Surgical repair

  • Example: Rhinoplasty (surgical repair of the nose)

7. “-scopy”

  • Meaning: Viewing or examination using a scope

  • Example: Endoscopy (examination of a body cavity)

8. “-logy”

  • Meaning: The study of

  • Example: Cardiology (study of the heart)

9. “-osis”

  • Meaning: Abnormal condition or disease

  • Example: Cirrhosis (a liver disease)

10. “-graphy”

  • Meaning: The process of recording

  • Example: Cardiography (recording heart activity)

Common Medical Roots in EMS Terminology

Roots form the core of medical terms and typically describe body parts, organs, or functions. Here are some important roots you’ll encounter in your training and practice:

1. “Cardi/o”

  • Meaning: Heart

  • Example: Cardiology (study of the heart)

2. “Gastr/o”

  • Meaning: Stomach

  • Example: Gastritis (inflammation of the stomach lining)

3. “Hemat/o”

  • Meaning: Blood

  • Example: Hemorrhage (excessive bleeding)

4. “Neuro/o”

  • Meaning: Nerve, nervous system

  • Example: Neurology (study of the nervous system)

5. “Oste/o”

  • Meaning: Bone

  • Example: Osteoarthritis (arthritis of the bone)

6. “Pulmon/o”

  • Meaning: Lungs

  • Example: Pulmonary edema (fluid buildup in the lungs)

7. “My/o”

  • Meaning: Muscle

  • Example: Myocardial (related to the heart muscle)

8. “Derm/a”

  • Meaning: Skin

  • Example: Dermatitis (inflammation of the skin)

9. “Ren/o”

  • Meaning: Kidney

  • Example: Renal failure (kidney failure)

10. “Rhin/o”

  • Meaning: Nose

  • Example: Rhinoplasty (surgical procedure on the nose)

Study Strategies for Mastering Medical Terminology

While learning prefixes, suffixes, and roots can seem overwhelming, there are several effective study techniques to help you retain and apply these concepts:

1. Use Flashcards

Flashcards are an excellent way to reinforce your understanding of prefixes, suffixes, and roots. Use physical cards or apps like Quizlet to test your knowledge on the go. Write the term on one side and its meaning on the other.

2. Create Mnemonics

To help remember terms, create memorable associations. For example, remember “tachy-” by thinking of “tachometer,” which measures speed (fast). For “brady-” (slow), think of Brady the tortoise from the classic story.

3. Break Down Terms

Whenever you encounter an unfamiliar term, break it down. Start with the root word, then look at the prefix and suffix. For example, Tachycardia:

  • Tachy- = fast

  • Cardi/o = heart

  • -ia = condition So, Tachycardia = a condition of a fast heart rate.

4. Group Study and Practice

Group study sessions help reinforce what you've learned. Discuss terms with classmates or colleagues and quiz each other regularly to ensure you understand the material.

5. Use Interactive Tools

Interactive quizzes and apps can make learning more engaging. Tools like Anki or MedTerm offer practice exercises that reinforce your understanding of medical terminology in a fun, interactive way.

Conclusion: Mastering Medical Terminology for EMS Professionals

In EMS, quick decision-making and clear communication can save lives. Understanding medical terminology, including prefixes, suffixes, and roots, allows you to decode complex terms on the fly and makes you a more effective responder. It’s a skill that will improve your ability to assess patients, document care, and work with your team efficiently.

At Delta Emergency Support Training, we understand the importance of a solid foundation in medical terminology. Our comprehensive Red Cross Babysitting course and First Aid training cover essential medical concepts that will set you up for success in the field. Whether you're just getting started or looking to advance your skills, mastering medical terminology is a key step in becoming a top-tier first responder.

Read More

The underestimated danger of lighting strikes

Lightning strikes are often underestimated and overlooked when it comes to assessing the dangers of thunderstorms. Yet, they pose a significant threat, capable of causing fatalities and injuries every year. In this article, we'll delve into the risks associated with lightning strikes, including the devastating effects on individuals, and discuss practical measures to stay safe.

single lighting striking into a field

Lightning strikes are often underestimated and overlooked when it comes to assessing the dangers of thunderstorms. Yet, they pose a significant threat, capable of causing fatalities and injuries every year. In this article, we'll delve into the risks associated with lightning strikes, including the devastating effects on individuals, and discuss practical measures to stay safe.

Understanding the Threat:

Every thunderstorm, no matter its intensity, harbors the potential for lightning strikes. Lightning is not only lethal but also unpredictable, making it a formidable hazard. In the United States alone, lightning claims the lives of 20-30 individuals annually and injures hundreds more. Unlike other storm-related dangers like tornadoes or hail, lightning can extend beyond the storm itself, making it the first to arrive and the last to depart.

Safe Shelter:

When thunder roars, seeking shelter becomes imperative. Large enclosed structures with plumbing and electrical wiring offer the safest refuge during thunderstorms. These include buildings like shopping centers, schools, offices, and homes. The presence of plumbing and wiring ensures a more efficient conduction of electricity, reducing the risk to individuals inside. Enclosed metal vehicles such as cars, vans, or buses also provide a viable alternative if no buildings are available.

Unsafe Locations:

Not all structures or vehicles are safe havens during lightning storms. Buildings with exposed openings, like beach shacks, metal sheds, or picnic shelters, pose significant risks. Convertible vehicles, despite having their tops up, offer no protection against lightning. Similarly, vehicles with open cabs, such as golf carts or tractors, should be avoided during thunderstorms.

Developing a Lightning Safety Plan:

Planning ahead is crucial for outdoor events to mitigate the risks posed by lightning. Event coordinators should incorporate a lightning safety plan into their preparations. This plan should address key questions such as identifying the safest shelter, assessing the distance to it, and estimating the time needed to reach it. Having these answers beforehand enhances preparedness and reduces the likelihood of lightning-related incidents.

Acting Promptly:

Studies have revealed that most lightning-related injuries occur before or after the peak of a thunderstorm. Lightning strikes can occur even when the storm is several miles away, emphasizing the importance of swift action. As a rule of thumb, if thunder is audible, you're within striking distance and should seek shelter immediately. Remember, "When thunder roars, go indoors," and remain there until 30 minutes after the last clap of thunder.

Understanding the Devastating Effects:

When lightning strikes a person, the consequences can be catastrophic. Immediate risks include cardiac arrest, severe burns, and damage to the nervous system and brain. The high voltage of a lightning bolt can disrupt the heart's rhythm, leading to sudden cardiac arrest. Lightning generates intense heat, causing severe burns both externally and internally. It can also disrupt the nervous system, leading to symptoms such as numbness, tingling, or paralysis. In severe cases, lightning strikes can cause traumatic brain injury (TBI), resulting in cognitive deficits or permanent disability.

Conclusion:

Lightning strikes may seem remote or rare, but they present a real and significant danger during thunderstorms. By understanding the risks associated with lightning and adhering to safety guidelines, individuals can protect themselves and others from potential harm. Remember, prioritizing safety and taking proactive measures are essential when confronted with the silent killer that is lightning. Stay informed, stay prepared, and stay safe.

Read More

5 Life-Saving First Aid Techniques Everyone Should Know

In a world where emergencies can strike at any moment, being equipped with life-saving skills is crucial. Delta Emergency Support Training's First Aid Classes in Calgary, Alberta, go beyond the basics, offering comprehensive training in CPR, back blows, Stop the Bleed, the recovery position, and AED use. With hands-on experience and expert guidance, participants gain the confidence to act decisively in critical situations. Enroll today and become a confident, capable first responder – because your quick response might just save a life.

First aider attends to unconscious man who has AED PADS PLACED ON CHEST

When faced with a medical emergency, having a solid understanding of basic first aid techniques can be the difference between life and death. Whether at home, work, or in public spaces, possessing fundamental first aid skills can empower you to respond effectively and decisively. In this blog, we'll explore five common life-saving first aid techniques that everyone should know.

  1. Cardiopulmonary Resuscitation (CPR):

    Cardiopulmonary Resuscitation, or CPR, is a critical skill used to revive individuals experiencing cardiac arrest. By combining chest compressions and rescue breaths, you can maintain blood flow and oxygenation to vital organs until professional medical help arrives. CPR training is widely accessible, and mastering this technique can significantly increase the chances of survival in emergencies.

  2. Back Blows and Abdominal Thrusts:

    Choking is a prevalent emergency that can happen anywhere, and knowing how to respond is crucial. The combination of back blows and abdominal thrusts is a technique used to dislodge a foreign object obstructing the airway. Begin with five sharp back blows between the shoulder blades, followed by five abdominal thrusts to force air from the lungs and expel the obstruction. This method can be a lifesaver in situations where swift action is necessary.

  3. Stop the Bleed:

    Uncontrolled bleeding is a leading cause of preventable death in emergencies. The "Stop the Bleed" technique focuses on controlling external bleeding until professional medical assistance arrives. Applying direct pressure to the wound with sterile bandages or clothing, using tourniquets when necessary, and elevating the injured limb are essential components of this life-saving skill.

  4. Recovery Position:

    The recovery position is a simple yet vital technique used to maintain an open airway for an unconscious person who is breathing. Placing the individual on their side helps prevent choking on vomit or other fluids and promotes proper breathing. This technique is particularly useful in cases of alcohol or drug overdose, where maintaining a clear airway is critical until medical help arrives.

  5. AED (Automated External Defibrillator) Use:

    AEDs are portable devices that deliver an electric shock to restore the heart's normal rhythm in cases of sudden cardiac arrest. Learning how to use an AED, in conjunction with CPR, can significantly increase the chances of survival for someone experiencing a cardiac emergency. Many public places and workplaces are equipped with AEDs, making understanding their proper use invaluable in time-sensitive situations.

    Delta Emergency Support Training's First Aid Classes in Calgary, Alberta, offer a comprehensive approach to life-saving techniques. By enrolling in these courses, participants gain the skills and confidence to respond effectively to emergencies. From CPR to back blows and abdominal thrusts, Stop the Bleed, the recovery position, and AED use, Delta Emergency Support Training ensures that individuals are well-prepared to make a positive impact in critical situations. Empower yourself with the knowledge that can make a difference – enroll in Delta Emergency Support Training's First Aid Classes today. Your quick response and expertise could be the key to saving lives.

Read More

Eye Injury Response: A Guide for First Aiders

In the world of advanced first aid, the ability to respond swiftly and effectively to eye injuries is paramount. Our comprehensive guide delves into the nuances of addressing diverse eye injuries, providing advanced responders with the knowledge and confidence needed to navigate these critical situations. From understanding the causes to mastering the essential steps, this guide is your go-to resource for safeguarding vision in emergency scenarios.

Man’s dark brown eye with a broken blood vessle staining the white of his eye.

In this edition of our first aid blog, we sharpen our focus on a critical aspect of emergency medical response – effectively addressing eye injuries. The eyes, being a vital sensory organ, demand swift and informed action from those trained in advanced first aid. Your knowledge and intervention can make a substantial difference in preserving vision and mitigating further harm. Join us as we navigate through the common types of eye injuries, their origins, and the indispensable steps to be taken in the event of a medical emergency.

Foreign Objects in the Eye

Causes

Foreign objects such as small debris, dust, sand, wood chips, or metal particles can easily enter the eyes during various activities. Working in construction, gardening, or simply being outdoors on a windy day increases the risk of encountering these particles.

Response: If a foreign object enters the eye

  • Do not rub the eye: Rubbing can potentially cause corneal abrasions or embed the foreign object further.

  • Blink repeatedly: Natural blinking can help stimulate tears, aiding in the removal of small particles.

  • Flush the eye with water: Use a sterile saline solution or clean, lukewarm water to rinse the eye gently. Tilting your head to the side can help prevent contamination of the unaffected eye.

Additional Tips

  • If the foreign object persists or the pain continues, do not attempt to remove it yourself. Seek professional medical help promptly.

  • Wearing protective eyewear during activities with a high risk of eye injury can significantly reduce the chances of foreign objects entering the eyes.

Chemical Burns

Causes:

Chemical burns to the eyes can occur from exposure to household cleaning products, industrial chemicals, or contact with substances like bleach or acids.

Response: If a chemical comes into contact with the eyes

  • Flush the eye immediately: Begin rinsing the affected eye with copious amounts of water for at least 15 minutes. Use a gentle stream to avoid splashing.

  • Hold the eyelids open: This ensures thorough flushing, helping to remove the chemical from all parts of the eye.

  • Seek immediate medical attention: Even if symptoms appear to improve during the rinsing process, professional evaluation is crucial to prevent potential long-term damage.

Additional Tips

  • Know the location of emergency eyewash stations in workplaces where exposure to chemicals is possible.

  • When handling chemicals, always wear appropriate protective eyewear to minimize the risk of accidental splashes or spills.

Subconjunctival Hemorrhage

Causes

A subconjunctival hemorrhage, often referred to as a broken blood vessel in the eye, manifests as a bright red patch on the sclera. This condition may result from various factors, such as eye trauma, a sudden increase in pressure, or underlying medical conditions.

Response

  • Stay calm: While alarming in appearance, a subconjunctival hemorrhage is typically painless and harmless.

  • Avoid rubbing the eye: To prevent further irritation or damage.

  • Monitor for changes: While spontaneous, if the subconjunctival hemorrhage is recurrent or accompanied by other symptoms, seek medical advice.

Blows to the Eye

Causes

Blows to the eye can result from accidents, falls, or injuries sustained during sports activities.

Response: If a person experiences a blow to the eye

  • Apply a cold compress: Use a clean cloth or ice pack wrapped in a thin towel to reduce swelling and alleviate pain.

  • Avoid placing pressure: Refrain from pressing on the eye directly; instead, gently apply the compress around the eye.

  • Seek medical attention: If there is significant swelling, double vision, or changes in vision, it's essential to consult a healthcare professional promptly.

Additional Tips

  • Use protective eyewear during sports or activities with an increased risk of eye injuries, such as racquet sports, paintball, or construction work.

  • Regular eye check-ups can help identify underlying issues that may increase the susceptibility to eye injuries.

Corneal Abrasions

Causes

Corneal abrasions result from scratches on the cornea, often caused by foreign objects like fingernails, contact lenses, or airborne particles.

Response: When dealing with a corneal abrasion

  • Avoid rubbing the eye: Rubbing may exacerbate the abrasion and hinder the healing process.

  • Keep the eye closed: This protects the eye from further irritation and reduces the chance of infection.

  • Seek medical attention: Even seemingly minor abrasions can lead to infections or other complications, making it crucial to consult a healthcare provider for appropriate treatment.

Additional Tips

  • If you wear contact lenses, follow proper hygiene practices, and avoid wearing lenses when your eyes are irritated or red.

  • Protective eyewear, such as safety glasses or goggles, can provide an additional layer of defense against potential corneal abrasions in various situations.

Conclusion

Eye injuries require immediate attention and proper care. Understanding the specific responses to different types of injuries is crucial for preserving vision and preventing long-term complications. Remember, early intervention and seeking professional medical help when needed are key components of effective eye injury first aid. By staying informed and taking preventive measures, you can play a pivotal role in protecting your vision and that of others. Stay safe, stay informed, and safeguard your vision.

Read More

Empowering Lives Through Training: Delta Emergency as a Red Cross Training Partner

The Red Cross, an emblem of humanitarian aid, has been at the forefront of disaster response and readiness for generations. They offer an array of training programs designed to equip individuals with essential skills for emergencies and crises. A Red Cross Training Partner is an organization that joins forces with the Red Cross to deliver certified training courses to individuals, workplaces, schools, and communities. This partnership ensures consistent, accurate, and up-to-date training aligned with the latest guidelines and best practices. One such partner, Delta Emergency, exemplifies this commitment through their collaboration, enriching lives with essential knowledge and empowering individuals to navigate emergencies with confidence.

In a world where emergencies can strike unexpectedly, being equipped with life-saving skills becomes paramount. This is where organizations like Delta Emergency step in, playing a pivotal role in preparing individuals to respond effectively during crises. As a Red Cross Training Partner, Delta Emergency takes its commitment to emergency preparedness to the next level.

Person wearing military uniform holding a jaw thrust on a manikin.

What is a Red Cross Training Partner?

The Red Cross, an internationally recognized humanitarian organization, has been at the forefront of disaster response and preparedness for over a century. They offer a wide range of training programs that empower individuals with essential skills to respond to emergencies, provide first aid, and support communities in times of crisis.

A Red Cross Training Partner is an organization that collaborates closely with the Red Cross to deliver certified training courses to individuals, workplaces, schools, and communities. These partners uphold the highest standards set by the Red Cross, ensuring that training is consistent, accurate, and aligned with the latest guidelines and best practices.

Delta Emergency: Empowering Lives Through Training

Delta Emergency, as a Red Cross Training Partner, embodies a commitment to excellence in emergency preparedness and response training. Through this partnership, Delta Emergency gains access to the Red Cross's wealth of knowledge, resources, and training materials. This collaboration enables Delta Emergency to offer a comprehensive range of Red Cross-certified courses, empowering individuals and organizations to be well-prepared when emergencies strike.

Benefits of Red Cross-Certified Training:

  1. Credibility:

    Red Cross certification is globally recognized and trusted. Courses offered by Delta Emergency carry the weight of a respected humanitarian organization, enhancing the credibility of the training.

  2. Quality Assurance:

    Red Cross training courses are meticulously designed by experts, ensuring that participants receive accurate, up-to-date, and reliable information. This quality assurance is crucial for building effective emergency response skills.

  3. Comprehensive Curriculum:

    Delta Emergency's Red Cross-certified courses cover a wide spectrum of topics, including Advanced First Aid, Standard First Aid, and the Babysitting course. From first aid and CPR to disaster response and psychological support, participants gain a well-rounded understanding of how to handle various emergency situations.

  4. Life-Saving Skills:

    Delta Emergency's partnership with the Red Cross equips individuals with practical skills that can make a life-saving difference. These skills can be applied not only in emergencies but also in daily life situations.

The Path to Empowerment:

By partnering with the Red Cross, Delta Emergency is enabling individuals and communities to be proactive in their approach to emergencies. Through these certified training courses, Delta Emergency is not only imparting essential skills but also fostering a culture of preparedness, resilience, and compassion.

Our Dedicated Team: Critical Care Paramedics, Advanced Care Paramedics, and Fire-Trained Instructors

At Delta Emergency, our commitment to excellence is upheld by our dedicated team. Our staff includes critical care paramedics, advanced care paramedics, and fire-trained instructors. Their expertise, combined with our Red Cross Training Partner status, ensures that our courses, including Advanced First Aid, Standard First Aid, and the Babysitting course, are taught with the highest level of professionalism and practical knowledge.

In conclusion, Delta Emergency's role as a Red Cross Training Partner underscores their dedication to equipping people with the tools needed to respond effectively in emergencies. This collaboration amplifies the impact of their training programs, ensuring that individuals are empowered to make a positive difference when it matters most. Through the combined efforts of Delta Emergency and the Red Cross, communities can face the unpredictable future with greater confidence and readiness.

Read More
Alberta, Wilderness, Healthcare Kumari Malhotra Alberta, Wilderness, Healthcare Kumari Malhotra

Surviving a Tornado: Key Tips to Increase Your Odds of Safety

Surviving a tornado requires preparedness, quick thinking, and the ability to adapt in the face of nature's fury. As recent events have shown, such as the devastating tornado outside Calgary, it is crucial to arm ourselves with knowledge and take proactive measures to increase our odds of safety. Staying informed about weather conditions and having a plan in place are paramount. From creating a tornado emergency kit filled with essential supplies to reinforcing your safe space, every step you take towards preparedness can make a significant difference. Remember, when a tornado strikes, seek shelter immediately, cover yourself for protection, and stay low to minimize the risk. And don't forget to have an evacuation bag ready, packed with essentials, so that you can swiftly respond to evacuation orders. With these precautions and a calm mindset, you can face tornadoes with greater confidence, ensuring the safety of yourself and your loved ones.

Tornadoes are powerful natural disasters that can cause extensive damage and put lives at risk. In the wake of an awful tornado outside Calgary, it is crucial to be prepared and informed about how to enhance your chances of survival. This guide provides essential tips to help you navigate through a tornado event and prioritize your safety.

Destructive tornado destroys farm.

Before the Tornado

Stay Informed:

  • Keep track of weather forecasts and pay attention to tornado watches and warnings issued by local authorities.

  • Utilize weather alert systems, radio broadcasts, and smartphone apps for timely updates.

Seek Shelter:

  • Immediately seek shelter in a sturdy structure with a basement if possible.

  • If a basement is unavailable, find an interior room on the lowest level, away from windows.

Prepare an Emergency Kit:

  • Create a tornado emergency kit with essentials like water, non-perishable food, a battery-powered radio, flashlight, first aid supplies, and a charged cell phone.

Reinforce Your Safe Space:

  • Strengthen your safe room or basement by using sturdy furniture or mattresses for added protection against debris.

  • Securely anchor large objects to prevent them from becoming hazardous projectiles.

During the Tornado

Cover Up for Protection:

  • Use mattresses, heavy blankets, or a bicycle helmet to shield yourself from flying debris.

  • Cover your head and body to reduce the risk of injury.

Stay Low and Hold On:

  • If caught in an open area with no shelter, lie flat in a low-lying area and cover your head with your arms.

  • Hold on to a stable object to avoid being swept away by strong winds.

If Caught Outside

Seek the Lowest Elevation:

  • Look for a nearby ditch, depression, or low-lying area and take cover.

  • Being in a lower position reduces the chances of being struck by debris.

Lie Flat and Cover Your Head:

  • Once in a low-lying area, lie flat on the ground with your face down and cover your head and neck with your arms.

  • Protecting your head reduces the risk of injury.

Be Aware of Surroundings:

  • Stay vigilant and watch out for flying objects, falling debris, or hazards that may pose a threat to your safety.

  • Stay away from trees, electrical poles, and structures vulnerable to collapse.

Evacuation Preparedness

Create an Evacuation Bag:

  • Pack essential items such as important documents, communication tools, clothing, food, water, first aid supplies, emergency cash, and personal hygiene items.

  • Keep the bag in a readily accessible location for quick retrieval during a tornado warning or evacuation situation.

Regularly Review and Update:

  • Periodically review and update the contents of your evacuation bag, checking expiration dates and replacing any necessary items.

  • Ensure that all documents and contact information are up to date.

Conclusion

Surviving a tornado requires preparedness, quick action, and a calm mindset. By staying informed, seeking shelter immediately, and following the guidelines provided, you can significantly increase your odds of staying safe during a tornado event. Additionally, being prepared with an evacuation bag ensures you have essential supplies during an evacuation. Remember, prioritize your safety, stay calm, and take necessary precautions to protect yourself and your loved ones in the face of a tornado.

Read More
First Aid, Online Course, Work Place First Aid Kumari Malhotra First Aid, Online Course, Work Place First Aid Kumari Malhotra

Eye Injury Prevention and Management in the Workplace: A First Aider's Guide

Eye injuries are a common occurrence in the workplace, particularly in industries that involve manual labor or the use of heavy machinery. As a first aider, it's important to be able to recognize common types of eye injuries and provide appropriate care to those in need. By taking steps to prevent eye injuries, employers can help to ensure the safety and well-being of their workers, and reduce the risk of workplace accidents. Here's what you need to know as a first aider about responding to workplace eye injuries.

Eye injuries can range from minor irritations to serious injuries that can cause vision loss or other complications. As a first aider, it's important to be able to recognize common types of eye injuries and provide appropriate care to those in need.

a first aid kit with eye supplies specifically for eye emergencies.

Workplace eye injuries are common, particularly in industries that involve manual labor or the use of heavy machinery. These injuries can often be prevented by taking simple precautions, such as wearing appropriate eye protection, conducting regular safety audits, and providing training and education on eye safety. Other factors that can contribute to workplace eye injuries include poor lighting, clutter and debris, and working with hazardous materials or power tools. By taking steps to prevent eye injuries, employers can help to ensure the safety and well-being of their workers, and reduce the risk of workplace accidents. As a first aider, it's important to be prepared to respond to eye injuries in the workplace and provide appropriate care to those in need.

Common Types of Eye Injuries

Foreign Bodies:

Foreign bodies are small objects or debris that enter the eye, such as dust, dirt, or metal shavings. They can cause irritation, redness, and discomfort. If a foreign object enters the eye, it's important not to rub or touch the eye, as this can push the object further in and cause more damage. Instead, cover the eye with a sterile gauze pad or cloth and seek medical attention. Do not attempt to remove the foreign object, as this can cause further damage or push the object deeper into the eye.

Chemical Burns:

Exposure to chemicals, such as acids or alkalis, can cause severe eye damage and should be treated as an emergency. If a person's eye comes into contact with a chemical, it's important to immediately flush the eye with clean water or saline solution for at least 20 minutes. Continue flushing the eye while seeking medical attention.

Corneal Abrasions:

A corneal abrasion is a scratch or cut on the cornea, which can cause pain, sensitivity to light, and tearing. If someone has a corneal abrasion, it's important to cover the injured eye with a sterile gauze pad or cloth and seek medical attention. Do not attempt to rub the eye or remove any foreign objects, as this can cause further damage.

Blunt Trauma:

Blunt trauma to the eye, such as from a ball or fist, can cause swelling, bleeding, or even vision loss. If someone has experienced blunt trauma to the eye, it's important to cover the injured eye with a sterile gauze pad or cloth and seek medical attention immediately.

Penetrating Injuries:

Penetrating Injuries: Penetrating injuries to the eye occur when an object, such as a piece of metal or glass, enters the eye and penetrates the eyeball. These injuries can be very serious and require immediate medical attention. If someone has experienced a penetrating eye injury, it's important to cover the injured eye with a sterile gauze pad or cloth, stabilize the object in place, and cover the other eye with a cloth or eye shield to prevent any movement. Seek emergency medical attention immediately. It's important not to remove the object, as this can cause further damage or bleeding.

Dealing with Eye Injuries

If you encounter someone with an eye injury, it's important to take immediate action to prevent further damage or complications. Here are some steps you can take:

  1. Remain calm and reassure the person that help is on the way.

  2. Encourage the person to keep their eyes closed to prevent further damage.

  3. Assess the injury by looking for signs of bleeding, swelling, or foreign objects in the eye.

  4. If both eyes are injured or there are signs of a head injury, call for emergency medical services right away.

    Preventing Eye Injuries on Work Sites

    Eye injuries are a common occurrence on work sites, particularly in industries that involve manual labor or the use of heavy machinery. These injuries can often be prevented by taking simple precautions, such as:

    1. Wearing appropriate eye protection:

      Eye protection should be worn by all workers who may be exposed to hazards such as flying debris, chemicals, or radiation. Employers should provide workers with appropriate eye protection and ensure that it meets safety standards.

    2. Conducting regular safety audits:

      Regular safety audits can help to identify potential hazards and ensure that safety measures are being followed. Employers should conduct regular safety audits to identify potential hazards and take steps to eliminate or minimize them.

    3. Providing training and education:

      Workers should be trained on the importance of eye safety and provided with the knowledge and skills necessary to identify potential hazards and take appropriate precautions.

    4. Using caution when working with hazardous materials:

      Workers should use caution when working with hazardous materials, such as chemicals or biological agents. Protective eyewear should be worn when working with these materials, and proper ventilation should be provided to minimize exposure.

    5. Using caution when working with power tools:

      Power tools can cause flying debris and other hazards that can cause eye injuries. Workers should always wear appropriate eye protection when working with power tools.

    6. Ensuring that work sites are well-lit:

      Poor lighting can increase the risk of eye injuries, as workers may not be able to see potential hazards. Employers should ensure that work sites are well-lit and that workers have adequate visibility.

    7. Removing clutter and debris:

      Clutter and debris on work sites can increase the risk of eye injuries. Employers should ensure that work sites are free from clutter and debris, and that workers have clear paths of travel.

    As a first aider, it's important to be able to recognize common types of eye injuries and provide appropriate care to those in need. By taking steps to prevent eye injuries, employers can help to ensure the safety and well-being of their workers, and reduce the risk of workplace accidents. Remember to always wear appropriate eye protection when working in hazardous environments, and to seek medical attention for serious or potentially serious eye injuries.

First Aid

Enroll in our first aid course in Calgary today and learn the skills you need to protect your vision and help others in any emergency situation. Visit us at deltaemergency.com to register for our course and take the first step towards becoming a confident and effective first aider.

Read More

Tourniquets: A Crucial Tool for Managing Severe Bleeding

As a first aider or advanced first aider, being prepared to manage severe bleeding is essential. Tourniquets are a critical tool in managing severe bleeding and can be the difference between life and death in emergency situations. In this blog post, we'll explain what a tourniquet is, when and why to use one, how to properly apply one, and why it's crucial not to remove it once it's on.

As a first aider or advanced first aider, it's important to be prepared to handle a wide range of emergency situations, including severe bleeding that can be life-threatening if not managed quickly and effectively. Tourniquets are an important tool in the first aider's toolkit for managing severe bleeding in emergency situations. In this blog post, we'll explain what a tourniquet is, why and when we might use one, and how to properly apply one. We'll also cover how to make an improvised tourniquet if a commercial one is not available.

Two first aiders are seen applying a tourniquet to a patient's limb in this image. The first aiders are wearing blue gloves, which are an essential part of their personal protective equipment (PPE) when providing medical care in emergency situations.

What is a tourniquet?

A tourniquet is a device used to control bleeding from a limb, typically a long bone. It can be made of a variety of materials such as fabric, rubber or nylon. Modern tourniquets are typically designed to be self-administered and easy to use in high-pressure situations, making them a valuable tool for first aiders and other medical professionals.

When is using a tourniquet warranted?

Tourniquets are used in emergency situations where a person is experiencing a life threatening bleed that cannot be controlled through other means, such as direct pressure. Indication for the use of tourniquet includes soaking through multiple dressings with no slow of blood loss.

It is important to remember that a tourniquet is a last resort and should only be used when direct pressure and other measures have failed to control bleeding.

How does it work?

The tourniquet works by compressing the blood vessels in the limb, which reduces or stops the flow of blood to the area below the device. This helps to prevent further blood loss and can save the patient's life.

Tourniquet application

When applying a tourniquet, it's important to locate the injury and apply the tourniquet at least 2 inches above the injury site or joint. This will ensure that the tourniquet is applied to the correct location and will effectively control the bleeding.

Once the tourniquet is in place, it must be tightened until the blood flow dramatically lessens or stops completely. It's important to monitor the patient closely and record the time the tourniquet was applied. If possible, mark the tourniquet with the time it was applied.

In some cases, multiple tourniquets may need to be applied to control severe bleeding. This may be necessary if the bleeding is occurring in multiple locations or if a single tourniquet is not effective in stopping the bleeding. After a tourniquet is applied it must not be removed.

Removing a tourniquet

Once a tourniquet is applied, it is important not to remove it until medical professionals can take over. Removing a tourniquet prematurely can cause the bleeding to resume and lead to further injury or even death. Instead, note the time that the tourniquet was applied and communicate this information to medical professionals when they arrive on the scene.

Improvised tourniquet

When a commercial tourniquet is unavailable you can create your own with simple everyday items. One method of creating an improvised tourniquet involves using a bandana, scarf, or strip of fabric. The fabric should be about two inches wide and long enough to wrap around the limb at least twice. Place the fabric around the limb, above the wound, and tie a knot to create a loose loop. Then, tie a second knot on top of the first, and continue tying knots until the fabric is snug and there is no more bleeding from the wound. Use a stick or similar object to tighten the knot by twisting it, until the fabric is tight enough to stop the bleeding.

Conclusion

In conclusion, tourniquets are an important tool in managing severe bleeding in emergency situations. As a first aider or advanced first aider, it's important to be prepared to use a tourniquet effectively and efficiently in emergency situations. By understanding what a tourniquet is, why and when we might use one, and how to properly apply one, we can help save lives and prevent further injury.

Training opportunities

At Delta Emergency Support Training, we understand the importance of being prepared for emergency situation. We offer a range of training sessions to help individuals and classes develop the skills and knowledge they need to respond to emergency situations. Our courses include Standard First Aid (SFA), Advanced First Aid (AFA), and Emergency Medical Responder (EMR), and we offer in-person, hybrid, and online options to suit different needs.

If you have any questions about our training sessions, please don't hesitate to reach out to us. You can contact us at info@deltaemergency.com and we'll be happy to assist you.

Read More
911, First Aid Kit, First Aid Kumari Malhotra 911, First Aid Kit, First Aid Kumari Malhotra

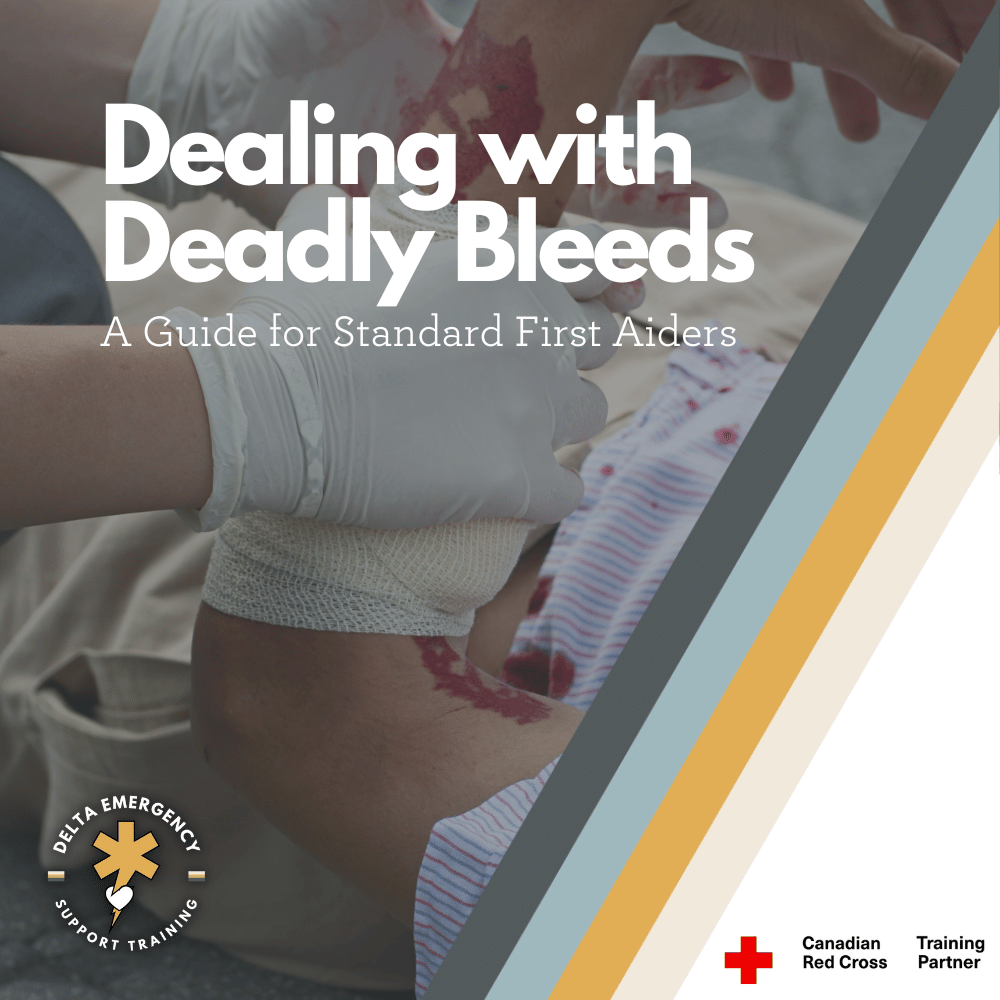
Dealing with Deadly Bleeds: A Guide for Standard First Aiders

Deadly bleeds can happen anytime, anywhere, and being prepared to handle them can mean the difference between life and death. Standard first aiders should be equipped with the knowledge and skills to identify different types of bleeds, as well as the appropriate techniques to manage them.

As a standard first aider, it's important to be prepared to deal with all kinds of emergencies, including deadly bleeds. A deadly bleed, also known as a hemorrhage, is a type of bleeding that is severe enough to threaten a person's life. In this blog post, we'll discuss what makes a bleed deadly, what different types of bleeds look like, and what our treatment options are. We'll also explore the physiology and biology behind what produces the most life-threatening bleeds.

A person in first aid gear is holding a clean, white cloth over a bleeding wound on another person's arm while exerting pressure.

What makes a bleed deadly?

A deadly bleed is usually caused by a significant loss of blood from a major artery or vein. This loss of blood can lead to a drop in blood pressure and, if left untreated, can ultimately result in shock and death. There are several types of bleeds that can be life-threatening, including arterial bleeds, venous bleeds, and internal bleeds.

Arterial bleeds:

Arterial bleeds are the most life-threatening type of bleed because they involve the loss of blood from an artery. Arteries carry oxygenated blood away from the heart to the rest of the body, and a significant loss of blood from an artery can lead to a lack of oxygen in the body's tissues. This can cause damage to vital organs and tissues, and can ultimately result in shock and death. Arterial bleeds are characterized by bright red blood that spurts out of the wound in time with the person's heartbeat. The high pressure of blood flowing from an artery means that a significant amount of blood can be lost quickly, leading to rapid blood loss.

Venous bleeds:

Venous bleeds, on the other hand, involve the loss of blood from a vein. Veins carry deoxygenated blood back to the heart, and a significant loss of blood from a vein can lead to a buildup of carbon dioxide in the body's tissues. This can cause tissue damage and can also lead to shock if the bleeding is not controlled quickly. Venous bleeds have a slower flow of dark red blood compared to arterial bleeds, and the bleeding is usually easier to control than an arterial bleed.

Internal bleeds:

Internal bleeds occur inside the body and may not be visible externally. These types of bleeds can be caused by trauma or medical conditions, and can be life-threatening if left untreated. Internal bleeds can lead to organ damage and shock, and symptoms may include pain, swelling, and bruising. Treatment for internal bleeds may involve surgery or other medical interventions, and it's important to seek medical attention as soon as possible if you suspect someone has an internal bleed.

What do different types of bleeds look like?

Arterial bleeds are characterized by bright red blood that spurts out of the wound in time with the person's heartbeat. Venous bleeds, on the other hand, have a slower flow of dark red blood. Internal bleeds, which occur inside the body, may present as bruising or not be visible externally.

What are our treatment options?

If you encounter a deadly bleed, it's important to act quickly to control the bleeding and prevent further loss of blood. The first step is to apply pressure to the wound using a clean cloth or bandage. If the wound is on an arm or leg, you can also elevate the limb above the level of the heart to help slow the bleeding. If the bleeding does not stop with pressure, a tourniquet may be necessary to stop the blood flow completely. However, tourniquets should only be used as a last resort, as they can cause damage to the tissue and lead to amputation.

Biology of deadly bleeds

The most life-threatening bleeds are those that involve major arteries, such as the femoral artery in the thigh or the carotid artery in the neck. Arteries are under high pressure, which means that a significant loss of blood from an artery can lead to a rapid drop in blood pressure and shock. In addition, the body's clotting system may not be able to keep up with the rapid loss of blood from an arterial bleed.

Personal Protective Equipment

It's important for standard first aiders to have the appropriate personal protective equipment (PPE) when dealing with bleeding emergencies. PPE can include gloves, masks, and eye protection, and is essential for protecting yourself from exposure to bloodborne pathogens such as HIV and hepatitis B and C. It's important to wear PPE whenever you are in contact with blood or bodily fluids to prevent the transmission of infectious diseases. In addition to protecting yourself, wearing PPE also helps prevent the spread of infections to others who may be in the vicinity of the bleeding person. By using the appropriate PPE, standard first aiders can provide care in a safe and effective manner.

Conclusion

In conclusion, as a standard first aider, it's important to be prepared to deal with deadly bleeds. Understanding what makes a bleed life-threatening, what different types of bleeds look like, and how to treat them can help you provide top-notch care in an emergency situation. Remember to act quickly to control the bleeding and seek medical attention as soon as possible.

Training

At Delta Emergency Support Training, we understand the importance of being prepared for emergency situation. We offer a range of training sessions to help individuals and classes develop the skills and knowledge they need to respond to emergency situations. Our courses include Standard First Aid (SFA), Advanced First Aid (AFA), and Emergency Medical Responder (EMR), and we offer in-person, hybrid, and online options to suit different needs.

If you have any questions about our training sessions or deadly bleeds, please don't hesitate to reach out to us. You can contact us at info@deltaemergency.com and we'll be happy to assist you.

Read More
Babysitter's, First Aid, Wilderness Kumari Malhotra Babysitter's, First Aid, Wilderness Kumari Malhotra

Heat Emergencies: First Aid Tips for Heat-Related Illnesses

With summer comes the risk of heat-related illnesses like heat exhaustion and heat stroke. Anyone can experience these conditions when exposed to high temperatures for extended periods. Certain groups, such as infants, the elderly, and those with chronic medical conditions, are at higher risk. Taking steps like staying hydrated, avoiding prolonged sun exposure, and taking breaks in cool or shaded areas can help prevent heat emergencies. In this post, we'll cover the differences between heat exhaustion and heat stroke, the groups most vulnerable, and first aid measures for managing heat emergencies.

The arrival of summer often means fun outdoor activities like beach trips, barbecues, and adventures. However, it's important to be mindful of the potential health risks associated with the high temperatures that come with the season. Heat-related illnesses like heat exhaustion and heat stroke can be serious, but being able to recognize the signs and knowing how to manage these conditions can help prevent them from escalating and causing harm to ourselves and others.

A man is standing outside in the sun on a hot day, holding a water bottle and taking a sip to cool down and prevent heat exhaustion.

Most vulnerable groups

Certain groups of people are at a higher risk for heat-related illnesses like heat exhaustion and heat stroke. These groups include:

  1. Infants and young children:

    Their bodies are less efficient at regulating temperature, making them more susceptible to heat-related illnesses.

  2. Elderly people:

    They are more likely to have pre-existing medical conditions that can affect their ability to regulate temperature and may take medications that can impair their ability to sweat and cool down.

  3. People with chronic medical conditions:

    Individuals with heart, lung, or kidney diseases, as well as those with diabetes or obesity, are more susceptible to heat-related illnesses due to their bodies' difficulty regulating temperature.

  4. Outdoor workers:

    People who work outside, especially in the construction or agricultural industries, are at high risk for heat exhaustion and heat stroke due to prolonged exposure to high temperatures.

  5. Athletes:

    Individuals who engage in strenuous physical activity, particularly in hot and humid conditions, are at risk for heat exhaustion and heat stroke.

It's important for individuals in these high-risk groups to take extra precautions when spending time in hot weather, including staying hydrated, taking breaks in cool or shaded areas, and wearing appropriate clothing.

Heat Exhaustion

Heat exhaustion is a condition that occurs when the body becomes dehydrated and overheated, and cannot regulate its temperature properly. This can happen when someone is exposed to high temperatures, especially when they're combined with high humidity. Heat exhaustion can progress quickly to heat stroke, which is a more severe and potentially life-threatening condition.

Symptoms of Heat Exhaustion:

  • Dizziness or lightheadedness

  • Nausea or vomiting

  • Headache

  • Rapid heartbeat

  • Cool, moist skin with goosebumps despite the heat

  • Heavy sweating

  • Muscle cramps or weakness

First Aid for Heat Exhaustion:

If someone is showing signs of heat exhaustion, it's important to take action quickly. Here are some steps to take:

  1. Move the person to a cooler location, preferably indoors with air conditioning or at least shade.

  2. Loosen tight clothing and remove any unnecessary layers.

  3. Provide cool water or a sports drink with electrolytes.

  4. Apply cool, wet towels or cloths to the skin or fan the person to help cool them down.

  5. Encourage them to rest and take it easy for the rest of the day.

Heat Stroke

Heat stroke is a more severe form of heat illness that occurs when the body's core temperature reaches 40°C or higher. It's a medical emergency that requires immediate attention as it can be fatal.

Symptoms of Heat Stroke:

  • Confusion or disorientation

  • Seizures or convulsions

  • Loss of consciousness

  • Rapid, shallow breathing

  • Dry, hot skin

  • Rapid, strong pulse

  • High body temperature (above 104°F)

First Aid for Heat Stroke:

If someone is showing signs of heat stroke, it's crucial to act quickly. Call emergency services right away and take these steps while waiting for medical help:

  1. Move the person to a cooler location, preferably indoors with air conditioning.

  2. Remove tight clothing and any unnecessary layers.

  3. Use cool water or ice packs to cool the person down, especially on the neck, armpits, and groin area.

  4. Fan the person or use a cool, wet cloth to help cool them down.

  5. If the person is conscious and able to swallow, offer small sips of cool water or a sports drink.

The Differences and Severity:

Heat exhaustion is considered less severe than heat stroke, but it can progress quickly to heat stroke if left untreated. Heat exhaustion is caused by dehydration and overheating, while heat stroke is caused by the body's inability to regulate its temperature due to prolonged exposure to high temperatures. The symptoms of heat exhaustion are similar to those of heat stroke, but heat stroke is much more serious and can result in long-term damage to the brain, other organs, and even death.

It's important to take heat-related illnesses seriously and to take steps to prevent them from occurring in the first place. Stay hydrated, avoid prolonged exposure to the sun, and take frequent breaks in the shade or air conditioning when spending time outdoors in high temperatures. If you or someone you know is showing signs of heat exhaustion or heat stroke, take action quickly to prevent the condition from worsening and seek medical attention if necessary.

Read More
Wilderness, First Aid, Chilcare, Babysitter's Kumari Malhotra Wilderness, First Aid, Chilcare, Babysitter's Kumari Malhotra

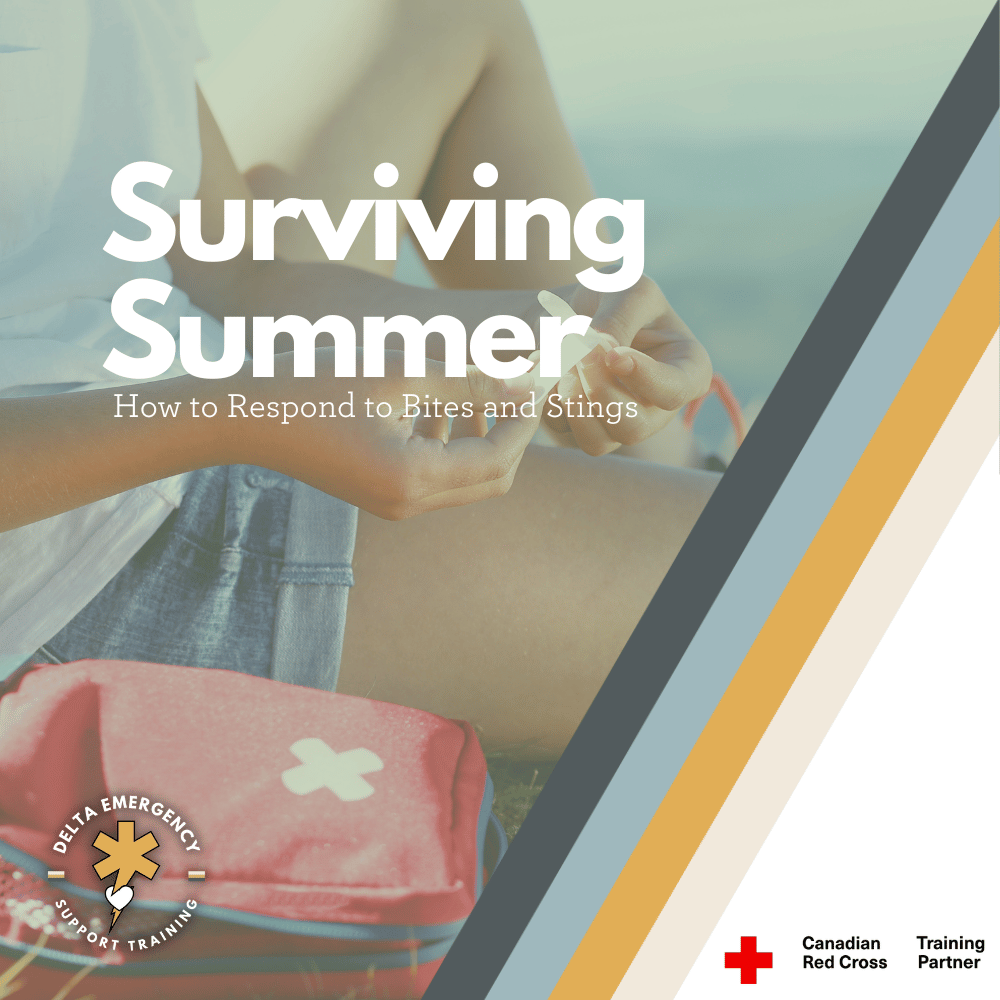
Surviving Summer: How to Respond to Insect Bites and Stings

To provide first aid for bites and stings, it's important to stay calm and identify the type of bite or sting. For insect stings, remove the stinger and clean the area, then apply a cold compress and take pain relievers. For bites from animals like snakes or spiders, seek medical attention immediately and keep the affected limb immobilized. If a severe allergic reaction occurs, call 911 or seek emergency medical attention. To prevent bites and stings, wear protective clothing and use insect repellent.

Bites and stings are a common occurrence in Canada, especially during the summer months when we spend the most time outdoors. While most bites and stings are harmless, some can cause allergic reactions, contain venom and transmit diseases. Knowing how to properly respond to bites and stings is an important part of first aid. In addition, certain bites and stings require specific first aid measures. Here's what you need to know about first aid for wasp, brown recluse, black widow, rattlesnake bites, and tick bites:

Girl preforming First Aid on her leg for a wasp sting.

DELTA FIRST AID TRAINEE USING FIRST AID TO TEND to HER wasp sting.

  1. Wasp Stings

    Wasp stings are a common occurrence during the summer months in Canada. If you are stung by a wasp, the first thing to do is to remove the stinger if it is still present. Gently scrape the stinger out with a flat object like a credit card or fingernail. Avoid squeezing or pinching the stinger, as this can cause more venom to enter your skin. Clean the area around the sting with soap and water to reduce the risk of infection. Apply a cold compress or ice pack to the sting area to reduce pain and swelling. You can also take over-the-counter pain relievers like acetaminophen or ibuprofen to help alleviate pain.

    Watch for signs of a severe reaction, such as difficulty breathing, swelling of the face or throat, hives, or rapid heartbeat. Seek medical attention immediately if you experience any of these symptoms, as wasp stings can cause allergic reactions and anaphylaxis in some people.

    If you have a history of severe allergic reactions to wasp stings, it is recommended to carry an epinephrine auto-injector (e.g., EpiPen) with you at all times. This can help treat an allergic reaction in an emergency situation until medical attention is available.

  2. Brown Recluse Spider

    Brown Recluse Spider Bites Brown recluse spiders are venomous and their bites can be dangerous, although not all bites will cause severe symptoms. If you are bitten by a brown recluse spider, clean the bite with soap and water to reduce the risk of infection. Apply a cool compress to the bite area to reduce pain and swelling. Take over-the-counter pain relievers like acetaminophen or ibuprofen to help alleviate pain.

    You may also need to elevate the affected limb to reduce swelling. Watch for signs of a severe reaction, such as fever, chills, or muscle cramps. Seek medical attention immediately if you experience any of these symptoms, as brown recluse spider bites can cause tissue damage and in rare cases, even death.

  3. Black Widow Spider

    Bites Black widow spiders are another venomous species, and their bites can also be dangerous. If you are bitten by a black widow spider, clean the bite with soap and water to reduce the risk of infection. Apply a cool compress to the bite area to reduce pain and swelling. You can also take over-the-counter pain relievers to help alleviate pain.

    Watch for signs of a severe reaction, such as muscle pain, nausea, or difficulty breathing. Seek medical attention immediately if you experience any of these symptoms, as black widow spider bites can be life-threatening.

  4. Rattle Snake

    If you are bitten by a rattlesnake, the first thing to do is to stay calm and still. Moving around will increase blood flow, which can spread the venom more quickly through your body. Keep the affected limb immobilized and at or below heart level to slow the spread of the venom. Remove any tight clothing or jewelry near the bite site to reduce constriction as swelling occurs. If possible, take note of the time of the bite and the location.

  5. Tick:

    If you find a tick attached to your skin, the first step is to carefully remove it as soon as possible. Using tweezers, grasp the tick as close to the skin as possible and pull it out with a slow, steady motion. Do not twist or jerk the tick, as this can cause the mouthparts to break off and remain in the skin.

    After removing the tick, clean the bite area with soap and water. Apply an antiseptic to reduce the risk of infection. Keep an eye on the bite area for any signs of redness, swelling, or rash, which may indicate a tick-borne illness such as Lyme disease.

    If you develop symptoms such as fever, headache, or fatigue within a few weeks of a tick bite, seek medical attention immediately. Early treatment with antibiotics can help prevent complications from tick-borne illnesses.

Knowing how to administer first aid for bites and stings is important in preventing serious complications and ensuring a quick recovery. Remember to remain calm, identify the type of bite or sting, and take the necessary steps to alleviate the symptoms

At Delta Emergency Support Training, we understand the importance of being prepared for medical emergencies. We offer a range of training sessions to help individuals and classes develop the skills and knowledge they need to respond to emergency situations. Our courses include Standard First Aid (SFA), Advanced First Aid (AFA), and Emergency Medical Responder (EMR), and we offer in-person, hybrid, and online options to suit different needs.

If you have any questions about our training sessions or medical emergencies in general, please don't hesitate to reach out to us. You can contact us at info@deltaemergency.com and we'll be happy to assist you.

Read More

Saving Lives: The Vital Role of Automated External Defibrillators (AEDs) in Cardiac Emergency Response

The importance of Automated External Defibrillators (AEDs) in cardiac emergency response cannot be overstated. This powerful photo depicts a person using an AED to deliver life-saving defibrillation during a critical moment of a cardiac emergency. With a descriptive filename, alt text, and metadata that includes relevant keywords, this image serves as a powerful visual representation of the vital role of AEDs in saving lives during cardiac emergencies.

Saving Lives with Automated External Defibrillators (AEDs): What You Need to Know

The importance of Automated External Defibrillators (AEDs) in cardiac emergency response cannot be overstated. This photo depicts an AED, ready to deliver life-saving defibrillation during a critical moment of a cardiac emergency.

Cardiac arrest is a sudden and life-threatening condition that occurs when the heart suddenly stops beating effectively. Immediate intervention is critical to increase the chances of survival, and Automated External Defibrillators (AEDs) have emerged as a crucial tool in saving lives during cardiac emergencies. In this blog post, we will explore what AEDs are, how they work, and why they are essential in cardiac arrest management.

What are AEDs?

An Automated External Defibrillator (AED) is a portable electronic device that is used to diagnose and treat life-threatening cardiac arrhythmias, such as ventricular fibrillation (VF) and pulseless ventricular tachycardia (VT). AEDs are designed to be used by non-medical professionals, including laypersons, and are commonly found in public places, workplaces, airports, schools, and other high-traffic areas.

How do AEDs work?

AEDs work by delivering an electric shock to the heart to restore its normal rhythm. When a person experiences cardiac arrest, the heart's electrical activity becomes chaotic, causing the heart to quiver or fibrillate instead of pumping blood effectively. AEDs are equipped with built-in sensors and computer algorithms that analyze the heart's electrical activity through adhesive pads (called electrodes) placed on the person's chest. If a shockable rhythm, such as Ventricular Fibrillation (VF) or Ventricular Tachycardia (VT), is detected, the AED will prompt the user to deliver a shock by pressing a button or automatically deliver the shock if it is a fully automated AED.

An Automated External Defibrillator (AED) is a portable electronic device that is used to diagnose and treat life-threatening cardiac arrhythmias, such as ventricular fibrillation (VF) and pulseless ventricular tachycardia (VT).

The shock delivered by the AED is intended to stop the chaotic electrical activity in the heart and allow the heart to reset itself and resume a normal rhythm. AEDs are designed to be safe and effective, with automated features that guide the user through each step of the process, including providing voice prompts, visual instructions, and feedback on the quality of CPR (cardiopulmonary resuscitation) being performed.

Why are AEDs important?

AEDs play a crucial role in improving the chances of survival for individuals experiencing sudden cardiac arrest. According to the American Heart Association (AHA), the use of an AED, in combination with CPR, can significantly increase the survival rate of cardiac arrest victims. In fact, for every minute that passes without defibrillation, the chances of survival decrease by approximately 10%. Therefore, quick access to an AED and early defibrillation is critical to increasing the chances of survival.


An Automated External Defibrillator (AED) electricity in action, ready to provide life-saving defibrillation during a cardiac emergency.


They are designed to be used by anyone, regardless of their medical training or experience. They are user-friendly, with clear instructions and prompts that guide the user through the entire process. Many AEDs also have visual aids, such as diagrams or animations, to assist users in correct pad placement and usage. This makes AEDs accessible and empowers bystanders to take immediate action during a cardiac emergency, even before professional medical help arrives.

AEDs are also lightweight and portable, making them easy to transport and use in various settings. They are often designed with durable cases, built-in carrying handles, and sometimes even equipped with backpacks or wall-mounted cabinets for easy storage and accessibility. Many AEDs also perform regular self-checks and have indicators that show their readiness status, ensuring that they are always ready for use in an emergency.

In addition to their ease of use and portability, AEDs are cost-effective. The cost of AEDs has decreased over the years, making them more affordable and accessible for public use. Some AEDs also come with maintenance packages, including


Another important aspect of AEDs is the potential for widespread community impact. When AEDs are strategically placed in public locations, they can be easily accessed and used by bystanders in the critical minutes following a cardiac arrest. This can significantly shorten the time to defibrillation and increase the chances of survival. Many communities, workplaces, and public facilities have recognized the importance of having AEDs readily available and have implemented AED programs as part of their emergency response plans. These AED programs often include training initiatives to educate community members on how to recognize cardiac arrest, perform CPR, and use an AED effectively, further empowering the community to respond to cardiac emergencies.

In conclusion, Automated External Defibrillators (AEDs) are crucial tools in saving lives during cardiac emergencies. Their ease of use, portability, affordability, and potential for widespread community impact make them essential components of cardiac arrest management. By providing early defibrillation and increasing the chances of survival, AEDs empower bystanders to take action and make a significant difference in saving lives. If you encounter someone experiencing sudden cardiac arrest, remember to call emergency services, start CPR, and locate and use an AED as soon as possible for the best chance of survival.

Read More