The Delta Dispatch
Body Substance Isolation for First Responders
In the high-stakes world of first response, safety is paramount. This blog dives deep into Body Substance Isolation (BSI) and its indispensable role in safeguarding the lives of first responders. We'll uncover how BSI practices have significantly reduced disease transmission rates, look back in history to understand the risks before BSI, and examine the pivotal role it plays in protecting both responders and the communities they serve. Join us on a journey through time and protocols as we explore the critical importance of BSI for those who rush to the scene of emergencies, preventing infections, and ultimately saving lives.
Introduction
First responders, the brave men and women who rush to the scene of emergencies, accidents, and disasters, face a multitude of hazards every day. While their primary goal is to save lives and provide immediate assistance, they must also protect themselves from potential dangers. Body Substance Isolation (BSI) is a set of precautions and practices that are absolutely crucial for first responders. In this blog, we will delve into the significance of BSI in ensuring the safety and well-being of those on the front lines of emergency response.
Medical professional applying gown and gloves as bsi
Understanding Body Substance Isolation (BSI)
Body Substance Isolation (BSI) is a comprehensive approach to infection control that involves the proper handling and protection from bodily fluids, tissues, and other potentially infectious materials. BSI is not limited to any particular type of emergency response but is relevant across the board, including medical emergencies, accidents, natural disasters, and hazardous material incidents.
The Core Principles of BSI
Personal Protective Equipment (PPE):
The foundation of BSI is the use of appropriate PPE. This includes gloves, masks, gowns, eye protection, and respirators when necessary. The use of PPE acts as a barrier between the responder and potentially infectious materials, preventing direct contact.
Hand Hygiene:
First responders must maintain excellent hand hygiene. Regular and thorough handwashing, or the use of hand sanitizers, is essential to minimize the risk of disease transmission.
Safe Handling and Disposal:
Proper techniques for the safe handling, packaging, and disposal of contaminated materials are fundamental to BSI. Sharps (such as needles) must be disposed of in puncture-resistant containers, while contaminated clothing and equipment must be handled carefully to prevent the spread of pathogens.
Respiratory Hygiene/Cough Etiquette:
Responders should follow respiratory hygiene practices to reduce the risk of inhaling airborne pathogens or spreading respiratory illnesses.
Masks, gloves, gowns, and eye protective equipment
Masks: Shielding the Respiratory System
Masks are a fundamental piece of personal protective equipment (PPE) for first responders, serving as a crucial shield for the respiratory system. These masks come in various types, each designed to address specific risks:
N95 Respirators:
N95 respirators are highly effective at filtering out airborne particles and are commonly used in situations where responders may be exposed to infectious agents, dust, or hazardous fumes. They provide an airtight seal around the nose and mouth, preventing the inhalation of harmful substances.
Surgical Masks:
Surgical masks are primarily used in medical settings. They protect both the wearer and those in close proximity from respiratory droplets and splashes. While they offer less filtration than N95 respirators, they are still essential for preventing disease transmission.
Proper mask usage is crucial. Responders must be trained in how to don and doff masks correctly to minimize the risk of contamination. A secure fit, regular replacements, and adherence to guidelines for extended use are all critical aspects of mask safety.
Gloves:
The Barrier Against Direct Contact
Gloves are the frontline defense against direct contact with potentially infectious materials. First responders use disposable gloves made from various materials, including latex, nitrile, and vinyl. The choice of glove material depends on individual preferences and potential allergies.
Proper glove usage involves:
Selecting the appropriate glove type for the task.
Ensuring gloves are the right size for a snug fit.
Changing gloves between tasks and after potential contamination.
Avoiding touching the face, adjusting masks, or handling personal items while wearing gloves.
Safely removing and disposing of gloves to prevent cross-contamination.
Failure to follow these guidelines can lead to accidental contamination and defeat the purpose of wearing gloves.
Gowns:
Protecting Against Splashes and Contamination
Gowns provide an additional layer of protection, especially in situations where responders may encounter bodily fluids or other potentially infectious materials. These disposable garments are typically made of non-porous materials like polyethylene or polypropylene.
Responders should don gowns before entering potentially contaminated areas.
Ensure gowns cover their entire body and are secured at the neck and wrists.
Remove gowns carefully to prevent contamination when exiting hazardous areas.
Dispose of gowns properly in designated containers.
Gowns are essential for minimizing the risk of contamination when working in close proximity to patients or in environments with a high potential for splashes.
Eye Protective Equipment:
Safeguarding Vision
Eye protective equipment, including goggles and face shields, shields the eyes from splashes, flying debris, or other hazards that could cause eye injuries or contamination. In healthcare and emergency response settings, eye protection is crucial, especially when dealing with patients exhibiting symptoms of infectious diseases.
Proper eye protection:
Shields the eyes completely, with no gaps for contaminants to enter.
Should be worn in conjunction with masks and other PPE, ensuring full facial coverage.
Eye protective equipment not only safeguards vision but also prevents potential disease transmission through the mucous membranes of the eyes.
Disease Transmission Rates
Historical Impact of BSI
Before the widespread adoption of BSI practices, first responders faced alarmingly high disease transmission rates. In the early days of modern medicine, the lack of standardized protective measures exposed them to severe risks. Diseases like tuberculosis, hepatitis, and HIV were known to spread readily among healthcare and emergency response personnel.
HIV/AIDS:
The HIV/AIDS epidemic in the 1980s and 1990s raised serious concerns about disease transmission among healthcare workers. Before the implementation of strict BSI measures, there were instances of HIV transmission in healthcare settings due to inadequate precautions.
Hepatitis B and C:
Hepatitis B and C viruses posed significant threats to first responders. These infections, transmitted through contact with contaminated blood and bodily fluids, were relatively common among healthcare workers before BSI guidelines were established.
Impact of BSI on Disease Transmission Rates:
The introduction of BSI protocols marked a turning point in the safety of first responders. These measures significantly reduced the risk of disease transmission, protecting the lives and health of those on the front lines.
HIV/AIDS:
With the implementation of universal precautions, including the use of gloves and safe disposal practices, the risk of HIV transmission to healthcare workers decreased dramatically. The incidence of occupational HIV infections among first responders dropped substantially.
Hepatitis B and C:
BSI guidelines, including vaccination, proper use of PPE, and strict handling and disposal procedures, led to a significant decline in the transmission of hepatitis B and C among first responders.
A Look Back in History
Pre-BSI Era:
Before the formalization of BSI, first responders operated in a much riskier environment. The lack of standardized precautions left them vulnerable to infections and contributed to disease outbreaks.
Infectious Disease Outbreaks:
Historical records show that outbreaks of diseases like tuberculosis, smallpox, and influenza often spread within healthcare and emergency response settings. The lack of protective measures not only endangered responders but also allowed diseases to propagate unchecked.
Post-BSI Era:
The development and implementation of BSI practices transformed emergency response and healthcare. Here's how:
Reduction in Occupational Infections:
BSI measures, such as the use of PPE, strict hand hygiene, and safe handling of contaminated materials, significantly reduced the incidence of occupational infections among first responders. This led to a safer working environment.
Protection of Patients:
BSI not only protects first responders but also safeguards the health of patients. The prevention of cross-contamination ensures that patients receive care in a safe and sanitary environment.
Improved Public Health:
By preventing the spread of infectious diseases at their source, BSI contributes to broader public health efforts. It helps limit the scope of disease outbreaks, reduces the burden on healthcare systems, and saves lives.
Conclusion
Body Substance Isolation is not merely a set of guidelines; it is a lifeline for first responders. It ensures their personal safety, prevents disease transmission, and ultimately saves lives. In a world where emergencies and crises are an unfortunate reality, BSI stands as a critical shield that allows first responders to carry out their noble mission while protecting themselves and the communities they serve. Every responder should be well-trained in BSI practices and consistently apply them, for their safety, the safety of those they help, and the greater good of society. The history of BSI underscores its pivotal role in stopping the spears of infectious diseases, making the world a safer and healthier place for all.
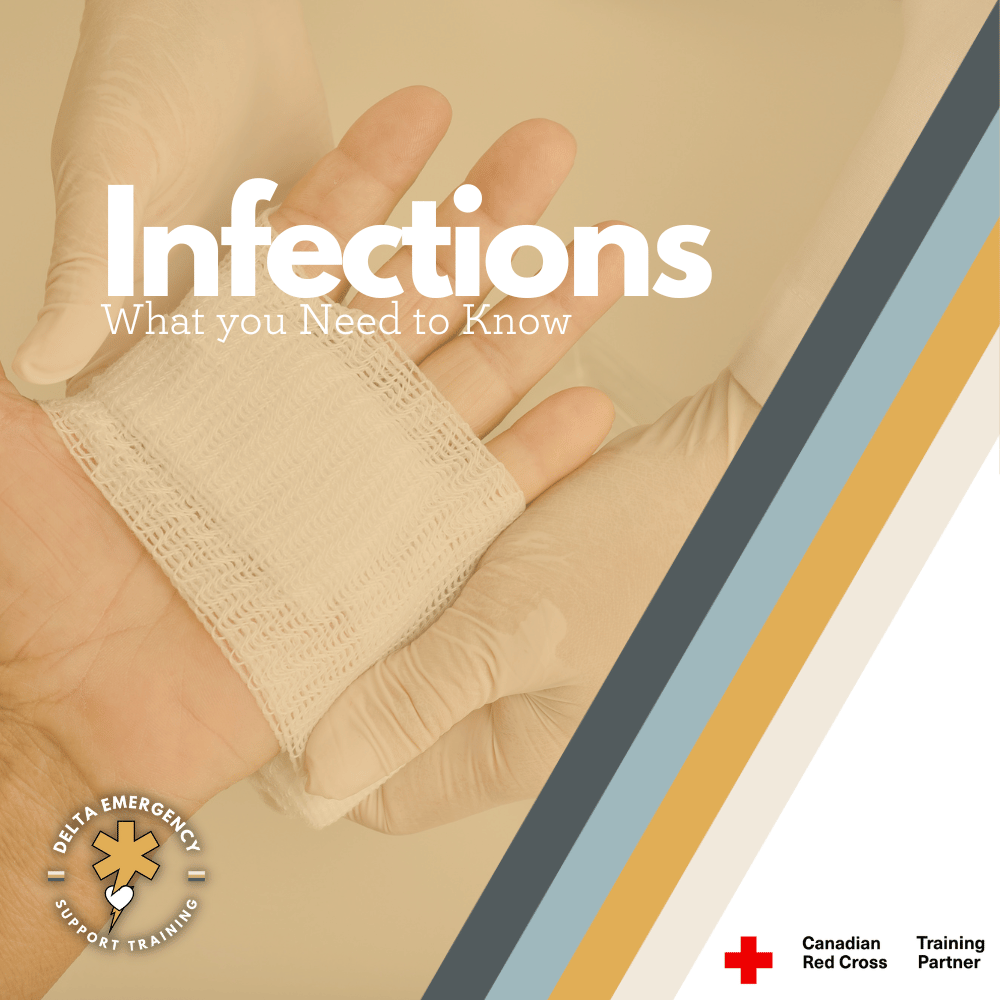
Infections: What you Need to Know
Infections can strike when you least expect them, but with the right knowledge and precautions, you can fortify your defenses. From the basics of wound care to identifying the early signs of infection, this guide has you covered. Explore the lurking danger of tetanus and the grave consequences of gangrene, and learn how to protect yourself and your loved ones. Your health is your most valuable asset, and understanding infections is the first step in defending it.
1. Wound Infections: A Common Threat
Medical professional wrapping a patients hand wound in steril bandages.
Any Wound is at Risk for Infection:
Whether it's a minor paper cut, a scraped knee, or a deep gash, any wound presents an opportunity for infection. Bacteria, viruses, and other pathogens are present everywhere, and they can easily enter the body through an open wound.
Cleaning the Wound:
Proper wound cleaning is critical. Use mild soap and clean, lukewarm water to gently wash the wound. Rinse thoroughly to remove any debris or foreign particles. Avoid harsh scrubbing, as this can damage delicate tissues.
Avoid Touching the Wound:
Always handle wounds with clean, sterile hands or instruments. Even a brief touch with unsterile hands can introduce harmful microbes, increasing the risk of infection.
Hemorrhage Control:
In cases of severe bleeding or extensive tissue damage, controlling the bleed is a priority. Apply pressure using a clean cloth or bandage and seek immediate transportation to a medical center.
Medical Care:
Once at a medical facility, healthcare professionals will perform a more thorough cleaning of the wound. They may also prescribe antibiotics to prevent or treat infection, especially if the wound is deep, contaminated, or at risk of infection.
2. Recognizing Infection Signs
Redness:
Infection often manifests as redness around the wound. This redness may gradually spread if the infection is left untreated.
Swelling:
Inflammation and swelling are natural responses to infection. The infected area might become noticeably larger than usual.
Increased Temperature:
An infected wound can feel warm or hot to the touch due to increased blood flow and inflammation in the area.
Throbbing Sensation:
Pain associated with an infected wound can intensify and take on a throbbing quality. This pain is typically more persistent than the initial injury-related pain.
Pus Formation:
Pus, a thick fluid, is a sign that the body is trying to fight off infection. The color of pus can vary (white, yellow, or green) and often indicates the presence of bacteria.
If an infection is not addressed promptly, it can extend to surrounding tissues and, in severe cases, even reach bones. In some instances, the infection can enter the circulatory system, leading to a systemic infection.
3. Systemic Infections: A Serious Threat
Red Streaks:
If you notice red streaks extending from the wound site, it's a sign that the infection might be spreading systemically. This is a crucial warning sign.
Flu-Like Symptoms:
Systemic infections often present with flu-like symptoms, including fever, muscle aches, fatigue, and chills. These symptoms indicate that the infection has reached the bloodstream and is affecting the entire body.
Prompt medical attention is essential if you suspect a systemic infection, as these can become life-threatening if left untreated.
4. Tetanus: A Lurking Danger
Tetanus:
Tetanus is caused by the bacterium Clostridium tetani, which is commonly found in soil and on rusty metal objects. This bacterium produces a potent toxin that affects the central nervous system and specific muscles.
Symptoms:
Tetanus can lead to difficulty swallowing, irritability, persistent headaches, fever, and muscle spasms, often near the infected area. It's sometimes referred to as "lockjaw" because facial muscles can contract severely.
Prevention:
The most effective way to protect against tetanus is vaccination, which typically provides immunity for 5-10 years. Ensure you stay up-to-date with tetanus shots, especially if you sustain a wound that may expose you to the bacterium.
5. Gangrene: A Grave Consequence
Bacterial Thriving:
Gangrene is caused by bacteria that thrive in environments lacking oxygen. It can also occur when blood flow to an area is compromised, leading to tissue death.
Symptoms:
Gangrene often presents with sudden, intense pain, swelling of the affected area, discolored tissues (which can range from black to blue to green), a foul-smelling discharge that is highly infectious, and sometimes a slight fever.
Necrotizing Fasciitis:
In rare cases, gangrene can progress to necrotizing fasciitis, a rapidly progressing and extremely painful infection often referred to as "flesh-eating disease." A distinctive characteristic is the presence of air bubbles beneath the skin.
If you suspect gangrene or experience symptoms associated with it, seek immediate medical help. Prompt treatment is essential to prevent further tissue damage and complications.
Conclusion
At Delta Emergency Support Training, we take your health seriously. In our first aid and advanced first aid classes, we provide comprehensive education on infections and wound care. Our courses are designed to equip you with the skills and knowledge needed to handle these situations effectively. Whether it's understanding the nuances of wound care, recognizing the early signs of infection, or learning about the specific risks associated with conditions like tetanus and gangrene, we've got you covered.
Infections can strike at any time, and being prepared is your best defense. Stay informed, proactive, and confident in your ability to protect your health. Join Delta Emergency Support Training today and take the first step towards becoming a health-conscious guardian of your well-being.
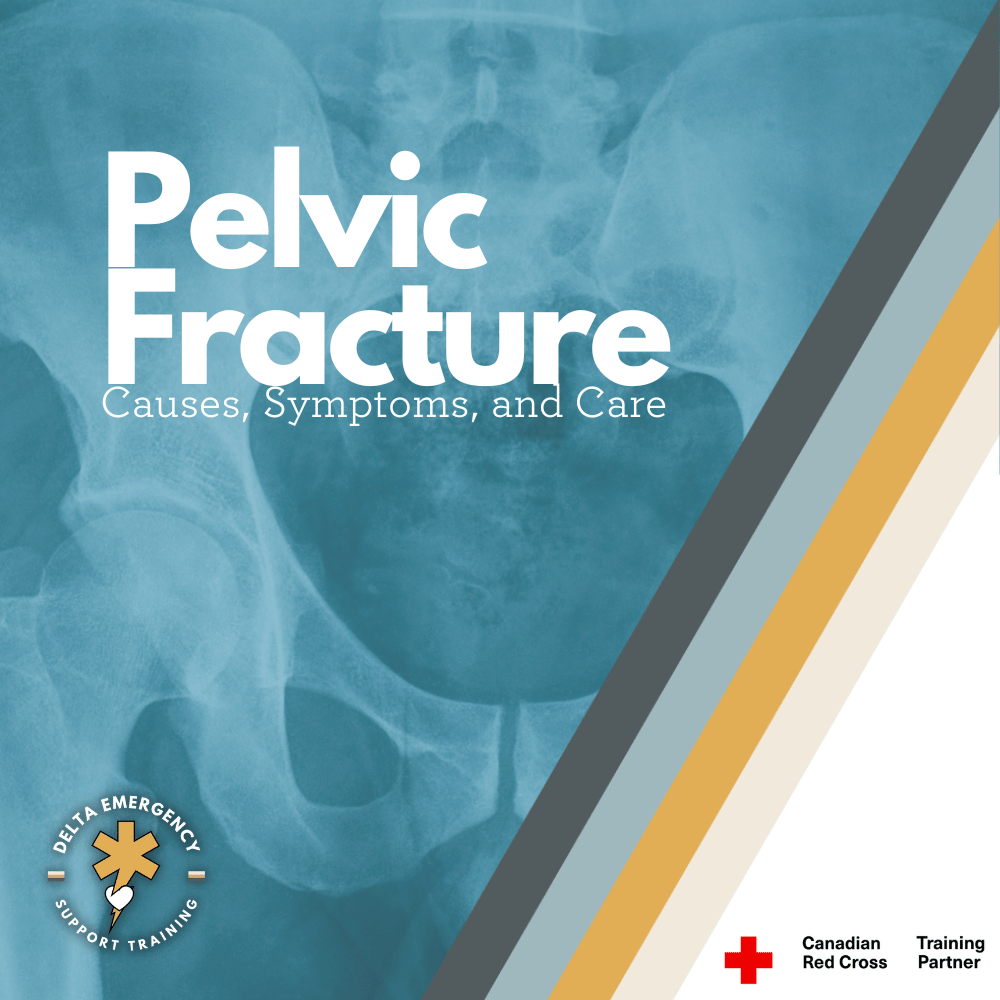
Navigating the Complexity of Broken Pelvis: Causes, Symptoms, and Care
In our comprehensive guide, we unveil the intricacies of pelvic fractures, shedding light on their causes, recognizing vital symptoms, and offering essential tips for immediate care. Unlock the secrets of this often-underestimated injury and empower yourself to make a difference in emergencies.
The pelvis, often overlooked in our daily lives, plays a pivotal role in our body's structure and stability. Yet, when a pelvic fracture occurs, it thrusts this often-neglected region into the spotlight as a site of pain, danger, and potential life-threatening complications. In this comprehensive blog, we embark on a journey to demystify pelvic fractures, exploring their origins, the subtle signs that signal their presence, and the crucial steps to provide immediate care. Join us as we uncover the intricacies of pelvic fractures, enabling you to recognize, respond to, and support those affected by this serious and often underestimated injury.
X-Ray of the pelvic region.
High-Impact Mechanisms of Injury (MOI) Leading to Pelvic Fractures
Pelvic fractures often arise from high-impact mechanisms of injury (MOI), which can deliver a devastating blow to the body's central support structure. It's essential to grasp the specific scenarios where these fractures commonly occur to take preventive measures and promptly address them. Here, we explore three prominent MOIs associated with pelvic fractures:
1. Car Accidents with Intrusion:
Car accidents, especially those involving intrusion into the passenger compartment, pose a significant risk of pelvic fractures. When a vehicle collides with another object or experiences a sudden deceleration, the forces involved can be transferred to the occupants. In such cases, the pelvis may absorb a substantial portion of the impact, leading to fractures. The use of seatbelts and properly installed airbags is crucial in reducing this risk.
2. Being Struck as a Pedestrian:
Pedestrians involved in accidents with moving vehicles face a heightened risk of pelvic fractures. When a pedestrian is struck by a vehicle, the impact forces are directed towards the pelvis, which can result in fractures. The severity of the injury depends on various factors, including the speed of the vehicle, point of impact, and the pedestrian's position. Awareness, adherence to traffic rules, and practicing safe pedestrian behaviors are essential in preventing these accidents.
3. High-Impact Sports, such as Horse Riding:
Engaging in high-impact sports like horse riding, skiing, or contact sports increases the likelihood of experiencing pelvic fractures. These activities expose individuals to abrupt movements, falls, or collisions with considerable force. In horse riding, for instance, an unexpected fall from a galloping horse can generate enough energy to fracture the pelvis. Proper safety gear, training, and adhering to safety guidelines can mitigate the risk associated with these sports.
Recognizing Indications of a Pelvic Fracture
When it comes to pelvic fractures, understanding the potential indications is paramount for swift intervention and treatment. These fractures often manifest with a combination of alarming symptoms, each serving as a red flag to signal the severity of the injury. Here, we explore some of the most common and telling indications:
1. Pelvic Instability:
One of the hallmark signs of a pelvic fracture is pelvic instability. This instability can cause a profound sense of discomfort and difficulty in maintaining balance and mobility. Individuals may experience a noticeable shift or misalignment of the pelvic bones, which can be felt when gently pressing on both sides of the pelvis. This instability can be particularly unsettling, making even simple movements a challenge.
2. Excruciating Pain:
Pelvic fractures are often accompanied by excruciating pain in the pelvic region. This pain is typically sharp, intense, and may radiate to the lower back or down the legs. The severity of the pain can vary depending on the extent and location of the fracture. It is important to note that the intensity of the pain may not correlate directly with the severity of the fracture, making it imperative to seek medical attention regardless of the perceived pain level.
3. Splayed Legs:
Another telltale sign of a pelvic fracture is the positioning of the legs. In many cases, the legs may appear splayed or twisted unnaturally due to the disruption of the pelvic bones. This visual indication can be distressing and further underscores the need for immediate medical evaluation.
4. Bruising Indicative of Internal Bleeding:
Bruising around the pelvic area can be indicative of internal bleeding, a critical concern associated with pelvic fractures. As the fractured bones can damage blood vessels within the pelvis, blood may accumulate in the surrounding tissues, causing visible bruising. This external sign of internal bleeding should not be overlooked, as it necessitates urgent medical attention.
Treatment of Pelvic Fractures
When a suspected pelvic fracture is encountered, the immediate goal is to provide stabilization and support while minimizing the risk of further injury. Proper treatment is essential to optimize outcomes and reduce complications. Here is a step-by-step guide to treating pelvic fractures:
1. Manual Stabilization:
The first and most crucial step in managing a suspected pelvic fracture is to provide manual stabilization. This involves gently supporting the pelvis with your hands to minimize movement. Care must be taken to avoid putting pressure directly on the fractured area to prevent exacerbating the injury. Manual stabilization helps in reducing pain and the risk of further damage.
2. Binding the Feet Together:
To address the splayed legs often associated with pelvic fractures and return them to a more anatomically aligned position, binding the feet together is recommended. This can be achieved by using a bandage or cloth to secure the ankles together. The goal is to maintain alignment and prevent further displacement of the fractured bones.
3. Application of a Commercial Pelvic Binder:
Commercial pelvic binders, such as the T-pod, are specially designed to provide effective stabilization for pelvic fractures. These devices are easy to apply and can help bring the fractured pelvic bones together, reducing pain and the risk of internal bleeding. Properly positioning and securing the pelvic binder is essential for its effectiveness.
4. Improvised Binding with a Sheet and Clips:
In situations where a commercial pelvic binder is not available, improvising with a sheet or any strong fabric, along with clips or other fasteners, can provide temporary stabilization. The sheet is wrapped tightly around the pelvis and secured in place to minimize movement and maintain alignment. While not as effective as commercial binders, this method can still be valuable in emergencies.
5. Administering High-Flow Oxygen:
The shock that often accompanies pelvic fractures can be life-threatening. Administering high-flow oxygen is a critical measure to help the body compensate and mitigate the effects of shock. Oxygen supplementation ensures that vital organs receive adequate oxygenation, reducing the risk of organ failure and improving the patient's chances of survival.
In Conclusion: Empowering Knowledge, Saving Lives, and Joining Delta Emergency
Our journey through pelvic fractures has highlighted the critical need for understanding this injury. Recognizing the signs, providing immediate care, and seeking prompt medical attention are paramount. Knowledge is power, and here, it can be lifesaving.
Pelvic fractures are complex, with hidden dangers such as internal bleeding and shock. Armed with this information, you're better prepared to respond effectively.
Joining Delta Emergency for your professional responder needs ensures you have access to comprehensive training, cutting-edge equipment, and a community committed to making a difference. Together, we can minimize the impact of pelvic fractures and provide the support and care that individuals deserve on their path to recovery.
Pain Assessments for Patients: A Crucial Skill for Professional Responders
In the high-stress world of professional emergency response, the ability to assess and manage pain effectively is paramount. Every second counts, and understanding a patient's pain is often the first step towards providing the right care. In this blog, we delve into the OPQRRRST format for pain assessments, breaking down each component to equip you with the skills needed to excel in roles like firefighting, paramedicine, and more. Pain assessment isn't just about addressing discomfort; it's about saving lives. Read on to discover why it matters, how to do it, and why Delta Emergency is your partner in authentic, hands-on training.
Professional responders, your ability to assess and manage pain effectively can make a profound difference in a patient's experience and outcome. While your primary focus is on providing immediate care and stabilizing the patient's condition, it's important to remember that pain assessments are a critical component of your secondary assessment. These assessments not only offer insights into the patient's discomfort but also guide your decision-making process in providing timely and appropriate interventions.
Paramedic preforming a secondary assessment including a OPQRRRST pain assessment.
In the dynamic and often high-stress environment of professional response, a structured approach to pain assessment, such as the OPQRRRST format, becomes an invaluable tool. It empowers you to gather crucial information efficiently, ensuring that no vital detail is overlooked in the midst of urgency and complexity. Through this blog, we will embark on a comprehensive journey through each component of the OPQRRRST format, equipping you with the knowledge and skills necessary to master this essential aspect of your role as a professional responder.
Onset - "When Did the Pain Start?"
When a patient experiences pain, it's essential to understand when it first began. This information can help differentiate between acute and chronic pain. Acute pain typically has a sudden onset and is often related to a specific event or injury, such as a fall or an accident. On the other hand, chronic pain persists over a longer period, often months or even years, and may develop gradually.
Ask the patient about the circumstances surrounding the pain's onset. Did it start after a particular incident or activity? Did it come on suddenly without any apparent cause? Knowing when the pain started can provide critical clues about its origin and potential causes.
Provocation - "What Makes It Worse?"
To gain a deeper understanding of the pain, inquire about factors that worsen it. Patients may have specific triggers or actions that exacerbate their discomfort. For example, for a patient with a musculoskeletal injury, movements or certain positions might worsen the pain. For a patient with gastrointestinal issues, eating certain foods might aggravate abdominal pain.
Identifying provocation factors is crucial for managing the patient's immediate comfort and for determining whether further medical investigations or interventions are necessary.
Quality - "Can You Describe Your Pain in Your Own Words?"
Pain quality is a subjective aspect that can provide valuable insights into the nature of the pain. Encourage the patient to describe their pain using descriptive terms. For instance, they might use words like "stabbing," "burning," "throbbing," "aching," or "cramping" to characterize their pain.
Understanding the pain's quality can help you differentiate between various types of pain. For example, sharp, stabbing pain might indicate nerve involvement, while a dull, aching sensation could be indicative of inflammation or muscle strain.
Region - "Can You Draw a Circle Around the Painful Area?"
Identifying the precise location of pain is crucial for pinpointing the source of the issue. Ask the patient to point to or mark the specific area where they feel pain. This can help you visually assess if there are any visible signs of injury, swelling, or redness in that region.
In cases of referred pain, where the pain is felt in a different area than its source, this step can aid in identifying the primary cause. For example, pain in the left arm could be referred pain from a heart issue.
Radiation - "Does the Pain Radiate Anywhere?"
Pain often doesn't stay localized; it can radiate or spread to other areas of the body. Ask the patient if they feel discomfort in areas adjacent to the primary pain site. Radiation patterns can provide valuable diagnostic clues.
For instance, if a patient with a herniated disc reports back pain that radiates down one leg (sciatica), it suggests nerve compression in the spine as the source of pain.
Relief - "Does Anything Provide You Relief?"
Identifying what alleviates the patient's pain is crucial for managing their discomfort effectively. Inquire if there are specific actions, medications, or interventions that provide relief. This information helps you determine appropriate pain management strategies.
For example, if a patient with a headache mentions that lying in a dark, quiet room provides relief, you can recommend this as a non-pharmacological intervention.
Severity - "Rate Your Pain on a 0-10 Scale"
Quantifying pain severity on a scale of 0 to 10 allows for a standardized assessment. It helps you understand the intensity of the patient's pain and track changes over time. This numerical rating also assists in evaluating the effectiveness of pain management interventions.
Patients should be encouraged to provide an honest assessment of their pain level, as this aids in tailoring treatment plans to their specific needs.
Time - "Is the Pain Constant or Does It Come and Go?"
Understanding the temporal characteristics of pain is essential. Inquire whether the pain is constant or intermittent. Does it have a specific pattern, such as occurring at certain times of the day or in response to specific activities or movements?
For example, pain that occurs only during physical activity but subsides at rest could indicate a musculoskeletal issue. Conversely, constant, unrelenting pain might be suggestive of an ongoing medical condition.
In the challenging and dynamic realm of professional response, mastering the OPQRRRST format for pain assessment is an indispensable skill that can significantly impact patient care and outcomes. As a professional responder, your commitment to providing compassionate and effective care begins with your ability to understand and manage pain.
At Delta Emergency, we understand the importance of equipping new professional responders, whether they are entering the world of firefighting, paramedicine, or other critical roles, with the knowledge and skills needed to excel in their mission of saving lives. Our advanced first aid classes are meticulously designed to provide comprehensive training in pain assessment and various aspects of emergency response.
We invite you to join our community of dedicated professionals and embark on a journey toward excellence in patient care. Sign up with Delta today for an authentic and immersive training experience that will prepare you to face the challenges of the field with confidence and competence. Together, we can make a difference when it matters most.
Emergency Birth as a First Responder: Preparation and assessment Part 1
Emergency births can present first responders with intense and unexpected situations, demanding quick thinking and swift actions. In Part 1 of this series, we delve into the crucial steps involved in preparing expectant mothers for childbirth and guiding them through the delivery process. From addressing fears to creating a clean environment, our guide equips first responders with the knowledge to assist in this pivotal moment.
Welcome to the first installment of a two-part series on emergency births and the crucial role of first responders in managing such situations. In this blog, we'll explore the initial steps involved in preparing the mother for delivery and guiding the childbirth process. From addressing fears to ensuring a safe environment, first responders play a vital role in this intense and impactful moment. Let's delve into the essential aspects of prepping and assisting in an imminent birth scenario. Stay tuned for Part 2, where we'll cover the post-birth care of both the neonate and the mother.
Preparing the Mother for Delivery
In the high-stress situation of an emergency birth, helping the mother feel at ease and well-prepared is essential. Here's how to create a comforting environment and gather important information:
Assess the Situation:
Approach the mother with a calm and reassuring demeanor. Introduce yourself and explain that you're there to assist her during the delivery process.
Ask Important Questions:
While time might be limited, try to ask a few key questions to better understand the situation and the mother's medical history. Some questions to consider include:
Is this your first baby, or have you given birth before?
How many prior births have you had, if any?
Have you received prenatal care during your pregnancy?
Address Fear and Anxiety:
It's natural for the mother to be fearful and anxious during an unplanned delivery. Acknowledge her emotions and reassure her that you are there to help and support her. Use a soothing tone and maintain eye contact to establish a sense of trust.
Provide Information:
Briefly explain the stages of labor and what she might expect during the delivery process. Let her know that her body knows how to give birth, and you're there to assist and guide her through it.
Encourage Breathing Techniques:
Breathing techniques can help manage anxiety and pain. Instruct her to take slow, deep breaths, inhaling through her nose and exhaling through her mouth. This can help her stay focused and calm.
Offer Comfort:
If possible, offer a reassuring touch or hold her hand to provide physical comfort. If she's comfortable, encourage her to find a position that feels right for her, whether sitting, lying down, or even kneeling.
Reiterate Support:
Continuously remind her that you're there to support her, and that her well-being and that of her baby are your top priorities.
Remember, your presence and demeanor can significantly impact the mother's experience during this intense moment. By addressing her fears, gathering important information, and offering a calm and steady presence, you can help create an environment conducive to a safe and successful delivery. Always be ready to adapt your approach based on the mother's needs and the progress of the situation.
Delivery Preparation
As a first responder, recognizing the signs of imminent birth and swiftly creating a clean and supportive environment are critical. Here's how to prepare for the actual delivery:
Recognizing Imminent Birth:
Contractions Less Than 3 Minutes Apart: When contractions are occurring at such a close interval, it's a strong indicator that the birth is imminent. The mother's body is progressing rapidly towards delivery.
Feeling the Need to Push:
The sensation of needing to push indicates that the baby is descending into the birth canal. This is a clear sign that the delivery is approaching.
Urge to Have a Bowel Movement:
This sensation often occurs as the baby's head moves lower in the pelvis. It's a common sign that birth is imminent.
Positioning for Comfort:
Help the mother find a comfortable position that allows her to feel in control. She might choose to sit, squat, or lie down. If she's comfortable with it, use pillows or cushions to support her in the chosen position.
Creating a Clean and Supportive Environment:
If available, throw clean towels in the dryer to warm them up. Warm towels provide comfort to both the mother and the newborn. Lay down clean linen, sheets, and towels on a flat and stable surface to create a clean area for the birth.
Privacy and Dignity:
Place a clean sheet over the mother's legs to provide her with a sense of privacy and dignity during the process.
Familiar Female Presence:
If a female first responder is present, the mother may feel more comfortable having her lead the delivery. The presence of a compassionate and empathetic individual can greatly ease the mother's anxiety.
Essential Supplies Ready:
Ensure you have the necessary supplies within arm's reach, including surgical scissors and clamps for cutting and clamping the cord, abdominal pads to manage potential bleeding, saline solution for cleaning, a neonate suction bulb to clear the baby's airway, and oxygen equipment.
Plastic Bag for Placenta:
Have a plastic bag ready for the placenta, which will be delivered shortly after the baby.
Preparing for an imminent birth involves both recognizing the signs that the delivery is moments away and creating a clean and supportive environment for the mother and newborn. By understanding the indicators of imminent birth and having essential supplies ready, you can ensure that the mother feels as comfortable and safe as possible during this intense experience. Your attentiveness, knowledge, and ability to create a clean and caring space are crucial in facilitating a successful and safe emergency birth.
The Delivery Process
Full PPE:
Before engaging in any medical procedure, including assisting in childbirth, it's crucial to don proper PPE. This typically includes wearing disposable gloves, a sterile gown, and a mask or face shield. PPE helps prevent the spread of infection and maintains a sterile environment for the mother and the newborn.
Dilation and Contractions:
Cervical dilation is a critical indicator of labor progression. A cervix that is fully dilated (10 cm) suggests that the baby is ready to be born. Contractions becoming less than 2 minutes apart indicate an advanced stage of labor, making it important to be prepared for imminent delivery.
Managing Crowning:
As the baby's head begins to crown, you can provide support to prevent rapid expulsion. Placing your hands gently on either side of the baby's head can help guide it out slowly. This controlled approach minimizes the risk of perineal tearing and ensures the mother's comfort.
Guiding the Baby's Head:
As the baby's head emerges, encourage the mother to pant or take shallow breaths. This prevents forceful pushing and allows the perineum to stretch gradually. The perineum is the area between the vagina and the anus, and it needs time to accommodate the baby's head.
Baby's Rotation and Shoulders:
The baby's head turning slightly to one side as it emerges is a natural movement that facilitates the passage of the shoulders through the birth canal. This rotation helps ensure a smoother delivery.
Supporting the Baby:
As the head emerges fully, it's important to provide gentle support to the baby's head and neck. This prevents any sudden movements that could strain the neck or spine. Maintaining a secure grip on the baby's head ensures a controlled delivery. Have a clean warm blanket or towel ready to catch the newborn as they slide out.
Primary Assessment and Documentation:
Conduct a quick assessment of the newborn's breathing, responsiveness, and overall condition. If the baby is breathing and appears healthy, allow the mother to hold the baby skin-to-skin while you continue monitoring.
Delay Cord Clamping:
Delayed cord clamping involves waiting a few minutes before clamping and cutting the umbilical cord. This allows the baby to receive additional blood volume and stem cells from the placenta, which can be beneficial for their health and development. When ready to clamp do so 4 and 6 inches away from the baby and wait for the placenta.
Waiting for the Placenta:
After the baby's birth, the placenta (also known as the afterbirth) is delivered. This usually happens within a few minutes to half an hour. Continue to monitor the mother for any signs of distress or bleeding while you wait for the placenta to be naturally expelled.
Conclusion
In the realm of emergency response, first responders serve as beacons of reassurance and skill during some of life's most intense and unexpected moments. As we conclude Part 1 of this series, we've explored the pivotal role these responders play in preparing expectant mothers for childbirth and guiding them through the delivery process. From addressing fears and creating a safe environment to offering gentle support and maintaining open communication, the steps taken during childbirth assistance are fundamental to ensuring the well-being of both the mother and the newborn.
Remember, each step requires precision, composure, and unwavering dedication to safety. While circumstances may differ, the principles of maintaining sterility, providing comfort, and effective communication stand as pillars of effective emergency birth assistance. Join us in Part 2 as we delve into the critical post-birth care of both the neonate and the mother, completing the comprehensive journey through this remarkable and life-affirming experience.
First Responder's Guide to Success
In the fast-paced world of first responders, achieving excellence is not just a goal; it's a continuous journey. This comprehensive guide explores the vital practices that empower first responders to excel in their roles. From studying practices that enhance knowledge to prioritizing mental and physical health, this guide equips first responders with the tools they need to be effective, resilient, and compassionate in the face of adversity.
First responders are the unsung heroes of our communities, bravely facing crises and emergencies to protect and serve others. The demanding nature of their work requires not only courage and skills but also a strong focus on personal development. In this blog, we will explore the essential good practices that first responders can embrace to excel in their roles, including studying practices to enhance their knowledge, mental health practices to cope with stress and trauma, and maintaining good physical health to sustain their well-being.
Fire fighters bonding at the station after a call
Studying Practices - Empowering Knowledge for Effective Response
The fast-paced and ever-evolving nature of emergency response demands that first responders remain adaptable, well-informed, and capable of making split-second decisions under pressure. By embracing a mindset of continuous learning and improvement, first responders can elevate their effectiveness, response capabilities, and overall impact on the communities they serve.
1. Regular Training:
Take advantage of the training opportunities provided by your organization. Regularly attend workshops, seminars, and skill-building sessions to stay updated on the latest techniques, equipment, and protocols.
Participate in mandatory training, as well as optional advanced courses, to enhance your capabilities and adapt to evolving challenges.
2. Scenario-Based Learning:
Engage in realistic simulations that mimic potential emergency situations. These simulations can help you develop quick thinking, problem-solving skills, and teamwork.
Learn from experienced mentors who can guide you through complex scenarios, offering valuable insights into decision-making and critical actions.
3. Research and Read:
Stay informed by reading industry publications, research papers, and reputable online sources. Subscribe to newsletters or podcasts that discuss current trends and advancements in your field.
Develop a habit of reading case studies or success stories to learn from real-life incidents and best practices.
4. Collaborate and Share:
Participate in regular knowledge-sharing sessions with your colleagues. Create a culture of open communication where experiences and lessons learned are shared freely.
Engage in interdisciplinary training or joint exercises with other emergency response teams, fostering cross-team collaboration and synergy.
5. Pursue Higher Education:
Consider enrolling in formal education programs related to emergency response, such as emergency management or paramedic training.
Higher education can provide a deeper understanding of the theoretical foundations of your field, complementing your practical experiences.
6. Utilize Technology and Online Resources:
Leverage online platforms and e-learning resources to access a vast array of educational materials, webinars, and interactive courses.
Explore virtual reality (VR) training scenarios that immerse you in realistic emergency situations, allowing for hands-on practice in a safe environment.
7. Continuous Self-Assessment:
Regularly evaluate your own performance and areas for improvement. Seek feedback from supervisors, colleagues, and mentors to identify blind spots.
Set personal learning goals and track your progress to ensure continuous development.
8. Specialize in Key Areas:
Identify specific areas of interest or expertise within your field and specialize in them. This can make you an invaluable resource in critical situations.
Pursue certifications or advanced training in specialized fields such as hazardous materials response, search and rescue, or medical specialties.
The Importance of Good Mental Health for First Responders
Being a first responder is a calling that demands courage, resilience, and unwavering dedication to serving others. However, the nature of the job exposes first responders to highly stressful and often traumatic situations, putting their mental well-being at risk. The importance of good mental health for first responders cannot be overstated, as it directly impacts their ability to provide effective and compassionate care, maintain personal well-being, and cope with the challenges they face daily. Here are some key reasons why prioritizing mental health is crucial for first responders:
1. Resilience in the Face of Stress and Trauma:
First responders frequently encounter distressing and emotionally challenging situations. Witnessing accidents, violence, loss of life, and suffering can take a toll on their mental well-being. Good mental health practices help build resilience, enabling them to cope with these difficult experiences and bounce back from adversity more effectively.
2. Decision-Making and Critical Thinking:
In high-pressure situations, clear and quick decision-making is essential. Maintaining good mental health enhances cognitive functions, including critical thinking, problem-solving, and judgment. A balanced and focused mind can lead to better on-the-spot decisions, which are crucial in emergency response scenarios.
3. Communication and Teamwork:
Effective communication and teamwork are paramount in the success of any emergency response operation. When first responders prioritize mental health, they are better equipped to communicate clearly, collaborate seamlessly with their team, and coordinate efforts efficiently, ensuring a cohesive response to emergencies.
4. Compassionate and Empathetic Care:
A mentally healthy first responder is better equipped to provide compassionate and empathetic care to those in distress. Mental well-being allows them to connect with individuals on a deeper level, demonstrating understanding and empathy even in challenging situations, thereby positively impacting the emotional recovery of those they assist.
5. Reduced Risk of Burnout and Compassion Fatigue:
The demanding nature of the job, coupled with exposure to traumatic events, can lead to burnout and compassion fatigue. Prioritizing mental health can act as a protective measure, reducing the risk of emotional exhaustion, cynicism, and disengagement from work.
6. Improved Work-Life Balance:
Maintaining good mental health supports a healthier work-life balance. First responders who are mentally well are more likely to effectively separate work-related stress from their personal lives, fostering stronger connections with their families, friends, and communities outside of work.
7. Positive Organizational Culture:
Organizations that prioritize mental health create a positive work environment where first responders feel supported, valued, and encouraged to seek help when needed. This promotes a culture of openness, reducing the stigma around mental health issues and encouraging individuals to proactively manage their well-being.
8. Enhancing Coping Mechanisms:
Good mental health equips first responders with healthier coping mechanisms to deal with stress. Instead of resorting to unhealthy ways of coping, such as substance abuse or avoidance, they can employ constructive strategies to manage stress effectively.
The Importance of Good Physical Health for First Responders
As first responders, the physically demanding and high-stress nature of the job requires peak physical fitness to perform effectively and safely. Prioritizing good physical health is essential for first responders, as it directly impacts their ability to carry out their duties, respond to emergencies, and maintain overall well-being. Here are some key reasons why focusing on physical health is crucial for first responders:
1. Enhanced Performance and Efficiency:
Being physically fit allows first responders to perform their duties efficiently and effectively. Improved cardiovascular health, strength, and endurance enable them to respond quickly and navigate challenging environments with agility, which is critical during emergencies.
2. Quick and Timely Responses:
Emergencies often require swift action, and physical fitness is vital for first responders to arrive at the scene promptly. Maintaining good physical health ensures that they can respond rapidly, potentially making a life-saving difference in critical situations.
3. Reduced Risk of Injuries:
The physically demanding nature of emergency response can lead to injuries if the body is not properly conditioned. Regular exercise and physical training help reduce the risk of musculoskeletal injuries and support a quicker recovery if injuries do occur.
4. Mental Clarity and Focus:
Physical activity has a positive impact on mental health. Engaging in regular exercise releases endorphins, which can improve mood, reduce stress, and enhance mental clarity and focus. This mental boost is invaluable for first responders, especially during high-stress situations.
5. Improved Stamina During Prolonged Operations:
Emergency response operations can be prolonged and physically taxing. Being in good physical condition enables first responders to sustain their energy levels during extended shifts, ensuring that they can perform at their best throughout the duration of an operation.
6. Team Cohesion and Trust:
A physically fit team builds trust and cohesion among its members. Knowing that each team member is capable of handling the physical demands of the job fosters a sense of confidence and mutual reliance, strengthening the team's overall performance.
7. Healthy Work-Life Balance:
Prioritizing physical health supports a healthier work-life balance for first responders. Regular exercise and fitness routines can serve as stress-relieving activities and provide an opportunity for them to disconnect from work and focus on personal well-being.
8. Increased Resilience to Stress:
Physical fitness enhances the body's ability to cope with stress. Regular exercise can help reduce the physiological effects of stress, making first responders more resilient and better able to manage the mental and emotional challenges they face on the job.
9. Positive Role Models for the Community:
First responders who prioritize their physical health can serve as positive role models for the community they serve. Demonstrating commitment to fitness not only inspires others to lead healthier lifestyles but also reinforces the image of a capable and prepared emergency response force.
In the demanding world of first responders, excellence is not just a goal; it's a continuous journey. This guide explores vital practices, from studying to mental and physical health, empowering them to excel in their roles. By prioritizing continuous learning, mental well-being, and physical fitness, first responders become effective, resilient, and compassionate in serving their communities. Together, let's support and appreciate these brave individuals as they continue to shine as beacons of hope and strength in the face of adversity.
Rapid Body Survey: Uncovering Hidden Injuries
In emergency medical situations, conducting a Rapid Body Survey (RBS) is crucial to identify hidden injuries and rule out life-threatening conditions. This comprehensive head-to-toe examination allows healthcare providers to quickly assess patients and provide prompt interventions. By systematically examining each body part, from head and neck to pelvis, legs, and arms, healthcare providers can detect visible signs of trauma, assess stability, and ensure the well-being of patients in critical situations.
What is a Rapid Body Survey
In emergency medical situations, time is of the essence, and healthcare providers must quickly assess patients to identify and address any immediate threats to their well-being. The Rapid Body Survey (RBS), also known as a head-to-toe examination, is a vital component of the initial assessment process. Its primary goal is to rule out significant or life-threatening injuries that may be hidden due to distracting injuries or the patient's unconsciousness.
Unconscious woman having a rapid body survey being done by professional responders.
During emergencies, patients may present with obvious injuries that demand immediate attention. However, these apparent injuries can sometimes mask more critical underlying conditions that require urgent intervention. By performing a systematic and comprehensive RBS, healthcare providers can thoroughly evaluate the patient's entire body, ensuring that no potentially dangerous injuries go unnoticed.
Conducting an RBS requires hands-on physical examination, allowing healthcare providers to assess stability, palpate for tenderness or deformities, and check for specific signs indicative of serious injuries. While respecting the patient's privacy and dignity, healthcare providers must obtain consent before initiating the physical examination.
If there are any signs of traumatic injury or if the patient reports pain or tenderness in specific areas, it is essential to remove the clothing covering those regions for a more thorough assessment. Removing clothing allows healthcare providers to visually inspect the affected areas, assess for visible wounds, bruising, or deformities, and palpate for tenderness, instability, or other signs of significant injury. While ensuring patient comfort and maintaining their privacy, the removal of clothing enables healthcare providers to gain a clearer understanding of the extent of the trauma and provides valuable information for making informed treatment decisions.
Now, let's delve into what a Rapid Body Survey (RBS) entails and explore the different components of this comprehensive examination.
Rapid Body Survey Components
Head and Face:
Bleeding: Look for any signs of bleeding, both externally and internally, on the head or face. Pay close attention to wounds or lacerations that may indicate significant trauma.
Facial or skull deformities: Inspect the face and skull for any abnormal shapes or contours, which may suggest fractures or dislocations.
Nosebleeds: Note the presence of nosebleeds, as they can indicate trauma to the nasal area or potential underlying skull fractures.
Pupil size: Assess the size of the pupils in both eyes. Unequal pupil size, known as anisocoria, can be an indication of head trauma or underlying neurological issues.
Cerebrospinal fluid (CSF) leakage from the ears: Check for any clear fluid draining from the ears, as it may be cerebrospinal fluid. This could be a sign of a basal skull fracture, requiring immediate medical attention.
Raccoon eyes: Observe for periorbital bruising or discoloration, commonly referred to as raccoon eyes. This bruising around the eyes can be an indicator of a skull fracture or other significant head injury.
Battle signs: Look for bruising behind the ears, known as battle signs. These bruises can be a sign of skull base fractures and should raise concerns about potential head trauma.
Missing teeth: Take note of any missing teeth, which may indicate facial trauma or injuries to the oral cavity.
Cyanosed lips: Check for lips that appear bluish or cyanotic, which may suggest inadequate oxygenation or circulation, potentially related to respiratory or cardiovascular issues.
Neck
Midline trachea: Observe the position of the trachea in the center of the neck. A trachea deviated to one side may indicate an injury or obstruction in the airway.
Jugular Vein Distention (JVD): Look for distention or engorgement of the jugular veins in the neck. JVD can be a sign of increased pressure in the chest or heart failure.
Obvious injuries: Check for any visible injuries, such as lacerations, abrasions, or swelling, which may require immediate attention.
Chest
Chief complaint of chest pain: If the patient's chief complaint involves chest pain (not of cardiac origin), it is essential to remove their shirt to allow for a closer examination.
Medication patches and surgical scars: Inspect the chest for the presence of medication patches or surgical scars, which may provide valuable information about the patient's medical history or recent interventions.
Trauma and obvious injuries: Look for any obvious signs of trauma, such as bruises, lacerations, or swelling, which may indicate a significant injury or potential internal damage.
Stability of collarbone and sternum: Physically assess the stability of the clavicle (collarbone) and sternum by gently applying pressure and checking for any abnormal movement or tenderness.
Rib stability and paradoxical movement: Palpate along the sides of the ribcage, asking the patient to take deep breaths if applicable. Evaluate for equal chest rise and fall and look for paradoxical chest movement, which is a characteristic inward movement of the chest during inhalation and outward movement during exhalation. Paradoxical chest movement may suggest a flail chest, a serious condition that requires immediate attention.
Signs of contusions: Check for contusions (bruises) on the chest, as they may indicate internal hemorrhaging or injuries to underlying organs.
Abdomen
Distention, rigidity, and tenderness (DRT): Use a wave-like motion with both hands to palpate the abdomen over the four quadrants. Assess for any abnormal distention (swelling), rigidity (stiffness), or tenderness, as these may indicate underlying trauma or internal organ damage.
Signs of contusions: Look for contusions or bruises on the abdomen, as they may suggest internal bleeding or injuries to organs.
Rebound tenderness: Gently press on the abdomen and release, observing if the patient experiences increased pain upon release. This rebound tenderness could indicate inflammation or injury in the abdominal cavity.
Organ-specific assessments: Depending on the patient's complaints or mechanism of injury, healthcare providers may focus on specific areas of the abdomen. For example, they may perform a focused examination to assess the liver, spleen, kidneys, or other organs based on the patient's symptoms and clinical indications.
Abdominal distension: Observe for any visible distension or swelling of the abdomen, as it may indicate fluid accumulation, organ enlargement, or other underlying conditions.
Pelvis
Pelvic stability assessment: Stand at the patient's side and place your hands on both sides of the pelvis. Apply upward and inward pressure to assess for any instability or abnormal movement. Instability or crepitus (grating sensation) may indicate a potential pelvic fracture, which can be a life-threatening injury.
Signs of pelvic trauma: Look for visible signs of pelvic trauma, such as bruising, swelling, or deformities. External signs may suggest the possibility of internal injuries or fractures.
Pelvic tenderness: Gently palpate the pelvic region, including the iliac crests and the pubic symphysis, for tenderness or pain. Localized tenderness may indicate an injury to the pelvic structures.
Note incontinence: While assessing the pelvis, be observant for any signs of incontinence, such as urinary or fecal leakage. Incontinence can indicate a neurological or structural injury and should be documented.
Legs
Femur, patella, tibia, and fibula stability: Using both hands, assess the stability and integrity of the major leg bones, including the femur (thigh bone), patella (kneecap), tibia, and fibula. Gently apply pressure and check for any abnormal movement, tenderness, or deformities.
Assess for fractures: Look for any visible signs of fractures, such as deformities, swelling, or bruising. Fractured femurs, in particular, can be life-threatening injuries if not promptly managed.
Proximal injury assessment: If there is an injury closer to the feet, such as ankle or foot trauma, remove the shoes and socks to examine the affected area more closely. Assess for swelling, deformities, tenderness, and neurovascular status.
Dorsal pedal pulse: Check the presence of the dorsal pedal pulse by palpating the top of the foot. The absence of the pulse may suggest compromised blood flow to the foot, requiring further investigation.
Mobility test: Perform a quick mobility test, such as the "gas pedal" test, to evaluate the patient's ability to move the affected leg. Assess the range of motion and observe for any pain, instability, or limitations in movement.
Spine
Crepitus: Pay attention to any grating or popping sensations (crepitus) during the palpation of the spine. Crepitus may indicate underlying spinal abnormalities or degenerative conditions.
Midline tenderness: Assess for tenderness along the midline of the back, as it may indicate a potential spinal injury or fracture.
Range of motion: Ask the patient to perform gentle movements, such as bending forward, backward, and sideways. Observe for any limitations, pain, or discomfort during these motions, which may suggest spinal issues.
Assess for back injuries: Look for visible signs of trauma on the back, such as bruises, lacerations, or swelling. External signs may indicate potential underlying spinal or soft tissue injuries.
During the Rapid Body Survey (RBS), the examination of the back may vary depending on the position of the patient. If the patient is lying supine, the back examination is typically performed after assessing other body parts. In situations where the patient is already positioned in the three-quarter prone position, the back examination can be initiated earlier. This allows for early detection of any visible signs of trauma or abnormalities in the back region.
Arms
Stability and tenderness: Using both hands, assess the stability and integrity of the arms. Gently apply pressure and check for any abnormal movement, tenderness, or deformities.
Range of motion: Ask the patient to move their arms in various directions, assessing the range of motion and noting any limitations, pain, or discomfort during movement.
Vascular assessment: While examining the arms, it is important to check the radial pulses, located on the wrist, to evaluate the vascular status. Absent or weak pulses may indicate compromised blood flow to the extremities.
Signs of self-harm: Observe the arms for any track marks, scars, or signs of self-harm, which may provide important information about the patient's history or current mental health concerns.
External injuries: Look for any visible signs of trauma, such as bruises, lacerations, or swelling, which may indicate fractures, dislocations, or other injuries.
Conclusion
In emergency medical situations, time is of the essence, and the Rapid Body Survey (RBS) is a vital tool in swiftly identifying hidden injuries and ruling out life-threatening conditions. This systematic examination technique is extensively covered in advanced first aid classes, including those required for firefighters in Alberta and as a recommended course before Emergency Medical Responder (EMR) training. By incorporating the RBS into their assessment protocols, healthcare providers can provide comprehensive and effective care, maximizing the chances of positive outcomes for patients in urgent need.
At our organization, we prioritize the importance of the RBS and offer advanced first aid classes that cover this critical assessment technique. Our courses are designed to equip individuals with the necessary skills to perform the RBS confidently and accurately. Whether you are pursuing a career in emergency services or simply seeking to enhance your first aid knowledge, our classes provide valuable training that can make a significant difference in emergency situations.
We are dedicated to supporting healthcare providers and individuals interested in emergency medical training. If you have any questions about the RBS or any other aspects of emergency care, please don't hesitate to reach out to us. Our team is here to provide guidance and assist you in your journey towards providing comprehensive and effective care to those in need. Together, we can make a difference and help save lives in emergency situations.
Opioid Overdose Reversal: Naloxone
Opioid overdose is a critical emergency that demands swift intervention. In our blog post, we explore the life-saving potential of naloxone as an opioid antagonist. Discover how naloxone works to reverse the effects of opioids, the importance of combining it with CPR in emergencies, and how you can learn about naloxone administration in our first aid courses. Be prepared to make a difference and save lives.
Opioid Overdose
Opioid overdose is a devastating crisis affecting individuals worldwide. With opioids causing respiratory depression and potentially fatal consequences, swift intervention is crucial. One powerful tool in combating opioid overdose is naloxone, commonly known by the brand name Narcan.
In this, we will delve into the life-saving potential of naloxone as an opioid antagonist, understanding how it works, and its role in preventing opioid-related fatalities. We will also explore how naloxone is administered, including the simple skill that anyone can learn to save lives.
Understanding Opioid Overdose:
Opioids, including prescription painkillers and illicit substances like heroin, bind to opioid receptors in the brain and spinal cord, reducing pain and inducing feelings of relaxation and euphoria. However, an excessive dose of opioids can overwhelm the body, leading to slowed or shallow breathing, which can result in a dangerous lack of oxygen. This respiratory depression is the primary cause of death in opioid overdose cases.
In opioid overdose, the slowed or shallow breathing can progress to respiratory arrest, where breathing stops altogether. As the body is deprived of oxygen, the brain and other vital organs begin to suffer. The lack of oxygen can lead to a cascade of events, including cardiac arrest, where the heart stops beating effectively. It is important to recognize that opioid overdose fatalities are primarily caused by respiratory arrest, which then leads to cardiac arrest.
Administration of Naloxone
Check Scene Safety:
Before approaching the individual, ensure that the scene is safe for both you and the person in distress. Look out for any potential hazards or risks.
Check Level of Consciousness:
Assess the person's level of consciousness. Gently tap their shoulders and ask loudly, "Are you okay?" If there is no response or the person is unresponsive, proceed to the next steps.
Communicate:
Clearly communicate your intentions to the person. Let them know that you are there to help and that you will be administering naloxone to reverse the effects of opioid overdose.
Personal Protective Equipment (PPE):
Put on gloves to protect yourself from potential exposure to bodily fluids during the process.
Prep the Syringe:
Take the naloxone syringe and carefully remove the cap. If necessary, snap or twist off the top of the ampule to access the medication. Attach the needle to the syringe securely.
Draw Up Naloxone:
Hold the ampule upright and insert the needle into the ampule's opening. Slowly pull the plunger back, drawing up the appropriate amount of naloxone (as instructed by the manufacturer or medical professional).
Expel Extra Air:
With the needle still in the ampule, gently tap the syringe to dislodge any air bubbles that may have formed. Slowly push the plunger up to expel the extra air until only naloxone remains in the syringe.
Lift Clothing and Insert Needle:
Lift the person's clothing to expose an area of skin for injection, typically the upper arm, thigh, or buttocks. Hold the syringe like a dart and swiftly insert the needle into the muscle at a 90-degree angle.
Compress All Liquid:
Push the plunger down fully, injecting all the naloxone into the muscle. Maintain pressure on the plunger for a few seconds to ensure all the medication has been administered.
Remove Needle and Dispose:
Carefully remove the needle from the skin. Place the used needle and syringe into a sharps container or any designated puncture-proof container for safe disposal.
Monitor Level of Consciousness:
Observe the person's level of consciousness and breathing. Stay with them and provide reassurance while waiting for emergency medical services (EMS) to arrive.
Remember, this tutorial serves as a general guide. It is essential to receive proper training on naloxone administration and follow the guidelines and instructions provided by healthcare professionals or local authorities.
Naloxone and CPR
Opioids depress the central nervous system, causing slowed or shallow breathing. If left untreated, this respiratory depression can progress to respiratory arrest, where breathing stops completely. When the body is deprived of oxygen, it can quickly lead to cardiac arrest, where the heart stops beating effectively.
In the event of a suspected opioid overdose, it is crucial to act swiftly. If you encounter someone who is not breathing and does not have a pulse, it is essential to initiate cardiopulmonary resuscitation (CPR) in conjunction with administering naloxone.
CPR involves a combination of chest compressions and rescue breaths, which aim to circulate oxygen-rich blood to the vital organs of the body. It helps to maintain a minimal level of oxygen supply until professional medical help arrives. CPR should be performed following the recommended guidelines and in accordance with any specific training you have received.
Naloxone is a vital component of overdose response because it rapidly reverses the effects of opioids and restores normal respiratory function. When administering naloxone during CPR, it can help counteract the respiratory depression caused by opioids, supporting the resuscitation efforts. By combining naloxone with CPR, you address both the respiratory and circulatory aspects of the overdose emergency, increasing the chances of successfully restoring the person's breathing and heartbeat.
In the event of a suspected opioid overdose where the individual does not have a device, such as a rescue facemask with a one-way valve, to protect yourself during rescue breaths, you can opt for compression-only CPR. Compression-only CPR involves performing continuous chest compressions without providing rescue breaths.
To perform compression-only CPR, follow these steps:
Ensure the person is lying on a firm surface.
Kneel beside the person's chest.
Place the heel of one hand on the center of the person's chest, between the nipples.
Place your other hand on top of the first hand, interlocking your fingers.
Keep your arms straight and position your shoulders directly above your hands.
Push hard and fast, compressing the chest at a rate of about 100-120 compressions per minute.
Allow the chest to fully recoil between compressions, but do not lift your hands off the chest.
Remember, in any medical emergency, including a suspected opioid overdose, it is essential to call 911 immediately. The emergency dispatcher can provide guidance and instructions tailored to the specific situation.
Remember, naloxone is not a substitute for seeking emergency medical assistance. Even if the person responds to naloxone and CPR, it is crucial to call emergency services right away. Prompt medical attention is necessary to provide comprehensive care and further stabilize the individual.
Training
Thank you for accompanying us on this two-part blog journey about naloxone. We hope that through this valuable information, you have gained the confidence and knowledge to respond effectively in opioid overdose emergencies. At Delta Emergency, we are committed to providing comprehensive training on naloxone administration, including recognizing signs and symptoms of opioid overdose, in our first aid and advanced first aid courses. Thank you for staying engaged, and together, let's make a positive impact by being prepared to respond in critical situations.
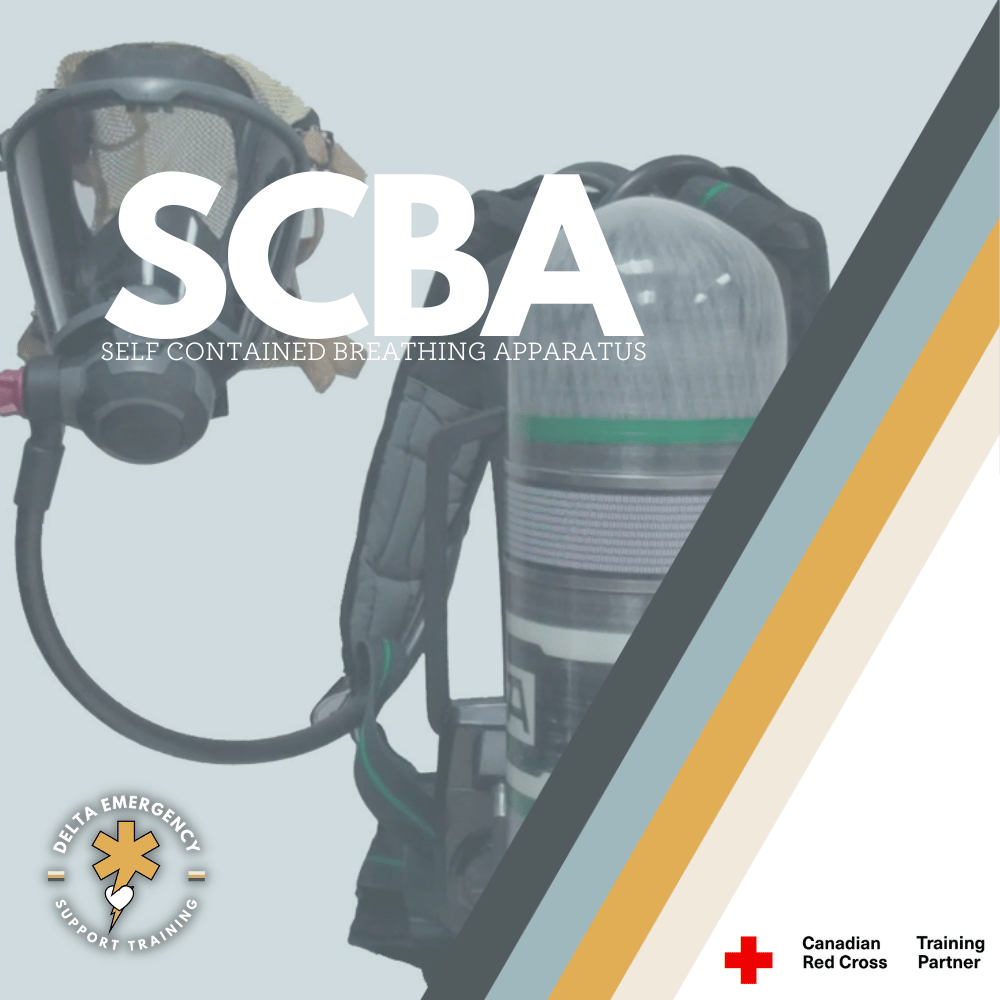
The Crucial Role of SCBA in Firefighting: Navigating Hazards with Confidence
For those aspiring to become firefighters, understanding the crucial role played by SCBA, or Self-Contained Breathing Apparatus, is paramount. In hazardous environments, where smoke, toxic gases, and oxygen deficiency pose significant risks, SCBA serves as a lifeline. It provides a continuous supply of clean, filtered air, enabling firefighters to navigate these perilous conditions while prioritizing their safety.
In this blog post, we delve into the significance of SCBA in firefighting operations. We explore how SCBA empowers firefighters to operate effectively and confidently in hazardous environments. From toxic gases and hazardous chemicals to oxygen-deficient atmospheres and unknown airborne substances, we shed light on the potential hazards that demand the use of SCBA.
By recognizing the importance of SCBA and its essential components, such as the facepiece, breathing regulator, compressed air cylinder, harness, integrated communication systems, monitoring and alarm systems, and air supply hoses, aspiring firefighters gain a deeper understanding of this life-saving respiratory protection equipment.
Join us as we explore the critical role of SCBA in ensuring the safety and well-being of firefighters in the face of potential hazards. Discover how SCBA equips these brave professionals with the necessary tools to navigate hazardous environments and carry out their duties with confidence and effectiveness.
For those aspiring to become firefighters, it's essential to understand the crucial role played by SCBA, or Self-Contained Breathing Apparatus. In this blog post, we will explore the significance of SCBA in firefighting operations and how it empowers firefighters to navigate hazardous environments while prioritizing their safety.
a firefighter dressed in full protective gear, including a helmet, turnout gear, and an SCBA (Self-Contained Breathing Apparatus). They are standing on a rig platform in the middle of the ocean, prepared to enter a hazardous environment.
The Life-Saving Importance of SCBA
Respiratory Protection:
Firefighters face numerous risks, including smoke, toxic gases, and lack of oxygen in the line of duty. SCBA serves as a lifeline, providing firefighters with a continuous supply of clean, filtered air, protecting them from inhaling dangerous substances and ensuring their ability to breathe safely.
Extended Operational Time:
Firefighters often require extended periods inside hazardous environments to perform critical tasks. SCBA systems are equipped with high-capacity air cylinders, enabling firefighters to work for longer durations without interruption. This ensures they have sufficient air supply to carry out rescue operations and firefighting tasks effectively.
Enhanced Visibility:
SCBA facepieces are designed with wide viewing lenses to improve visibility in smoke-filled environments. This enables firefighters to navigate through low-visibility conditions with more clarity enabling them to identify potential hazards and locating victims more effectively.
Essential components of an SCBA system
Self-Contained Breathing Apparatus (SCBA) comprises several integral pieces that work together to provide firefighters and other professionals with reliable and life-saving respiratory protection in hazardous environments.
Face piece:
The facepiece is a critical component of the SCBA, serving as the interface between the user and the surrounding atmosphere. It is designed to create an airtight seal around the face, preventing the entry of harmful gases, smoke, or particulates. Facepieces are typically constructed from durable materials. In accordance with NFPA (National Fire Protection Association) regulation standards the face piece should withstand heat up to 500°F.
Breathing Regulator:
The breathing regulator regulates the flow of compressed air from the SCBA cylinder to the user. It ensures a consistent and controlled supply of breathable air, enabling smooth and effortless breathing. The regulator may include features like adjustable air flow rates and audible or visual alarms to notify the user of low air supply or other critical conditions.
Compressed Air Cylinder:
The compressed air cylinder is a high-pressure vessel that stores the air supply for the SCBA system. It is typically made from lightweight materials, such as carbon fiber or aluminum, to minimize the overall weight of the SCBA. The cylinder is refillable and can be replaced or refilled as needed. Different sizes of cylinders are available to accommodate varying durations of operation.
Harness and Straps:
The harness and straps secure the SCBA system to the user's body. They are designed to distribute the weight of the system evenly and provide a comfortable and secure fit. The harness usually consists of adjustable shoulder straps, waist belts, and chest straps, ensuring stability and preventing excessive movement during operation.
Integrated Communication Systems:
Many modern SCBA systems feature integrated communication systems. These systems allow firefighters to maintain constant communication with their team members, improving coordination, situational awareness, and operational efficiency. Integrated microphones, speakers, and radio interfaces enable effective communication while wearing the SCBA facepiece.
Monitoring and Alarm Systems:
SCBA units incorporate monitoring and alarm systems to provide critical information to the user. These systems may include visual displays, audible alarms, or vibrating alerts to indicate remaining air supply, battery life, and other important parameters. Real-time monitoring helps users stay informed about their equipment status and take appropriate actions as needed.
Air Supply Hoses:
Air supply hoses connect the facepiece to the breathing regulator, allowing the flow of air from the cylinder to the user's respiratory system. These hoses are designed to be flexible and durable, facilitating ease of movement and ensuring uninterrupted air supply during operation.
Each component of an SCBA system plays a crucial role in providing reliable and life-saving respiratory protection. The face piece, breathing regulator, compressed air cylinder, harness, integrated communication systems, monitoring and alarm systems, and air supply hoses work together seamlessly to ensure firefighters and other professionals can operate safely and effectively in hazardous environments. By understanding the functionality and importance of each component, users can maximize the benefits of SCBA technology and confidently face the challenges of their critical roles.
Hazardous Environments
In hazardous environments, various potential hazards, including different types of gases, necessitate the use of SCBA to ensure personal safety. Let's explore some of these hazards and understand why SCBA is essential in mitigating the risks associated with them.
Toxic Gases:
Toxic gases pose a significant threat in various industries, such as firefighting, chemical manufacturing, and industrial operations. Examples of toxic gases include carbon monoxide (CO), hydrogen sulfide (H2S), ammonia (NH3), chlorine (Cl2), and many others. These gases are highly dangerous when inhaled in high concentrations, as they can cause severe respiratory distress, loss of consciousness, and even death. SCBA provides a reliable supply of clean, filtered air, ensuring that individuals working in environments contaminated with toxic gases can breathe safely and carry out their tasks without compromising their health.
Hazardous Chemicals:
Industries dealing with hazardous chemicals, such as laboratories, refineries, and chemical processing plants, face the risk of exposure to harmful vapors, fumes, and airborne contaminants. Many chemicals used in these industries can have acute or chronic health effects when inhaled.
Oxygen-Deficient Atmospheres:
Certain work environments, such as confined spaces or areas with poor ventilation, can have oxygen-deficient atmospheres. Oxygen levels below the safe threshold of around 19.5% can lead to dizziness, loss of consciousness, and asphyxiation. In these situations, SCBA becomes essential to supply the wearer with an independent source of breathable air, allowing them to operate safely.
Unknown or Unidentified Gases:
In emergency response situations or hazardous material incidents, first responders and hazmat teams often encounter unknown or unidentified gases. SCBA is indispensable in these scenarios since it offers a level of protection against any potentially harmful airborne substances.
By understanding the critical role of SCBA and its importance in mitigating potential hazards, aspiring firefighters and professionals in various industries can appreciate the significance of this life-saving respiratory protection equipment. SCBA empowers individuals to navigate hazardous environments with confidence while prioritizing their safety and well-being. With SCBA as their lifeline, firefighters and professionals can face the challenges of their critical roles, protecting lives and property with the assurance of respiratory protection in the most demanding situations.
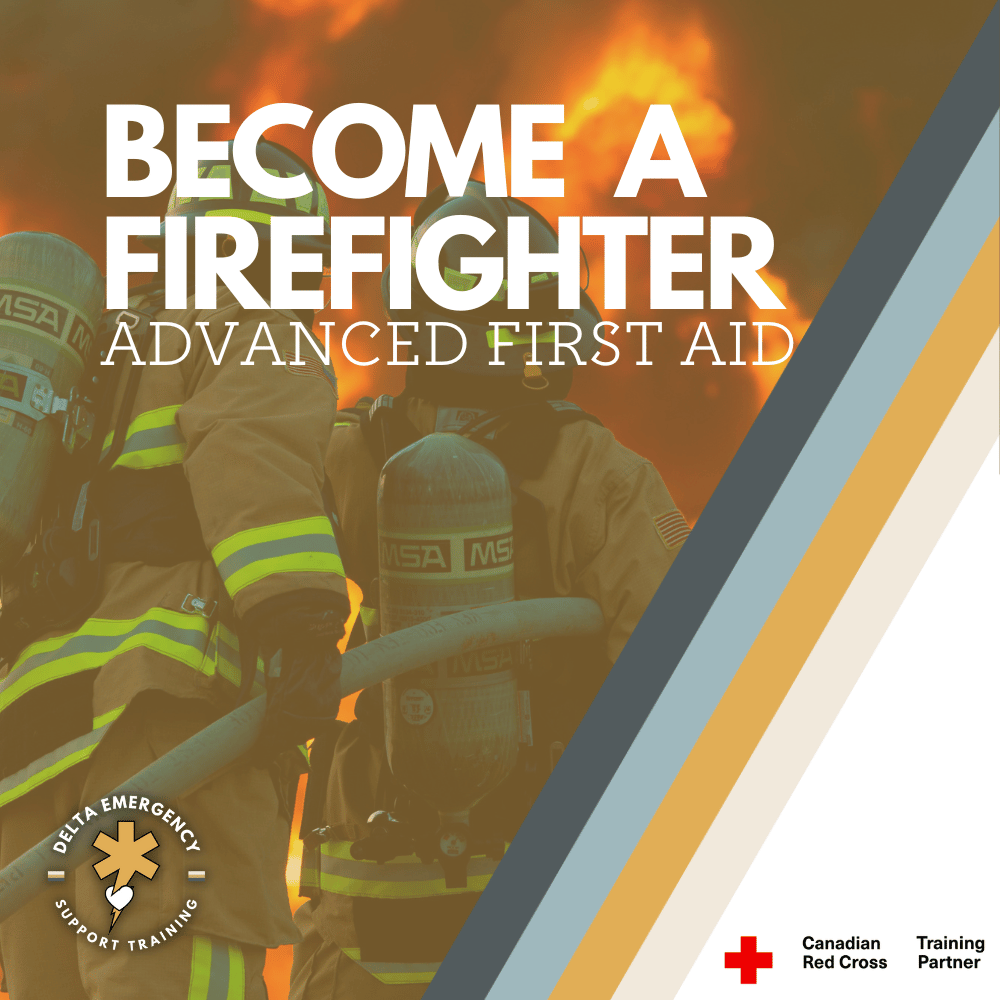
Becoming a Firefighter: Advanced First Aid with Delta
As a firefighter, you will be called upon to respond to a variety of emergency situations, ranging from minor injuries to life-threatening illnesses. That's why AFA training is so important for firefighters - it equips them with the skills and knowledge they need to handle these emergencies effectively and provide the best possible care to patients. AFA training covers a wide range of topics, including scene safety, basic life support, airway management, breathing management, in-depth CPR training, thorough body survey, packaging patients onto spine boards, dealing with life-threatening injuries, taking vitals, administering life-saving medications, and running calls from start to finish.
Becoming a firefighter is a career path that is both challenging and rewarding. It requires a unique set of skills and qualifications to effectively protect the public and their property from the dangers of fire, natural disasters, and other emergencies. One of the essential prerequisites for Calgary Fire Department or Edmonton Fire Rescue Services, is having advanced first aid (AFA) training.
Two firefighters with advanced first aid training, in full gear fighting a fire, with their backs turned to the camera.
AFA training equips firefighters with the skills and knowledge they need to handle these emergencies effectively and provide the best possible care to patients. As a firefighter, you may be required to perform advanced procedures such as administering medication, bagging patients, and providing advanced airway management. AFA training provides firefighters with the advanced skills and knowledge necessary to perform these procedures safely and effectively, ensuring the best possible outcomes for patients.
In this blog, we'll take a closer look at AFA training and why it's a must for firefighters. We'll explore what AFA training is, why it's important for firefighters to have, and how to obtain this training.
If you're considering a career as a firefighter or are already working in this field, read on to learn more about how AFA training can make you a better responder in medical emergencies.
Scene Safety
The first step in any emergency situation is to ensure scene safety. As part of AFA training, firefighters learn how to assess a scene for potential hazards and risks, ensuring that they can safely and effectively provide care to patients. Using Delta’s acronyms to assist in efficient learning.
C-Spine
AFA students will learn about C-spine and Spinal Motion Restriction (SMR). What mechanisms of injury indicates the use of SMR, how to apply a cervical collar as well as packaging a patient with a suspected spinal injury.
Basic Life Support
Basic life support (BLS) is a critical component of AFA training. Firefighters learn how to perform cardiopulmonary resuscitation (CPR) and use automated external defibrillators (AEDs) to help patients in cardiac arrest. Within the completion of AFA, students will receive a BLS certificate.
Airway Management
Maintaining a patient's airway is essential in emergency situations. AFA training covers a range of airway management techniques, including using oropharyngeal and nasopharyngeal airways, as well as different manual airway management maneuvers.
Breathing Management
In addition to airway management, AFA training covers breathing management techniques. Firefighters learn how to use nasal cannulas, non-rebreather masks and bag-valve-masks as well as how to correlate each apparatus to the oxygen tank while regulating flow rate.
In-Depth CPR Training
CPR is a critical life-saving skill that all firefighters must be proficient in. AFA training covers CPR in-depth, including chest compressions, rescue breathing, and AED use.
Rapid Body Survey
As part of AFA training, firefighters learn how to conduct a thorough rapid body survey, which checks for injuries that require immediate attention. This includes checking and treating for life-threatening injuries such as bleeding, flail chest, and broken pelvis.
Vital Signs
AFA training covers how to take vital signs, including manual blood pressure, heart rate, respiratory rate, pupils, blood glucose, Glasgow Coma Scale, skin and temperature. Firefighters learn what the normal and abnormal ranges are and how to interpret vital sign readings to assess a patient's condition.
Life-Saving Medications
Firefighters may need to administer life-saving medications in emergency situations. AFA training covers how to administer medications such as naloxone, aspirin, and epinephrine, as well as how to assist with administering other medications as needed.
Patient Packaging
Packaging a patient for transport is a critical part of providing advanced first aid. AFA training covers how to package a patient onto a spine board or scoop.
Running a Call
AFA training also covers how to run a call as the primary responder from start to finish. This includes assessing the scene, providing care to patients, communicating with and delegating other responders and medical personnel.
Fire Safety for Kids: Teach Your Children to Stay Safe
Protecting your family from the danger of fires is essential. In this blog, we’ll discuss how to teach your children about fire safety, including preventing fires and what to do in case of an emergency. We’ll also cover the importance of smoke detectors and fire extinguishers and how to get additional training from your local fire department.
As parents, one of our top priorities is to protect our children from harm. Whether we're at home or away, we want to ensure that our children are safe and secure at all times. One important aspect of keeping our children safe is teaching them about fire safety. By educating our children about fire safety, we can give them the skills they need to keep themselves safe in case of an emergency.
Family home with a porch ENGULFED in flames.
Fire safety is a topic that can be taught to children of all ages. Even young children can learn the basics of fire safety, such as not playing with matches or lighters and what to do in case of a fire. By teaching our children about fire safety, we can help them to be prepared in case of an emergency and give them the confidence they need to stay safe.
In this blog, we'll explore some essential fire safety tips that parents can teach their children. We'll cover topics such as preventing fires, what to do in case of a fire, and how to stay safe if caught in a fire. By following these tips, parents can ensure that their children are prepared to handle any fire-related situation that may arise, whether they are at home or away.
Fire Prevention
Fire prevention is an essential aspect of fire safety that parents can teach their children. By taking steps to prevent fires from starting, we can greatly reduce the risk of a fire occurring in our homes. Here are some tips on fire prevention that parents can teach their children:
Keep flammable objects away from heat sources:
Teach your children to keep flammable objects such as curtains, paper, and clothing away from heat sources such as stoves, fireplaces, and heaters.
Avoid leaving cooking unattended:
Cooking is a common cause of house fires, especially when food is left unattended on the stove or in the oven. Teach your children to never leave cooking food unattended, and to turn off the stove or oven when they're done cooking.
Out of reach:
Lighters and matches should be stored where children do not have access. Flammable liquids such as gasoline, lighter fluid, and paint thinner should be stored in a cool, dry place away from heat sources and also out of reach of children.
Avoid overloading electrical outlets:
Overloading electrical outlets can cause them to overheat and start a fire. Teach your children to never plug too many devices into one outlet, and to use extension cords safely.
Use candles safely:
Candles can be a cozy addition to any home, but they should be used with caution. Teach your children to never leave candles unattended, and to keep them away from flammable objects such as curtains and papers.
By teaching our children about fire prevention, we can greatly reduce the risk of a fire occurring in our homes.
Smoke Detectors and Fire Extinguishers
Smoke detectors and fire extinguishers are two essential tools in protecting your home and family from the dangers of a fire. Here are some reasons why they are so important:
Early detection: Smoke detectors can detect the presence of smoke and fire early, giving you and your family time to evacuate the house before the fire spreads. Early detection can mean the difference between life and death.
Alert others: Smoke detectors can alert other people in the house or nearby, who can also help evacuate the house or call for help.
Fire suppression: Fire extinguishers can help suppress small fires before they become uncontrollable, potentially saving your home and belongings.
Required by law: Smoke detectors and fire extinguishers are often required by law in many areas, and failure to comply with regulations can result in fines or penalties.
When installing smoke detectors in your home, it is important to place them in key areas, such as in or near bedrooms and on every level of the house. Regularly test and replace batteries to ensure that they are working properly. It is also important to have a fire escape plan and to practice it regularly with your family.
When it comes to fire extinguishers, make sure that you have the correct type for the type of fire that could occur in your home. For example, a kitchen fire may require a different type of extinguisher than a fire in the garage. It is also important to have the extinguisher in an easily accessible location and to know how to properly use it.
What to Do in Case of a Fire
Knowing what to do in case of a fire is crucial for ensuring the safety of yourself and your family. Here are some steps that parents can teach their children in case of a fire:
Have a plan:
Develop a fire escape plan with your family and practice it regularly. Make sure that everyone in the family knows the plan and the designated meeting spot outside.
Check doors for heat:
Before opening any doors during a fire, teach your children to check the door for heat with the back of their hand. If the door is hot, do not open it, as it could be a sign that there is a fire on the other side.
Stay low and crawl to safety:
In the event of a fire, smoke can quickly fill a room, making it difficult to see and breathe. Teach your children to stay low to the ground and crawl to the nearest exit. Covering your mouth and nose with a cloth can provide some protection from smoke. If you're trapped in a room, cover any gaps under the door with a blanket or towel to prevent smoke from entering. Open a window and wave a brightly colored cloth to signal for help.
Exit the building immediately:
If the fire is too large to put out, exit the building immediately and go to the designated meeting spot outside. Do not go back into the building for any reason.
Call for help:
Call the fire department or 911 to report the fire. Give them your address and a description of the fire, and wait for help to arrive. Do not go back in under any circumstances.
Don't Wait Until It's Too Late
Fire safety is an important topic for parents to discuss with their children. By taking steps to prevent fires, such as having smoke detectors and fire extinguishers, and teaching children what to do in case of a fire, families can help keep their homes and loved ones safe. Remember to have a family fire escape plan and practice it regularly. And for more in-depth training, consider contacting your local fire department for in-person training and resources. By working together, we can ensure that our families and communities are prepared in case of a fire emergency.
SAGER: Traction Splinting A Midline Femur Fracture
At Delta Emergency Support Training, we provide in-depth advanced first aid classes that cover a variety of topics, including the proper application of a Sager splint. Our classes are designed for medical professionals and advanced first aiders who want to expand their knowledge and skills. In this guide, we'll cover how to effectively use a Sager splint to immobilize femoral shaft fractures and other leg injuries.
What is a Sager Splint?
A Sager splint, also known as a traction splint, is a medical device used to immobilize and align a fractured or injured leg. It is designed to reduce pain and swelling by applying traction to the leg, pulling the bone fragments back into alignment. The splint consists of two main components: the splint itself, which is a long, narrow rod that extends from the foot to the groin, and the traction mechanism, which is attached to the foot end of the splint.
An advanced first aider applies a Sager splint to a patient with a broken femur. The patient is lying on their back and the first aider is wearing white gloves and kneeling beside them.
The splint is typically made of aluminum or carbon fiber and is lightweight and easy to transport. It is designed to be adjustable to fit a variety of leg sizes and can be quickly and easily applied in emergency situations. The traction mechanism is usually a ratcheting system that allows the medical professional to control the amount of traction being applied to the leg. This mechanism can be adjusted to achieve the desired amount of traction and can be released easily if necessary.
The amount of pressure applied is weighed in pound with a rule of thumb being 10% of the patients body weight for a maximum of 15 pounds per femur fracture or 30 pounds for a bilateral femoral fracture.
Sager splints are used for femoral shaft fractures, which are fractures that occur in the middle of the thigh bone. These types of fractures can be serious and require immediate attention. Sager splints are effective at immobilizing the affected leg, reducing pain and swelling, and realigning the bone fragments.
What causes a femur fracture?
Femur fractures can occur due to a variety of mechanisms of injury (MOI), with high-energy trauma and direct impact being the most common causes.
High-energy trauma, which involves a significant amount of force, can be caused by car accidents, falls from a height, sports injuries, and other incidents that involve significant force. The femur can break due to the impact of the force or due to bending or twisting of the bone.
Direct impact to the thigh bone, such as a blow from a heavy object or a fall onto a hard surface, is another common MOI that can cause a femur fracture. This can occur in industrial accidents or during contact sports. In both cases, the force applied to the femur is greater than the bone's ability to absorb it, causing the bone to break.
It's important to note that the severity of the femur fracture can vary depending on the MOI and the angle of impact.
How serious is a broken femur?
A femur break, particularly a bilateral femur fracture, can be a serious and potentially limb-threatening injury. The femur is the longest and strongest bone in the human body and is responsible for supporting the weight of the body and facilitating movement. When the femur is fractured, it can cause significant pain, swelling, and deformity of the affected leg.
One of the most significant dangers of a femur break is the potential for the femoral artery to be compromised by a bone fragment. The femoral artery is a large blood vessel that runs through the thigh and supplies blood to the lower leg and foot. If a bone fragment from a femur break punctures the femoral artery, it can lead to internal bleeding, which can be life-threatening if not treated promptly.
In addition to the danger of internal bleeding, a femur break can also result in nerve damage, muscle damage, and compartment syndrome. Compartment syndrome occurs when pressure within a muscle compartment builds up, which can cause damage to the nerves, blood vessels, and muscles in the affected area. If left untreated, compartment syndrome can lead to permanent damage or loss of function in the affected limb.
Indications and contraindications
Indications:
Femoral shaft fractures:
Sager splints are commonly used to immobilize and align femoral shaft fractures, which are fractures that occur in the middle of the thigh bone. Bi-lateral or single femur fractures.
Contraindications:
Open fractures:
A compound or open fracture is a type of bone fracture where the broken bone pierces through the skin.
In a compound fracture, the exposed bone can be seen or felt through the wound in the skin, and there may be visible bleeding, swelling, and/or deformity at the site of the injury. If the skin over the fracture is broken or torn, the Sager splint should not be applied as it can cause further damage or infection.
Injuries on the effected leg:
If the patient has any other associated injuries, such as ankle or fib tib fractures, a Sager splint may be contraindicated. Additionally, if the patient has a knee injury, such as a dislocated knee, a Sager splint may not be appropriate as it can exacerbate the injury. It's important to carefully evaluate the patient with a thorough rapid body survey to rule out injuries that may effect application.
Life threatening injuries:
If a patient has a life-threatening injury, the priority is to rapidly transport the patient to a medical facility for appropriate treatment. In such cases, immobilization with a Sager splint may not be the best course of action, as it can take time to properly apply the splint, and rapid transport may be necessary to save the patient's life.
It's important to remember that in cases of multiple injuries or life-threatening injuries, the priority is to save the patient's life, life over limb. While a femur fracture can be a serious and potentially limb-threatening injury, other injuries may take precedence over the fracture.
Proper application
Assuming that the patient has been assessed and a Sager splint is deemed appropriate, the medical professional or advanced first aider will follow the steps outlined in the previous response to properly apply the splint. Proper application of a Sager splint requires medical training and should only be done by trained professionals. Here are the general steps involved in applying a Sager splint:
Assessment of the patient's injury:
Before applying a Sager splint, the medical professional should assess the patient's injury to determine if it's the right tool for the job. A physician should evaluate indications and contraindications.
Patient in a supine position:
Once it's been determined that a Sager splint is necessary, the patient should be placed in a supine position.
Remove clothing from effected area:
Any clothing that obstructs the affected leg should be trauma stripped to ensure proper placement of the Sager as well as to check for compound fractures.
Placement of the Sager:
The Sager splint should be placed on the affected leg, positioning the ankle and foot in the appropriate spot. The splint should be placed with the traction component of the device facing the foot.
Securing the splint to the leg:
The splint should be secured to the leg with straps or bandages, ensuring that it is snug but not too tight. This will help to keep the splint in place and provide the necessary support.
Application of traction:
The traction component of the Sager splint should be applied, pulling the leg gently and steadily until the desired amount of traction is achieved. This will help to reduce pain and swelling and realign the bone fragments.
Pulse, sensation, and movement check:
The medical professional should check the patient's pedal pulse, sensation, and movement in the affected leg to ensure that the splint is not causing further damage or obstruction.
Training
Sager splints are orthopedic devices that are commonly used to immobilize femoral shaft fractures. They can help to stabilize the fracture and prevent further damage to the leg or other parts of the body. However, the proper application of a Sager splint requires specialized training and should only be done by trained medical professionals or advanced first aiders.
At Delta Emergency Support Training, we provide in-depth advanced first aid classes that cover a variety of topics, including the proper application of a Sager splint.
Act FAST: Stroke Identification for Advanced First Aiders
As an advanced first aider, it's important to be prepared for a wide range of emergency situations, including strokes. Delta Emergency Support Training offers advanced first aid courses that can help you recognize the signs and symptoms of a stroke and provide basic care until professional medical assistance arrives. While there are limitations to what an advanced first aider can do in treating strokes, being able to recognize the signs and act quickly can make a significant difference in the chances of a positive outcome. Discover how Delta Emergency Support Training can help prepare you to respond effectively in emergency situations like strokes.
Understanding Strokes
Strokes, also know as Cerebrovascular Accident (CVA) occur when the blood supply to the brain is interrupted, either due to a blocked blood vessel or a bleeding blood vessel. This interruption can cause brain cells to die, leading to a range of symptoms and complications. Strokes can be caused by a variety of factors, including high blood pressure, smoking, diabetes, and heart disease, among others.
an older man holding his head in his hand, as if he is experiencing discomfort or pain.
There are two main types of strokes: ischemic strokes and hemorrhagic strokes. Ischemic strokes occur when a blood clot blocks a blood vessel in the brain, while hemorrhagic strokes occur when a blood vessel in the brain ruptures and bleeds into the surrounding tissue. Symptoms of a stroke can vary depending on the location and severity of the damage, but can include sudden weakness or numbness on one side of the body, difficulty speaking or understanding speech, vision problems, severe headache, and dizziness or loss of balance.
Risk Factors for Strokes
There are several factors that can increase the risk of strokes, including high blood pressure, high cholesterol, smoking, obesity, and a family history of strokes. Certain medical conditions, such as diabetes and heart disease, can also increase the risk of strokes. To reduce the risk of strokes, it's important to maintain a healthy lifestyle, eat a balanced diet, exercise regularly, and manage any underlying medical conditions.
Responding To a Suspected Stroke
Recognizing the signs of a stroke and responding quickly is essential in improving the chances of a positive outcome for stroke patients. Taking a full set of vitals including BGL to rule out possible stroke mimics.
Some of the most common symptoms of a stroke include:
Severe headache
Altered LOC
Numbness or weakness in the face, arm, or leg, especially on one side of the body
Vision problems in one or both eyes
Sudden trouble walking, dizziness, or loss of balance or coordination
It's important to note that these symptoms can occur suddenly and without warning, and that not all symptoms may be present in every stroke. Additionally, some strokes may cause more subtle symptoms that are not immediately noticeable, such as weakness or numbness that comes and goes, or changes in mood or behavior.
FAST
As an AFA, you should be familiar with the acronym FAST to help you remember the signs and symptoms of a stroke and respond quickly. Here's what it stands for:
F: Face drooping or numbness
A: Arm weakness or numbness
S: Speech difficulty or confusion
T: Time symptoms started
By asking the following questions you can quickly assess if the patient is FAST positive, which is indicative of a stroke.
F: Smile big for me, I want to see all your teeth.
A: Lift patients arms in the air and ask them to hold them up for 5 seconds.
S: Repeat after me, the early bird gets the worm.
T: Ask the patient when the symptoms started.
Treatment
As an advanced first aider, it's important to recognize the limitations of our scope of practice when it comes to treating strokes in the prehospital world. While we can provide basic care such as administering oxygen and preparing the patient for rapid transport to a medical facility, there are few treatments that we can provide beyond that. It's crucial to act quickly and call for emergency medical assistance when someone is experiencing a stroke, as prompt medical treatment at a hospital facility is key to improving the chances of a positive outcome. As an advanced first aider, it's our role to recognize the signs and symptoms of a stroke and act quickly.
Advanced First Aid Training
At Delta Emergency Support Training, we understand the importance of being prepared for emergency situations, including strokes. That's why we offer a range of training sessions, including Advanced First Aid (AFA), to help individuals and classes develop the skills and knowledge they need to respond effectively. Our AFA training includes instruction on recognizing the signs and symptoms of a stroke, as well as providing basic care until professional medical assistance arrives. Our courses are available in-person and hybrid formats to accommodate different schedules and learning styles.
If you have any questions about our AFA training, including stroke-related topics, please don't hesitate to reach out to us. You can contact us at info@deltaemergency.com and our knowledgeable instructors will be happy to assist you. We're committed to helping you develop the skills and confidence you need to respond effectively in emergency situations.
Tourniquets: A Crucial Tool for Managing Severe Bleeding
As a first aider or advanced first aider, being prepared to manage severe bleeding is essential. Tourniquets are a critical tool in managing severe bleeding and can be the difference between life and death in emergency situations. In this blog post, we'll explain what a tourniquet is, when and why to use one, how to properly apply one, and why it's crucial not to remove it once it's on.
As a first aider or advanced first aider, it's important to be prepared to handle a wide range of emergency situations, including severe bleeding that can be life-threatening if not managed quickly and effectively. Tourniquets are an important tool in the first aider's toolkit for managing severe bleeding in emergency situations. In this blog post, we'll explain what a tourniquet is, why and when we might use one, and how to properly apply one. We'll also cover how to make an improvised tourniquet if a commercial one is not available.
Two first aiders are seen applying a tourniquet to a patient's limb in this image. The first aiders are wearing blue gloves, which are an essential part of their personal protective equipment (PPE) when providing medical care in emergency situations.
What is a tourniquet?
A tourniquet is a device used to control bleeding from a limb, typically a long bone. It can be made of a variety of materials such as fabric, rubber or nylon. Modern tourniquets are typically designed to be self-administered and easy to use in high-pressure situations, making them a valuable tool for first aiders and other medical professionals.
When is using a tourniquet warranted?
Tourniquets are used in emergency situations where a person is experiencing a life threatening bleed that cannot be controlled through other means, such as direct pressure. Indication for the use of tourniquet includes soaking through multiple dressings with no slow of blood loss.
It is important to remember that a tourniquet is a last resort and should only be used when direct pressure and other measures have failed to control bleeding.
How does it work?
The tourniquet works by compressing the blood vessels in the limb, which reduces or stops the flow of blood to the area below the device. This helps to prevent further blood loss and can save the patient's life.
Tourniquet application
When applying a tourniquet, it's important to locate the injury and apply the tourniquet at least 2 inches above the injury site or joint. This will ensure that the tourniquet is applied to the correct location and will effectively control the bleeding.
Once the tourniquet is in place, it must be tightened until the blood flow dramatically lessens or stops completely. It's important to monitor the patient closely and record the time the tourniquet was applied. If possible, mark the tourniquet with the time it was applied.
In some cases, multiple tourniquets may need to be applied to control severe bleeding. This may be necessary if the bleeding is occurring in multiple locations or if a single tourniquet is not effective in stopping the bleeding. After a tourniquet is applied it must not be removed.
Removing a tourniquet
Once a tourniquet is applied, it is important not to remove it until medical professionals can take over. Removing a tourniquet prematurely can cause the bleeding to resume and lead to further injury or even death. Instead, note the time that the tourniquet was applied and communicate this information to medical professionals when they arrive on the scene.
Improvised tourniquet
When a commercial tourniquet is unavailable you can create your own with simple everyday items. One method of creating an improvised tourniquet involves using a bandana, scarf, or strip of fabric. The fabric should be about two inches wide and long enough to wrap around the limb at least twice. Place the fabric around the limb, above the wound, and tie a knot to create a loose loop. Then, tie a second knot on top of the first, and continue tying knots until the fabric is snug and there is no more bleeding from the wound. Use a stick or similar object to tighten the knot by twisting it, until the fabric is tight enough to stop the bleeding.
Conclusion
In conclusion, tourniquets are an important tool in managing severe bleeding in emergency situations. As a first aider or advanced first aider, it's important to be prepared to use a tourniquet effectively and efficiently in emergency situations. By understanding what a tourniquet is, why and when we might use one, and how to properly apply one, we can help save lives and prevent further injury.
Training opportunities
At Delta Emergency Support Training, we understand the importance of being prepared for emergency situation. We offer a range of training sessions to help individuals and classes develop the skills and knowledge they need to respond to emergency situations. Our courses include Standard First Aid (SFA), Advanced First Aid (AFA), and Emergency Medical Responder (EMR), and we offer in-person, hybrid, and online options to suit different needs.
If you have any questions about our training sessions, please don't hesitate to reach out to us. You can contact us at info@deltaemergency.com and we'll be happy to assist you.
Alberta Wildfires: Evacuation Preparedness Guide
With the unprecedented hot and dry weather, high winds, and the prevalence of wildfires in Alberta, being prepared for fire evacuations is crucial. This blog provides valuable information on understanding the current extreme weather conditions, mitigating fire hazards, staying informed with the Alberta Wildfire app, and assembling an evacuation bag with essential items. Familiarize yourself with fire-prone areas, adopt fire-smart practices, and know the importance of emergency notifications and evacuation routes. Let's stay informed, prepared, and grateful for the dedicated firefighters working tirelessly to keep us safe.
Summer brings excitement and outdoor activities, but it also brings an increased risk of wildfires. With the unprecedented hot, dry weather, high winds, and the prevalence of wildfires in the region, being prepared for fire evacuations is crucial.
In this blog, we will explore fire evacuation preparedness, focusing on weather conditions, safe summer practices, staying informed, and essential items to include in your evacuation bag.
a summer day with a raging wildfire in the background. Thick plumes of smoke fill the air. The flames can be seen engulfing trees and vegetation, emitting a fiery glow. The image portrays the destructive power and danger associated with wildfires.
Understanding Alberta's Wildfire Risks
Extreme Weather Conditions
Alberta experiences hot and dry weather during the summer months, creating a conducive environment for wildfires to ignite and spread quickly. The combination of high temperatures and low humidity dries out vegetation, turning it into fuel for fires. This dry fuel allows wildfires to burn more intensely and cover larger areas.
Impact of Recent Excessive High Winds:
The recent excessive high winds have exacerbated the wildfires throughout western Alberta, contributing to their growth and rapid spread. Strong winds can significantly impact fire behaviour in several ways.
Increased Fire Spread: High winds can push flames forward, causing the fire front to advance rapidly. The strong gusts carry burning embers and ignite new spot fires ahead of the main fire, making containment efforts more challenging.
Spotting and Fire Jumping: The powerful winds can carry burning embers over long distances, sometimes miles away from the main fire. These embers can ignite new fires when they land on dry vegetation or flammable structures, leading to the rapid expansion of the fire perimeter.
Fire Direction Changes: Winds can shift the direction in which a fire is moving, making it difficult to predict and control the fire's path. This unpredictability poses significant challenges for firefighters and emergency responders.
Increased Fire Intensity: Strong winds provide a continuous supply of oxygen to the fire, enhancing its intensity. This intensified burning can result in faster rates of spread, increased flame height, and more challenging firefighting conditions.
Fire-Prone Areas
Familiarize yourself with areas in Alberta that are prone to wildfires and take extra precautions if you live or vacation in these regions. Wildfire-prone areas can include:
Forested Regions:
Alberta has vast forests, including boreal forests and mountainous regions, which are more susceptible to wildfires. These areas often have abundant vegetation and dry undergrowth, making them more prone to ignition and rapid fire spread.
Grasslands and Prairie Regions:
Alberta is also home to expansive grasslands and prairie regions, which can be susceptible to wildfires, especially during dry periods. The dry grasses and shrubs provide ample fuel for fires to ignite and spread quickly across these open landscapes.
Interface Areas:
Interface areas refer to regions where human settlements meet natural wildlands, such as residential areas close to forests or grasslands. These areas are at a higher risk as wildfires can directly threaten homes, structures, and communities.
Mitigating Fire Hazards
Mitigating fire hazards is crucial in preventing wildfires and ensuring the safety of communities and natural environments. Here are some important practices to follow.
Fire-Smart Practices
It is essential to adopt fire-smart practices in your daily life.
Properly Extinguishing Cigarettes:
Ensure that cigarettes are completely extinguished in designated ashtrays or containers. Avoid discarding them in dry vegetation or areas where they can easily ignite.
Avoiding Open Burning:
Respect local fire regulations and avoid open burning, especially during dry and windy conditions. Dispose of waste materials appropriately and consider alternative methods for waste management, such as recycling or composting.
Using Fireworks Responsibly:
If fireworks are permitted in your area, use them only in designated areas and follow all safety guidelines. Avoid launching fireworks near dry grasses or wooded areas, and always have a water source nearby to extinguish them properly.
Campfire Safety:
When allowed to have campfires in designated areas, it is crucial to prioritize safety. Maintain small and contained campfires using designated fire rings or pits, avoiding dry or flammable surfaces. Always fully extinguish the campfire before leaving the site or going to bed. Drown the fire with water, stir the ashes, and repeat until no hot embers remain. Monitoring the campfire and never leaving it unattended is essential.
Equipment Safety:
When using machinery and tools outdoors avoid sparks, be mindful of activities that could generate sparks, especially in dry vegetation. Refrain from using equipment during peak heat and windy hours, as this increases the risk of fire ignition. If possible, schedule outdoor tasks during cooler and less windy periods.
Staying Informed and Prepared
When it comes to wildfires or any emergency situation, staying informed helps ensure your safety and well-being. Timely and accurate information allows you to make informed decisions, take necessary precautions, and respond appropriately to changing conditions.
Alberta Wildfire App
Download the Alberta Wildfire app or visit the Alberta Wildfire website to stay updated on current wildfire conditions, evacuation orders, and road closures.
Emergency Notifications
Sign up for emergency alert systems in your area to receive timely evacuation notices and critical updates.
Emergency Evacuation Routes
Familiarize yourself with the evacuation routes in your vicinity and have alternative routes in mind. Stay informed about road conditions and closures.
Building an Evacuation Bag
Important Documents:
Keep identification papers, passports, insurance documents, and medical records in a waterproof container or digitally stored for quick access.
Emergency Supplies:
Pack a three-day supply of non-perishable food, water, medications, first aid supplies, and personal hygiene items. Include a battery-operated radio, flashlight, extra batteries, and a portable phone charger.
Clothing and Comfort:
Pack extra clothing, sturdy footwear, blankets, and comfort items to help endure potential extended stays in evacuation centers.
Firefighter Appreciation
We extend our heartfelt gratitude and appreciation to all the wildland, urban and rural firefighters who tirelessly work to keep us safe. Their unwavering commitment, courage, and expertise are instrumental in combating wildfires and protecting our communities and natural landscapes. These brave men and women put their lives on the line, facing extreme heat, challenging terrain, and unpredictable conditions to contain and extinguish fires. Their selfless dedication and teamwork inspire us all.
By following fire-smart guidelines, staying informed, and taking necessary precautions, we can contribute to wildfire prevention and support the efforts of our firefighters.
Let us also recognize the invaluable support systems, including incident management teams, support personnel, and volunteers, who work behind the scenes to ensure the effectiveness and safety of firefighting operations. Their collective efforts and coordination contribute to the successful containment and suppression of wildfires. Together, we can prevent and mitigate the impact of wildfires and express our sincere appreciation.
Treating Chest Pain: Aspirin and Nitroglycerin
Aspirin and nitroglycerin are two medications that are commonly used by first responders to treat chest pain or suspected heart attack. Aspirin is a platelet inhibitor that helps to prevent blood clots from forming and reduces the risk of further damage to the heart. Nitroglycerin is a vasodilator that helps to increase blood flow to the heart by dilating blood vessels, which reduces the workload on the heart muscle.
While these medications can be effective in treating chest pain or suspected heart attack, it's important for first responders to be familiar with their uses, risks, and benefits, and to follow established protocols and guidelines when administering them. Aspirin and nitroglycerin can have potential side effects and contraindications, so it's important to use them only as directed and under the guidance of a healthcare professional.
To ensure the safety and well-being of their patients, first responders should also educate patients about the benefits and risks of aspirin and nitroglycerin, and the importance of seeking medical follow-up after receiving these medications. By working closely with healthcare professionals and following established protocols and guidelines, first responders can provide effective care and help ensure the safety and well-being of their patients.
When it comes to treating chest pain or suspected heart attack, aspirin and nitroglycerin are two medications that first responders may use to help their patients depending on scope of practice. But what are these medications, how do they work, and what do first responders need to know about their use?
man sitting down and clutching his chest in pain. He appears to be experiencing a heart attack. Calgary Fire Fighters on the way.
Aspirin:
What is Aspirin, and How Does it Work?
Aspirin, also known as acetylsalicylic acid (ASA), is a medication that's commonly used to treat pain, fever, and inflammation. Aspirin works by inhibiting the activity of platelets, which are small blood cells that play a key role in blood clotting. When a blood vessel is damaged, platelets are activated and begin to stick to the damaged area to form a plug, which helps to stop bleeding. However, when a blood clot forms inside an artery supplying the heart, it can block blood flow and cause a heart attack.
As a platelet inhibitor, aspirin helps to prevent blood clots from forming and reduces the risk of further damage to the heart.
How is Aspirin Used in Emergency Situations?
Aspirin is an important medication for first responders to use in emergency situations, particularly for patients experiencing chest pain or suspected heart attack also know as a myocardial infarction. To speed up its onset of action, chewing aspirin is often recommended. The recommended dose of aspirin for patients with suspected heart attack is typically between 160-325 mg.
Contraindications:
There are certain situations where aspirin use may not be appropriate or may need to be used with caution.
Some common contraindications for aspirin use include:
Allergy or hypersensitivity to aspirin or other non-steroidal anti-inflammatory drugs (NSAIDs)
Active bleeding or bleeding disorders
Suspected stroke
ASA exacerbated asthma
Children with viral infection
Nitroglycerin:
What is Nitroglycerin, and How Does it Work?
Nitroglycerin is a medication used to treat chest pain or angina, which is often a symptom of heart disease. Nitroglycerin is a vasodilator, which means that it relaxes and widens blood vessels throughout the body, including the coronary arteries that supply blood to the heart muscle.
By dilating the blood vessels, nitroglycerin helps to increase blood flow to the heart, which reduces the workload on the heart muscle and can relieve chest pain or angina. Nitroglycerin works by releasing nitric oxide, which is a gas that relaxes the smooth muscle cells in the walls of blood vessels.
In addition to its effects on the coronary arteries, nitroglycerin can also cause vasodilation in other blood vessels, which can lead to a drop in blood pressure or hypotension. This is why nitroglycerin should not be given to patients with low blood pressure or hypotension.
It is administered as a sublingual spray with a recommended dose of 0.4 mg.
Contrindications:
While nitroglycerin is a useful medication, there are some precautions to keep in mind. PASS is an acronym to help you remember nitroglycerin’s contraindications.
Prescription: Making sure the nitro is prescribed to the patient.
Allergy: Confirming the patient does not have an allergy to nitro or other nitrates.
Systolic: Taking vitals to confirm their systolic blood pressure is above 100.
Sex drugs: A brief history of the patients medication use, Viagra, Levitra and Cialis in the last 24hr are all contraindicated for nitro.
Aspirin and Nitro
Aspirin and nitroglycerin are two medications that first responders will encounter in emergency situations for patients experiencing chest pain or suspected heart attack. While both medications can be effective in treating these conditions, they work in different ways and have different indications and contraindications.
Aspirin is a platelet inhibitor that helps to prevent blood clots from forming and reduces the risk of further damage to the heart. It is often used as a long-term treatment to reduce the risk of recurrent heart attacks or stroke. Nitroglycerin, on the other hand, is a vasodilator that helps to increase blood flow to the heart by dilating blood vessels, which reduces the workload on the heart muscle. It is typically used as a short-term treatment to relieve chest pain or angina.
By understanding their uses, risks, and benefits, first responders can provide effective care and help ensure the safety and well-being of their patients.
Training
In our advanced first aid training class, we cover topics such as heart disease and the use of aspirin and nitroglycerin to equip you with the knowledge and skills to provide excellent care in emergency situations. Calgary Fire, for example, is one of the many organizations that uses these medications as part of their protocols for responding to chest pain and suspected heart attack.
At Delta Emergency, we are dedicated to providing you with the tools you need to confidently handle any emergency situation involving chest pain or suspected heart attack. Our training programs are designed to teach you about the uses, risks, and benefits of aspirin and nitroglycerin, as well as the proper administration and monitoring of these medications.
If you have any questions or concerns about our training programs or the use of aspirin and nitroglycerin in emergency situations, please don't hesitate to contact us at info@deltaemergency.com. We're here to support you every step of the way in providing effective care to patients experiencing chest pain or suspected heart attack, just like Calgary Fire and other first responders do on a daily basis.
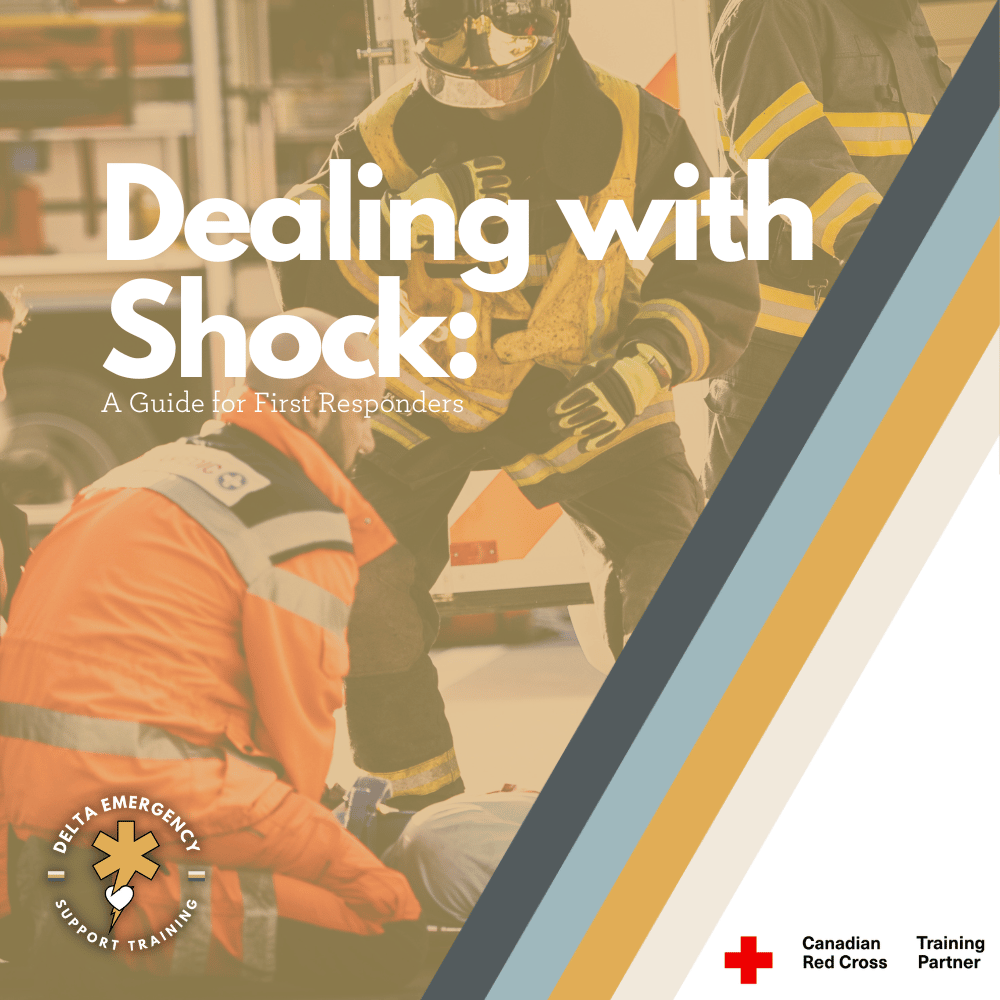
Dealing with Shock: A Guide for First Responders
Shock is a serious and potentially life-threatening condition that occurs when there is inadequate blood flow to the body's tissues and organs. There are several different types of shock, including hypovolemic shock (caused by severe blood loss), cardiogenic shock (caused by heart failure), obstructive shock (caused by a physical obstruction), and distributive shock (caused by a loss of blood vessel tone).
Common symptoms of shock include rapid breathing, rapid heart rate, low blood pressure, confusion or disorientation, and pale or cool skin. If left untreated, shock can lead to organ failure and even death.
Effective treatment of shock depends on identifying the underlying cause and quickly providing appropriate interventions. This may include providing high-flow oxygen, addressing the underlying cause (such as stopping severe bleeding), and closely monitoring the patient's vital signs.
Shock is a life-threatening medical condition that can occur in a variety of situations, including trauma, infection, and severe bleeding. It's important for firefighters and other first responders to be able to recognize the signs and symptoms of shock and to know how to treat it effectively.
First responders at a car crash scene attending to a patient in shock.
What is shock
When the body enters a state of shock, it undergoes a process called vasoconstriction. This is where the blood vessels throughout the body narrow and constrict in an attempt to redirect blood flow to the body's core organs, such as the heart, lungs, and brain. This is a protective mechanism that allows the body to prioritize blood flow to the most vital organs during times of stress or injury.
However, this process of vasoconstriction can have negative effects on other parts of the body. Blood flow to the extremities, such as the arms and legs, can be significantly reduced, which can lead to cold, clammy skin and impaired wound healing. The kidneys may also be affected, as decreased blood flow to the kidneys can lead to decreased urine output and impaired kidney function.
If shock is not addressed and blood flow to the body's core organs is not restored, the body's compensatory mechanisms may become overwhelmed and ineffective. This can lead to a state of decompensation, where the body's vital organs begin to fail and serious complications can occur.
What does shock look like?
Shock is characterized by a lack of oxygen and nutrients to the body's tissues and organs. This can cause a range of symptoms, including:
Rapid heart rate and breathing
Low blood pressure
Cold, clammy skin
Confusion or disorientation
Weakness or fatigue
Nausea or vomiting
Different types of shock
There are several different types of shock, each with their own unique causes and characteristics:
Hypovolemic shock occurs when there is a significant loss of blood or other fluids from the body, such as from a severe injury or dehydration.
Cardiogenic shock is caused by a heart that is unable to pump blood effectively due to damage or disease.
Obstructive shock occurs when there is a physical blockage that prevents blood from circulating properly, such as from a blood clot or a collapsed lung.
Distributive shock is caused by a disruption of the body's natural balance of fluids and can be the result of severe infection, an allergic reaction, or neurological damage.
Treatment
Administering high-flow oxygen:
One of the first steps in treating someone in shock is to provide high-flow oxygen. This can help improve oxygen delivery to the body's tissues and organs.
Addressing the underlying cause:
Depending on the type of shock, there may be an underlying cause that needs to be addressed. For example, if the shock is caused by severe bleeding, the bleeding must be stopped in order to effectively treat the shock.
Monitoring vital signs:
It's important to monitor the patient's vital signs, including their heart rate, blood pressure, and oxygen saturation levels, in order to determine the effectiveness of treatment and make any necessary adjustments.
It's important to note that the specific treatment for shock will vary depending on the underlying cause and the patient's individual needs. Therefore, it's crucial for first responders to be properly trained and equipped to identify and treat shock in a timely and effective manner.
Training
At Delta Emergency Support Training, we understand the importance of being prepared for emergency situation. We offer a range of training sessions to help individuals and classes develop the skills and knowledge they need to respond to emergency situations. Our courses include Standard First Aid (SFA), Advanced First Aid (AFA), and Emergency Medical Responder (EMR), and we offer in-person, hybrid, and online options to suit different needs.
If you have any questions about our training sessions or shock, please don't hesitate to reach out to us. You can contact us at info@deltaemergency.com and we'll be happy to assist you.
Understanding Hypoxia: A Firefighters guide
Hypoxia is a serious medical condition that can be caused by a range of factors, including respiratory conditions, cardiac emergencies, trauma, and drug overdose. However, one potential cause that is often overlooked is smoke inhalation and carbon monoxide (CO) poisoning.
Inhaling smoke from a fire can expose individuals to high levels of CO, a poisonous gas that can cause hypoxia by binding to hemoglobin in the blood and reducing the amount of oxygen that can be carried to the body's tissues. It's important to note that carbon monoxide poisoning can cause the SpO2 monitor to read a normal oxygen saturation level, even when the individual is experiencing hypoxia. Therefore, administering high-flow oxygen is crucial for any fire patient, as it can help displace carbon monoxide and increase the amount of oxygen available to the body's tissues.
As an advanced first aider, it's important to be familiar with the signs and symptoms of hypoxia, particularly in cases of smoke inhalation and CO poisoning. Symptoms may include cyanosis, shortness of breath, and altered mental status. Administering high-flow oxygen and working closely with emergency medical services personnel and hospital staff can help ensure that individuals receive appropriate care and follow-up treatment for their condition.
Overall, understanding the potential for hypoxia in smoke inhalation and carbon monoxide poisoning is critical for providing effective care in the prehospital setting. Administering high-flow oxygen and working closely with other healthcare providers can help ensure that individuals receive timely and effective treatment for their condition.
What is Hypoxia?
Hypoxia is a condition where there is a decrease in the amount of oxygen reaching the body's tissues.
a small medical device that is used to measure oxygen saturation levels in the blood. The device features a digital display screen and clips onto a person's finger. The screen displays a 98% SPO2 reading.
Causes of Hypoxia
Hypoxia can be caused by a variety of factors, including pulmonary disorders, cardiovascular disease, trauma, carbon monoxide poisoning, and drug overdose. Given the frequency of these causes in their work, firefighters must be prepared to recognize and manage hypoxia in emergency situations.
Overall, understanding the potential causes of hypoxia and being prepared to manage this potentially life-threatening condition is critical for firefighters and other first responders.
Respiratory emergencies:
Conditions such as asthma, chronic obstructive pulmonary disease (COPD), and pneumonia can impair the lungs' ability to transfer oxygen to the blood, leading to hypoxia.
Individuals with respiratory conditions may experience shortness of breath, rapid breathing, and wheezing, which can indicate a lack of oxygen in the body. These symptoms can worsen during periods of physical exertion, stress, or exposure to environmental triggers such as allergens or pollutants.
Cardiac emergencies:
Cardiac emergencies are another potential cause of hypoxia in the prehospital setting. Conditions such as heart failure, heart attack, and pulmonary embolism can reduce blood flow to the body's tissues, leading to hypoxia.
When the heart is unable to pump blood effectively, the body may not receive sufficient oxygen, resulting in hypoxia. Individuals with cardiac emergencies may experience symptoms such as chest pain, shortness of breath, and rapid or irregular heartbeat, which can indicate a lack of oxygen to the tissues.
Trauma:
When an individual experiences severe trauma, such as from a motor vehicle accident or a fall, they may sustain injuries that impede their ability to breathe and deliver oxygen to their tissues.
Injuries such as broken ribs or a collapsed lung can interfere with the normal mechanics of breathing, preventing sufficient oxygen intake. Additionally, traumatic injuries can cause significant bleeding, reducing the body's ability to transport oxygen to the tissues. In some cases, trauma can also lead to shock, which can result in decreased oxygen delivery to the tissues.
Carbon monoxide poisoning:
When individuals inhale smoke from a fire, they may be exposed to high levels of carbon monoxide, a poisonous gas that can cause hypoxia by binding to the hemoglobin in the blood, reducing the amount of oxygen that can be carried to the body's tissues.
A complication with carbon monoxide poisoning is that it can lead to a false readings when using an SpO2 monitor. This is because carbon monoxide can bind to hemoglobin in a similar way to oxygen, which can cause the SpO2 monitor to read a normal oxygen saturation level, such as 99%. However, even if the SpO2 reading appears normal, the individual may still be experiencing hypoxia due to carbon monoxide poisoning.
Therefore, it's important to always administer high-flow oxygen to any fire patient, including those who have potentially been exposed to carbon monoxide. Providing high-flow oxygen can help to displace carbon monoxide from hemoglobin and increase the amount of oxygen available to the body's tissues.
Drug overdose:
Many drugs, particularly opioids and sedatives, can cause respiratory depression, which means that an individual's breathing rate is reduced and they may not receive enough oxygen.
Symptoms of Hypoxia
The symptoms of hypoxia can vary depending on the severity of the condition and the underlying cause. Some common symptoms of hypoxia include shortness of breath, rapid or shallow laboured breathing, cyanosis (bluish tint to the skin), confusion or disorientation, headache, fatigue, nausea, rapid heartbeat, and dizziness or lightheadedness.
How to Check for Hypoxia Using an SpO2 Monitor
As an advanced first aider who is allowed to treat with oxygen, it's important to understand how to check for hypoxia using an SpO2 monitor. An SpO2 monitor measures the oxygen saturation in the blood, which can help determine if an individual is experiencing hypoxia.
To use an SpO2 monitor, follow these steps:
Turn on the monitor and place the sensor on the individual's fingertip.
Wait for the monitor to display the oxygen saturation percentage.
Take note of the percentage and compare it to normal levels.
What Percentage of Oxygen on the Monitor Indicates Different Severities of Hypoxia?
Normal oxygen saturation levels are typically between 95-100%. If the oxygen saturation level is below 95%, it may indicate hypoxia. The severity of hypoxia can be determined by the following percentage ranges:
Mild hypoxia: Oxygen saturation level between 90-94%.
Moderate hypoxia: Oxygen saturation level between 80-89%.
Severe hypoxia: Oxygen saturation level below 80%.
It's important to note that an SpO2 monitor is not a definitive diagnosis of hypoxia and should be used in conjunction with other symptoms and clinical assessments.
Treatment of Hypoxia
As an advanced first aider who is allowed to treat with oxygen, your first step in treating hypoxia is to administer high flow O2 via NRB (Non Rebreather) or BVM (Bag Valve Mask).
Administering supplemental oxygen is a key treatment measure for hypoxia, but it's also important to address the underlying condition that is causing the hypoxia. This may involve working closely with other healthcare providers, such as respiratory therapists or emergency medical services personnel, to provide comprehensive care.
Overall, as an advanced firefighter, being familiar with the causes, symptoms, treatment, and prevention of hypoxia can help you provide effective care and support to individuals who are experiencing this potentially life-threatening condition.
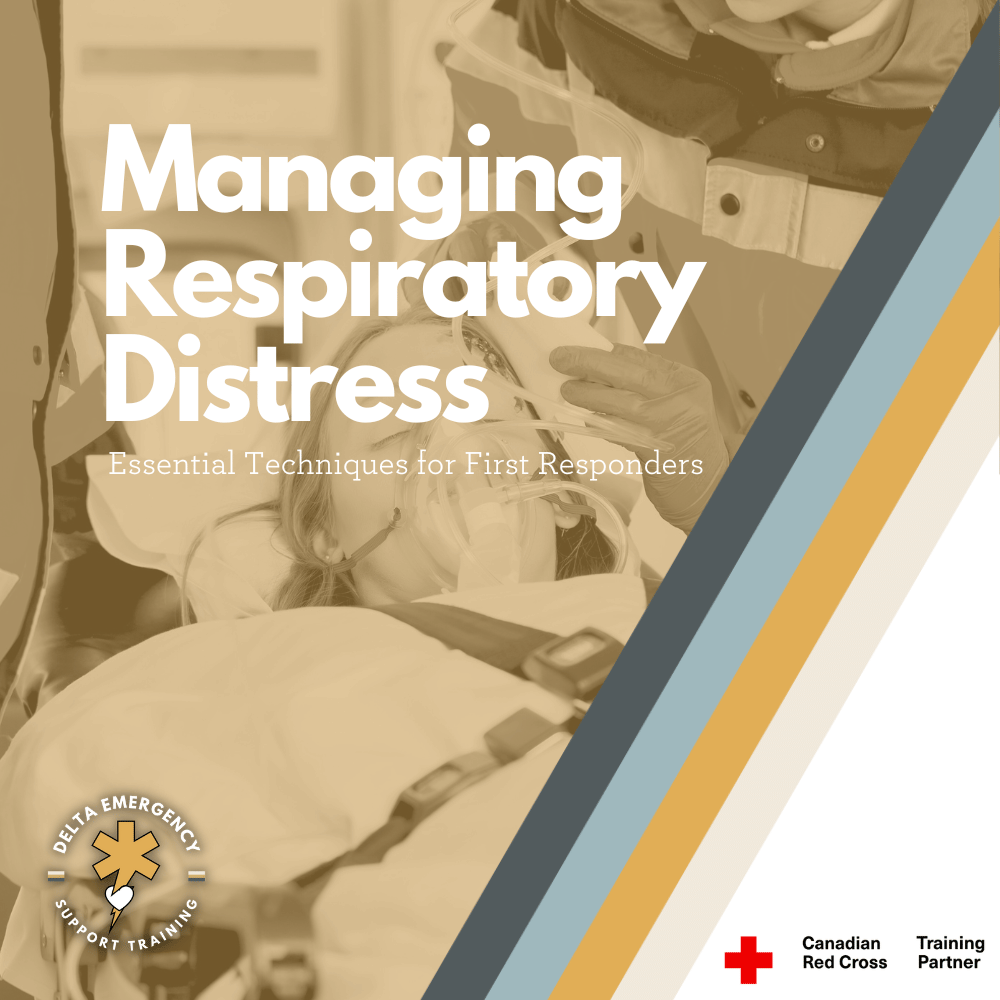
Managing Respiratory Distress: Essential Techniques for First Responders
First responders play a critical role in emergency situations, including managing the breathing of patients. In this blog, we will discuss the importance of breathing management for first responders and provide tips for ensuring the best possible outcomes for patients.
As a first responder, proper breathing management is essential for providing effective care to patients in respiratory distress. Understanding the anatomy of the respiratory system, recognizing signs and symptoms of respiratory distress, and maintaining normal breathing rates are all important aspects of breathing management. In this post, we'll explore these topics in the context of first responders.
The first responder has placed an oxygen mask, known as a non-rebreather, over the patient's nose and mouth. The non-rebreather has a bag that fills with oxygen, which allows the patient to receive a high concentration of oxygen with each breath. The non-rebreather mask is used to treat patients who are experiencing respiratory distress or who require high levels of oxygen.
Anatomy of the Respiratory System
As a first responder, it's important to have a basic understanding of the anatomy of the respiratory system. The respiratory system consists of several parts that work together to facilitate breathing. The main organs involved in breathing are the lungs, which are located in the chest. The lungs are made up of millions of tiny air sacs called alveoli, which are responsible for exchanging gases with the blood. The trachea, or windpipe, connects the lungs to the mouth and nose, while the diaphragm is a muscle that helps with breathing by contracting and relaxing. The bronchi are the tubes that branch off from the trachea and lead to the lungs, and the bronchioles are smaller tubes that branch off from the bronchi and lead to the alveoli.
Signs and Symptoms of Respiratory Distress
As a first responder, it's important to recognize the signs and symptoms of respiratory distress. These may include:
Shortness of breath:
Feeling like you can't get enough air, or struggling to breathe, is a common symptom of respiratory distress.
Rapid breathing:
Breathing faster than normal, or taking shallow breaths, may be a sign of respiratory distress.
Chest pain:
Pain or discomfort in the chest can be a sign of a serious respiratory problem.
Wheezing/Stridor:
A high-pitched whistling sound when breathing may indicate narrowing of the airways.
Cyanosis:
This can indicate a lack of oxygen in the blood.
Confusion:
Lack of oxygen can cause confusion or disorientation.
Fatigue:
Difficulty breathing can cause fatigue or weakness.
Maintaining Normal Breathing Rates
As a first responder, it's important to know the normal breathing rates for adults and children. The normal breathing rate for an adult is around 12-20 breaths per minute, while the normal breathing rate for a child is higher, around 20-40 breaths per minute. However, certain conditions can cause abnormal breathing rates. For example, respiratory distress can cause rapid, shallow breathing, while other conditions, such as sleep apnea, can cause periods of slowed or paused breathing.
Breathing Management
Proper breathing management is essential for providing effective care to patients in respiratory distress. As a first responder, here are some tips for managing breathing:
Administer oxygen:
Depending on the severity of the patient's respiratory distress, administering oxygen may be necessary. The appropriate oxygen delivery device should be used based on the patient's level of respiratory distress.
Position the patient:
Positioning the patient in a way that maximizes their breathing capacity can be helpful. For example, placing the patient in a sitting position with their head slightly elevated may make it easier for them to breathe.
Provide assisted ventilation:
In some cases, conscious bagging with a bag valve mask may be necessary to help the patient normalize their breathing rate.
Transport the patient to a medical facility:
If the patient's respiratory distress is severe, transport them to a medical facility for further treatment.
Oxygen masks and flow rates
Breathing masks are a crucial piece of equipment for first responders, as they allow them to provide oxygen to patients in respiratory distress. There are several types of breathing masks available, each with its own specific use and oxygen flow rate. In this post, we'll explore the different types of breathing masks commonly used by first responders, including the nasal cannula, simple face mask, non-rebreather mask, and bag valve mask.
Nasal Cannula
The nasal cannula is a type of oxygen delivery device that is used to provide oxygen to patients with mild to moderate respiratory distress. It is a thin tube that is inserted into the nostrils and is held in place by a strap that goes around the patient's head. The nasal cannula is typically used to deliver low to medium oxygen flow rates, typically ranging from 1 to 6 liters per minute (LPM).
Simple Face Mask
The simple face mask is another type of oxygen delivery device that is used to provide oxygen to patients with respiratory distress. It covers the nose and mouth and is held in place by an elastic strap that goes around the patient's head. The simple face mask is typically used to deliver medium to high oxygen flow rates, typically ranging from 5 to 10 LPM.
Non-Rebreather Mask
The non-rebreather mask is a type of face mask that is used to deliver high concentrations of oxygen to patients with severe respiratory distress. It covers both the nose and mouth and has a one-way valve that allows the patient to inhale oxygen from a reservoir bag. The non-rebreather mask is typically used to deliver high oxygen flow rates, ranging from 10 to 15 LPM.
Bag Valve Mask
The bag valve mask, also known as a manual resuscitator, is a handheld device that is used to provide positive pressure ventilation to patients in respiratory distress. It consists of a bag that is attached to a mask and is used to deliver oxygen to the patient's lungs. The bag valve mask is typically used to deliver high oxygen flow rates, ranging from 10 to 15 LPM.
By following proper breathing management techniques, first responders can help ensure that patients receive the oxygen they need to survive, while also ensuring their own safety in emergency situations.
At Delta Emergency Support Training, we understand the importance of being prepared for medical emergencies. We offer a range of training sessions to help individuals and classes develop the skills and knowledge they need to respond to emergency situations. Our courses include Standard First Aid (SFA), Advanced First Aid (AFA), and Emergency Medical Responder (EMR), and we offer in-person, hybrid, and online options to suit different needs.
If you have any questions about our training sessions or medical emergencies in general, please don't hesitate to reach out to us. You can contact us at info@deltaemergency.com and we'll be happy to assist you.

