The Delta Dispatch
Navigating the Storm: Dealing with Combative Patients as a First Responder
In the realm of first responders, the challenges are many, and the stakes are high. They are the heroes who rush to the scenes of emergencies, offering crucial medical assistance to individuals in their most vulnerable moments. Yet, within this high-stress environment, first responders often encounter patients who are not just physically unwell but also emotionally distressed, agitated, and combative.
In the realm of first responders, the challenges are many, and the stakes are high. They are the heroes who rush to the scenes of emergencies, offering crucial medical assistance to individuals in their most vulnerable moments. Yet, within this high-stress environment, first responders often encounter patients who are not just physically unwell but also emotionally distressed, agitated, and combative. In this blog, we will delve into the world of first responders, explore the reasons behind patient agitation, and unravel the essential art of deescalation techniques. We'll also emphasize the significance of adhering to local protocols to ensure a seamless and safe response.
Hand reaching out for help.
Understanding the Storm
First responders often find themselves in situations where emotions run high and tensions soar. To navigate these turbulent waters effectively, it's essential to understand why some individuals become combative in these challenging circumstances:
Fear and Anxiety:
It's no surprise that the fear of the unknown, pain, or invasive medical procedures can trigger intense anxiety. For many patients, it's the fear of the unseen that sends them into a frenzy.
Loss of Control:
The loss of control over their situation can make patients feel helpless and agitated. This loss of power can manifest as anger or aggression.
Past Trauma:
Some individuals carry the scars of previous negative experiences with healthcare providers or traumatic medical incidents. These past traumas can lead to a deep-seated fear of doctors, medical procedures, or paramedics.
Mental Health Challenges:
For patients with underlying mental health conditions, managing emotions can be a daunting task. In these cases, agitation may be a manifestation of their struggles.
Mastering the Art of Deescalation
First responders are not just skilled in providing medical care; they are also trained in the art of deescalation. Their ability to defuse tense situations is crucial to ensure the safety of both themselves and their patients. Here are some invaluable deescalation techniques they employ:
Stay Calm and Composed:
In the midst of chaos, first responders maintain a demeanor of calm and composure. Their emotional stability can have a profound impact on the patient's emotional state.
Active Listening:
Listening attentively to the patient's concerns and fears is the first step in deescalation. Empathetic listening goes a long way in acknowledging their feelings.
Use Verbal Communication:
They communicate clearly and concisely, avoiding medical jargon and explaining procedures in simple terms.
Respect Personal Space:
A safe distance is maintained to prevent patients from feeling threatened. Respecting their physical boundaries is crucial.
Non-Threatening Body Language:
First responders employ open and non-threatening body language, with open palms and a relaxed posture.
Offer Choices:
Whenever possible, patients are given choices to make them feel more in control of their situation.
Assess for Pain:
Addressing pain promptly is vital, as it can exacerbate agitation. First responders aim to alleviate pain as part of their deescalation strategy.
Involve Family and Friends:
If appropriate, they involve loved ones to provide emotional support and comfort.
Reinforce Positive Behavior:
Praising the patient for cooperation and positive behavior can be a powerful deescalation tool.
Seek Backup:
If the situation escalates beyond their control, first responders are not afraid to call for additional assistance, whether from law enforcement or psychiatric professionals.
The Role of Local Protocols
In the unpredictable world of first response, adherence to local protocols is a guiding star. These protocols are the compass that ensures first responders are on course. Here's why they are crucial:
Legal and Ethical Compliance:
Local protocols are rooted in legal and ethical standards, ensuring that first responders operate within the boundaries of the law while upholding ethical principles.
Consistency in Care:
Standardized protocols guarantee consistency in patient care, a vital factor in maintaining quality and minimizing risks associated with combative behavior.
Patient Safety:
Protocols prioritize patient safety, providing a structured framework for responding to emergencies while minimizing harm.
Minimizing Liability:
Following protocols can protect first responders and their agencies from potential legal liability, offering a robust defense in the event of adverse outcomes.
Effective Communication:
Protocols include guidelines for effective communication with other healthcare professionals, law enforcement, and dispatchers, facilitating a coordinated response.
Training and Preparedness:
Protocols are integrated into training programs, ensuring that first responders are well-prepared to navigate high-stress situations with confidence.
Patient Rights and Dignity:
Protocols often emphasize respecting patient rights and maintaining their dignity, even in the most challenging circumstances.
Conclusion
First responders are the unsung heroes who brave the storm of emergencies to provide critical medical assistance. In doing so, they often encounter patients who are emotionally distressed and combative. By mastering the art of deescalation, they transform these tumultuous situations into opportunities for healing and reassurance. With calm, empathetic communication and adherence to local protocols, first responders ensure the safety and well-being of both patients and themselves. They embody the essence of compassion and professionalism, making a difference in people's lives during their most vulnerable moments.
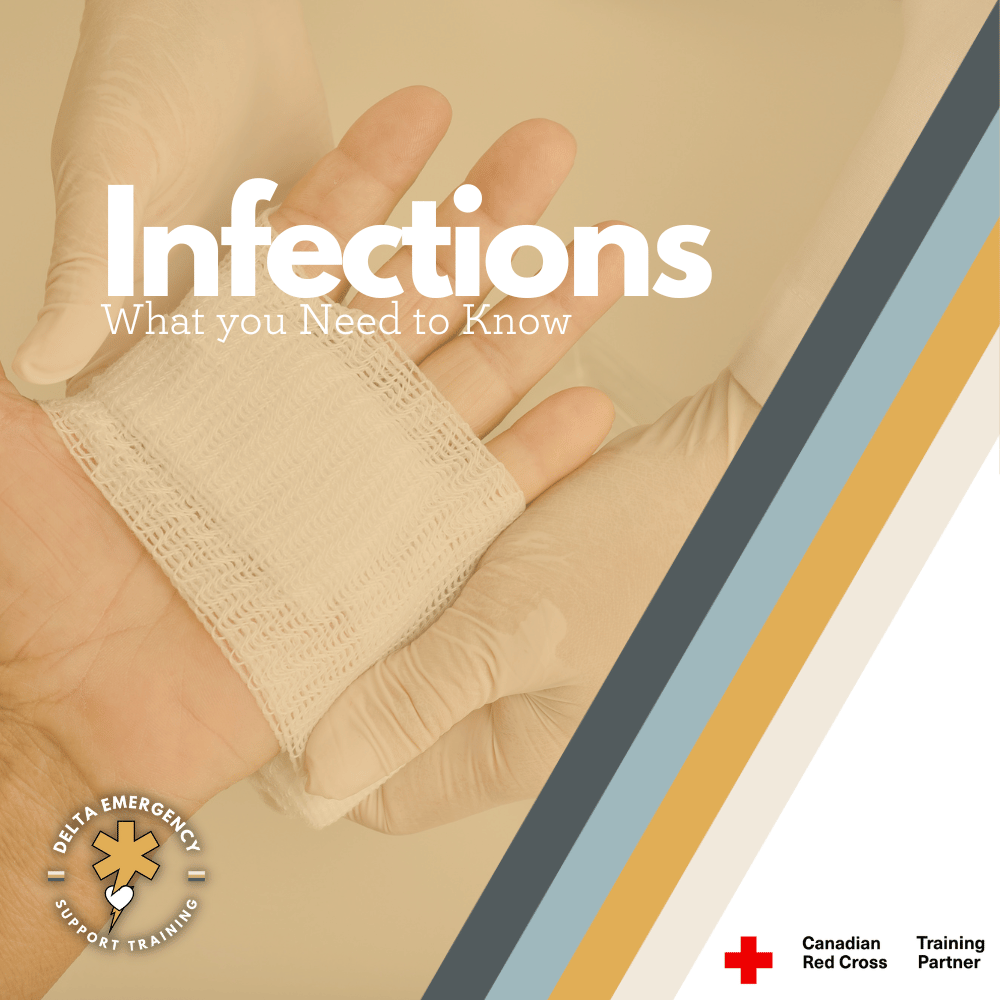
Infections: What you Need to Know
Infections can strike when you least expect them, but with the right knowledge and precautions, you can fortify your defenses. From the basics of wound care to identifying the early signs of infection, this guide has you covered. Explore the lurking danger of tetanus and the grave consequences of gangrene, and learn how to protect yourself and your loved ones. Your health is your most valuable asset, and understanding infections is the first step in defending it.
1. Wound Infections: A Common Threat
Medical professional wrapping a patients hand wound in steril bandages.
Any Wound is at Risk for Infection:
Whether it's a minor paper cut, a scraped knee, or a deep gash, any wound presents an opportunity for infection. Bacteria, viruses, and other pathogens are present everywhere, and they can easily enter the body through an open wound.
Cleaning the Wound:
Proper wound cleaning is critical. Use mild soap and clean, lukewarm water to gently wash the wound. Rinse thoroughly to remove any debris or foreign particles. Avoid harsh scrubbing, as this can damage delicate tissues.
Avoid Touching the Wound:
Always handle wounds with clean, sterile hands or instruments. Even a brief touch with unsterile hands can introduce harmful microbes, increasing the risk of infection.
Hemorrhage Control:
In cases of severe bleeding or extensive tissue damage, controlling the bleed is a priority. Apply pressure using a clean cloth or bandage and seek immediate transportation to a medical center.
Medical Care:
Once at a medical facility, healthcare professionals will perform a more thorough cleaning of the wound. They may also prescribe antibiotics to prevent or treat infection, especially if the wound is deep, contaminated, or at risk of infection.
2. Recognizing Infection Signs
Redness:
Infection often manifests as redness around the wound. This redness may gradually spread if the infection is left untreated.
Swelling:
Inflammation and swelling are natural responses to infection. The infected area might become noticeably larger than usual.
Increased Temperature:
An infected wound can feel warm or hot to the touch due to increased blood flow and inflammation in the area.
Throbbing Sensation:
Pain associated with an infected wound can intensify and take on a throbbing quality. This pain is typically more persistent than the initial injury-related pain.
Pus Formation:
Pus, a thick fluid, is a sign that the body is trying to fight off infection. The color of pus can vary (white, yellow, or green) and often indicates the presence of bacteria.
If an infection is not addressed promptly, it can extend to surrounding tissues and, in severe cases, even reach bones. In some instances, the infection can enter the circulatory system, leading to a systemic infection.
3. Systemic Infections: A Serious Threat
Red Streaks:
If you notice red streaks extending from the wound site, it's a sign that the infection might be spreading systemically. This is a crucial warning sign.
Flu-Like Symptoms:
Systemic infections often present with flu-like symptoms, including fever, muscle aches, fatigue, and chills. These symptoms indicate that the infection has reached the bloodstream and is affecting the entire body.
Prompt medical attention is essential if you suspect a systemic infection, as these can become life-threatening if left untreated.
4. Tetanus: A Lurking Danger
Tetanus:
Tetanus is caused by the bacterium Clostridium tetani, which is commonly found in soil and on rusty metal objects. This bacterium produces a potent toxin that affects the central nervous system and specific muscles.
Symptoms:
Tetanus can lead to difficulty swallowing, irritability, persistent headaches, fever, and muscle spasms, often near the infected area. It's sometimes referred to as "lockjaw" because facial muscles can contract severely.
Prevention:
The most effective way to protect against tetanus is vaccination, which typically provides immunity for 5-10 years. Ensure you stay up-to-date with tetanus shots, especially if you sustain a wound that may expose you to the bacterium.
5. Gangrene: A Grave Consequence
Bacterial Thriving:
Gangrene is caused by bacteria that thrive in environments lacking oxygen. It can also occur when blood flow to an area is compromised, leading to tissue death.
Symptoms:
Gangrene often presents with sudden, intense pain, swelling of the affected area, discolored tissues (which can range from black to blue to green), a foul-smelling discharge that is highly infectious, and sometimes a slight fever.
Necrotizing Fasciitis:
In rare cases, gangrene can progress to necrotizing fasciitis, a rapidly progressing and extremely painful infection often referred to as "flesh-eating disease." A distinctive characteristic is the presence of air bubbles beneath the skin.
If you suspect gangrene or experience symptoms associated with it, seek immediate medical help. Prompt treatment is essential to prevent further tissue damage and complications.
Conclusion
At Delta Emergency Support Training, we take your health seriously. In our first aid and advanced first aid classes, we provide comprehensive education on infections and wound care. Our courses are designed to equip you with the skills and knowledge needed to handle these situations effectively. Whether it's understanding the nuances of wound care, recognizing the early signs of infection, or learning about the specific risks associated with conditions like tetanus and gangrene, we've got you covered.
Infections can strike at any time, and being prepared is your best defense. Stay informed, proactive, and confident in your ability to protect your health. Join Delta Emergency Support Training today and take the first step towards becoming a health-conscious guardian of your well-being.
Pain Assessments for Patients: A Crucial Skill for Professional Responders
In the high-stress world of professional emergency response, the ability to assess and manage pain effectively is paramount. Every second counts, and understanding a patient's pain is often the first step towards providing the right care. In this blog, we delve into the OPQRRRST format for pain assessments, breaking down each component to equip you with the skills needed to excel in roles like firefighting, paramedicine, and more. Pain assessment isn't just about addressing discomfort; it's about saving lives. Read on to discover why it matters, how to do it, and why Delta Emergency is your partner in authentic, hands-on training.
Professional responders, your ability to assess and manage pain effectively can make a profound difference in a patient's experience and outcome. While your primary focus is on providing immediate care and stabilizing the patient's condition, it's important to remember that pain assessments are a critical component of your secondary assessment. These assessments not only offer insights into the patient's discomfort but also guide your decision-making process in providing timely and appropriate interventions.
Paramedic preforming a secondary assessment including a OPQRRRST pain assessment.
In the dynamic and often high-stress environment of professional response, a structured approach to pain assessment, such as the OPQRRRST format, becomes an invaluable tool. It empowers you to gather crucial information efficiently, ensuring that no vital detail is overlooked in the midst of urgency and complexity. Through this blog, we will embark on a comprehensive journey through each component of the OPQRRRST format, equipping you with the knowledge and skills necessary to master this essential aspect of your role as a professional responder.
Onset - "When Did the Pain Start?"
When a patient experiences pain, it's essential to understand when it first began. This information can help differentiate between acute and chronic pain. Acute pain typically has a sudden onset and is often related to a specific event or injury, such as a fall or an accident. On the other hand, chronic pain persists over a longer period, often months or even years, and may develop gradually.
Ask the patient about the circumstances surrounding the pain's onset. Did it start after a particular incident or activity? Did it come on suddenly without any apparent cause? Knowing when the pain started can provide critical clues about its origin and potential causes.
Provocation - "What Makes It Worse?"
To gain a deeper understanding of the pain, inquire about factors that worsen it. Patients may have specific triggers or actions that exacerbate their discomfort. For example, for a patient with a musculoskeletal injury, movements or certain positions might worsen the pain. For a patient with gastrointestinal issues, eating certain foods might aggravate abdominal pain.
Identifying provocation factors is crucial for managing the patient's immediate comfort and for determining whether further medical investigations or interventions are necessary.
Quality - "Can You Describe Your Pain in Your Own Words?"
Pain quality is a subjective aspect that can provide valuable insights into the nature of the pain. Encourage the patient to describe their pain using descriptive terms. For instance, they might use words like "stabbing," "burning," "throbbing," "aching," or "cramping" to characterize their pain.
Understanding the pain's quality can help you differentiate between various types of pain. For example, sharp, stabbing pain might indicate nerve involvement, while a dull, aching sensation could be indicative of inflammation or muscle strain.
Region - "Can You Draw a Circle Around the Painful Area?"
Identifying the precise location of pain is crucial for pinpointing the source of the issue. Ask the patient to point to or mark the specific area where they feel pain. This can help you visually assess if there are any visible signs of injury, swelling, or redness in that region.
In cases of referred pain, where the pain is felt in a different area than its source, this step can aid in identifying the primary cause. For example, pain in the left arm could be referred pain from a heart issue.
Radiation - "Does the Pain Radiate Anywhere?"
Pain often doesn't stay localized; it can radiate or spread to other areas of the body. Ask the patient if they feel discomfort in areas adjacent to the primary pain site. Radiation patterns can provide valuable diagnostic clues.
For instance, if a patient with a herniated disc reports back pain that radiates down one leg (sciatica), it suggests nerve compression in the spine as the source of pain.
Relief - "Does Anything Provide You Relief?"
Identifying what alleviates the patient's pain is crucial for managing their discomfort effectively. Inquire if there are specific actions, medications, or interventions that provide relief. This information helps you determine appropriate pain management strategies.
For example, if a patient with a headache mentions that lying in a dark, quiet room provides relief, you can recommend this as a non-pharmacological intervention.
Severity - "Rate Your Pain on a 0-10 Scale"
Quantifying pain severity on a scale of 0 to 10 allows for a standardized assessment. It helps you understand the intensity of the patient's pain and track changes over time. This numerical rating also assists in evaluating the effectiveness of pain management interventions.
Patients should be encouraged to provide an honest assessment of their pain level, as this aids in tailoring treatment plans to their specific needs.
Time - "Is the Pain Constant or Does It Come and Go?"
Understanding the temporal characteristics of pain is essential. Inquire whether the pain is constant or intermittent. Does it have a specific pattern, such as occurring at certain times of the day or in response to specific activities or movements?
For example, pain that occurs only during physical activity but subsides at rest could indicate a musculoskeletal issue. Conversely, constant, unrelenting pain might be suggestive of an ongoing medical condition.
In the challenging and dynamic realm of professional response, mastering the OPQRRRST format for pain assessment is an indispensable skill that can significantly impact patient care and outcomes. As a professional responder, your commitment to providing compassionate and effective care begins with your ability to understand and manage pain.
At Delta Emergency, we understand the importance of equipping new professional responders, whether they are entering the world of firefighting, paramedicine, or other critical roles, with the knowledge and skills needed to excel in their mission of saving lives. Our advanced first aid classes are meticulously designed to provide comprehensive training in pain assessment and various aspects of emergency response.
We invite you to join our community of dedicated professionals and embark on a journey toward excellence in patient care. Sign up with Delta today for an authentic and immersive training experience that will prepare you to face the challenges of the field with confidence and competence. Together, we can make a difference when it matters most.
Empowering Lives Through Training: Delta Emergency as a Red Cross Training Partner
The Red Cross, an emblem of humanitarian aid, has been at the forefront of disaster response and readiness for generations. They offer an array of training programs designed to equip individuals with essential skills for emergencies and crises. A Red Cross Training Partner is an organization that joins forces with the Red Cross to deliver certified training courses to individuals, workplaces, schools, and communities. This partnership ensures consistent, accurate, and up-to-date training aligned with the latest guidelines and best practices. One such partner, Delta Emergency, exemplifies this commitment through their collaboration, enriching lives with essential knowledge and empowering individuals to navigate emergencies with confidence.
In a world where emergencies can strike unexpectedly, being equipped with life-saving skills becomes paramount. This is where organizations like Delta Emergency step in, playing a pivotal role in preparing individuals to respond effectively during crises. As a Red Cross Training Partner, Delta Emergency takes its commitment to emergency preparedness to the next level.
Person wearing military uniform holding a jaw thrust on a manikin.
What is a Red Cross Training Partner?
The Red Cross, an internationally recognized humanitarian organization, has been at the forefront of disaster response and preparedness for over a century. They offer a wide range of training programs that empower individuals with essential skills to respond to emergencies, provide first aid, and support communities in times of crisis.
A Red Cross Training Partner is an organization that collaborates closely with the Red Cross to deliver certified training courses to individuals, workplaces, schools, and communities. These partners uphold the highest standards set by the Red Cross, ensuring that training is consistent, accurate, and aligned with the latest guidelines and best practices.
Delta Emergency: Empowering Lives Through Training
Delta Emergency, as a Red Cross Training Partner, embodies a commitment to excellence in emergency preparedness and response training. Through this partnership, Delta Emergency gains access to the Red Cross's wealth of knowledge, resources, and training materials. This collaboration enables Delta Emergency to offer a comprehensive range of Red Cross-certified courses, empowering individuals and organizations to be well-prepared when emergencies strike.
Benefits of Red Cross-Certified Training:
Credibility:
Red Cross certification is globally recognized and trusted. Courses offered by Delta Emergency carry the weight of a respected humanitarian organization, enhancing the credibility of the training.
Quality Assurance:
Red Cross training courses are meticulously designed by experts, ensuring that participants receive accurate, up-to-date, and reliable information. This quality assurance is crucial for building effective emergency response skills.
Comprehensive Curriculum:
Delta Emergency's Red Cross-certified courses cover a wide spectrum of topics, including Advanced First Aid, Standard First Aid, and the Babysitting course. From first aid and CPR to disaster response and psychological support, participants gain a well-rounded understanding of how to handle various emergency situations.
Life-Saving Skills:
Delta Emergency's partnership with the Red Cross equips individuals with practical skills that can make a life-saving difference. These skills can be applied not only in emergencies but also in daily life situations.
The Path to Empowerment:
By partnering with the Red Cross, Delta Emergency is enabling individuals and communities to be proactive in their approach to emergencies. Through these certified training courses, Delta Emergency is not only imparting essential skills but also fostering a culture of preparedness, resilience, and compassion.
Our Dedicated Team: Critical Care Paramedics, Advanced Care Paramedics, and Fire-Trained Instructors
At Delta Emergency, our commitment to excellence is upheld by our dedicated team. Our staff includes critical care paramedics, advanced care paramedics, and fire-trained instructors. Their expertise, combined with our Red Cross Training Partner status, ensures that our courses, including Advanced First Aid, Standard First Aid, and the Babysitting course, are taught with the highest level of professionalism and practical knowledge.
In conclusion, Delta Emergency's role as a Red Cross Training Partner underscores their dedication to equipping people with the tools needed to respond effectively in emergencies. This collaboration amplifies the impact of their training programs, ensuring that individuals are empowered to make a positive difference when it matters most. Through the combined efforts of Delta Emergency and the Red Cross, communities can face the unpredictable future with greater confidence and readiness.
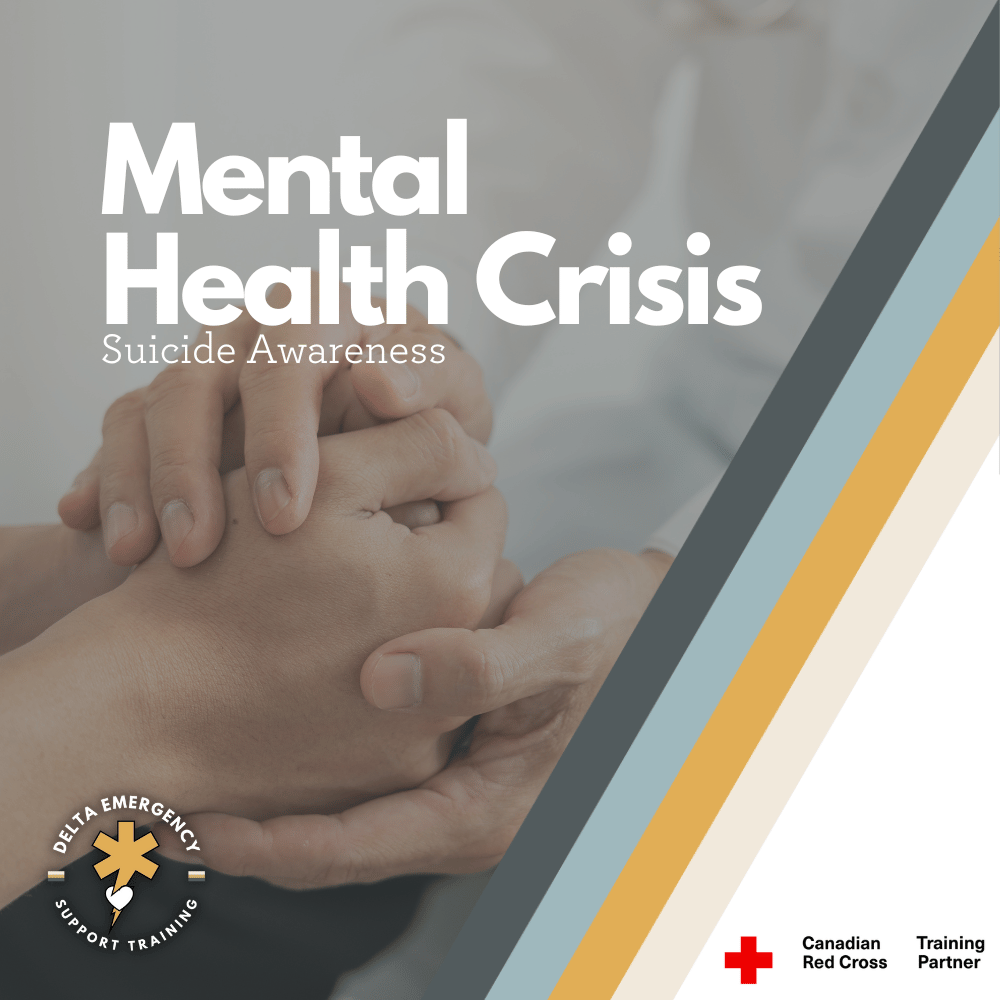
Breaking the Silence: Empowering First Responders in the Battle Against Suicide
In the face of rising suicide rates, first responders are stepping up as champions of change. Through open discussions on mental health and the dismantling of societal stigma, they are reshaping the landscape of support and prevention. Join us as we delve into their pivotal role in battling suicide head-on, offering hope, understanding, and a path toward healing.
Trigger warning: Discussion of suicide and mental health crisis
Patient holding hands and being CONSOLED by a medical professional
Impact of Suicide in Canada
Suicide casts a wide-reaching shadow over people of all ages and backgrounds in Canada. The sobering statistics underscore the urgency of addressing this crisis
Annually, approximately 4,500 individuals in Canada succumb to suicide, translating to an average of 12 lives lost each day.
For each person lost to suicide, numerous others grapple with thoughts of suicide or engage in suicide attempts.
Every day witnesses over 200 suicide attempts across Canada.
Tragically, every death by suicide impacts at least 7 to 10 individuals as survivors, significantly affected by the loss.
Higher-Risk Populations:
Certain segments of the Canadian population are particularly susceptible to higher rates of suicide:
Men and Boys: This demographic experiences heightened rates of suicide.
Individuals Serving Federal Sentences: Those within this group are also at an increased vulnerability to suicide.
Survivors of Suicide Loss and Attempts: Individuals who have lost a loved one to suicide or have personally attempted suicide face an elevated level of risk.
Specific Indigenous Communities: Certain First Nation and Métis communities, particularly among youth, alongside all Inuit regions in Canada, contend with elevated rates of suicide.
Addressing the Crisis of Suicide:
The crisis of suicide reverberates across Canadian society, impacting families, communities, and responders alike. Remarkably, it stands as a leading cause of death among individuals aged 15-19. In the face of such distressing statistics, first responders rise to the challenge with a profound understanding of the urgency and intricacy inherent in these situations.
The Trauma of Responding to Suicide:
For first responders, answering a suicide call is far more than a task; it's a deeply emotional and challenging responsibility. Beyond the immediate turmoil lies an emotionally charged atmosphere that can have a lasting impact on those who bear witness. This impact intensifies when friends or family members are present, creating intricate layers of complexity and heightened emotions.
Navigating Emotional Turmoil:
When friends or family members are on the scene of a suicide, their anguish is palpable. Their grief, shock, and anguish can infuse the environment with heightened intensity. First responders must skillfully navigate this emotional turmoil, balancing the urgency of intervention with the compassionate acknowledgment of others' crises.
Caring for the Caregivers Amidst Crisis:
Responding to suicide scenes exacts a heavy toll on first responders, burdening them with emotional weight. Prioritizing self-care and mental health support becomes imperative. Regular debriefing sessions, access to counseling, and trauma management guidance equip responders to navigate the aftermath of these incidents while safeguarding their own well-being.
The Ripple Effect:
Compassionate Response for Lasting Change: The profound impact of first responders extends well beyond the immediate scene. By offering empathy, resources, and essential support, they become beacons of hope during times of darkness. Their role in connecting survivors with counseling and resources creates a pathway to healing, not just for the survivors but also for the responders who extend a lifeline of compassion.
Conclusion:
Illuminating the Path to Healing. Within the grim landscape of suicide scenes, first responders assume dual roles as witnesses to tragedy and agents of healing. Through compassionate intervention, they offer solace to those directly affected and contribute to the broader mission of suicide prevention. Their actions not only rescue lives in the moment but also illuminate the path toward healing and resilience for survivors and responders alike.
If you or someone you know is considering suicide, remember that help is always available. Reach out to a crisis hotline such as 1.833.456.4566, where trained professionals can provide the support you need during this challenging time. Remember, you are not alone, and there are people ready to listen and help guide you toward healing.
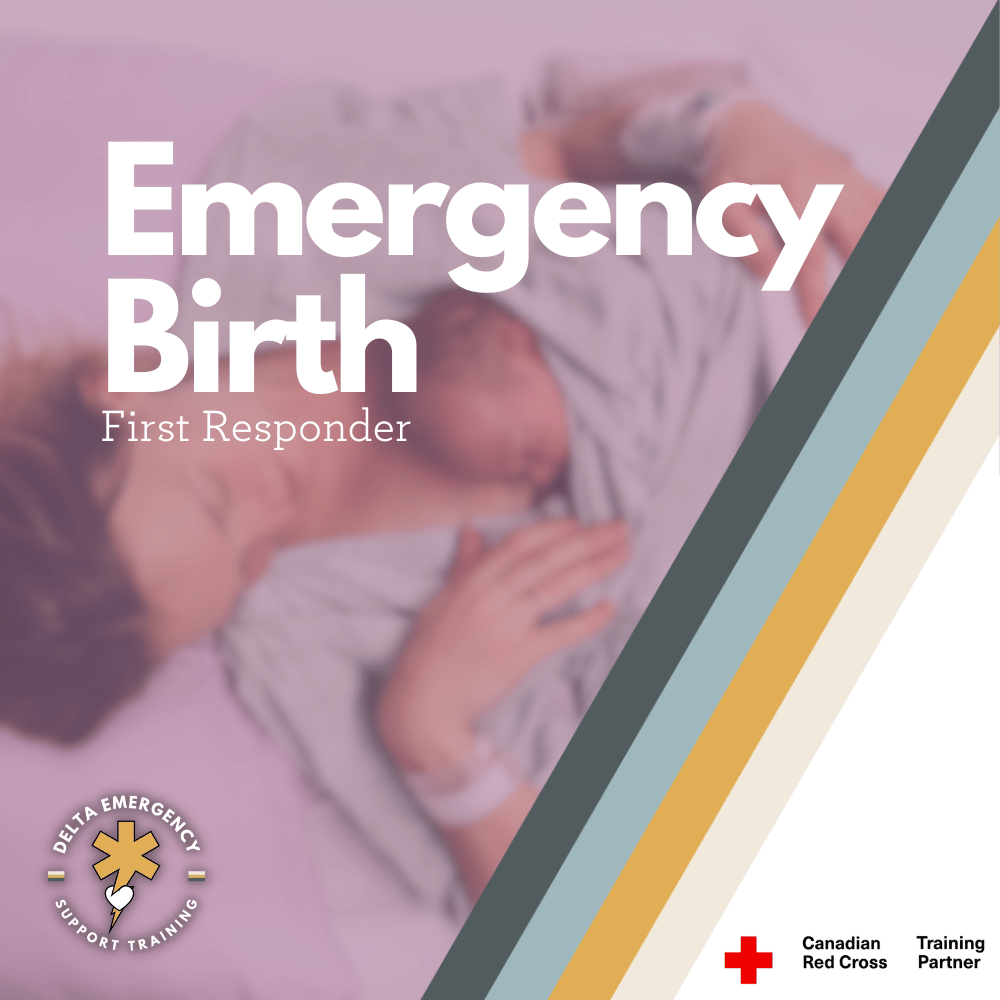
Emergency Birth as a First Responder: Postpartum Care
Dive into the realm of postpartum care during emergency births, where first responders play a vital role. Explore expert techniques, bleeding management strategies, and firsthand insights from seasoned paramedics. Elevate your capabilities as a first responder with invaluable knowledge on ensuring the well-being of both newborns and mothers in these critical moments.
Caring for the Newborn
Welcome to the second part of our comprehensive two-part series, where we continue our exploration of emergency births and the invaluable contributions of first responders. In the initial segment, we delved into the preparations and assistance offered during the childbirth process. Now, as we progress into Part 2, our focus intensifies on the pivotal steps undertaken by first responders to ensure the immediate well-being of both the newborn and the mother post-delivery.
Mother postpartum holding neonate on her chest.
This installment delves deeper into the critical aspects of post-birth care, revealing the intricate measures that first responders execute to stabilize the newborn and provide essential support to the mother. We'll navigate through the essential processes of promoting the newborn's well-being, utilizing tools like the APGAR scale to assess their condition. Simultaneously, we address the importance of postpartum care for the mother, emphasizing vigilant monitoring and timely interventions to manage postpartum bleeding.
With these multifaceted actions, first responders display their unwavering commitment to preserving life and fostering well-being during the immediate aftermath of childbirth. Join us on this journey as we uncover the intricacies of post-birth care, shedding light on the dedication and expertise that first responders bring to these unforeseen situations.
Vigorous Drying Techniques:
If the newborn does not exhibit signs of breathing or crying, immediate action is essential. Begin by employing vigorous drying techniques. Take a clean, soft towel and gently rub the baby's back, arms, and legs. This tactile stimulation often prompts a response by initiating their reflexes.
Assessing the Response:
After performing vigorous drying for approximately 30 seconds, pause and closely observe the baby's reaction. Look for any movements, breathing, or vocalizations. This assessment helps determine the baby's level of responsiveness and guides further intervention.
Using a Bag-Valve-Mask (BVM):
If the newborn remains unresponsive, it's time to provide assisted ventilation using a BVM. Ensure a proper seal by placing the mask over the baby's nose and mouth. Administer gentle breaths at a rate of 1 ventilation every 3 seconds. This method delivers a controlled supply of oxygen to the baby's lungs.
Ventilation and Pulse Assessment:
During the 30-second period of ventilation using the BVM, closely monitor the newborn's response. Afterward, assess the baby's pulse. If the pulse is below 60 BPM, it's an indication that immediate intervention is necessary.
Neonate CPR Protocol:
When the pulse remains below 60 BPM, initiate neonate CPR. Begin with 3 gentle chest compressions, followed by 1 breath using the BVM. Continue this cycle, maintaining a ratio of 3 compressions to 1 breath. As you administer CPR, be vigilant about monitoring the baby's heart rate.
Optimal Heart Rate:
A newborn's optimal heart rate typically falls between 140 and 160 BPM. Continuous heart rate monitoring informs you about the baby's response to the resuscitative efforts. Continue with primary assessment once neonates ABC’s are considered stable. Begin conducting a baseline set of vitals if possible.
APGAR Scale
The APGAR scale is a valuable tool used to assess the overall condition of a newborn immediately after birth. Named after its creator, Dr. Virginia Apgar, this assessment helps medical professionals and first responders quickly evaluate the baby's physical status and determine if any immediate interventions are required. The APGAR scale evaluates five key factors:
Appearance (Skin Color):
The baby's skin color is assessed. A newborn with a pink or rosy skin tone receives a score of 2, while pale or bluish skin results in a lower score.
Pulse (Heart Rate):
The baby's heart rate is evaluated. A heart rate of 100 to 140 BPM is considered normal and receives a score of 2. A lower heart rate receives a score of 1, and a heart rate of less than 100 BPM gets a score of 0.
Grimace Response (Reflexes):
The baby's reflexes are tested by gently stimulating their nose or feet. A newborn who responds with a sneeze, cough, or grimace (frowning) gets a score of 2. A sluggish response results in a score of 1, and no response gets a score of 0.
Activity (Muscle Tone):
The baby's muscle tone is assessed. If the baby exhibits active movement and flexion, they receive a score of 2. If the limbs are partially flexed, the score is 1. If there is minimal or no movement, the score is 0.
Respiration ( Rate and Effort):
The baby's breathing rate and effort are observed. If the baby is crying and breathing normally, they receive a score of 2. Irregular or slow breathing results in a score of 1, and no breathing receives a score of 0.
When and How the APGAR Scale is Conducted:
The APGAR assessment is typically performed twice: at 1 minute after birth and again at 5 minutes after birth. Each factor is assigned a numerical rating of 0, 1, or 2. The scores are then added together to yield a total score out of 10. The assessment helps medical professionals and first responders quickly identify any issues that require immediate attention and determine if the baby is adapting well to life outside the womb.
Caring for the Mother Post Delivery
After stabilizing the newborn, it's essential to provide comprehensive care to the mother, addressing both physical and emotional needs. Here's a closer look at postpartum care for the mother:
Encouraging Breastfeeding:
Following the stabilization of the newborn, encouraging the mother to breastfeed is a vital step. Breastfeeding stimulates the uterus to contract, which in turn helps reduce bleeding. This process, known as uterine involution, assists the mother's body in returning to its pre-pregnancy state. Moreover, breastfeeding establishes a strong bond between mother and baby and offers a multitude of benefits for both.
Placenta Handling:
In line with recommended practices, refrain from cutting the placenta from the newborn unless local protocols or medical direction dictate otherwise. Instead, carefully wrap the placenta in a plastic bag and towel for transport with the family. This approach respects the physiological connection between the placenta and the newborn and ensures a smooth transition.
Managing Postpartum Bleeding:
In cases where postpartum bleeding is a concern, gentle and non-invasive techniques are employed. Use sterile gauze or a clean towel to gently clean the mother's perineal area. This process helps slow down bleeding without resorting to any interventions that may pose risks.
Monitoring and Recognizing Excessive Bleeding:
Keeping a vigilant eye on postpartum bleeding is crucial. Differentiating between normal and excessive bleeding is essential for the mother's well-being. Excessive bleeding may result from the uterus not contracting as it should. This information will be instrumental in determining the appropriate interventions.
Addressing Shock Symptoms:
It's important to be aware that mothers might present symptoms similar to shock, which can include pale skin, rapid heartbeat, and altered mental state. In cases where these symptoms persist or worsen, rapid transportation to a medical facility becomes imperative. This is particularly crucial if bleeding remains a concern.
Through these measures, first responders offer a holistic approach to postpartum care for the mother. From promoting uterine contraction through breastfeeding to respecting placenta connection, these actions contribute to the mother's comfort and well-being. Vigilant monitoring, appropriate interventions, and the utmost sensitivity to the mother's condition reflect the dedicated commitment of first responders in ensuring the holistic health and safety of both the newborn and the mother during this critical phase.
Conclusion
Throughout this enlightening two-part series, we've unveiled the crucial role that first responders undertake in emergency births. From cultivating a sterile environment to aiding childbirth and offering essential postpartum care.
Join us in our advanced first aid class where we offer comprehensive obstetrics training. Collaborate with seasoned paramedics who have delivered babies in the field, gaining practical insights that prepare you to confidently assist during emergency births.
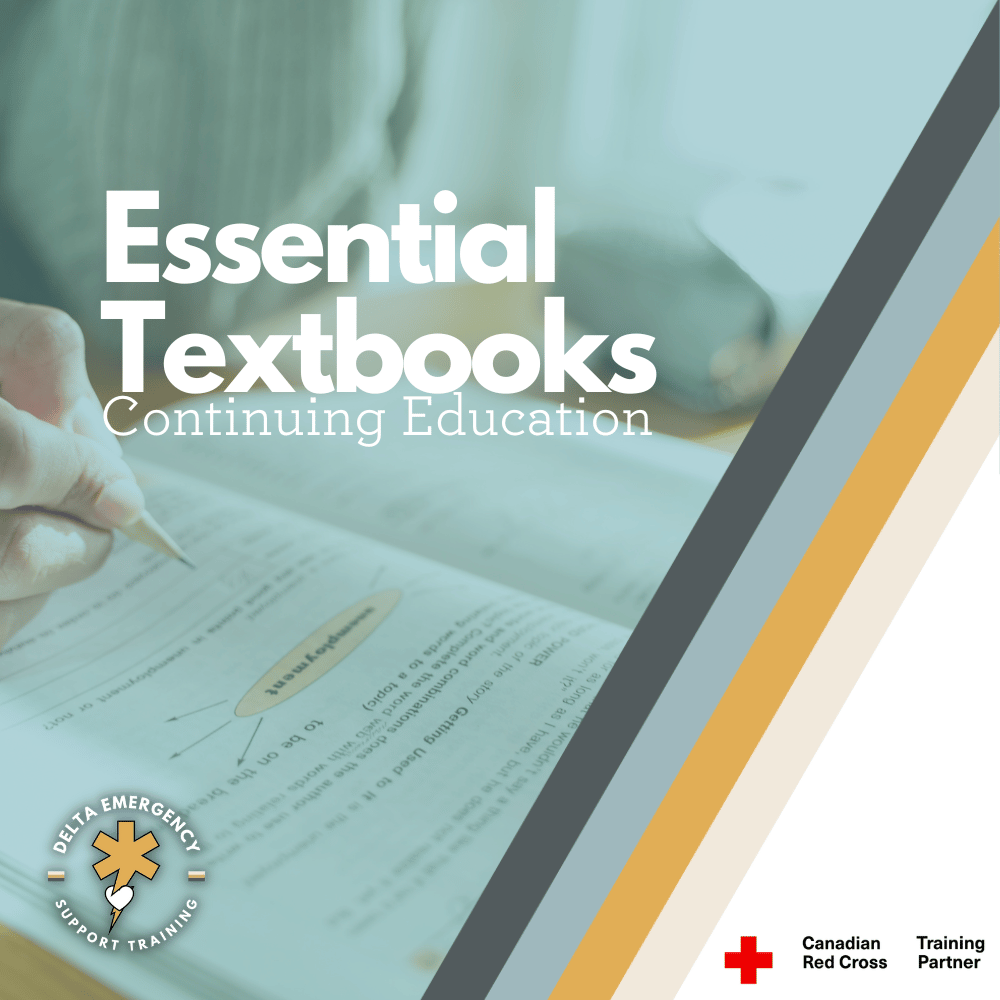
Empowering Learning Through Essential Textbooks: Continuing Education
Discover a World of Learning with Our Essential Textbooks
At Delta Emergency, we're thrilled to present our diverse collection of textbooks, each crafted to meet unique learning needs. Whether you're embarking on wilderness adventures, nurturing young minds as a babysitter, mastering life-saving techniques, or aiming to elevate your emergency care skills, our textbooks are here to empower and educate. The tactile pleasure of flipping through the pages of our physical copies enhances the learning experience, making each topic come to life. Dive into our range and unlock a wealth of knowledge today.
At Delta Emergency Support Training, we're excited to offer a versatile collection of textbooks that cater to a wide array of learning needs. Whether you're a wilderness explorer, an aspiring babysitter, a medical professional, or someone seeking vital lifesaving skills, our textbooks are thoughtfully designed to impart knowledge and empower individuals.For those who appreciate the feel of physical paper copies, we have just the thing for you. Let's dive into our selection:
Woman using a textbook to take notes and study.
Wilderness First Aid: Navigating Nature's Challenges with Confidence
Embark on outdoor adventures fully equipped with our "Wilderness First Aid" textbook. Priced at CA$74.97, this guide not only covers emergency response but also emphasizes safeguarding patients from the elements. From creating basic shelters to regulating body temperature, this resource ensures patient well-being in harsh environments. Learn to assess the ABCs (Airway, Breathing, Circulation) and identify and treat life-threatening emergencies. With a focus on both patient safety and effective response, this guide prepares you for the unexpected challenges of the wild.
Babysitter First Aid: Nurturing Safety and Confidence
Designed for young caregivers, our "Babysitter First Aid" textbook is a crucial resource that is a great tool for babysitters. Priced at CA$31.45 (Original Price: CA$34.95), this guide empowers budding babysitters with engaging activities, game ideas, and practical checklists. It equips you with the confidence and knowledge necessary to ensure children's safety and well-being. Not only does it cover babysitting essentials, but it also imparts vital babysitter first aid skills, expanding your capabilities and making you a trusted and reliable caregiver.
Basic Life Support: Mastering Lifesaving Techniques
BLS goes beyond the basics, offering practical insights such as oxygen flow rates for different levels of hypoxia, airway adjunct techniques, and CPR rates and compression depths. Whether you're familiarizing yourself with ventilation devices or learning the intricacies of CPR, this guide provides invaluable information to ensure your readiness in critical situations. Priced at CA$31.45, this comprehensive guide delves into the art of preserving life.
Professional Responder: Elevate Your Emergency Care Skills
Tailored for First Responders, Advanced First Aid, and Emergency Medical Responder courses, this comprehensive resource leaves no stone unturned. This textbook will give you the knowledge, skills and confidence to pursue your career as a firefighter, paramedic or any other professional responder. Encompassing topics from anatomy to physiology, this guide equips you with real-life scenarios, intricate charts, diagrams, and photographic illustrations. Designed to elevate your capabilities, it readies you for a gamut of challenging scenarios, ensuring your competence in emergency situations. Elevate your expertise with the "Professional Responder" textbook, available for CA$212.35 (Original Price: CA$235.95).
The Power of Knowledge
At Delta, we recognize the power of a physical textbook in an increasingly digital era. Our textbooks are carefully curated to enrich your understanding, bolster your skills, and guide you toward mastery. Seize the opportunity to learn, grow, and excel. Your transformative journey starts here.
Unraveling Traumatic Brain Injuries: Causes, Effects, and Signs
Unravel the complex terrain of traumatic brain injuries, where the immediate impact is just the beginning. Explore the hidden consequences as we delve into the intricate aftermath of these injuries. From internal bleeding that disrupts brain function to bruised brain tissue and the delicate damage to nerve cells, discover how hemorrhaging, contusions, and axonal injury cast a far-reaching impact. Our exploration not only sheds light on the physiological intricacies but also emphasizes the critical need for comprehensive care and healing strategies. Join us in uncovering the hidden layers of traumatic brain injuries and understanding their profound implications on both the brain and the individual's well-being.
Within the intricate realm of human health, traumatic brain injuries (TBIs) stand as complex and potentially life-altering events that can reshape the course of an individual's existence. These injuries, often stemming from accidents and unforeseen incidents, cast a broad shadow of consequences affecting cognitive, physical, and emotional well-being. In this comprehensive exploration, we delve deeply into the intricate landscape of TBIs, unearthing their causes, effects, and telltale signs. Moreover, we'll embark on an illuminating journey into the biomechanics of coup and counter coup injuries, while also delving into the internal trauma that accompanies these impactful events.
Understanding Traumatic Brain Injuries
At the heart of traumatic brain injuries lies the abrupt and forceful interaction between the brain and external forces. Such interactions lead to damage within the delicate structures of the brain, triggering a cascade of physiological and neurological disturbances. These injuries can vary in severity, ranging from the seemingly minor effects of a concussion to the profound and enduring consequences of severe brain damage.
Coup and Counter Coup: Unraveling the Mechanics
Underlying the mechanics of TBIs are phenomena known as coup and counter coup injuries. During rapid deceleration or impact, the brain can collide with the inner surfaces of the skull. This initial impact, known as coup injury, occurs at the point of contact. However, the brain's momentum doesn't cease abruptly; it continues to travel within the skull, resulting in a secondary impact on the opposite side—this is the counter coup injury. The intricate interplay between coup and counter coup impacts can lead to widespread damage and potentially severe traumatic brain injury.
Common Causes of TBI
Falls:
Everyday scenarios like falls from heights, slips on slippery surfaces, and stumbling down stairs contribute significantly to TBIs.
Motor Vehicle Accidents:
High-speed collisions, rollovers, and direct blows to the head during vehicular accidents are among the leading causes of traumatic brain injuries.
Sports-Related Injuries:
Contact sports like football, soccer, and hockey pose a notable risk of TBIs, particularly without adequate protective gear.
Assaults:
Violent incidents, physical altercations, and intentional blows to the head can culminate in traumatic brain injuries.
Signs and Symptoms of TBI
Physical Symptoms:
Common physical indicators of a TBI encompass persistent headaches, nausea, vomiting, dizziness, and sensitivity to light or noise.
Cognitive Changes:
Traumatic brain injuries frequently bring about cognitive alterations, such as confusion, memory problems, difficulty concentrating, and shifts in thinking patterns.
Emotional and Mood Alterations:
TBI sufferers often grapple with emotional shifts including irritability, mood swings, heightened anxiety, depression, and intensified emotional responses to stimuli.
Internal Hemorrhaging, Contusions, and TBI
The far-reaching consequences of TBIs often extend to internal injuries that exacerbate the damage:
Hemorrhaging:
Hemorrhaging, a serious consequence of traumatic brain injuries, emerges as a result of the forceful impact that the brain endures. The sheer intensity of the trauma can cause blood vessels within the brain to rupture, initiating internal bleeding that reverberates throughout the delicate neural terrain. This internal bleeding is not only a physical disruption but also a cascading event that disrupts the brain's intricate balance and functionality.
As blood pools within the brain, it creates pressure, a phenomenon referred to as elevated intracranial pressure. This heightened pressure exerts strain on the surrounding brain tissue, inhibiting normal circulation and potentially leading to ischemia—a lack of oxygen and nutrients for brain cells. The disrupted blood flow and accumulated blood can also trigger inflammation, exacerbating the injury's impact and hindering the brain's attempts to heal itself.
Contusions:
Contusions, akin to bruises on the brain, manifest as a direct result of the brain colliding with the unyielding bony structures of the skull. This collision leads to localized areas of brain tissue sustaining damage and becoming compromised. Similar to how a bruise forms on the skin's surface after an impact, contusions arise within the brain tissue due to the abrupt and forceful contact.
The aftermath of a contusion involves a complex interplay of cellular responses. The damaged tissue swells in response to the trauma, leading to localized swelling that can further compress adjacent brain areas. Neural pathways, responsible for transmitting signals and facilitating communication between different regions of the brain, can be disrupted due to this swelling. This disruption can lead to impairments in cognitive, sensory, and motor functions, depending on the location of the contusion.
Axonal Injury:
The swift movement of the brain within the confines of the skull can result in a phenomenon known as axonal injury—a condition where nerve cells, or axons, endure stretching, twisting, or even shearing. These axons serve as the communication highways of the nervous system, transmitting electrical impulses that enable various bodily functions and cognitive processes.
In cases of axonal injury, these vital communication pathways become compromised. The structural integrity of the axons is disrupted, leading to a range of neurological impairments. Depending on the severity of the injury and the extent of axonal damage, individuals may experience motor deficits, cognitive dysfunction, and sensory disturbances. The complexities of axonal injuries are further compounded by the fact that these microscopic structures are challenging to repair, necessitating innovative approaches to encourage nerve cell regeneration and functional recovery.
Seeking Medical Attention and the Road to Recovery
Recognizing the signs of a TBI and swiftly seeking professional medical attention are pivotal steps in the journey toward effective diagnosis and treatment. The path to recovery from a traumatic brain injury is as diverse as the injuries themselves. Factors such as the severity of the injury and the effectiveness of medical interventions all contribute to the healing process. Rehabilitation therapies, cognitive exercises, and supportive care all play a pivotal role in aiding recovery and restoring quality of life.
Conclusion
Traumatic brain injuries stand as complex events with multifaceted implications for both the individual and their support network. By cultivating a deep understanding of the causes, effects, and signs of TBIs, we are empowered to advocate for enhanced safety measures and expedient medical intervention. The intricate biomechanics of coup and counter coup injuries underscore the dynamic relationship between the brain and the protective skull. As we strive for safer environments and heightened awareness, we take significant strides in diminishing the impact of TBIs on lives, while fostering a culture of brain health and holistic well-being.
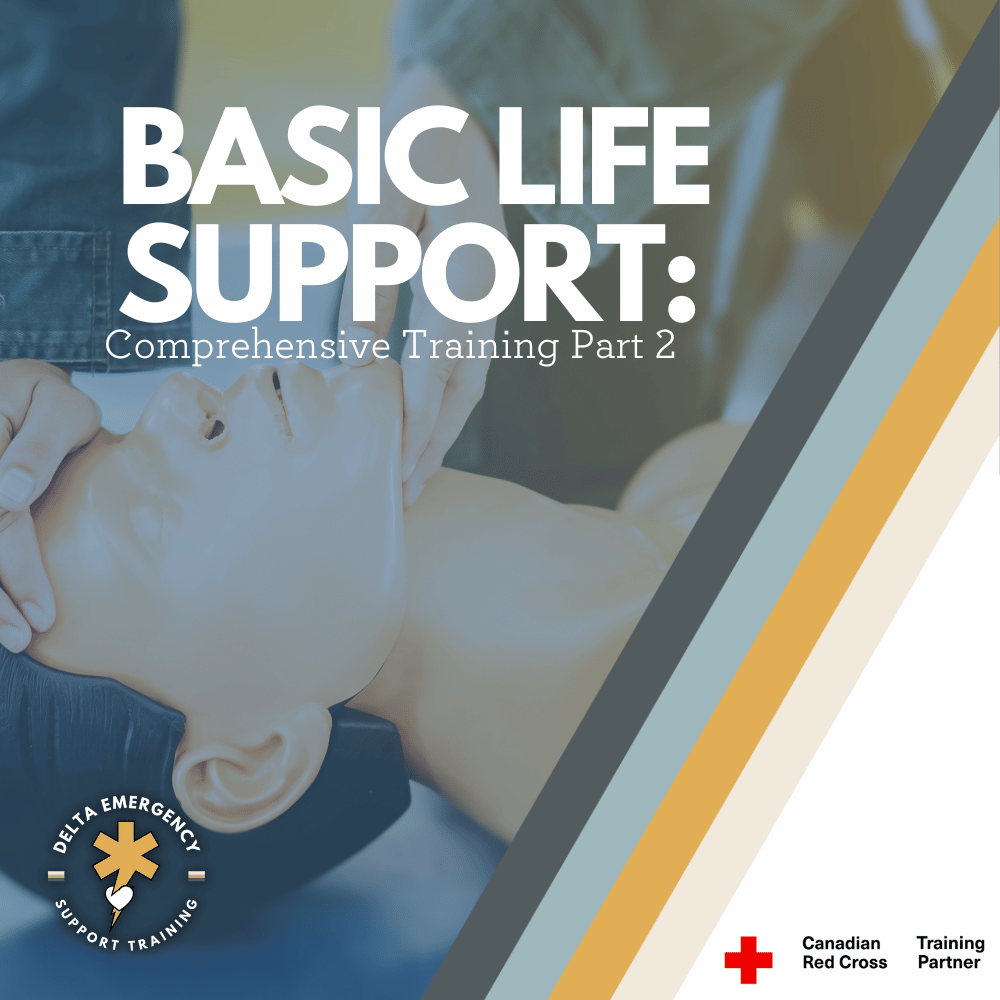
Basic Life Support Training Series: Part 2
Are you prepared to save lives during emergencies? Mastering Basic Life Support (BLS) is crucial, and understanding the key steps for assessing airway, breathing, and circulation is essential. Discover effective techniques like the head tilt-chin lift and jaw thrust for opening the airway, and learn about devices such as oropharyngeal airways (OPA) and nasal cannulas for maintaining clear breathing passages. Find out how to assess circulation through pulse checks, capillary refill, and extremity warmth. Explore these vital BLS skills and be ready to make a difference when it matters most. Boost your life-saving capabilities now!
Welcome back to the second part of our blog series on Basic Life Support (BLS). In the first blog, we discussed scene assessment, the ABC check (Airway, Breathing, and Circulation), and the proper use of CPR and AED. Now, in part two, we will delve into life-saving interventions and devices used within each step of the ABC check. Let's explore the crucial steps that can make a significant difference in saving lives.
Head tilt chin lift in basic life support training class
Life Saving Interventions: Airway
Airway management is a critical component of Basic Life Support (BLS) and plays a crucial role in ensuring the patient's ability to breathe effectively. In addition to the manual maneuvers we discussed earlier, such as the head tilt-chin lift and jaw thrust, there are other devices that can be used to secure and protect the airway. Let's explore two commonly used devices: the Oropharyngeal Airway (OPA) and the Nasopharyngeal Airway (NPA).
Oropharyngeal Airway (OPA):
The oropharyngeal airway, is a curved plastic tube that is inserted into the patient's mouth to maintain the patency of the airway. It serves two main purposes:
a) Clearing Obstructions: The OPA helps to displace the tongue from the back of the throat, preventing it from obstructing the airway and impeding the passage of air. This is used for unconscious patients or those with decreased consciousness.
b) Facilitating Manual Stabilization: By providing a firm structure, the OPA allows rescuers to perform manual stabilization of the patient's head and neck, as it helps maintain the alignment of the airway.
When using an OPA, it is important to select the correct size for the patient to ensure proper placement and prevent complications. Insert the device upside down, rotating it 180 degrees as it reaches the back of the throat. Proper placement should allow the device to sit between the teeth or lips and the base of the tongue.
Nasopharyngeal Airway (NPA):
The nasopharyngeal airway, or nasal airway, is a flexible tube inserted through the nostril into the back of the throat. It is particularly useful in patients who have an intact gag reflex or clenched teeth, making oral insertion difficult or risky. The NPA has several advantages:
1) Improved Comfort: The NPA is generally better tolerated by conscious or semi-conscious patients as it avoids stimulation of the gag reflex.
2) Unobstructed Oral Access: By securing the airway through the nasal passage, the mouth remains free and accessible for other procedures, such as suctioning or oral medication administration.
To insert an NPA, select the appropriate size by measuring from the tip of the nostril to the earlobe or the angle of the jaw. Lubricate the device before gently inserting it along the floor of the nasal passage, aiming towards the back of the throat. Monitor for signs of discomfort or obstruction during insertion and adjust if necessary.
It is important to note that the use of OPAs and NPAs requires proper training and an understanding of the patient's anatomy and potential contraindications. Rescuers should be cautious and attentive to the patient's response while using these devices.
By employing manual maneuvers like the head tilt-chin lift and jaw thrust, along with the use of OPAs and NPAs, rescuers can effectively secure and maintain an open airway for patients in need of Basic Life Support. Remember, accurate assessment and regular practice are essential to ensure proper airway management in emergency situations.
Life Saving Interventions: Breathing
Various devices can be used to provide oxygenation and ventilation support. Let's explore the different devices commonly used in BLS:
Nasal Cannula:
The nasal cannula is a lightweight device that delivers supplemental oxygen through two small prongs inserted into the patient's nostrils. It provides a low to moderate flow rate of 1-4 liters per minute (LPM) with an oxygen concentration ranging from 25% to 45%. The nasal cannula is comfortable and allows patients to speak, and move freely while receiving oxygen.
Simple Face Mask:
The simple face mask is a mask that covers the patient's nose and mouth, delivering oxygen at a flow rate of 6-10 LPM. It provides a higher oxygen concentration compared to the nasal cannula, ranging from 40% to 60%. The simple face mask is commonly used in patients who require higher oxygen levels or when a more precise oxygen concentration is not required. However, it may impede communication and patient comfort.
Non-Rebreather:
The non-rebreather is a mask with a reservoir bag attached, ensuring the delivery of high concentrations of oxygen. It has one-way valves that prevent the patient from inhaling exhaled air and allow for a flow rate of 10-15 LPM. The non-rebreather mask can deliver an oxygen concentration of 90% or higher. It is particularly useful in patients with severe hypoxia or in cases where precise oxygen titration is necessary.
Bag-Valve-Mask (BVM):
The bag-valve-mask (BVM) device, is a manually operated resuscitator used to provide positive pressure ventilation. It consists of a self-inflating bag, a one-way valve, and a mask. The BVM is connected to an oxygen tank with a flow rate of 15 LPM, providing an oxygen concentration close to 100%. The BVM is often used in cases of respiratory distress or respiratory arrest, when the patient is not breathing adequately or requires assisted ventilation.
During assisted ventilation with a BVM, 1/3 of the bag should be compressed once every 5-6 seconds to achieve a target ventilation rate of 10-12 breaths per minute.
Newer BVM’s include a safety valve that makes a noise if you are compressing the bag too hard or fast, allowing for user friendly use.
As you provide assisted ventilation using a BVM, pay close attention to the patient's response. Look for chest rise and fall with each breath delivered. The presence of chest rise indicates that the ventilation is effectively reaching the patient's lungs.
Additionally, observe the patient's overall color. Effective ventilation should help improve the patient's skin color, with a return to a more normal or healthier appearance. If the patient's color improves, it is a positive sign that oxygenation and ventilation are being adequately supported.
It is important to note that when administering oxygen, the flow rate should be carefully adjusted based on the patient's condition and oxygen saturation levels. Oxygen therapy should be monitored closely.
Circulation assessment
Circulation assessment is a crucial step in Basic Life Support (BLS) to determine the adequacy of blood flow. While CPR remains the life-saving intervention when a pulse is not detected, let's explore other methods to assess circulation when a pulse is present.
Capillary Refill: To assess capillary refill, gently press down on the patient's nail bed or the tip of their finger. Upon releasing the pressure, observe how quickly the color returns to the area. A normal capillary refill time is around 2 seconds. If color returns within this timeframe, it indicates good capillary refill and suggests adequate peripheral circulation.
Extremity Warmth: Feeling the temperature of the patient's extremities, such as their hands and feet, can provide valuable information about circulation. Warm extremities indicate good blood flow, while cold extremities may suggest impaired circulation.
It's important to note that these assessments are complementary to the presence of a pulse. If there are concerns about circulation or any signs of poor perfusion, prompt medical attention should be sought.
Circulatory Obstruction: Major blood loss from an injury can obstruct circulation and pose a life-threatening situation. In such cases, immediate action is crucial. If the hemorrhage is external, apply direct pressure to the bleeding site using PPE always. Maintaining pressure helps control the bleeding and promotes clot formation, thereby restoring circulation. If available, consider the use of a tourniquet for severe hemorrhage that cannot be controlled by direct pressure alone.
Remember, it is important to prioritize personal safety and seek professional medical help as soon as possible in cases of significant bleeding or other circulatory emergencies. Timely intervention can make a significant difference in patient outcomes.
Training
Mastering Basic Life Support (BLS) is crucial for healthcare professionals, including nurses, doctors, dentists, firefighters, and other first responders. Understanding the key steps for assessing and applying critical interventions for airway, breathing, and circulation is essential to deliver timely and effective care during emergencies. At Delta, we recognize the importance of BLS training, as it is often required to be completed yearly for professionals in various fields. We are dedicated to providing frequent BLS courses to equip individuals with the life-saving skills they need. Enroll in our BLS courses today and stay prepared to make a difference when it matters most.
Rapid Body Survey: Uncovering Hidden Injuries
In emergency medical situations, conducting a Rapid Body Survey (RBS) is crucial to identify hidden injuries and rule out life-threatening conditions. This comprehensive head-to-toe examination allows healthcare providers to quickly assess patients and provide prompt interventions. By systematically examining each body part, from head and neck to pelvis, legs, and arms, healthcare providers can detect visible signs of trauma, assess stability, and ensure the well-being of patients in critical situations.
What is a Rapid Body Survey
In emergency medical situations, time is of the essence, and healthcare providers must quickly assess patients to identify and address any immediate threats to their well-being. The Rapid Body Survey (RBS), also known as a head-to-toe examination, is a vital component of the initial assessment process. Its primary goal is to rule out significant or life-threatening injuries that may be hidden due to distracting injuries or the patient's unconsciousness.
Unconscious woman having a rapid body survey being done by professional responders.
During emergencies, patients may present with obvious injuries that demand immediate attention. However, these apparent injuries can sometimes mask more critical underlying conditions that require urgent intervention. By performing a systematic and comprehensive RBS, healthcare providers can thoroughly evaluate the patient's entire body, ensuring that no potentially dangerous injuries go unnoticed.
Conducting an RBS requires hands-on physical examination, allowing healthcare providers to assess stability, palpate for tenderness or deformities, and check for specific signs indicative of serious injuries. While respecting the patient's privacy and dignity, healthcare providers must obtain consent before initiating the physical examination.
If there are any signs of traumatic injury or if the patient reports pain or tenderness in specific areas, it is essential to remove the clothing covering those regions for a more thorough assessment. Removing clothing allows healthcare providers to visually inspect the affected areas, assess for visible wounds, bruising, or deformities, and palpate for tenderness, instability, or other signs of significant injury. While ensuring patient comfort and maintaining their privacy, the removal of clothing enables healthcare providers to gain a clearer understanding of the extent of the trauma and provides valuable information for making informed treatment decisions.
Now, let's delve into what a Rapid Body Survey (RBS) entails and explore the different components of this comprehensive examination.
Rapid Body Survey Components
Head and Face:
Bleeding: Look for any signs of bleeding, both externally and internally, on the head or face. Pay close attention to wounds or lacerations that may indicate significant trauma.
Facial or skull deformities: Inspect the face and skull for any abnormal shapes or contours, which may suggest fractures or dislocations.
Nosebleeds: Note the presence of nosebleeds, as they can indicate trauma to the nasal area or potential underlying skull fractures.
Pupil size: Assess the size of the pupils in both eyes. Unequal pupil size, known as anisocoria, can be an indication of head trauma or underlying neurological issues.
Cerebrospinal fluid (CSF) leakage from the ears: Check for any clear fluid draining from the ears, as it may be cerebrospinal fluid. This could be a sign of a basal skull fracture, requiring immediate medical attention.
Raccoon eyes: Observe for periorbital bruising or discoloration, commonly referred to as raccoon eyes. This bruising around the eyes can be an indicator of a skull fracture or other significant head injury.
Battle signs: Look for bruising behind the ears, known as battle signs. These bruises can be a sign of skull base fractures and should raise concerns about potential head trauma.
Missing teeth: Take note of any missing teeth, which may indicate facial trauma or injuries to the oral cavity.
Cyanosed lips: Check for lips that appear bluish or cyanotic, which may suggest inadequate oxygenation or circulation, potentially related to respiratory or cardiovascular issues.
Neck
Midline trachea: Observe the position of the trachea in the center of the neck. A trachea deviated to one side may indicate an injury or obstruction in the airway.
Jugular Vein Distention (JVD): Look for distention or engorgement of the jugular veins in the neck. JVD can be a sign of increased pressure in the chest or heart failure.
Obvious injuries: Check for any visible injuries, such as lacerations, abrasions, or swelling, which may require immediate attention.
Chest
Chief complaint of chest pain: If the patient's chief complaint involves chest pain (not of cardiac origin), it is essential to remove their shirt to allow for a closer examination.
Medication patches and surgical scars: Inspect the chest for the presence of medication patches or surgical scars, which may provide valuable information about the patient's medical history or recent interventions.
Trauma and obvious injuries: Look for any obvious signs of trauma, such as bruises, lacerations, or swelling, which may indicate a significant injury or potential internal damage.
Stability of collarbone and sternum: Physically assess the stability of the clavicle (collarbone) and sternum by gently applying pressure and checking for any abnormal movement or tenderness.
Rib stability and paradoxical movement: Palpate along the sides of the ribcage, asking the patient to take deep breaths if applicable. Evaluate for equal chest rise and fall and look for paradoxical chest movement, which is a characteristic inward movement of the chest during inhalation and outward movement during exhalation. Paradoxical chest movement may suggest a flail chest, a serious condition that requires immediate attention.
Signs of contusions: Check for contusions (bruises) on the chest, as they may indicate internal hemorrhaging or injuries to underlying organs.
Abdomen
Distention, rigidity, and tenderness (DRT): Use a wave-like motion with both hands to palpate the abdomen over the four quadrants. Assess for any abnormal distention (swelling), rigidity (stiffness), or tenderness, as these may indicate underlying trauma or internal organ damage.
Signs of contusions: Look for contusions or bruises on the abdomen, as they may suggest internal bleeding or injuries to organs.
Rebound tenderness: Gently press on the abdomen and release, observing if the patient experiences increased pain upon release. This rebound tenderness could indicate inflammation or injury in the abdominal cavity.
Organ-specific assessments: Depending on the patient's complaints or mechanism of injury, healthcare providers may focus on specific areas of the abdomen. For example, they may perform a focused examination to assess the liver, spleen, kidneys, or other organs based on the patient's symptoms and clinical indications.
Abdominal distension: Observe for any visible distension or swelling of the abdomen, as it may indicate fluid accumulation, organ enlargement, or other underlying conditions.
Pelvis
Pelvic stability assessment: Stand at the patient's side and place your hands on both sides of the pelvis. Apply upward and inward pressure to assess for any instability or abnormal movement. Instability or crepitus (grating sensation) may indicate a potential pelvic fracture, which can be a life-threatening injury.
Signs of pelvic trauma: Look for visible signs of pelvic trauma, such as bruising, swelling, or deformities. External signs may suggest the possibility of internal injuries or fractures.
Pelvic tenderness: Gently palpate the pelvic region, including the iliac crests and the pubic symphysis, for tenderness or pain. Localized tenderness may indicate an injury to the pelvic structures.
Note incontinence: While assessing the pelvis, be observant for any signs of incontinence, such as urinary or fecal leakage. Incontinence can indicate a neurological or structural injury and should be documented.
Legs
Femur, patella, tibia, and fibula stability: Using both hands, assess the stability and integrity of the major leg bones, including the femur (thigh bone), patella (kneecap), tibia, and fibula. Gently apply pressure and check for any abnormal movement, tenderness, or deformities.
Assess for fractures: Look for any visible signs of fractures, such as deformities, swelling, or bruising. Fractured femurs, in particular, can be life-threatening injuries if not promptly managed.
Proximal injury assessment: If there is an injury closer to the feet, such as ankle or foot trauma, remove the shoes and socks to examine the affected area more closely. Assess for swelling, deformities, tenderness, and neurovascular status.
Dorsal pedal pulse: Check the presence of the dorsal pedal pulse by palpating the top of the foot. The absence of the pulse may suggest compromised blood flow to the foot, requiring further investigation.
Mobility test: Perform a quick mobility test, such as the "gas pedal" test, to evaluate the patient's ability to move the affected leg. Assess the range of motion and observe for any pain, instability, or limitations in movement.
Spine
Crepitus: Pay attention to any grating or popping sensations (crepitus) during the palpation of the spine. Crepitus may indicate underlying spinal abnormalities or degenerative conditions.
Midline tenderness: Assess for tenderness along the midline of the back, as it may indicate a potential spinal injury or fracture.
Range of motion: Ask the patient to perform gentle movements, such as bending forward, backward, and sideways. Observe for any limitations, pain, or discomfort during these motions, which may suggest spinal issues.
Assess for back injuries: Look for visible signs of trauma on the back, such as bruises, lacerations, or swelling. External signs may indicate potential underlying spinal or soft tissue injuries.
During the Rapid Body Survey (RBS), the examination of the back may vary depending on the position of the patient. If the patient is lying supine, the back examination is typically performed after assessing other body parts. In situations where the patient is already positioned in the three-quarter prone position, the back examination can be initiated earlier. This allows for early detection of any visible signs of trauma or abnormalities in the back region.
Arms
Stability and tenderness: Using both hands, assess the stability and integrity of the arms. Gently apply pressure and check for any abnormal movement, tenderness, or deformities.
Range of motion: Ask the patient to move their arms in various directions, assessing the range of motion and noting any limitations, pain, or discomfort during movement.
Vascular assessment: While examining the arms, it is important to check the radial pulses, located on the wrist, to evaluate the vascular status. Absent or weak pulses may indicate compromised blood flow to the extremities.
Signs of self-harm: Observe the arms for any track marks, scars, or signs of self-harm, which may provide important information about the patient's history or current mental health concerns.
External injuries: Look for any visible signs of trauma, such as bruises, lacerations, or swelling, which may indicate fractures, dislocations, or other injuries.
Conclusion
In emergency medical situations, time is of the essence, and the Rapid Body Survey (RBS) is a vital tool in swiftly identifying hidden injuries and ruling out life-threatening conditions. This systematic examination technique is extensively covered in advanced first aid classes, including those required for firefighters in Alberta and as a recommended course before Emergency Medical Responder (EMR) training. By incorporating the RBS into their assessment protocols, healthcare providers can provide comprehensive and effective care, maximizing the chances of positive outcomes for patients in urgent need.
At our organization, we prioritize the importance of the RBS and offer advanced first aid classes that cover this critical assessment technique. Our courses are designed to equip individuals with the necessary skills to perform the RBS confidently and accurately. Whether you are pursuing a career in emergency services or simply seeking to enhance your first aid knowledge, our classes provide valuable training that can make a significant difference in emergency situations.
We are dedicated to supporting healthcare providers and individuals interested in emergency medical training. If you have any questions about the RBS or any other aspects of emergency care, please don't hesitate to reach out to us. Our team is here to provide guidance and assist you in your journey towards providing comprehensive and effective care to those in need. Together, we can make a difference and help save lives in emergency situations.
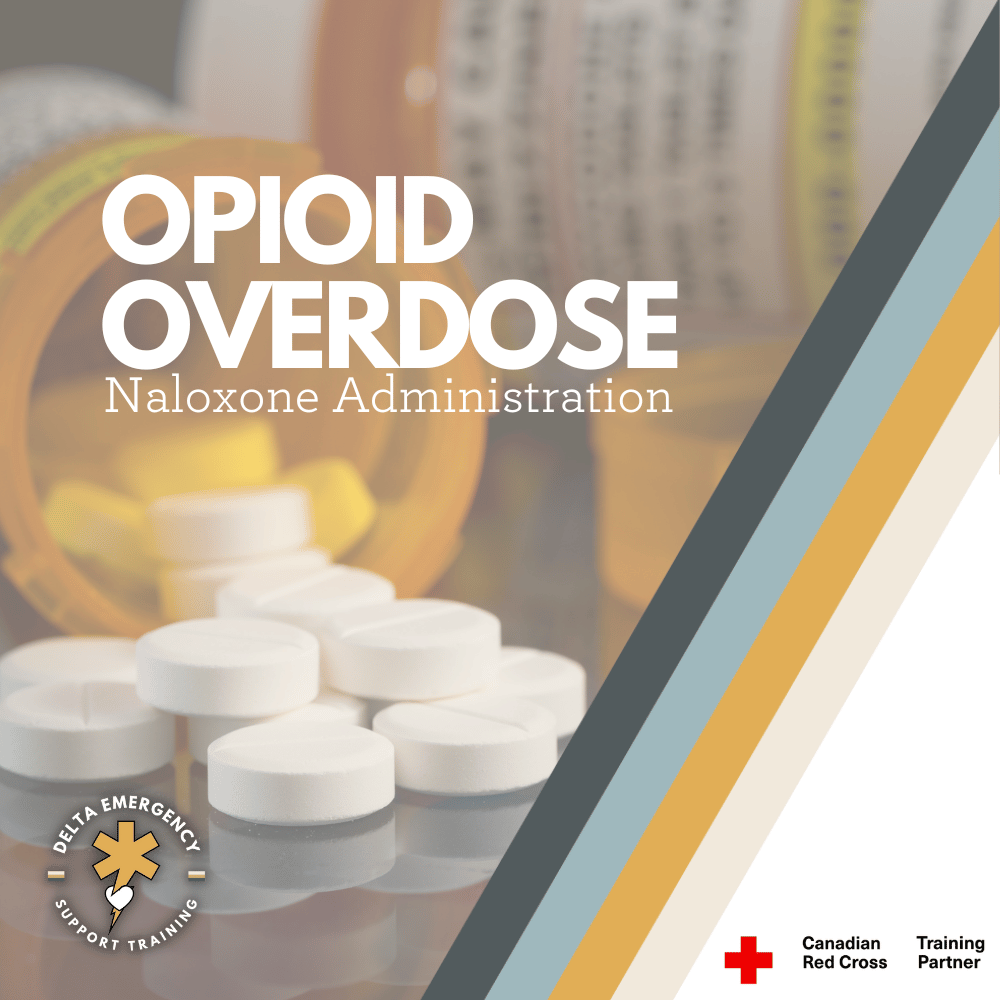
Opioid Overdose Reversal: Naloxone
Opioid overdose is a critical emergency that demands swift intervention. In our blog post, we explore the life-saving potential of naloxone as an opioid antagonist. Discover how naloxone works to reverse the effects of opioids, the importance of combining it with CPR in emergencies, and how you can learn about naloxone administration in our first aid courses. Be prepared to make a difference and save lives.
Opioid Overdose
Opioid overdose is a devastating crisis affecting individuals worldwide. With opioids causing respiratory depression and potentially fatal consequences, swift intervention is crucial. One powerful tool in combating opioid overdose is naloxone, commonly known by the brand name Narcan.
In this, we will delve into the life-saving potential of naloxone as an opioid antagonist, understanding how it works, and its role in preventing opioid-related fatalities. We will also explore how naloxone is administered, including the simple skill that anyone can learn to save lives.
Understanding Opioid Overdose:
Opioids, including prescription painkillers and illicit substances like heroin, bind to opioid receptors in the brain and spinal cord, reducing pain and inducing feelings of relaxation and euphoria. However, an excessive dose of opioids can overwhelm the body, leading to slowed or shallow breathing, which can result in a dangerous lack of oxygen. This respiratory depression is the primary cause of death in opioid overdose cases.
In opioid overdose, the slowed or shallow breathing can progress to respiratory arrest, where breathing stops altogether. As the body is deprived of oxygen, the brain and other vital organs begin to suffer. The lack of oxygen can lead to a cascade of events, including cardiac arrest, where the heart stops beating effectively. It is important to recognize that opioid overdose fatalities are primarily caused by respiratory arrest, which then leads to cardiac arrest.
Administration of Naloxone
Check Scene Safety:
Before approaching the individual, ensure that the scene is safe for both you and the person in distress. Look out for any potential hazards or risks.
Check Level of Consciousness:
Assess the person's level of consciousness. Gently tap their shoulders and ask loudly, "Are you okay?" If there is no response or the person is unresponsive, proceed to the next steps.
Communicate:
Clearly communicate your intentions to the person. Let them know that you are there to help and that you will be administering naloxone to reverse the effects of opioid overdose.
Personal Protective Equipment (PPE):
Put on gloves to protect yourself from potential exposure to bodily fluids during the process.
Prep the Syringe:
Take the naloxone syringe and carefully remove the cap. If necessary, snap or twist off the top of the ampule to access the medication. Attach the needle to the syringe securely.
Draw Up Naloxone:
Hold the ampule upright and insert the needle into the ampule's opening. Slowly pull the plunger back, drawing up the appropriate amount of naloxone (as instructed by the manufacturer or medical professional).
Expel Extra Air:
With the needle still in the ampule, gently tap the syringe to dislodge any air bubbles that may have formed. Slowly push the plunger up to expel the extra air until only naloxone remains in the syringe.
Lift Clothing and Insert Needle:
Lift the person's clothing to expose an area of skin for injection, typically the upper arm, thigh, or buttocks. Hold the syringe like a dart and swiftly insert the needle into the muscle at a 90-degree angle.
Compress All Liquid:
Push the plunger down fully, injecting all the naloxone into the muscle. Maintain pressure on the plunger for a few seconds to ensure all the medication has been administered.
Remove Needle and Dispose:
Carefully remove the needle from the skin. Place the used needle and syringe into a sharps container or any designated puncture-proof container for safe disposal.
Monitor Level of Consciousness:
Observe the person's level of consciousness and breathing. Stay with them and provide reassurance while waiting for emergency medical services (EMS) to arrive.
Remember, this tutorial serves as a general guide. It is essential to receive proper training on naloxone administration and follow the guidelines and instructions provided by healthcare professionals or local authorities.
Naloxone and CPR
Opioids depress the central nervous system, causing slowed or shallow breathing. If left untreated, this respiratory depression can progress to respiratory arrest, where breathing stops completely. When the body is deprived of oxygen, it can quickly lead to cardiac arrest, where the heart stops beating effectively.
In the event of a suspected opioid overdose, it is crucial to act swiftly. If you encounter someone who is not breathing and does not have a pulse, it is essential to initiate cardiopulmonary resuscitation (CPR) in conjunction with administering naloxone.
CPR involves a combination of chest compressions and rescue breaths, which aim to circulate oxygen-rich blood to the vital organs of the body. It helps to maintain a minimal level of oxygen supply until professional medical help arrives. CPR should be performed following the recommended guidelines and in accordance with any specific training you have received.
Naloxone is a vital component of overdose response because it rapidly reverses the effects of opioids and restores normal respiratory function. When administering naloxone during CPR, it can help counteract the respiratory depression caused by opioids, supporting the resuscitation efforts. By combining naloxone with CPR, you address both the respiratory and circulatory aspects of the overdose emergency, increasing the chances of successfully restoring the person's breathing and heartbeat.
In the event of a suspected opioid overdose where the individual does not have a device, such as a rescue facemask with a one-way valve, to protect yourself during rescue breaths, you can opt for compression-only CPR. Compression-only CPR involves performing continuous chest compressions without providing rescue breaths.
To perform compression-only CPR, follow these steps:
Ensure the person is lying on a firm surface.
Kneel beside the person's chest.
Place the heel of one hand on the center of the person's chest, between the nipples.
Place your other hand on top of the first hand, interlocking your fingers.
Keep your arms straight and position your shoulders directly above your hands.
Push hard and fast, compressing the chest at a rate of about 100-120 compressions per minute.
Allow the chest to fully recoil between compressions, but do not lift your hands off the chest.
Remember, in any medical emergency, including a suspected opioid overdose, it is essential to call 911 immediately. The emergency dispatcher can provide guidance and instructions tailored to the specific situation.
Remember, naloxone is not a substitute for seeking emergency medical assistance. Even if the person responds to naloxone and CPR, it is crucial to call emergency services right away. Prompt medical attention is necessary to provide comprehensive care and further stabilize the individual.
Training
Thank you for accompanying us on this two-part blog journey about naloxone. We hope that through this valuable information, you have gained the confidence and knowledge to respond effectively in opioid overdose emergencies. At Delta Emergency, we are committed to providing comprehensive training on naloxone administration, including recognizing signs and symptoms of opioid overdose, in our first aid and advanced first aid courses. Thank you for staying engaged, and together, let's make a positive impact by being prepared to respond in critical situations.
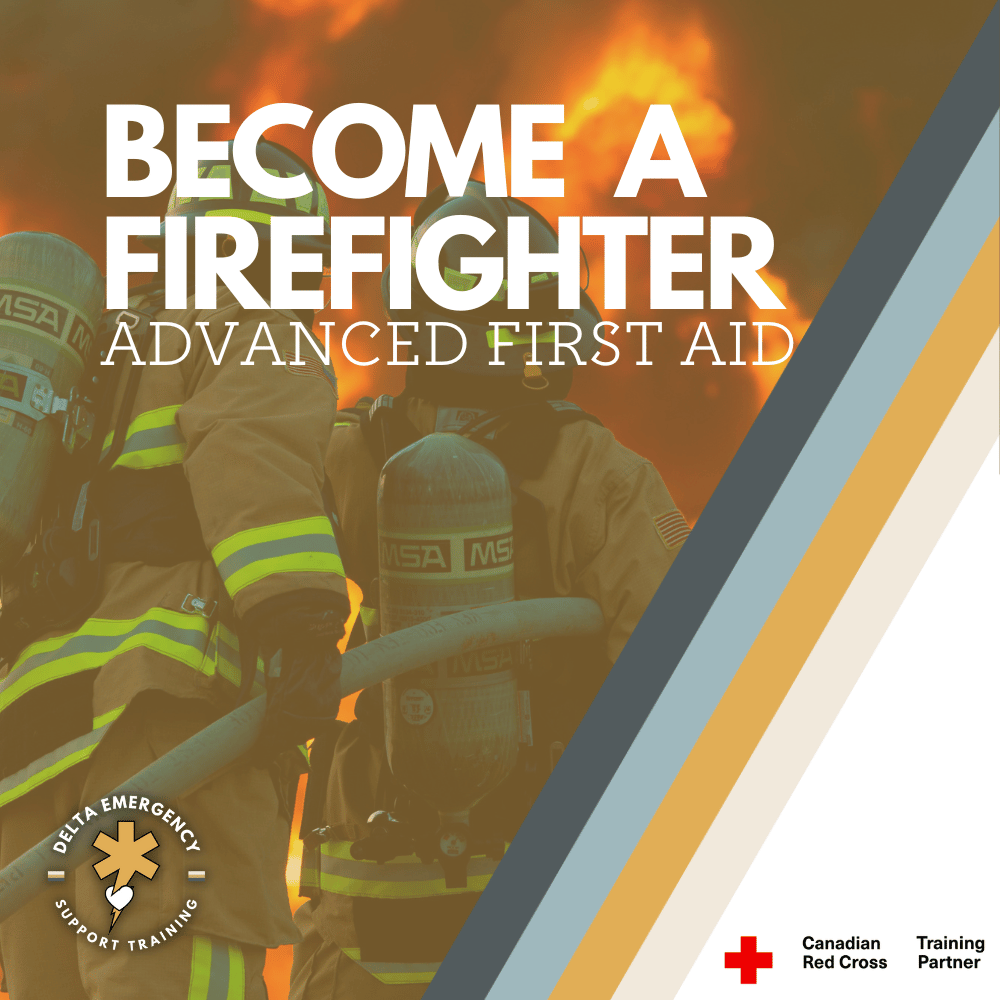
Becoming a Firefighter: Advanced First Aid with Delta
As a firefighter, you will be called upon to respond to a variety of emergency situations, ranging from minor injuries to life-threatening illnesses. That's why AFA training is so important for firefighters - it equips them with the skills and knowledge they need to handle these emergencies effectively and provide the best possible care to patients. AFA training covers a wide range of topics, including scene safety, basic life support, airway management, breathing management, in-depth CPR training, thorough body survey, packaging patients onto spine boards, dealing with life-threatening injuries, taking vitals, administering life-saving medications, and running calls from start to finish.
Becoming a firefighter is a career path that is both challenging and rewarding. It requires a unique set of skills and qualifications to effectively protect the public and their property from the dangers of fire, natural disasters, and other emergencies. One of the essential prerequisites for Calgary Fire Department or Edmonton Fire Rescue Services, is having advanced first aid (AFA) training.
Two firefighters with advanced first aid training, in full gear fighting a fire, with their backs turned to the camera.
AFA training equips firefighters with the skills and knowledge they need to handle these emergencies effectively and provide the best possible care to patients. As a firefighter, you may be required to perform advanced procedures such as administering medication, bagging patients, and providing advanced airway management. AFA training provides firefighters with the advanced skills and knowledge necessary to perform these procedures safely and effectively, ensuring the best possible outcomes for patients.
In this blog, we'll take a closer look at AFA training and why it's a must for firefighters. We'll explore what AFA training is, why it's important for firefighters to have, and how to obtain this training.
If you're considering a career as a firefighter or are already working in this field, read on to learn more about how AFA training can make you a better responder in medical emergencies.
Scene Safety
The first step in any emergency situation is to ensure scene safety. As part of AFA training, firefighters learn how to assess a scene for potential hazards and risks, ensuring that they can safely and effectively provide care to patients. Using Delta’s acronyms to assist in efficient learning.
C-Spine
AFA students will learn about C-spine and Spinal Motion Restriction (SMR). What mechanisms of injury indicates the use of SMR, how to apply a cervical collar as well as packaging a patient with a suspected spinal injury.
Basic Life Support
Basic life support (BLS) is a critical component of AFA training. Firefighters learn how to perform cardiopulmonary resuscitation (CPR) and use automated external defibrillators (AEDs) to help patients in cardiac arrest. Within the completion of AFA, students will receive a BLS certificate.
Airway Management
Maintaining a patient's airway is essential in emergency situations. AFA training covers a range of airway management techniques, including using oropharyngeal and nasopharyngeal airways, as well as different manual airway management maneuvers.
Breathing Management
In addition to airway management, AFA training covers breathing management techniques. Firefighters learn how to use nasal cannulas, non-rebreather masks and bag-valve-masks as well as how to correlate each apparatus to the oxygen tank while regulating flow rate.
In-Depth CPR Training
CPR is a critical life-saving skill that all firefighters must be proficient in. AFA training covers CPR in-depth, including chest compressions, rescue breathing, and AED use.
Rapid Body Survey
As part of AFA training, firefighters learn how to conduct a thorough rapid body survey, which checks for injuries that require immediate attention. This includes checking and treating for life-threatening injuries such as bleeding, flail chest, and broken pelvis.
Vital Signs
AFA training covers how to take vital signs, including manual blood pressure, heart rate, respiratory rate, pupils, blood glucose, Glasgow Coma Scale, skin and temperature. Firefighters learn what the normal and abnormal ranges are and how to interpret vital sign readings to assess a patient's condition.
Life-Saving Medications
Firefighters may need to administer life-saving medications in emergency situations. AFA training covers how to administer medications such as naloxone, aspirin, and epinephrine, as well as how to assist with administering other medications as needed.
Patient Packaging
Packaging a patient for transport is a critical part of providing advanced first aid. AFA training covers how to package a patient onto a spine board or scoop.
Running a Call
AFA training also covers how to run a call as the primary responder from start to finish. This includes assessing the scene, providing care to patients, communicating with and delegating other responders and medical personnel.
SAGER: Traction Splinting A Midline Femur Fracture
At Delta Emergency Support Training, we provide in-depth advanced first aid classes that cover a variety of topics, including the proper application of a Sager splint. Our classes are designed for medical professionals and advanced first aiders who want to expand their knowledge and skills. In this guide, we'll cover how to effectively use a Sager splint to immobilize femoral shaft fractures and other leg injuries.
What is a Sager Splint?
A Sager splint, also known as a traction splint, is a medical device used to immobilize and align a fractured or injured leg. It is designed to reduce pain and swelling by applying traction to the leg, pulling the bone fragments back into alignment. The splint consists of two main components: the splint itself, which is a long, narrow rod that extends from the foot to the groin, and the traction mechanism, which is attached to the foot end of the splint.
An advanced first aider applies a Sager splint to a patient with a broken femur. The patient is lying on their back and the first aider is wearing white gloves and kneeling beside them.
The splint is typically made of aluminum or carbon fiber and is lightweight and easy to transport. It is designed to be adjustable to fit a variety of leg sizes and can be quickly and easily applied in emergency situations. The traction mechanism is usually a ratcheting system that allows the medical professional to control the amount of traction being applied to the leg. This mechanism can be adjusted to achieve the desired amount of traction and can be released easily if necessary.
The amount of pressure applied is weighed in pound with a rule of thumb being 10% of the patients body weight for a maximum of 15 pounds per femur fracture or 30 pounds for a bilateral femoral fracture.
Sager splints are used for femoral shaft fractures, which are fractures that occur in the middle of the thigh bone. These types of fractures can be serious and require immediate attention. Sager splints are effective at immobilizing the affected leg, reducing pain and swelling, and realigning the bone fragments.
What causes a femur fracture?
Femur fractures can occur due to a variety of mechanisms of injury (MOI), with high-energy trauma and direct impact being the most common causes.
High-energy trauma, which involves a significant amount of force, can be caused by car accidents, falls from a height, sports injuries, and other incidents that involve significant force. The femur can break due to the impact of the force or due to bending or twisting of the bone.
Direct impact to the thigh bone, such as a blow from a heavy object or a fall onto a hard surface, is another common MOI that can cause a femur fracture. This can occur in industrial accidents or during contact sports. In both cases, the force applied to the femur is greater than the bone's ability to absorb it, causing the bone to break.
It's important to note that the severity of the femur fracture can vary depending on the MOI and the angle of impact.
How serious is a broken femur?
A femur break, particularly a bilateral femur fracture, can be a serious and potentially limb-threatening injury. The femur is the longest and strongest bone in the human body and is responsible for supporting the weight of the body and facilitating movement. When the femur is fractured, it can cause significant pain, swelling, and deformity of the affected leg.
One of the most significant dangers of a femur break is the potential for the femoral artery to be compromised by a bone fragment. The femoral artery is a large blood vessel that runs through the thigh and supplies blood to the lower leg and foot. If a bone fragment from a femur break punctures the femoral artery, it can lead to internal bleeding, which can be life-threatening if not treated promptly.
In addition to the danger of internal bleeding, a femur break can also result in nerve damage, muscle damage, and compartment syndrome. Compartment syndrome occurs when pressure within a muscle compartment builds up, which can cause damage to the nerves, blood vessels, and muscles in the affected area. If left untreated, compartment syndrome can lead to permanent damage or loss of function in the affected limb.
Indications and contraindications
Indications:
Femoral shaft fractures:
Sager splints are commonly used to immobilize and align femoral shaft fractures, which are fractures that occur in the middle of the thigh bone. Bi-lateral or single femur fractures.
Contraindications:
Open fractures:
A compound or open fracture is a type of bone fracture where the broken bone pierces through the skin.
In a compound fracture, the exposed bone can be seen or felt through the wound in the skin, and there may be visible bleeding, swelling, and/or deformity at the site of the injury. If the skin over the fracture is broken or torn, the Sager splint should not be applied as it can cause further damage or infection.
Injuries on the effected leg:
If the patient has any other associated injuries, such as ankle or fib tib fractures, a Sager splint may be contraindicated. Additionally, if the patient has a knee injury, such as a dislocated knee, a Sager splint may not be appropriate as it can exacerbate the injury. It's important to carefully evaluate the patient with a thorough rapid body survey to rule out injuries that may effect application.
Life threatening injuries:
If a patient has a life-threatening injury, the priority is to rapidly transport the patient to a medical facility for appropriate treatment. In such cases, immobilization with a Sager splint may not be the best course of action, as it can take time to properly apply the splint, and rapid transport may be necessary to save the patient's life.
It's important to remember that in cases of multiple injuries or life-threatening injuries, the priority is to save the patient's life, life over limb. While a femur fracture can be a serious and potentially limb-threatening injury, other injuries may take precedence over the fracture.
Proper application
Assuming that the patient has been assessed and a Sager splint is deemed appropriate, the medical professional or advanced first aider will follow the steps outlined in the previous response to properly apply the splint. Proper application of a Sager splint requires medical training and should only be done by trained professionals. Here are the general steps involved in applying a Sager splint:
Assessment of the patient's injury:
Before applying a Sager splint, the medical professional should assess the patient's injury to determine if it's the right tool for the job. A physician should evaluate indications and contraindications.
Patient in a supine position:
Once it's been determined that a Sager splint is necessary, the patient should be placed in a supine position.
Remove clothing from effected area:
Any clothing that obstructs the affected leg should be trauma stripped to ensure proper placement of the Sager as well as to check for compound fractures.
Placement of the Sager:
The Sager splint should be placed on the affected leg, positioning the ankle and foot in the appropriate spot. The splint should be placed with the traction component of the device facing the foot.
Securing the splint to the leg:
The splint should be secured to the leg with straps or bandages, ensuring that it is snug but not too tight. This will help to keep the splint in place and provide the necessary support.
Application of traction:
The traction component of the Sager splint should be applied, pulling the leg gently and steadily until the desired amount of traction is achieved. This will help to reduce pain and swelling and realign the bone fragments.
Pulse, sensation, and movement check:
The medical professional should check the patient's pedal pulse, sensation, and movement in the affected leg to ensure that the splint is not causing further damage or obstruction.
Training
Sager splints are orthopedic devices that are commonly used to immobilize femoral shaft fractures. They can help to stabilize the fracture and prevent further damage to the leg or other parts of the body. However, the proper application of a Sager splint requires specialized training and should only be done by trained medical professionals or advanced first aiders.
At Delta Emergency Support Training, we provide in-depth advanced first aid classes that cover a variety of topics, including the proper application of a Sager splint.
Act FAST: Stroke Identification for Advanced First Aiders
As an advanced first aider, it's important to be prepared for a wide range of emergency situations, including strokes. Delta Emergency Support Training offers advanced first aid courses that can help you recognize the signs and symptoms of a stroke and provide basic care until professional medical assistance arrives. While there are limitations to what an advanced first aider can do in treating strokes, being able to recognize the signs and act quickly can make a significant difference in the chances of a positive outcome. Discover how Delta Emergency Support Training can help prepare you to respond effectively in emergency situations like strokes.
Understanding Strokes
Strokes, also know as Cerebrovascular Accident (CVA) occur when the blood supply to the brain is interrupted, either due to a blocked blood vessel or a bleeding blood vessel. This interruption can cause brain cells to die, leading to a range of symptoms and complications. Strokes can be caused by a variety of factors, including high blood pressure, smoking, diabetes, and heart disease, among others.
an older man holding his head in his hand, as if he is experiencing discomfort or pain.
There are two main types of strokes: ischemic strokes and hemorrhagic strokes. Ischemic strokes occur when a blood clot blocks a blood vessel in the brain, while hemorrhagic strokes occur when a blood vessel in the brain ruptures and bleeds into the surrounding tissue. Symptoms of a stroke can vary depending on the location and severity of the damage, but can include sudden weakness or numbness on one side of the body, difficulty speaking or understanding speech, vision problems, severe headache, and dizziness or loss of balance.
Risk Factors for Strokes
There are several factors that can increase the risk of strokes, including high blood pressure, high cholesterol, smoking, obesity, and a family history of strokes. Certain medical conditions, such as diabetes and heart disease, can also increase the risk of strokes. To reduce the risk of strokes, it's important to maintain a healthy lifestyle, eat a balanced diet, exercise regularly, and manage any underlying medical conditions.
Responding To a Suspected Stroke
Recognizing the signs of a stroke and responding quickly is essential in improving the chances of a positive outcome for stroke patients. Taking a full set of vitals including BGL to rule out possible stroke mimics.
Some of the most common symptoms of a stroke include:
Severe headache
Altered LOC
Numbness or weakness in the face, arm, or leg, especially on one side of the body
Vision problems in one or both eyes
Sudden trouble walking, dizziness, or loss of balance or coordination
It's important to note that these symptoms can occur suddenly and without warning, and that not all symptoms may be present in every stroke. Additionally, some strokes may cause more subtle symptoms that are not immediately noticeable, such as weakness or numbness that comes and goes, or changes in mood or behavior.
FAST
As an AFA, you should be familiar with the acronym FAST to help you remember the signs and symptoms of a stroke and respond quickly. Here's what it stands for:
F: Face drooping or numbness
A: Arm weakness or numbness
S: Speech difficulty or confusion
T: Time symptoms started
By asking the following questions you can quickly assess if the patient is FAST positive, which is indicative of a stroke.
F: Smile big for me, I want to see all your teeth.
A: Lift patients arms in the air and ask them to hold them up for 5 seconds.
S: Repeat after me, the early bird gets the worm.
T: Ask the patient when the symptoms started.
Treatment
As an advanced first aider, it's important to recognize the limitations of our scope of practice when it comes to treating strokes in the prehospital world. While we can provide basic care such as administering oxygen and preparing the patient for rapid transport to a medical facility, there are few treatments that we can provide beyond that. It's crucial to act quickly and call for emergency medical assistance when someone is experiencing a stroke, as prompt medical treatment at a hospital facility is key to improving the chances of a positive outcome. As an advanced first aider, it's our role to recognize the signs and symptoms of a stroke and act quickly.
Advanced First Aid Training
At Delta Emergency Support Training, we understand the importance of being prepared for emergency situations, including strokes. That's why we offer a range of training sessions, including Advanced First Aid (AFA), to help individuals and classes develop the skills and knowledge they need to respond effectively. Our AFA training includes instruction on recognizing the signs and symptoms of a stroke, as well as providing basic care until professional medical assistance arrives. Our courses are available in-person and hybrid formats to accommodate different schedules and learning styles.
If you have any questions about our AFA training, including stroke-related topics, please don't hesitate to reach out to us. You can contact us at info@deltaemergency.com and our knowledgeable instructors will be happy to assist you. We're committed to helping you develop the skills and confidence you need to respond effectively in emergency situations.
Tourniquets: A Crucial Tool for Managing Severe Bleeding
As a first aider or advanced first aider, being prepared to manage severe bleeding is essential. Tourniquets are a critical tool in managing severe bleeding and can be the difference between life and death in emergency situations. In this blog post, we'll explain what a tourniquet is, when and why to use one, how to properly apply one, and why it's crucial not to remove it once it's on.
As a first aider or advanced first aider, it's important to be prepared to handle a wide range of emergency situations, including severe bleeding that can be life-threatening if not managed quickly and effectively. Tourniquets are an important tool in the first aider's toolkit for managing severe bleeding in emergency situations. In this blog post, we'll explain what a tourniquet is, why and when we might use one, and how to properly apply one. We'll also cover how to make an improvised tourniquet if a commercial one is not available.
Two first aiders are seen applying a tourniquet to a patient's limb in this image. The first aiders are wearing blue gloves, which are an essential part of their personal protective equipment (PPE) when providing medical care in emergency situations.
What is a tourniquet?
A tourniquet is a device used to control bleeding from a limb, typically a long bone. It can be made of a variety of materials such as fabric, rubber or nylon. Modern tourniquets are typically designed to be self-administered and easy to use in high-pressure situations, making them a valuable tool for first aiders and other medical professionals.
When is using a tourniquet warranted?
Tourniquets are used in emergency situations where a person is experiencing a life threatening bleed that cannot be controlled through other means, such as direct pressure. Indication for the use of tourniquet includes soaking through multiple dressings with no slow of blood loss.
It is important to remember that a tourniquet is a last resort and should only be used when direct pressure and other measures have failed to control bleeding.
How does it work?
The tourniquet works by compressing the blood vessels in the limb, which reduces or stops the flow of blood to the area below the device. This helps to prevent further blood loss and can save the patient's life.
Tourniquet application
When applying a tourniquet, it's important to locate the injury and apply the tourniquet at least 2 inches above the injury site or joint. This will ensure that the tourniquet is applied to the correct location and will effectively control the bleeding.
Once the tourniquet is in place, it must be tightened until the blood flow dramatically lessens or stops completely. It's important to monitor the patient closely and record the time the tourniquet was applied. If possible, mark the tourniquet with the time it was applied.
In some cases, multiple tourniquets may need to be applied to control severe bleeding. This may be necessary if the bleeding is occurring in multiple locations or if a single tourniquet is not effective in stopping the bleeding. After a tourniquet is applied it must not be removed.
Removing a tourniquet
Once a tourniquet is applied, it is important not to remove it until medical professionals can take over. Removing a tourniquet prematurely can cause the bleeding to resume and lead to further injury or even death. Instead, note the time that the tourniquet was applied and communicate this information to medical professionals when they arrive on the scene.
Improvised tourniquet
When a commercial tourniquet is unavailable you can create your own with simple everyday items. One method of creating an improvised tourniquet involves using a bandana, scarf, or strip of fabric. The fabric should be about two inches wide and long enough to wrap around the limb at least twice. Place the fabric around the limb, above the wound, and tie a knot to create a loose loop. Then, tie a second knot on top of the first, and continue tying knots until the fabric is snug and there is no more bleeding from the wound. Use a stick or similar object to tighten the knot by twisting it, until the fabric is tight enough to stop the bleeding.
Conclusion
In conclusion, tourniquets are an important tool in managing severe bleeding in emergency situations. As a first aider or advanced first aider, it's important to be prepared to use a tourniquet effectively and efficiently in emergency situations. By understanding what a tourniquet is, why and when we might use one, and how to properly apply one, we can help save lives and prevent further injury.
Training opportunities
At Delta Emergency Support Training, we understand the importance of being prepared for emergency situation. We offer a range of training sessions to help individuals and classes develop the skills and knowledge they need to respond to emergency situations. Our courses include Standard First Aid (SFA), Advanced First Aid (AFA), and Emergency Medical Responder (EMR), and we offer in-person, hybrid, and online options to suit different needs.
If you have any questions about our training sessions, please don't hesitate to reach out to us. You can contact us at info@deltaemergency.com and we'll be happy to assist you.
Treating Chest Pain: Aspirin and Nitroglycerin
Aspirin and nitroglycerin are two medications that are commonly used by first responders to treat chest pain or suspected heart attack. Aspirin is a platelet inhibitor that helps to prevent blood clots from forming and reduces the risk of further damage to the heart. Nitroglycerin is a vasodilator that helps to increase blood flow to the heart by dilating blood vessels, which reduces the workload on the heart muscle.
While these medications can be effective in treating chest pain or suspected heart attack, it's important for first responders to be familiar with their uses, risks, and benefits, and to follow established protocols and guidelines when administering them. Aspirin and nitroglycerin can have potential side effects and contraindications, so it's important to use them only as directed and under the guidance of a healthcare professional.
To ensure the safety and well-being of their patients, first responders should also educate patients about the benefits and risks of aspirin and nitroglycerin, and the importance of seeking medical follow-up after receiving these medications. By working closely with healthcare professionals and following established protocols and guidelines, first responders can provide effective care and help ensure the safety and well-being of their patients.
When it comes to treating chest pain or suspected heart attack, aspirin and nitroglycerin are two medications that first responders may use to help their patients depending on scope of practice. But what are these medications, how do they work, and what do first responders need to know about their use?
man sitting down and clutching his chest in pain. He appears to be experiencing a heart attack. Calgary Fire Fighters on the way.
Aspirin:
What is Aspirin, and How Does it Work?
Aspirin, also known as acetylsalicylic acid (ASA), is a medication that's commonly used to treat pain, fever, and inflammation. Aspirin works by inhibiting the activity of platelets, which are small blood cells that play a key role in blood clotting. When a blood vessel is damaged, platelets are activated and begin to stick to the damaged area to form a plug, which helps to stop bleeding. However, when a blood clot forms inside an artery supplying the heart, it can block blood flow and cause a heart attack.
As a platelet inhibitor, aspirin helps to prevent blood clots from forming and reduces the risk of further damage to the heart.
How is Aspirin Used in Emergency Situations?
Aspirin is an important medication for first responders to use in emergency situations, particularly for patients experiencing chest pain or suspected heart attack also know as a myocardial infarction. To speed up its onset of action, chewing aspirin is often recommended. The recommended dose of aspirin for patients with suspected heart attack is typically between 160-325 mg.
Contraindications:
There are certain situations where aspirin use may not be appropriate or may need to be used with caution.
Some common contraindications for aspirin use include:
Allergy or hypersensitivity to aspirin or other non-steroidal anti-inflammatory drugs (NSAIDs)
Active bleeding or bleeding disorders
Suspected stroke
ASA exacerbated asthma
Children with viral infection
Nitroglycerin:
What is Nitroglycerin, and How Does it Work?
Nitroglycerin is a medication used to treat chest pain or angina, which is often a symptom of heart disease. Nitroglycerin is a vasodilator, which means that it relaxes and widens blood vessels throughout the body, including the coronary arteries that supply blood to the heart muscle.
By dilating the blood vessels, nitroglycerin helps to increase blood flow to the heart, which reduces the workload on the heart muscle and can relieve chest pain or angina. Nitroglycerin works by releasing nitric oxide, which is a gas that relaxes the smooth muscle cells in the walls of blood vessels.
In addition to its effects on the coronary arteries, nitroglycerin can also cause vasodilation in other blood vessels, which can lead to a drop in blood pressure or hypotension. This is why nitroglycerin should not be given to patients with low blood pressure or hypotension.
It is administered as a sublingual spray with a recommended dose of 0.4 mg.
Contrindications:
While nitroglycerin is a useful medication, there are some precautions to keep in mind. PASS is an acronym to help you remember nitroglycerin’s contraindications.
Prescription: Making sure the nitro is prescribed to the patient.
Allergy: Confirming the patient does not have an allergy to nitro or other nitrates.
Systolic: Taking vitals to confirm their systolic blood pressure is above 100.
Sex drugs: A brief history of the patients medication use, Viagra, Levitra and Cialis in the last 24hr are all contraindicated for nitro.
Aspirin and Nitro
Aspirin and nitroglycerin are two medications that first responders will encounter in emergency situations for patients experiencing chest pain or suspected heart attack. While both medications can be effective in treating these conditions, they work in different ways and have different indications and contraindications.
Aspirin is a platelet inhibitor that helps to prevent blood clots from forming and reduces the risk of further damage to the heart. It is often used as a long-term treatment to reduce the risk of recurrent heart attacks or stroke. Nitroglycerin, on the other hand, is a vasodilator that helps to increase blood flow to the heart by dilating blood vessels, which reduces the workload on the heart muscle. It is typically used as a short-term treatment to relieve chest pain or angina.
By understanding their uses, risks, and benefits, first responders can provide effective care and help ensure the safety and well-being of their patients.
Training
In our advanced first aid training class, we cover topics such as heart disease and the use of aspirin and nitroglycerin to equip you with the knowledge and skills to provide excellent care in emergency situations. Calgary Fire, for example, is one of the many organizations that uses these medications as part of their protocols for responding to chest pain and suspected heart attack.
At Delta Emergency, we are dedicated to providing you with the tools you need to confidently handle any emergency situation involving chest pain or suspected heart attack. Our training programs are designed to teach you about the uses, risks, and benefits of aspirin and nitroglycerin, as well as the proper administration and monitoring of these medications.
If you have any questions or concerns about our training programs or the use of aspirin and nitroglycerin in emergency situations, please don't hesitate to contact us at info@deltaemergency.com. We're here to support you every step of the way in providing effective care to patients experiencing chest pain or suspected heart attack, just like Calgary Fire and other first responders do on a daily basis.
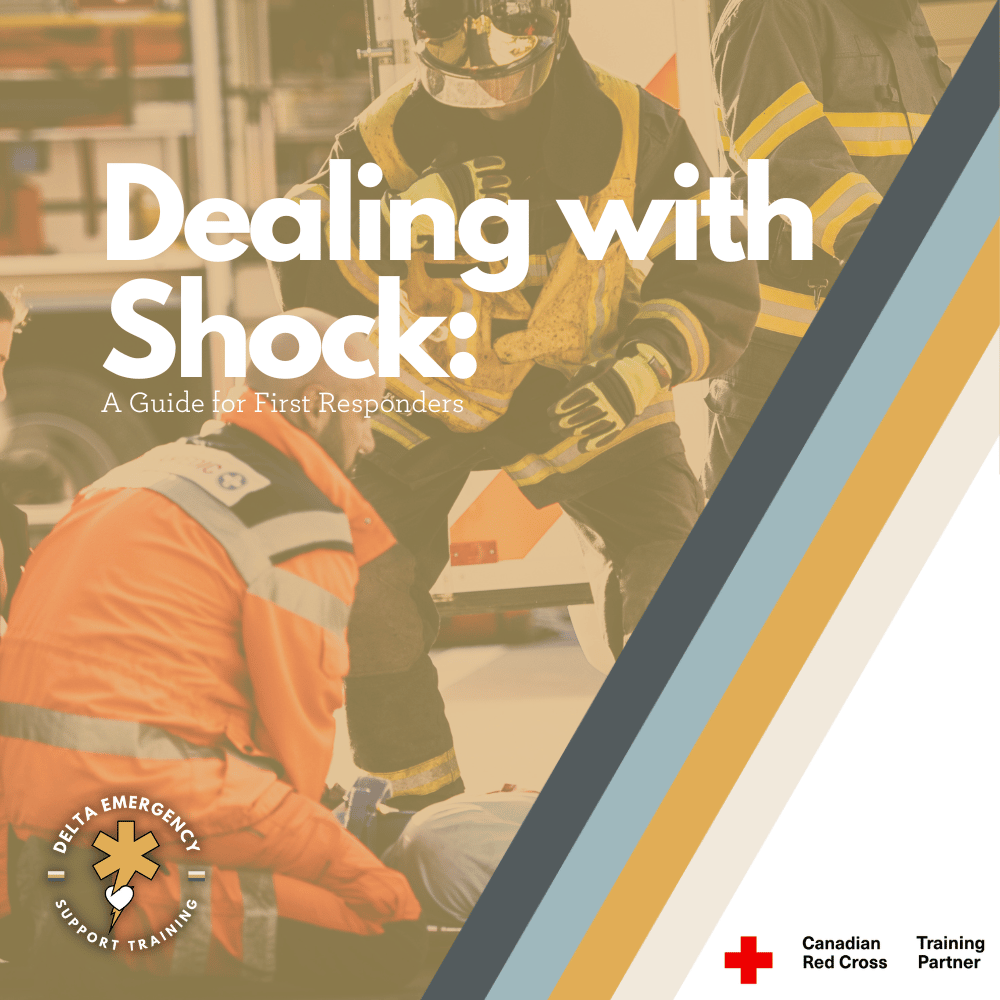
Dealing with Shock: A Guide for First Responders
Shock is a serious and potentially life-threatening condition that occurs when there is inadequate blood flow to the body's tissues and organs. There are several different types of shock, including hypovolemic shock (caused by severe blood loss), cardiogenic shock (caused by heart failure), obstructive shock (caused by a physical obstruction), and distributive shock (caused by a loss of blood vessel tone).
Common symptoms of shock include rapid breathing, rapid heart rate, low blood pressure, confusion or disorientation, and pale or cool skin. If left untreated, shock can lead to organ failure and even death.
Effective treatment of shock depends on identifying the underlying cause and quickly providing appropriate interventions. This may include providing high-flow oxygen, addressing the underlying cause (such as stopping severe bleeding), and closely monitoring the patient's vital signs.
Shock is a life-threatening medical condition that can occur in a variety of situations, including trauma, infection, and severe bleeding. It's important for firefighters and other first responders to be able to recognize the signs and symptoms of shock and to know how to treat it effectively.
First responders at a car crash scene attending to a patient in shock.
What is shock
When the body enters a state of shock, it undergoes a process called vasoconstriction. This is where the blood vessels throughout the body narrow and constrict in an attempt to redirect blood flow to the body's core organs, such as the heart, lungs, and brain. This is a protective mechanism that allows the body to prioritize blood flow to the most vital organs during times of stress or injury.
However, this process of vasoconstriction can have negative effects on other parts of the body. Blood flow to the extremities, such as the arms and legs, can be significantly reduced, which can lead to cold, clammy skin and impaired wound healing. The kidneys may also be affected, as decreased blood flow to the kidneys can lead to decreased urine output and impaired kidney function.
If shock is not addressed and blood flow to the body's core organs is not restored, the body's compensatory mechanisms may become overwhelmed and ineffective. This can lead to a state of decompensation, where the body's vital organs begin to fail and serious complications can occur.
What does shock look like?
Shock is characterized by a lack of oxygen and nutrients to the body's tissues and organs. This can cause a range of symptoms, including:
Rapid heart rate and breathing
Low blood pressure
Cold, clammy skin
Confusion or disorientation
Weakness or fatigue
Nausea or vomiting
Different types of shock
There are several different types of shock, each with their own unique causes and characteristics:
Hypovolemic shock occurs when there is a significant loss of blood or other fluids from the body, such as from a severe injury or dehydration.
Cardiogenic shock is caused by a heart that is unable to pump blood effectively due to damage or disease.
Obstructive shock occurs when there is a physical blockage that prevents blood from circulating properly, such as from a blood clot or a collapsed lung.
Distributive shock is caused by a disruption of the body's natural balance of fluids and can be the result of severe infection, an allergic reaction, or neurological damage.
Treatment
Administering high-flow oxygen:
One of the first steps in treating someone in shock is to provide high-flow oxygen. This can help improve oxygen delivery to the body's tissues and organs.
Addressing the underlying cause:
Depending on the type of shock, there may be an underlying cause that needs to be addressed. For example, if the shock is caused by severe bleeding, the bleeding must be stopped in order to effectively treat the shock.
Monitoring vital signs:
It's important to monitor the patient's vital signs, including their heart rate, blood pressure, and oxygen saturation levels, in order to determine the effectiveness of treatment and make any necessary adjustments.
It's important to note that the specific treatment for shock will vary depending on the underlying cause and the patient's individual needs. Therefore, it's crucial for first responders to be properly trained and equipped to identify and treat shock in a timely and effective manner.
Training
At Delta Emergency Support Training, we understand the importance of being prepared for emergency situation. We offer a range of training sessions to help individuals and classes develop the skills and knowledge they need to respond to emergency situations. Our courses include Standard First Aid (SFA), Advanced First Aid (AFA), and Emergency Medical Responder (EMR), and we offer in-person, hybrid, and online options to suit different needs.
If you have any questions about our training sessions or shock, please don't hesitate to reach out to us. You can contact us at info@deltaemergency.com and we'll be happy to assist you.
Understanding Hypoxia: A Firefighters guide
Hypoxia is a serious medical condition that can be caused by a range of factors, including respiratory conditions, cardiac emergencies, trauma, and drug overdose. However, one potential cause that is often overlooked is smoke inhalation and carbon monoxide (CO) poisoning.
Inhaling smoke from a fire can expose individuals to high levels of CO, a poisonous gas that can cause hypoxia by binding to hemoglobin in the blood and reducing the amount of oxygen that can be carried to the body's tissues. It's important to note that carbon monoxide poisoning can cause the SpO2 monitor to read a normal oxygen saturation level, even when the individual is experiencing hypoxia. Therefore, administering high-flow oxygen is crucial for any fire patient, as it can help displace carbon monoxide and increase the amount of oxygen available to the body's tissues.
As an advanced first aider, it's important to be familiar with the signs and symptoms of hypoxia, particularly in cases of smoke inhalation and CO poisoning. Symptoms may include cyanosis, shortness of breath, and altered mental status. Administering high-flow oxygen and working closely with emergency medical services personnel and hospital staff can help ensure that individuals receive appropriate care and follow-up treatment for their condition.
Overall, understanding the potential for hypoxia in smoke inhalation and carbon monoxide poisoning is critical for providing effective care in the prehospital setting. Administering high-flow oxygen and working closely with other healthcare providers can help ensure that individuals receive timely and effective treatment for their condition.
What is Hypoxia?
Hypoxia is a condition where there is a decrease in the amount of oxygen reaching the body's tissues.
a small medical device that is used to measure oxygen saturation levels in the blood. The device features a digital display screen and clips onto a person's finger. The screen displays a 98% SPO2 reading.
Causes of Hypoxia
Hypoxia can be caused by a variety of factors, including pulmonary disorders, cardiovascular disease, trauma, carbon monoxide poisoning, and drug overdose. Given the frequency of these causes in their work, firefighters must be prepared to recognize and manage hypoxia in emergency situations.
Overall, understanding the potential causes of hypoxia and being prepared to manage this potentially life-threatening condition is critical for firefighters and other first responders.
Respiratory emergencies:
Conditions such as asthma, chronic obstructive pulmonary disease (COPD), and pneumonia can impair the lungs' ability to transfer oxygen to the blood, leading to hypoxia.
Individuals with respiratory conditions may experience shortness of breath, rapid breathing, and wheezing, which can indicate a lack of oxygen in the body. These symptoms can worsen during periods of physical exertion, stress, or exposure to environmental triggers such as allergens or pollutants.
Cardiac emergencies:
Cardiac emergencies are another potential cause of hypoxia in the prehospital setting. Conditions such as heart failure, heart attack, and pulmonary embolism can reduce blood flow to the body's tissues, leading to hypoxia.
When the heart is unable to pump blood effectively, the body may not receive sufficient oxygen, resulting in hypoxia. Individuals with cardiac emergencies may experience symptoms such as chest pain, shortness of breath, and rapid or irregular heartbeat, which can indicate a lack of oxygen to the tissues.
Trauma:
When an individual experiences severe trauma, such as from a motor vehicle accident or a fall, they may sustain injuries that impede their ability to breathe and deliver oxygen to their tissues.
Injuries such as broken ribs or a collapsed lung can interfere with the normal mechanics of breathing, preventing sufficient oxygen intake. Additionally, traumatic injuries can cause significant bleeding, reducing the body's ability to transport oxygen to the tissues. In some cases, trauma can also lead to shock, which can result in decreased oxygen delivery to the tissues.
Carbon monoxide poisoning:
When individuals inhale smoke from a fire, they may be exposed to high levels of carbon monoxide, a poisonous gas that can cause hypoxia by binding to the hemoglobin in the blood, reducing the amount of oxygen that can be carried to the body's tissues.
A complication with carbon monoxide poisoning is that it can lead to a false readings when using an SpO2 monitor. This is because carbon monoxide can bind to hemoglobin in a similar way to oxygen, which can cause the SpO2 monitor to read a normal oxygen saturation level, such as 99%. However, even if the SpO2 reading appears normal, the individual may still be experiencing hypoxia due to carbon monoxide poisoning.
Therefore, it's important to always administer high-flow oxygen to any fire patient, including those who have potentially been exposed to carbon monoxide. Providing high-flow oxygen can help to displace carbon monoxide from hemoglobin and increase the amount of oxygen available to the body's tissues.
Drug overdose:
Many drugs, particularly opioids and sedatives, can cause respiratory depression, which means that an individual's breathing rate is reduced and they may not receive enough oxygen.
Symptoms of Hypoxia
The symptoms of hypoxia can vary depending on the severity of the condition and the underlying cause. Some common symptoms of hypoxia include shortness of breath, rapid or shallow laboured breathing, cyanosis (bluish tint to the skin), confusion or disorientation, headache, fatigue, nausea, rapid heartbeat, and dizziness or lightheadedness.
How to Check for Hypoxia Using an SpO2 Monitor
As an advanced first aider who is allowed to treat with oxygen, it's important to understand how to check for hypoxia using an SpO2 monitor. An SpO2 monitor measures the oxygen saturation in the blood, which can help determine if an individual is experiencing hypoxia.
To use an SpO2 monitor, follow these steps:
Turn on the monitor and place the sensor on the individual's fingertip.
Wait for the monitor to display the oxygen saturation percentage.
Take note of the percentage and compare it to normal levels.
What Percentage of Oxygen on the Monitor Indicates Different Severities of Hypoxia?
Normal oxygen saturation levels are typically between 95-100%. If the oxygen saturation level is below 95%, it may indicate hypoxia. The severity of hypoxia can be determined by the following percentage ranges:
Mild hypoxia: Oxygen saturation level between 90-94%.
Moderate hypoxia: Oxygen saturation level between 80-89%.
Severe hypoxia: Oxygen saturation level below 80%.
It's important to note that an SpO2 monitor is not a definitive diagnosis of hypoxia and should be used in conjunction with other symptoms and clinical assessments.
Treatment of Hypoxia
As an advanced first aider who is allowed to treat with oxygen, your first step in treating hypoxia is to administer high flow O2 via NRB (Non Rebreather) or BVM (Bag Valve Mask).
Administering supplemental oxygen is a key treatment measure for hypoxia, but it's also important to address the underlying condition that is causing the hypoxia. This may involve working closely with other healthcare providers, such as respiratory therapists or emergency medical services personnel, to provide comprehensive care.
Overall, as an advanced firefighter, being familiar with the causes, symptoms, treatment, and prevention of hypoxia can help you provide effective care and support to individuals who are experiencing this potentially life-threatening condition.
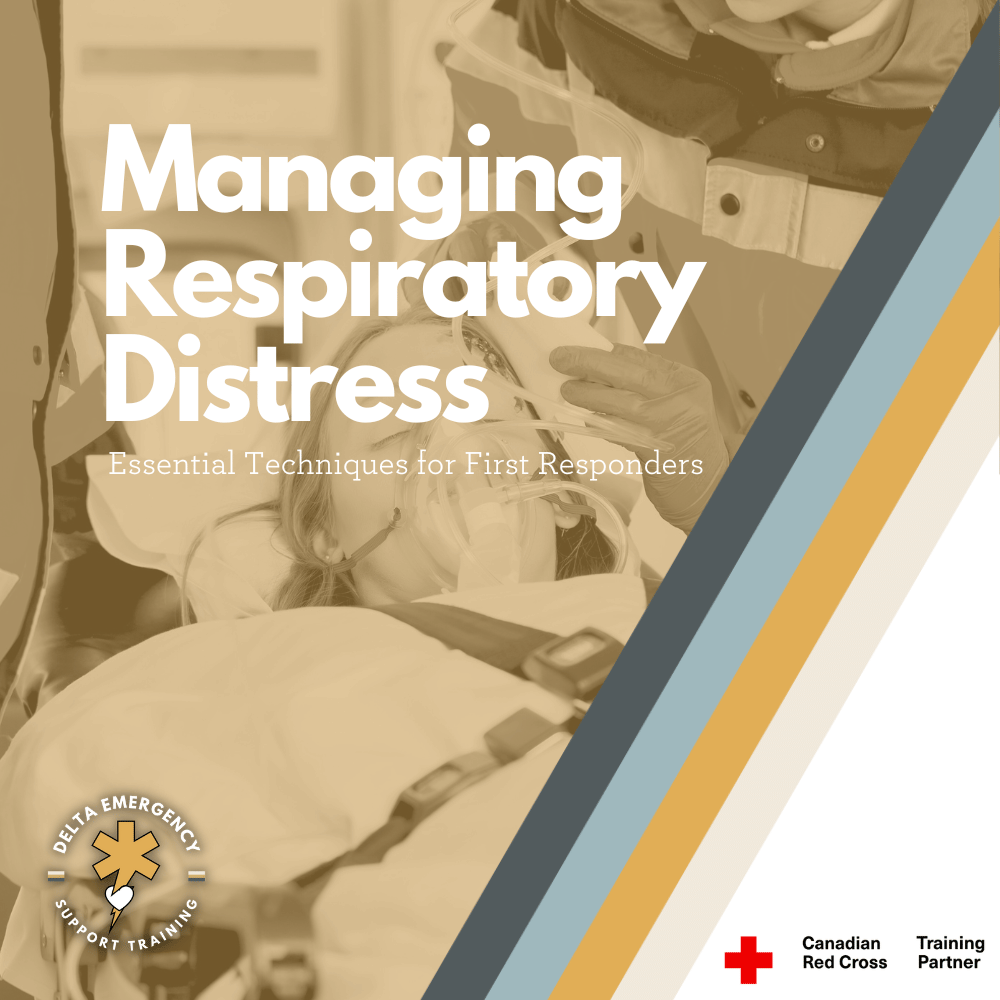
Managing Respiratory Distress: Essential Techniques for First Responders
First responders play a critical role in emergency situations, including managing the breathing of patients. In this blog, we will discuss the importance of breathing management for first responders and provide tips for ensuring the best possible outcomes for patients.
As a first responder, proper breathing management is essential for providing effective care to patients in respiratory distress. Understanding the anatomy of the respiratory system, recognizing signs and symptoms of respiratory distress, and maintaining normal breathing rates are all important aspects of breathing management. In this post, we'll explore these topics in the context of first responders.
The first responder has placed an oxygen mask, known as a non-rebreather, over the patient's nose and mouth. The non-rebreather has a bag that fills with oxygen, which allows the patient to receive a high concentration of oxygen with each breath. The non-rebreather mask is used to treat patients who are experiencing respiratory distress or who require high levels of oxygen.
Anatomy of the Respiratory System
As a first responder, it's important to have a basic understanding of the anatomy of the respiratory system. The respiratory system consists of several parts that work together to facilitate breathing. The main organs involved in breathing are the lungs, which are located in the chest. The lungs are made up of millions of tiny air sacs called alveoli, which are responsible for exchanging gases with the blood. The trachea, or windpipe, connects the lungs to the mouth and nose, while the diaphragm is a muscle that helps with breathing by contracting and relaxing. The bronchi are the tubes that branch off from the trachea and lead to the lungs, and the bronchioles are smaller tubes that branch off from the bronchi and lead to the alveoli.
Signs and Symptoms of Respiratory Distress
As a first responder, it's important to recognize the signs and symptoms of respiratory distress. These may include:
Shortness of breath:
Feeling like you can't get enough air, or struggling to breathe, is a common symptom of respiratory distress.
Rapid breathing:
Breathing faster than normal, or taking shallow breaths, may be a sign of respiratory distress.
Chest pain:
Pain or discomfort in the chest can be a sign of a serious respiratory problem.
Wheezing/Stridor:
A high-pitched whistling sound when breathing may indicate narrowing of the airways.
Cyanosis:
This can indicate a lack of oxygen in the blood.
Confusion:
Lack of oxygen can cause confusion or disorientation.
Fatigue:
Difficulty breathing can cause fatigue or weakness.
Maintaining Normal Breathing Rates
As a first responder, it's important to know the normal breathing rates for adults and children. The normal breathing rate for an adult is around 12-20 breaths per minute, while the normal breathing rate for a child is higher, around 20-40 breaths per minute. However, certain conditions can cause abnormal breathing rates. For example, respiratory distress can cause rapid, shallow breathing, while other conditions, such as sleep apnea, can cause periods of slowed or paused breathing.
Breathing Management
Proper breathing management is essential for providing effective care to patients in respiratory distress. As a first responder, here are some tips for managing breathing:
Administer oxygen:
Depending on the severity of the patient's respiratory distress, administering oxygen may be necessary. The appropriate oxygen delivery device should be used based on the patient's level of respiratory distress.
Position the patient:
Positioning the patient in a way that maximizes their breathing capacity can be helpful. For example, placing the patient in a sitting position with their head slightly elevated may make it easier for them to breathe.
Provide assisted ventilation:
In some cases, conscious bagging with a bag valve mask may be necessary to help the patient normalize their breathing rate.
Transport the patient to a medical facility:
If the patient's respiratory distress is severe, transport them to a medical facility for further treatment.
Oxygen masks and flow rates
Breathing masks are a crucial piece of equipment for first responders, as they allow them to provide oxygen to patients in respiratory distress. There are several types of breathing masks available, each with its own specific use and oxygen flow rate. In this post, we'll explore the different types of breathing masks commonly used by first responders, including the nasal cannula, simple face mask, non-rebreather mask, and bag valve mask.
Nasal Cannula
The nasal cannula is a type of oxygen delivery device that is used to provide oxygen to patients with mild to moderate respiratory distress. It is a thin tube that is inserted into the nostrils and is held in place by a strap that goes around the patient's head. The nasal cannula is typically used to deliver low to medium oxygen flow rates, typically ranging from 1 to 6 liters per minute (LPM).
Simple Face Mask
The simple face mask is another type of oxygen delivery device that is used to provide oxygen to patients with respiratory distress. It covers the nose and mouth and is held in place by an elastic strap that goes around the patient's head. The simple face mask is typically used to deliver medium to high oxygen flow rates, typically ranging from 5 to 10 LPM.
Non-Rebreather Mask
The non-rebreather mask is a type of face mask that is used to deliver high concentrations of oxygen to patients with severe respiratory distress. It covers both the nose and mouth and has a one-way valve that allows the patient to inhale oxygen from a reservoir bag. The non-rebreather mask is typically used to deliver high oxygen flow rates, ranging from 10 to 15 LPM.
Bag Valve Mask
The bag valve mask, also known as a manual resuscitator, is a handheld device that is used to provide positive pressure ventilation to patients in respiratory distress. It consists of a bag that is attached to a mask and is used to deliver oxygen to the patient's lungs. The bag valve mask is typically used to deliver high oxygen flow rates, ranging from 10 to 15 LPM.
By following proper breathing management techniques, first responders can help ensure that patients receive the oxygen they need to survive, while also ensuring their own safety in emergency situations.
At Delta Emergency Support Training, we understand the importance of being prepared for medical emergencies. We offer a range of training sessions to help individuals and classes develop the skills and knowledge they need to respond to emergency situations. Our courses include Standard First Aid (SFA), Advanced First Aid (AFA), and Emergency Medical Responder (EMR), and we offer in-person, hybrid, and online options to suit different needs.
If you have any questions about our training sessions or medical emergencies in general, please don't hesitate to reach out to us. You can contact us at info@deltaemergency.com and we'll be happy to assist you.
Firefighter Training: OPA's and NPA's for Airway Management
Nasopharyngeal airways (NPA) and oropharyngeal airways (OPA) are commonly used in healthcare settings to maintain a patient's airway and assist with breathing.When used correctly, NPAs can help clients who may be experiencing respiratory distress during certain treatments. However, it's important to have the necessary knowledge and protocols in place to safely insert and monitor the device. At Delta Emergency Support Training, we can help you learn how to safely use NPAs in spa settings and beyond. Our training sessions include a range of courses, including Standard First Aid (SFA), Advanced First Aid (AFA), and Emergency Medical Responder (EMR), and we offer in-person, hybrid, and online options to suit different needs. Contact us at info@deltaemergency.com to learn more about our training sessions and how we can help you develop the skills and knowledge you need to respond to emergency situations effectively.
As a firefighter, you need to be prepared to respond to emergency situations, including those involving airway management for an unconscious patients airway. Two commonly used tools for airway management are oropharyngeal airways (OPA's) and nasopharyngeal airways (NPA's). Today we'll discuss what these devices are, why they are used, and how to properly insert them as a first responder.
Four colour coded Oropharyngeal airways lay across a medical sheet.
What are OPA's and NPA's?
Oropharyngeal airways (OPA's) and nasopharyngeal airways (NPA's) are medical devices used to keep an airway open in patients who can’t secure it themselves. They are used when the patient is unable to maintain their own airway due to injury, illness, or drug overdose and become unconscious. OPA's and NPA's are both designed to be inserted into the patient's airway to help keep it open.
An OPA is a curved plastic device that is inserted into the patient's mouth and extends into the pharynx. It helps to prevent the tongue from obstructing the airway and allows air to pass freely into the lungs. OPA's are available in different sizes to accommodate patients of different ages and sizes.
An NPA is a flexible, hollow tube that is inserted into the patient's nostril and extends into the nasopharynx. It helps to keep the airway open and can be used in patients who are unable to tolerate an OPA due to gag reflex or other reasons.
Why do we use OPA's and NPA's?
The primary reason for using OPA's and NPA's is to maintain a patient's airway and ensure that they are able to breathe. When a patient's airway is obstructed, it can quickly lead to hypoxia, which is a dangerous condition where the body's tissues do not receive enough oxygen. OPA's and NPA's are used to prevent this from happening by keeping the airway open and allowing oxygen to flow freely into the lungs.
Testing for LOC (Level Of Consciousness)
Before inserting an OPA, it is important to assess the patient's level of consciousness. The AVPU scale is a simple and quick method for assessing a patient's level of consciousness based on their response to stimuli. The scale has four categories:
A: Alert
V: Verbal response
P: Pain response
U: Unresponsive
To use the AVPU scale, a healthcare provider would first try to get the patient's attention by speaking to them in a normal tone of voice. If the patient responds appropriately, they would be classified as "A" for alert. If the patient responds to verbal stimuli but is not fully alert, they would be classified as "V" for verbal response. If the patient only responds to painful/physical stimuli, such as a trap squeeze or nail bed pressure, they would be classified as "P" for pain/physical response. If the patient does not respond to any stimuli, they would be classified as "U" for unresponsive.
If a patient is assessed as being unresponsive or only responding to painful stimuli, an OPA may need to be inserted to maintain their airway. However, if the patient is alert or responding to verbal stimuli, an OPA may not be necessary.
How to insert OPA's and NPA's as a first responder
Proper insertion of OPA's and NPA's is crucial to their effectiveness and patient safety. Here are some general steps for inserting OPA's and NPA's:
Inserting an OPA:
Choose the appropriate size OPA for the patient based on their age and size. Measure from the corner of the mouth to the angle of the jaw.
Position the patient's head in a neutral position.
Open the patient's mouth using the cross finger technique.
Insert the OPA into the patient's mouth, with the curved end facing the roof of the mouth.
Gently rotate the device 180 degrees as you insert it, until it is in a anatomical position.
Inserting an NPA:
Choose the appropriate size NPA for the patient based on their age and size by measuring the tip of the nose to the corner of the jaw.
Lubricate the NPA with a water-soluble lubricant.
Position the patient's head in a neutral position.
Insert the NPA into the patient's nostril starting with the right nostril. Bevelled edge facing the septum.
Gently advance the device until it reaches the back of the nasopharynx
At Delta Emergency Support Training, we understand the importance of being prepared for medical emergencies. We offer a range of training sessions to help individuals and classes develop the skills and knowledge they need to respond to emergency situations. Our courses include Standard First Aid (SFA), Advanced First Aid (AFA), and Emergency Medical Responder (EMR), and we offer in-person, hybrid, and online options to suit different needs.
If you have any questions about our training sessions or medical emergencies in general, please don't hesitate to reach out to us. You can contact us at info@deltaemergency.com and we'll be happy to assist you.

