The Delta Dispatch
Crush Injuries: When to leave it to the professionals
Accidents can happen at any time and in various environments, resulting in different types of injuries. One particularly challenging type of injury to manage is a crush injury. Whether caused by heavy machinery, falling objects, or high-pressure forces, crush injuries can lead to severe damage to body tissues, bones, and organs. In this comprehensive guide, we provide first aid responders with the knowledge and skills needed to effectively manage crush injuries. From assessing the scene and preserving the airway to controlling bleeding and understanding the risks of object removal, we cover crucial steps and considerations. Additionally, we delve into the impact of acidosis in crush injuries, emphasizing the importance of professional medical assistance. By being prepared and informed, first aid responders can provide essential care and potentially save lives in crush injury incidents.
Accidents can occur at any time and in various environments, resulting in different types of injuries. One particularly challenging type of injury to manage is a crush injury. These injuries can be caused by heavy machinery, falling objects, or other high-pressure forces, leading to severe damage to body tissues, bones, and organs.
Industrial worker having first aid preformed on a injured arm.
As a first aider or professional responder, it is crucial to be prepared and knowledgeable about how to provide immediate care to individuals with crush injuries. In this comprehensive guide, we will explore the basics of crush injuries, discuss the essential steps to effectively manage and treat them, and outline the considerations specific to first responders.
Understanding Crush Injuries: A crush injury occurs when a body part becomes trapped between two objects or experiences a significant force that compresses the tissues. Such injuries can result in a range of complications, including bleeding, fractures, muscle damage, nerve injuries, and even internal organ damage. Immediate intervention is vital to prevent further harm and minimize the risk of long-term consequences. It is important to note that if an object has been in place for more than ten minutes in a crush injury, it should not be removed.
Steps to Treat Crush Injuries
Ensure Personal Safety: Before providing aid to someone with a crush injury, always assess the surroundings for potential dangers. Ensure that the scene is safe for both the injured person and yourself. Be cautious of any ongoing hazards, such as unstable structures, electrical wires, or potential falling objects.
Call for Professional Help: If the crush injury is severe or life-threatening, call emergency medical services immediately. Crush injuries often require advanced medical interventions, including surgical procedures, and should be evaluated by healthcare professionals. Communicate with medical control for guidance as needed.
Preserve the Airway: If the individual is unconscious or having difficulty breathing, check their airway for any obstructions. If necessary, clear the airway by performing the head-tilt, chin-lift maneuver, or using appropriate techniques as per your first aid training. Maintaining a clear airway is crucial, particularly if the object is impeding breathing.
Control Bleeding: Apply direct pressure on any visible wounds to control bleeding. Use a sterile cloth, bandage, or any clean cloth available. If the bleeding is severe or arterial, apply firm pressure and consider using a tourniquet as a last resort. Communicate with medical control for guidance on tourniquet application if available.
Provide Comfort and Reassurance: Crush injuries can be traumatic for the victim, causing pain, anxiety, and distress. Offer comfort and reassurance while waiting for professional help to arrive. Keep the individual warm, provide emotional support, and let them know that help is on the way.
Monitor Vital Signs: While waiting for medical professionals, continuously monitor the individual's vital signs, including breathing, pulse, and level of consciousness. Be prepared to perform cardiopulmonary resuscitation (CPR) if necessary. Communicate changes in the individual's condition to medical control.
Considerations for First Responders
Scene Safety: Prioritize the safety of both the injured person and the first responders. Assess the scene for hazards and take necessary precautions to ensure a safe working environment.
Airway compromisation: In cases where a crush injury results in airway being compromised, immediate action must be taken to ensure the person's ability to breathe. If the object is crushing an area around the chest neck or face obstructing breathing, it is necessary to carefully move or remove the object to restore a clear airway. However, caution should be exercised to avoid causing further harm or worsening the injury.
Professional Judgment: First responders, such as paramedics or emergency medical technicians (EMTs), should rely on their training and experience to make decisions regarding object removal or other interventions. Consult with medical control as needed.
Critical Situations: In life-threatening situations where the object is obstructing the airway, causing severe bleeding, or compromising circulation, first responders may need to remove the object promptly to preserve life and restore normal breathing. Follow protocols and training guidelines specific to your region.
Specialized Tools and Techniques: First responders may have access to specialized tools and techniques to safely remove objects from crush injuries. Use these tools according to training and guidelines to minimize the risk of further injury.
Communication and Collaboration: Maintain effective communication with your team and medical control. Provide a detailed report of the situation and seek guidance if unsure about the appropriate course of action. Collaborate with medical professionals to ensure the best possible outcome.
Dangers of Removing Objects
Removing an object involved in a crush injury should only be done when necessary and under appropriate circumstances. It is crucial to consider the following dangers:
Further Tissue Damage: Removing an object without proper medical guidance and expertise can cause additional harm. It may tear or damage tissues, exacerbate bleeding, or worsen fractures.
Embedded Objects: If an object is deeply embedded or stuck in the injured area, attempting to remove it may cause more harm than good. It is best to leave the removal to healthcare professionals with specialized tools and techniques.
Acidosis
Acidosis is a condition characterized by an imbalance in the body's pH levels, resulting in increased acidity. In the context of crush injuries, acidosis can occur when the injured extremity experiences compromised circulation, leading to inadequate oxygen and nutrient supply to the tissues. Without sufficient oxygen, the tissues switch to anaerobic metabolism, which produces lactic acid as a byproduct.
When circulation is cut off to an extremity due to a crush injury, the accumulated lactic acid and other acidic waste products remain trapped within the affected tissues. However, when circulation is restored, such as through the release of the compressive force or during medical intervention, the acidic waste can be reintroduced into the circulatory system. This can lead to systemic acidosis, where the blood and body fluids become more acidic.
Systemic acidosis can have detrimental effects on various organs, including the heart. The increased acidity interferes with normal cellular function and can affect the heart's ability to pump effectively. It can impair the delivery of oxygen and nutrients to the body's tissues and organs, further exacerbating the injury's impact. Additionally, acidosis can disrupt the body's electrolyte balance and interfere with enzymatic reactions necessary for proper cellular functioning.
Managing acidosis in crush injuries involves addressing the underlying cause and restoring normal circulation and oxygenation to the affected tissues. This may require immediate medical intervention, such as surgical decompression or the use of specialized equipment to release the compressive force. In severe cases, intravenous fluids and medications may be administered to correct the acid-base imbalance.
It is important for first aid responders and healthcare professionals to be aware of the potential complications of acidosis in crush injuries. Early recognition and prompt treatment of acidosis, along with comprehensive management of the crush injury itself, can help minimize the adverse effects on the he
Conclusion
Crush injuries require immediate and appropriate first aid intervention to prevent further harm and improve the chances of recovery. As a first aid responder, your role is crucial in stabilizing the injured person, controlling bleeding, and providing comfort while awaiting professional medical assistance. However, it is important to recognize the limitations of first aid and seek professional help for severe crush injuries.
At Delta, we understand the unique risks associated with crush injuries, particularly in industrial settings. That's why we offer industry-specific training programs designed to equip first aid responders with the knowledge and skills necessary to handle these situations effectively. Our specialized training covers protocols for stabilizing the injured person, controlling bleeding, and managing potential complications.
To ensure you are fully prepared to respond to crush injuries, contact us for specialized training. Our programs are tailored to the needs of industrial workplaces where crush injuries are a significant concern. By undergoing our training, you can enhance your ability to provide essential assistance in situations involving crush injuries, potentially saving lives and minimizing the long-term impact on individuals affected by these injuries.
Always remember to prioritize the preservation of the airway in crush injuries, and if the object is impeding breathing, take prompt action to restore normal respiration. Additionally, exercise caution when considering object removal and be aware of the risks associated with acidosis when circulation is compromised. Collaboration with medical control, adherence to protocols, and a thorough understanding of the risks and appropriate interventions will contribute to effective first aid response in crush injury incidents.
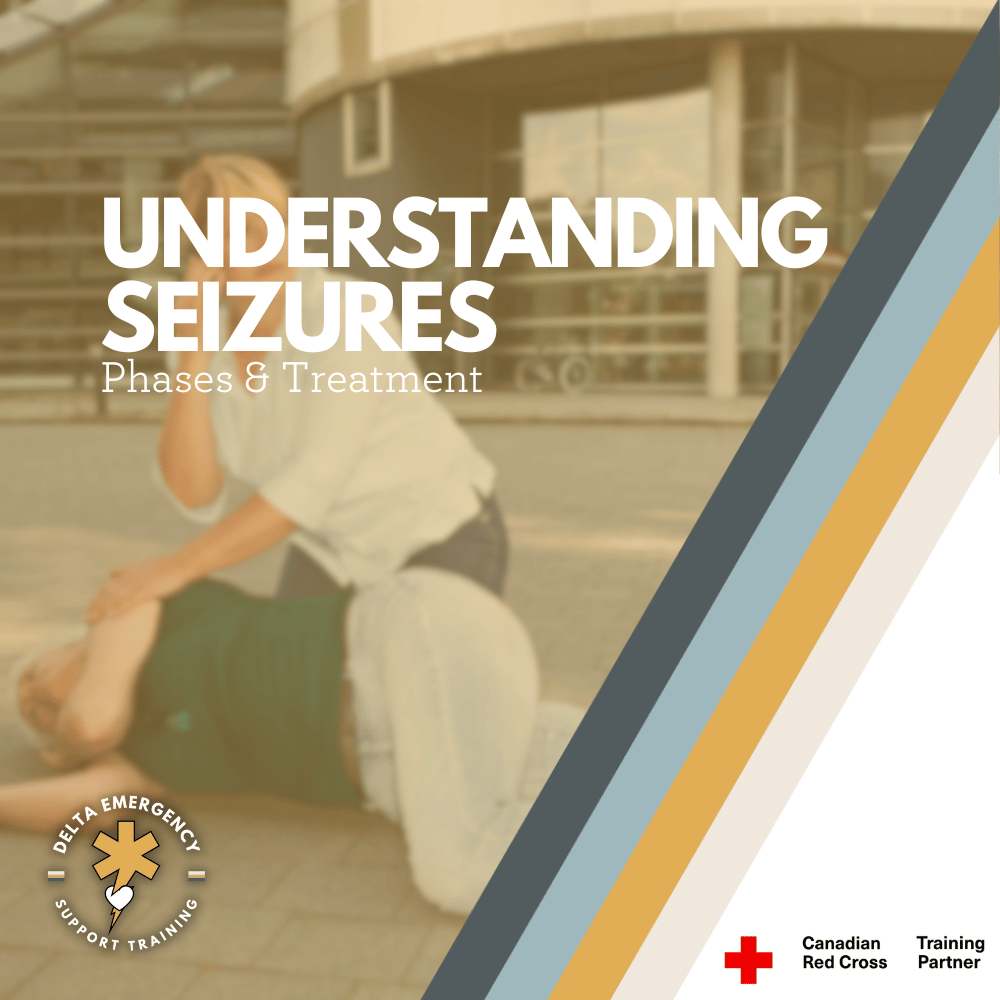
Understanding Seizures: Exploring Types, Phases, and Treatment
In this comprehensive guide, we delve into the intricate world of seizures, providing a detailed understanding of their types, phases, and treatment options. Whether you're seeking knowledge about Grand Mal seizures, febrile seizures, or absence seizures, we've got you covered. We break down the various phases of a seizure, from the pre-seizure aura to the postictal phase, shedding light on what happens during each stage. Empower yourself with valuable insights and strategies for effectively managing seizures and promoting overall well-being.
Introduction:
Seizures are neurological events characterized by abnormal electrical activity in the brain, which can lead to a wide range of physical and mental symptoms. They affect millions of people worldwide and can be a result of various underlying conditions. In this blog, we will delve into the world of seizures, exploring their different types and understanding the phases that accompany them.
A middle aged woman assisting a older woman who is collapsed on the ground.
What are Seizures?
Seizures are episodes of abnormal electrical activity in the brain that can cause a variety of symptoms, including convulsions, altered consciousness, and unusual behaviors. They can occur as a result of various factors, such as epilepsy, head injuries, infections, stroke, or certain genetic disorders.
Types of Seizures:
There are several types of seizures, each presenting distinct characteristics and affecting individuals differently. Here are a few common types:
Grand Mal Seizure (Generalized Tonic-Clonic Seizure)
This is one of the most well-known types of seizures and often associated with epilepsy. Grand Mal seizures involve both hemispheres of the brain and can be divided into four phases:
Aura Phase:
Some individuals may experience warning signs or an aura before the seizure. These warning signs can vary, such as a strange smell, visual disturbances, or intense emotions.
Tonic Phase:
The tonic phase marks the beginning of the seizure, where the person loses consciousness and experiences muscle stiffness. They may fall to the ground and exhibit rigidity for a short period.
Clonic Phase:
The clonic phase follows the tonic phase, characterized by rhythmic jerking movements caused by alternating muscle contractions and relaxations. Breathing may be irregular during this phase.
Postictal Phase:
After the seizure subsides, the postictal phase begins. The person gradually regains consciousness but may feel confused, fatigued, or disoriented. They might also experience headaches or muscle soreness.
Febrile Seizure
Febrile seizures are seizures that occur in young children, usually between the ages of 6 months and 5 years, triggered by high fevers. They are relatively common and are typically brief, lasting only a few minutes. Febrile seizures often do not cause any long-term complications and tend to resolve on their own.
Absence Seizure
Absence seizures are characterized by a brief loss of consciousness, often lasting for a few seconds. They commonly affect children and can be mistaken for daydreaming or inattentiveness. During an absence seizure, the person may exhibit staring spells, slight twitching, and lack of responsiveness.
Seizures can be distressing and disruptive events that affect individuals of all ages. Understanding the different types of seizures and their accompanying phases is crucial for recognizing and managing them effectively. Whether it's the intense convulsions of a Grand Mal seizure, the brief episodes of absence seizures, or the fever-induced febrile seizures in children, each type requires appropriate care and support. If you or someone you know experiences seizures, it's important to consult with a healthcare professional to determine the underlying cause and develop an appropriate treatment plan. By raising awareness and promoting understanding, we can create a more inclusive and supportive environment for those living with seizures.
How to Help
Witnessing someone having a Grand Mal seizure can be a frightening experience. However, knowing how to respond and provide assistance can make a significant difference in ensuring their safety and well-being. In this article, we will discuss important steps to help someone during a Grand Mal seizure.
Stay Calm and Assess the Situation:
Maintaining a calm demeanor is crucial during a seizure. Remember that a Grand Mal seizure typically follows a specific sequence of phases, including the aura phase, tonic phase, clonic phase, and postictal phase. Focus on the person's safety and provide support throughout the episode.
Protect the Person from Injury:
During a seizure, the individual may lose control of their body and experience intense muscle contractions. It's essential to create a safe environment to prevent any potential harm:
Clear the surroundings: Move away any sharp or dangerous objects that the person may come into contact with during the seizure.
Cushion the area: Place soft padding or cushions around the person to prevent injury from falls or head impacts.
Do not restrain: Avoid holding the person down or attempting to stop their movements forcefully, as this can cause additional harm.
Support the head: Gently cradle the person's head or place a soft object, like a pillow or folded clothing, under their head to protect it.
Time the Seizure:
It is helpful to note the duration of the seizure. Timing the seizure can assist medical professionals in assessing the situation and determining the appropriate treatment if necessary. Use a watch or clock to track the duration from the beginning to the end of the seizure.
Do Not Insert Objects or Restrict Breathing:
During a Grand Mal seizure, it is important to remember not to insert anything into the person's mouth. Contrary to popular belief, they cannot swallow their tongue. Inserting an object into their mouth can cause injury to the teeth, gums, or airway. Additionally, avoid attempting to restrict their movements or control their body.
Maintain a Safe Distance and Observe:
While providing support and ensuring safety, give the person space during the seizure. Avoid unnecessary touching or movement unless there is an immediate risk. Observe the person's movements and the sequence of the seizure, as this information can be helpful for medical professionals when assessing the situation.
Communicate and Reassure:
Although the person may not be fully conscious during the seizure, speaking calmly and reassuringly can provide comfort. Your voice may reach their subconscious mind, and hearing familiar tones can be reassuring during the postictal phase.
Stay with the Person During the Postictal Phase:
After the seizure ends, the person will enter the postictal phase. They may appear disoriented, fatigued, or confused. Stay with them, offering comfort and support. Speak calmly and help them reorient themselves to their surroundings. If necessary, provide assistance in contacting a medical professional or someone they trust.
Seek Medical Attention if Required: While most Grand Mal seizures end on their own, it is essential to seek medical attention in the following situations:
The seizure lasts longer than five minutes.
The person experiences difficulty breathing or has prolonged periods without breathing.
The person is injured during the seizure.
The seizure occurs in water or at a height, resulting in a risk of drowning or falling.
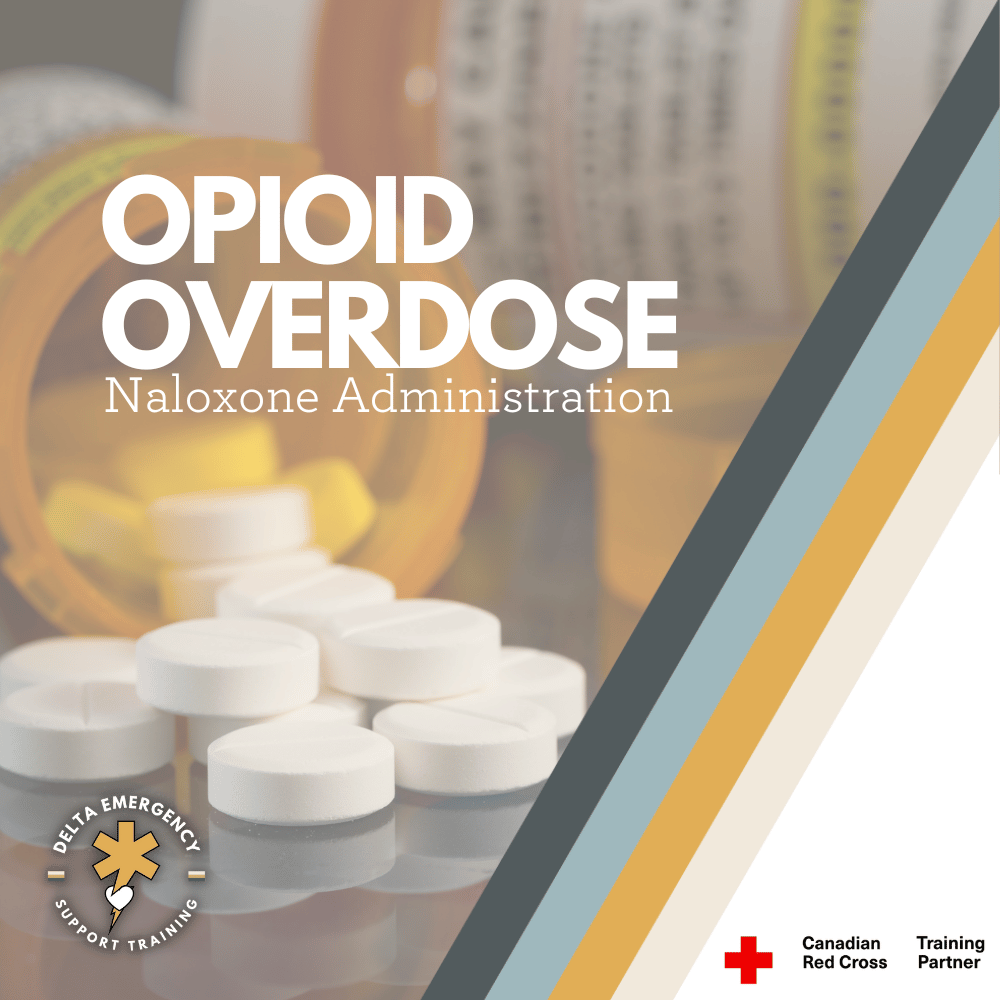
Opioid Overdose Reversal: Naloxone
Opioid overdose is a critical emergency that demands swift intervention. In our blog post, we explore the life-saving potential of naloxone as an opioid antagonist. Discover how naloxone works to reverse the effects of opioids, the importance of combining it with CPR in emergencies, and how you can learn about naloxone administration in our first aid courses. Be prepared to make a difference and save lives.
Opioid Overdose
Opioid overdose is a devastating crisis affecting individuals worldwide. With opioids causing respiratory depression and potentially fatal consequences, swift intervention is crucial. One powerful tool in combating opioid overdose is naloxone, commonly known by the brand name Narcan.
In this, we will delve into the life-saving potential of naloxone as an opioid antagonist, understanding how it works, and its role in preventing opioid-related fatalities. We will also explore how naloxone is administered, including the simple skill that anyone can learn to save lives.
Understanding Opioid Overdose:
Opioids, including prescription painkillers and illicit substances like heroin, bind to opioid receptors in the brain and spinal cord, reducing pain and inducing feelings of relaxation and euphoria. However, an excessive dose of opioids can overwhelm the body, leading to slowed or shallow breathing, which can result in a dangerous lack of oxygen. This respiratory depression is the primary cause of death in opioid overdose cases.
In opioid overdose, the slowed or shallow breathing can progress to respiratory arrest, where breathing stops altogether. As the body is deprived of oxygen, the brain and other vital organs begin to suffer. The lack of oxygen can lead to a cascade of events, including cardiac arrest, where the heart stops beating effectively. It is important to recognize that opioid overdose fatalities are primarily caused by respiratory arrest, which then leads to cardiac arrest.
Administration of Naloxone
Check Scene Safety:
Before approaching the individual, ensure that the scene is safe for both you and the person in distress. Look out for any potential hazards or risks.
Check Level of Consciousness:
Assess the person's level of consciousness. Gently tap their shoulders and ask loudly, "Are you okay?" If there is no response or the person is unresponsive, proceed to the next steps.
Communicate:
Clearly communicate your intentions to the person. Let them know that you are there to help and that you will be administering naloxone to reverse the effects of opioid overdose.
Personal Protective Equipment (PPE):
Put on gloves to protect yourself from potential exposure to bodily fluids during the process.
Prep the Syringe:
Take the naloxone syringe and carefully remove the cap. If necessary, snap or twist off the top of the ampule to access the medication. Attach the needle to the syringe securely.
Draw Up Naloxone:
Hold the ampule upright and insert the needle into the ampule's opening. Slowly pull the plunger back, drawing up the appropriate amount of naloxone (as instructed by the manufacturer or medical professional).
Expel Extra Air:
With the needle still in the ampule, gently tap the syringe to dislodge any air bubbles that may have formed. Slowly push the plunger up to expel the extra air until only naloxone remains in the syringe.
Lift Clothing and Insert Needle:
Lift the person's clothing to expose an area of skin for injection, typically the upper arm, thigh, or buttocks. Hold the syringe like a dart and swiftly insert the needle into the muscle at a 90-degree angle.
Compress All Liquid:
Push the plunger down fully, injecting all the naloxone into the muscle. Maintain pressure on the plunger for a few seconds to ensure all the medication has been administered.
Remove Needle and Dispose:
Carefully remove the needle from the skin. Place the used needle and syringe into a sharps container or any designated puncture-proof container for safe disposal.
Monitor Level of Consciousness:
Observe the person's level of consciousness and breathing. Stay with them and provide reassurance while waiting for emergency medical services (EMS) to arrive.
Remember, this tutorial serves as a general guide. It is essential to receive proper training on naloxone administration and follow the guidelines and instructions provided by healthcare professionals or local authorities.
Naloxone and CPR
Opioids depress the central nervous system, causing slowed or shallow breathing. If left untreated, this respiratory depression can progress to respiratory arrest, where breathing stops completely. When the body is deprived of oxygen, it can quickly lead to cardiac arrest, where the heart stops beating effectively.
In the event of a suspected opioid overdose, it is crucial to act swiftly. If you encounter someone who is not breathing and does not have a pulse, it is essential to initiate cardiopulmonary resuscitation (CPR) in conjunction with administering naloxone.
CPR involves a combination of chest compressions and rescue breaths, which aim to circulate oxygen-rich blood to the vital organs of the body. It helps to maintain a minimal level of oxygen supply until professional medical help arrives. CPR should be performed following the recommended guidelines and in accordance with any specific training you have received.
Naloxone is a vital component of overdose response because it rapidly reverses the effects of opioids and restores normal respiratory function. When administering naloxone during CPR, it can help counteract the respiratory depression caused by opioids, supporting the resuscitation efforts. By combining naloxone with CPR, you address both the respiratory and circulatory aspects of the overdose emergency, increasing the chances of successfully restoring the person's breathing and heartbeat.
In the event of a suspected opioid overdose where the individual does not have a device, such as a rescue facemask with a one-way valve, to protect yourself during rescue breaths, you can opt for compression-only CPR. Compression-only CPR involves performing continuous chest compressions without providing rescue breaths.
To perform compression-only CPR, follow these steps:
Ensure the person is lying on a firm surface.
Kneel beside the person's chest.
Place the heel of one hand on the center of the person's chest, between the nipples.
Place your other hand on top of the first hand, interlocking your fingers.
Keep your arms straight and position your shoulders directly above your hands.
Push hard and fast, compressing the chest at a rate of about 100-120 compressions per minute.
Allow the chest to fully recoil between compressions, but do not lift your hands off the chest.
Remember, in any medical emergency, including a suspected opioid overdose, it is essential to call 911 immediately. The emergency dispatcher can provide guidance and instructions tailored to the specific situation.
Remember, naloxone is not a substitute for seeking emergency medical assistance. Even if the person responds to naloxone and CPR, it is crucial to call emergency services right away. Prompt medical attention is necessary to provide comprehensive care and further stabilize the individual.
Training
Thank you for accompanying us on this two-part blog journey about naloxone. We hope that through this valuable information, you have gained the confidence and knowledge to respond effectively in opioid overdose emergencies. At Delta Emergency, we are committed to providing comprehensive training on naloxone administration, including recognizing signs and symptoms of opioid overdose, in our first aid and advanced first aid courses. Thank you for staying engaged, and together, let's make a positive impact by being prepared to respond in critical situations.
Eye Injury Prevention and Management in the Workplace: A First Aider's Guide
Eye injuries are a common occurrence in the workplace, particularly in industries that involve manual labor or the use of heavy machinery. As a first aider, it's important to be able to recognize common types of eye injuries and provide appropriate care to those in need. By taking steps to prevent eye injuries, employers can help to ensure the safety and well-being of their workers, and reduce the risk of workplace accidents. Here's what you need to know as a first aider about responding to workplace eye injuries.
Eye injuries can range from minor irritations to serious injuries that can cause vision loss or other complications. As a first aider, it's important to be able to recognize common types of eye injuries and provide appropriate care to those in need.
a first aid kit with eye supplies specifically for eye emergencies.
Workplace eye injuries are common, particularly in industries that involve manual labor or the use of heavy machinery. These injuries can often be prevented by taking simple precautions, such as wearing appropriate eye protection, conducting regular safety audits, and providing training and education on eye safety. Other factors that can contribute to workplace eye injuries include poor lighting, clutter and debris, and working with hazardous materials or power tools. By taking steps to prevent eye injuries, employers can help to ensure the safety and well-being of their workers, and reduce the risk of workplace accidents. As a first aider, it's important to be prepared to respond to eye injuries in the workplace and provide appropriate care to those in need.
Common Types of Eye Injuries
Foreign Bodies:
Foreign bodies are small objects or debris that enter the eye, such as dust, dirt, or metal shavings. They can cause irritation, redness, and discomfort. If a foreign object enters the eye, it's important not to rub or touch the eye, as this can push the object further in and cause more damage. Instead, cover the eye with a sterile gauze pad or cloth and seek medical attention. Do not attempt to remove the foreign object, as this can cause further damage or push the object deeper into the eye.
Chemical Burns:
Exposure to chemicals, such as acids or alkalis, can cause severe eye damage and should be treated as an emergency. If a person's eye comes into contact with a chemical, it's important to immediately flush the eye with clean water or saline solution for at least 20 minutes. Continue flushing the eye while seeking medical attention.
Corneal Abrasions:
A corneal abrasion is a scratch or cut on the cornea, which can cause pain, sensitivity to light, and tearing. If someone has a corneal abrasion, it's important to cover the injured eye with a sterile gauze pad or cloth and seek medical attention. Do not attempt to rub the eye or remove any foreign objects, as this can cause further damage.
Blunt Trauma:
Blunt trauma to the eye, such as from a ball or fist, can cause swelling, bleeding, or even vision loss. If someone has experienced blunt trauma to the eye, it's important to cover the injured eye with a sterile gauze pad or cloth and seek medical attention immediately.
Penetrating Injuries:
Penetrating Injuries: Penetrating injuries to the eye occur when an object, such as a piece of metal or glass, enters the eye and penetrates the eyeball. These injuries can be very serious and require immediate medical attention. If someone has experienced a penetrating eye injury, it's important to cover the injured eye with a sterile gauze pad or cloth, stabilize the object in place, and cover the other eye with a cloth or eye shield to prevent any movement. Seek emergency medical attention immediately. It's important not to remove the object, as this can cause further damage or bleeding.
Dealing with Eye Injuries
If you encounter someone with an eye injury, it's important to take immediate action to prevent further damage or complications. Here are some steps you can take:
Remain calm and reassure the person that help is on the way.
Encourage the person to keep their eyes closed to prevent further damage.
Assess the injury by looking for signs of bleeding, swelling, or foreign objects in the eye.
If both eyes are injured or there are signs of a head injury, call for emergency medical services right away.
Preventing Eye Injuries on Work Sites
Eye injuries are a common occurrence on work sites, particularly in industries that involve manual labor or the use of heavy machinery. These injuries can often be prevented by taking simple precautions, such as:
Wearing appropriate eye protection:
Eye protection should be worn by all workers who may be exposed to hazards such as flying debris, chemicals, or radiation. Employers should provide workers with appropriate eye protection and ensure that it meets safety standards.
Conducting regular safety audits:
Regular safety audits can help to identify potential hazards and ensure that safety measures are being followed. Employers should conduct regular safety audits to identify potential hazards and take steps to eliminate or minimize them.
Providing training and education:
Workers should be trained on the importance of eye safety and provided with the knowledge and skills necessary to identify potential hazards and take appropriate precautions.
Using caution when working with hazardous materials:
Workers should use caution when working with hazardous materials, such as chemicals or biological agents. Protective eyewear should be worn when working with these materials, and proper ventilation should be provided to minimize exposure.
Using caution when working with power tools:
Power tools can cause flying debris and other hazards that can cause eye injuries. Workers should always wear appropriate eye protection when working with power tools.
Ensuring that work sites are well-lit:
Poor lighting can increase the risk of eye injuries, as workers may not be able to see potential hazards. Employers should ensure that work sites are well-lit and that workers have adequate visibility.
Removing clutter and debris:
Clutter and debris on work sites can increase the risk of eye injuries. Employers should ensure that work sites are free from clutter and debris, and that workers have clear paths of travel.
As a first aider, it's important to be able to recognize common types of eye injuries and provide appropriate care to those in need. By taking steps to prevent eye injuries, employers can help to ensure the safety and well-being of their workers, and reduce the risk of workplace accidents. Remember to always wear appropriate eye protection when working in hazardous environments, and to seek medical attention for serious or potentially serious eye injuries.
First Aid
Enroll in our first aid course in Calgary today and learn the skills you need to protect your vision and help others in any emergency situation. Visit us at deltaemergency.com to register for our course and take the first step towards becoming a confident and effective first aider.
Drink at Your Own Risk: The Dangers of Untreated Water and How to Purify It in the Backcountry
Drinking untreated water may seem like a good idea when you're out camping or hiking, but it can lead to serious health problems. In this blog, we'll explore the various waterborne illnesses that can be caused by untreated water in Canada, and discuss different water purification methods that you can use in the backcountry to stay safe and hydrated.
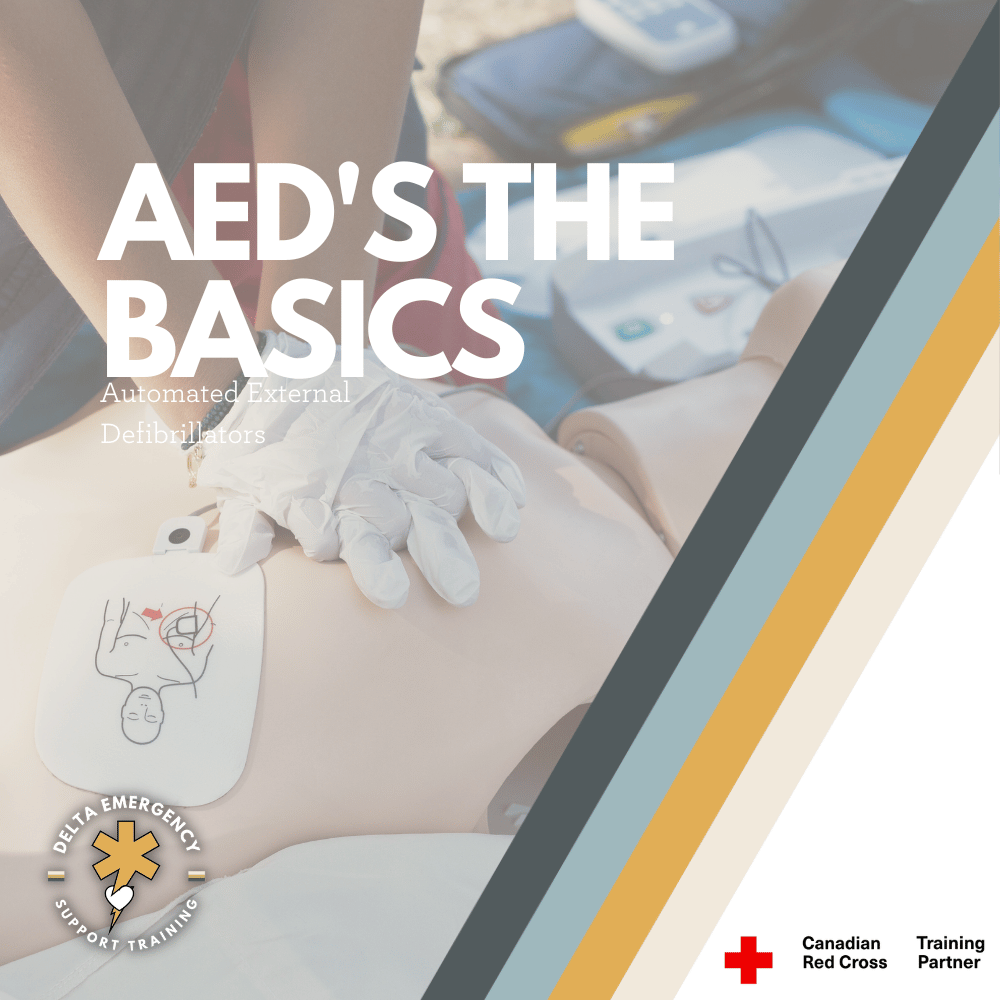
When you're out on a camping trip or hiking adventure, the urge to drink from a nearby river or stream can be tempting. After all, what could be more refreshing than crystal-clear water straight from nature? However, drinking untreated water can be a serious health risk, especially in Canada where it can contain harmful bacteria, viruses, and parasites.
A man stands near a lake in the mountains and fills his water bottle with water from the lake.
In this blog, we'll explore the various illnesses and conditions that can be caused by drinking untreated water and discuss the different types of water purification methods that you can use in the backcountry to keep yourself safe and healthy.
We'll cover the pros and cons of different methods, including boiling water, using water filters, chemical treatments, and UV light. By the end of this blog, you'll have all the information you need to make an informed decision about how to purify water on your next outdoor adventure.
Whats the Harm?
That's right - those pristine-looking water sources can contain harmful bacteria, viruses, and parasites that can cause a range of illnesses. From beaver fever to E. coli, we'll take you on a tour of the illnesses that can turn a fun camping trip into a nightmare. After reading this, you won't want to drink out of streams anymore!
Here's a list of the different waterborne illnesses that can be contracted from drinking untreated water:
Beaver Fever:
This is an infection of the small intestine caused by the parasite Giardia lamblia, found in the intestines of animals, including beavers, that can contaminate water sources. It can cause symptoms such as diarrhea, abdominal pain, bloating, and nausea. It usually takes 1-3 weeks for symptoms to appear after exposure to contaminated water, and the illness can last for several weeks.
Cryptosporidiosis:
This is an infection of the intestines caused by the parasite Cryptosporidium. The parasite is spread through the fecal-oral route, meaning that it can be contracted by ingesting water or food that has been contaminated with the feces of an infected person or animal. It can cause symptoms such as diarrhea, stomach cramps, nausea, and fever. Symptoms usually start within 2-10 days after exposure to contaminated water and can last for several weeks.
Hepatitis A:
This is a viral infection that affects the liver. In Canada, Hepatitis A outbreaks have been linked to untreated water sources, particularly in areas with poor sanitation or where sewage systems can overflow into rivers and lakes. When contaminated water is ingested, the virus can enter the body and begin to replicate in the liver. This can lead to symptoms such as fatigue, fever, nausea, and abdominal pain. In severe cases, Hepatitis A can cause jaundice (yellowing of the skin and eyes), dark urine, and pale stools. The illness can last for several weeks to several months, and while most people recover fully, some may develop chronic liver disease. It's important to remember that even in areas with clean-looking water, there may still be a risk of contamination from human or animal fecal matter.
Campylobacteriosis:
This is a bacterial infection that can cause symptoms such as diarrhea (sometimes bloody), stomach cramps, fever, and nausea. Symptoms usually start within 2-5 days after exposure to contaminated water and can last for several days to several weeks. In some cases, the infection can lead to more serious complications, such as reactive arthritis or Guillain-Barré syndrome, a rare but potentially life-threatening condition that affects the nervous system.
E. coli infection:
This is a type of bacteria that can cause infections in the intestines. It can cause symptoms such as diarrhea (sometimes bloody), stomach cramps, and fever. Symptoms usually start within 1-8 days after exposure to contaminated water and can last for several days to several weeks. There have been several outbreaks of E. coli linked to untreated water sources, particularly in rural areas where there is a higher risk of contamination.
Even the most idyllic-looking water sources can be hiding some pretty gross stuff. For example, an animal carcass upstream could be introducing all sorts of bacteria and pathogens into the water, while animal fecal matter can travel downstream and contaminate even the cleanest-looking water sources.
Water Purification
Here's an overview of different water purification methods and their pros and cons:
Boiling:
Boiling water is one of the simplest and most effective ways to kill off harmful bacteria and viruses. By boiling water for at least one minute (or longer at higher altitudes), you can ensure that it's safe to drink.
Boiling does however require a pot and an effective source of heat. Beware that boiling won't remove any sediment or debris from the water, it requires pre-filtering.
Portable water filters:
Portable water filters, such as those made by brands like Katadyn or Sawyer, are a popular choice for backcountry adventurers. These filters typically use a combination of ceramic or carbon filters to remove harmful bacteria. They're lightweight, compact, and easy to use, making them a convenient option for outdoor enthusiasts.
However, they can be relatively expensive, and they can not remove viruses without a chemical component. Cloudy particle rich water may slow down and clog the filter.
Chemical treatments:
Chemical treatments, such as iodine tablets or chlorine drops, can be an effective way to disinfect water. These treatments typically involve adding a small amount of chemical to the water and waiting a certain amount of time for it to take effect. They're lightweight and easy to pack, making them a popular choice for backpackers and hikers.
Chemical treatments can leave a chemical taste in the water, and they are not effective against cysts.
UV water purifiers:
UV water purifiers, such as those made by SteriPen, use ultraviolet light to kill off harmful bacteria and viruses. They're easy and quick to use and require no chemicals or filters.
Uv water purifiers can be relatively expensive, and they require batteries or a power source to operate.
Ultimately, the best water purification method will depend on your specific needs and preferences. It's a good idea to research different options and experiment with them before your next outdoor adventure, so that you can find the method that works best for you.
Emergency Situation
In a survival situation where you're stranded without access to clean water, it may be necessary to drink untreated water in order to stay hydrated. While this is not ideal, it's important to understand that drinking unpurified water is sometimes necessary for survival.
If you find yourself in a situation where you need to drink untreated water, there are some precautions you can take to minimize the risk of illness. For example, it's generally safer to drink from fast-moving rivers or streams, as these are less likely to be contaminated with harmful bacteria and pathogens than stagnant bodies of water such as lakes or ponds. If you must drink from a stagnant body of water, try to collect water from the surface rather than the bottom, as this is less likely to contain sediment and debris.
It's also important to remember that drinking untreated water always carries some risk, and you should be prepared to deal with the consequences if you do get sick.
Conclusion
Access to clean drinking water is something that many of us take for granted, but it's important to remember that untreated water can carry harmful bacteria and pathogens.
By taking the necessary precautions and being prepared, you can ensure that you'll be able to stay hydrated and healthy even in the most challenging of circumstances. So, whether you're planning a weekend camping trip or venturing into the wilderness on a multi-day hike, always be mindful of the risks associated with untreated water and take the steps necessary to protect yourself and stay safe.
AEDs: The Basics
Sudden cardiac arrest (SCA) is a leading cause of death worldwide, with millions of people experiencing it each year. AEDs, or Automated External Defibrillators, are critical in treating SCA because they can deliver a life-saving shock within minutes of the onset of symptoms. This blog post will cover the basics of AEDs, including how they work, why they're important, and how to use them.
Automated External Defibrillators (AED): What You Need to Know
An Automated External Defibrillator, or AED, is a portable electronic device used to treat sudden cardiac arrest (SCA) in conjunction with Cardiopulmonary Resuscitation (CPR). AEDs are designed to be used by anyone, regardless of their level of training or experience, to help save lives in emergency situations.
A person wearing gloves is performing first aid on a CPR dummy, while following AED directions. The person's hands are on the chest of the dummy, as if performing chest compressions. There is an AED device next to the dummy, with the pads attached to the dummy's chest.
How Does An AED Work?
AEDs work by analyzing the heart rhythm of a person experiencing SCA, and then delivering an electric shock to restore the heart's natural rhythm. The device comes with two sticky pads with attached wires, called electrodes. These pads are placed on the person's chest, and the AED's computer analyzes the heart rhythm through the electrodes. If the AED determines that the person's heart is in ventricular fibrillation or another treatable rhythm, it will prompt the user to deliver a shock. However, if the person's heart is in asystole, which is the absence of any heart rhythm, the AED will not deliver a shock. It's important to note that the use of an AED on a person with no heart rhythm (asystole) is not recommended because it is unlikely to be effective.
AED + CPR
CPR, or cardiopulmonary resuscitation, is a life-saving technique used to help someone who is in cardiac arrest. It involves a combination of chest compressions and rescue breaths to manually circulate oxygen-rich blood through the body when the heart is not beating effectively. CPR is performed when someone is unconscious, not breathing, and has no pulse.
When someone experiences sudden cardiac arrest (SCA), CPR should be performed while waiting for an AED to arrive or be retrieved. The combination of CPR and AED can significantly increase the chances of survival.
Why Are AED’s Important
Sudden cardiac arrest (SCA) is a leading cause of death worldwide, with millions of people experiencing it each year. AEDs, or Automated External Defibrillators, are critical in treating SCA because they can deliver a life-saving shock within minutes of the onset of symptoms. AEDs are easy to use, portable, and equipped with clear instructions and voice prompts. They can be stored in public places, homes, and businesses to provide quick access in case of an emergency.
Where Can I Find An AED?
AEDs are becoming more common in public places, such as airports, shopping centers, and schools. Many workplaces are also beginning to invest in AEDs for their employees and customers. It's important to know where the nearest AED is located in case of an emergency. Look for AEDs in clearly marked cabinets, often mounted on the wall. Some AEDs come with an audible alarm or flashing light to make them easier to find in an emergency. If you are unsure where an AED is located, ask your employer or contact your local fire department or ambulance service for more information.
How Can You Use An AED?
AEDs are designed to be simple and easy to use. Most devices come with clear verbal instructions and visual prompts that guide the user through the steps of using the device. Here is a brief overview of how to place AED pads on adults and children:
For adults: Place one pad on the upper right side of the chest and the other pad on the lower left side of the chest, as shown in the diagram on the AED or in the instructions. It's important to make sure the pads are placed correctly and securely on the skin.
For children: Pediatric pads should be used for children under the age of eight or weighing less than 55 pounds. These pads have a lower energy setting to avoid harm to the child. Place one pad on the center of the child's chest and the other pad on the child's back, just below the shoulder blades.
It's important to note that AEDs should not be used on a wet surface or in water. The chest should be shaved and dried if necessary to ensure good contact with the electrode pads. Sweat and other moisture can interfere with the proper function of the device.
Automated External Defibrillators are an important tool in treating sudden cardiac arrest. These devices can be used by anyone, regardless of their level of training or experience, to help save lives in emergency situations.
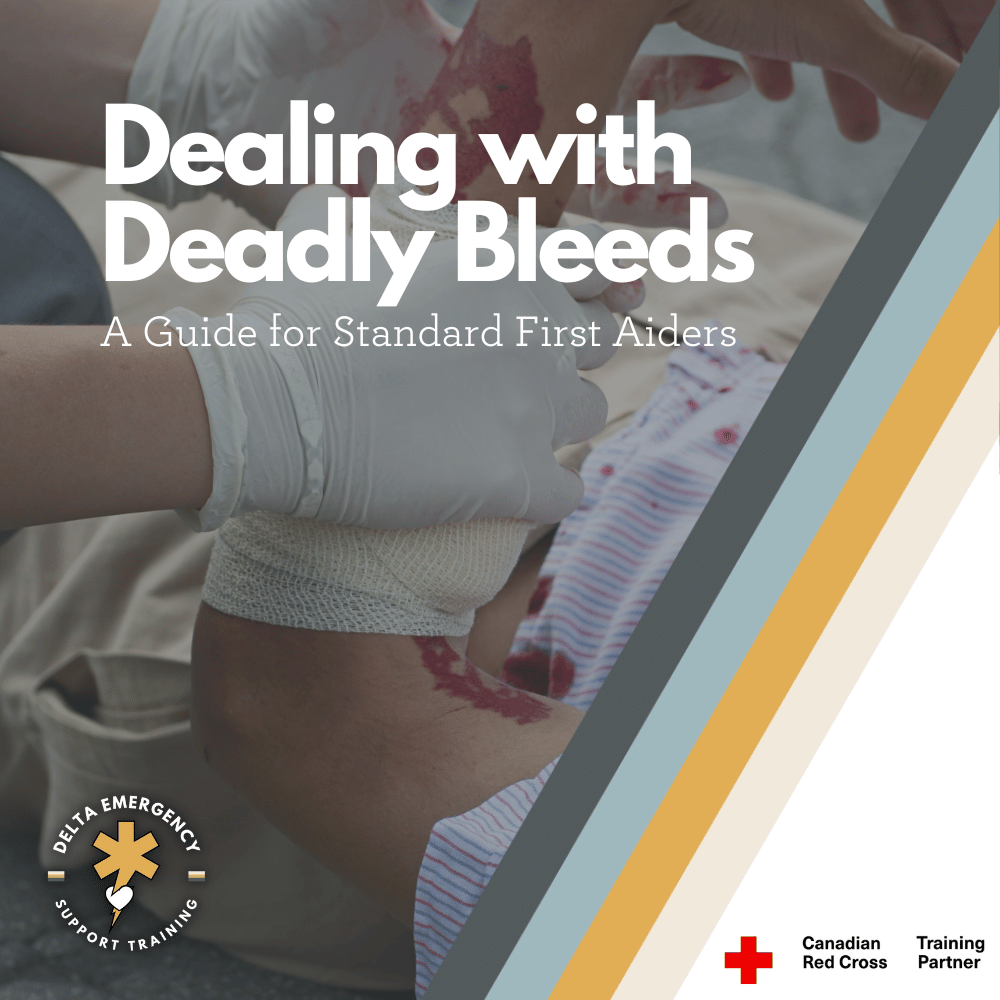
Dealing with Deadly Bleeds: A Guide for Standard First Aiders
Deadly bleeds can happen anytime, anywhere, and being prepared to handle them can mean the difference between life and death. Standard first aiders should be equipped with the knowledge and skills to identify different types of bleeds, as well as the appropriate techniques to manage them.
As a standard first aider, it's important to be prepared to deal with all kinds of emergencies, including deadly bleeds. A deadly bleed, also known as a hemorrhage, is a type of bleeding that is severe enough to threaten a person's life. In this blog post, we'll discuss what makes a bleed deadly, what different types of bleeds look like, and what our treatment options are. We'll also explore the physiology and biology behind what produces the most life-threatening bleeds.
A person in first aid gear is holding a clean, white cloth over a bleeding wound on another person's arm while exerting pressure.
What makes a bleed deadly?
A deadly bleed is usually caused by a significant loss of blood from a major artery or vein. This loss of blood can lead to a drop in blood pressure and, if left untreated, can ultimately result in shock and death. There are several types of bleeds that can be life-threatening, including arterial bleeds, venous bleeds, and internal bleeds.
Arterial bleeds:
Arterial bleeds are the most life-threatening type of bleed because they involve the loss of blood from an artery. Arteries carry oxygenated blood away from the heart to the rest of the body, and a significant loss of blood from an artery can lead to a lack of oxygen in the body's tissues. This can cause damage to vital organs and tissues, and can ultimately result in shock and death. Arterial bleeds are characterized by bright red blood that spurts out of the wound in time with the person's heartbeat. The high pressure of blood flowing from an artery means that a significant amount of blood can be lost quickly, leading to rapid blood loss.
Venous bleeds:
Venous bleeds, on the other hand, involve the loss of blood from a vein. Veins carry deoxygenated blood back to the heart, and a significant loss of blood from a vein can lead to a buildup of carbon dioxide in the body's tissues. This can cause tissue damage and can also lead to shock if the bleeding is not controlled quickly. Venous bleeds have a slower flow of dark red blood compared to arterial bleeds, and the bleeding is usually easier to control than an arterial bleed.
Internal bleeds:
Internal bleeds occur inside the body and may not be visible externally. These types of bleeds can be caused by trauma or medical conditions, and can be life-threatening if left untreated. Internal bleeds can lead to organ damage and shock, and symptoms may include pain, swelling, and bruising. Treatment for internal bleeds may involve surgery or other medical interventions, and it's important to seek medical attention as soon as possible if you suspect someone has an internal bleed.
What do different types of bleeds look like?
Arterial bleeds are characterized by bright red blood that spurts out of the wound in time with the person's heartbeat. Venous bleeds, on the other hand, have a slower flow of dark red blood. Internal bleeds, which occur inside the body, may present as bruising or not be visible externally.
What are our treatment options?
If you encounter a deadly bleed, it's important to act quickly to control the bleeding and prevent further loss of blood. The first step is to apply pressure to the wound using a clean cloth or bandage. If the wound is on an arm or leg, you can also elevate the limb above the level of the heart to help slow the bleeding. If the bleeding does not stop with pressure, a tourniquet may be necessary to stop the blood flow completely. However, tourniquets should only be used as a last resort, as they can cause damage to the tissue and lead to amputation.
Biology of deadly bleeds
The most life-threatening bleeds are those that involve major arteries, such as the femoral artery in the thigh or the carotid artery in the neck. Arteries are under high pressure, which means that a significant loss of blood from an artery can lead to a rapid drop in blood pressure and shock. In addition, the body's clotting system may not be able to keep up with the rapid loss of blood from an arterial bleed.
Personal Protective Equipment
It's important for standard first aiders to have the appropriate personal protective equipment (PPE) when dealing with bleeding emergencies. PPE can include gloves, masks, and eye protection, and is essential for protecting yourself from exposure to bloodborne pathogens such as HIV and hepatitis B and C. It's important to wear PPE whenever you are in contact with blood or bodily fluids to prevent the transmission of infectious diseases. In addition to protecting yourself, wearing PPE also helps prevent the spread of infections to others who may be in the vicinity of the bleeding person. By using the appropriate PPE, standard first aiders can provide care in a safe and effective manner.
Conclusion
In conclusion, as a standard first aider, it's important to be prepared to deal with deadly bleeds. Understanding what makes a bleed life-threatening, what different types of bleeds look like, and how to treat them can help you provide top-notch care in an emergency situation. Remember to act quickly to control the bleeding and seek medical attention as soon as possible.
Training
At Delta Emergency Support Training, we understand the importance of being prepared for emergency situation. We offer a range of training sessions to help individuals and classes develop the skills and knowledge they need to respond to emergency situations. Our courses include Standard First Aid (SFA), Advanced First Aid (AFA), and Emergency Medical Responder (EMR), and we offer in-person, hybrid, and online options to suit different needs.
If you have any questions about our training sessions or deadly bleeds, please don't hesitate to reach out to us. You can contact us at info@deltaemergency.com and we'll be happy to assist you.
Heat Emergencies: First Aid Tips for Heat-Related Illnesses
With summer comes the risk of heat-related illnesses like heat exhaustion and heat stroke. Anyone can experience these conditions when exposed to high temperatures for extended periods. Certain groups, such as infants, the elderly, and those with chronic medical conditions, are at higher risk. Taking steps like staying hydrated, avoiding prolonged sun exposure, and taking breaks in cool or shaded areas can help prevent heat emergencies. In this post, we'll cover the differences between heat exhaustion and heat stroke, the groups most vulnerable, and first aid measures for managing heat emergencies.
The arrival of summer often means fun outdoor activities like beach trips, barbecues, and adventures. However, it's important to be mindful of the potential health risks associated with the high temperatures that come with the season. Heat-related illnesses like heat exhaustion and heat stroke can be serious, but being able to recognize the signs and knowing how to manage these conditions can help prevent them from escalating and causing harm to ourselves and others.
A man is standing outside in the sun on a hot day, holding a water bottle and taking a sip to cool down and prevent heat exhaustion.
Most vulnerable groups
Certain groups of people are at a higher risk for heat-related illnesses like heat exhaustion and heat stroke. These groups include:
Infants and young children:
Their bodies are less efficient at regulating temperature, making them more susceptible to heat-related illnesses.
Elderly people:
They are more likely to have pre-existing medical conditions that can affect their ability to regulate temperature and may take medications that can impair their ability to sweat and cool down.
People with chronic medical conditions:
Individuals with heart, lung, or kidney diseases, as well as those with diabetes or obesity, are more susceptible to heat-related illnesses due to their bodies' difficulty regulating temperature.
Outdoor workers:
People who work outside, especially in the construction or agricultural industries, are at high risk for heat exhaustion and heat stroke due to prolonged exposure to high temperatures.
Athletes:
Individuals who engage in strenuous physical activity, particularly in hot and humid conditions, are at risk for heat exhaustion and heat stroke.
It's important for individuals in these high-risk groups to take extra precautions when spending time in hot weather, including staying hydrated, taking breaks in cool or shaded areas, and wearing appropriate clothing.
Heat Exhaustion
Heat exhaustion is a condition that occurs when the body becomes dehydrated and overheated, and cannot regulate its temperature properly. This can happen when someone is exposed to high temperatures, especially when they're combined with high humidity. Heat exhaustion can progress quickly to heat stroke, which is a more severe and potentially life-threatening condition.
Symptoms of Heat Exhaustion:
Dizziness or lightheadedness
Nausea or vomiting
Headache
Rapid heartbeat
Cool, moist skin with goosebumps despite the heat
Heavy sweating
Muscle cramps or weakness
First Aid for Heat Exhaustion:
If someone is showing signs of heat exhaustion, it's important to take action quickly. Here are some steps to take:
Move the person to a cooler location, preferably indoors with air conditioning or at least shade.
Loosen tight clothing and remove any unnecessary layers.
Provide cool water or a sports drink with electrolytes.
Apply cool, wet towels or cloths to the skin or fan the person to help cool them down.
Encourage them to rest and take it easy for the rest of the day.
Heat Stroke
Heat stroke is a more severe form of heat illness that occurs when the body's core temperature reaches 40°C or higher. It's a medical emergency that requires immediate attention as it can be fatal.
Symptoms of Heat Stroke:
Confusion or disorientation
Seizures or convulsions
Loss of consciousness
Rapid, shallow breathing
Dry, hot skin
Rapid, strong pulse
High body temperature (above 104°F)
First Aid for Heat Stroke:
If someone is showing signs of heat stroke, it's crucial to act quickly. Call emergency services right away and take these steps while waiting for medical help:
Move the person to a cooler location, preferably indoors with air conditioning.
Remove tight clothing and any unnecessary layers.
Use cool water or ice packs to cool the person down, especially on the neck, armpits, and groin area.
Fan the person or use a cool, wet cloth to help cool them down.
If the person is conscious and able to swallow, offer small sips of cool water or a sports drink.
The Differences and Severity:
Heat exhaustion is considered less severe than heat stroke, but it can progress quickly to heat stroke if left untreated. Heat exhaustion is caused by dehydration and overheating, while heat stroke is caused by the body's inability to regulate its temperature due to prolonged exposure to high temperatures. The symptoms of heat exhaustion are similar to those of heat stroke, but heat stroke is much more serious and can result in long-term damage to the brain, other organs, and even death.
It's important to take heat-related illnesses seriously and to take steps to prevent them from occurring in the first place. Stay hydrated, avoid prolonged exposure to the sun, and take frequent breaks in the shade or air conditioning when spending time outdoors in high temperatures. If you or someone you know is showing signs of heat exhaustion or heat stroke, take action quickly to prevent the condition from worsening and seek medical attention if necessary.
Surviving Summer: How to Respond to Insect Bites and Stings
To provide first aid for bites and stings, it's important to stay calm and identify the type of bite or sting. For insect stings, remove the stinger and clean the area, then apply a cold compress and take pain relievers. For bites from animals like snakes or spiders, seek medical attention immediately and keep the affected limb immobilized. If a severe allergic reaction occurs, call 911 or seek emergency medical attention. To prevent bites and stings, wear protective clothing and use insect repellent.
Bites and stings are a common occurrence in Canada, especially during the summer months when we spend the most time outdoors. While most bites and stings are harmless, some can cause allergic reactions, contain venom and transmit diseases. Knowing how to properly respond to bites and stings is an important part of first aid. In addition, certain bites and stings require specific first aid measures. Here's what you need to know about first aid for wasp, brown recluse, black widow, rattlesnake bites, and tick bites:
DELTA FIRST AID TRAINEE USING FIRST AID TO TEND to HER wasp sting.
Wasp Stings
Wasp stings are a common occurrence during the summer months in Canada. If you are stung by a wasp, the first thing to do is to remove the stinger if it is still present. Gently scrape the stinger out with a flat object like a credit card or fingernail. Avoid squeezing or pinching the stinger, as this can cause more venom to enter your skin. Clean the area around the sting with soap and water to reduce the risk of infection. Apply a cold compress or ice pack to the sting area to reduce pain and swelling. You can also take over-the-counter pain relievers like acetaminophen or ibuprofen to help alleviate pain.
Watch for signs of a severe reaction, such as difficulty breathing, swelling of the face or throat, hives, or rapid heartbeat. Seek medical attention immediately if you experience any of these symptoms, as wasp stings can cause allergic reactions and anaphylaxis in some people.
If you have a history of severe allergic reactions to wasp stings, it is recommended to carry an epinephrine auto-injector (e.g., EpiPen) with you at all times. This can help treat an allergic reaction in an emergency situation until medical attention is available.
Brown Recluse Spider
Brown Recluse Spider Bites Brown recluse spiders are venomous and their bites can be dangerous, although not all bites will cause severe symptoms. If you are bitten by a brown recluse spider, clean the bite with soap and water to reduce the risk of infection. Apply a cool compress to the bite area to reduce pain and swelling. Take over-the-counter pain relievers like acetaminophen or ibuprofen to help alleviate pain.
You may also need to elevate the affected limb to reduce swelling. Watch for signs of a severe reaction, such as fever, chills, or muscle cramps. Seek medical attention immediately if you experience any of these symptoms, as brown recluse spider bites can cause tissue damage and in rare cases, even death.
Black Widow Spider
Bites Black widow spiders are another venomous species, and their bites can also be dangerous. If you are bitten by a black widow spider, clean the bite with soap and water to reduce the risk of infection. Apply a cool compress to the bite area to reduce pain and swelling. You can also take over-the-counter pain relievers to help alleviate pain.
Watch for signs of a severe reaction, such as muscle pain, nausea, or difficulty breathing. Seek medical attention immediately if you experience any of these symptoms, as black widow spider bites can be life-threatening.
Rattle Snake
If you are bitten by a rattlesnake, the first thing to do is to stay calm and still. Moving around will increase blood flow, which can spread the venom more quickly through your body. Keep the affected limb immobilized and at or below heart level to slow the spread of the venom. Remove any tight clothing or jewelry near the bite site to reduce constriction as swelling occurs. If possible, take note of the time of the bite and the location.
Tick:
If you find a tick attached to your skin, the first step is to carefully remove it as soon as possible. Using tweezers, grasp the tick as close to the skin as possible and pull it out with a slow, steady motion. Do not twist or jerk the tick, as this can cause the mouthparts to break off and remain in the skin.
After removing the tick, clean the bite area with soap and water. Apply an antiseptic to reduce the risk of infection. Keep an eye on the bite area for any signs of redness, swelling, or rash, which may indicate a tick-borne illness such as Lyme disease.
If you develop symptoms such as fever, headache, or fatigue within a few weeks of a tick bite, seek medical attention immediately. Early treatment with antibiotics can help prevent complications from tick-borne illnesses.
Knowing how to administer first aid for bites and stings is important in preventing serious complications and ensuring a quick recovery. Remember to remain calm, identify the type of bite or sting, and take the necessary steps to alleviate the symptoms
At Delta Emergency Support Training, we understand the importance of being prepared for medical emergencies. We offer a range of training sessions to help individuals and classes develop the skills and knowledge they need to respond to emergency situations. Our courses include Standard First Aid (SFA), Advanced First Aid (AFA), and Emergency Medical Responder (EMR), and we offer in-person, hybrid, and online options to suit different needs.
If you have any questions about our training sessions or medical emergencies in general, please don't hesitate to reach out to us. You can contact us at info@deltaemergency.com and we'll be happy to assist you.
Why First Responders Use Vital Signs: A comprehensive guide
Vital signs are measurements of the body's basic functions and are used to assess a person's overall health and wellbeing. There are four primary vital signs: body temperature, pulse rate, blood pressure, and respiratory rate. Each vital sign provides important information about a person's health and can help identify underlying health conditions or other problems.
Body temperature is a measure of the body's internal heat and is typically measured using a thermometer. A fever is generally defined as a body temperature above 100.4°F (38°C) and can indicate an infection or other underlying health condition.
Pulse rate is a measure of the heart rate, or the number of times the heart beats per minute. A rapid pulse may indicate a fever, dehydration, or an irregular heartbeat, while a slow pulse may indicate heart disease or other health conditions.
Blood pressure is a measure of the force of blood against the walls of arteries as the heart pumps blood through the body. High blood pressure, or hypertension, can increase the risk of heart disease, stroke, and other health problems.
Respiratory rate is a measure of the number of breaths a person takes per minute. A rapid respiratory rate may indicate an underlying health condition, such as asthma or pneumonia.
Monitoring vital signs is an essential part of healthcare and can help healthcare professionals and first responders make informed decisions about treatment and care.
Vital signs are measurements of basic bodily functions that are essential for assessing a person's overall health and well-being. These measurements are typically taken by healthcare professionals, but they can also be taken by trained first responders in emergency situations.
first responders attending to a patient lying on a cot outside an ambulance. One responder is checking the patient's vital signs while the other is preparing medical equipment. The patient appears to be receiving urgent medical attention, and the responders are focused and prepared to administer necessary treatment
What Are Vital Signs?
Vital signs are a set of measurements that healthcare professionals use to assess a patient's overall health status. These measurements include temperature, heart rate, blood pressure, respiratory rate, Glasgow Coma Scale (GCS), oxygen saturation (SPO2), pupils and skin.
Body Temperature:
Body temperature is an important vital sign as it can indicate whether a person is healthy or if they have a fever, which could be a sign of infection. Body temperature can be measured in several ways, including orally, rectally, or using a forehead thermometer. It is important to use the correct method and follow the manufacturer's instructions when taking a person's temperature.
Heart Rate:
Heart rate: Heart rate is the number of times the heart beats per minute and is a reflection of the heart's ability to circulate blood throughout the body. The heart rate can vary depending on age, gender, physical activity, and overall health status. A high heart rate could indicate a potential problem, such as an irregular heartbeat, dehydration, or anxiety, while a low heart rate could be a sign of a heart condition or medication side effect.
Blood Pressure:
Blood pressure is the measure of the force of blood against the walls of the arteries. It is measured in millimetres of mercury (mmHg) and consists of two numbers: the systolic pressure (the higher number) and the diastolic pressure (the lower number). A healthy blood pressure reading is typically around 120/80 mmHg. High blood pressure (hypertension) can put a strain on the heart and blood vessels, while low blood pressure (hypotension) can cause dizziness, fainting, or other symptoms.
Respiratory Rate:
Respiratory rate is the number of breaths taken per minute and is a reflection of the body's ability to take in oxygen and expel carbon dioxide. The respiratory rate can vary depending on age, physical activity, and overall health status. A high respiratory rate could indicate a potential problem, such as a lung infection or asthma, while a low respiratory rate could be a sign of respiratory depression or a medical condition that affects breathing.
Glasgow Coma Scale:
Glasgow Coma Scale or GCS measures a patient's response to verbal, motor, and eye-opening stimuli. The score ranges from 3 to 15, with a higher score indicating a higher level of consciousness. The GCS is commonly used in trauma settings to assess patients with brain injury, altered mental status, or who are sedated.
SPO2:
SPO2 is a measure of the amount of oxygen that is carried by the hemoglobin in the red blood cells. The measurement of SPO2 is non-invasive and can be performed using a pulse oximeter, which is a small device that is attached to the finger, toe, or earlobe. The pulse oximeter uses light to measure the amount of oxygen that is present in the blood.
Pupils:
Pupils can also be an important vital sign in assessing a person's neurological function. The size, shape, and reactivity of the pupils can provide valuable information about the health of the brain and nervous system. Unequal pupil size (ani or a lack of reactivity to light can be a sign of a neurological issue, such as a brain injury or nerve damage.
Skin:
Assessing skin color and moisture is important because changes in these vital signs can be indicative of underlying medical conditions. For example, changes in skin color can be a sign of poor blood flow, infection, or inflammation, while changes in skin moisture can be a sign of dehydration or certain medical conditions.
Normal Vital Sign Ranges
The normal ranges for vital signs vary depending on a person's age, gender, and health status. Here are the standard ranges:
Body Temperature:
A normal body temperature generally ranges from 36.1°C to 37.2°C, with an average of 37°C. A fever, which is typically defined as a body temperature above 38°C, can be a sign of an infection or illness. Hypothermia, in which the body's core temperature drops below 35°C, can be caused by prolonged exposure to cold temperatures or certain medical conditions. Hyperthermia, in which the body's core temperature rises above its normal range, typically above 40°C, can be caused by heatstroke, extreme physical exertion, or certain medications.
Pulse Rate:
The normal resting heart rate range for an adult is between 60 to 100 beats per minute. A higher or lower heart rate may indicate a medical condition. Healthcare professionals use heart rate to assess cardiac function, diagnose heart conditions, and monitor the effectiveness of treatments.
Blood Pressure:
The normal blood pressure for an adult is typically around 120/80 mmHg. High blood pressure, or hypertension, is defined as consistently measuring higher than 130/80 mmHg, and can increase the risk of heart disease, stroke, and other health problems. Low blood pressure, or hypotension, is less common but can also be a serious medical condition, and is typically defined as a systolic pressure of less than 90 mmHg or a diastolic pressure of less than 60 mmHg.
Respiratory Rate:
The normal respiratory rate for an adult at rest is typically between 12 and 20 breaths per minute. A higher or lower respiratory rate than this range may indicate a medical condition. The quality of breath is also important in assessing a patient's respiratory function. Shallow, labored breathing or irregular breathing patterns can indicate respiratory distress and may require immediate medical attention.
Glasgow Coma Scale:
A GCS score of 15 is considered normal, indicating that the person is fully alert and oriented. The GCS is based on three categories: eye opening, verbal response, and motor response, and each category is assigned a score from 1-4 or 1-6. A higher score indicates a higher level of consciousness, while a lower score indicates a lower level of consciousness.
SPO2
Healthy SPO2 levels are between 95% and 100%, and SPO2 levels below 90% can indicate a lack of oxygen in the body. Supplemental oxygen may be necessary to raise the patient's SPO2 levels to a healthy range, but it is important to monitor the oxygen levels carefully and avoid over-oxygenation. Healthcare professionals use SPO2 measurements to guide treatment decisions and ensure that patients are receiving the appropriate level of oxygen.
Pupils:
The normal range for pupil size is between 2-4 millimeters in diameter for both pupils, and they should be equal in size. Pupils that are larger or smaller than this range, or are unequal in size (anisocoria), can be indicative of underlying medical conditions. Additionally, pupils should react briskly to changes in light, which is known as the pupillary light reflex. A sluggish or absent pupillary light reflex can be a sign of a neurological issue, such as a brain injury or nerve damage.
Skin:
Skin can vary in color and moisture depending on a person's age, sex, ethnicity, and overall health. In general, healthy skin should have a consistent color and texture across the body, without any unusual bumps, rashes, or lesions. The normal range of skin moisture varies from person to person, but it should generally feel soft and supple, without feeling excessively dry or oily.
Why First Responders Use Vital Signs?
Interpreting vital signs can help first responders make informed decisions about the best course of action for treating a patient. Monitoring changes in vital signs over time can also help to identify trends or progression of medical conditions, and inform treatment plans for better outcomes. First responders are trained to assess and respond to changes in vital signs quickly and effectively, which is essential in emergency situations.
At Delta Emergency Support Training we are happy to answer any questions you may have about vital signs as well as training sessions for individuals or classes. We offer in person, hybrid and online classes for Standard First Aid (SFA) Advanced First Aid (AFA) and Emergency Medical Responder (EMR) courses. For all inquiries please email info@deltaemergency.com .
Burn Management: Understanding Burns and How to Provide First Aid
Depending on the severity of the burn, it can be a painful and potentially life-threatening injury. Superficial burns only affect the outer layer of skin and typically result in redness, pain, and mild swelling. Partial-thickness burns affect both the outer and underlying layer of skin and can result in blisters, severe pain, and swelling. Full-thickness burns are the most severe type of burn, affecting all layers of skin and potentially even deeper tissue. Full-thickness burns can result in blackened or charred skin and can cause nerve damage, muscle and bone damage, and even death.
If you or someone else experiences a burn, providing first aid as soon as possible is crucial for promoting healing and preventing complications. The first step is to remove the source of the burn, such as a hot object or a chemical. Then, run cool (not cold) water over the burned area for at least 10-20 minutes. After that, cover the burn with a sterile, non-adhesive bandage or cloth. If the burn is severe, seek medical attention immediately.
A person's hand is shown with a burn on the skin. The person is using an antiseptic spray to clean and sanitize the burned area. The spray is shown being directed onto the burned area.
Burns are a common injury that can be caused by a variety of factors, including heat, chemicals, electricity, and radiation. Depending on the severity of the burn, it can be a painful and potentially life-threatening injury. It's important to understand the different types of burns and how to properly provide first aid and medical treatment to promote healing and prevent complications.
Types of Burns
There are three main types of burns, including superficial burns, partial-thickness burns, and full-thickness burns. Superficial burns only affect the outer layer of skin and typically result in redness, pain, and mild swelling. Partial-thickness burns affect both the outer and underlying layer of skin and can result in blisters, severe pain, and swelling. Full-thickness burns are the most severe type of burn, affecting all layers of skin and potentially even deeper tissue. Full-thickness burns can result in blackened or charred skin and can cause nerve damage, muscle and bone damage, and even death.
First Aid for Burns
If you or someone else experiences a burn, providing first aid as soon as possible is crucial for promoting healing and preventing complications. The first step is to remove the source of the burn, such as a hot object or a chemical. Then, run cool (not cold) water over the burned area for at least 10-20 minutes. After that, cover the burn with a sterile, non-adhesive bandage or cloth. If the burn is severe, seek medical attention immediately.
It's important to note that for chemical burns, it's important to flush the affected area with water for at least 20 minutes before removing any clothing or jewelry that may have come in contact with the chemical.
For electrical burns, it's important to turn off the power source or remove the person from the electrical source before administering first aid.
Medical Treatment for Burns
If a burn is severe or covers a large area of the body, medical treatment may be necessary. In addition to first aid, medical treatment for burns may include antibiotics to prevent infection, pain medication to manage discomfort, and intravenous fluids to replace lost fluids and electrolytes.
For partial-thickness and full-thickness burns, wound care may be necessary to promote healing. This can include removing dead tissue, applying topical creams or ointments, and using specialized dressings or wraps. In some cases, skin grafts may be necessary to cover the burn and promote healing.
For severe burns, such as those that cover a large portion of the body or involve the face, hospitalization may be necessary to provide more intensive care.
Preventing Burns
While it's not always possible to prevent burns, there are some steps you can take to reduce your risk. These include being careful when handling hot objects, wearing protective clothing when working with chemicals or other hazardous materials, and keeping children away from hot surfaces or objects.
Burns can be a painful and potentially dangerous injury, but with proper first aid and medical treatment, most burns can be effectively managed. It's important to understand the different types of burns, provide prompt first aid, and seek medical attention if necessary. By taking steps to prevent burns and following recommended burn management techniques, you can help protect your health and promote healing.
Assisting Elderly Who Have Fallen: A Comprehensive Guide to Providing Care and Support
Encountering an elderly or geriatric person who has fallen can be a difficult and distressing experience. Falls are a common problem among older adults and can lead to serious injuries, such as broken bones, head trauma, and bruises. It's important to approach the situation with care and sensitivity and take steps to provide appropriate assistance. Whether you're a family member, caregiver, or passerby, knowing what to do when you find an injured elderly person who has fallen can help to ensure their safety and well-being. In this blog post, we'll explore some general steps you can take to provide valuable assistance and help to ensure that the person receives the care and treatment they need.
Encountering an elderly or geriatric person who has fallen can be a difficult experience. It is important to approach the situation with care and sensitivity and take steps to provide appropriate assistance. Here are some general steps you can take to help:
two first aiders are providing assistance to an elderly person who has fallen. The first aider on the left is checking the person's pulse, while the other is evaluating their injuries. The person on the ground appears to be conscious but injured, and is lying on their side.
Evaluate the situation:
First, assess the situation to determine the extent of the person's injuries. If the person is conscious and can communicate, ask if they need help. If the person is unconscious or unresponsive, call emergency services immediately.
Provide first aid:
If the person has minor injuries that can be treated on-site, provide first aid as necessary. This might include cleaning and bandaging wounds, or helping them to sit or lie down in a comfortable position. If the person is bleeding heavily, try to apply pressure to the wound to stop the bleeding.
Call for help:
If the person's injuries are more serious or require medical attention, call emergency services immediately. Be sure to provide clear and accurate information about the person's location and the nature of their injuries.
Stay with the person:
While waiting for emergency services to arrive, it is important to stay with the person and provide comfort and reassurance. Let them know that help is on the way and that they are not alone.
Communicate clearly:
When speaking with the injured person, speak clearly and calmly. Avoid using complex language or medical jargon, and try to keep the person as relaxed as possible. If the person is unable to communicate, try to find out if they have any medical conditions or allergies that emergency services should be aware of.
Provide information:
If you are able to, provide emergency services with as much information as possible about the person's condition and any relevant medical history. This can help medical professionals provide more effective treatment.
Be respectful:
Remember that the injured person is likely to be feeling scared, vulnerable, and in pain. Treat them with respect and kindness, and try to keep them as calm and comfortable as possible until help arrives.
Encountering an elderly or geriatric person who has fallen can be a challenging experience, but by following these steps, you can provide valuable assistance and help to ensure that the person receives the care and treatment they need.Encountering an elderly or geriatric person who has fallen can be a difficult experience. It is important to approach the situation with care and sensitivity and take steps to provide appropriate assistance. Here are some general steps you can take to help:
Evaluate the situation:
First, assess the situation to determine the extent of the person's injuries. If the person is conscious and can communicate, ask if they need help. If the person is unconscious or unresponsive, call emergency services immediately.
Provide first aid:
If the person has minor injuries that can be treated on-site, provide first aid as necessary. This might include cleaning and bandaging wounds, or helping them to sit or lie down in a comfortable position. If the person is bleeding heavily, try to apply pressure to the wound to stop the bleeding.
Call for help:
If the person's injuries are more serious or require medical attention, call emergency services immediately. Be sure to provide clear and accurate information about the person's location and the nature of their injuries.
Stay with the person:
While waiting for emergency services to arrive, it is important to stay with the person and provide comfort and reassurance. Let them know that help is on the way and that they are not alone.
Communicate clearly:
When speaking with the injured person, speak clearly and calmly. Avoid using complex language or medical jargon, and try to keep the person as relaxed as possible. If the person is unable to communicate, try to find out if they have any medical conditions or allergies that emergency services should be aware of.
Provide information:
If you are able to, provide emergency services with as much information as possible about the person's condition and any relevant medical history. This can help medical professionals provide more effective treatment.
Be respectful:
Remember that the injured person is likely to be feeling scared, vulnerable, and in pain. Treat them with respect and kindness, and try to keep them as calm and comfortable as possible until help arrives.
Encountering an elderly or geriatric person who has fallen can be a challenging experience, but by following these steps, you can provide valuable assistance and help to ensure that the person receives the care and treatment they need.
At Delta Emergency Support Training we are happy to answer any questions you may have on geriatric emergencies as well as training sessions for individuals or classes. We offer in person, hybrid and online classes for Standard First Aid (SFA) Advanced First Aid (AFA) and Emergency Medical Responder (EMR) courses. For all inquiries please email info@deltaemergency.com .
Maximize Your Babysitting Skills with the BEST: Babysitter Essential Support Training for Super Sitters
Sure! Here's an excerpt for "Maximize Your Babysitting Skills with the BEST: Babysitter Essential Support Training for Super Sitters":
As a babysitter, it's important to have the skills and knowledge necessary to provide safe and effective care for children. That's where the BEST program comes in. The Babysitter Essential Support Training (BEST) is a comprehensive training program designed to help sitters maximize their babysitting skills.
The BEST program covers a wide range of topics, including child development, safety, first aid and CPR, discipline, and communication. With the BEST program, you'll learn how to identify and respond to common childhood emergencies, such as choking and allergic reactions. You'll also learn how to manage challenging behavior and communicate effectively with parents.
In addition to the comprehensive training curriculum, the BEST program also provides ongoing support and resources for sitters. This includes access to a community of fellow sitters, as well as tools and resources to help you succeed in your babysitting career.
By completing the BEST program, you'll have the knowledge and confidence to provide exceptional care for children, while also setting yourself apart as a professional and reliable babysitter. So why wait? Enroll in the BEST program today and start maximizing your babysitting skills!
Delta Emergency Support Training’s BEST Babysitter’s Key Concepts:
BEST Babysitter
B - Babysitting Basics
E - Essential Skills
S - Safety Training
T - Tips and Techniques
In this context, Babysitter Essential Support Training, or "BEST" represents the core elements of the course, focusing on fundamental babysitting knowledge and skills, essential safety training, and practical tips and techniques for successful babysitting. This acronym could be used as a catchy and memorable way to promote the course and highlight its key features.
a group of babysitters-in-training gathered around infant dolls on the ground.
The Basics of Babysitting
Welcome to the world of babysitting! Being a babysitter can be a fun and rewarding job where you get to care for and entertain children while their parents are away. However, it also comes with a great deal of responsibility. In this chapter, we'll cover the basics of babysitting, including important skills, safety guidelines, and essential information for being a responsible babysitter.
1.1 The Role of a Babysitter
As a babysitter, your main role is to ensure the safety and well-being of the children in your care. You are responsible for supervising them, providing meals, helping with homework or other activities, and entertaining them. It's important to be attentive, patient, and nurturing to create a positive and enjoyable experience for the children you're looking after.
1.2 Basic Skills for Babysitters
There are several skills that are essential for babysitters to possess. These skills include:
1.2.1 Communication Skills:
As a babysitter, you need to be able to communicate effectively with both the children and their parents. You should be able to listen attentively to the children, understand their needs, and respond appropriately. Additionally, you should be able to communicate clearly with parents about any concerns or updates regarding the children's care.
1.2.2 Problem-Solving Skills:
Babysitting often involves handling unexpected situations, such as a child getting sick or having an emotional meltdown. Being able to think quickly and calmly in these situations and come up with appropriate solutions is crucial.
1.2.3 First Aid and CPR:
Knowing basic first aid and CPR (Cardiopulmonary Resuscitation) is extremely important as a babysitter. You should be able to respond to minor injuries or emergencies and provide appropriate care until professional help arrives.
1.2.4 Time Management Skills:
Babysitting often involves managing multiple tasks simultaneously, such as preparing meals, supervising playtime, and helping with homework. Good time management skills are necessary to ensure that all responsibilities are fulfilled efficiently.
1.2.5 Childcare Experience:
While it's not always a requirement, having previous experience in childcare, such as volunteering at a daycare or babysitting for family and friends, can be helpful in gaining confidence and understanding children's needs.
1.3 Safety Guidelines for Babysitters
Safety should be the top priority for any babysitter. Here are some important safety guidelines to follow:
1.3.1 Childproofing:
Make sure the environment is safe for the children by removing any potential hazards, such as sharp objects, choking hazards, and poisonous substances. Ensure that outlets are covered, cabinets with dangerous items are locked, and that there are no loose cords or wires that could pose a danger.
1.3.2 Emergency Preparedness:
Familiarize yourself with the location of fire extinguishers, first aid kits, and emergency phone numbers. Have a plan in place for emergencies, such as fires, natural disasters, or medical emergencies, and know how to evacuate the home safely.
1.3.3 Stranger Danger:
Teach the children about stranger danger and emphasize the importance of not opening the door to anyone they do not know. Instruct them to never give out personal information or accept gifts from strangers.
1.3.4 Safe Play:
Make sure the children are engaged in age-appropriate activities and supervise them closely during playtime, especially when playing outdoors or near water. Always follow the parents' guidelines regarding screen time, internet usage, and other safety concerns.
1.3.5 Transportation Safety:
If you need to transport the children, always ensure that they are secured in appropriate car seats or seat belts, depending on their age and size. Follow all traffic laws and never leave children unattended
1.1 The Role of a Babysitter
As a babysitter, your role goes beyond just supervising children. You are also responsible for providing emotional support, fostering a safe and nurturing environment, and being a positive role model. Here are some key aspects of the role of a babysitter:
1.1.1 Caregiver:
Your primary responsibility is to care for the well-being of the children in your charge. This includes ensuring their physical needs are met, such as providing meals, helping with hygiene tasks like bathing and changing diapers, and making sure they get enough rest.
1.1.2 Playmate:
Babysitting is not just about keeping children safe; it's also about having fun! Engaging in age-appropriate playtime activities, such as reading, playing games, and doing crafts, can help foster their development and create memorable experiences.
1.1.3 Educator:
Babysitters can also assist with homework or engage in educational activities, such as helping with reading, practicing math skills, or providing guidance on projects. Encouraging a love for learning and supporting their educational goals can be an important aspect of your role.
1.1.4 Mediator:
Children may sometimes have conflicts or disagreements. As a babysitter, you may need to step in and help resolve disputes in a fair and impartial manner. Teaching conflict resolution skills, promoting kindness and empathy, and setting clear boundaries can help establish a peaceful environment.
1.1.5 Communicator:
Effective communication is crucial in babysitting. You need to be able to clearly communicate with the children, understand their needs and emotions, and respond in a compassionate and respectful manner. You also need to communicate with the parents, providing updates on the children's well-being and any issues that may arise.
1.1.6 Safety Advocate:
Ensuring the safety of the children is your top priority. This includes supervising them at all times, being vigilant for potential hazards, and taking appropriate measures to prevent accidents. You should also be knowledgeable about emergency procedures, including knowing when to seek medical attention or contact parents in case of an emergency.
As a babysitter, one of your most crucial roles is to create a safe environment for the children in your care. Safety should be a top priority at all times to prevent accidents and ensure the well-being of the children. Here are some important aspects of safety that a babysitter should be knowledgeable about:
1.1.6.1 Supervision:
It's essential to provide constant supervision to the children, especially for younger children or those with special needs. You should always keep a watchful eye on the children, actively engaging with them and being aware of their activities, to prevent any accidents or injuries.
1.1.6.2 Hazard Prevention:
Identifying potential hazards in the environment and taking appropriate measures to prevent them is crucial. This includes ensuring that sharp objects, toxic substances, and small objects that pose a choking hazard are safely stored and out of reach of children. It also involves keeping doors and windows locked, securing staircases, and ensuring that outdoor play areas are safe and well-maintained.
1.1.6.3 Emergency Preparedness:
Babysitters should be prepared for emergencies and know how to respond appropriately. This includes knowing the location of first aid supplies, fire extinguishers, and emergency contact information. Babysitters should also be trained in basic first aid and CPR, as well as knowing the appropriate steps to take in case of a medical emergency or other emergencies, such as fires, natural disasters, or intruders.
1.1.6.4 Transportation Safety:
If you need to transport the children as part of your babysitting duties, whether it's walking them to school, driving them to activities, or using public transportation, it's important to follow proper safety guidelines. This includes using age-appropriate car seats or seat belts, following traffic rules, and ensuring that the children are always supervised and accounted for during transportation.
1.1.6.5 Internet and Technology Safety:
In today's digital age, babysitters should also be mindful of internet and technology safety. This includes monitoring children's online activities, setting age-appropriate content restrictions, and educating children about safe internet use and potential risks.
1.1.6.6 Communicating with Parents:
Babysitters should establish open and clear communication with parents regarding safety protocols, emergency procedures, and any specific instructions or concerns related to the children's safety. It's important to work collaboratively with parents to ensure that the children's safety is prioritized at all times.
By prioritizing safety and being vigilant in identifying and addressing potential hazards, a babysitter can create a secure environment for the children in their care. Remember, prevention is key, and it's always better to be proactive in ensuring the safety of the children rather than reacting to an emergency situation.
Remember, as a babysitter, you are entrusted with the care and well-being of someone else's precious children. Your role goes beyond just being present; it involves building trust, creating a positive environment, and providing excellent care for the children in your charge.
BABYSITTER QUIZ!
What is the primary responsibility of a babysitter?
A. Providing meals
B. Playing games
C. Teaching conflict resolution skills
D. Ensuring safety
2. Which of the following is NOT a role of a babysitter?
A. Caregiver
B. Mediator
C. Cleaning the house
D. Educator
3. What should a babysitter do in case of an emergency
A. Ignore it and continue with regular activities
B. Contact the parents immediately
C. Panic and call 911
D. Leave the house and go home
4. Why is effective communication important for a babysitter?
A. It helps the babysitter bond with the children
B. It allows the babysitter to understand the children's needs and emotions
C. It helps in resolving conflicts among children
D. All of the above
5. What should a babysitter do to ensure the safety of the children?
A. Supervise the children at all times
B. Be vigilant for potential hazards
C. Follow emergency procedures
D. All of the above
Answers:
D. Ensuring safety
C. Cleaning the house
B. Contact the parents immediately
D. All of the above
D. All of the above
Note: The quiz questions and answers may vary depending on specific guidelines or requirements of the babysitting situation. It's important to always follow the parents' instructions and guidelines when babysitting.
At Delta Emergency Support Training we are happy to answer any questions you may have about Babysitter Skills and Babysitter Certification. We provide training sessions for individuals or classes. We have options for in person, hybrid or online classes for Babysitter’s, Standard First Aid (SFA), Advanced First Aid (AFA), Emergency Medical Responder (EMR), and more courses. For all inquiries please email info@deltaemergency.com
Saving Lives: The Vital Role of Automated External Defibrillators (AEDs) in Cardiac Emergency Response
The importance of Automated External Defibrillators (AEDs) in cardiac emergency response cannot be overstated. This powerful photo depicts a person using an AED to deliver life-saving defibrillation during a critical moment of a cardiac emergency. With a descriptive filename, alt text, and metadata that includes relevant keywords, this image serves as a powerful visual representation of the vital role of AEDs in saving lives during cardiac emergencies.
Saving Lives with Automated External Defibrillators (AEDs): What You Need to Know
The importance of Automated External Defibrillators (AEDs) in cardiac emergency response cannot be overstated. This photo depicts an AED, ready to deliver life-saving defibrillation during a critical moment of a cardiac emergency.
Cardiac arrest is a sudden and life-threatening condition that occurs when the heart suddenly stops beating effectively. Immediate intervention is critical to increase the chances of survival, and Automated External Defibrillators (AEDs) have emerged as a crucial tool in saving lives during cardiac emergencies. In this blog post, we will explore what AEDs are, how they work, and why they are essential in cardiac arrest management.
What are AEDs?
An Automated External Defibrillator (AED) is a portable electronic device that is used to diagnose and treat life-threatening cardiac arrhythmias, such as ventricular fibrillation (VF) and pulseless ventricular tachycardia (VT). AEDs are designed to be used by non-medical professionals, including laypersons, and are commonly found in public places, workplaces, airports, schools, and other high-traffic areas.
How do AEDs work?
AEDs work by delivering an electric shock to the heart to restore its normal rhythm. When a person experiences cardiac arrest, the heart's electrical activity becomes chaotic, causing the heart to quiver or fibrillate instead of pumping blood effectively. AEDs are equipped with built-in sensors and computer algorithms that analyze the heart's electrical activity through adhesive pads (called electrodes) placed on the person's chest. If a shockable rhythm, such as Ventricular Fibrillation (VF) or Ventricular Tachycardia (VT), is detected, the AED will prompt the user to deliver a shock by pressing a button or automatically deliver the shock if it is a fully automated AED.
An Automated External Defibrillator (AED) is a portable electronic device that is used to diagnose and treat life-threatening cardiac arrhythmias, such as ventricular fibrillation (VF) and pulseless ventricular tachycardia (VT).
The shock delivered by the AED is intended to stop the chaotic electrical activity in the heart and allow the heart to reset itself and resume a normal rhythm. AEDs are designed to be safe and effective, with automated features that guide the user through each step of the process, including providing voice prompts, visual instructions, and feedback on the quality of CPR (cardiopulmonary resuscitation) being performed.
Why are AEDs important?
AEDs play a crucial role in improving the chances of survival for individuals experiencing sudden cardiac arrest. According to the American Heart Association (AHA), the use of an AED, in combination with CPR, can significantly increase the survival rate of cardiac arrest victims. In fact, for every minute that passes without defibrillation, the chances of survival decrease by approximately 10%. Therefore, quick access to an AED and early defibrillation is critical to increasing the chances of survival.
An Automated External Defibrillator (AED) electricity in action, ready to provide life-saving defibrillation during a cardiac emergency.
They are designed to be used by anyone, regardless of their medical training or experience. They are user-friendly, with clear instructions and prompts that guide the user through the entire process. Many AEDs also have visual aids, such as diagrams or animations, to assist users in correct pad placement and usage. This makes AEDs accessible and empowers bystanders to take immediate action during a cardiac emergency, even before professional medical help arrives.
AEDs are also lightweight and portable, making them easy to transport and use in various settings. They are often designed with durable cases, built-in carrying handles, and sometimes even equipped with backpacks or wall-mounted cabinets for easy storage and accessibility. Many AEDs also perform regular self-checks and have indicators that show their readiness status, ensuring that they are always ready for use in an emergency.
In addition to their ease of use and portability, AEDs are cost-effective. The cost of AEDs has decreased over the years, making them more affordable and accessible for public use. Some AEDs also come with maintenance packages, including
Another important aspect of AEDs is the potential for widespread community impact. When AEDs are strategically placed in public locations, they can be easily accessed and used by bystanders in the critical minutes following a cardiac arrest. This can significantly shorten the time to defibrillation and increase the chances of survival. Many communities, workplaces, and public facilities have recognized the importance of having AEDs readily available and have implemented AED programs as part of their emergency response plans. These AED programs often include training initiatives to educate community members on how to recognize cardiac arrest, perform CPR, and use an AED effectively, further empowering the community to respond to cardiac emergencies.
In conclusion, Automated External Defibrillators (AEDs) are crucial tools in saving lives during cardiac emergencies. Their ease of use, portability, affordability, and potential for widespread community impact make them essential components of cardiac arrest management. By providing early defibrillation and increasing the chances of survival, AEDs empower bystanders to take action and make a significant difference in saving lives. If you encounter someone experiencing sudden cardiac arrest, remember to call emergency services, start CPR, and locate and use an AED as soon as possible for the best chance of survival.
Pocket Mask Requirements: First Aid Program Standards in 2021
All participants attending classroom training are required to have their own pocket resuscitation mask with single-use one-way valve.
Important changes to program standards
In the interest of public health during COVID-19 and beyond, please be advised the Canadian Red Cross program standards have been updated with respect to pocket masks in Red Cross First Aid training. All participants attending classroom training are required to have their own pocket resuscitation mask with single-use one-way valve.
Pocket masks must be new (if provided by the Training Partner) or previously owned by the participant only. While pocket masks are already used in training, they are typically decontaminated and reused along with a new one-way valve.
Purchase here: Pocket Mask
With this revised standard, the practice of decontaminating pocket resuscitation masks will be discontinued as masks may not be reused.
To ensure the safety of all students, course participants can bring their own pocket mask with a one-way valve, or they may opt to purchase one as an add-on item prior to class. Masks can be shipped to your home, or picked up on class day.
This new standard begins on March 31, 2021. Delta Emergency will adopt this new standard today, December 17, 2020. All courses that require mask ventilation training will be required to add a pocket mask at time of course purchase. If you choose not to buy a mask and do not have one on class day, you will be required to purchase one from your trainer in person before training can commence. If you refuse to purchase a mask in class, your participation will be marked as incomplete. We appreciate your understanding of this transition and we believe this will greatly reduce the risk of disease transmission for course participants.
Resources
Our COVID-19 protocols for classroom training have been revised to reflect this change. The courses this training will affect are:
Emergency First Aid
Standard First Aid
CPR A, CPR C, BLS, AED
Oxygen Therapy
Airway Management
Advanced First Aid
Please contact the Canadian Red Cross at 1-877-356-3226 with any questions regarding this new training standard.
As always, the health and safety of our partners, Instructors, and course participants is our first priority. Thank you for your support in ensuring a safe training environment.

