The Delta Dispatch

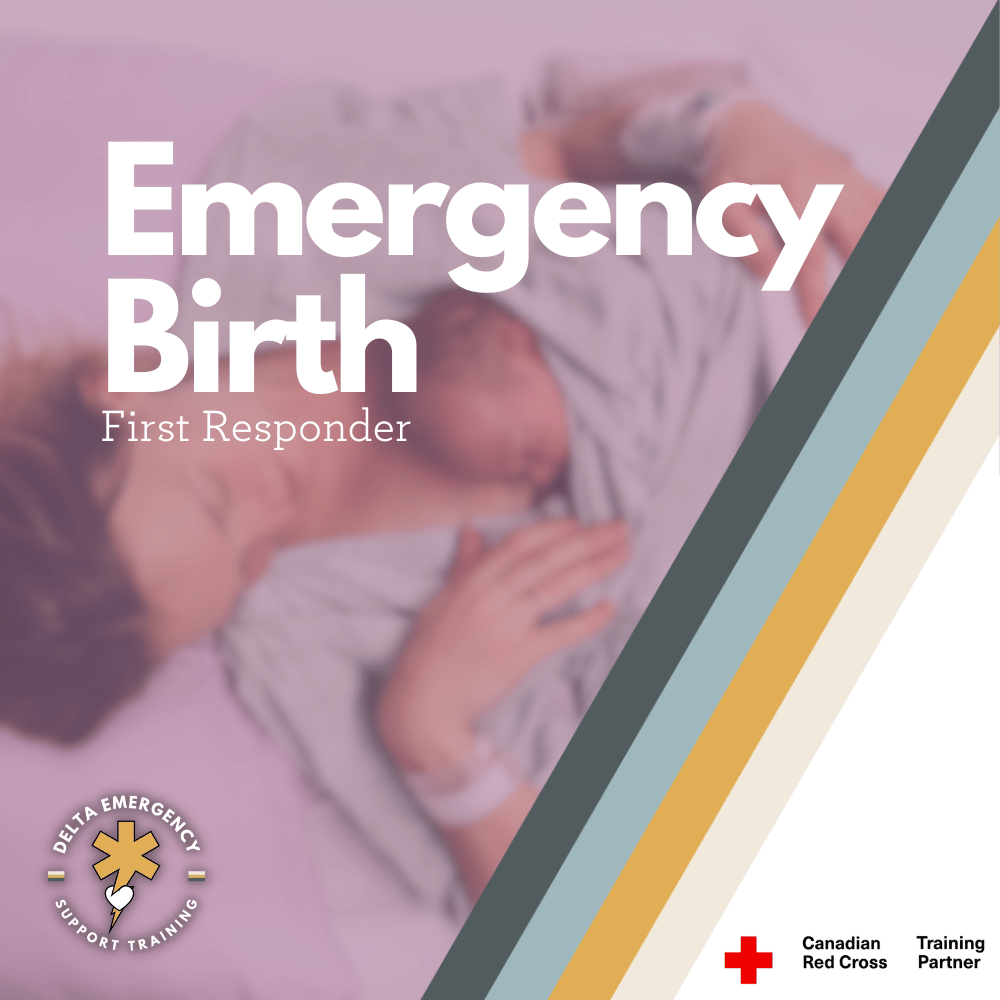
Emergency Birth as a First Responder: Postpartum Care

Dive into the realm of postpartum care during emergency births, where first responders play a vital role. Explore expert techniques, bleeding management strategies, and firsthand insights from seasoned paramedics. Elevate your capabilities as a first responder with invaluable knowledge on ensuring the well-being of both newborns and mothers in these critical moments.


Caring for the Newborn

Welcome to the second part of our comprehensive two-part series, where we continue our exploration of emergency births and the invaluable contributions of first responders. In the initial segment, we delved into the preparations and assistance offered during the childbirth process. Now, as we progress into Part 2, our focus intensifies on the pivotal steps undertaken by first responders to ensure the immediate well-being of both the newborn and the mother post-delivery.

Mother postpartum holding neonate on her chest.

This installment delves deeper into the critical aspects of post-birth care, revealing the intricate measures that first responders execute to stabilize the newborn and provide essential support to the mother. We'll navigate through the essential processes of promoting the newborn's well-being, utilizing tools like the APGAR scale to assess their condition. Simultaneously, we address the importance of postpartum care for the mother, emphasizing vigilant monitoring and timely interventions to manage postpartum bleeding.

With these multifaceted actions, first responders display their unwavering commitment to preserving life and fostering well-being during the immediate aftermath of childbirth. Join us on this journey as we uncover the intricacies of post-birth care, shedding light on the dedication and expertise that first responders bring to these unforeseen situations.

Vigorous Drying Techniques:

If the newborn does not exhibit signs of breathing or crying, immediate action is essential. Begin by employing vigorous drying techniques. Take a clean, soft towel and gently rub the baby's back, arms, and legs. This tactile stimulation often prompts a response by initiating their reflexes.

Assessing the Response:

After performing vigorous drying for approximately 30 seconds, pause and closely observe the baby's reaction. Look for any movements, breathing, or vocalizations. This assessment helps determine the baby's level of responsiveness and guides further intervention.

Using a Bag-Valve-Mask (BVM):

If the newborn remains unresponsive, it's time to provide assisted ventilation using a BVM. Ensure a proper seal by placing the mask over the baby's nose and mouth. Administer gentle breaths at a rate of 1 ventilation every 3 seconds. This method delivers a controlled supply of oxygen to the baby's lungs.

Ventilation and Pulse Assessment:

During the 30-second period of ventilation using the BVM, closely monitor the newborn's response. Afterward, assess the baby's pulse. If the pulse is below 60 BPM, it's an indication that immediate intervention is necessary.

Neonate CPR Protocol:

When the pulse remains below 60 BPM, initiate neonate CPR. Begin with 3 gentle chest compressions, followed by 1 breath using the BVM. Continue this cycle, maintaining a ratio of 3 compressions to 1 breath. As you administer CPR, be vigilant about monitoring the baby's heart rate.

Optimal Heart Rate:

A newborn's optimal heart rate typically falls between 140 and 160 BPM. Continuous heart rate monitoring informs you about the baby's response to the resuscitative efforts. Continue with primary assessment once neonates ABC’s are considered stable. Begin conducting a baseline set of vitals if possible.

APGAR Scale

The APGAR scale is a valuable tool used to assess the overall condition of a newborn immediately after birth. Named after its creator, Dr. Virginia Apgar, this assessment helps medical professionals and first responders quickly evaluate the baby's physical status and determine if any immediate interventions are required. The APGAR scale evaluates five key factors:

  1. Appearance (Skin Color):

    The baby's skin color is assessed. A newborn with a pink or rosy skin tone receives a score of 2, while pale or bluish skin results in a lower score.

  2. Pulse (Heart Rate):

    The baby's heart rate is evaluated. A heart rate of 100 to 140 BPM is considered normal and receives a score of 2. A lower heart rate receives a score of 1, and a heart rate of less than 100 BPM gets a score of 0.

  3. Grimace Response (Reflexes):

    The baby's reflexes are tested by gently stimulating their nose or feet. A newborn who responds with a sneeze, cough, or grimace (frowning) gets a score of 2. A sluggish response results in a score of 1, and no response gets a score of 0.

  4. Activity (Muscle Tone):

    The baby's muscle tone is assessed. If the baby exhibits active movement and flexion, they receive a score of 2. If the limbs are partially flexed, the score is 1. If there is minimal or no movement, the score is 0.

  5. Respiration ( Rate and Effort):

    The baby's breathing rate and effort are observed. If the baby is crying and breathing normally, they receive a score of 2. Irregular or slow breathing results in a score of 1, and no breathing receives a score of 0.

When and How the APGAR Scale is Conducted:

The APGAR assessment is typically performed twice: at 1 minute after birth and again at 5 minutes after birth. Each factor is assigned a numerical rating of 0, 1, or 2. The scores are then added together to yield a total score out of 10. The assessment helps medical professionals and first responders quickly identify any issues that require immediate attention and determine if the baby is adapting well to life outside the womb.

Caring for the Mother Post Delivery

After stabilizing the newborn, it's essential to provide comprehensive care to the mother, addressing both physical and emotional needs. Here's a closer look at postpartum care for the mother:

Encouraging Breastfeeding:

Following the stabilization of the newborn, encouraging the mother to breastfeed is a vital step. Breastfeeding stimulates the uterus to contract, which in turn helps reduce bleeding. This process, known as uterine involution, assists the mother's body in returning to its pre-pregnancy state. Moreover, breastfeeding establishes a strong bond between mother and baby and offers a multitude of benefits for both.

Placenta Handling:

In line with recommended practices, refrain from cutting the placenta from the newborn unless local protocols or medical direction dictate otherwise. Instead, carefully wrap the placenta in a plastic bag and towel for transport with the family. This approach respects the physiological connection between the placenta and the newborn and ensures a smooth transition.

Managing Postpartum Bleeding:

In cases where postpartum bleeding is a concern, gentle and non-invasive techniques are employed. Use sterile gauze or a clean towel to gently clean the mother's perineal area. This process helps slow down bleeding without resorting to any interventions that may pose risks.

Monitoring and Recognizing Excessive Bleeding:

Keeping a vigilant eye on postpartum bleeding is crucial. Differentiating between normal and excessive bleeding is essential for the mother's well-being. Excessive bleeding may result from the uterus not contracting as it should. This information will be instrumental in determining the appropriate interventions.

Addressing Shock Symptoms:

It's important to be aware that mothers might present symptoms similar to shock, which can include pale skin, rapid heartbeat, and altered mental state. In cases where these symptoms persist or worsen, rapid transportation to a medical facility becomes imperative. This is particularly crucial if bleeding remains a concern.

Through these measures, first responders offer a holistic approach to postpartum care for the mother. From promoting uterine contraction through breastfeeding to respecting placenta connection, these actions contribute to the mother's comfort and well-being. Vigilant monitoring, appropriate interventions, and the utmost sensitivity to the mother's condition reflect the dedicated commitment of first responders in ensuring the holistic health and safety of both the newborn and the mother during this critical phase.

Conclusion

Throughout this enlightening two-part series, we've unveiled the crucial role that first responders undertake in emergency births. From cultivating a sterile environment to aiding childbirth and offering essential postpartum care.

Join us in our advanced first aid class where we offer comprehensive obstetrics training. Collaborate with seasoned paramedics who have delivered babies in the field, gaining practical insights that prepare you to confidently assist during emergency births.

Read More

Emergency Birth as a First Responder: Preparation and assessment Part 1

Emergency births can present first responders with intense and unexpected situations, demanding quick thinking and swift actions. In Part 1 of this series, we delve into the crucial steps involved in preparing expectant mothers for childbirth and guiding them through the delivery process. From addressing fears to creating a clean environment, our guide equips first responders with the knowledge to assist in this pivotal moment.


Welcome to the first installment of a two-part series on emergency births and the crucial role of first responders in managing such situations. In this blog, we'll explore the initial steps involved in preparing the mother for delivery and guiding the childbirth process. From addressing fears to ensuring a safe environment, first responders play a vital role in this intense and impactful moment. Let's delve into the essential aspects of prepping and assisting in an imminent birth scenario. Stay tuned for Part 2, where we'll cover the post-birth care of both the neonate and the mother.

Preparing the Mother for Delivery

In the high-stress situation of an emergency birth, helping the mother feel at ease and well-prepared is essential. Here's how to create a comforting environment and gather important information:

Assess the Situation:

Approach the mother with a calm and reassuring demeanor. Introduce yourself and explain that you're there to assist her during the delivery process.

Ask Important Questions:

While time might be limited, try to ask a few key questions to better understand the situation and the mother's medical history. Some questions to consider include:

  • Is this your first baby, or have you given birth before?

  • How many prior births have you had, if any?

  • Have you received prenatal care during your pregnancy?

Address Fear and Anxiety:

It's natural for the mother to be fearful and anxious during an unplanned delivery. Acknowledge her emotions and reassure her that you are there to help and support her. Use a soothing tone and maintain eye contact to establish a sense of trust.

Provide Information:

Briefly explain the stages of labor and what she might expect during the delivery process. Let her know that her body knows how to give birth, and you're there to assist and guide her through it.

Encourage Breathing Techniques:

Breathing techniques can help manage anxiety and pain. Instruct her to take slow, deep breaths, inhaling through her nose and exhaling through her mouth. This can help her stay focused and calm.

Offer Comfort:

If possible, offer a reassuring touch or hold her hand to provide physical comfort. If she's comfortable, encourage her to find a position that feels right for her, whether sitting, lying down, or even kneeling.

Reiterate Support:

Continuously remind her that you're there to support her, and that her well-being and that of her baby are your top priorities.

Remember, your presence and demeanor can significantly impact the mother's experience during this intense moment. By addressing her fears, gathering important information, and offering a calm and steady presence, you can help create an environment conducive to a safe and successful delivery. Always be ready to adapt your approach based on the mother's needs and the progress of the situation.

Delivery Preparation

As a first responder, recognizing the signs of imminent birth and swiftly creating a clean and supportive environment are critical. Here's how to prepare for the actual delivery:

Recognizing Imminent Birth:

Contractions Less Than 3 Minutes Apart: When contractions are occurring at such a close interval, it's a strong indicator that the birth is imminent. The mother's body is progressing rapidly towards delivery.

Feeling the Need to Push:

The sensation of needing to push indicates that the baby is descending into the birth canal. This is a clear sign that the delivery is approaching.

Urge to Have a Bowel Movement:

This sensation often occurs as the baby's head moves lower in the pelvis. It's a common sign that birth is imminent.

Positioning for Comfort:

Help the mother find a comfortable position that allows her to feel in control. She might choose to sit, squat, or lie down. If she's comfortable with it, use pillows or cushions to support her in the chosen position.

Creating a Clean and Supportive Environment:

If available, throw clean towels in the dryer to warm them up. Warm towels provide comfort to both the mother and the newborn. Lay down clean linen, sheets, and towels on a flat and stable surface to create a clean area for the birth.

Privacy and Dignity:

Place a clean sheet over the mother's legs to provide her with a sense of privacy and dignity during the process.

Familiar Female Presence:

If a female first responder is present, the mother may feel more comfortable having her lead the delivery. The presence of a compassionate and empathetic individual can greatly ease the mother's anxiety.

Essential Supplies Ready:

Ensure you have the necessary supplies within arm's reach, including surgical scissors and clamps for cutting and clamping the cord, abdominal pads to manage potential bleeding, saline solution for cleaning, a neonate suction bulb to clear the baby's airway, and oxygen equipment.

Plastic Bag for Placenta:

Have a plastic bag ready for the placenta, which will be delivered shortly after the baby.

Preparing for an imminent birth involves both recognizing the signs that the delivery is moments away and creating a clean and supportive environment for the mother and newborn. By understanding the indicators of imminent birth and having essential supplies ready, you can ensure that the mother feels as comfortable and safe as possible during this intense experience. Your attentiveness, knowledge, and ability to create a clean and caring space are crucial in facilitating a successful and safe emergency birth.

The Delivery Process

Full PPE:

Before engaging in any medical procedure, including assisting in childbirth, it's crucial to don proper PPE. This typically includes wearing disposable gloves, a sterile gown, and a mask or face shield. PPE helps prevent the spread of infection and maintains a sterile environment for the mother and the newborn.

Dilation and Contractions:

Cervical dilation is a critical indicator of labor progression. A cervix that is fully dilated (10 cm) suggests that the baby is ready to be born. Contractions becoming less than 2 minutes apart indicate an advanced stage of labor, making it important to be prepared for imminent delivery.

Managing Crowning:

As the baby's head begins to crown, you can provide support to prevent rapid expulsion. Placing your hands gently on either side of the baby's head can help guide it out slowly. This controlled approach minimizes the risk of perineal tearing and ensures the mother's comfort.

Guiding the Baby's Head:

As the baby's head emerges, encourage the mother to pant or take shallow breaths. This prevents forceful pushing and allows the perineum to stretch gradually. The perineum is the area between the vagina and the anus, and it needs time to accommodate the baby's head.

Baby's Rotation and Shoulders:

The baby's head turning slightly to one side as it emerges is a natural movement that facilitates the passage of the shoulders through the birth canal. This rotation helps ensure a smoother delivery.

Supporting the Baby:

As the head emerges fully, it's important to provide gentle support to the baby's head and neck. This prevents any sudden movements that could strain the neck or spine. Maintaining a secure grip on the baby's head ensures a controlled delivery. Have a clean warm blanket or towel ready to catch the newborn as they slide out.

Primary Assessment and Documentation:

Conduct a quick assessment of the newborn's breathing, responsiveness, and overall condition. If the baby is breathing and appears healthy, allow the mother to hold the baby skin-to-skin while you continue monitoring.

Delay Cord Clamping:

Delayed cord clamping involves waiting a few minutes before clamping and cutting the umbilical cord. This allows the baby to receive additional blood volume and stem cells from the placenta, which can be beneficial for their health and development. When ready to clamp do so 4 and 6 inches away from the baby and wait for the placenta.

Waiting for the Placenta:

After the baby's birth, the placenta (also known as the afterbirth) is delivered. This usually happens within a few minutes to half an hour. Continue to monitor the mother for any signs of distress or bleeding while you wait for the placenta to be naturally expelled.

Conclusion

In the realm of emergency response, first responders serve as beacons of reassurance and skill during some of life's most intense and unexpected moments. As we conclude Part 1 of this series, we've explored the pivotal role these responders play in preparing expectant mothers for childbirth and guiding them through the delivery process. From addressing fears and creating a safe environment to offering gentle support and maintaining open communication, the steps taken during childbirth assistance are fundamental to ensuring the well-being of both the mother and the newborn.

Remember, each step requires precision, composure, and unwavering dedication to safety. While circumstances may differ, the principles of maintaining sterility, providing comfort, and effective communication stand as pillars of effective emergency birth assistance. Join us in Part 2 as we delve into the critical post-birth care of both the neonate and the mother, completing the comprehensive journey through this remarkable and life-affirming experience.

Read More
911, First Responder Kumari Malhotra 911, First Responder Kumari Malhotra

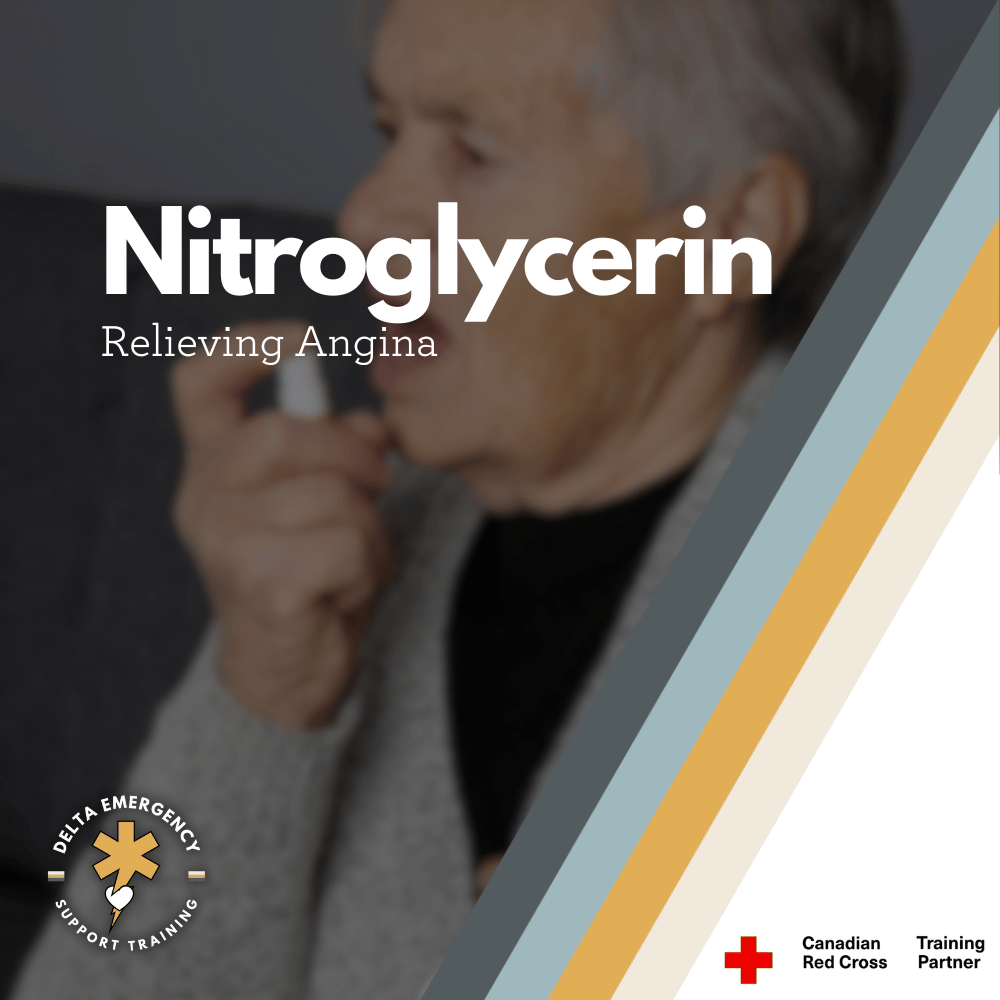
Nitroglycerin: Relieving Angina with

Angina, a distressing sensation of chest pain or discomfort, can be a daunting reality for individuals living with heart conditions. Thankfully, medical science has paved the way for innovative solutions to alleviate this cardiac discomfort. Nitroglycerin, in the form of a sublingual spray, emerges as a beacon of relief. By harnessing its vasodilating prowess, nitroglycerin sublingual spray not only provides respite from angina but also offers insights into the intricate connection between chemistry and cardiovascular health. In this article, we explore the mechanism behind nitroglycerin's effectiveness, its strategic sublingual administration, dosing precision, and the role it plays in modern cardiovascular care. Whether you're a patient seeking relief or a healthcare enthusiast, join us in unraveling the science behind managing angina with nitroglycerin.

In the realm of medical science, there are compounds that stand out for their transformative impact on patient care, particularly in the realm of cardiovascular health. Nitroglycerin, a compound with a rich history, has emerged as a true medical marvel, primarily due to its remarkable ability to alleviate cardiac pain, commonly known as angina. This blog will delve into the fascinating world of nitroglycerin's vasodilation mechanism, its pivotal role in managing angina, and the significance of its sublingual administration. Additionally, we'll explore key administration details, including dosing precision and the crucial priming step.

Woman using Nitroglycerin spray

Vasodilation

At the heart of nitroglycerin's medical efficacy lies its remarkable capacity to function as a vasodilator. Vasodilation, the widening of blood vessels, increases blood flow and reduces resistance within the circulatory system. Nitroglycerin accomplishes this by liberating nitric oxide (NO) upon entering the bloodstream.

Nitric Oxide

Nitric oxide, a signaling molecule, plays a pivotal role in regulating numerous physiological processes, including blood vessel dilation. Once nitroglycerin enters the bloodstream, it metamorphoses into nitric oxide. This wondrous molecule prompts smooth muscle cells within blood vessel walls to relax, culminating in vessel dilation. This relaxation orchestrates augmented blood flow and diminished pressure within arteries, offering particularly favorable outcomes for individuals grappling with angina or heart failure.

Blood Pressure

While the vasodilation advantages of nitroglycerin are profound, they can also precipitate a notable decline in blood pressure, a phenomenon termed hypotension. It's for this reason that nitroglycerin spray is contraindicated for systolic blood pressure under 110 mm Hg. Individuals with lower blood pressure may encounter an excessive drop, which could lead to sensations of faintness or dizziness or syncope.

Sublingual Administration: A Strategic Approach

Nitroglycerin's sublingual administration is a strategic maneuver that leverages the sublingual blood vessels, located beneath the tongue. This route ensures rapid absorption and delivery of the compound into the bloodstream. The patient administers the spray by aiming it under the tongue, allowing the nitroglycerin to be absorbed directly into the circulation through the rich network of blood vessels present in the sublingual area.

Dosing Precision

A standard dose of nitroglycerin sublingual spray typically involves a single spray, releasing approximately 0.4 mg of nitroglycerin. This dosage is meticulously calibrated to yield the desired vasodilation effects while mitigating the risk of pronounced blood pressure drops.

Priming

Before administering nitroglycerin sublingual spray, it is crucial to prime the bottle. Priming involves releasing a small amount of the spray to ensure the nozzle is functional and to guarantee accurate dosing during use.

Conclusion

Nitroglycerin sublingual spray stands as a testament to the potential of medical compounds to revolutionize cardiovascular care. Its unique ability to trigger vasodilation through the release of nitric oxide offers a lifeline to individuals grappling with heart-related conditions. As we continue to uncover the synergies between chemistry and human health, nitroglycerin remains an exemplary agent that has reshaped the landscape of cardiovascular medicine, improving lives one spray at a time.

Read More

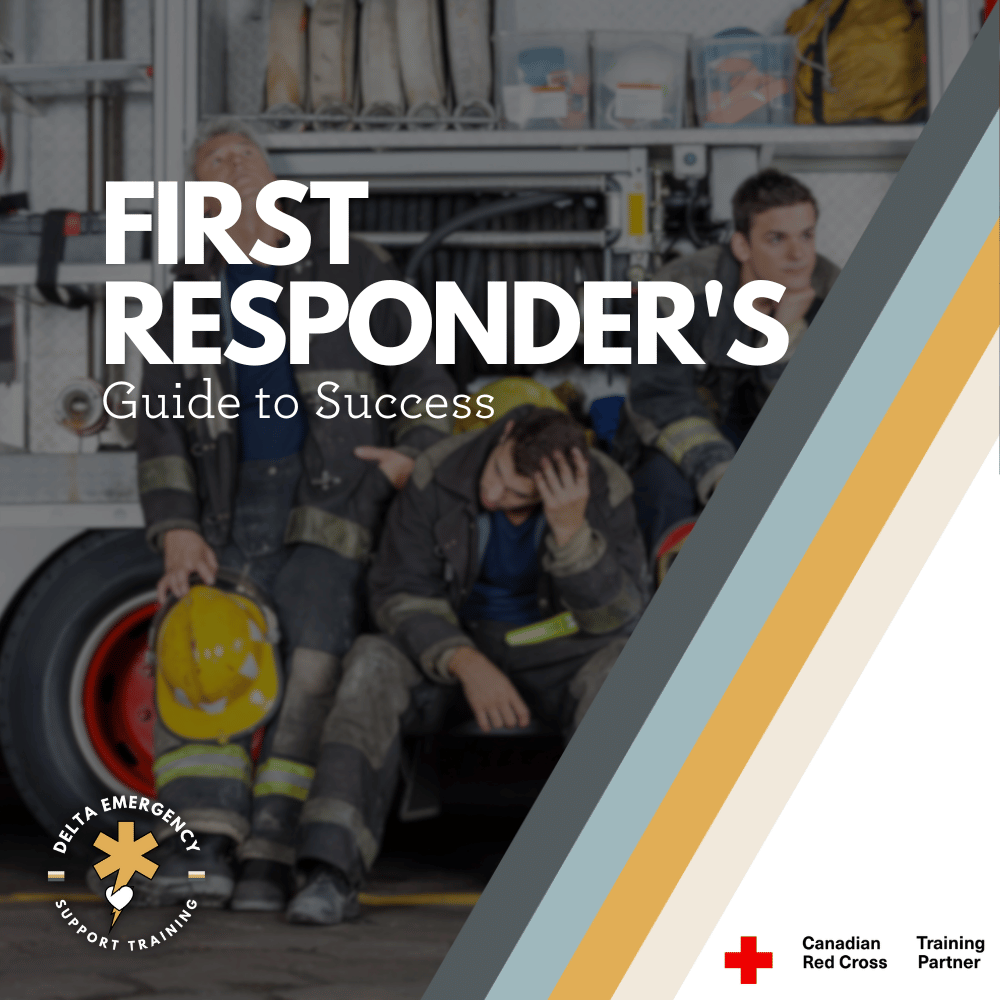
First Responder's Guide to Success

In the fast-paced world of first responders, achieving excellence is not just a goal; it's a continuous journey. This comprehensive guide explores the vital practices that empower first responders to excel in their roles. From studying practices that enhance knowledge to prioritizing mental and physical health, this guide equips first responders with the tools they need to be effective, resilient, and compassionate in the face of adversity.

First responders are the unsung heroes of our communities, bravely facing crises and emergencies to protect and serve others. The demanding nature of their work requires not only courage and skills but also a strong focus on personal development. In this blog, we will explore the essential good practices that first responders can embrace to excel in their roles, including studying practices to enhance their knowledge, mental health practices to cope with stress and trauma, and maintaining good physical health to sustain their well-being.

Fire fighters bonding at the station after a call

Studying Practices - Empowering Knowledge for Effective Response

The fast-paced and ever-evolving nature of emergency response demands that first responders remain adaptable, well-informed, and capable of making split-second decisions under pressure. By embracing a mindset of continuous learning and improvement, first responders can elevate their effectiveness, response capabilities, and overall impact on the communities they serve.

1. Regular Training:

Take advantage of the training opportunities provided by your organization. Regularly attend workshops, seminars, and skill-building sessions to stay updated on the latest techniques, equipment, and protocols.

Participate in mandatory training, as well as optional advanced courses, to enhance your capabilities and adapt to evolving challenges.

2. Scenario-Based Learning:

Engage in realistic simulations that mimic potential emergency situations. These simulations can help you develop quick thinking, problem-solving skills, and teamwork.

Learn from experienced mentors who can guide you through complex scenarios, offering valuable insights into decision-making and critical actions.

3. Research and Read:

Stay informed by reading industry publications, research papers, and reputable online sources. Subscribe to newsletters or podcasts that discuss current trends and advancements in your field.

Develop a habit of reading case studies or success stories to learn from real-life incidents and best practices.

4. Collaborate and Share:

Participate in regular knowledge-sharing sessions with your colleagues. Create a culture of open communication where experiences and lessons learned are shared freely.

Engage in interdisciplinary training or joint exercises with other emergency response teams, fostering cross-team collaboration and synergy.

5. Pursue Higher Education:

Consider enrolling in formal education programs related to emergency response, such as emergency management or paramedic training.

Higher education can provide a deeper understanding of the theoretical foundations of your field, complementing your practical experiences.

6. Utilize Technology and Online Resources:

Leverage online platforms and e-learning resources to access a vast array of educational materials, webinars, and interactive courses.

Explore virtual reality (VR) training scenarios that immerse you in realistic emergency situations, allowing for hands-on practice in a safe environment.

7. Continuous Self-Assessment:

Regularly evaluate your own performance and areas for improvement. Seek feedback from supervisors, colleagues, and mentors to identify blind spots.

Set personal learning goals and track your progress to ensure continuous development.

8. Specialize in Key Areas:

Identify specific areas of interest or expertise within your field and specialize in them. This can make you an invaluable resource in critical situations.

Pursue certifications or advanced training in specialized fields such as hazardous materials response, search and rescue, or medical specialties.

The Importance of Good Mental Health for First Responders

Being a first responder is a calling that demands courage, resilience, and unwavering dedication to serving others. However, the nature of the job exposes first responders to highly stressful and often traumatic situations, putting their mental well-being at risk. The importance of good mental health for first responders cannot be overstated, as it directly impacts their ability to provide effective and compassionate care, maintain personal well-being, and cope with the challenges they face daily. Here are some key reasons why prioritizing mental health is crucial for first responders:

1. Resilience in the Face of Stress and Trauma:

First responders frequently encounter distressing and emotionally challenging situations. Witnessing accidents, violence, loss of life, and suffering can take a toll on their mental well-being. Good mental health practices help build resilience, enabling them to cope with these difficult experiences and bounce back from adversity more effectively.

2. Decision-Making and Critical Thinking:

In high-pressure situations, clear and quick decision-making is essential. Maintaining good mental health enhances cognitive functions, including critical thinking, problem-solving, and judgment. A balanced and focused mind can lead to better on-the-spot decisions, which are crucial in emergency response scenarios.

3. Communication and Teamwork:

Effective communication and teamwork are paramount in the success of any emergency response operation. When first responders prioritize mental health, they are better equipped to communicate clearly, collaborate seamlessly with their team, and coordinate efforts efficiently, ensuring a cohesive response to emergencies.

4. Compassionate and Empathetic Care:

A mentally healthy first responder is better equipped to provide compassionate and empathetic care to those in distress. Mental well-being allows them to connect with individuals on a deeper level, demonstrating understanding and empathy even in challenging situations, thereby positively impacting the emotional recovery of those they assist.

5. Reduced Risk of Burnout and Compassion Fatigue:

The demanding nature of the job, coupled with exposure to traumatic events, can lead to burnout and compassion fatigue. Prioritizing mental health can act as a protective measure, reducing the risk of emotional exhaustion, cynicism, and disengagement from work.

6. Improved Work-Life Balance:

Maintaining good mental health supports a healthier work-life balance. First responders who are mentally well are more likely to effectively separate work-related stress from their personal lives, fostering stronger connections with their families, friends, and communities outside of work.

7. Positive Organizational Culture:

Organizations that prioritize mental health create a positive work environment where first responders feel supported, valued, and encouraged to seek help when needed. This promotes a culture of openness, reducing the stigma around mental health issues and encouraging individuals to proactively manage their well-being.

8. Enhancing Coping Mechanisms:

Good mental health equips first responders with healthier coping mechanisms to deal with stress. Instead of resorting to unhealthy ways of coping, such as substance abuse or avoidance, they can employ constructive strategies to manage stress effectively.

The Importance of Good Physical Health for First Responders

As first responders, the physically demanding and high-stress nature of the job requires peak physical fitness to perform effectively and safely. Prioritizing good physical health is essential for first responders, as it directly impacts their ability to carry out their duties, respond to emergencies, and maintain overall well-being. Here are some key reasons why focusing on physical health is crucial for first responders:

1. Enhanced Performance and Efficiency:

Being physically fit allows first responders to perform their duties efficiently and effectively. Improved cardiovascular health, strength, and endurance enable them to respond quickly and navigate challenging environments with agility, which is critical during emergencies.

2. Quick and Timely Responses:

Emergencies often require swift action, and physical fitness is vital for first responders to arrive at the scene promptly. Maintaining good physical health ensures that they can respond rapidly, potentially making a life-saving difference in critical situations.

3. Reduced Risk of Injuries:

The physically demanding nature of emergency response can lead to injuries if the body is not properly conditioned. Regular exercise and physical training help reduce the risk of musculoskeletal injuries and support a quicker recovery if injuries do occur.

4. Mental Clarity and Focus:

Physical activity has a positive impact on mental health. Engaging in regular exercise releases endorphins, which can improve mood, reduce stress, and enhance mental clarity and focus. This mental boost is invaluable for first responders, especially during high-stress situations.

5. Improved Stamina During Prolonged Operations:

Emergency response operations can be prolonged and physically taxing. Being in good physical condition enables first responders to sustain their energy levels during extended shifts, ensuring that they can perform at their best throughout the duration of an operation.

6. Team Cohesion and Trust:

A physically fit team builds trust and cohesion among its members. Knowing that each team member is capable of handling the physical demands of the job fosters a sense of confidence and mutual reliance, strengthening the team's overall performance.

7. Healthy Work-Life Balance:

Prioritizing physical health supports a healthier work-life balance for first responders. Regular exercise and fitness routines can serve as stress-relieving activities and provide an opportunity for them to disconnect from work and focus on personal well-being.

8. Increased Resilience to Stress:

Physical fitness enhances the body's ability to cope with stress. Regular exercise can help reduce the physiological effects of stress, making first responders more resilient and better able to manage the mental and emotional challenges they face on the job.

9. Positive Role Models for the Community:

First responders who prioritize their physical health can serve as positive role models for the community they serve. Demonstrating commitment to fitness not only inspires others to lead healthier lifestyles but also reinforces the image of a capable and prepared emergency response force.

In the demanding world of first responders, excellence is not just a goal; it's a continuous journey. This guide explores vital practices, from studying to mental and physical health, empowering them to excel in their roles. By prioritizing continuous learning, mental well-being, and physical fitness, first responders become effective, resilient, and compassionate in serving their communities. Together, let's support and appreciate these brave individuals as they continue to shine as beacons of hope and strength in the face of adversity.

Read More

Crush Injuries: When to leave it to the professionals

Accidents can happen at any time and in various environments, resulting in different types of injuries. One particularly challenging type of injury to manage is a crush injury. Whether caused by heavy machinery, falling objects, or high-pressure forces, crush injuries can lead to severe damage to body tissues, bones, and organs. In this comprehensive guide, we provide first aid responders with the knowledge and skills needed to effectively manage crush injuries. From assessing the scene and preserving the airway to controlling bleeding and understanding the risks of object removal, we cover crucial steps and considerations. Additionally, we delve into the impact of acidosis in crush injuries, emphasizing the importance of professional medical assistance. By being prepared and informed, first aid responders can provide essential care and potentially save lives in crush injury incidents.

Accidents can occur at any time and in various environments, resulting in different types of injuries. One particularly challenging type of injury to manage is a crush injury. These injuries can be caused by heavy machinery, falling objects, or other high-pressure forces, leading to severe damage to body tissues, bones, and organs.

Man wearing an orange safety vest has a arm injury tended to.

Industrial worker having first aid preformed on a injured arm.

As a first aider or professional responder, it is crucial to be prepared and knowledgeable about how to provide immediate care to individuals with crush injuries. In this comprehensive guide, we will explore the basics of crush injuries, discuss the essential steps to effectively manage and treat them, and outline the considerations specific to first responders.

Understanding Crush Injuries: A crush injury occurs when a body part becomes trapped between two objects or experiences a significant force that compresses the tissues. Such injuries can result in a range of complications, including bleeding, fractures, muscle damage, nerve injuries, and even internal organ damage. Immediate intervention is vital to prevent further harm and minimize the risk of long-term consequences. It is important to note that if an object has been in place for more than ten minutes in a crush injury, it should not be removed.

Steps to Treat Crush Injuries

  1. Ensure Personal Safety: Before providing aid to someone with a crush injury, always assess the surroundings for potential dangers. Ensure that the scene is safe for both the injured person and yourself. Be cautious of any ongoing hazards, such as unstable structures, electrical wires, or potential falling objects.

  2. Call for Professional Help: If the crush injury is severe or life-threatening, call emergency medical services immediately. Crush injuries often require advanced medical interventions, including surgical procedures, and should be evaluated by healthcare professionals. Communicate with medical control for guidance as needed.

  3. Preserve the Airway: If the individual is unconscious or having difficulty breathing, check their airway for any obstructions. If necessary, clear the airway by performing the head-tilt, chin-lift maneuver, or using appropriate techniques as per your first aid training. Maintaining a clear airway is crucial, particularly if the object is impeding breathing.

  4. Control Bleeding: Apply direct pressure on any visible wounds to control bleeding. Use a sterile cloth, bandage, or any clean cloth available. If the bleeding is severe or arterial, apply firm pressure and consider using a tourniquet as a last resort. Communicate with medical control for guidance on tourniquet application if available.

  5. Provide Comfort and Reassurance: Crush injuries can be traumatic for the victim, causing pain, anxiety, and distress. Offer comfort and reassurance while waiting for professional help to arrive. Keep the individual warm, provide emotional support, and let them know that help is on the way.

  6. Monitor Vital Signs: While waiting for medical professionals, continuously monitor the individual's vital signs, including breathing, pulse, and level of consciousness. Be prepared to perform cardiopulmonary resuscitation (CPR) if necessary. Communicate changes in the individual's condition to medical control.

Considerations for First Responders

  1. Scene Safety: Prioritize the safety of both the injured person and the first responders. Assess the scene for hazards and take necessary precautions to ensure a safe working environment.

  2. Airway compromisation: In cases where a crush injury results in airway being compromised, immediate action must be taken to ensure the person's ability to breathe. If the object is crushing an area around the chest neck or face obstructing breathing, it is necessary to carefully move or remove the object to restore a clear airway. However, caution should be exercised to avoid causing further harm or worsening the injury.

  3. Professional Judgment: First responders, such as paramedics or emergency medical technicians (EMTs), should rely on their training and experience to make decisions regarding object removal or other interventions. Consult with medical control as needed.

  4. Critical Situations: In life-threatening situations where the object is obstructing the airway, causing severe bleeding, or compromising circulation, first responders may need to remove the object promptly to preserve life and restore normal breathing. Follow protocols and training guidelines specific to your region.

  5. Specialized Tools and Techniques: First responders may have access to specialized tools and techniques to safely remove objects from crush injuries. Use these tools according to training and guidelines to minimize the risk of further injury.

  6. Communication and Collaboration: Maintain effective communication with your team and medical control. Provide a detailed report of the situation and seek guidance if unsure about the appropriate course of action. Collaborate with medical professionals to ensure the best possible outcome.

Dangers of Removing Objects

Removing an object involved in a crush injury should only be done when necessary and under appropriate circumstances. It is crucial to consider the following dangers:

  1. Further Tissue Damage: Removing an object without proper medical guidance and expertise can cause additional harm. It may tear or damage tissues, exacerbate bleeding, or worsen fractures.

  2. Embedded Objects: If an object is deeply embedded or stuck in the injured area, attempting to remove it may cause more harm than good. It is best to leave the removal to healthcare professionals with specialized tools and techniques.

Acidosis

Acidosis is a condition characterized by an imbalance in the body's pH levels, resulting in increased acidity. In the context of crush injuries, acidosis can occur when the injured extremity experiences compromised circulation, leading to inadequate oxygen and nutrient supply to the tissues. Without sufficient oxygen, the tissues switch to anaerobic metabolism, which produces lactic acid as a byproduct.

When circulation is cut off to an extremity due to a crush injury, the accumulated lactic acid and other acidic waste products remain trapped within the affected tissues. However, when circulation is restored, such as through the release of the compressive force or during medical intervention, the acidic waste can be reintroduced into the circulatory system. This can lead to systemic acidosis, where the blood and body fluids become more acidic.

Systemic acidosis can have detrimental effects on various organs, including the heart. The increased acidity interferes with normal cellular function and can affect the heart's ability to pump effectively. It can impair the delivery of oxygen and nutrients to the body's tissues and organs, further exacerbating the injury's impact. Additionally, acidosis can disrupt the body's electrolyte balance and interfere with enzymatic reactions necessary for proper cellular functioning.

Managing acidosis in crush injuries involves addressing the underlying cause and restoring normal circulation and oxygenation to the affected tissues. This may require immediate medical intervention, such as surgical decompression or the use of specialized equipment to release the compressive force. In severe cases, intravenous fluids and medications may be administered to correct the acid-base imbalance.

It is important for first aid responders and healthcare professionals to be aware of the potential complications of acidosis in crush injuries. Early recognition and prompt treatment of acidosis, along with comprehensive management of the crush injury itself, can help minimize the adverse effects on the he

Conclusion

Crush injuries require immediate and appropriate first aid intervention to prevent further harm and improve the chances of recovery. As a first aid responder, your role is crucial in stabilizing the injured person, controlling bleeding, and providing comfort while awaiting professional medical assistance. However, it is important to recognize the limitations of first aid and seek professional help for severe crush injuries.

At Delta, we understand the unique risks associated with crush injuries, particularly in industrial settings. That's why we offer industry-specific training programs designed to equip first aid responders with the knowledge and skills necessary to handle these situations effectively. Our specialized training covers protocols for stabilizing the injured person, controlling bleeding, and managing potential complications.

To ensure you are fully prepared to respond to crush injuries, contact us for specialized training. Our programs are tailored to the needs of industrial workplaces where crush injuries are a significant concern. By undergoing our training, you can enhance your ability to provide essential assistance in situations involving crush injuries, potentially saving lives and minimizing the long-term impact on individuals affected by these injuries.

Always remember to prioritize the preservation of the airway in crush injuries, and if the object is impeding breathing, take prompt action to restore normal respiration. Additionally, exercise caution when considering object removal and be aware of the risks associated with acidosis when circulation is compromised. Collaboration with medical control, adherence to protocols, and a thorough understanding of the risks and appropriate interventions will contribute to effective first aid response in crush injury incidents.

Read More
Awareness, First Aid, First Responder, Healthcare Kumari Malhotra Awareness, First Aid, First Responder, Healthcare Kumari Malhotra

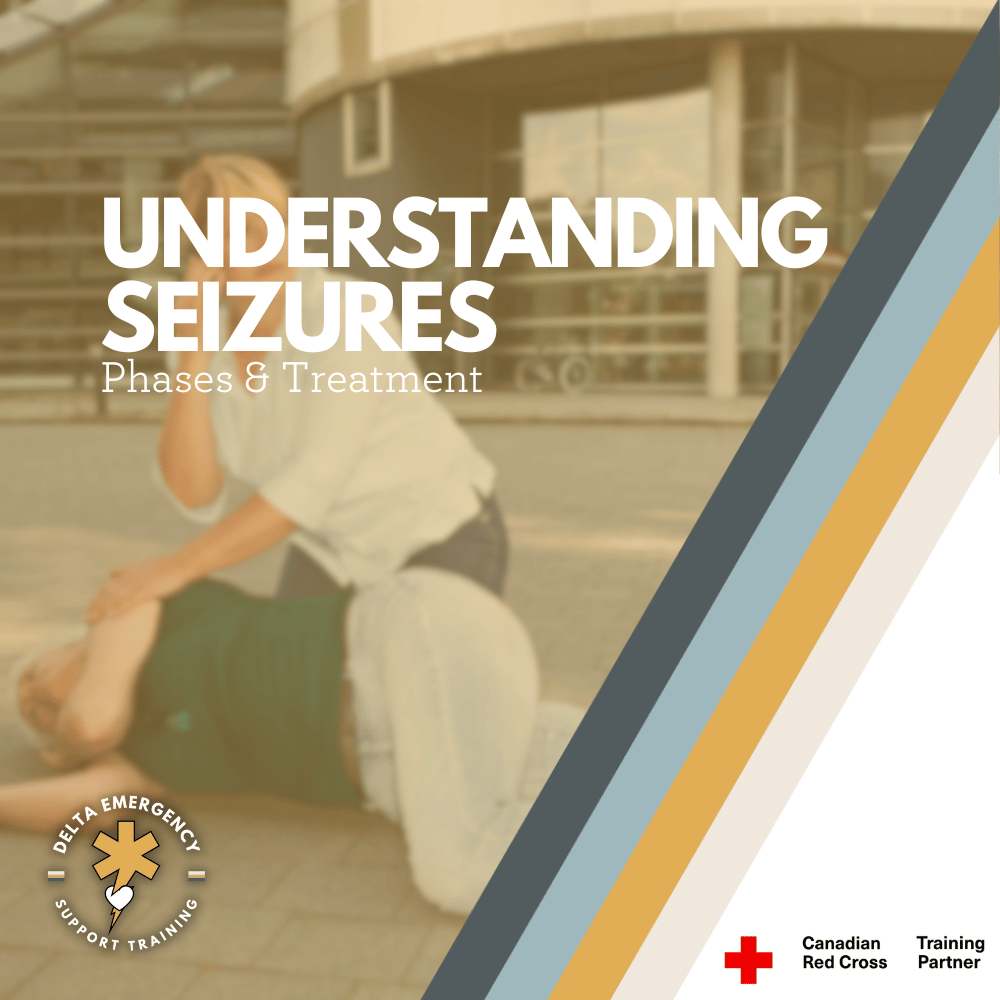
Understanding Seizures: Exploring Types, Phases, and Treatment

In this comprehensive guide, we delve into the intricate world of seizures, providing a detailed understanding of their types, phases, and treatment options. Whether you're seeking knowledge about Grand Mal seizures, febrile seizures, or absence seizures, we've got you covered. We break down the various phases of a seizure, from the pre-seizure aura to the postictal phase, shedding light on what happens during each stage. Empower yourself with valuable insights and strategies for effectively managing seizures and promoting overall well-being.

Introduction:

Seizures are neurological events characterized by abnormal electrical activity in the brain, which can lead to a wide range of physical and mental symptoms. They affect millions of people worldwide and can be a result of various underlying conditions. In this blog, we will delve into the world of seizures, exploring their different types and understanding the phases that accompany them.

A middle aged woman assisting a older woman who is collapsed on the ground.

What are Seizures?

Seizures are episodes of abnormal electrical activity in the brain that can cause a variety of symptoms, including convulsions, altered consciousness, and unusual behaviors. They can occur as a result of various factors, such as epilepsy, head injuries, infections, stroke, or certain genetic disorders.

Types of Seizures:

There are several types of seizures, each presenting distinct characteristics and affecting individuals differently. Here are a few common types:

Grand Mal Seizure (Generalized Tonic-Clonic Seizure)

This is one of the most well-known types of seizures and often associated with epilepsy. Grand Mal seizures involve both hemispheres of the brain and can be divided into four phases:

Aura Phase:

Some individuals may experience warning signs or an aura before the seizure. These warning signs can vary, such as a strange smell, visual disturbances, or intense emotions.

Tonic Phase:

The tonic phase marks the beginning of the seizure, where the person loses consciousness and experiences muscle stiffness. They may fall to the ground and exhibit rigidity for a short period.

Clonic Phase:

The clonic phase follows the tonic phase, characterized by rhythmic jerking movements caused by alternating muscle contractions and relaxations. Breathing may be irregular during this phase.

Postictal Phase:

After the seizure subsides, the postictal phase begins. The person gradually regains consciousness but may feel confused, fatigued, or disoriented. They might also experience headaches or muscle soreness.

Febrile Seizure

Febrile seizures are seizures that occur in young children, usually between the ages of 6 months and 5 years, triggered by high fevers. They are relatively common and are typically brief, lasting only a few minutes. Febrile seizures often do not cause any long-term complications and tend to resolve on their own.

Absence Seizure

Absence seizures are characterized by a brief loss of consciousness, often lasting for a few seconds. They commonly affect children and can be mistaken for daydreaming or inattentiveness. During an absence seizure, the person may exhibit staring spells, slight twitching, and lack of responsiveness.

Seizures can be distressing and disruptive events that affect individuals of all ages. Understanding the different types of seizures and their accompanying phases is crucial for recognizing and managing them effectively. Whether it's the intense convulsions of a Grand Mal seizure, the brief episodes of absence seizures, or the fever-induced febrile seizures in children, each type requires appropriate care and support. If you or someone you know experiences seizures, it's important to consult with a healthcare professional to determine the underlying cause and develop an appropriate treatment plan. By raising awareness and promoting understanding, we can create a more inclusive and supportive environment for those living with seizures.

How to Help

Witnessing someone having a Grand Mal seizure can be a frightening experience. However, knowing how to respond and provide assistance can make a significant difference in ensuring their safety and well-being. In this article, we will discuss important steps to help someone during a Grand Mal seizure.

Stay Calm and Assess the Situation:

Maintaining a calm demeanor is crucial during a seizure. Remember that a Grand Mal seizure typically follows a specific sequence of phases, including the aura phase, tonic phase, clonic phase, and postictal phase. Focus on the person's safety and provide support throughout the episode.

Protect the Person from Injury:

During a seizure, the individual may lose control of their body and experience intense muscle contractions. It's essential to create a safe environment to prevent any potential harm:

  • Clear the surroundings: Move away any sharp or dangerous objects that the person may come into contact with during the seizure.

  • Cushion the area: Place soft padding or cushions around the person to prevent injury from falls or head impacts.

  • Do not restrain: Avoid holding the person down or attempting to stop their movements forcefully, as this can cause additional harm.

  • Support the head: Gently cradle the person's head or place a soft object, like a pillow or folded clothing, under their head to protect it.

Time the Seizure:

It is helpful to note the duration of the seizure. Timing the seizure can assist medical professionals in assessing the situation and determining the appropriate treatment if necessary. Use a watch or clock to track the duration from the beginning to the end of the seizure.

Do Not Insert Objects or Restrict Breathing:

During a Grand Mal seizure, it is important to remember not to insert anything into the person's mouth. Contrary to popular belief, they cannot swallow their tongue. Inserting an object into their mouth can cause injury to the teeth, gums, or airway. Additionally, avoid attempting to restrict their movements or control their body.

Maintain a Safe Distance and Observe:

While providing support and ensuring safety, give the person space during the seizure. Avoid unnecessary touching or movement unless there is an immediate risk. Observe the person's movements and the sequence of the seizure, as this information can be helpful for medical professionals when assessing the situation.

Communicate and Reassure:

Although the person may not be fully conscious during the seizure, speaking calmly and reassuringly can provide comfort. Your voice may reach their subconscious mind, and hearing familiar tones can be reassuring during the postictal phase.

Stay with the Person During the Postictal Phase:

After the seizure ends, the person will enter the postictal phase. They may appear disoriented, fatigued, or confused. Stay with them, offering comfort and support. Speak calmly and help them reorient themselves to their surroundings. If necessary, provide assistance in contacting a medical professional or someone they trust.

Seek Medical Attention if Required: While most Grand Mal seizures end on their own, it is essential to seek medical attention in the following situations:

  • The seizure lasts longer than five minutes.

  • The person experiences difficulty breathing or has prolonged periods without breathing.

  • The person is injured during the seizure.

  • The seizure occurs in water or at a height, resulting in a risk of drowning or falling.

Read More

Rapid Body Survey: Uncovering Hidden Injuries

In emergency medical situations, conducting a Rapid Body Survey (RBS) is crucial to identify hidden injuries and rule out life-threatening conditions. This comprehensive head-to-toe examination allows healthcare providers to quickly assess patients and provide prompt interventions. By systematically examining each body part, from head and neck to pelvis, legs, and arms, healthcare providers can detect visible signs of trauma, assess stability, and ensure the well-being of patients in critical situations.

What is a Rapid Body Survey

In emergency medical situations, time is of the essence, and healthcare providers must quickly assess patients to identify and address any immediate threats to their well-being. The Rapid Body Survey (RBS), also known as a head-to-toe examination, is a vital component of the initial assessment process. Its primary goal is to rule out significant or life-threatening injuries that may be hidden due to distracting injuries or the patient's unconsciousness.

Unconscious woman having a rapid body survey being done by professional responders.

During emergencies, patients may present with obvious injuries that demand immediate attention. However, these apparent injuries can sometimes mask more critical underlying conditions that require urgent intervention. By performing a systematic and comprehensive RBS, healthcare providers can thoroughly evaluate the patient's entire body, ensuring that no potentially dangerous injuries go unnoticed.

Conducting an RBS requires hands-on physical examination, allowing healthcare providers to assess stability, palpate for tenderness or deformities, and check for specific signs indicative of serious injuries. While respecting the patient's privacy and dignity, healthcare providers must obtain consent before initiating the physical examination.


If there are any signs of traumatic injury or if the patient reports pain or tenderness in specific areas, it is essential to remove the clothing covering those regions for a more thorough assessment. Removing clothing allows healthcare providers to visually inspect the affected areas, assess for visible wounds, bruising, or deformities, and palpate for tenderness, instability, or other signs of significant injury. While ensuring patient comfort and maintaining their privacy, the removal of clothing enables healthcare providers to gain a clearer understanding of the extent of the trauma and provides valuable information for making informed treatment decisions.

Now, let's delve into what a Rapid Body Survey (RBS) entails and explore the different components of this comprehensive examination.

Rapid Body Survey Components

Head and Face:

  1. Bleeding: Look for any signs of bleeding, both externally and internally, on the head or face. Pay close attention to wounds or lacerations that may indicate significant trauma.

  2. Facial or skull deformities: Inspect the face and skull for any abnormal shapes or contours, which may suggest fractures or dislocations.

  3. Nosebleeds: Note the presence of nosebleeds, as they can indicate trauma to the nasal area or potential underlying skull fractures.

  4. Pupil size: Assess the size of the pupils in both eyes. Unequal pupil size, known as anisocoria, can be an indication of head trauma or underlying neurological issues.

  5. Cerebrospinal fluid (CSF) leakage from the ears: Check for any clear fluid draining from the ears, as it may be cerebrospinal fluid. This could be a sign of a basal skull fracture, requiring immediate medical attention.

  6. Raccoon eyes: Observe for periorbital bruising or discoloration, commonly referred to as raccoon eyes. This bruising around the eyes can be an indicator of a skull fracture or other significant head injury.

  7. Battle signs: Look for bruising behind the ears, known as battle signs. These bruises can be a sign of skull base fractures and should raise concerns about potential head trauma.

  8. Missing teeth: Take note of any missing teeth, which may indicate facial trauma or injuries to the oral cavity.

  9. Cyanosed lips: Check for lips that appear bluish or cyanotic, which may suggest inadequate oxygenation or circulation, potentially related to respiratory or cardiovascular issues.

Neck

  1. Midline trachea: Observe the position of the trachea in the center of the neck. A trachea deviated to one side may indicate an injury or obstruction in the airway.

  2. Jugular Vein Distention (JVD): Look for distention or engorgement of the jugular veins in the neck. JVD can be a sign of increased pressure in the chest or heart failure.

  3. Obvious injuries: Check for any visible injuries, such as lacerations, abrasions, or swelling, which may require immediate attention.

Chest

  1. Chief complaint of chest pain: If the patient's chief complaint involves chest pain (not of cardiac origin), it is essential to remove their shirt to allow for a closer examination.

  2. Medication patches and surgical scars: Inspect the chest for the presence of medication patches or surgical scars, which may provide valuable information about the patient's medical history or recent interventions.

  3. Trauma and obvious injuries: Look for any obvious signs of trauma, such as bruises, lacerations, or swelling, which may indicate a significant injury or potential internal damage.

  4. Stability of collarbone and sternum: Physically assess the stability of the clavicle (collarbone) and sternum by gently applying pressure and checking for any abnormal movement or tenderness.

  5. Rib stability and paradoxical movement: Palpate along the sides of the ribcage, asking the patient to take deep breaths if applicable. Evaluate for equal chest rise and fall and look for paradoxical chest movement, which is a characteristic inward movement of the chest during inhalation and outward movement during exhalation. Paradoxical chest movement may suggest a flail chest, a serious condition that requires immediate attention.

  6. Signs of contusions: Check for contusions (bruises) on the chest, as they may indicate internal hemorrhaging or injuries to underlying organs.

Abdomen

  1. Distention, rigidity, and tenderness (DRT): Use a wave-like motion with both hands to palpate the abdomen over the four quadrants. Assess for any abnormal distention (swelling), rigidity (stiffness), or tenderness, as these may indicate underlying trauma or internal organ damage.

  2. Signs of contusions: Look for contusions or bruises on the abdomen, as they may suggest internal bleeding or injuries to organs.

  3. Rebound tenderness: Gently press on the abdomen and release, observing if the patient experiences increased pain upon release. This rebound tenderness could indicate inflammation or injury in the abdominal cavity.

  4. Organ-specific assessments: Depending on the patient's complaints or mechanism of injury, healthcare providers may focus on specific areas of the abdomen. For example, they may perform a focused examination to assess the liver, spleen, kidneys, or other organs based on the patient's symptoms and clinical indications.

  5. Abdominal distension: Observe for any visible distension or swelling of the abdomen, as it may indicate fluid accumulation, organ enlargement, or other underlying conditions.

    Pelvis

    1. Pelvic stability assessment: Stand at the patient's side and place your hands on both sides of the pelvis. Apply upward and inward pressure to assess for any instability or abnormal movement. Instability or crepitus (grating sensation) may indicate a potential pelvic fracture, which can be a life-threatening injury.

    2. Signs of pelvic trauma: Look for visible signs of pelvic trauma, such as bruising, swelling, or deformities. External signs may suggest the possibility of internal injuries or fractures.

    3. Pelvic tenderness: Gently palpate the pelvic region, including the iliac crests and the pubic symphysis, for tenderness or pain. Localized tenderness may indicate an injury to the pelvic structures.

    4. Note incontinence: While assessing the pelvis, be observant for any signs of incontinence, such as urinary or fecal leakage. Incontinence can indicate a neurological or structural injury and should be documented.

Legs

  1. Femur, patella, tibia, and fibula stability: Using both hands, assess the stability and integrity of the major leg bones, including the femur (thigh bone), patella (kneecap), tibia, and fibula. Gently apply pressure and check for any abnormal movement, tenderness, or deformities.

  2. Assess for fractures: Look for any visible signs of fractures, such as deformities, swelling, or bruising. Fractured femurs, in particular, can be life-threatening injuries if not promptly managed.

  3. Proximal injury assessment: If there is an injury closer to the feet, such as ankle or foot trauma, remove the shoes and socks to examine the affected area more closely. Assess for swelling, deformities, tenderness, and neurovascular status.

  4. Dorsal pedal pulse: Check the presence of the dorsal pedal pulse by palpating the top of the foot. The absence of the pulse may suggest compromised blood flow to the foot, requiring further investigation.

  5. Mobility test: Perform a quick mobility test, such as the "gas pedal" test, to evaluate the patient's ability to move the affected leg. Assess the range of motion and observe for any pain, instability, or limitations in movement.

Spine

  1. Crepitus: Pay attention to any grating or popping sensations (crepitus) during the palpation of the spine. Crepitus may indicate underlying spinal abnormalities or degenerative conditions.

  2. Midline tenderness: Assess for tenderness along the midline of the back, as it may indicate a potential spinal injury or fracture.

  3. Range of motion: Ask the patient to perform gentle movements, such as bending forward, backward, and sideways. Observe for any limitations, pain, or discomfort during these motions, which may suggest spinal issues.

  4. Assess for back injuries: Look for visible signs of trauma on the back, such as bruises, lacerations, or swelling. External signs may indicate potential underlying spinal or soft tissue injuries.


    During the Rapid Body Survey (RBS), the examination of the back may vary depending on the position of the patient. If the patient is lying supine, the back examination is typically performed after assessing other body parts. In situations where the patient is already positioned in the three-quarter prone position, the back examination can be initiated earlier. This allows for early detection of any visible signs of trauma or abnormalities in the back region.

Arms

  1. Stability and tenderness: Using both hands, assess the stability and integrity of the arms. Gently apply pressure and check for any abnormal movement, tenderness, or deformities.

  2. Range of motion: Ask the patient to move their arms in various directions, assessing the range of motion and noting any limitations, pain, or discomfort during movement.

  3. Vascular assessment: While examining the arms, it is important to check the radial pulses, located on the wrist, to evaluate the vascular status. Absent or weak pulses may indicate compromised blood flow to the extremities.

  4. Signs of self-harm: Observe the arms for any track marks, scars, or signs of self-harm, which may provide important information about the patient's history or current mental health concerns.

  5. External injuries: Look for any visible signs of trauma, such as bruises, lacerations, or swelling, which may indicate fractures, dislocations, or other injuries.

Conclusion

In emergency medical situations, time is of the essence, and the Rapid Body Survey (RBS) is a vital tool in swiftly identifying hidden injuries and ruling out life-threatening conditions. This systematic examination technique is extensively covered in advanced first aid classes, including those required for firefighters in Alberta and as a recommended course before Emergency Medical Responder (EMR) training. By incorporating the RBS into their assessment protocols, healthcare providers can provide comprehensive and effective care, maximizing the chances of positive outcomes for patients in urgent need.

At our organization, we prioritize the importance of the RBS and offer advanced first aid classes that cover this critical assessment technique. Our courses are designed to equip individuals with the necessary skills to perform the RBS confidently and accurately. Whether you are pursuing a career in emergency services or simply seeking to enhance your first aid knowledge, our classes provide valuable training that can make a significant difference in emergency situations.

We are dedicated to supporting healthcare providers and individuals interested in emergency medical training. If you have any questions about the RBS or any other aspects of emergency care, please don't hesitate to reach out to us. Our team is here to provide guidance and assist you in your journey towards providing comprehensive and effective care to those in need. Together, we can make a difference and help save lives in emergency situations.

Read More

Opioid Overdose: Recognizing the Signs

Welcome to our two-part blog series on opioid overdose awareness and intervention. In this first blog post, we will delve into the nature of opioid addiction, the signs and symptoms of overdose, and how this epidemic can impact anyone, regardless of background. Stay tuned for the second blog, where we will focus on naloxone, an opioid antagonist, and provide comprehensive training on its usage.

Opioid Overdose, What is it?

An opioid overdose occurs when an individual takes an excessive amount of opioids, which are a class of drugs that include prescription painkillers like oxycodone, hydrocodone, and fentanyl, as well as illegal substances like heroin. Opioids bind to opioid receptors in the brain and spinal cord, reducing pain sensations and producing feelings of relaxation and euphoria.

However, when too many opioids are consumed, the respiratory system becomes depressed, leading to slowed or shallow breathing. This can result in a dangerous lack of oxygen, causing severe hypoxia, brain damage and death.

Signs and Symptoms

Recognizing the signs and symptoms of an opioid overdose is crucial for timely intervention, as it can mean the difference between life and death. Here are some expanded details on the signs and symptoms to watch for:

  1. Slow or Shallow Breathing:

    One of the hallmark signs of an opioid overdose is slow or shallow breathing. The individual may take abnormally long pauses between breaths or have difficulty taking a full breath. Their breathing may become erratic, weak, or barely noticeable.

  2. Unresponsiveness:

    Opioid overdose can cause loss of consciousness. The person may be unresponsive to stimuli, and have difficulty staying awake. They may appear excessively drowsy, as if in a deep sleep, and have difficulty speaking or interacting.

  3. Pinpoint Pupils:

    A clear indication of an opioid overdose is constricted or pinpoint pupils (pupils that appear very small). This occurs due to the effect opioids have on the muscles controlling the size of the pupils. In normal lighting conditions, the pupils of someone experiencing an overdose will not dilate or respond to changes in light.

  4. Pallor:

    During an opioid overdose, the individual's skin may appear pale, cool, and clammy to the touch. This is due to decreased blood circulation and oxygenation resulting from the suppressed respiratory system.

  5. Cyanosis:

    In severe cases of opioid overdose, the person's lips, nails, or fingertips may turn bluish or purplish. This condition, called cyanosis, indicates a lack of oxygen in the bloodstream, signaling a medical emergency.

  6. Slow or Weak Pulse:

    Opioids can slow down the heart rate, resulting in a slow or weak pulse. The person's pulse may feel faint or difficult to detect.

Understanding and Addressing the Crisis

Opioid addiction is a pervasive issue that knows no boundaries. It can affect individuals from all walks of life, irrespective of age, gender, or social status.

Understanding the underlying risk factors associated with opioid addiction is essential. Chronic pain, often treated with prescription opioids, can increase the likelihood of developing an addiction. Additionally, individuals with a history of substance abuse or mental health disorders may be more susceptible to opioid misuse. Lack of access to healthcare, social isolation, and environmental factors can also contribute to the risk.

Addressing the opioid crisis requires an approach that focuses on prevention, education, and support. It is essential to educate individuals, healthcare professionals, and communities about the risks associated with opioids and alternative pain management strategies. Building strong support systems and promoting access to evidence-based addiction treatment and counseling services is vital. Encouraging open dialogue and reducing the stigma surrounding addiction can help individuals feel comfortable seeking help.

Read More

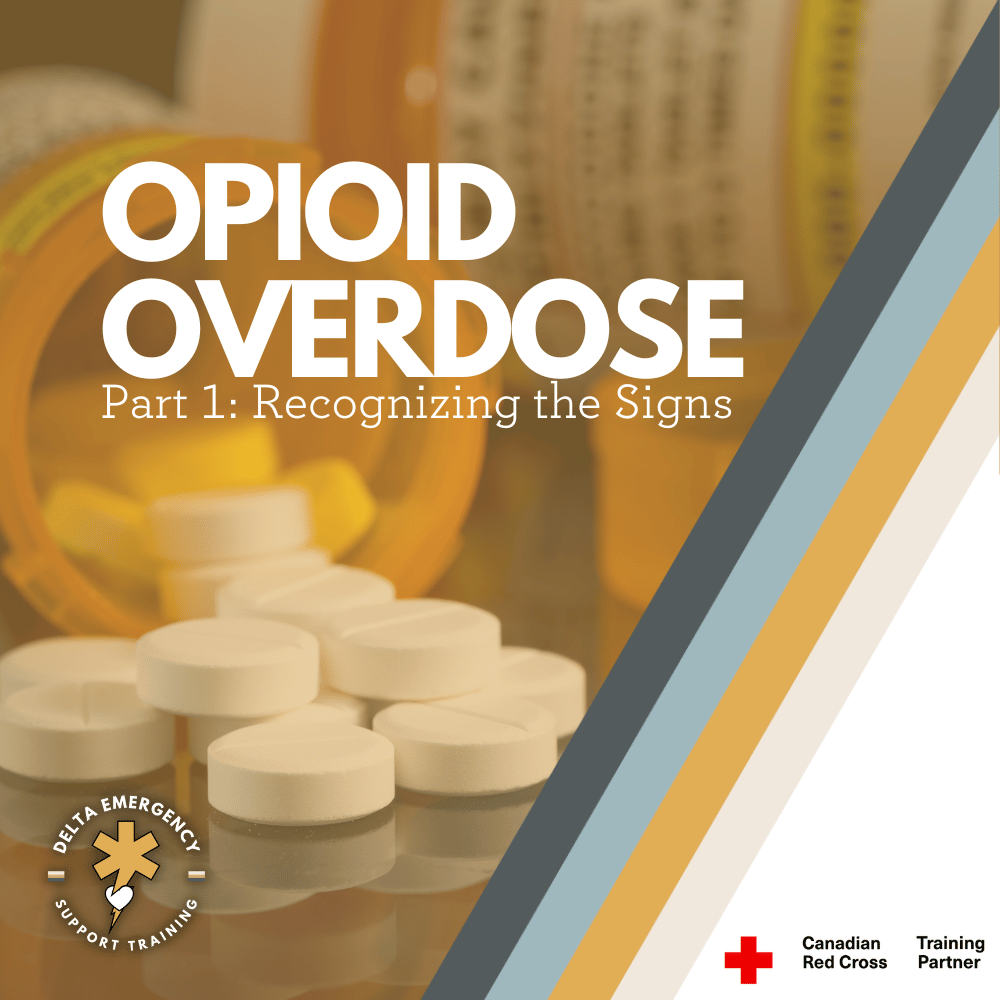
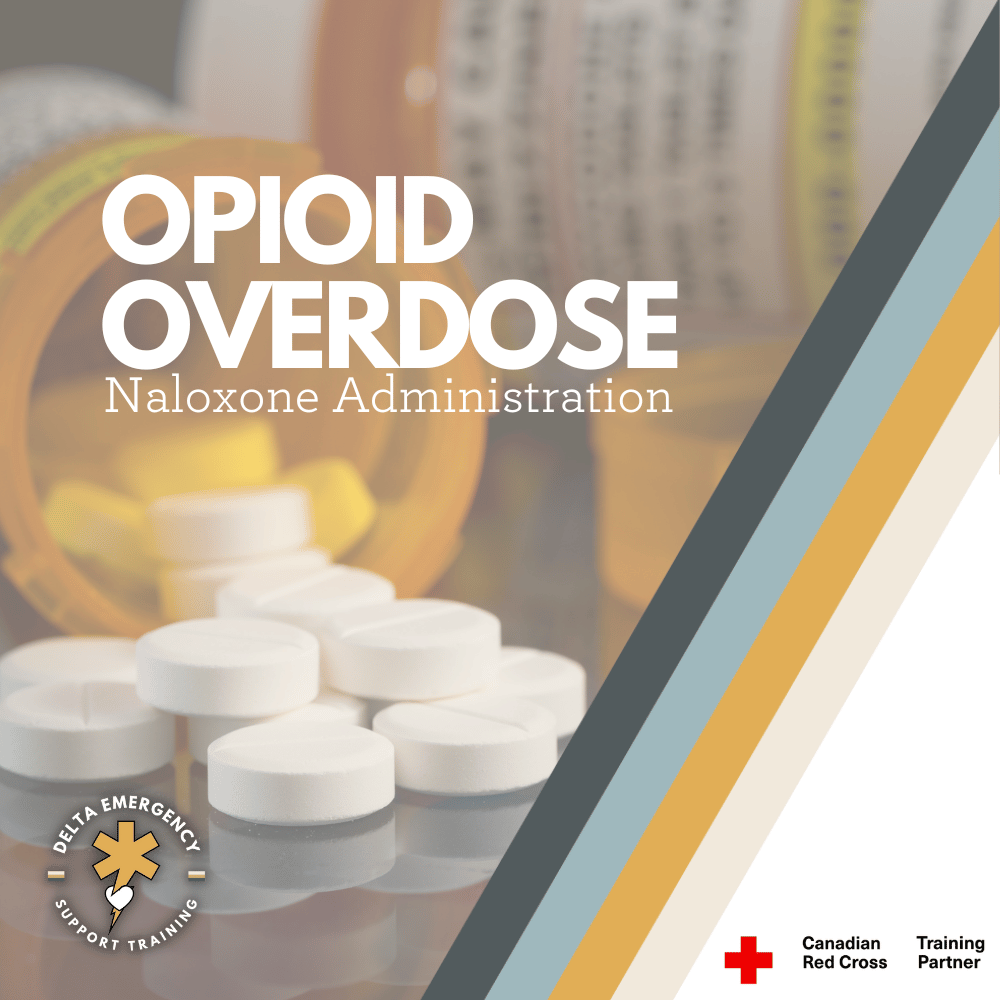
Opioid Overdose Reversal: Naloxone

Opioid overdose is a critical emergency that demands swift intervention. In our blog post, we explore the life-saving potential of naloxone as an opioid antagonist. Discover how naloxone works to reverse the effects of opioids, the importance of combining it with CPR in emergencies, and how you can learn about naloxone administration in our first aid courses. Be prepared to make a difference and save lives.

Opioid Overdose

Opioid overdose is a devastating crisis affecting individuals worldwide. With opioids causing respiratory depression and potentially fatal consequences, swift intervention is crucial. One powerful tool in combating opioid overdose is naloxone, commonly known by the brand name Narcan.

In this, we will delve into the life-saving potential of naloxone as an opioid antagonist, understanding how it works, and its role in preventing opioid-related fatalities. We will also explore how naloxone is administered, including the simple skill that anyone can learn to save lives.

Understanding Opioid Overdose:

Opioids, including prescription painkillers and illicit substances like heroin, bind to opioid receptors in the brain and spinal cord, reducing pain and inducing feelings of relaxation and euphoria. However, an excessive dose of opioids can overwhelm the body, leading to slowed or shallow breathing, which can result in a dangerous lack of oxygen. This respiratory depression is the primary cause of death in opioid overdose cases.

In opioid overdose, the slowed or shallow breathing can progress to respiratory arrest, where breathing stops altogether. As the body is deprived of oxygen, the brain and other vital organs begin to suffer. The lack of oxygen can lead to a cascade of events, including cardiac arrest, where the heart stops beating effectively. It is important to recognize that opioid overdose fatalities are primarily caused by respiratory arrest, which then leads to cardiac arrest.

Administration of Naloxone

  1. Check Scene Safety:

    Before approaching the individual, ensure that the scene is safe for both you and the person in distress. Look out for any potential hazards or risks.

  2. Check Level of Consciousness:

    Assess the person's level of consciousness. Gently tap their shoulders and ask loudly, "Are you okay?" If there is no response or the person is unresponsive, proceed to the next steps.

  3. Communicate:

    Clearly communicate your intentions to the person. Let them know that you are there to help and that you will be administering naloxone to reverse the effects of opioid overdose.

  4. Personal Protective Equipment (PPE):

    Put on gloves to protect yourself from potential exposure to bodily fluids during the process.

  5. Prep the Syringe:

    Take the naloxone syringe and carefully remove the cap. If necessary, snap or twist off the top of the ampule to access the medication. Attach the needle to the syringe securely.

  6. Draw Up Naloxone:

    Hold the ampule upright and insert the needle into the ampule's opening. Slowly pull the plunger back, drawing up the appropriate amount of naloxone (as instructed by the manufacturer or medical professional).

  7. Expel Extra Air:

    With the needle still in the ampule, gently tap the syringe to dislodge any air bubbles that may have formed. Slowly push the plunger up to expel the extra air until only naloxone remains in the syringe.

  8. Lift Clothing and Insert Needle:

    Lift the person's clothing to expose an area of skin for injection, typically the upper arm, thigh, or buttocks. Hold the syringe like a dart and swiftly insert the needle into the muscle at a 90-degree angle.

  9. Compress All Liquid:

    Push the plunger down fully, injecting all the naloxone into the muscle. Maintain pressure on the plunger for a few seconds to ensure all the medication has been administered.

  10. Remove Needle and Dispose:

    Carefully remove the needle from the skin. Place the used needle and syringe into a sharps container or any designated puncture-proof container for safe disposal.

  11. Monitor Level of Consciousness:

    Observe the person's level of consciousness and breathing. Stay with them and provide reassurance while waiting for emergency medical services (EMS) to arrive.

Remember, this tutorial serves as a general guide. It is essential to receive proper training on naloxone administration and follow the guidelines and instructions provided by healthcare professionals or local authorities.

Naloxone and CPR

Opioids depress the central nervous system, causing slowed or shallow breathing. If left untreated, this respiratory depression can progress to respiratory arrest, where breathing stops completely. When the body is deprived of oxygen, it can quickly lead to cardiac arrest, where the heart stops beating effectively.

In the event of a suspected opioid overdose, it is crucial to act swiftly. If you encounter someone who is not breathing and does not have a pulse, it is essential to initiate cardiopulmonary resuscitation (CPR) in conjunction with administering naloxone.

CPR involves a combination of chest compressions and rescue breaths, which aim to circulate oxygen-rich blood to the vital organs of the body. It helps to maintain a minimal level of oxygen supply until professional medical help arrives. CPR should be performed following the recommended guidelines and in accordance with any specific training you have received.

Naloxone is a vital component of overdose response because it rapidly reverses the effects of opioids and restores normal respiratory function. When administering naloxone during CPR, it can help counteract the respiratory depression caused by opioids, supporting the resuscitation efforts. By combining naloxone with CPR, you address both the respiratory and circulatory aspects of the overdose emergency, increasing the chances of successfully restoring the person's breathing and heartbeat.

In the event of a suspected opioid overdose where the individual does not have a device, such as a rescue facemask with a one-way valve, to protect yourself during rescue breaths, you can opt for compression-only CPR. Compression-only CPR involves performing continuous chest compressions without providing rescue breaths.

To perform compression-only CPR, follow these steps:

  1. Ensure the person is lying on a firm surface.

  2. Kneel beside the person's chest.

  3. Place the heel of one hand on the center of the person's chest, between the nipples.

  4. Place your other hand on top of the first hand, interlocking your fingers.

  5. Keep your arms straight and position your shoulders directly above your hands.

  6. Push hard and fast, compressing the chest at a rate of about 100-120 compressions per minute.

  7. Allow the chest to fully recoil between compressions, but do not lift your hands off the chest.

Remember, in any medical emergency, including a suspected opioid overdose, it is essential to call 911 immediately. The emergency dispatcher can provide guidance and instructions tailored to the specific situation.

Remember, naloxone is not a substitute for seeking emergency medical assistance. Even if the person responds to naloxone and CPR, it is crucial to call emergency services right away. Prompt medical attention is necessary to provide comprehensive care and further stabilize the individual.

Training

Thank you for accompanying us on this two-part blog journey about naloxone. We hope that through this valuable information, you have gained the confidence and knowledge to respond effectively in opioid overdose emergencies. At Delta Emergency, we are committed to providing comprehensive training on naloxone administration, including recognizing signs and symptoms of opioid overdose, in our first aid and advanced first aid courses. Thank you for staying engaged, and together, let's make a positive impact by being prepared to respond in critical situations.

Read More

Act FAST: Stroke Identification for Advanced First Aiders

As an advanced first aider, it's important to be prepared for a wide range of emergency situations, including strokes. Delta Emergency Support Training offers advanced first aid courses that can help you recognize the signs and symptoms of a stroke and provide basic care until professional medical assistance arrives. While there are limitations to what an advanced first aider can do in treating strokes, being able to recognize the signs and act quickly can make a significant difference in the chances of a positive outcome. Discover how Delta Emergency Support Training can help prepare you to respond effectively in emergency situations like strokes.

Understanding Strokes

Strokes, also know as Cerebrovascular Accident (CVA) occur when the blood supply to the brain is interrupted, either due to a blocked blood vessel or a bleeding blood vessel. This interruption can cause brain cells to die, leading to a range of symptoms and complications. Strokes can be caused by a variety of factors, including high blood pressure, smoking, diabetes, and heart disease, among others.

Elderly man experiencing head pain

an older man holding his head in his hand, as if he is experiencing discomfort or pain.

There are two main types of strokes: ischemic strokes and hemorrhagic strokes. Ischemic strokes occur when a blood clot blocks a blood vessel in the brain, while hemorrhagic strokes occur when a blood vessel in the brain ruptures and bleeds into the surrounding tissue. Symptoms of a stroke can vary depending on the location and severity of the damage, but can include sudden weakness or numbness on one side of the body, difficulty speaking or understanding speech, vision problems, severe headache, and dizziness or loss of balance.

Risk Factors for Strokes

There are several factors that can increase the risk of strokes, including high blood pressure, high cholesterol, smoking, obesity, and a family history of strokes. Certain medical conditions, such as diabetes and heart disease, can also increase the risk of strokes. To reduce the risk of strokes, it's important to maintain a healthy lifestyle, eat a balanced diet, exercise regularly, and manage any underlying medical conditions.

Responding To a Suspected Stroke

Recognizing the signs of a stroke and responding quickly is essential in improving the chances of a positive outcome for stroke patients. Taking a full set of vitals including BGL to rule out possible stroke mimics.

Some of the most common symptoms of a stroke include:

  • Severe headache

  • Altered LOC

  • Numbness or weakness in the face, arm, or leg, especially on one side of the body

  • Vision problems in one or both eyes

  • Sudden trouble walking, dizziness, or loss of balance or coordination

It's important to note that these symptoms can occur suddenly and without warning, and that not all symptoms may be present in every stroke. Additionally, some strokes may cause more subtle symptoms that are not immediately noticeable, such as weakness or numbness that comes and goes, or changes in mood or behavior.

FAST

As an AFA, you should be familiar with the acronym FAST to help you remember the signs and symptoms of a stroke and respond quickly. Here's what it stands for:

  • F: Face drooping or numbness

  • A: Arm weakness or numbness

  • S: Speech difficulty or confusion

  • T: Time symptoms started

    By asking the following questions you can quickly assess if the patient is FAST positive, which is indicative of a stroke.

  • F: Smile big for me, I want to see all your teeth.

  • A: Lift patients arms in the air and ask them to hold them up for 5 seconds.

  • S: Repeat after me, the early bird gets the worm.

  • T: Ask the patient when the symptoms started.

    Treatment

    As an advanced first aider, it's important to recognize the limitations of our scope of practice when it comes to treating strokes in the prehospital world. While we can provide basic care such as administering oxygen and preparing the patient for rapid transport to a medical facility, there are few treatments that we can provide beyond that. It's crucial to act quickly and call for emergency medical assistance when someone is experiencing a stroke, as prompt medical treatment at a hospital facility is key to improving the chances of a positive outcome. As an advanced first aider, it's our role to recognize the signs and symptoms of a stroke and act quickly.

    Advanced First Aid Training

    At Delta Emergency Support Training, we understand the importance of being prepared for emergency situations, including strokes. That's why we offer a range of training sessions, including Advanced First Aid (AFA), to help individuals and classes develop the skills and knowledge they need to respond effectively. Our AFA training includes instruction on recognizing the signs and symptoms of a stroke, as well as providing basic care until professional medical assistance arrives. Our courses are available in-person and hybrid formats to accommodate different schedules and learning styles.

    If you have any questions about our AFA training, including stroke-related topics, please don't hesitate to reach out to us. You can contact us at info@deltaemergency.com and our knowledgeable instructors will be happy to assist you. We're committed to helping you develop the skills and confidence you need to respond effectively in emergency situations.

Read More

Treating Chest Pain: Aspirin and Nitroglycerin

Aspirin and nitroglycerin are two medications that are commonly used by first responders to treat chest pain or suspected heart attack. Aspirin is a platelet inhibitor that helps to prevent blood clots from forming and reduces the risk of further damage to the heart. Nitroglycerin is a vasodilator that helps to increase blood flow to the heart by dilating blood vessels, which reduces the workload on the heart muscle.

While these medications can be effective in treating chest pain or suspected heart attack, it's important for first responders to be familiar with their uses, risks, and benefits, and to follow established protocols and guidelines when administering them. Aspirin and nitroglycerin can have potential side effects and contraindications, so it's important to use them only as directed and under the guidance of a healthcare professional.

To ensure the safety and well-being of their patients, first responders should also educate patients about the benefits and risks of aspirin and nitroglycerin, and the importance of seeking medical follow-up after receiving these medications. By working closely with healthcare professionals and following established protocols and guidelines, first responders can provide effective care and help ensure the safety and well-being of their patients.

When it comes to treating chest pain or suspected heart attack, aspirin and nitroglycerin are two medications that first responders may use to help their patients depending on scope of practice. But what are these medications, how do they work, and what do first responders need to know about their use?

man sitting down and clutching his chest in pain. He appears to be experiencing a heart attack. Calgary Fire Fighters on the way.

Aspirin:

What is Aspirin, and How Does it Work?

Aspirin, also known as acetylsalicylic acid (ASA), is a medication that's commonly used to treat pain, fever, and inflammation. Aspirin works by inhibiting the activity of platelets, which are small blood cells that play a key role in blood clotting. When a blood vessel is damaged, platelets are activated and begin to stick to the damaged area to form a plug, which helps to stop bleeding. However, when a blood clot forms inside an artery supplying the heart, it can block blood flow and cause a heart attack.

As a platelet inhibitor, aspirin helps to prevent blood clots from forming and reduces the risk of further damage to the heart.

How is Aspirin Used in Emergency Situations?

Aspirin is an important medication for first responders to use in emergency situations, particularly for patients experiencing chest pain or suspected heart attack also know as a myocardial infarction. To speed up its onset of action, chewing aspirin is often recommended. The recommended dose of aspirin for patients with suspected heart attack is typically between 160-325 mg.

Contraindications:

There are certain situations where aspirin use may not be appropriate or may need to be used with caution.

Some common contraindications for aspirin use include:

  • Allergy or hypersensitivity to aspirin or other non-steroidal anti-inflammatory drugs (NSAIDs)

  • Active bleeding or bleeding disorders

  • Suspected stroke

  • ASA exacerbated asthma

  • Children with viral infection

    Nitroglycerin:

    What is Nitroglycerin, and How Does it Work?

    Nitroglycerin is a medication used to treat chest pain or angina, which is often a symptom of heart disease. Nitroglycerin is a vasodilator, which means that it relaxes and widens blood vessels throughout the body, including the coronary arteries that supply blood to the heart muscle.

    By dilating the blood vessels, nitroglycerin helps to increase blood flow to the heart, which reduces the workload on the heart muscle and can relieve chest pain or angina. Nitroglycerin works by releasing nitric oxide, which is a gas that relaxes the smooth muscle cells in the walls of blood vessels.

    In addition to its effects on the coronary arteries, nitroglycerin can also cause vasodilation in other blood vessels, which can lead to a drop in blood pressure or hypotension. This is why nitroglycerin should not be given to patients with low blood pressure or hypotension.

    It is administered as a sublingual spray with a recommended dose of 0.4 mg.

    Contrindications:

    While nitroglycerin is a useful medication, there are some precautions to keep in mind. PASS is an acronym to help you remember nitroglycerin’s contraindications.

  • Prescription: Making sure the nitro is prescribed to the patient.

  • Allergy: Confirming the patient does not have an allergy to nitro or other nitrates.

  • Systolic: Taking vitals to confirm their systolic blood pressure is above 100.

  • Sex drugs: A brief history of the patients medication use, Viagra, Levitra and Cialis in the last 24hr are all contraindicated for nitro.

    Aspirin and Nitro

    Aspirin and nitroglycerin are two medications that first responders will encounter in emergency situations for patients experiencing chest pain or suspected heart attack. While both medications can be effective in treating these conditions, they work in different ways and have different indications and contraindications.

    Aspirin is a platelet inhibitor that helps to prevent blood clots from forming and reduces the risk of further damage to the heart. It is often used as a long-term treatment to reduce the risk of recurrent heart attacks or stroke. Nitroglycerin, on the other hand, is a vasodilator that helps to increase blood flow to the heart by dilating blood vessels, which reduces the workload on the heart muscle. It is typically used as a short-term treatment to relieve chest pain or angina.

    By understanding their uses, risks, and benefits, first responders can provide effective care and help ensure the safety and well-being of their patients.

    Training

    In our advanced first aid training class, we cover topics such as heart disease and the use of aspirin and nitroglycerin to equip you with the knowledge and skills to provide excellent care in emergency situations. Calgary Fire, for example, is one of the many organizations that uses these medications as part of their protocols for responding to chest pain and suspected heart attack.

    At Delta Emergency, we are dedicated to providing you with the tools you need to confidently handle any emergency situation involving chest pain or suspected heart attack. Our training programs are designed to teach you about the uses, risks, and benefits of aspirin and nitroglycerin, as well as the proper administration and monitoring of these medications.

    If you have any questions or concerns about our training programs or the use of aspirin and nitroglycerin in emergency situations, please don't hesitate to contact us at info@deltaemergency.com. We're here to support you every step of the way in providing effective care to patients experiencing chest pain or suspected heart attack, just like Calgary Fire and other first responders do on a daily basis.

Read More

Firefighter Training: OPA's and NPA's for Airway Management

Nasopharyngeal airways (NPA) and oropharyngeal airways (OPA) are commonly used in healthcare settings to maintain a patient's airway and assist with breathing.When used correctly, NPAs can help clients who may be experiencing respiratory distress during certain treatments. However, it's important to have the necessary knowledge and protocols in place to safely insert and monitor the device. At Delta Emergency Support Training, we can help you learn how to safely use NPAs in spa settings and beyond. Our training sessions include a range of courses, including Standard First Aid (SFA), Advanced First Aid (AFA), and Emergency Medical Responder (EMR), and we offer in-person, hybrid, and online options to suit different needs. Contact us at info@deltaemergency.com to learn more about our training sessions and how we can help you develop the skills and knowledge you need to respond to emergency situations effectively.

As a firefighter, you need to be prepared to respond to emergency situations, including those involving airway management for an unconscious patients airway. Two commonly used tools for airway management are oropharyngeal airways (OPA's) and nasopharyngeal airways (NPA's). Today we'll discuss what these devices are, why they are used, and how to properly insert them as a first responder.

Four colour coded Oropharyngeal airways lay across a medical sheet.

What are OPA's and NPA's?

Oropharyngeal airways (OPA's) and nasopharyngeal airways (NPA's) are medical devices used to keep an airway open in patients who can’t secure it themselves. They are used when the patient is unable to maintain their own airway due to injury, illness, or drug overdose and become unconscious. OPA's and NPA's are both designed to be inserted into the patient's airway to help keep it open.

An OPA is a curved plastic device that is inserted into the patient's mouth and extends into the pharynx. It helps to prevent the tongue from obstructing the airway and allows air to pass freely into the lungs. OPA's are available in different sizes to accommodate patients of different ages and sizes.

An NPA is a flexible, hollow tube that is inserted into the patient's nostril and extends into the nasopharynx. It helps to keep the airway open and can be used in patients who are unable to tolerate an OPA due to gag reflex or other reasons.

Why do we use OPA's and NPA's?

The primary reason for using OPA's and NPA's is to maintain a patient's airway and ensure that they are able to breathe. When a patient's airway is obstructed, it can quickly lead to hypoxia, which is a dangerous condition where the body's tissues do not receive enough oxygen. OPA's and NPA's are used to prevent this from happening by keeping the airway open and allowing oxygen to flow freely into the lungs.

Testing for LOC (Level Of Consciousness)

Before inserting an OPA, it is important to assess the patient's level of consciousness. The AVPU scale is a simple and quick method for assessing a patient's level of consciousness based on their response to stimuli. The scale has four categories:

  • A: Alert

  • V: Verbal response

  • P: Pain response

  • U: Unresponsive

To use the AVPU scale, a healthcare provider would first try to get the patient's attention by speaking to them in a normal tone of voice. If the patient responds appropriately, they would be classified as "A" for alert. If the patient responds to verbal stimuli but is not fully alert, they would be classified as "V" for verbal response. If the patient only responds to painful/physical stimuli, such as a trap squeeze or nail bed pressure, they would be classified as "P" for pain/physical response. If the patient does not respond to any stimuli, they would be classified as "U" for unresponsive.

If a patient is assessed as being unresponsive or only responding to painful stimuli, an OPA may need to be inserted to maintain their airway. However, if the patient is alert or responding to verbal stimuli, an OPA may not be necessary.

How to insert OPA's and NPA's as a first responder

Proper insertion of OPA's and NPA's is crucial to their effectiveness and patient safety. Here are some general steps for inserting OPA's and NPA's:

Inserting an OPA:

  1. Choose the appropriate size OPA for the patient based on their age and size. Measure from the corner of the mouth to the angle of the jaw.

  2. Position the patient's head in a neutral position.

  3. Open the patient's mouth using the cross finger technique.

  4. Insert the OPA into the patient's mouth, with the curved end facing the roof of the mouth.

  5. Gently rotate the device 180 degrees as you insert it, until it is in a anatomical position.

Inserting an NPA:

  1. Choose the appropriate size NPA for the patient based on their age and size by measuring the tip of the nose to the corner of the jaw.

  2. Lubricate the NPA with a water-soluble lubricant.

  3. Position the patient's head in a neutral position.

  4. Insert the NPA into the patient's nostril starting with the right nostril. Bevelled edge facing the septum.

  5. Gently advance the device until it reaches the back of the nasopharynx

At Delta Emergency Support Training, we understand the importance of being prepared for medical emergencies. We offer a range of training sessions to help individuals and classes develop the skills and knowledge they need to respond to emergency situations. Our courses include Standard First Aid (SFA), Advanced First Aid (AFA), and Emergency Medical Responder (EMR), and we offer in-person, hybrid, and online options to suit different needs.

If you have any questions about our training sessions or medical emergencies in general, please don't hesitate to reach out to us. You can contact us at info@deltaemergency.com and we'll be happy to assist you.

Read More

On the Frontline: Mastering Scene Assessment for AFA with Calgary & Edmonton Fire Departments

During an emergency, AFAs are trained to conduct thorough scene assessments to gather crucial information that informs the appropriate course of action. This includes assessing the safety of the scene, identifying hazards, evaluating the mechanism of injury or nature of illness, and determining the number of patients and their condition. By working closely with Calgary & Edmonton Fire Departments, we (EMS) can collaborate on scene management strategies, coordinate resources, and prioritize patient care based on the severity of injuries or illnesses.

Mastering AFA Scene Assessment with Calgary & Edmonton Fire Departments.

The safety of the AFA and the team is the top priority. Before entering the scene, the AFA should carefully assess for potential hazards, such as traffic, fire, hazardous materials, or violence. This may involve observing the scene from a safe distance to determine if it's safe to approach. If there are any immediate dangers, the AFA should take appropriate precautions, such as wearing PPE, using caution signs, and calling for assistance from, Police, EMS, Calgary Fire or Edmonton Fire departments, if needed.

as Advanced first aiders, Calgary FIRE & Edmonton Fire Departments always perform scene assessments during an emergency response.

  1. Scene Size-Up: The AFA should assess the overall size and nature of the scene. This includes identifying the location, type of setting (e.g., residential area, workplace, public location), and any specific details that may impact the response, such as the presence of bystanders, vehicles, or potential sources of danger. This information helps the AFA get a general understanding of the situation and plan their approach accordingly, while coordinating with the Calgary or Edmonton fire department if necessary.

  2. Mechanism of Injury or Nature of Illness: The AFA should observe and gather information about the mechanism of injury or nature of illness. This includes identifying how the injury or illness occurred, such as a motor vehicle accident, a fall, a medical emergency, or a traumatic injury. Understanding the mechanism of injury or nature of illness can help the AFA anticipate potential injuries or illnesses and determine the appropriate course of action for care, while keeping the Calgary or Edmonton fire department informed as needed.

  3. Number of Patients: The AFA should assess the number of patients involved in the incident. This may include identifying if there are multiple patients or just one. This information helps the AFA determine the need for additional resources and prioritize care, while coordinating with the Calgary or Edmonton fire department to ensure adequate care for all patients.

  4. Initial Impressions: The AFA should formulate an initial impression of the patients' condition(s) based on their observations from a distance. This includes looking for obvious signs of life-threatening conditions, such as unresponsiveness, difficulty breathing, severe bleeding, or obvious deformities. This initial impression can help the AFA prioritize care and initiate appropriate interventions, while keeping the Calgary or Edmonton fire department updated on the patients' status.

  5. Additional Resources: The AFA should determine if additional resources are needed, such as additional EMS units, the Calgary or Edmonton fire department, or law enforcement. This may involve communicating with dispatch or calling for assistance from the Calgary or Edmonton fire department as necessary. The AFA should ensure that appropriate resources are enroute to the scene to provide timely and effective care.

  6. Personal Protective Equipment (PPE): The AFA and the team should ensure that they are wearing appropriate PPE for the situation. This includes gloves, mask, goggles, and other protective gear as needed, to prevent exposure to potential hazards or communicable diseases. Wearing PPE is crucial to protect the AFA and the team from any potential risks during the response, while coordinating with the Calgary or Edmonton fire department for additional support if required.

  7. Consideration of C-Spine: If there is a possibility of a spinal injury, the AFA should consider and maintain cervical spine precautions until further assessment can be performed. This may involve stabilizing the head and neck and avoiding any unnecessary movement that could worsen a potential spinal injury, while coordinating with the Calgary or Edmonton fire department for specialized assistance if needed.

  8. Approach to Patients: The AFA should approach patients with care, assess their level of consciousness, and initiate appropriate care based on their assessment findings and protocols. This may include checking for responsiveness, assessing airway, breathing, circulation, and any obvious injuries. The AFA should provide care based on their training and protocols, while coordinating with the Calgary or Edmonton fire department for any additional support or specialized care that may be required.

  9. Ongoing Assessment: The AFA should continuously reassess patients' conditions and monitor their vital signs, symptoms, and response to interventions. This includes checking for any changes in the patients' condition, identifying any new injuries or symptoms, and adjusting the care plan as needed. The AFA should communicate any changes or updates to the Calgary or Edmonton fire department and coordinate any necessary interventions or transport arrangements.

  10. Documentation: The AFA should document their findings, assessments, interventions, and any communication with the Calgary or Edmonton fire department. This includes recording vital signs, patient information, and any other relevant details in the appropriate format or system. Accurate and thorough documentation is essential for continuity of care, communication with other healthcare providers, and potential legal purposes.

  11. Handover to Higher Level of Care: If the patients require a higher level of care beyond the scope of the AFA's training or capabilities, the AFA should initiate handover to the Calgary or Edmonton fire department or other appropriate healthcare providers. This may involve providing a concise and accurate report of the patients' condition, care provided, and any pertinent details to ensure a smooth transition of care.

  12. Scene Management: The AFA should actively manage the scene throughout the response, ensuring the safety of all individuals involved and coordinating with the Calgary or Edmonton fire department and other responding agencies as needed. This may include establishing a safe zone, controlling traffic, managing bystanders, and coordinating resources and logistics to ensure an efficient and effective response.

  13. Follow-up: After the response, the AFA should debrief with the team, review the incident, and identify any areas for improvement. The AFA should also complete any necessary paperwork, reports, or documentation related to the incident, and follow any relevant protocols or procedures for reporting and follow-up. This may also include communicating with the Calgary or Edmonton fire department for any necessary follow-up or information sharing.

In conclusion, mastering scene assessment is a critical skill for Advanced First Aid (AFA) responders, and depending on your location, collaboration with Calgary Fire & Edmonton Fire Departments is crucial for efficient and effective emergency response. Through meticulous scene assessments, patient assessments, and accurate documentation, AFAs can work for fire departments and ensure scene safety and provide timely and appropriate medical care to those in need.

The partnership between AFAs and fire departments is vital in delivering excellence in emergency response on the frontline in Alberta. By continuously honing their skills and working together, AFAs and fire departments strive to provide the highest level of care to patients in emergency situations. It's important to remember that the roles and responsibilities of an AFA may vary depending on local regulations, protocols, and training. It's essential to always work within your scope of practice and seek appropriate guidance from your Fire department or other healthcare providers as needed.

At Delta Emergency Support Training we are happy to answer any questions you may have about Scene Assessments and Advanced First Aid. We provide training sessions for individuals or classes. We have options for in person, hybrid or online classes for Standard First Aid (SFA), Advanced First Aid (AFA), Emergency Medical Responder (EMR), and more courses. For all inquiries please email info@deltaemergency.com

Read More
Professional Responder, First Responder Jarrett Chisholm Professional Responder, First Responder Jarrett Chisholm

"Ensuring Public Safety: The Crucial Role of Professional Responders in Calgary's Emergency Medical Response System"

Advanced First Aid responders are individuals who have undergone advanced first aid training, often in addition to their regular jobs. In Alberta, they are typically found in fire departments, workplaces such as construction sites, factories, and offices where there is a higher risk…

In Calgary, Alberta, Canada, the first responder emergency medical response system is divided into three levels: First Responder, Advanced First Aid, and Emergency Medical Responder (EMR). These professional responders play a crucial role in responding to medical emergencies, providing initial care and support to the patients before they are transported to a medical facility for further treatment.

First Responders are typically the first on the scene of an emergency. They are often firefighters or police officers who have received additional training in emergency medical response. They are equipped with basic first aid equipment and are trained to provide initial care to patients until advanced medical support arrives. First responders can administer CPR, control bleeding, stabilize the spine, and perform other basic life support interventions.

Advanced First Aid responders are individuals who have undergone advanced first aid training, often in addition to their regular jobs. In Alberta, they are typically found in fire departments, workplaces such as construction sites, factories, and offices where there is a higher risk of accidents and injuries. Advanced first aid responders are equipped with additional first aid equipment and are trained to provide advanced first aid, including the administration of oxygen and the use of automated external defibrillators (AEDs).

Emergency Medical Responders (EMRs) are trained professionals who provide basic life support and emergency medical care. They are often the first medical professionals to arrive on the scene of an emergency, and they are trained to assess the patient's condition and provide necessary interventions such as administering oxygen, providing medications, Entonox for pain, and immobilizing the patient's spine. EMRs work closely with other medical professionals, including paramedics and emergency physicians, to ensure that the patient receives the appropriate level of care.

In Calgary, professional responders are trained and certified by the Canadian Red Cross - which sets standards for the education and training of medical professionals Delta Emergency Support Training ensures these standards are upheld and that all responders are well-trained, competent, and able to provide the highest level of care to patients in emergency situations.

The Alberta College of Paramedics holds the standards for EMS professions in Alberta, such as a provincially licensed EMR, PCP, ACP, and eventually, CCP.

In addition to their medical skills, professional responders in Calgary are also trained in communication and teamwork, which are essential skills in emergency response situations. They must be able to communicate effectively with patients, family members, and other medical professionals, and work together as a team to provide the best possible care.

In conclusion, professional responders play a crucial role in the emergency medical response system in Calgary. They provide initial care and support to patients in emergency situations and work closely with other medical professionals to ensure that patients receive the appropriate level of care. Their training and expertise make them an essential part of the healthcare system, and they are an integral part of the community's safety and well-being.

Read More

What is an EMR?

The first step for an EMR is to assess the situation for hazards that can harm themselves, their partners, and their patients, and determine the nature of the emergency. They need to determine the level of medical attention needed and make quick decisions…

Behind the Scenes of an Emergency Medical Responder: Saving Lives with Speed and Skill

An Emergency Medical Responder (EMR) is a healthcare professional who is trained to provide immediate medical care in emergency situations. EMRs are often the first healthcare providers to arrive on the scene of an emergency, and they work closely with other healthcare professionals to ensure that patients receive the appropriate care and treatment. EMRs are trained to provide basic life support measures, including administering CPR, controlling bleeding, treating shock, managing spinal injuries, and stabilizing fractures. They are also trained to manage patients with a variety of medical emergencies, including cardiac arrest, respiratory distress, and trauma. Here are some of the typical job functions of an EMR:

1. Assess the situation:

The first step for an EMR is to assess the situation for hazards that can harm themselves, their partners, and their patients, and determine the nature of the emergency. They need to determine the level of medical attention needed and make quick decisions based on their assessment.

2. Stabilize Patients:

EMRs are trained to stabilize patients by maintaining their airways and providing necessary interventions such as assisted ventilations, medical oxygen, life-threatening bleeding, and medication.

2. Administer First Aid:

EMRs are trained to provide basic-intermediate-advanced first aid such as CPR, wound management, and immobilization of injured patients.

4. Communicate with the medical team:

EMRs communicate vital information to the medical team, such as the patient's vital signs, symptoms, and any other relevant medical history.

5. Provide Emotional Support:

EMRs provide emotional support to patients and their families during times of crisis. They should be compassionate and empathetic, helping to ease the stress and anxiety that often come with medical emergencies.

6. Document the incident:

EMRs must document the incident, including vital signs, patient history, and any medical interventions administered.

7. Transport Patients:

EMRs are responsible for transporting patients to medical facilities safely. Overall, the role of an EMR is crucial in emergency medical situations, and they must be well-trained, quick-thinking, and compassionate individuals. EMRs work in a variety of settings, including ambulance services, fire departments, and hospitals. They play a critical role in the healthcare system by providing immediate medical care to patients in emergency situations, and their actions can often make the difference between life and death.

The road to EMR certification can be confusing. The EMR program is different in provinces like BC, Alberta, Saskatchewan, and Manitoba. The Canadian Red Cross EMR, AFA, or FR curriculum is identical across Canada but provincial standards and must be taught in respective provinces. At Delta Emergency, we understand what certifications you need for your future career, how and where to obtain them, and what type of work will be available to you when you’re fully certified. Reach out with questions!

Calgary BVM airway oxygen and ventilations for BLS FR AFA and EMR

BVM

Maintain an Airway, use HTCL or MJT, use Suction, insert an OPA or NPA, begin Ventilations and apply Oxygen. BLS, FR, AFA, and EMR

This is a basic and generalized overview of Emergency Medical Responders across North America. When in doubt, follow your local protocols! Contact us if you have any specific questions about the EMR scope of practice and career path in Alberta. We are industry experts and have been working full time in EMS for years.

At Delta Emergency Support Training we are happy to answer any questions you may have about becoming an EMR. We provide training sessions for individuals or classes. We have options for in person, hybrid or online classes for Standard First Aid (SFA) Advanced First Aid (AFA) and Emergency Medical Responder (EMR) courses. For all inquiries please email info@deltaemergency.com

Read More

SMR - Spinal Motion Restriction | Professional Responder Skill Series

While SMR is generally considered a safe and effective method for preventing spinal cord injury, there are certain risks and considerations that must be taken into account, such as the potential…

"Spinal Motion Restriction: Techniques and Considerations for Prehospital Care Providers"


Spinal motion restriction (SMR) is a technique used to limit movement of the spinal cord and surrounding tissues during transport to a medical facility for further evaluation and treatment. SMR is typically performed by prehospital care providers, such as paramedics or emergency medical technicians, who are trained in the technique and can quickly assess and stabilize a patient's condition.

SMR involves the use of various devices and techniques to immobilize the spine, including cervical collars, backboards, and straps. While SMR is generally considered a safe and effective method for preventing spinal cord injury, there are certain risks and considerations that must be taken into account, such as the potential for pressure ulcers, respiratory compromise, and the need for prompt removal of SMR devices once the patient reaches a medical facility. Prehospital care providers must also be aware of the latest guidelines and protocols for SMR, as these may vary depending on the patient's condition and the severity of their injuries.

In addition to trauma patients, individuals with certain medical conditions may also require SMR. For example, individuals with spinal fractures, spinal tumors, or spinal infections may require SMR to prevent further damage to the spine and surrounding tissues.

It is important to note that SMR should only be performed by trained professionals and should be used judiciously, as excessive immobilization can lead to complications such as pressure ulcers, respiratory problems, and muscle atrophy.

Ultimately, the decision to use SMR should be made on a case-by-case basis, taking into account the patient's specific needs and the risks and benefits of this technique. In some cases, SMR may be necessary for the safety of the patient, while in other cases, alternative techniques may be more appropriate.

AHS First Responder C-Spine Protocol


This section contains a large amount of information about how we determine applying SMR to a patient. As a firefighter or first responder in Alberta, this is the protocol you will also follow. If you examine both the Canadian C-Spine rule and the AHS C-Spine Protocol, you will find they are very similar.


Background

The C-Spine Assessment Protocol is to be applied to blunt trauma patients where there is a potential for a cervical spine injury and/or the potential for pre-hospital C-spine clearance where the practitioner needs to assess the requirement for spinal motion restriction (SMR).  It is imperative that the practitioner primarily assesses the patient and not the scene or mechanism to determine the need for SMR.  To facilitate this, the Canadian C-Spine Rule has been incorporated into the protocol to aid practitioners’ decision-making.

The Canadian C-Spine Rule applies to alert (GCS of 15), cooperative, and stable adult blunt trauma patients where there is a potential for C-spine injury with neck pain and/or trauma markings above the level of the clavicles.

C-collar application and SMR are contraindicated in all cases of isolated penetrating trauma.  C-collar application and SMR are NEVER indicated in any isolated penetrating trauma.  There is documented increased mortality due to the delay to definitive care with surgical interventions as a result of increased on scene time while applying C-collar and SMR.  Of note, the long board can still be used to facilitate the extrication of the patient.

Patient Safety Considerations
SMR and C-collar application are contraindicated in cases of isolated penetrating trauma. For those patients greater than 65 years of age, take into account biological age versus chronological age. An alert, cooperative and stable patient with no neurological symptoms and no neck pain can be transported without a C-collar. The long board is not necessary for SMR


Etiology

This algorithm is designed to help the practitioner make an informed determination of the need for spinal motion restriction in the field. It is for alert (GCS of 15) and stable trauma patients where cervical spine injury is a concern.
 

  1. Perform spinal motion restriction (SMR) if any of the following are present:
     

    1. High-risk factors

      1. Fall from 1 m / 5 stairs or greater

      2. Axial load to head (e.g. diving injuries)

      3. MVC (Speed greater than 100 km/h, rollover, ejection)

      4. Motorized recreational vehicles

      5. Bicycle collision with object

      6. Medical risk factors (for example, arthritis, prolonged steroid use, degenerative bone disease, history of cervical surgery)

      7. MVC with death of other occupant in the same vehicle

      8. Collisions involving ATVs, motorbikes, and snowmobiles

      9. Pedestrian/cyclist struck by motor vehicle at greater than 15 km/h
         

    2. Altered LOC

      1. Glasgow Coma Scale 14 or less

      2. Disorientation to person, place, time, and/or event

      3. Inability to remember 3 objects after 5 minutes

      4. Delayed or inappropriate response to external stimuli

    3. Paresthesia – including any abnormal motor or sensory neurological finding (e.g. numbness, tingling, weakness)

      1. Unequal handgrip strength

      2. Inability to raise arm(s) against gravity

      3. Inability to move toes

      4. Inability to perform plantar flexion and dorsiflexion of the feet

      5. Sensory deficits such as weakness or numbness or radicular (electric or shooting) pain
         

    4. Tenderness/deformity of spine

      1. Almost all spinal injuries are associated with either pain or tenderness localized to the spine

      2. Pain felt deeply in the neck should be considered spine pain

    5. Alcohol/drugs affecting judgement
       

    6. Communication difficulties (e.g. language barrier)
       

    7. Distracting painful injury:

      1. Long bone fracture

      2. Abdominal or thoracic injury causing distress

      3. Large laceration, degloving, or crush injury

      4. Large burns

      5. Any other injury-producing acute functional impairment
         

    8. Degenerative bone disorder, ankylosing spondylitis, Down’s syndrome – assure the neutral position corresponds to the underlying medical condition
       

    9. Suspicion of spinal injury on the part of the practitioner
       

  2. If any of the following low-risk factors for spinal injury are present, evaluate patient for need for spinal motion restriction:

    1. Ambulatory at any time

    2. Absence of pain during midline palpation

    3. Delayed (not immediate) onset of neck pain

    4. Simple rear-end MVC, excluding:

      1. Pushed into oncoming traffic

      2. Hit by bus / large truck

      3. Rollover

      4. Hit by high-speed vehicle (100 km/hr or greater)

On evaluation, if unable to voluntarily rotate the neck 45° left and right, regardless of pain, use SMR.

Range of Motion Examination

  1. Ask the patient to voluntarily rotate their neck 45° to the left and right regardless of pain

  2. If the patient can rotate their neck, spinal motion restriction is not indicated\

Nerve Root | Movements

C5 | Shoulder adbuction, elbow flexion
C6 | Elbow flexion (semipronated)
C7 | Finger extension, elbow extension
C8 | Finger flexors
T1 | Small muscles of the hand
L1, L2 | Hip flexion
L3, L4 | Knee extension
L5 | Extension of great toe
S1 | Hip extension, knee flexion, plantar flexion
Don’t forget sensory — light touch/pain

Spinal motion restriction (SMR)

  • SMR is required in all patients with potential spinal injuries, with the exceptions as above (i.e. penetrating trauma)

  • Where possible, SMR should be maintained with a properly fitted C-collar and/or blanket-rolls (or a comparable commercial device) secured to the stretcher with tape when appropriate.  If a c-collar would pull the patient out of neutral alignment then it should not be applied

  • Supine positioning is the preferred position for patients requiring SMR.  However, if these patients cannot be transported supine, they should be maintained in a reasonable position of comfort with neutral alignment of the spine relative to the patient’s underlying medical condition or their current presentation

  • SMR should not take priority over management of life-threatening co-morbidities such as airway management or hemorrhage control

  • Long boards can be used for extrication or as a means of moving an immobile patient to the stretcher but is not required to achieve SMR and is contraindicated in patients who have a long transport and/or wait times (greater than 30 minutes)           

  • EMS practitioners may remove the patient from the long board and place them supine with a C-collar and head rolls/head blocks, onto an EMS stretcher (secured with stretcher seatbelts), as soon as deemed safe and practical to do so

  • In cases in which SMR is indicated as per protocol, patients with life-threatening respiratory compromise exacerbated by the supine position (i.e. head, facial/neck trauma, severe respiratory disease, body habitus), may be transported on the stretcher in semi-Fowlers or high Fowlers (maintaining SMR with a C-collar/head blocks and secured with stretcher seatbelts

  • Patients with C-collars in place should not be transferred via wheelchair or walking

  • With regard to the pillow/padding of SMR patients, the priority is maintaining neutral alignment as near as possible.  Continue with light padding or small pillows which do not alter the normal cervical alignment of patients as long as the SMR techniques still ensures appropriate control, immobilization and stabilization of the C-spine

    Once again: C-collar application and SMR are contraindicated in all cases of isolated penetrating trauma.  C-collar application and SMR are NEVER indicated in any isolated penetrating trauma.  There is documented increased mortality due to the delay to definitive care with surgical interventions as a result of increased on scene time while applying C-collar and SMR.  Of note, the long board can still be used to facilitate the extrication of the patient

The information above is opinion based and taken from different research articles, First Response training protocols, AHS EMS, and textbooks. There are no specifics given regarding an assessment or treatment modality, as SMR protocols change between different Fire/EMS systems. Follow YOUR local protocols.

At Delta Emergency Support Training we are happy to answer any questions you may have about spinal motion restriction. We provide training sessions for individuals or classes. We have options for in person, hybrid or online classes for Babysitters, Standard First Aid (SFA) Advanced First Aid (AFA) and Emergency Medical Responder (EMR)courses. For all inquiries please email info@deltaemergency.com

Read More