The Delta Dispatch

Understanding Hypoxia: A Firefighters guide

Hypoxia is a serious medical condition that can be caused by a range of factors, including respiratory conditions, cardiac emergencies, trauma, and drug overdose. However, one potential cause that is often overlooked is smoke inhalation and carbon monoxide (CO) poisoning.

Inhaling smoke from a fire can expose individuals to high levels of CO, a poisonous gas that can cause hypoxia by binding to hemoglobin in the blood and reducing the amount of oxygen that can be carried to the body's tissues. It's important to note that carbon monoxide poisoning can cause the SpO2 monitor to read a normal oxygen saturation level, even when the individual is experiencing hypoxia. Therefore, administering high-flow oxygen is crucial for any fire patient, as it can help displace carbon monoxide and increase the amount of oxygen available to the body's tissues.

As an advanced first aider, it's important to be familiar with the signs and symptoms of hypoxia, particularly in cases of smoke inhalation and CO poisoning. Symptoms may include cyanosis, shortness of breath, and altered mental status. Administering high-flow oxygen and working closely with emergency medical services personnel and hospital staff can help ensure that individuals receive appropriate care and follow-up treatment for their condition.

Overall, understanding the potential for hypoxia in smoke inhalation and carbon monoxide poisoning is critical for providing effective care in the prehospital setting. Administering high-flow oxygen and working closely with other healthcare providers can help ensure that individuals receive timely and effective treatment for their condition.

What is Hypoxia?

Hypoxia is a condition where there is a decrease in the amount of oxygen reaching the body's tissues.

This device uses a small LED light to measure the amount of oxygen present in the blood, and is an important tool for diagnosing and managing hypoxia in medical settings.

a small medical device that is used to measure oxygen saturation levels in the blood. The device features a digital display screen and clips onto a person's finger. The screen displays a 98% SPO2 reading.

Causes of Hypoxia

Hypoxia can be caused by a variety of factors, including pulmonary disorders, cardiovascular disease, trauma, carbon monoxide poisoning, and drug overdose. Given the frequency of these causes in their work, firefighters must be prepared to recognize and manage hypoxia in emergency situations.

Overall, understanding the potential causes of hypoxia and being prepared to manage this potentially life-threatening condition is critical for firefighters and other first responders.

  1. Respiratory emergencies:

    Conditions such as asthma, chronic obstructive pulmonary disease (COPD), and pneumonia can impair the lungs' ability to transfer oxygen to the blood, leading to hypoxia.

    Individuals with respiratory conditions may experience shortness of breath, rapid breathing, and wheezing, which can indicate a lack of oxygen in the body. These symptoms can worsen during periods of physical exertion, stress, or exposure to environmental triggers such as allergens or pollutants.

  2. Cardiac emergencies:

    Cardiac emergencies are another potential cause of hypoxia in the prehospital setting. Conditions such as heart failure, heart attack, and pulmonary embolism can reduce blood flow to the body's tissues, leading to hypoxia.

    When the heart is unable to pump blood effectively, the body may not receive sufficient oxygen, resulting in hypoxia. Individuals with cardiac emergencies may experience symptoms such as chest pain, shortness of breath, and rapid or irregular heartbeat, which can indicate a lack of oxygen to the tissues.

  3. Trauma:

    When an individual experiences severe trauma, such as from a motor vehicle accident or a fall, they may sustain injuries that impede their ability to breathe and deliver oxygen to their tissues.

    Injuries such as broken ribs or a collapsed lung can interfere with the normal mechanics of breathing, preventing sufficient oxygen intake. Additionally, traumatic injuries can cause significant bleeding, reducing the body's ability to transport oxygen to the tissues. In some cases, trauma can also lead to shock, which can result in decreased oxygen delivery to the tissues.

  4. Carbon monoxide poisoning:

    When individuals inhale smoke from a fire, they may be exposed to high levels of carbon monoxide, a poisonous gas that can cause hypoxia by binding to the hemoglobin in the blood, reducing the amount of oxygen that can be carried to the body's tissues.

    A complication with carbon monoxide poisoning is that it can lead to a false readings when using an SpO2 monitor. This is because carbon monoxide can bind to hemoglobin in a similar way to oxygen, which can cause the SpO2 monitor to read a normal oxygen saturation level, such as 99%. However, even if the SpO2 reading appears normal, the individual may still be experiencing hypoxia due to carbon monoxide poisoning.

    Therefore, it's important to always administer high-flow oxygen to any fire patient, including those who have potentially been exposed to carbon monoxide. Providing high-flow oxygen can help to displace carbon monoxide from hemoglobin and increase the amount of oxygen available to the body's tissues.

  5. Drug overdose:

    Many drugs, particularly opioids and sedatives, can cause respiratory depression, which means that an individual's breathing rate is reduced and they may not receive enough oxygen.

Symptoms of Hypoxia

The symptoms of hypoxia can vary depending on the severity of the condition and the underlying cause. Some common symptoms of hypoxia include shortness of breath, rapid or shallow laboured breathing, cyanosis (bluish tint to the skin), confusion or disorientation, headache, fatigue, nausea, rapid heartbeat, and dizziness or lightheadedness.

How to Check for Hypoxia Using an SpO2 Monitor

As an advanced first aider who is allowed to treat with oxygen, it's important to understand how to check for hypoxia using an SpO2 monitor. An SpO2 monitor measures the oxygen saturation in the blood, which can help determine if an individual is experiencing hypoxia.

To use an SpO2 monitor, follow these steps:

  1. Turn on the monitor and place the sensor on the individual's fingertip.

  2. Wait for the monitor to display the oxygen saturation percentage.

  3. Take note of the percentage and compare it to normal levels.

What Percentage of Oxygen on the Monitor Indicates Different Severities of Hypoxia?

Normal oxygen saturation levels are typically between 95-100%. If the oxygen saturation level is below 95%, it may indicate hypoxia. The severity of hypoxia can be determined by the following percentage ranges:

  1. Mild hypoxia: Oxygen saturation level between 90-94%.

  2. Moderate hypoxia: Oxygen saturation level between 80-89%.

  3. Severe hypoxia: Oxygen saturation level below 80%.

It's important to note that an SpO2 monitor is not a definitive diagnosis of hypoxia and should be used in conjunction with other symptoms and clinical assessments.

Treatment of Hypoxia

As an advanced first aider who is allowed to treat with oxygen, your first step in treating hypoxia is to administer high flow O2 via NRB (Non Rebreather) or BVM (Bag Valve Mask).

Administering supplemental oxygen is a key treatment measure for hypoxia, but it's also important to address the underlying condition that is causing the hypoxia. This may involve working closely with other healthcare providers, such as respiratory therapists or emergency medical services personnel, to provide comprehensive care.

Overall, as an advanced firefighter, being familiar with the causes, symptoms, treatment, and prevention of hypoxia can help you provide effective care and support to individuals who are experiencing this potentially life-threatening condition.

Read More

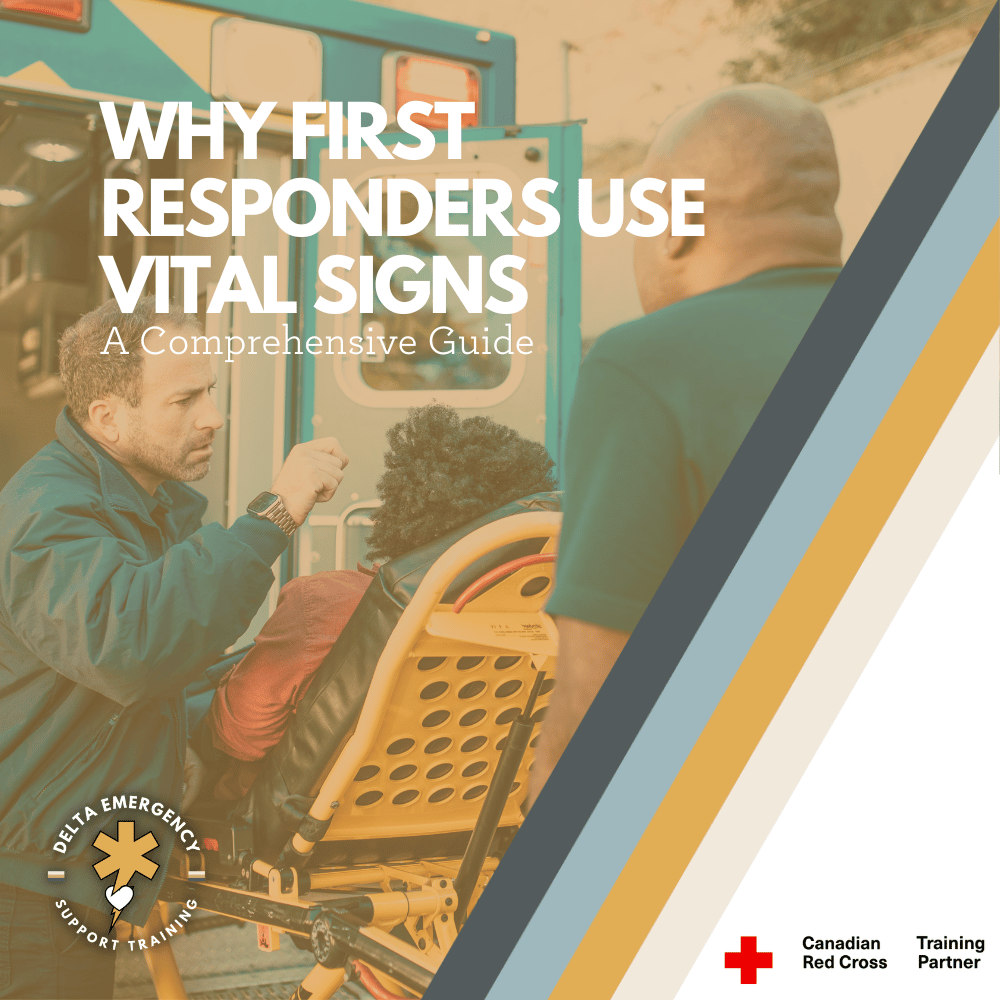
Why First Responders Use Vital Signs: A comprehensive guide

Vital signs are measurements of the body's basic functions and are used to assess a person's overall health and wellbeing. There are four primary vital signs: body temperature, pulse rate, blood pressure, and respiratory rate. Each vital sign provides important information about a person's health and can help identify underlying health conditions or other problems.

Body temperature is a measure of the body's internal heat and is typically measured using a thermometer. A fever is generally defined as a body temperature above 100.4°F (38°C) and can indicate an infection or other underlying health condition.

Pulse rate is a measure of the heart rate, or the number of times the heart beats per minute. A rapid pulse may indicate a fever, dehydration, or an irregular heartbeat, while a slow pulse may indicate heart disease or other health conditions.

Blood pressure is a measure of the force of blood against the walls of arteries as the heart pumps blood through the body. High blood pressure, or hypertension, can increase the risk of heart disease, stroke, and other health problems.

Respiratory rate is a measure of the number of breaths a person takes per minute. A rapid respiratory rate may indicate an underlying health condition, such as asthma or pneumonia.

Monitoring vital signs is an essential part of healthcare and can help healthcare professionals and first responders make informed decisions about treatment and care.

Vital signs are measurements of basic bodily functions that are essential for assessing a person's overall health and well-being. These measurements are typically taken by healthcare professionals, but they can also be taken by trained first responders in emergency situations.

first responders attending to a patient lying on a cot outside an ambulance. One responder is checking the patient's vital signs while the other is preparing medical equipment. The patient appears to be receiving urgent medical attention, and the responders are focused and prepared to administer necessary treatment

What Are Vital Signs?

Vital signs are a set of measurements that healthcare professionals use to assess a patient's overall health status. These measurements include temperature, heart rate, blood pressure, respiratory rate, Glasgow Coma Scale (GCS), oxygen saturation (SPO2), pupils and skin.

  1. Body Temperature:

    Body temperature is an important vital sign as it can indicate whether a person is healthy or if they have a fever, which could be a sign of infection. Body temperature can be measured in several ways, including orally, rectally, or using a forehead thermometer. It is important to use the correct method and follow the manufacturer's instructions when taking a person's temperature.

  2. Heart Rate:

    Heart rate: Heart rate is the number of times the heart beats per minute and is a reflection of the heart's ability to circulate blood throughout the body. The heart rate can vary depending on age, gender, physical activity, and overall health status. A high heart rate could indicate a potential problem, such as an irregular heartbeat, dehydration, or anxiety, while a low heart rate could be a sign of a heart condition or medication side effect.

  3. Blood Pressure:

    Blood pressure is the measure of the force of blood against the walls of the arteries. It is measured in millimetres of mercury (mmHg) and consists of two numbers: the systolic pressure (the higher number) and the diastolic pressure (the lower number). A healthy blood pressure reading is typically around 120/80 mmHg. High blood pressure (hypertension) can put a strain on the heart and blood vessels, while low blood pressure (hypotension) can cause dizziness, fainting, or other symptoms.

  4. Respiratory Rate:

    Respiratory rate is the number of breaths taken per minute and is a reflection of the body's ability to take in oxygen and expel carbon dioxide. The respiratory rate can vary depending on age, physical activity, and overall health status. A high respiratory rate could indicate a potential problem, such as a lung infection or asthma, while a low respiratory rate could be a sign of respiratory depression or a medical condition that affects breathing.

  5. Glasgow Coma Scale:

    Glasgow Coma Scale or GCS measures a patient's response to verbal, motor, and eye-opening stimuli. The score ranges from 3 to 15, with a higher score indicating a higher level of consciousness. The GCS is commonly used in trauma settings to assess patients with brain injury, altered mental status, or who are sedated.

  6. SPO2:

    SPO2 is a measure of the amount of oxygen that is carried by the hemoglobin in the red blood cells. The measurement of SPO2 is non-invasive and can be performed using a pulse oximeter, which is a small device that is attached to the finger, toe, or earlobe. The pulse oximeter uses light to measure the amount of oxygen that is present in the blood.

  7. Pupils:

    Pupils can also be an important vital sign in assessing a person's neurological function. The size, shape, and reactivity of the pupils can provide valuable information about the health of the brain and nervous system. Unequal pupil size (ani or a lack of reactivity to light can be a sign of a neurological issue, such as a brain injury or nerve damage.

  8. Skin:

    Assessing skin color and moisture is important because changes in these vital signs can be indicative of underlying medical conditions. For example, changes in skin color can be a sign of poor blood flow, infection, or inflammation, while changes in skin moisture can be a sign of dehydration or certain medical conditions.

Normal Vital Sign Ranges

The normal ranges for vital signs vary depending on a person's age, gender, and health status. Here are the standard ranges:

  1. Body Temperature:

    A normal body temperature generally ranges from 36.1°C to 37.2°C, with an average of 37°C. A fever, which is typically defined as a body temperature above 38°C, can be a sign of an infection or illness. Hypothermia, in which the body's core temperature drops below 35°C, can be caused by prolonged exposure to cold temperatures or certain medical conditions. Hyperthermia, in which the body's core temperature rises above its normal range, typically above 40°C, can be caused by heatstroke, extreme physical exertion, or certain medications.

  2. Pulse Rate:

    The normal resting heart rate range for an adult is between 60 to 100 beats per minute. A higher or lower heart rate may indicate a medical condition. Healthcare professionals use heart rate to assess cardiac function, diagnose heart conditions, and monitor the effectiveness of treatments.

  3. Blood Pressure:

    The normal blood pressure for an adult is typically around 120/80 mmHg. High blood pressure, or hypertension, is defined as consistently measuring higher than 130/80 mmHg, and can increase the risk of heart disease, stroke, and other health problems. Low blood pressure, or hypotension, is less common but can also be a serious medical condition, and is typically defined as a systolic pressure of less than 90 mmHg or a diastolic pressure of less than 60 mmHg.

  4. Respiratory Rate:

    The normal respiratory rate for an adult at rest is typically between 12 and 20 breaths per minute. A higher or lower respiratory rate than this range may indicate a medical condition. The quality of breath is also important in assessing a patient's respiratory function. Shallow, labored breathing or irregular breathing patterns can indicate respiratory distress and may require immediate medical attention.

  5. Glasgow Coma Scale:

    A GCS score of 15 is considered normal, indicating that the person is fully alert and oriented. The GCS is based on three categories: eye opening, verbal response, and motor response, and each category is assigned a score from 1-4 or 1-6. A higher score indicates a higher level of consciousness, while a lower score indicates a lower level of consciousness.

  6. SPO2

    Healthy SPO2 levels are between 95% and 100%, and SPO2 levels below 90% can indicate a lack of oxygen in the body. Supplemental oxygen may be necessary to raise the patient's SPO2 levels to a healthy range, but it is important to monitor the oxygen levels carefully and avoid over-oxygenation. Healthcare professionals use SPO2 measurements to guide treatment decisions and ensure that patients are receiving the appropriate level of oxygen.

  7. Pupils:

    The normal range for pupil size is between 2-4 millimeters in diameter for both pupils, and they should be equal in size. Pupils that are larger or smaller than this range, or are unequal in size (anisocoria), can be indicative of underlying medical conditions. Additionally, pupils should react briskly to changes in light, which is known as the pupillary light reflex. A sluggish or absent pupillary light reflex can be a sign of a neurological issue, such as a brain injury or nerve damage.

  8. Skin:

    Skin can vary in color and moisture depending on a person's age, sex, ethnicity, and overall health. In general, healthy skin should have a consistent color and texture across the body, without any unusual bumps, rashes, or lesions. The normal range of skin moisture varies from person to person, but it should generally feel soft and supple, without feeling excessively dry or oily.

Why First Responders Use Vital Signs?

Interpreting vital signs can help first responders make informed decisions about the best course of action for treating a patient. Monitoring changes in vital signs over time can also help to identify trends or progression of medical conditions, and inform treatment plans for better outcomes. First responders are trained to assess and respond to changes in vital signs quickly and effectively, which is essential in emergency situations.

At Delta Emergency Support Training we are happy to answer any questions you may have about vital signs as well as training sessions for individuals or classes. We offer in person, hybrid and online classes for Standard First Aid (SFA) Advanced First Aid (AFA) and Emergency Medical Responder (EMR) courses. For all inquiries please email info@deltaemergency.com .

Read More

Unraveling the Mystery of the Heart's Electrical Dance: How Your Heart Beats to Its Own Rhythm!

Heart's Electrical Conduction - Key Concepts and Terminology. Delve into the intricacies of the heart's electrical conduction system with our comprehensive overview. Learn about the physiology, function, and regulation of the heart's electrical pathways. Gain a deeper understanding of this vital organ's complex conduction system with our informative blog.

Understanding the Intricacies of the Heart's Electrical Conduction System: A Comprehensive Overview

The human heart is a complex organ responsible for pumping blood throughout the body to sustain life. At the core of this remarkable organ lies a sophisticated electrical conduction system that coordinates the heartbeat and ensures its proper functioning. This paper aims to provide a comprehensive overview of the heart's electrical conduction system, including its anatomy, physiology, and the sequence of events that occur during each cardiac cycle.

Anatomy of the Heart's Electrical Conduction System: The heart's electrical conduction system comprises specialized cardiac cells that are distributed in various regions of the heart. These cells possess unique properties that enable them to generate, conduct, and regulate electrical signals, ultimately controlling the rhythm and rate of the heartbeat.

  1. Sinoatrial Node (SA Node): The SA node is located in the upper right atrium near the opening of the superior vena cava. Often referred to as the "natural pacemaker" of the heart, the SA node initiates the electrical impulses that determine the heart's rhythm. It generates electrical signals that travel through the atria, causing them to contract and pump blood into the ventricles.

  2. Atrioventricular Node (AV Node): The AV node is located at the bottom of the right atrium near the interatrial septum. It acts as a gatekeeper, delaying the electrical signals from the atria before passing them to the ventricles. This delay allows the atria to fully contract and empty their blood into the ventricles before the ventricles contract.

  3. Bundle of His: The Bundle of His is a collection of specialized fibers that transmit the electrical signals from the AV node to the ventricles. It branches into the left and right bundle branches, which extend along the interventricular septum and eventually divide into smaller Purkinje fibers.

  4. Purkinje Fibers: Purkinje fibers are specialized cardiac cells that distribute the electrical signals throughout the ventricles, causing them to contract and pump blood out of the heart.

Physiology of the Heart's Electrical Conduction System: The electrical activity in the heart is regulated by the flow of ions across the cell membranes of the cardiac cells, which results in changes in the cell's electrical charge. These changes in electrical charge create the electrical signals that propagate through the heart and coordinate the heartbeat.

  1. Resting Membrane Potential: The resting membrane potential of cardiac cells is around -90 millivolts (mV), meaning that the inside of the cell is more negatively charged compared to the outside. This is due to the uneven distribution of ions across the cell membrane, with higher concentrations of potassium (K+) inside the cell and higher concentrations of sodium (Na+) and calcium (Ca2+) outside the cell.

  2. Depolarization: The depolarization of cardiac cells is the process by which the cell's electrical charge becomes more positive, leading to the generation of an action potential. The depolarization of the SA node is initiated by the influx of calcium ions, which triggers the opening of voltage-gated sodium channels, allowing sodium ions to rush into the cell. This leads to a rapid depolarization of the cell membrane, resulting in the generation of an action potential.

  3. Action Potential Propagation: Once the action potential is generated in the SA node, it spreads through the atria, causing them to contract. The action potential then reaches the AV node, where it is delayed for a brief period to allow the atria to fully contract and empty their blood into the ventricles. After the delay, the action potential is transmitted through the Bundle of His and the Purkinje fibers, which rapidly conduct the electrical signals to the ventricles. The depolarization of the ventricles leads to their contraction and the ejection of blood from the heart.

  4. Repolarization: After depolarization, the cardiac cells need to repolarize to restore their resting membrane potential and prepare for the next electrical signal. Repolarization is achieved through the movement of potassium ions out of the cell, which results in the restoration of the negative charge inside the cell.

Sequence of Events during Cardiac Cycle:

The electrical conduction system of the heart plays a crucial role in coordinating the events of the cardiac cycle, which consists of two main phases: diastole and systole.

  1. Diastole: During diastole, the heart is relaxed, and the chambers fill with blood. The electrical signals generated by the SA node initiate the diastole by causing the atria to contract and pump blood into the ventricles. The electrical signals then reach the AV node, where there is a slight delay before the signals are transmitted to the ventricles through the Bundle of His and Purkinje fibers. This delay allows for complete filling of the ventricles before their contraction.

  2. Systole: During systole, the heart contracts, and blood is ejected from the ventricles into the arteries. The electrical signals from the Purkinje fibers cause the ventricles to contract and pump blood out of the heart. Once the electrical signals are completed, the heart returns to diastole, and the cycle restarts.

Regulation of the Heart's Electrical Conduction System: The heart's electrical conduction system is regulated by various factors to maintain the proper rhythm and rate of the heartbeat.

  1. Autonomic Nervous System: The autonomic nervous system, consisting of the sympathetic and parasympathetic divisions, plays a significant role in regulating the heart's electrical conduction system. The sympathetic division increases the heart rate and conduction velocity, while the parasympathetic division decreases the heart rate and conduction velocity.

  2. Hormones: Hormones such as adrenaline and noradrenaline released during times of stress or excitement can affect the heart's electrical conduction system, leading to an increase in heart rate and conduction velocity.

  3. Electrolyte Balance: Proper electrolyte balance, particularly the levels of potassium, sodium, and calcium, is crucial for the normal functioning of the heart's electrical conduction system. Disturbances in electrolyte levels can disrupt the conduction of electrical signals, leading to arrhythmias.

The heart's electrical conduction system is a complex and intricate system that ensures the coordinated contraction and relaxation of the heart, leading to effective pumping of blood. The SA node acts as the natural pacemaker, generating electrical signals that initiate and regulate the heartbeat. The electrical signals are conducted through the AV node, Bundle of His, and Purkinje fibers, causing the atria and ventricles to contract in a synchronized manner. Proper regulation of the heart's electrical conduction system is essential for maintaining a healthy heart rhythm and preventing arrhythmias. Further research and understanding of this complex system may lead to advancements in diagnosing and treating various cardiac conditions related to electrical conduction abnormalities.

Read More

On the Frontline: Mastering Scene Assessment for AFA with Calgary & Edmonton Fire Departments

During an emergency, AFAs are trained to conduct thorough scene assessments to gather crucial information that informs the appropriate course of action. This includes assessing the safety of the scene, identifying hazards, evaluating the mechanism of injury or nature of illness, and determining the number of patients and their condition. By working closely with Calgary & Edmonton Fire Departments, we (EMS) can collaborate on scene management strategies, coordinate resources, and prioritize patient care based on the severity of injuries or illnesses.

Mastering AFA Scene Assessment with Calgary & Edmonton Fire Departments.

The safety of the AFA and the team is the top priority. Before entering the scene, the AFA should carefully assess for potential hazards, such as traffic, fire, hazardous materials, or violence. This may involve observing the scene from a safe distance to determine if it's safe to approach. If there are any immediate dangers, the AFA should take appropriate precautions, such as wearing PPE, using caution signs, and calling for assistance from, Police, EMS, Calgary Fire or Edmonton Fire departments, if needed.

as Advanced first aiders, Calgary FIRE & Edmonton Fire Departments always perform scene assessments during an emergency response.

  1. Scene Size-Up: The AFA should assess the overall size and nature of the scene. This includes identifying the location, type of setting (e.g., residential area, workplace, public location), and any specific details that may impact the response, such as the presence of bystanders, vehicles, or potential sources of danger. This information helps the AFA get a general understanding of the situation and plan their approach accordingly, while coordinating with the Calgary or Edmonton fire department if necessary.

  2. Mechanism of Injury or Nature of Illness: The AFA should observe and gather information about the mechanism of injury or nature of illness. This includes identifying how the injury or illness occurred, such as a motor vehicle accident, a fall, a medical emergency, or a traumatic injury. Understanding the mechanism of injury or nature of illness can help the AFA anticipate potential injuries or illnesses and determine the appropriate course of action for care, while keeping the Calgary or Edmonton fire department informed as needed.

  3. Number of Patients: The AFA should assess the number of patients involved in the incident. This may include identifying if there are multiple patients or just one. This information helps the AFA determine the need for additional resources and prioritize care, while coordinating with the Calgary or Edmonton fire department to ensure adequate care for all patients.

  4. Initial Impressions: The AFA should formulate an initial impression of the patients' condition(s) based on their observations from a distance. This includes looking for obvious signs of life-threatening conditions, such as unresponsiveness, difficulty breathing, severe bleeding, or obvious deformities. This initial impression can help the AFA prioritize care and initiate appropriate interventions, while keeping the Calgary or Edmonton fire department updated on the patients' status.

  5. Additional Resources: The AFA should determine if additional resources are needed, such as additional EMS units, the Calgary or Edmonton fire department, or law enforcement. This may involve communicating with dispatch or calling for assistance from the Calgary or Edmonton fire department as necessary. The AFA should ensure that appropriate resources are enroute to the scene to provide timely and effective care.

  6. Personal Protective Equipment (PPE): The AFA and the team should ensure that they are wearing appropriate PPE for the situation. This includes gloves, mask, goggles, and other protective gear as needed, to prevent exposure to potential hazards or communicable diseases. Wearing PPE is crucial to protect the AFA and the team from any potential risks during the response, while coordinating with the Calgary or Edmonton fire department for additional support if required.

  7. Consideration of C-Spine: If there is a possibility of a spinal injury, the AFA should consider and maintain cervical spine precautions until further assessment can be performed. This may involve stabilizing the head and neck and avoiding any unnecessary movement that could worsen a potential spinal injury, while coordinating with the Calgary or Edmonton fire department for specialized assistance if needed.

  8. Approach to Patients: The AFA should approach patients with care, assess their level of consciousness, and initiate appropriate care based on their assessment findings and protocols. This may include checking for responsiveness, assessing airway, breathing, circulation, and any obvious injuries. The AFA should provide care based on their training and protocols, while coordinating with the Calgary or Edmonton fire department for any additional support or specialized care that may be required.

  9. Ongoing Assessment: The AFA should continuously reassess patients' conditions and monitor their vital signs, symptoms, and response to interventions. This includes checking for any changes in the patients' condition, identifying any new injuries or symptoms, and adjusting the care plan as needed. The AFA should communicate any changes or updates to the Calgary or Edmonton fire department and coordinate any necessary interventions or transport arrangements.

  10. Documentation: The AFA should document their findings, assessments, interventions, and any communication with the Calgary or Edmonton fire department. This includes recording vital signs, patient information, and any other relevant details in the appropriate format or system. Accurate and thorough documentation is essential for continuity of care, communication with other healthcare providers, and potential legal purposes.

  11. Handover to Higher Level of Care: If the patients require a higher level of care beyond the scope of the AFA's training or capabilities, the AFA should initiate handover to the Calgary or Edmonton fire department or other appropriate healthcare providers. This may involve providing a concise and accurate report of the patients' condition, care provided, and any pertinent details to ensure a smooth transition of care.

  12. Scene Management: The AFA should actively manage the scene throughout the response, ensuring the safety of all individuals involved and coordinating with the Calgary or Edmonton fire department and other responding agencies as needed. This may include establishing a safe zone, controlling traffic, managing bystanders, and coordinating resources and logistics to ensure an efficient and effective response.

  13. Follow-up: After the response, the AFA should debrief with the team, review the incident, and identify any areas for improvement. The AFA should also complete any necessary paperwork, reports, or documentation related to the incident, and follow any relevant protocols or procedures for reporting and follow-up. This may also include communicating with the Calgary or Edmonton fire department for any necessary follow-up or information sharing.

In conclusion, mastering scene assessment is a critical skill for Advanced First Aid (AFA) responders, and depending on your location, collaboration with Calgary Fire & Edmonton Fire Departments is crucial for efficient and effective emergency response. Through meticulous scene assessments, patient assessments, and accurate documentation, AFAs can work for fire departments and ensure scene safety and provide timely and appropriate medical care to those in need.

The partnership between AFAs and fire departments is vital in delivering excellence in emergency response on the frontline in Alberta. By continuously honing their skills and working together, AFAs and fire departments strive to provide the highest level of care to patients in emergency situations. It's important to remember that the roles and responsibilities of an AFA may vary depending on local regulations, protocols, and training. It's essential to always work within your scope of practice and seek appropriate guidance from your Fire department or other healthcare providers as needed.

At Delta Emergency Support Training we are happy to answer any questions you may have about Scene Assessments and Advanced First Aid. We provide training sessions for individuals or classes. We have options for in person, hybrid or online classes for Standard First Aid (SFA), Advanced First Aid (AFA), Emergency Medical Responder (EMR), and more courses. For all inquiries please email info@deltaemergency.com

Read More

What is an EMR?

The first step for an EMR is to assess the situation for hazards that can harm themselves, their partners, and their patients, and determine the nature of the emergency. They need to determine the level of medical attention needed and make quick decisions…

Behind the Scenes of an Emergency Medical Responder: Saving Lives with Speed and Skill

An Emergency Medical Responder (EMR) is a healthcare professional who is trained to provide immediate medical care in emergency situations. EMRs are often the first healthcare providers to arrive on the scene of an emergency, and they work closely with other healthcare professionals to ensure that patients receive the appropriate care and treatment. EMRs are trained to provide basic life support measures, including administering CPR, controlling bleeding, treating shock, managing spinal injuries, and stabilizing fractures. They are also trained to manage patients with a variety of medical emergencies, including cardiac arrest, respiratory distress, and trauma. Here are some of the typical job functions of an EMR:

1. Assess the situation:

The first step for an EMR is to assess the situation for hazards that can harm themselves, their partners, and their patients, and determine the nature of the emergency. They need to determine the level of medical attention needed and make quick decisions based on their assessment.

2. Stabilize Patients:

EMRs are trained to stabilize patients by maintaining their airways and providing necessary interventions such as assisted ventilations, medical oxygen, life-threatening bleeding, and medication.

2. Administer First Aid:

EMRs are trained to provide basic-intermediate-advanced first aid such as CPR, wound management, and immobilization of injured patients.

4. Communicate with the medical team:

EMRs communicate vital information to the medical team, such as the patient's vital signs, symptoms, and any other relevant medical history.

5. Provide Emotional Support:

EMRs provide emotional support to patients and their families during times of crisis. They should be compassionate and empathetic, helping to ease the stress and anxiety that often come with medical emergencies.

6. Document the incident:

EMRs must document the incident, including vital signs, patient history, and any medical interventions administered.

7. Transport Patients:

EMRs are responsible for transporting patients to medical facilities safely. Overall, the role of an EMR is crucial in emergency medical situations, and they must be well-trained, quick-thinking, and compassionate individuals. EMRs work in a variety of settings, including ambulance services, fire departments, and hospitals. They play a critical role in the healthcare system by providing immediate medical care to patients in emergency situations, and their actions can often make the difference between life and death.

The road to EMR certification can be confusing. The EMR program is different in provinces like BC, Alberta, Saskatchewan, and Manitoba. The Canadian Red Cross EMR, AFA, or FR curriculum is identical across Canada but provincial standards and must be taught in respective provinces. At Delta Emergency, we understand what certifications you need for your future career, how and where to obtain them, and what type of work will be available to you when you’re fully certified. Reach out with questions!

Calgary BVM airway oxygen and ventilations for BLS FR AFA and EMR

BVM

Maintain an Airway, use HTCL or MJT, use Suction, insert an OPA or NPA, begin Ventilations and apply Oxygen. BLS, FR, AFA, and EMR

This is a basic and generalized overview of Emergency Medical Responders across North America. When in doubt, follow your local protocols! Contact us if you have any specific questions about the EMR scope of practice and career path in Alberta. We are industry experts and have been working full time in EMS for years.

At Delta Emergency Support Training we are happy to answer any questions you may have about becoming an EMR. We provide training sessions for individuals or classes. We have options for in person, hybrid or online classes for Standard First Aid (SFA) Advanced First Aid (AFA) and Emergency Medical Responder (EMR) courses. For all inquiries please email info@deltaemergency.com

Read More

SMR - Spinal Motion Restriction | Professional Responder Skill Series

While SMR is generally considered a safe and effective method for preventing spinal cord injury, there are certain risks and considerations that must be taken into account, such as the potential…

"Spinal Motion Restriction: Techniques and Considerations for Prehospital Care Providers"


Spinal motion restriction (SMR) is a technique used to limit movement of the spinal cord and surrounding tissues during transport to a medical facility for further evaluation and treatment. SMR is typically performed by prehospital care providers, such as paramedics or emergency medical technicians, who are trained in the technique and can quickly assess and stabilize a patient's condition.

SMR involves the use of various devices and techniques to immobilize the spine, including cervical collars, backboards, and straps. While SMR is generally considered a safe and effective method for preventing spinal cord injury, there are certain risks and considerations that must be taken into account, such as the potential for pressure ulcers, respiratory compromise, and the need for prompt removal of SMR devices once the patient reaches a medical facility. Prehospital care providers must also be aware of the latest guidelines and protocols for SMR, as these may vary depending on the patient's condition and the severity of their injuries.

In addition to trauma patients, individuals with certain medical conditions may also require SMR. For example, individuals with spinal fractures, spinal tumors, or spinal infections may require SMR to prevent further damage to the spine and surrounding tissues.

It is important to note that SMR should only be performed by trained professionals and should be used judiciously, as excessive immobilization can lead to complications such as pressure ulcers, respiratory problems, and muscle atrophy.

Ultimately, the decision to use SMR should be made on a case-by-case basis, taking into account the patient's specific needs and the risks and benefits of this technique. In some cases, SMR may be necessary for the safety of the patient, while in other cases, alternative techniques may be more appropriate.

AHS First Responder C-Spine Protocol


This section contains a large amount of information about how we determine applying SMR to a patient. As a firefighter or first responder in Alberta, this is the protocol you will also follow. If you examine both the Canadian C-Spine rule and the AHS C-Spine Protocol, you will find they are very similar.


Background

The C-Spine Assessment Protocol is to be applied to blunt trauma patients where there is a potential for a cervical spine injury and/or the potential for pre-hospital C-spine clearance where the practitioner needs to assess the requirement for spinal motion restriction (SMR).  It is imperative that the practitioner primarily assesses the patient and not the scene or mechanism to determine the need for SMR.  To facilitate this, the Canadian C-Spine Rule has been incorporated into the protocol to aid practitioners’ decision-making.

The Canadian C-Spine Rule applies to alert (GCS of 15), cooperative, and stable adult blunt trauma patients where there is a potential for C-spine injury with neck pain and/or trauma markings above the level of the clavicles.

C-collar application and SMR are contraindicated in all cases of isolated penetrating trauma.  C-collar application and SMR are NEVER indicated in any isolated penetrating trauma.  There is documented increased mortality due to the delay to definitive care with surgical interventions as a result of increased on scene time while applying C-collar and SMR.  Of note, the long board can still be used to facilitate the extrication of the patient.

Patient Safety Considerations
SMR and C-collar application are contraindicated in cases of isolated penetrating trauma. For those patients greater than 65 years of age, take into account biological age versus chronological age. An alert, cooperative and stable patient with no neurological symptoms and no neck pain can be transported without a C-collar. The long board is not necessary for SMR


Etiology

This algorithm is designed to help the practitioner make an informed determination of the need for spinal motion restriction in the field. It is for alert (GCS of 15) and stable trauma patients where cervical spine injury is a concern.
 

  1. Perform spinal motion restriction (SMR) if any of the following are present:
     

    1. High-risk factors

      1. Fall from 1 m / 5 stairs or greater

      2. Axial load to head (e.g. diving injuries)

      3. MVC (Speed greater than 100 km/h, rollover, ejection)

      4. Motorized recreational vehicles

      5. Bicycle collision with object

      6. Medical risk factors (for example, arthritis, prolonged steroid use, degenerative bone disease, history of cervical surgery)

      7. MVC with death of other occupant in the same vehicle

      8. Collisions involving ATVs, motorbikes, and snowmobiles

      9. Pedestrian/cyclist struck by motor vehicle at greater than 15 km/h
         

    2. Altered LOC

      1. Glasgow Coma Scale 14 or less

      2. Disorientation to person, place, time, and/or event

      3. Inability to remember 3 objects after 5 minutes

      4. Delayed or inappropriate response to external stimuli

    3. Paresthesia – including any abnormal motor or sensory neurological finding (e.g. numbness, tingling, weakness)

      1. Unequal handgrip strength

      2. Inability to raise arm(s) against gravity

      3. Inability to move toes

      4. Inability to perform plantar flexion and dorsiflexion of the feet

      5. Sensory deficits such as weakness or numbness or radicular (electric or shooting) pain
         

    4. Tenderness/deformity of spine

      1. Almost all spinal injuries are associated with either pain or tenderness localized to the spine

      2. Pain felt deeply in the neck should be considered spine pain

    5. Alcohol/drugs affecting judgement
       

    6. Communication difficulties (e.g. language barrier)
       

    7. Distracting painful injury:

      1. Long bone fracture

      2. Abdominal or thoracic injury causing distress

      3. Large laceration, degloving, or crush injury

      4. Large burns

      5. Any other injury-producing acute functional impairment
         

    8. Degenerative bone disorder, ankylosing spondylitis, Down’s syndrome – assure the neutral position corresponds to the underlying medical condition
       

    9. Suspicion of spinal injury on the part of the practitioner
       

  2. If any of the following low-risk factors for spinal injury are present, evaluate patient for need for spinal motion restriction:

    1. Ambulatory at any time

    2. Absence of pain during midline palpation

    3. Delayed (not immediate) onset of neck pain

    4. Simple rear-end MVC, excluding:

      1. Pushed into oncoming traffic

      2. Hit by bus / large truck

      3. Rollover

      4. Hit by high-speed vehicle (100 km/hr or greater)

On evaluation, if unable to voluntarily rotate the neck 45° left and right, regardless of pain, use SMR.

Range of Motion Examination

  1. Ask the patient to voluntarily rotate their neck 45° to the left and right regardless of pain

  2. If the patient can rotate their neck, spinal motion restriction is not indicated\

Nerve Root | Movements

C5 | Shoulder adbuction, elbow flexion
C6 | Elbow flexion (semipronated)
C7 | Finger extension, elbow extension
C8 | Finger flexors
T1 | Small muscles of the hand
L1, L2 | Hip flexion
L3, L4 | Knee extension
L5 | Extension of great toe
S1 | Hip extension, knee flexion, plantar flexion
Don’t forget sensory — light touch/pain

Spinal motion restriction (SMR)

  • SMR is required in all patients with potential spinal injuries, with the exceptions as above (i.e. penetrating trauma)

  • Where possible, SMR should be maintained with a properly fitted C-collar and/or blanket-rolls (or a comparable commercial device) secured to the stretcher with tape when appropriate.  If a c-collar would pull the patient out of neutral alignment then it should not be applied

  • Supine positioning is the preferred position for patients requiring SMR.  However, if these patients cannot be transported supine, they should be maintained in a reasonable position of comfort with neutral alignment of the spine relative to the patient’s underlying medical condition or their current presentation

  • SMR should not take priority over management of life-threatening co-morbidities such as airway management or hemorrhage control

  • Long boards can be used for extrication or as a means of moving an immobile patient to the stretcher but is not required to achieve SMR and is contraindicated in patients who have a long transport and/or wait times (greater than 30 minutes)           

  • EMS practitioners may remove the patient from the long board and place them supine with a C-collar and head rolls/head blocks, onto an EMS stretcher (secured with stretcher seatbelts), as soon as deemed safe and practical to do so

  • In cases in which SMR is indicated as per protocol, patients with life-threatening respiratory compromise exacerbated by the supine position (i.e. head, facial/neck trauma, severe respiratory disease, body habitus), may be transported on the stretcher in semi-Fowlers or high Fowlers (maintaining SMR with a C-collar/head blocks and secured with stretcher seatbelts

  • Patients with C-collars in place should not be transferred via wheelchair or walking

  • With regard to the pillow/padding of SMR patients, the priority is maintaining neutral alignment as near as possible.  Continue with light padding or small pillows which do not alter the normal cervical alignment of patients as long as the SMR techniques still ensures appropriate control, immobilization and stabilization of the C-spine

    Once again: C-collar application and SMR are contraindicated in all cases of isolated penetrating trauma.  C-collar application and SMR are NEVER indicated in any isolated penetrating trauma.  There is documented increased mortality due to the delay to definitive care with surgical interventions as a result of increased on scene time while applying C-collar and SMR.  Of note, the long board can still be used to facilitate the extrication of the patient

The information above is opinion based and taken from different research articles, First Response training protocols, AHS EMS, and textbooks. There are no specifics given regarding an assessment or treatment modality, as SMR protocols change between different Fire/EMS systems. Follow YOUR local protocols.

At Delta Emergency Support Training we are happy to answer any questions you may have about spinal motion restriction. We provide training sessions for individuals or classes. We have options for in person, hybrid or online classes for Babysitters, Standard First Aid (SFA) Advanced First Aid (AFA) and Emergency Medical Responder (EMR)courses. For all inquiries please email info@deltaemergency.com

Read More